mazmenagerie
MASTERSON MENAGERIE
Some things you'll find here: Sewing • Earrings • Rabbits • DIY Nails
117 posts
Don't wanna be here? Send us removal request.
Last Seen Blogs

yenaworld
제목 없음

sensizs3x
I wish

trump-the-clown
Trump the Clown
wind-on-the-panes
obsessed with sadness & with frivolous pop culture

Text
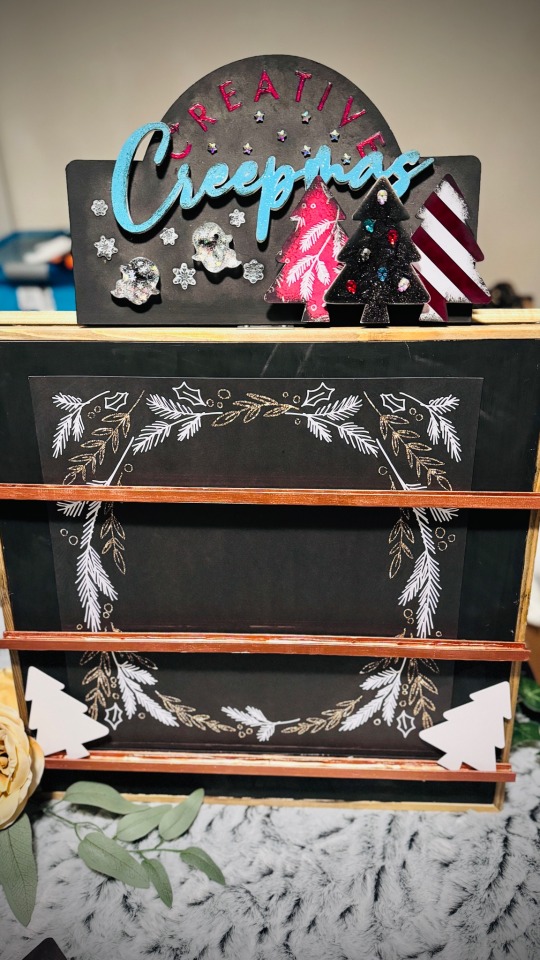
The display I made for my handmade holiday earrings I’ll be selling at a vendor fair.
0 notes
Text
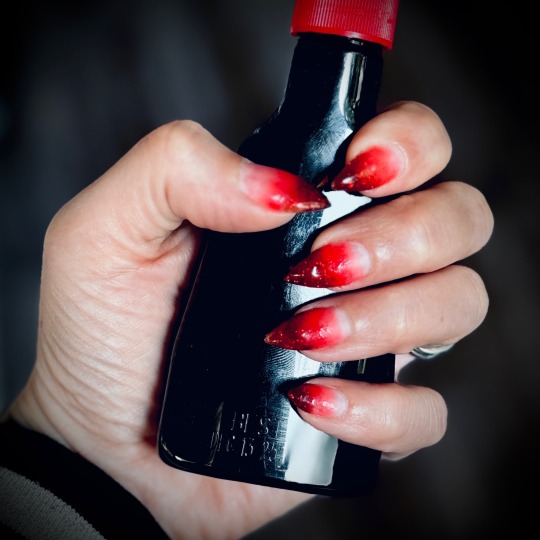
Hard Builder gel over natural nails.
• base coat, fully cure
• small “blob” of dark red glitter gel at the tip, line of red below that - blend to blur the line between
• line of dark pink below - blend again
• small blob of base coat after the pink (closest to cuticle - blend, then fully cure
• matte top coat, fully cure
• shiny top coat at tip - pull down nail to make the tip look like fresh/wet blood, fully cure
It is really easy to end up with too much gel polish on your nail with this set. Use a brush to remove excess and wipe any gel off skin before curing. I found it helped to partially cure after doing each nail to set up the gel and prevent it from running amok, then fully curing all on the last nail.
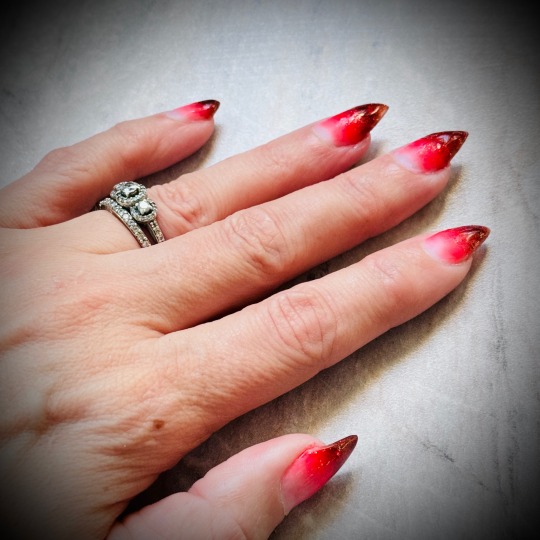
1 note
·
View note
Text
• Hard builder gel over natural nails
• Base gel, fully cure, don’t wipe
• Black glitter gel & pink glitter gel, fully cure
• Nail stickers
• Top coat, fully cure, repeat
0 notes
Text
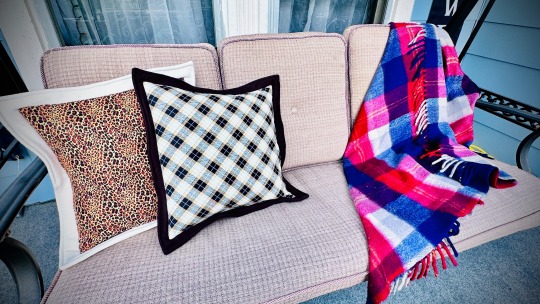
Made cases to cover my very summery porch pillows. I would have loved to make Halloween-themed cases, but it was quicker to just go with more of a Fall theme. Tomorrow I have to start working on my Halloween costume, so everything else gets put on hold until its done.
0 notes
Text
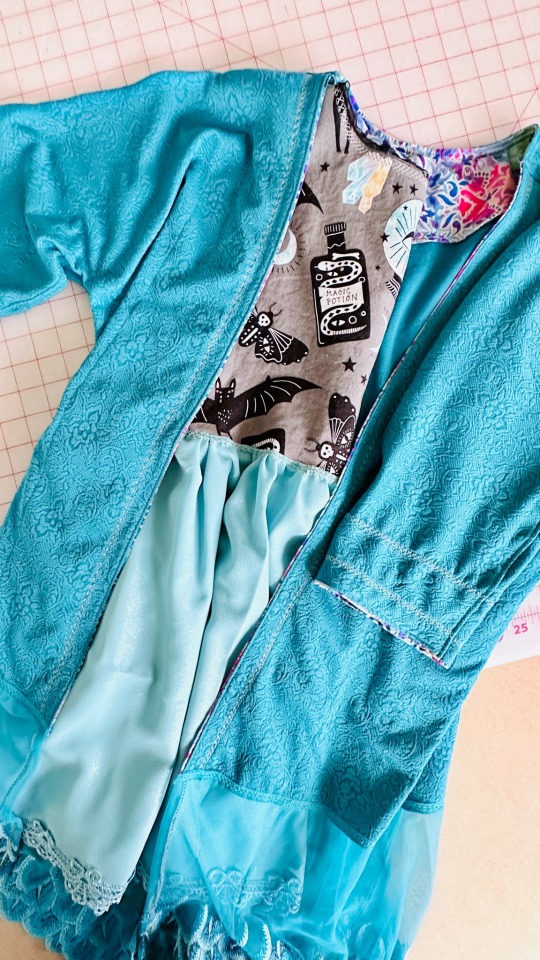
Just finished sewing two new items for Fall. The dress is a summer pattern, but it is oversized/boxy, so great for layering. Hoping to get some better pictures of both soon.
0 notes
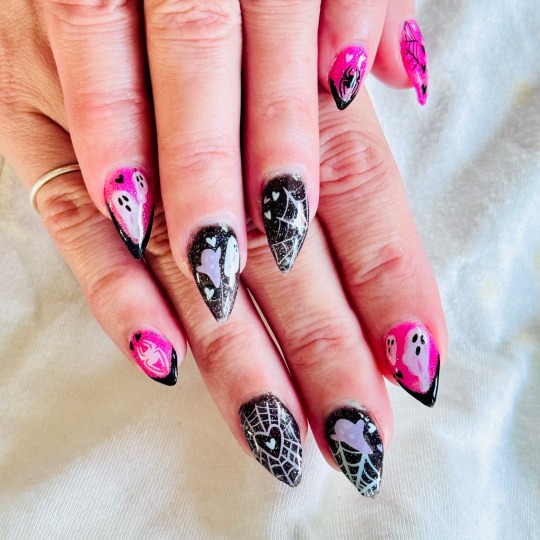
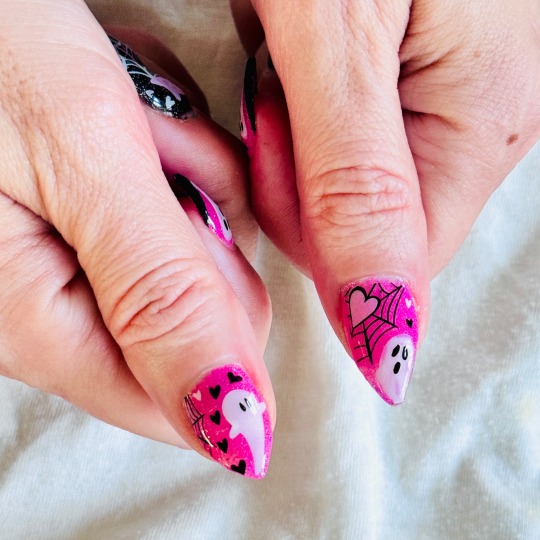
Text

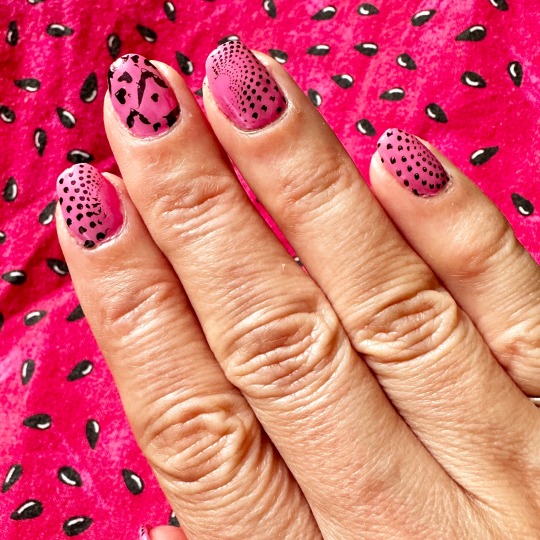
I didn’t have much interest in doing my nails the past couple weeks (probably because I was able to start sewing again 🤩), so last week I cheated and just did some maintenance to make my previous mani last another week. It was definitely worth waiting until I felt in the mood because these are super rad!
• hard builder gel over natural nails
⭐️ I used paper forms to make them longer
• base gel, fully cure, no need to wipe at any time
⭐️ the sticky layer helps the next layer stick
• thin layer of black glitter gel, cure, repeat
• melting faces nail stickers from Shein
• glitter gel, cure
• no-wipe top coat, cure, repeat
8 notes
·
View notes
Text
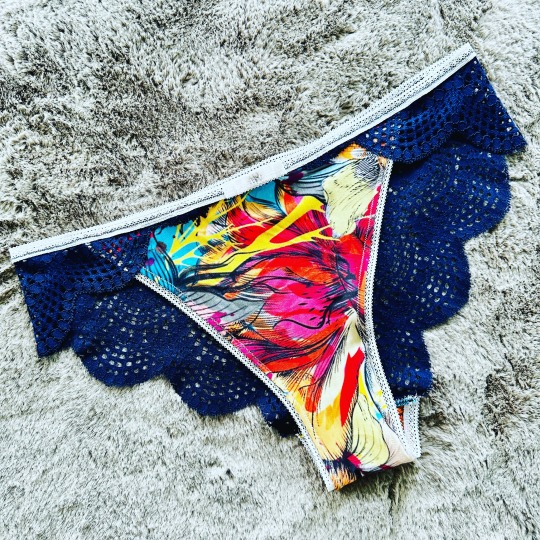
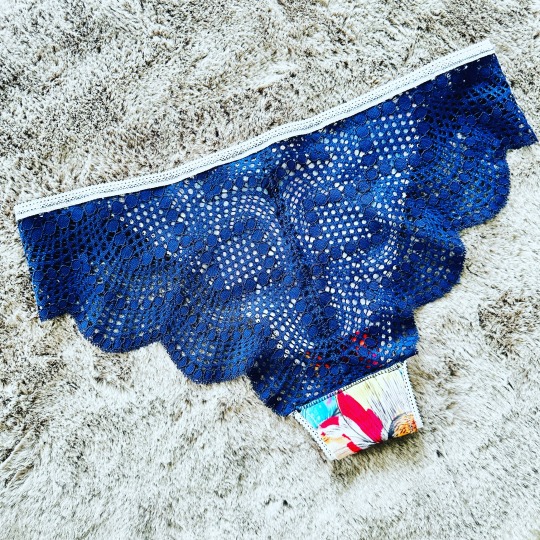
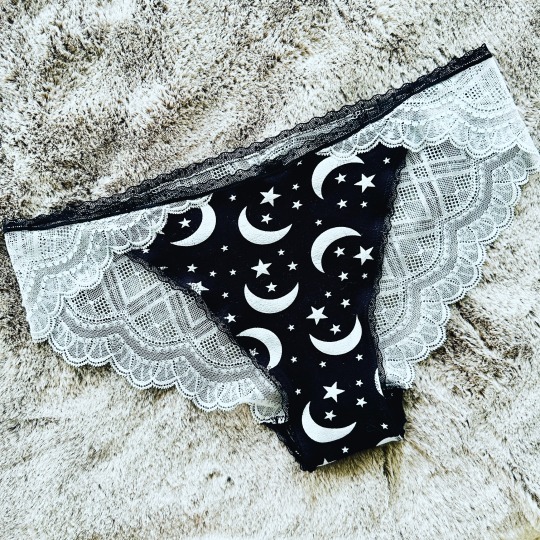
Another Bikini Armonioso from Businka Mania and the last panty pattern for a while. I have already started two other projects 😬 Fabric designed by me and available in my Spoonflower shop!
2 notes
·
View notes
Text
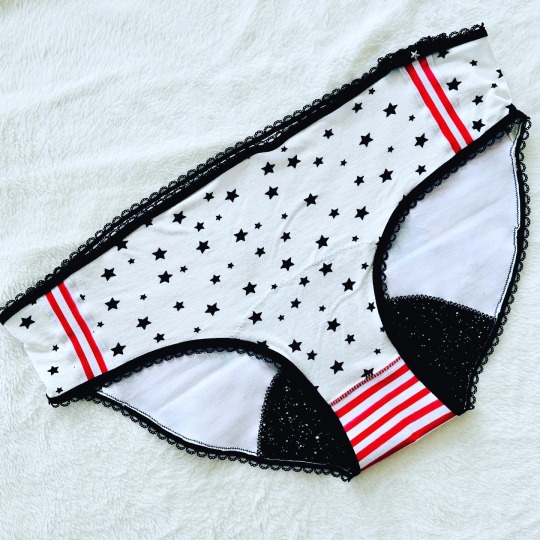
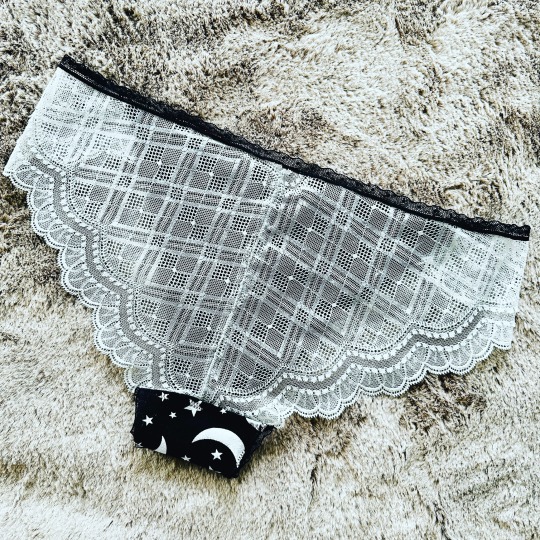
I’ve tried several panty patterns and the Keep It Brief from Rockerbye Destash is definitely my favorite (so far). The fit is perfect and coverage is good for everyday wear. The liner is a realistic size and the pattern includes instructions for adding a padded liner (period panties). I made a pair for lifting that are leak-proof 🤩, but this latest pair features a regular liner.
2 notes
·
View notes
Text
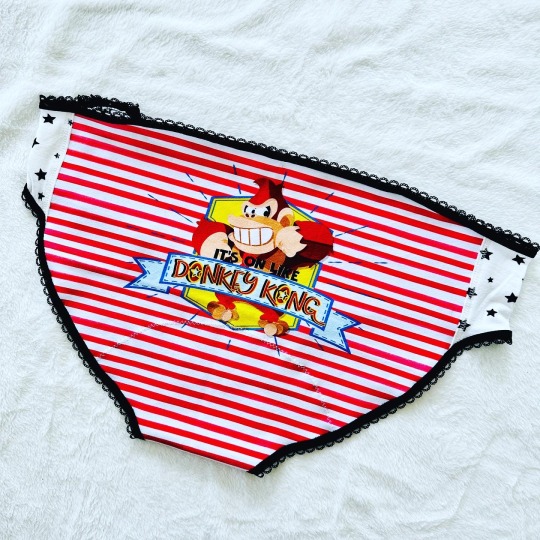
Finally sewing again! This was a really fun pattern to get back on track with. It is the Bikini Aromonioso from BusinkaMania. Super easy to make.
0 notes
Text
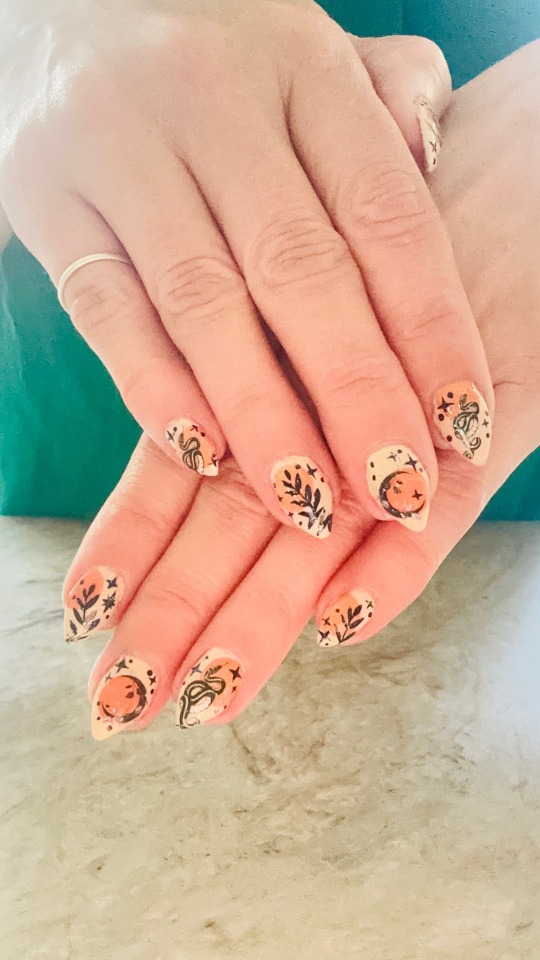
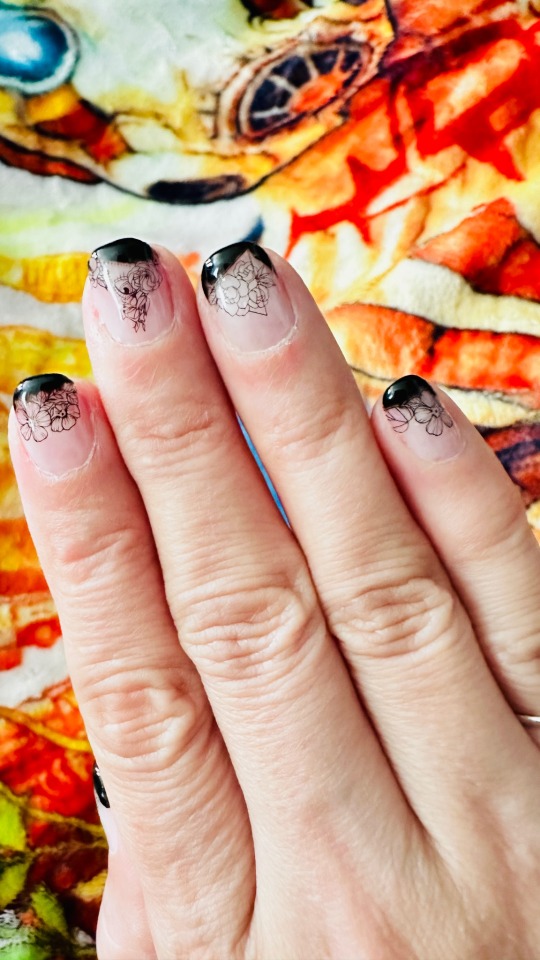
Witchy nails for Labor Day weekend aka first weekend in September aka start of spooky season.
• builder gel over natural nails
• base coat, cure, don’t wipe
• cream colored gel polish, cure, don’t wipe, repeat
• orange stamping for moons
• black nail stickers & stamping
• glitter gel polish, cure, don’t wipe
• no-wipe top coat, cure
0 notes
Text
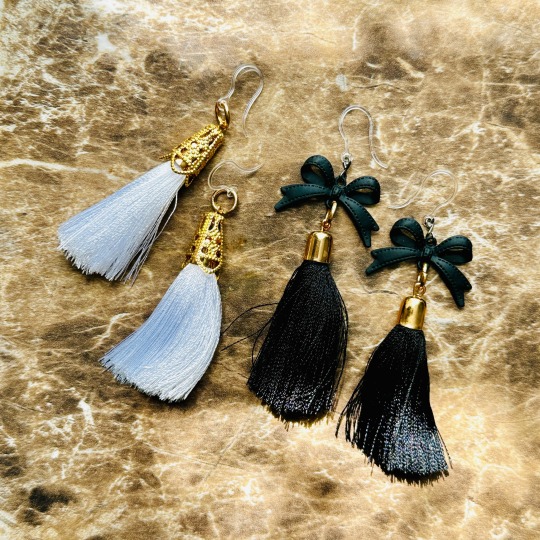
Made some cute new earrings today.
0 notes
Text
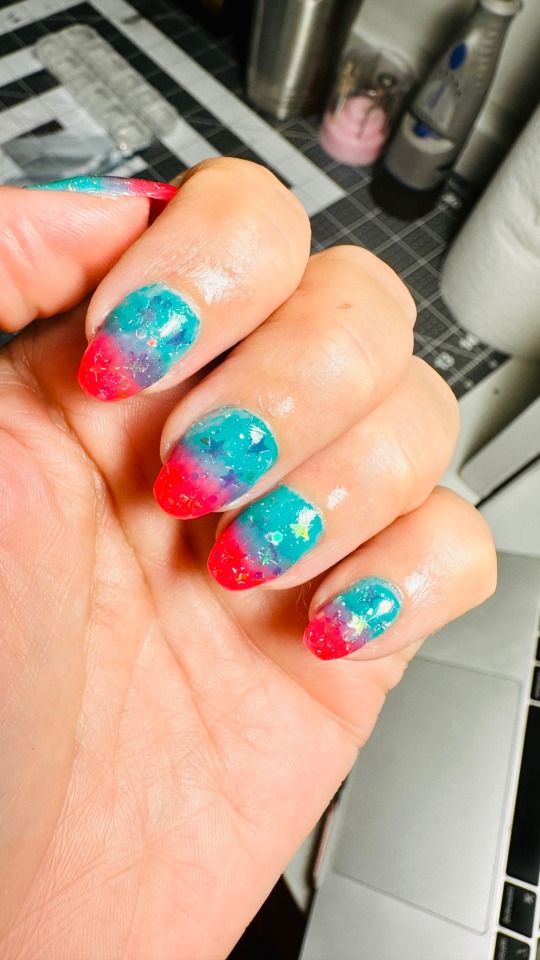
My latest set. I have decided I want to repaint my desk and am starting with the chair. Pictures to come, of course.
• builder gel over natural nails
• base coat, cure (don’t wipe sticky layer)
• dab of blue gel polish, dab of pink, then blend with a feathery brush & cure (don’t wipe)
• glitter gel polish + iridescent stars, cure (no wipey)
• no-wipe top coat two times
1 note
·
View note
Text

New nails this week!
My life has settled down, so I can have long nails again, but I decided I want to grow them out rather than just extend them. So they will be short until then.
• builder gel in a pot (not in a bottle)
• cure 60 sec & wipe off sticky top layer
• sand to ensure smoothness and shape
• pink mud gel (2 layers, curing each 60 sec)
• wipe off sticky top layer
• black stamping polish
• gel top coat (2 layers, curing each 60 sec)
I use no-wipe top coat. It does take a minute after curing to “dry” so it isn’t sticky. I like no-wipe because (to me) it leaves a shinier finish.
Builder gel in a pot is much thicker than the kind that come in a bottle. You’ll need a good brush for application. I started with brushes used for acrylic and settled on one that has slightly thinner, rounded bristles.
Let me know if you have any questions!
0 notes
Text
Did my nails early because I have several busy days ahead of me. My fingers look rough because I’ve been doing manual labor. I’ll have to treat them to some extra oil.
I did a very pale pink, then stickers, then filled in with black gel and finished them with two layers of top coat.
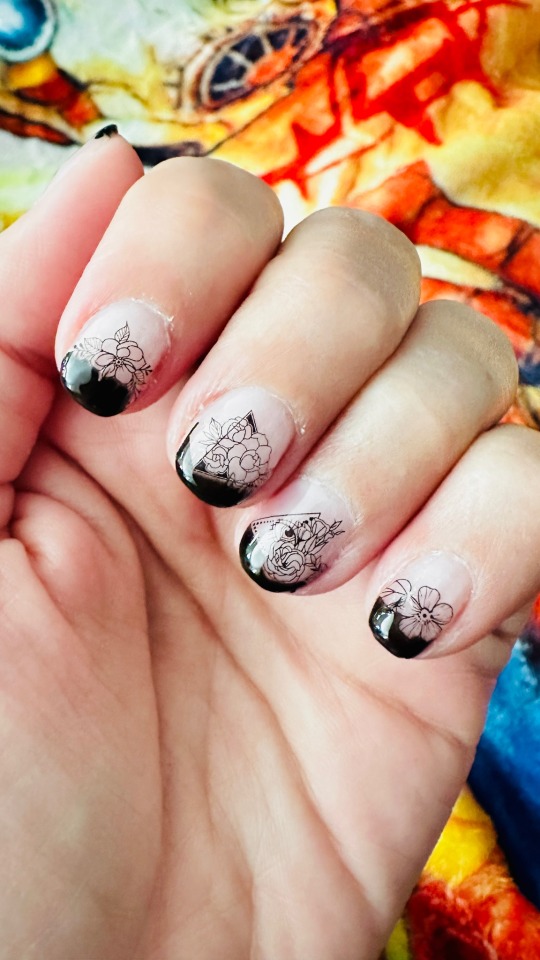
0 notes
Text
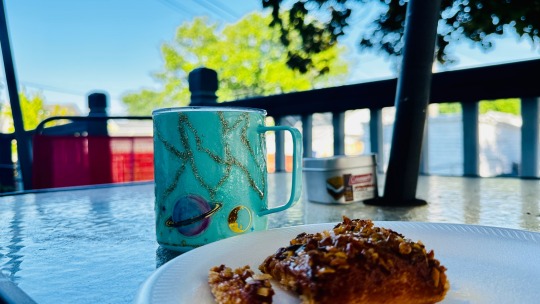
My internal clock is apparently haywire because I wake up anytime between 5am and noon on the weekends now. At least it was beautiful out and I had pastries.
1 note
·
View note
Text
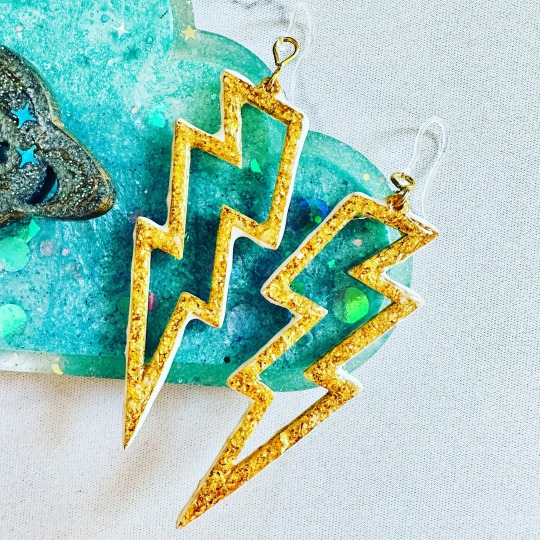
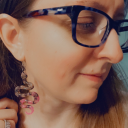
I gave away the last set of gold lightening earrings, so I whipped these up for myself.
#crafts#earrings#handmade earrings#handmade#lightning#lightning earrings#resin#resin creations#resin earrings
3 notes
·
View notes
Text
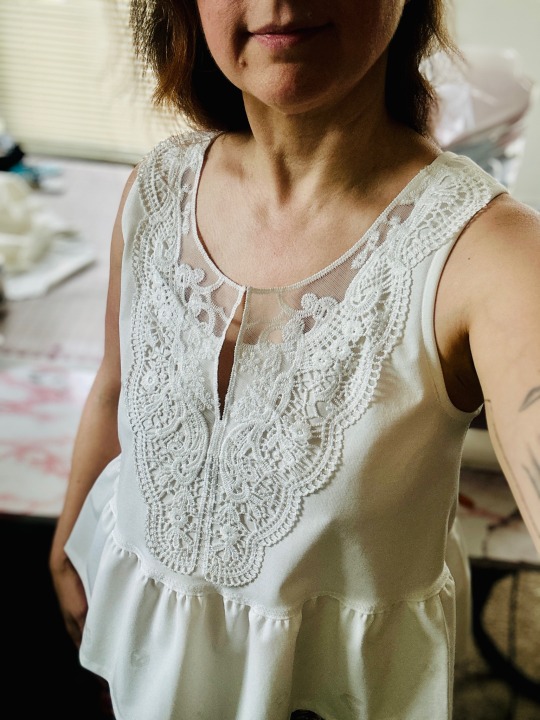
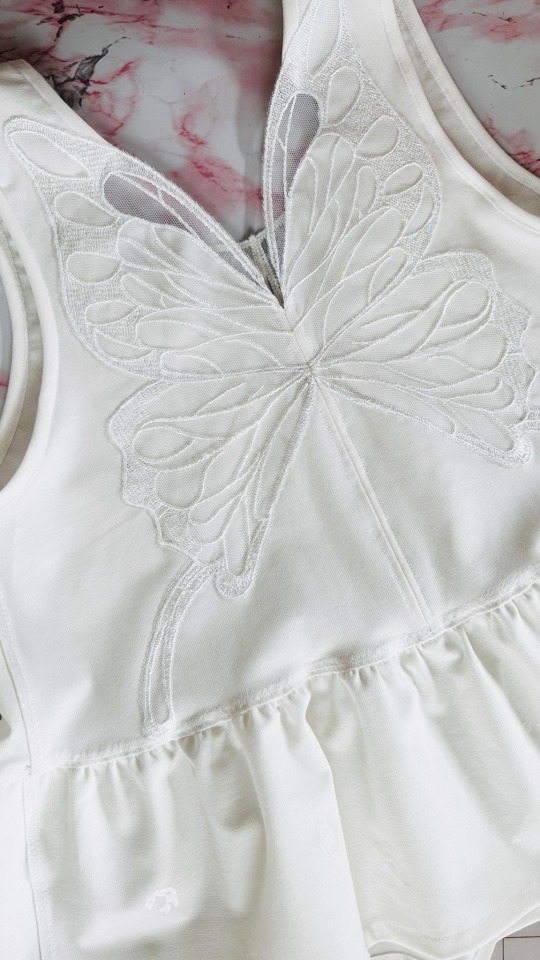
My Latest Make
This is the Peppermint Peplum Top from In the Folds. I made it with summer ponte. I decided to add the lace appliqué to the front after the front bodice was completed and I love how it looks. The butterfly appliqué on the back was always part of the plan. The only modification I made was to make the skirt portion 1 1/2” times the width of the bodice instead of 2 times the width as the pattern calls for. Oh - I also took some of the width out of the back to eliminate some gaping.
2 notes
·
View notes