
kaienkun
"MorPhine
Amy (Yuuko) | 24 | Female | Mexican | Pseudo Illustrator, Designer & Computer Systems Engineer - Works @ Starke | Likes: 櫻井 敦司 ♥, draw, tegaki msn, graphic & web design...
Art tag, Likes, Flavors.me, Pixiv, Deviantart, SSketch, Silent Whispers
466 posts
Don't wanna be here? Send us removal request.
Last Seen Blogs

impossible-rat-babies
the sorrow of a thousand worlds weighs heavy

my-myobsessions-posts-blog
myobsessions

jsssshy
hi :-)

oboeslip1
The Journaling of Patel 232

Photo
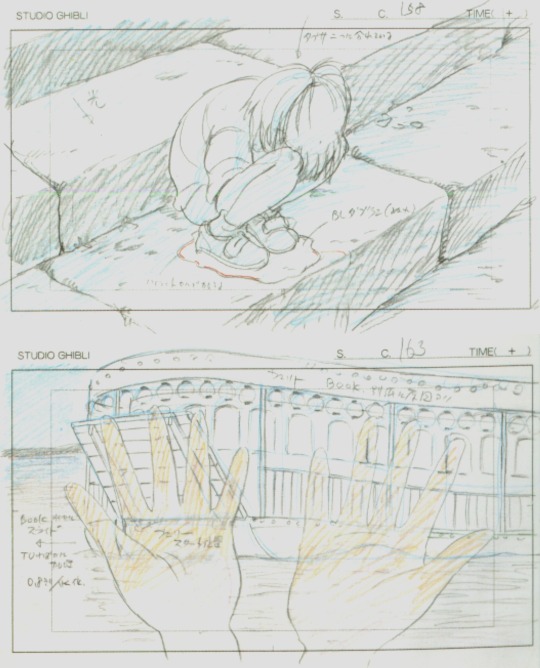
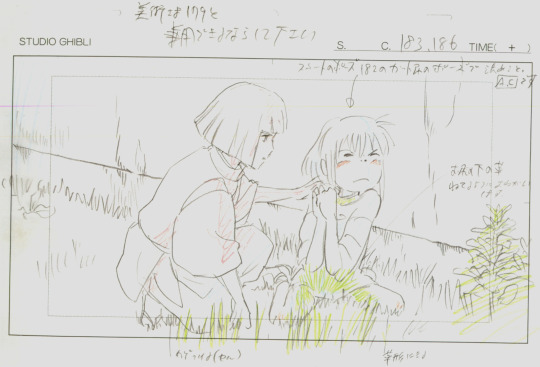
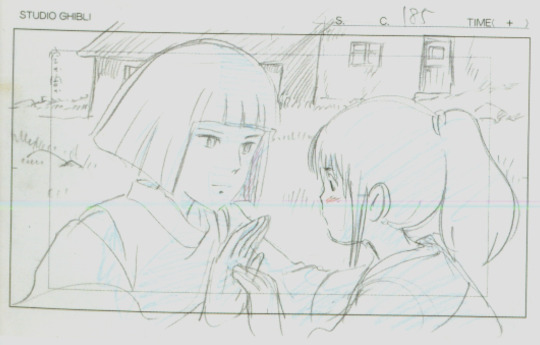

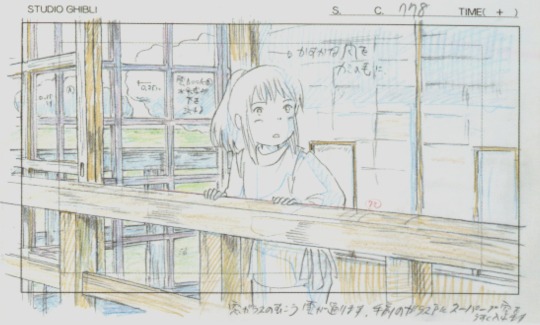
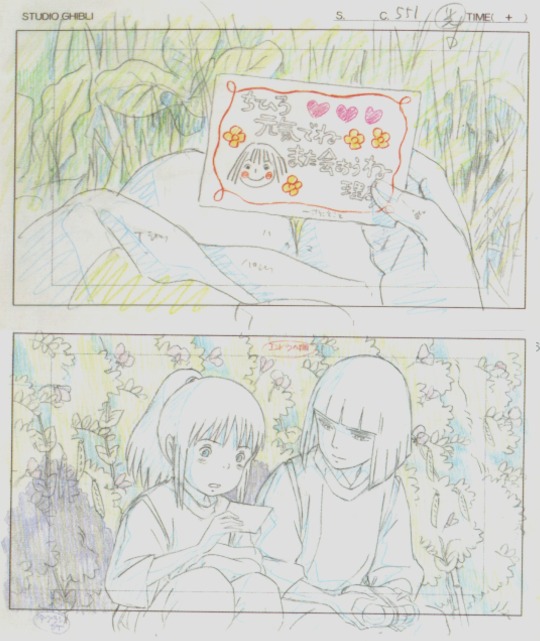
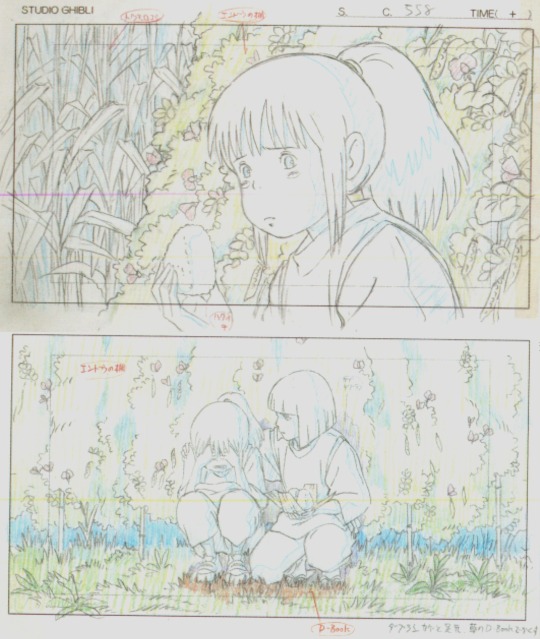
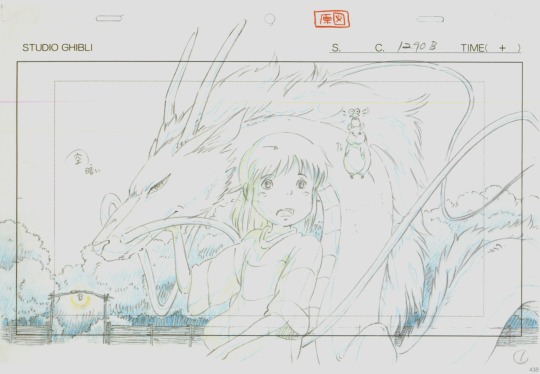
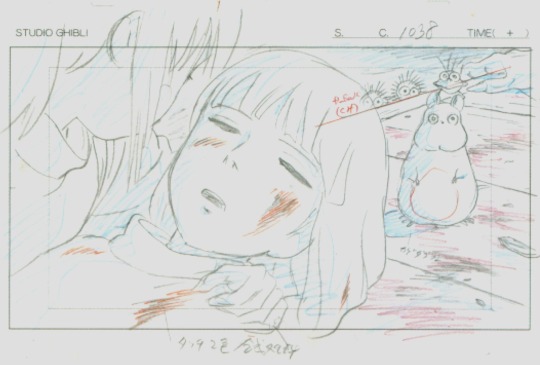
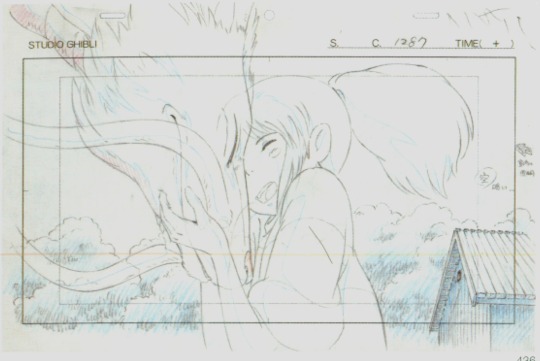
Spirited Away (千と千尋の神隠し) Animation Layouts for my Chihiro: Nefeli !
Thank you for sharing so many beautiful memories with me. I organized this post, wanting to show how significant others are there for each other, having adventures, fun, and of course healing mentally each other’s wounds… Σ'αγαπάααω ! ^_^ (Haven’t slept. Watched the STAKES finale. While editing these the whole night, thinking about you, crying over Bubbline. 11:06 AM & we just talked on the phone. Good morning! Sorry I didn’t say I didn’t sleep. Love you. Going to buy cereal <3 ) Everything stays…
3 years ago, we kissed for the first time… 18/11
4K notes
·
View notes
Photo

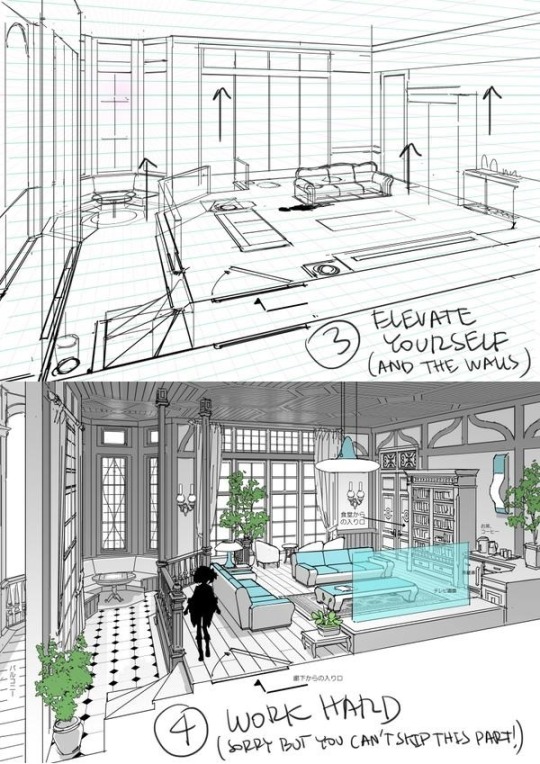

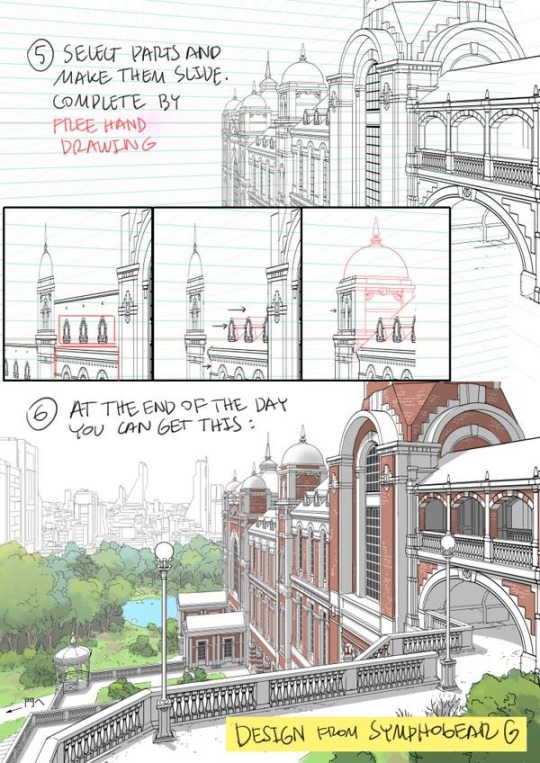


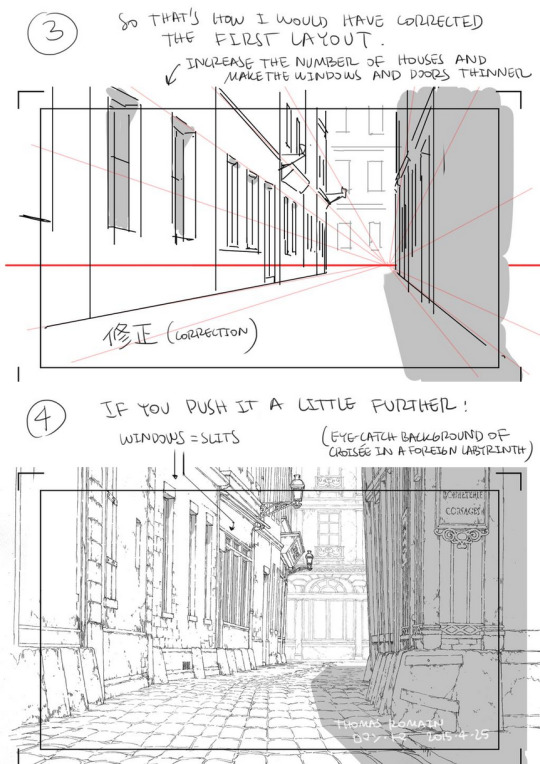
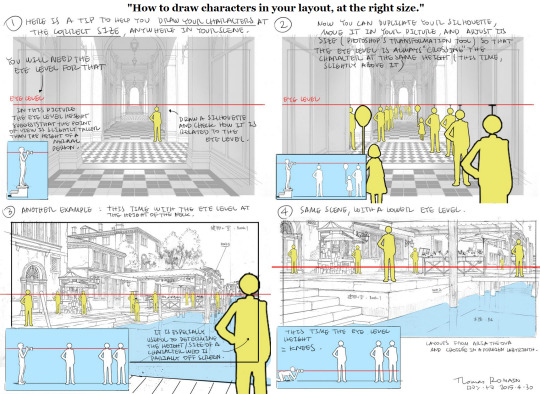

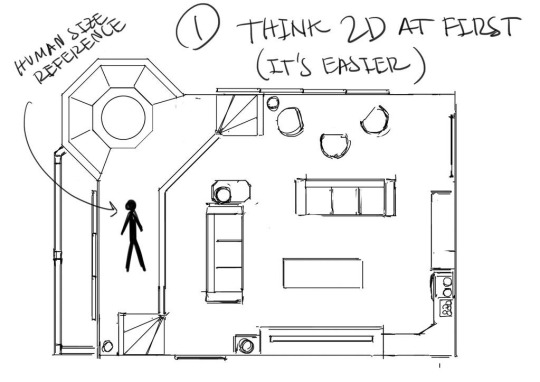
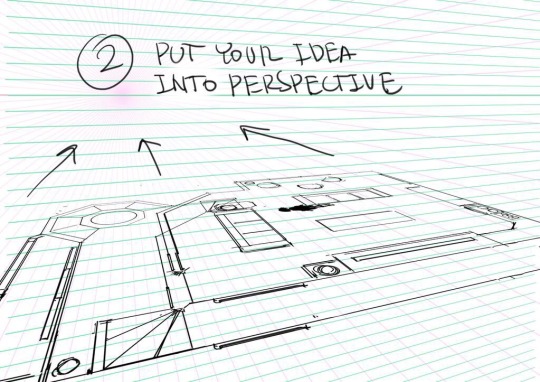
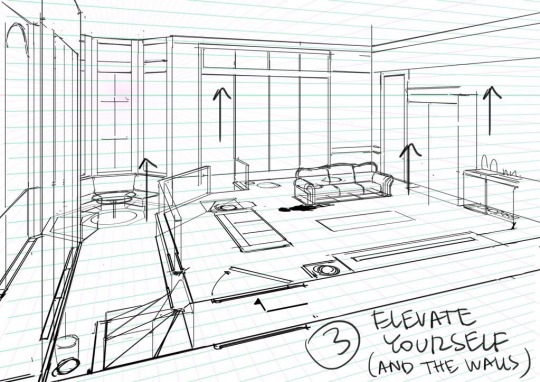
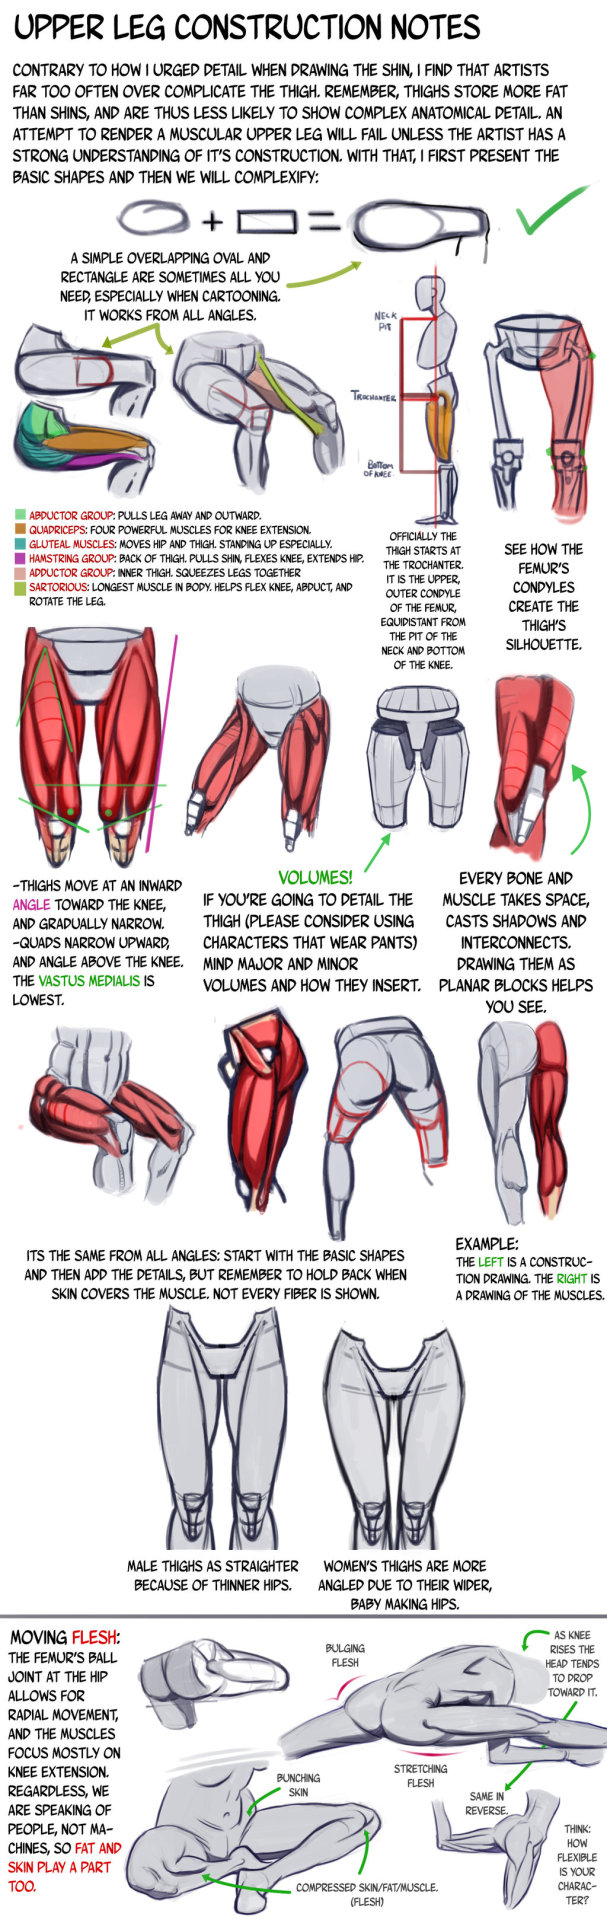
A master post of Thomas Romain’s art tutorials.
There’s not enough space to post all of them, SO here’s links to everything he has posted (on twitter) so far : 1 2 3 4 5 6 7 8 9 10 11 12.
Now that new semesters have started, I thought people might need these. Enjoy your lessons!
390K notes
·
View notes
Photo


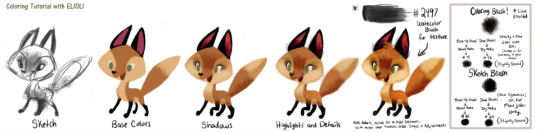


ELIOLI tutorials and processes
A Whole ‘Lotta Tutorials, Y'all.
We should mention that all of these were done in Photoshop CS3 and Paint Tool SAI!
This time, it’s all combined into one, if anyone were to reference these… if any at all!
Oh and sorry if you can’t read the first one too well (really old one), but you get the idea!
22K notes
·
View notes
Photo
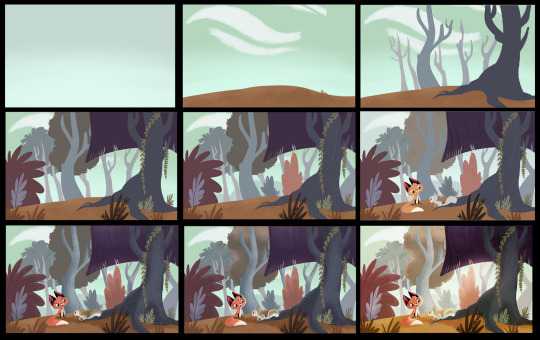

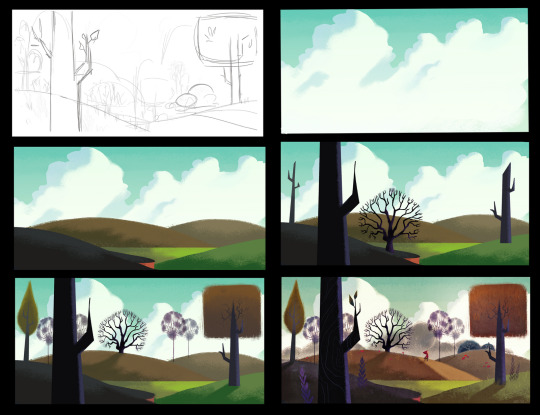
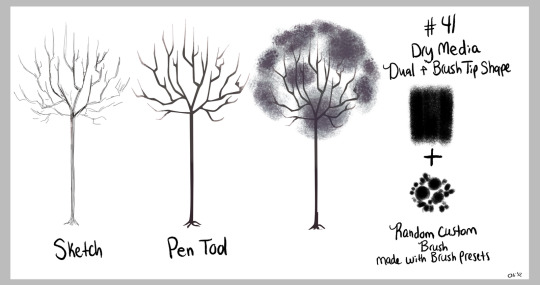
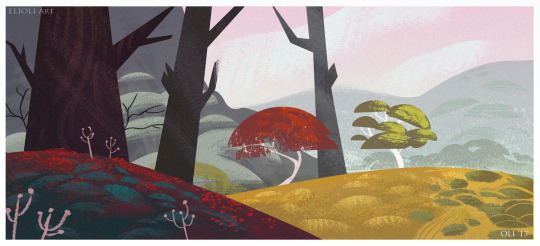
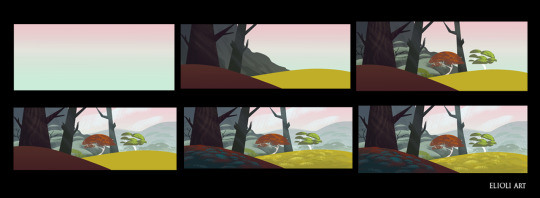
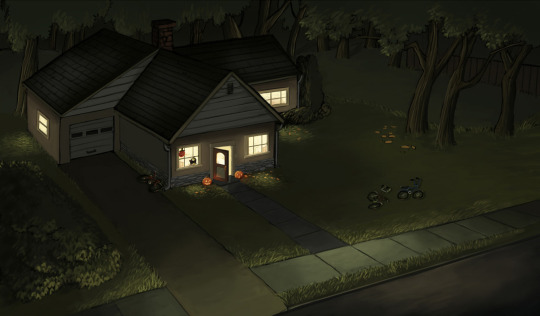
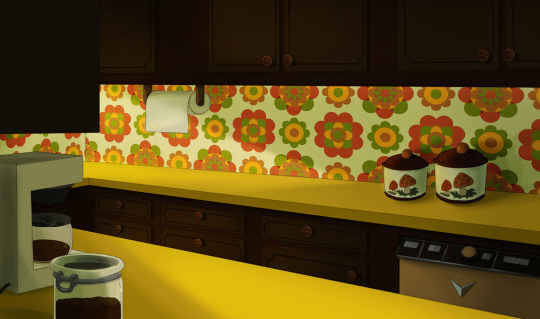
Forest Talk Process - OLI (2012)
Finished picture here.
More bunched up tutorials here, (Will post separately soon)
————————————
Keep in mind when following from a visual process piece ( much like this one and without words) or a tutorial, don’t try to copy exactly what you see from it. Don’t try to copy the trees, the clothes, the colors, or the characters (the fox if for a WIP book of ours(!)) but try to apply the steps into a totally original picture of your own. You get a lot more out of a process by taking it one by one. In this case, layer by layer. Just apply what you see in the process of laying out the picture, instead of emulating the artists’s visual style. We have done that from past experience looking up tutorials on DeviantART when we were like, 13/14! It may help for the moment, but find your own process, and explore what helps you get a picture done easier! Hope this helps a little. :)
1K notes
·
View notes
Photo
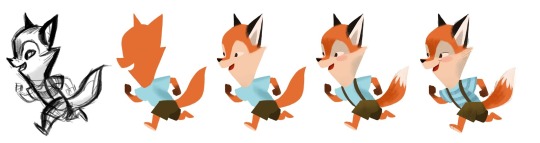
Here’s some more stuff for figuring out the Fox Book style. We should just stick with something by now. Our titles are creative, aren’t they?
-OLI
http://www.elioliart.com/2013/09/some-other-fb-background-with-process.html
255 notes
·
View notes
Text
geekysideburns replied to your post: I’m having a hard time no…
Have you gotten to reference layers yet because OMG.
WAT IS THAT
83K notes
·
View notes
Photo

Wirt
#934030
#594A40
#E6B497 #E2C195
#383741 #4E4C59 #726F80
#DAB156
#CECEAE #ECECCC
#474343 #827D79
#161616
35 notes
·
View notes
Photo
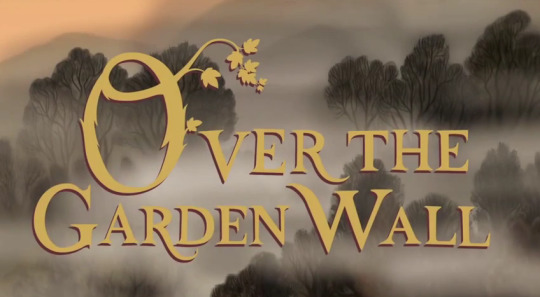
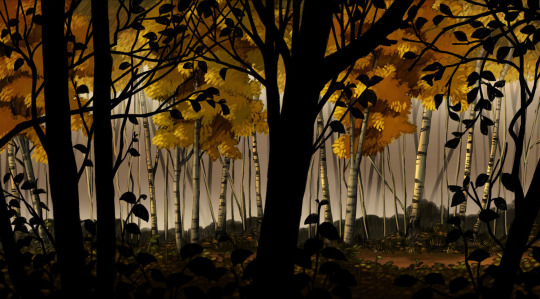
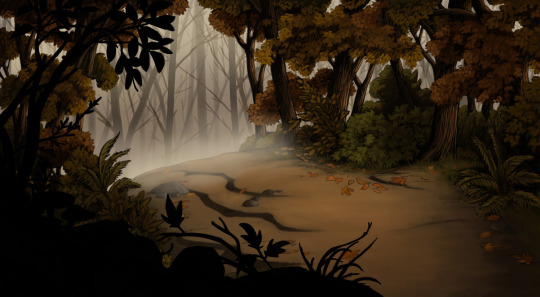
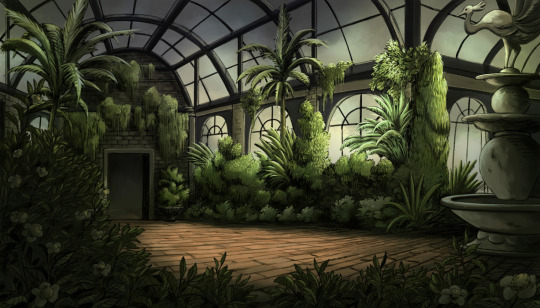
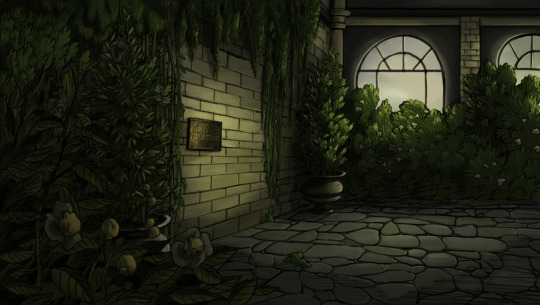
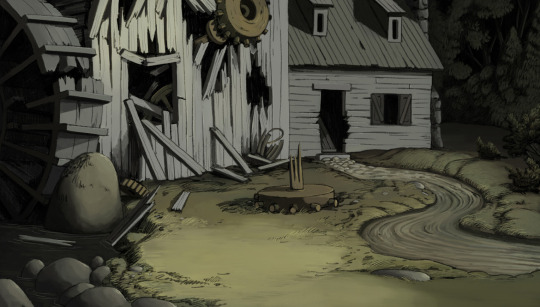
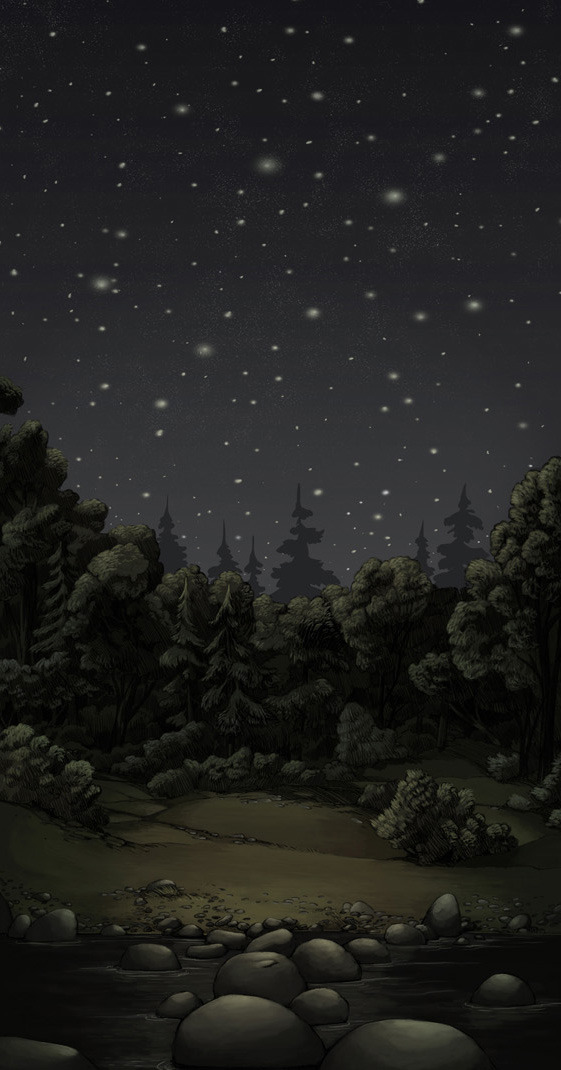

Background paintings by Clarke Snyder for Cartoon Network’s Over The Garden Wall.
17K notes
·
View notes
Photo
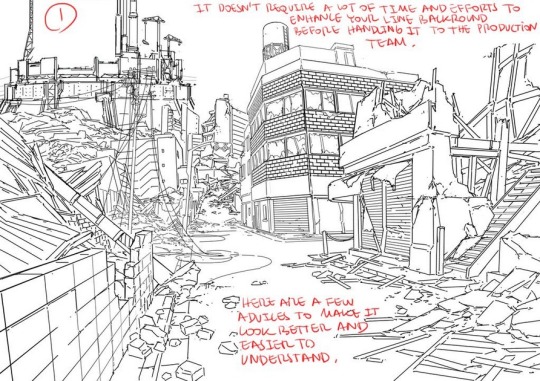
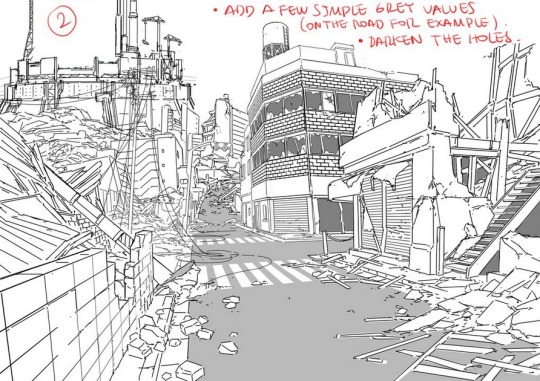
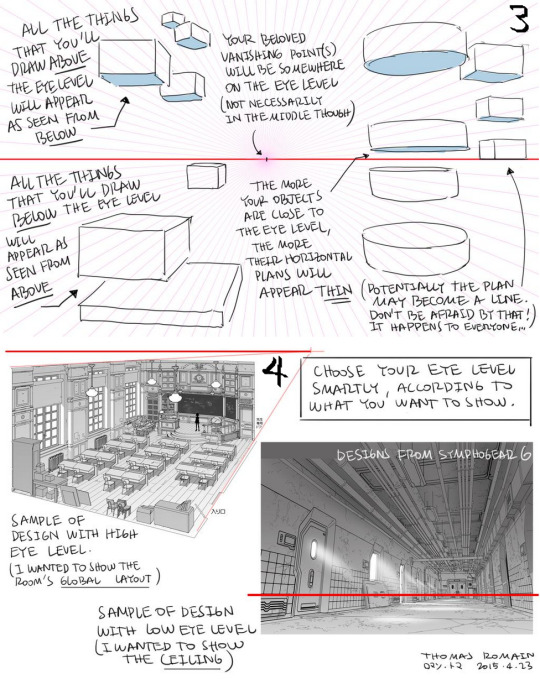
Advices to make you line background more understandable. Animation is team work, your design must be easy to work with.
by Thomas Romain (Space Dandy, Cannon Busters, E.P. Kiss Dum, Code Lyoko, Basquash!) ! Another great tutorial: Part 6, 5, 4, 3, 2, 1.
4K notes
·
View notes
Photo


Some animated running by Yoh Yoshinari (吉成曜)
Tutorial by the director of Little Witch Academia, and key animator in: Gurren Lagann, FLCL, KILL la KILL, Evangelion, Panty & Stocking (X)
49K notes
·
View notes
Photo

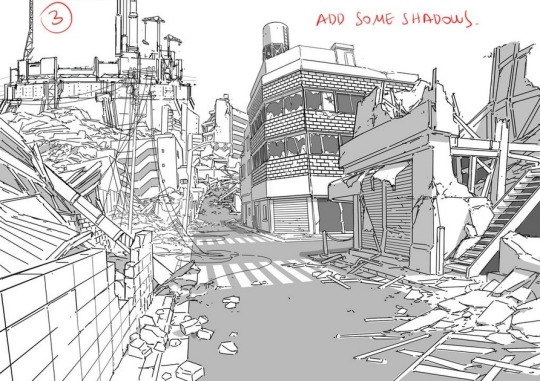
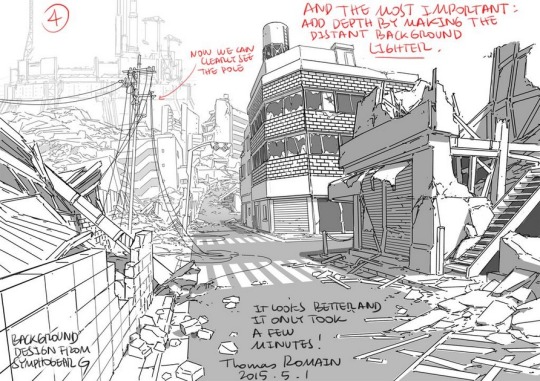
A brief breakdown of how Thomas Romain (co-creator of Code Lyoko, Basquash! Space Dandy Mecha Designer, Cannon Busters) designs backgrounds digitally.
Brilliant.
https://www.twitter.com/thomasintokyo
66K notes
·
View notes
Photo
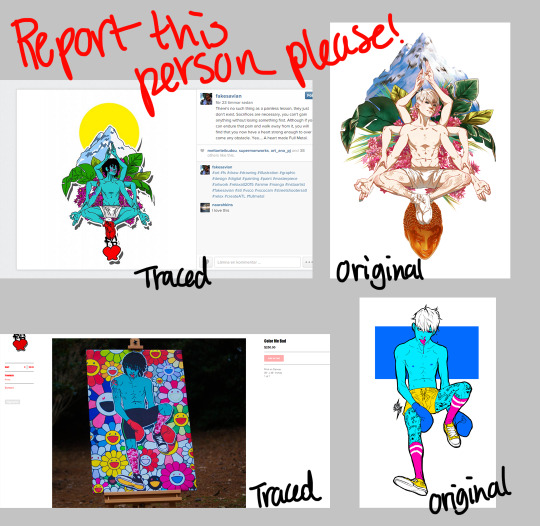
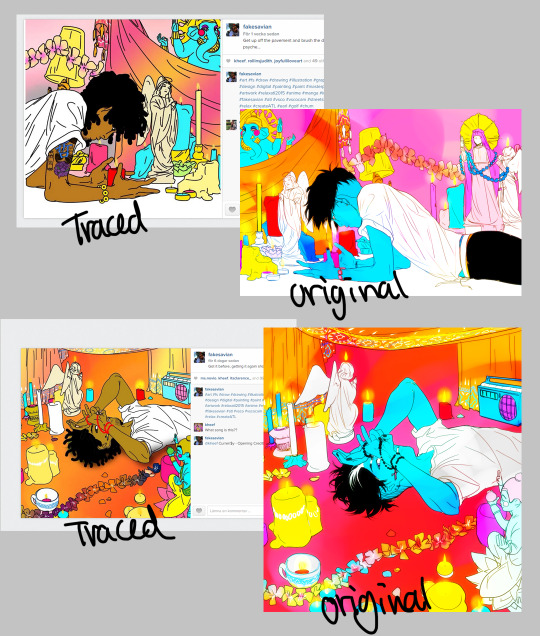
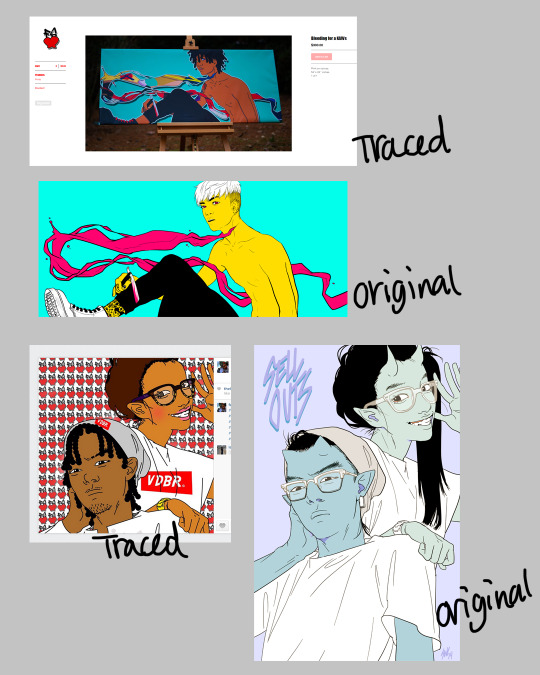
PLEASE HELP ME REPORT THIS PERSON!!
Sorry for the long post, but I need you guys to help me out.
This person has been tracing/copying not only mine but several other artists’ artwork. They’ve been selling traced/copied art on their bigcartel and participated in various exhibitions for their own profit.
Their Instagram Tumblr Bigcartel Twitter
Signal boosts are super appreciated, thank you!
27K notes
·
View notes
Text
DIY Aluminium Calligraphy Pen
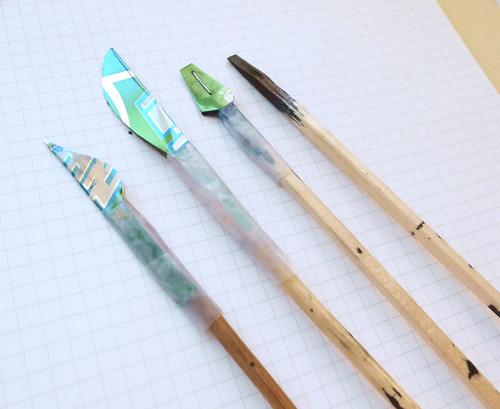
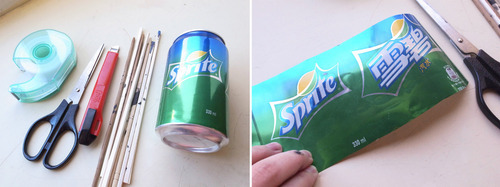
You’ll need tape, scissors, knife, disposable chopsticks, empty aluminium can, stapler and ink.
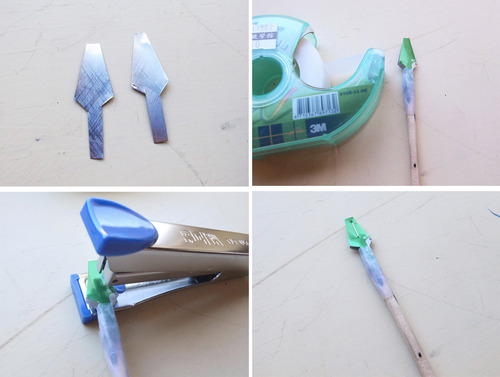
Calligraphy Pen for Gothic: cut the aluminium into two pieces like above and tape it on chopstick, then Staple the aluminium.
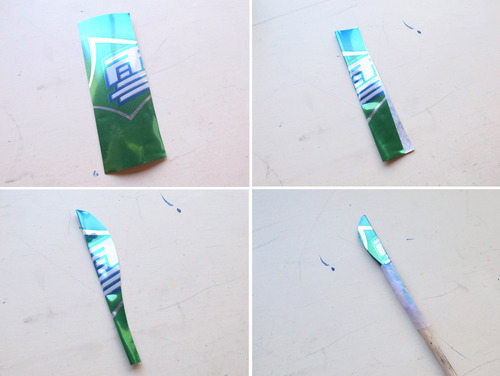
Medium Point Calligraphy Pen: Fold a piece of aluminim, and cut it like picture above. Then tape it on chopstick.
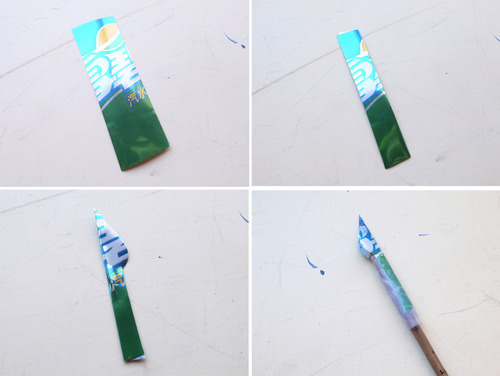
Fine Point Calligraphy Pen: Fold a piece of aluminim, and cut it like picture above. Then tape it on chopstick.
Now enjoy it :)


☞Turning straw into pen.
284K notes
·
View notes
Photo

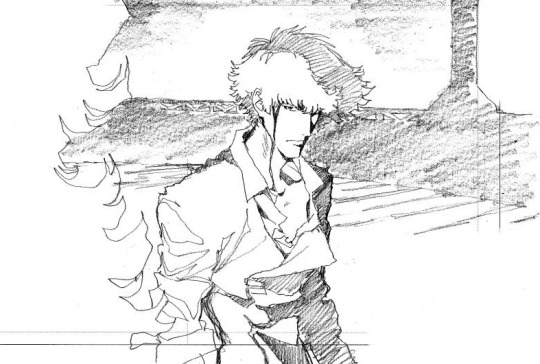
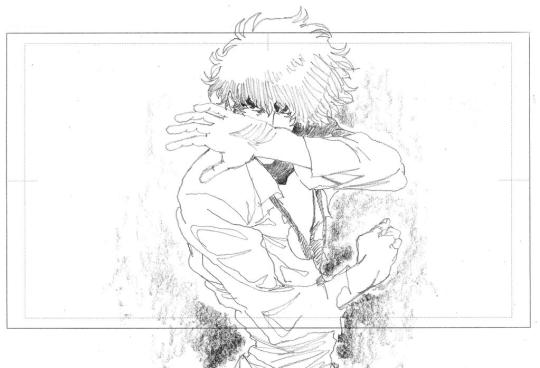
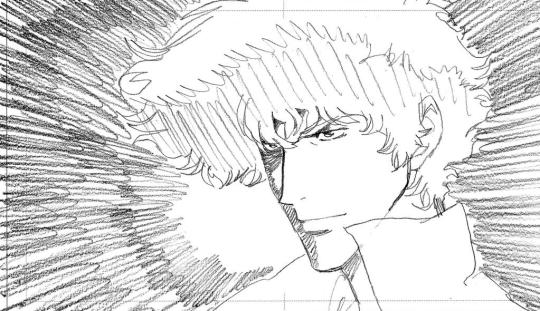
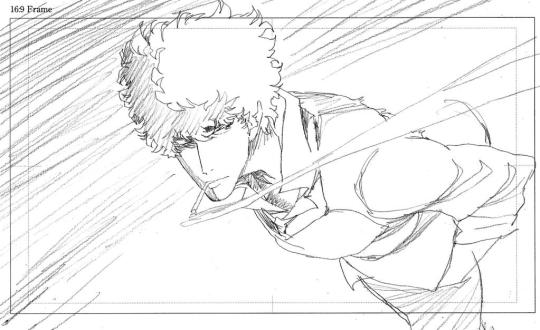
Sword of the Stranger (ストレンヂア 無皇刃譚) | Nanashi vs Luo-Lang
Key-animation by Yutaka Nakamura (中村 豊)
4K notes
·
View notes