Last Seen Blogs

tjblog26
Untitled
black--heretic
No mourners. No funerals.

arcticmuseum
The Peary-MacMillan Arctic Museum
pastacatprod
A musical weirdo

alexandraturcu-77
Untitled
Text
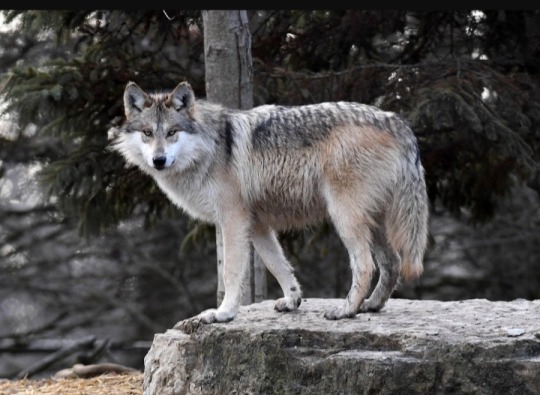
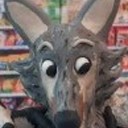
Wolf refrence that I based/inspired Atmik's fur colour/patterns
0 notes
Text
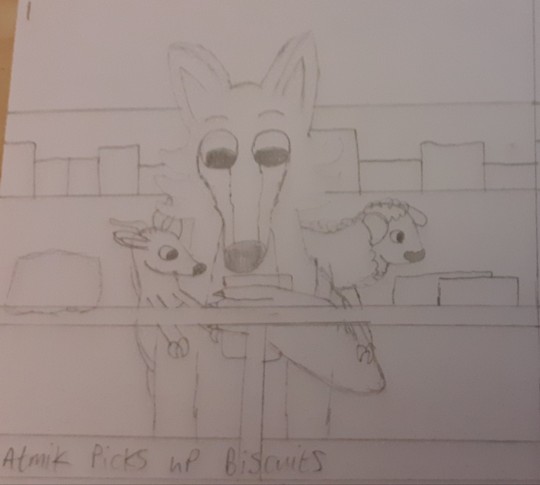
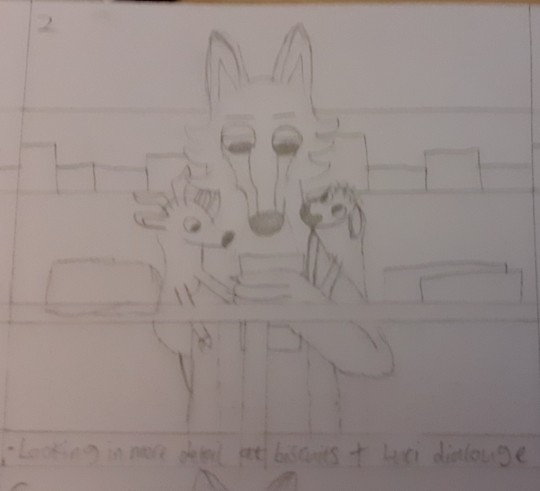
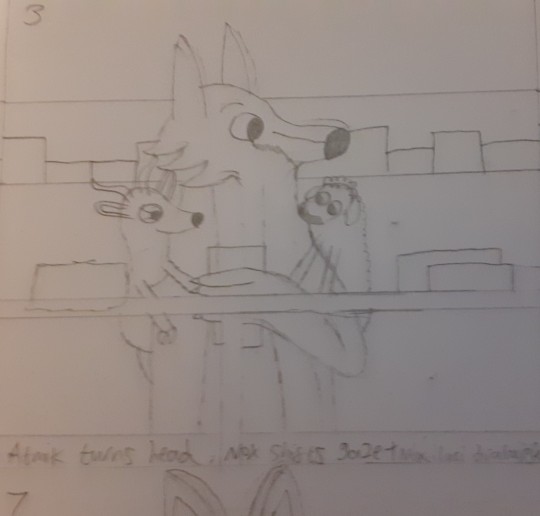
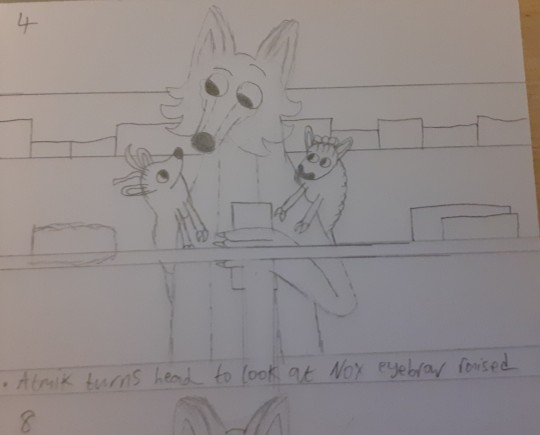
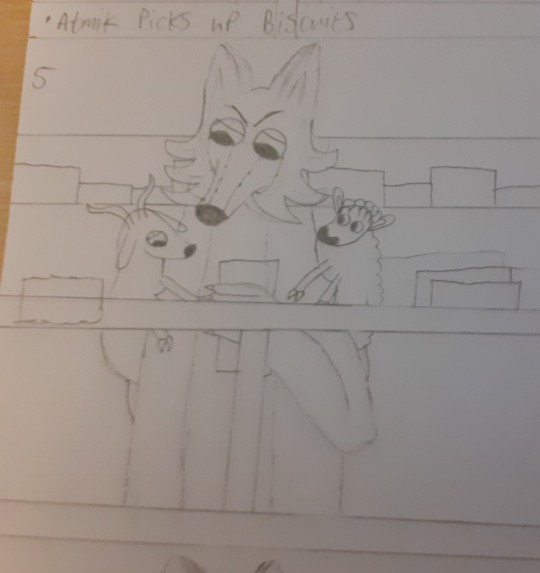
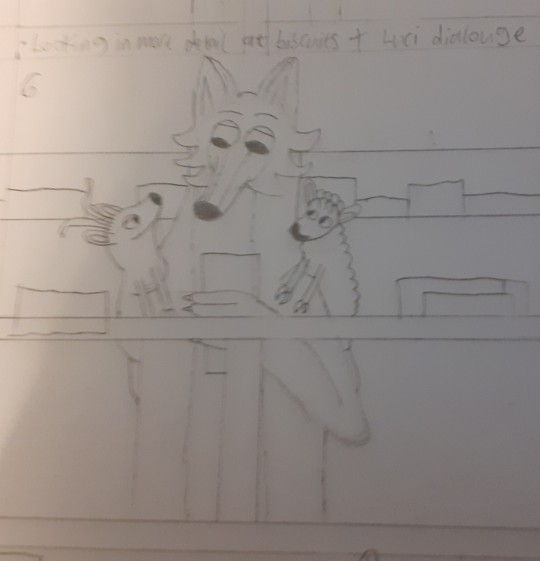
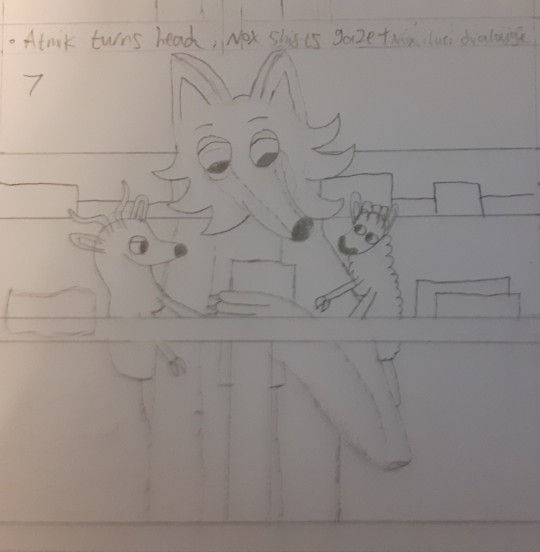


Clearer pictures of the individual panels/drawings from the animation storyboard based on the script
0 notes
Text

Animation storyboard- similarly to the coloured character designs this was something I back tracked to after I had done the animation. I decided to just create the script initially as I thought it would be more informative and provide me with a better guide for the animation than a storyboard would. Plus I’m not great at drawing and I thought it would take to long. But after I had done what I was able to do with the animation I decided to at least attempt a storyboard from where I left off in the animation to act as a visual aid for the remaining script/give a visual rough idea of what the movements would be. But also because on my original plan/ proposal I wrote that I wanted to do a storyboard so I thought I should probably do one to at least cover it.
This is a scanned in version of it and I just did it roughly in pencil so its quite hard to see. So in another post I took pictures of each panel on my phone so they would be more visible. The proportions of the characters and background are inconsonant and its not my best drawing quality due to being confined to a small area for each drawing. Although that doesn't really matter too much with a storyboard as long as you can tell what's going on and the characters are recognisable. I think along with the script to explain it the drawings give a reasonably clear idea of what the rest of the animation would have been.
0 notes
Text
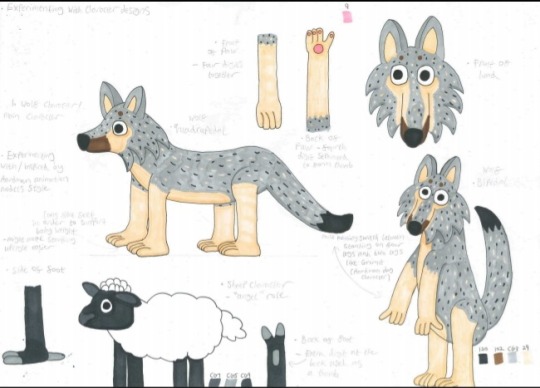
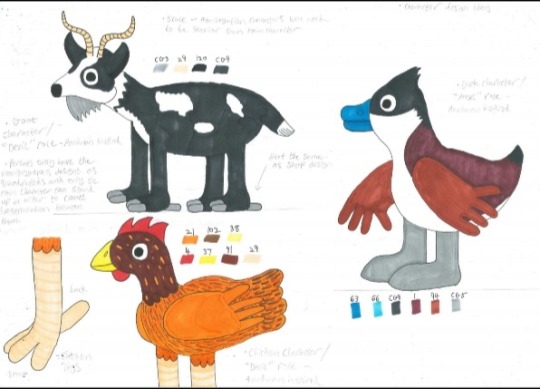
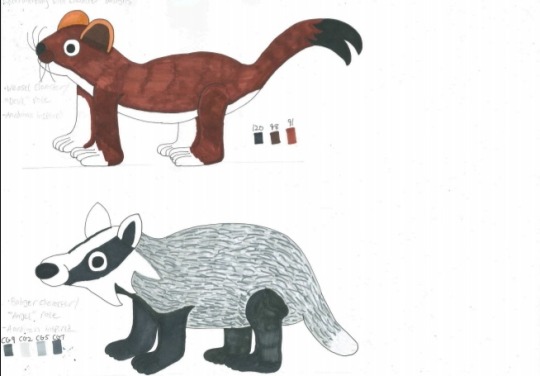
These are the original drawn concepts for the models characters that I did but coloured. I originally decided not to colour them in order to save time as getting the models made and animated was much more important to the project. But I thought I should go back and colour them since I had done what I could with the animation and they would look a lot more like complete concepts/artwork if they were coloured/ they would be more presentable and be something to add to the portfolio.
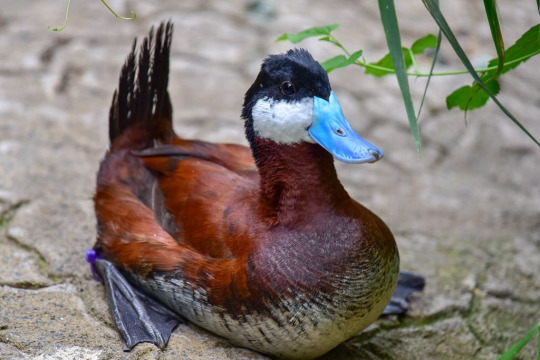
The wolf, goat and sheep character concepts I just coloured based on their model counterparts. But for the other characters they didn't have a model version that I could base the colours on. So instead I looked at the references that I had used previously to design the basic sketches and used those to help me come up with the colours. For example the duck character’s colours are based on the duck reference/picture that has a blue beak, I decided to use this reference particularly because I thought the coloration was really interesting/unusual. It’s not the average duck you would see at your local pond/lake.
0 notes
Text
https://m.youtube.com/watch?v=PCOWE0EiCyo&list=PLefIWyXlY3YFHFukgpF76SQbHeM2GtjT9&index=12
youtube
Similarly to Adam I think this is one of Aardman’s older stopmotion creations, Creature comforts. This is closer to what I did for my animation in terms of how the characters look. These were the sort of characters from Aardman that I was looking at when looking for design inspiration. (Although I didn’t enthasies certain features as much, such as the mouths which always seem to be quite large on Aardman characters.) I’m not entirely sure whether they used armatures for these or not which they seemed to have switched heavily in favour of in their more recent work. But in the animation just by looking at the texturing on the characters it’s quite clear that they used actual clay for the majority of the models bodies. The animation is very fluid and expressive similarly to Adam and is the sort of standard I would like to get to if I continued to do animation/stop motion/claymation animation. Although I would obviously need to practice a lot more. The actual content of the episodes is based around interviewing people on certain topics and these people have been turned into/depicted as various animal characters which are designed and animated to fit with the audio and individuals from the interviews. As a result it has a rather wide reaching/not overly clear audience. The characters themselves would probably be more appealing to children due to them being animals with enthasied features such as eyes and mouths which usually look either cute or funny. But the actual content of it being about interviewing people on various topics is more likely to appeal to an older audience who would be interested in other people’s opinions and perhaps find them funny. While a child would probably be rather disinterest in the dialogue and on its own would probably find it boring. This results in you getting a piece of animation which appeals to two distinctly seperate audiences/age groups for different reasons/it works on two seperate levels. It’s the sort of thing parents could casually sit down with their children and watch as the children would likely enjoy the animation and the parents/adults can be entertained by what’s being said. I think my animation is rather similar to this as the visuals are likely to drawn in a younger audience, but the actual story of the animation is more likely to appeal to an older audience.
0 notes
Text
https://m.youtube.com/watch?v=ZHemTNW-q9M&list=PLefIWyXlY3YFHFukgpF76SQbHeM2GtjT9&index=6
youtube
This was one of the other video tutorials that I watched but forgot to post on the blog. It goes over quite a lot of the same points that the previous video tutorial that I looked at goes over, Stop Motion Basics. Although this one is more specific to claymation while the previous tutorial was more generalised/covered stopmotion as a whole. They also suggest using some kind of armature which you could make from various materials including paper clips or even toothpicks which I’m still not entirely sure how you would do that with clay without the armature being/becoming exposed. For the animation they show at the end it’s done very well, the animation is fluid, expressive and creative. But the characters are very simple and rough. There are areas were the clay is very roughly sculpted with bumpy surfaces and cracks in the clay. Perhaps if I had made my models simpler and less refined/tidy I could have used an armature. But I like having detailed characters and they were very important to the animation so I thought they should look appealing/charming. They look more unique/ like individuals with personalities and quirks which you don’t always get with very simple characters which heavily rely on their actions to convey personality. Admittedly detailed characters aren’t necessary for creating an interesting, appealing well defined character but I think it does help.
0 notes
Text
https://m.youtube.com/watch?v=stSYs7a2UHE&list=PLefIWyXlY3YFHFukgpF76SQbHeM2GtjT9&index=10
youtube
Video about how Aardman makes their animation models/their model making process. It’s rather long and complicated and they don’t actually appear to use that much modeling clay (at least in these more modern/latest models) in their final animation models. Modeling clay is only used for small segments of the characters such as the mouths and the majority of the model/puppet is made out of lots of other different materials such as silicon, foam latex, fabric/fur, metal (for the armature), ply wood, etc. They use a lot of different moulds to make character parts and a lot of the characters have very sophisticated internal mechanisms. Their more recent models appear to be on a simailr level to the ones used in Wes Anderson films, unlike one of their earlier films Adam which is more similar to what I did/somewhat more in the range of my capabilities and resources. At least as far as I can tell. I believe they just used clay for the characters in Adam, apart from the hand of course, but I can’t be 100% certain
0 notes
Text
https://m.youtube.com/watch?v=E5t_DXgZmFM&list=PLefIWyXlY3YFHFukgpF76SQbHeM2GtjT9&index=17
youtube
This was a video I found about how Aardman mixes their clay for animating. Rather than doing it by hand like me they use an old chewing gum/bubble gum machine which mixes and combines clay in order to get the correct colour and consistency. If the clay is too soft they add chalk in order to stiffen the clay or if it’s too stiff they add linseed oil to softer the clay. It would have been quite nice to have something like a bubblegum machine in order to mix my clay as I spent quite a lot of time mixing clay colours so they matched which is partly why the wolf model took so long to make. Although I have no idea where you would get a bubble gum machine and it probably would only really be worth getting if I was mixing very large batches of clay. (And I wouldn’t have the money or anywhere to put it.) Interestingly Aardman appears to use the same plastercine I used to make my animation models, Newplast. Although they only use it for small parts of their models such as mouths and eyelids rather than the entire model.
0 notes
Text
https://m.youtube.com/watch?v=uimF41CrMXM&list=PLefIWyXlY3YFHFukgpF76SQbHeM2GtjT9&index=2
youtube
https://m.youtube.com/watch?v=yr7ftXqFwRk&list=PLefIWyXlY3YFHFukgpF76SQbHeM2GtjT9&index=3
youtube
https://m.youtube.com/watch?v=z2hPHKV42Xc&list=PLefIWyXlY3YFHFukgpF76SQbHeM2GtjT9&index=4
youtube
Video tutorials I watched- these were some videos about stopmotion puppets that I watched earlier on in the project but forgot to actually upload onto the Tumblr blog. I decided I wanted to look into stopmotion puppets as it was a potential alternative method to make the characters. The stuff that’s done in Wes Anderson films and in the bottom video use very complex puppets with ball and socket armatures. According to the top video you can buy these, at least bipedal ones. I’m not sure if it’s possible to get a hold of quadruped armatures. But these can cost at least over £100 and are usually several hundreds of pounds so buying one to use wasn’t really an option for one let alone three characters. Plus I don’t really have the knowledge/metal work skills to make my own. The top two tutorials suggest and show a much less sophistiated/simpler of making an armature for a stopmotion puppet that is also a lot cheaper. You essentially create an armature out of just wire twisted together at certain points which you shape inside a scale drawing of your character/your characters basic body shape in order to get the shape and scale of the armature correct. Then epoxy putty is added where the armature doesn’t need to bend in order to add strength to the armature and function a bit like bones. The exposed wire functions as a joint. The head of the puppet can be made from something like a wooden or tin foil ball which clay is moulded over. You can also add t-nuts to the feet which along with washers and wing nuts these can be used to bolt the puppet down to the surface it’s on to help it stand, such as when one foot is off the ground with a bipedal puppet.
Once you have the basic armature you can essentially start adding on the sort of “flesh/muscle and skin” of the puppet. According to the top video you can just add clay straight onto the armature, but I don’t see how that would work. I imagine if you tried to move it the wire would just stick out of the clay or you would just squash the clay while trying to move it. Or the clay just wouldn’t stay on the wire in the first place. At least I don’t think you would be able to make an overly detailed character with this method. They also suggest instead of bulking out the armature with clay use foam, cotton batting or pre wrap. Then over this layer you add clothing. For human characters/ characters that have clothing this works but I’m not entirely sure how I could have adapted this for my character since they are animals. Fur fabric/faux fur perhaps. But I’m not entirely sure how I would hide the joins between the different fur pieces. There’s also the fact that the head would also probably be a different material. Having a fabric/clothed body with a hard clay head as the top two videos show works with a human character but I don’t think would really look good on an furry animal character/ character with fur if I used fur fabric for the body and clay on the head. Both are meant to be fluffy but the head if it was hard clay wouldn’t match with fur fabric. The stark difference in textures when they are supposed to be part of one whole thing usually doesn’t look good at all. Maybe sticking fur fabric onto a hard head base or sewing/making a plush one with a foam base could have worked, but this would have been a nightmare to do.
So I ultimately decided to not use this method and just stick with claymation because I wasn’t really sure how to adapt the characters to this method without them wearing clothing. Which if it did give them clothes I would either have to buy some doll ones or sew my own which I have never done before/have no idea how to do. Plus the shoulder character would be quite small so would be extra difficult to make armatures for. But my other main reason was because I thought the process was rather complex and would take way too long to do. Either I would only end up making one of the characters or make all three but not have any actual time to animate them which was my ultimate goal. Claymation seemed the better option because it was simpler and wouldn’t take as long, although the characters movements wouldn’t be able to be as complex and the models were very fragile.
0 notes
Text

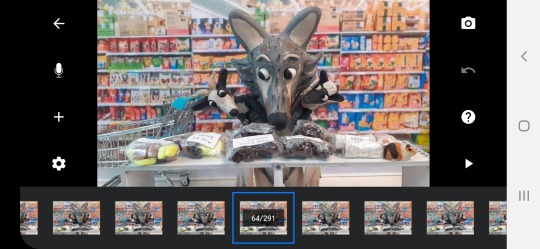
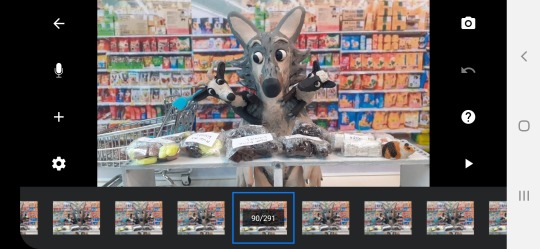

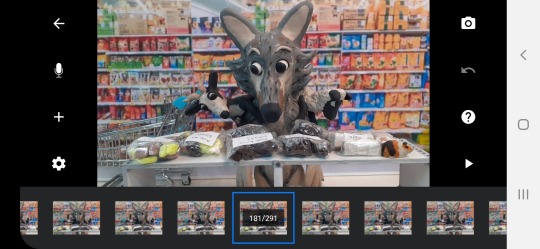


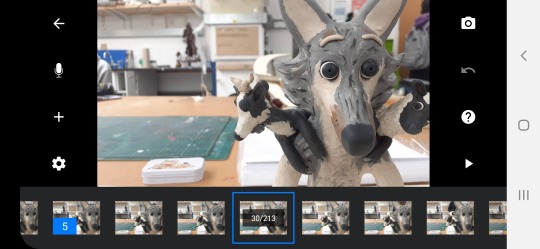
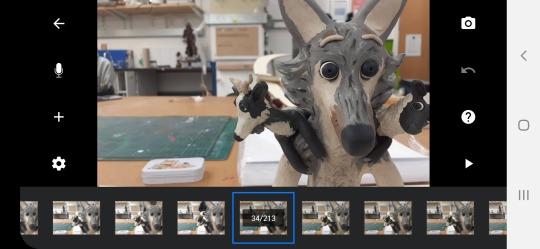
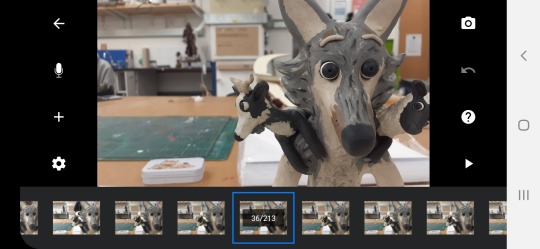
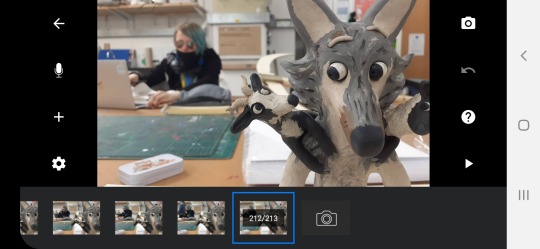
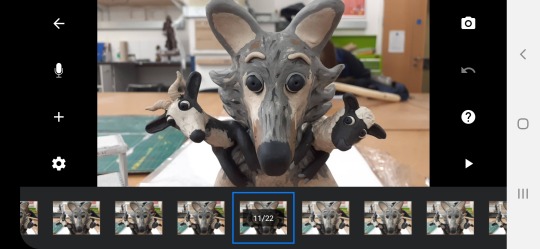
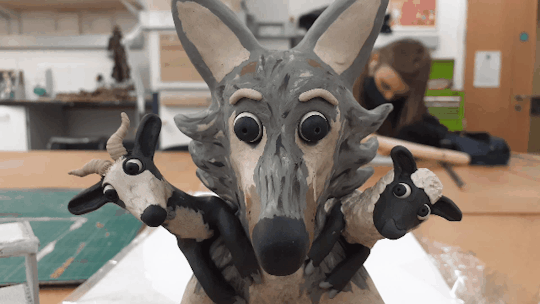
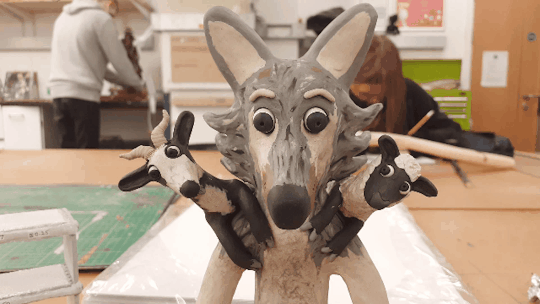
Final animation- I didn't get anywhere close to actually finishing this animation based on the script for the animation, although I didn’t expect to since animation takes so long. The animation ended up being just nine seconds. I probably could have made it a bit longer by lowering the frame rate as I had it at the maximum that the app allowed, 30 frames per second. But I liked how fluid it made the animation look and I think I would rather the animation be short but good quality than longer but not great quality. The shortness of it is also down to the fact that I ended up only having one day to shoot it. If I had been a bit faster with the blog work perhaps I would have had a few more days to film and gotten further through the script. Even then though I don't think I would have gotten much further. If I was to fully animate the script I would probably need at least another week.
The animation does have it’s issues, the props on the shelf were quite difficult to not accidently touch while trying to move the models so their position shifts throughout the animation. The wolf model also started getting hot under the lamp ,which I was using to help keep the lighting constant, and started leaning over into the shelf. I had to animate the model leaning back and stick the feet and tail to the base board using masking tape in an attempt to hold it in place. The lighting level also shifted slightly throughout the animation, although considerably less than if I hadn't used the lamp at all. Although I am quite pleased with the fact that in certain points of the animation I was able to animate three separate characters/models simultaneously.
0 notes
Text


Goat animation test/experiment- similarly to the sheep experiment I mostly just used this to play around with facial expressions and experiment with the goat model’s movement capabilities
0 notes
Text


Sheep animation test/experiment- I didn't have a particular plan with this experiment. I just messed around with the sheep model to have a quick test of it’s movement capabilities as well as practicing shifting between and creating facial expressions
0 notes
Text


Expression shift/ changing facial expression animation test- testing out the facial expression capabilities of the wolf model and shifting between expressions in animations rather than just still photos.
0 notes
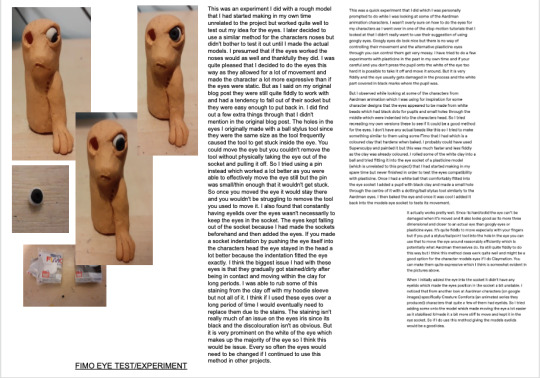
Text
Eye movement animation experiment- Generally just testing how to move the eyes, although the the eyebrows are moving a bit as well which was unintentional. I probably knocked them or they fell off and I had to put them back on while animating. Its probably something you get better at avoiding or correcting accurately with practice.
0 notes
Text
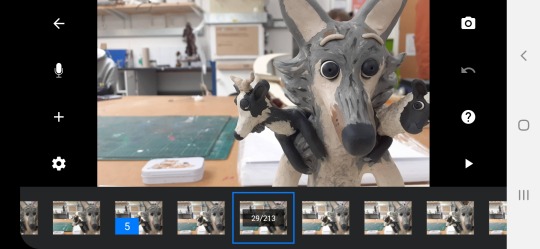
Eye blink animation test- testing out how to get the characters to blink. In this test I gave the model both a top and bottom eyelid, although I later refined this to only have a top eyelid. I found that there wasn't room for a bottom eyelid on the smaller models when I later experimented with making them blink. So I only gave them a top eyelid. But I found that this actually worked/looked better so in the final animation all the models only have a top eyelid when they blink.
( The version of this on the animation app I used to create the animations called Stop Motion Studio is a bit slower. When I tried to upload this one onto anything it wouldn't let me. The only way I could get it to play anywhere other than the app was to save it as a GIF so it’s playing a lot faster than I would like it to. I had the same issue with the eye movement test. The longer animations I wasn't able to get on here at all, I think because Tumblr doesn't like the format/file type they are in. So they are just shown through a few screen shots of the key movements. I was able to upload them onto my website through google drive though.)
0 notes
Text
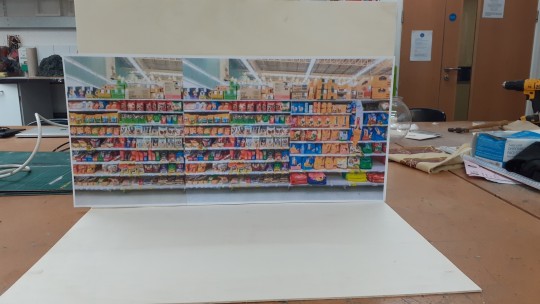

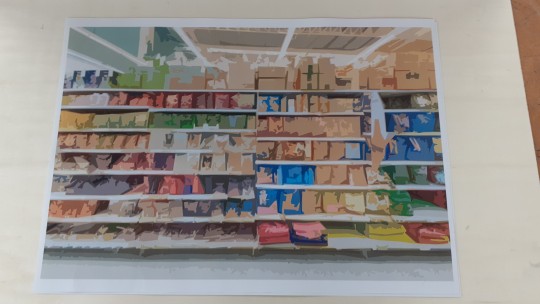
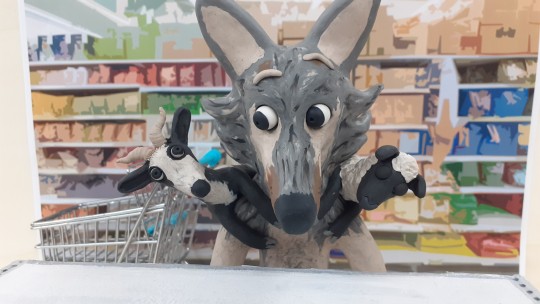
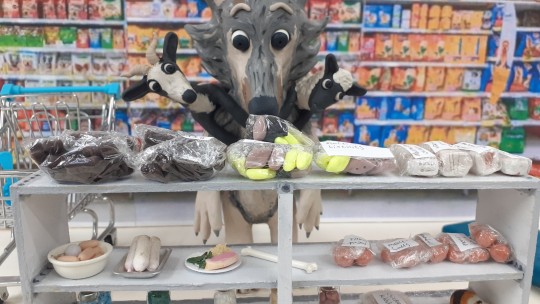
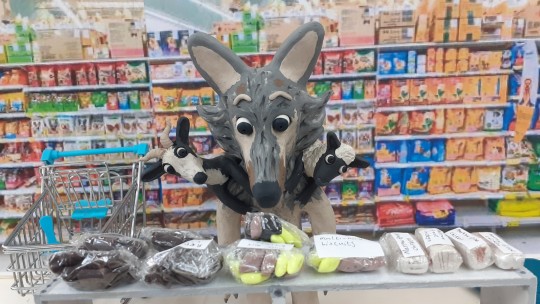
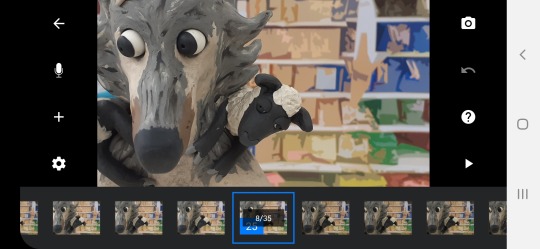
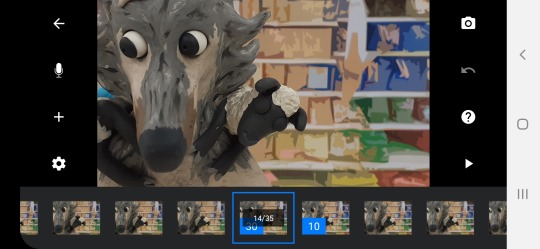
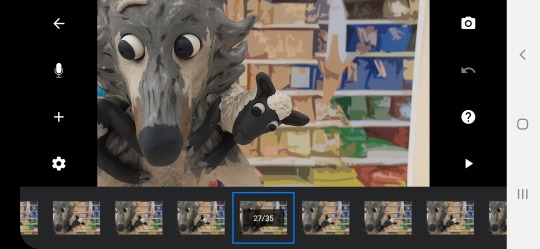
Animation set and experimenting with different backgrounds- The animation set was very simple, it was basically two wooden boards stuck together with some nails and a larger piece of wood at the back in order to make it more stable/stand upright properly. Similarly to the shelf Kyrstie constructed the set, although I helped a little bit to hold it together while it was being assembled. The set was still rather unstable as the back board had a tendency to move due to the air current coming from the heating system in the workshop, but this wasn't really an issue as it still held together and I don’t think the movement is visible in the animations I made. Or if it is it’s very subtle. The camera had to be constantly facing forward otherwise you would see outside the set, but it worked quite well overall despite this. With the background picture it creates a rather convincing impression that the characters are in a supermarket and the props of the shelf and trolley help add to this. (The trolley was something was something I had brought from a shop called Tiger quite a while ago, but I brought it in to add to the background as I thought it would be appropriate.)
The picture that I got to use for the background had been saved in a vey small scale and when it was scaled up and printed out it came out rather blurry/distorted. One of my other teachers Josh tried to fix this by putting the image through Photoshop (I’m not entirely sure exactly what he did to the picture) and this photoshop version of the picture can be seen in the third and fourth picture. I do quite like how it looks as it emphasises the colours and has created some interesting patterns, its rather abstract/artistic. But I decided to stick with the original picture because I liked being able to see what the products on the shelves were. Plus because it was realistic it made the fact that the characters were in a supermarket more clear/convincing. The blurriness wasn’t ideal but because it was the background this didn't matter too much. Although I did have to extend the picture in order to cover the entire backboard by printing out another one, lining it up and sticking the two pictures together using double sided tape which is also what I used to stick the picture to the wooden backboard. If you look closely at the top of the background you can see where the second picture has been attached due to the difference in the ceiling. But like the blurriness this only becomes really apparent when you start looking at it closely. In the animations your mostly paying attention to the movement of the characters so this is probably something people will only start to notice after watching the animation several times.
0 notes