Last Seen Blogs

autisticayin
pm blog
lee-blenderiano
FXANG WORLD
cxy-blog1
i am not a dirty god
naoyaslut
did you really mean it? really?
portraitzine
Zines On The Way!
Text
Week 10: Final Summary
This term gave a whole new perspective and opened new doors for my creativity and design processes. It introduced me to new design processes leading up to modelling and ultimately 3D renderings in preparations for the 3D printing.
As I started to work my way into the said process, I started off with sketching exercises which helped me understand about the scales, dimensions, line weights and the importance of taking a step back to have a better view of what I was doing. For example, drafting the sketches required me to visualise the whole sketch as a 3D view in my head to orientate perspectives required to construct an accurate views on paper.
Furthermore, as I progressed through the sketching processes, I faced some difficulties in orthogonal and auxiliary projections. Especially, when in week 4 task where I failed to gain a bigger picture in my mind and resulting in some minor inaccuracies when developing the auxiliary sketches. After all the sketches at the end of the tasks, I always had to make a model or do something practical which helped me to see a better way to further improve my sketches by assisting me to understand the whole process.
After all that I've learned to visualise 2Ds into 3D drawings, I progressed further to incorporate my own designs into my drawings. Spreading out all my thoughts and ideas onto one piece of paper in terms of visualisation of ideas for the OLAY bottle was fulfilling for me as I love imaginations and creating compared to procedures. The most important thing I have learned in this process is to forget uncertainties and unsureness of the design creation process and just to lead the way by the tip of my pen. At first I was very unsure of whether to not my curves or edges would look nice in someone's eyes other than me but I started to let go of the doubt and wholly set on my intent to create and develop.
Further into the course, we stepped into the world of modelling before 3D stages. At first I thought in great joy that finally it had come to my area of expertise as I enjoyed using photoshop very much. However, it turned out there are so many tools and execution techniques that I have not explored before. And learning about them not only helped me with this course, it also helped me advance my knowledge for other creative processes. The predominant task for me in this process was making my own model.
Modelling had been very fun and enjoyable process but also made me realise it is hard to visualise but it is even harder to create what my visualisations took me. Multiple difficulties were met when I used clay but I stuck with my plan as I wanted to create what I saw in my mind. the sculpting and refining process was very rewarding and challenging at the same time. But the joy of holding your own creation after so much hardship was something I had missed for so long since Covid changed modelling ways to be digital rather than physical.
Finally, we were tasked to use new softwares and tools to develop our models even further. Learning new software and their ways to execution had never been easy for me and 3DS Max is not an exception. As my Mac does not allow the installation, I remotely accessed the desktops from Uni to learn and use the software. At first, it was challenging to know where the commands and tabs are and to recognise what each of them represent and do. After some tutorial exercises, I developed some mental map of 3Ds's UI and from there things were much easier. This process as a whole had progress both my skills in designing as well as my design process in terms of bringing visualisations into fruition. Each and every techniques I explored and learned here will definitely become tools in my arsenal.
2 notes
·
View notes
Text
Week 9 Studio Tutorial – Preparing a 3d scan for printing
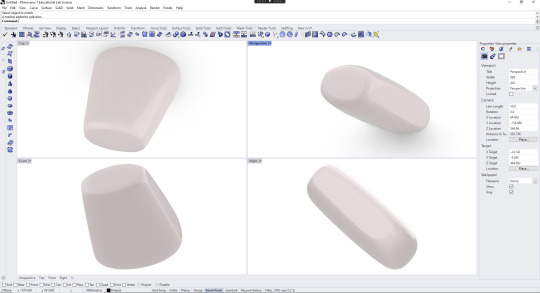
Image 1: Rhino Quad remesh
This week's task is to prepare a 3D scan and perfecting it so that it can be ready for 3D printing. I downloaded the file from Moodle then imported to Rhino 7 for quad remesh with at least 15000 faces but I miscalculated the first try where it only had 12689 faces. But in the second time it had 15178 so I think it improved. Also after remeshing it, I rendered it in a different colour for both aesthetics and ease for the eyes as plain white is starting to blur for me.
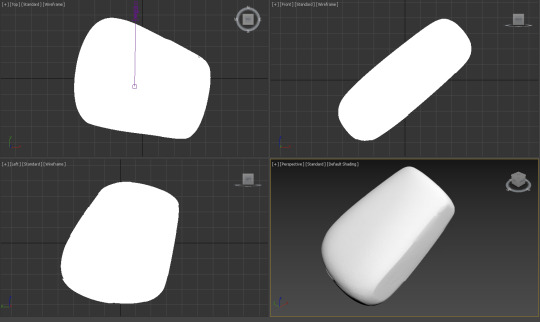
Image2: 3Ds
This where I imported the rhino file into 3ds software and started to follow the intrusions as per the Moodle such as aligning the pivot, centering to the object and the world, changing absolute world coordinates then ultimately, XForm reset. This one still looks a bit edgy and rough as it hadn't been smoothened out or dents fixed.
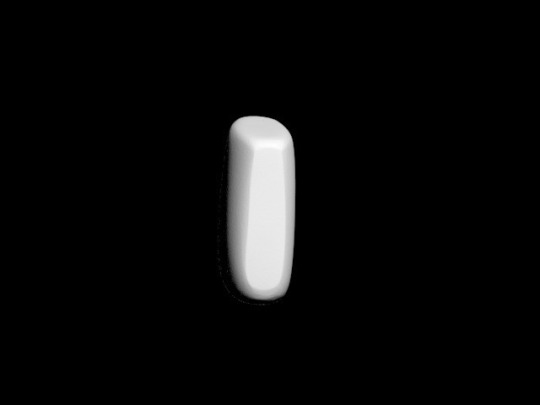
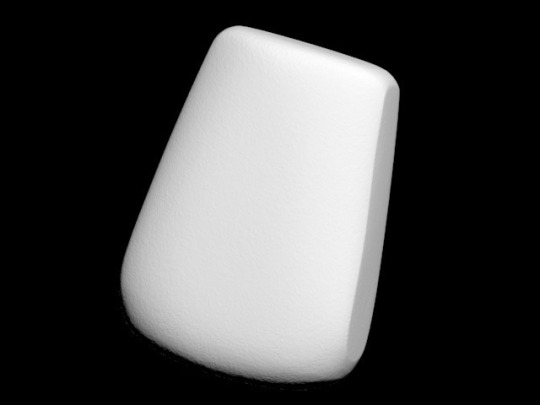
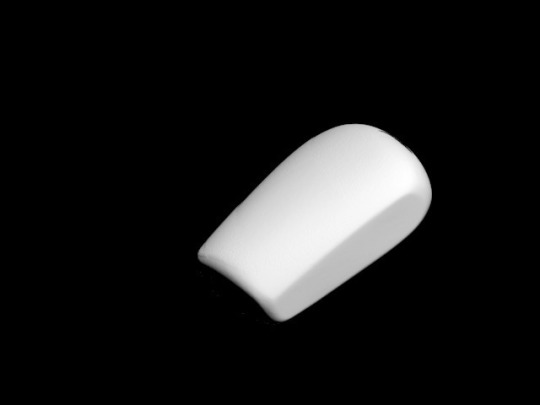
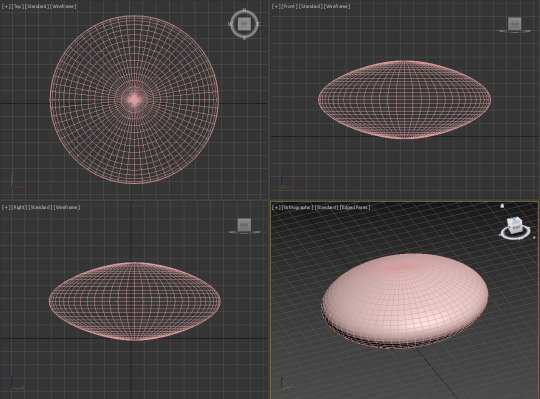
Image 3 and 4: Smoothened rendering
So, as I cannot stand the rough edges I smoothened them out using Turbosmooth and relax. My first try got the application to freeze and stop working as I unreasonably increased iterations both for the preview and render iterations. So for my second time I carefully set the iterations to 3 maximum and render iteration to just 1. I did not have the same problem with the relax modifier though, it was also a more subtle change. I was very satisfied with these renders so I decided to move onto the modifying stage.
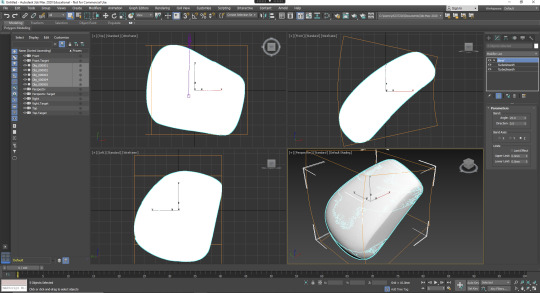
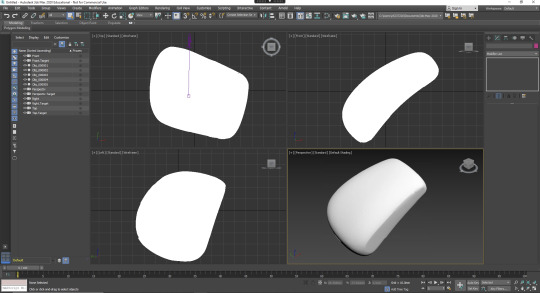
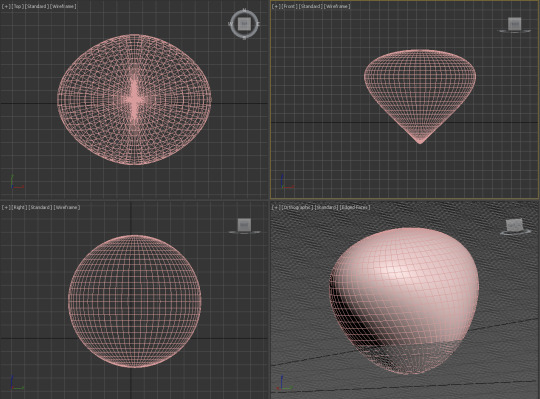
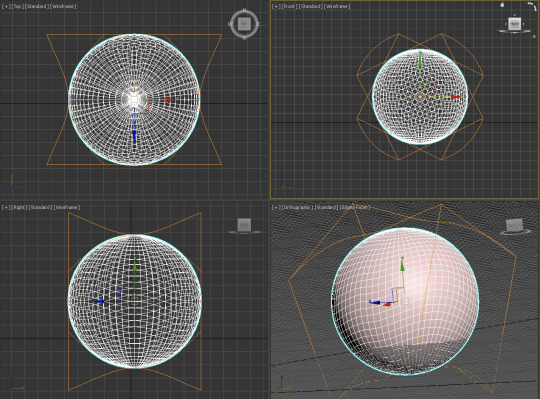
Image 5 and 6: Bend and Taper modifiers
I started off by using the Bend modifier so I could manipulate the general curve of the shape but also not really influencing the overall design of the bottle. Then, I used Taper to narrow some aspects of the bottle but simultaneously trying to be subtle with the editing of the bottle. I was satisfied after the alterations so I rendered them out.
The final render came out to be better than I expected and it was very rewarding to witness 6 hours of torture turn into a pretty thing. Everything was smooth, curved, bent and tapered just as I wanted them to be. As a lesson, I have gained a new skillset for me to improve on. Using another software for modelling inspired me with new and better ways to present my mind through tangible means.
6 notes
·
View notes
Text
Week 8: Studio Tutorial- Digital Iteration
This week we were asked to use a new software which was a little bit challenging as I don't have the software nor the laptop to load it. But I managed through with the access from uni and turns out it was just a matter of exploring and familiarising the processes.
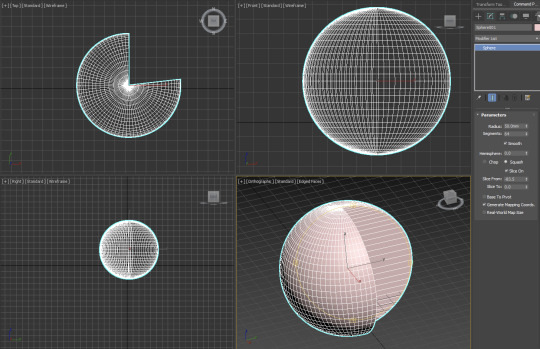
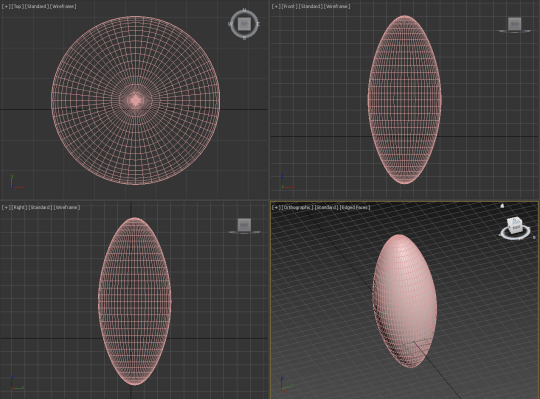
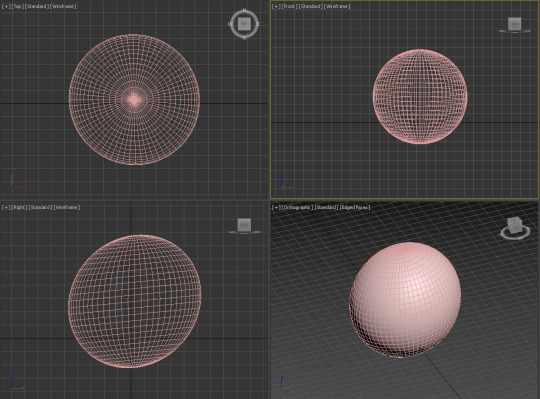
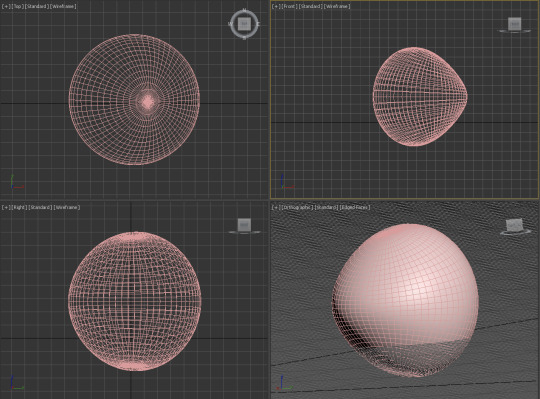
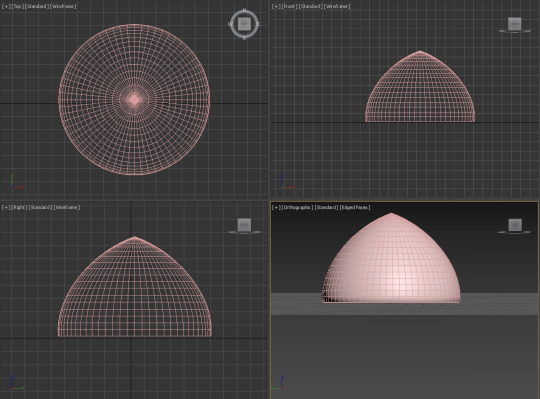
Image 1: Sphere
After forming the sphere and set the guidelines to properly function it, I played around with the parameters and started slicing the sphere into set parameters. It worked splendidly so I moved onto exploring the effects of modifiers next.
Part 2
After giving them a try once each, I moved onto part 2 which is modelling tools, polygon modelling part 1 and 2. Since there are more tools to use and there were multiple toolbars which greatly confused me where they are and what they are used for. But after some time, I got the hang of it and started learning to use the short-keys rather than clicking everything by pointer-which really increased my speed of making models as well as reducing the mistakes of me clicking random things and messing the camera views.

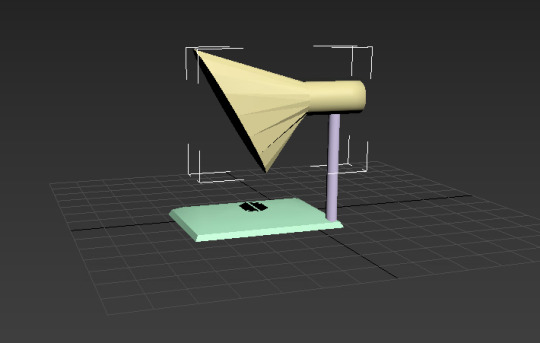
First I made a lounge chair or something like a sofa using the new tools prescribed by the tutorials and turned out pretty great. I am amazed by the results resulting from the mesh modelling/polygon modelling tools and although there were challenges of me losing track of where the "Edit" button is. Turns out I did not not select anything to edit while I searched for the button. IT was a major step-up from using Rhino as I always have been using in most of my terms.
6 notes
·
View notes
Text
Week 7: Sketch Modelling
This week's task is the one I have been most looking forward to but also the kind that gets my hands and desk dirty. Nevertheless, I loved every aspect of it. I first started off by drawing the templates but I got confused with numbers at one point so I had to rough sketch the dimensions first to get my scales accurate (Image 1).
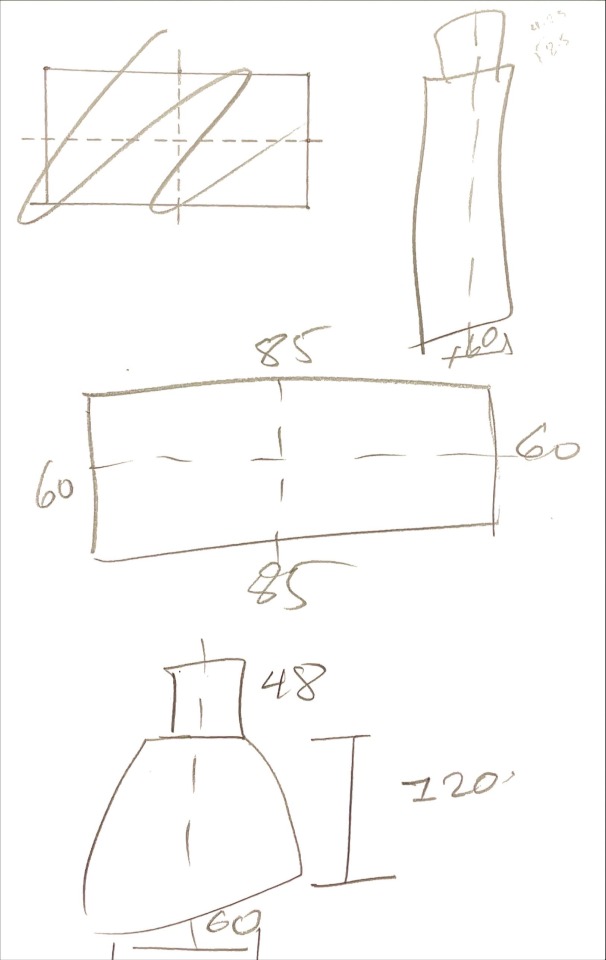
Image 1: Rough sketch for dimensions
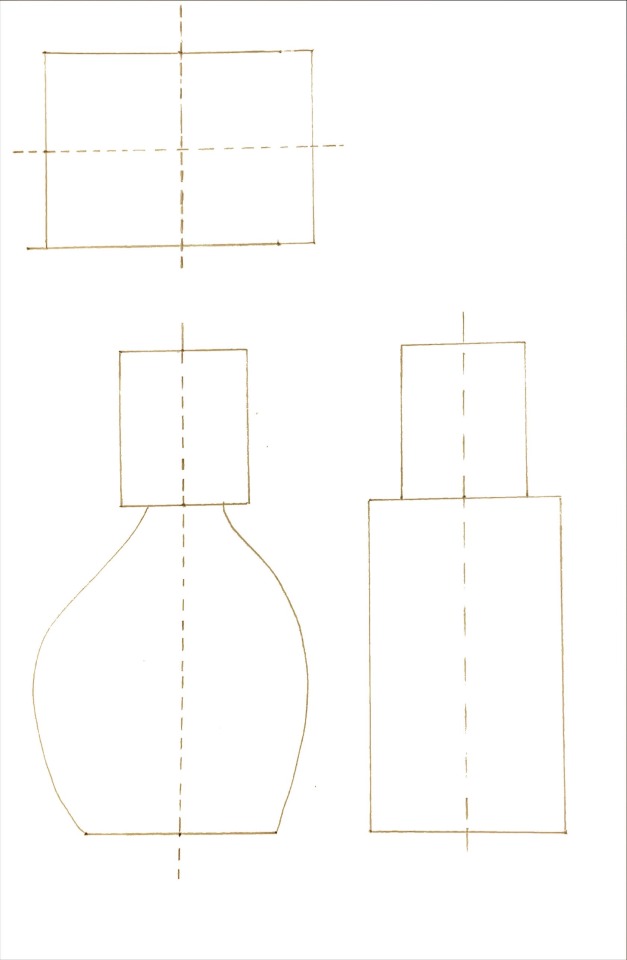
Image 2: Finalised base template
Now that I got my dimensions right for the bottle I could draw the template quite easily.
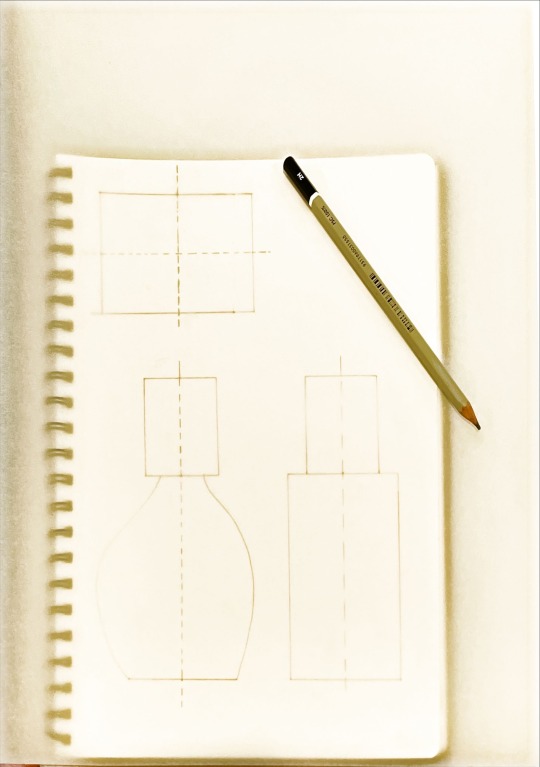
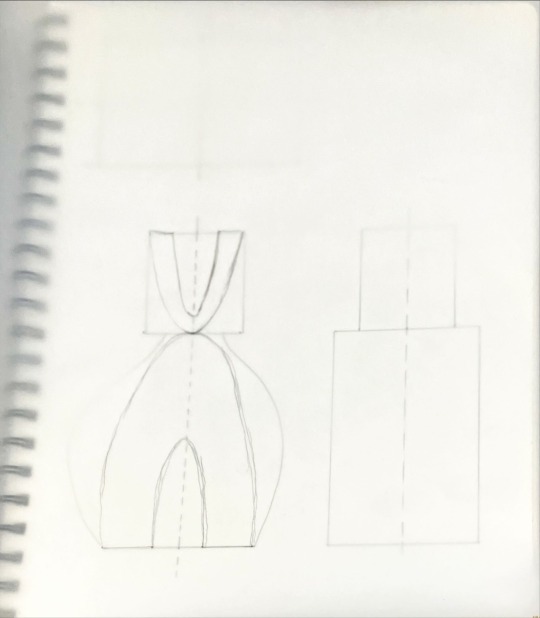
Image 3 and 4: Tracing paper to assist with dimensions and shapes
After I finished the base bottle design with accurate dimensions I used the tracing paper to keep track of my scales while I draw my design on top. It also helped me visualise the curving out process easier as well as reduces time needed to redraw a whole new template for my design.
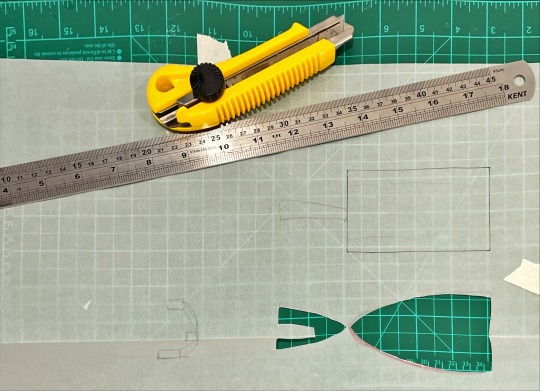
Image 5: Cutting out the template.
After drawing, it's cutting time! I used both cutting knife and scissors as I'm kind of bad with knives. But for the tiny gaps its easier for the knife to go through.
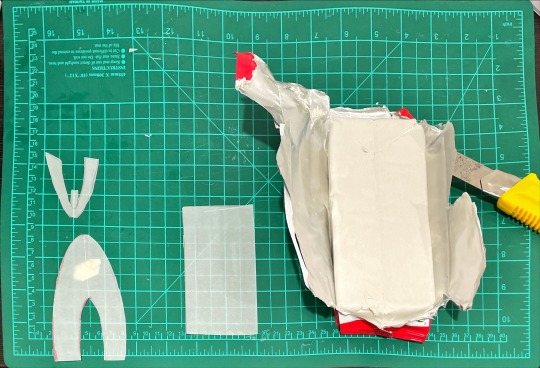
Image 6: Raw material before shaping.
I decided to use air drying clay for my modelling as I find the clay to be more organic than the foam which allows me to shape things to my will. Also it's because I feel like the foam cannot represent my design philosophy behind which is to be monolithic and minimalistic.
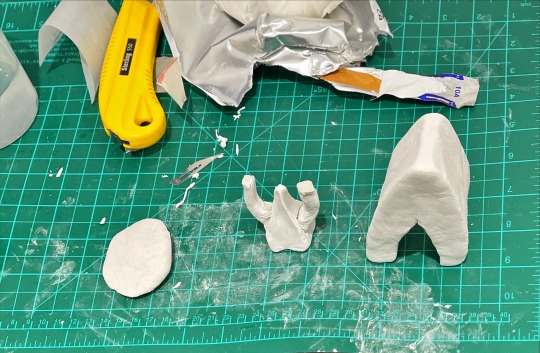
Image 7: Shaped models
I used the cutting knife and surgical razor to assist me with the lid but the body of the bottle is entirely shaped by hand. The thickness is very hard to achieve as the clay had to be combined and squeezed to eliminate air pockets from folding and combining. The lid design was very hard to make as it is made from 3 separate components. I found it very hard to attach them through normal ways so I serrated the attachment spots, applied a layer of wet clay then let it air dry.
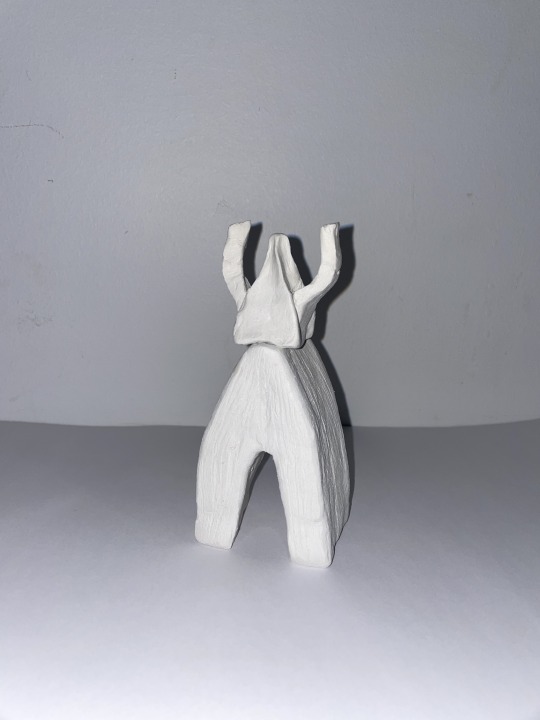
Image 8: Finalised model
This step was the most time-consuming and detailed work. For the body, I added texture and roundness towards the edges but I tried not to go overboard with it as I wanted it to look as natural as possible. While doing this, I found some cracks and imperfections so I used the clay dust and a few drops of water to plaster them. The lid was also reshaped to have a more defined edges. While I was doing this, the right arm of the lid nearly broke off so I had to be much more gentle with the process. I also plastered it firm with the clay dust and water mixture. I then baked it for 30 minutes at 180* and this is the final model which came out exactly as I had imagined it to be.
2 notes
·
View notes
Text
Week 6: Digital Rendering
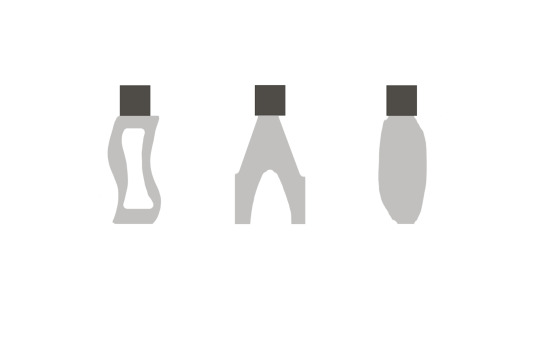
Image 1: Step one drawing
This is what I drew and shaped after I watched the tutorial videos and grasped what I should be doing. But I wanted to do things in my own way too so u experimented with some other shaping and cutting ways to slowly visualise my designs.
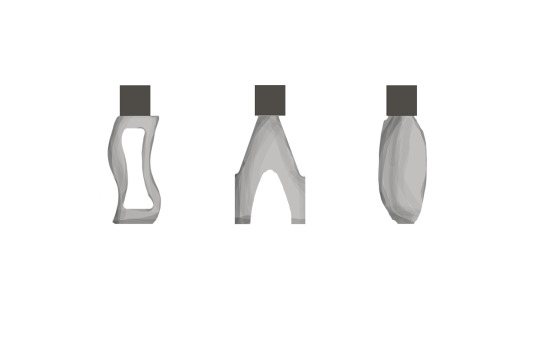
Image 2: Shading and contour
After the design shaping and trimmings, I started to shade the bottles so they can have the 3D feel to it. Frankly, I already quite like this stage already.
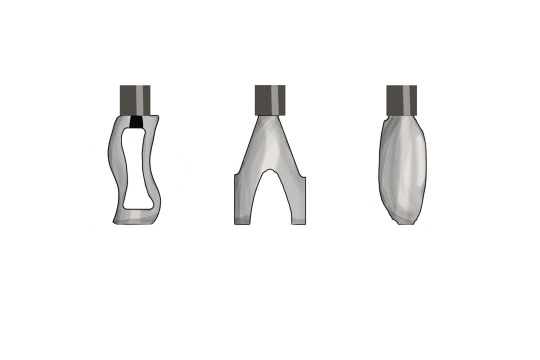
Image 3: Highlights
This step is where I outlined the exterior of the bottles just to make them look a bit more defined and stable instead of foggy and blurred as it was in the previous steps. Also, the caps are now sort of 3D too!
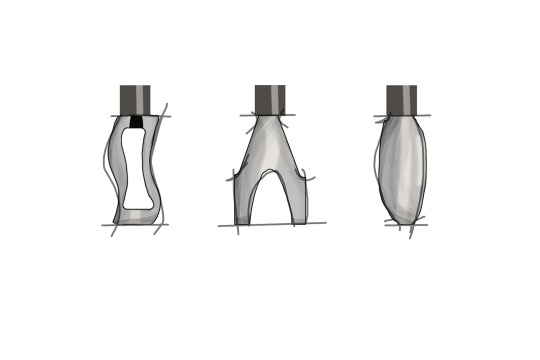
Image 4: Digital Sketching
I tried to add the outer sketches as directed by the tutorials. The added lines helps communicate my ideas of the bottles to the audience and be flexible about it.
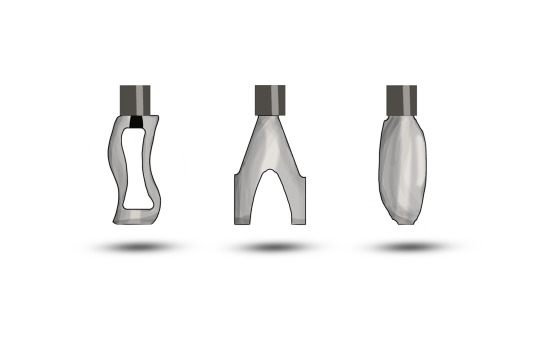
Image 5: Shadows
This is one of my new favourite way of adding a bottom shadow to my designs. I did not know it before but now that I know about it, it's quite a neat way to do it.
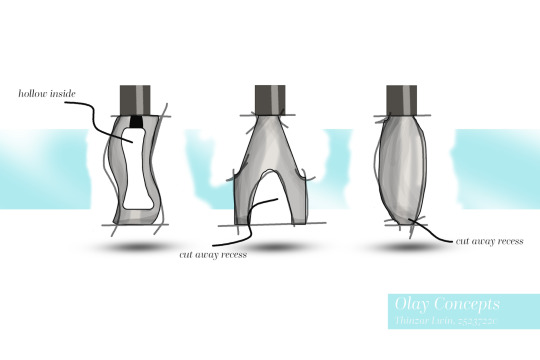
Image 6: Colouring and labels
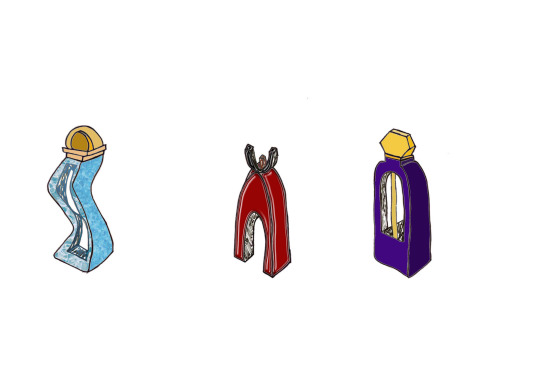
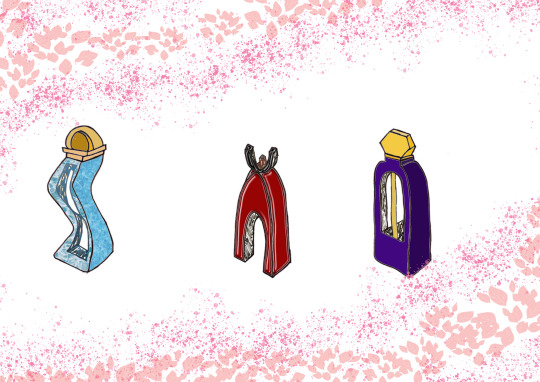
This final picture shows what negative spaces in my designs are and how they fit into my design idea for the bottles. I did add in some colours to shake things up a little from being monotonic.
The following images are what I envisioned my designs to be like although they are not digitally rendered or sketched. They were just edited in photoshop to visualise the finalised designs of mine.

1 note
·
View note
Text
Week 5 Studio Tutorial Drawing
Part 1: 2D Orthographic Thumbnails
This week's task has to be the most fun to do so far as redesigning the bottles motivated my creativity to flow better in the sense that I have something substantial to work on. Before starting anything, I tried to imagine how I could use my arsenal of pencils to shade execute my sketches then I dove straight into the process.
Image 1 and Image 2: Placement of boxes
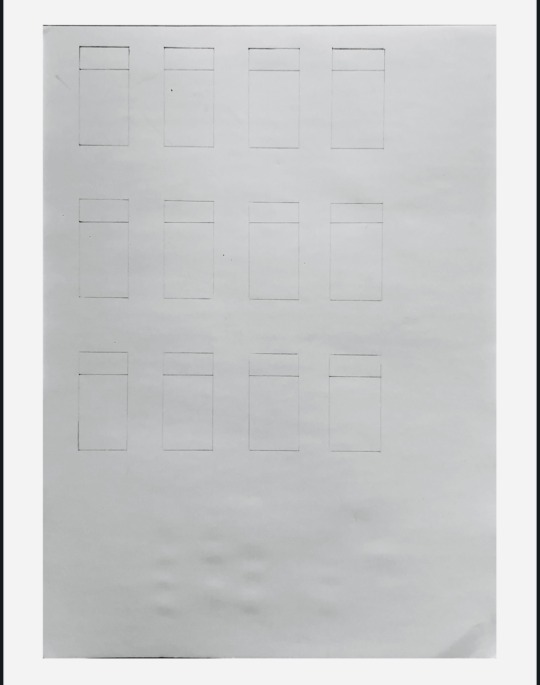
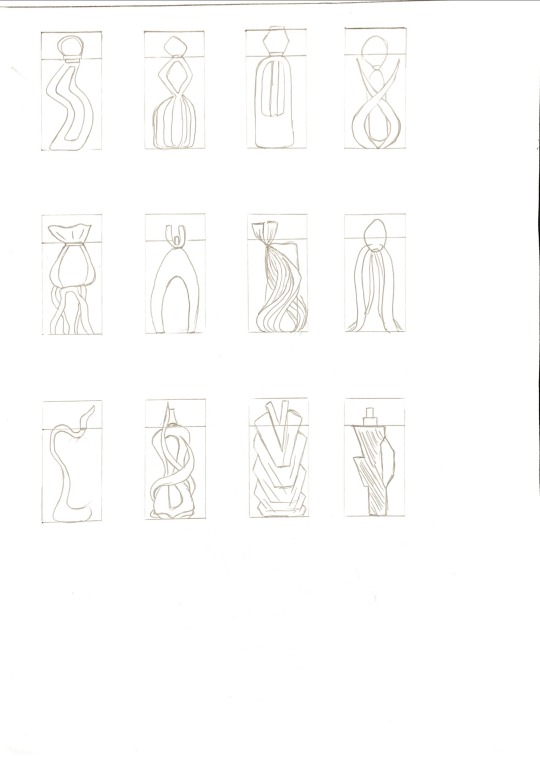
Image 3: created designs
I came up with a bunch of organic designs which I derived from nature and the inspirations from Pinterest. Some of the designs were derived from animals, some from statues and some from the curvatures of nature. It was so much fun to play around with different forms especially when I tried to reimagine animate beings to become a bottle. Some lines were messed but, relatively, I am satisfied with my efforts, considering that I finished them very quickly.
Part 2: Perspective sketch
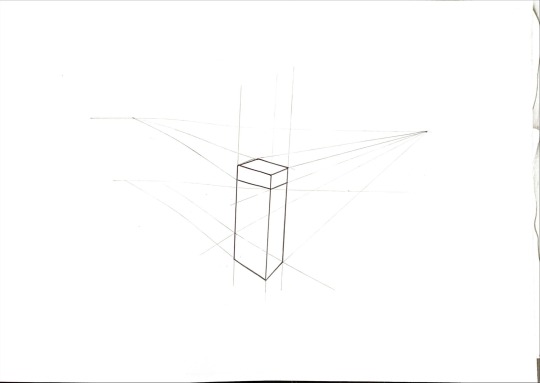
This part felt like an extension of week 4's task but slightly more simplified which helped me as I struggled a little bit for the previous task. But now I can draw this with average effort and I am quite relieved it turned out better than I expected. Please excuse my shaky hands.
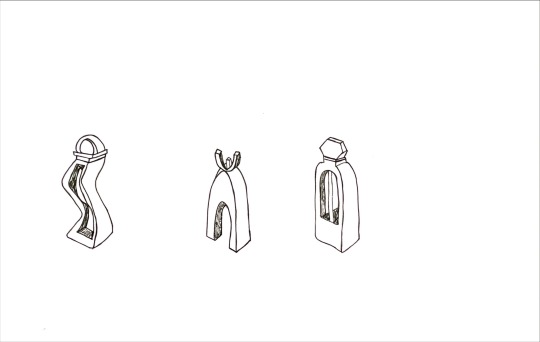
The final results actually surprised me! It was actually not bad! I finished this 3d sketch and shadings on tracing paper as I felt that it would help with my lines. Each bottle was inspired from a staircase, prehistoric huts and a pendulum, respectively. I can't wait to improve my designs in the coming weeks!
0 notes
Text
Week 4 Studio Tutorial – Perspective Drawing
Part 1 : Construct a 2 point perspective view of your chamfered box
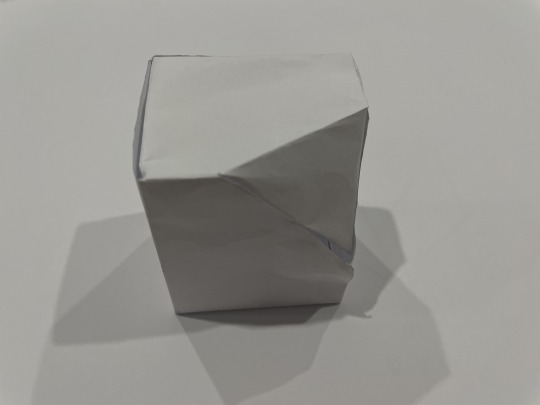
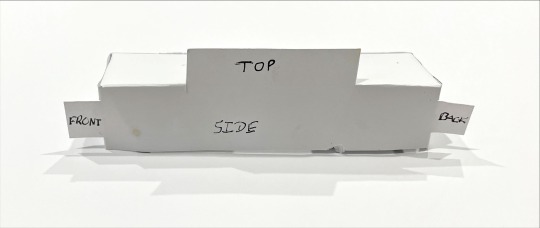
After printing the format out, I chose to cut the thing out with scissors which helps better with tight corners. Folding it up was a but challenging but I think I managed to make it look alright.
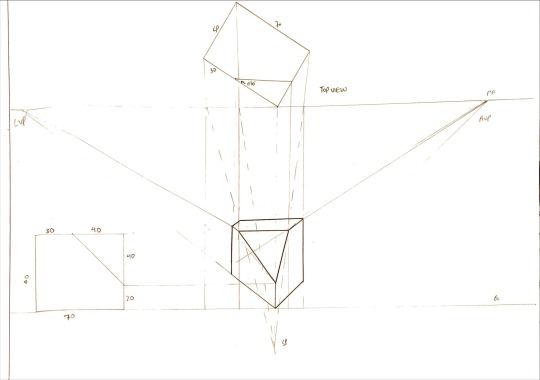
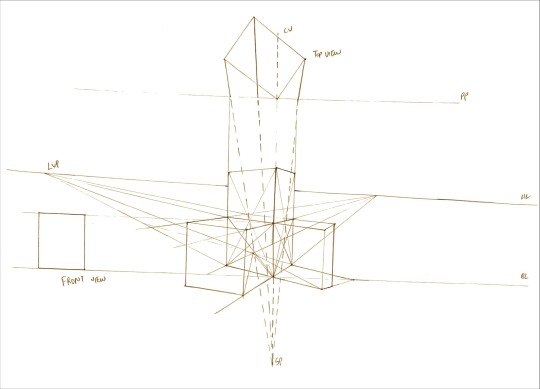
Part 2 : Extending a box in perspective
This part was a lot more challenging for me to wrap my mind around the orientations and scales. Maybe I had my eyes too confused with the lines but in the end, with a lot of trials and errors, it was satisfying. I felt like I could tilt or rotate the structure better but in the end it did not work out like I wanted to 100%. But I am still celebrating. Placing more cubes was not as hard as I thought it would've been so it was smooth sailing after I got used to the lines.
iii
Part 3. Drawing circles in perspective
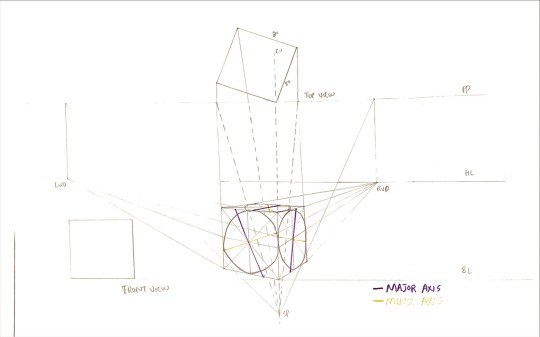
And finally, I just drew in the circles in perspective then the major and minor axes. I am sure this exercise had thought me a great deal of curving and rotating things in my mind yet still be able to project it into perspectives.
4 notes
·
View notes
Text
Week 3 - Section and Auxiliary views of Tapered Block
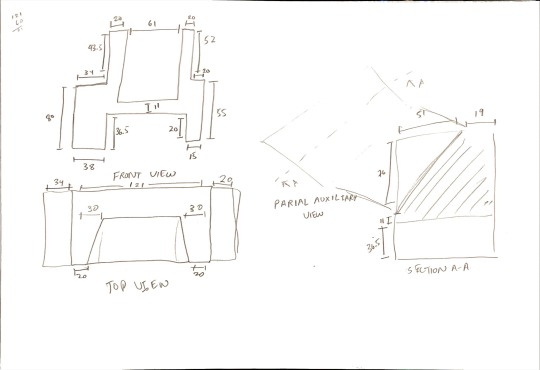
Figure 1 ( Free-hand sketch)
First, I checked the isometric view with all the dimensions and forms. Then I started to sketch it roughly as far as I can replicate for the top view, front view and section. After that I could see and understand the steps I should take afterwards clearly. This step was very crucial to achieve this task easily.
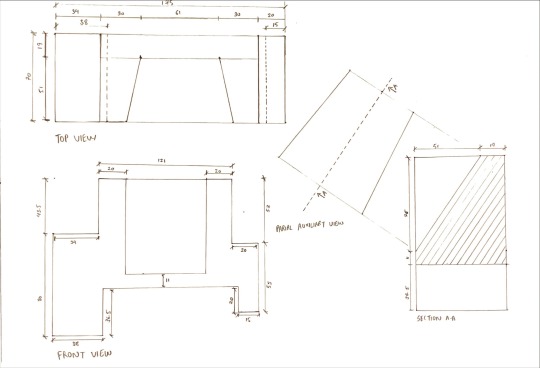
Figure 2 (Draft)
After the rough sketch I hand-drawn earlier, this is the steps here I took a step further to polish it better. This drawing had me use all the instruments and techniques as well as the scales and labels to adhere with the guidelines. I think this drawing makes me preview how my finalised drawing would look like.
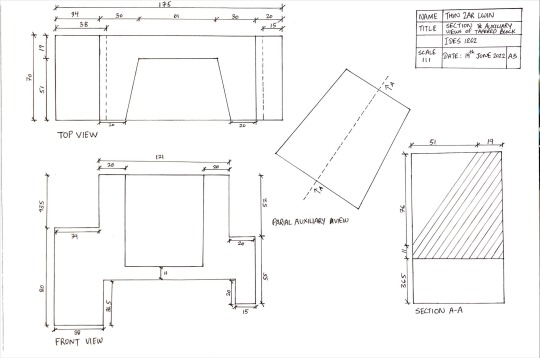
Figure 3 (Finalised drawing)
This drawing is where I figured out all the line weights and hatches. It was tricky to not let the ink stain the paper longer than it should as it can affect the line weight although I used 0.1, 0.3, 0.5 pens. This drawing actually feels very professional, at least to me. This is the clearest drawing out of all drafts and I am very satisfied as well as felt accomplished to have drawn this with my own hands.
0 notes
Text
Week 2 - Orthogonal Projection & AS1100 Standards
Week 2's assignment focuses on the orthogonal projection and AS1100 Standards. I chose Vape as the built item for the projection.
Part 1. Construct a 5 sided box to fit over your chosen object
(Image 1)
Planning the scales and drawing the 5-sided box's 2D plan was intriguing and rewarding process. There were a number of times I had to redraw but I was so eager to cut that picture for 2D plan was not taken.
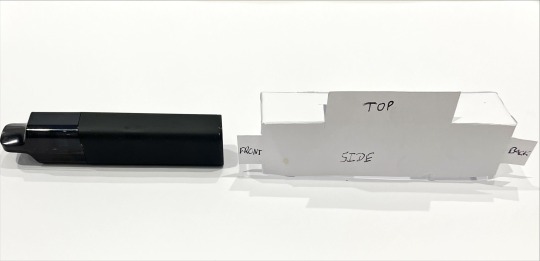
(Image 2)
The labels were made post-assembly so there were some tidiness issues but otherwise it was a perfect fit unexpectedly! I was so proud!
Part 2. Sketch a third angle orthographic drawing of your object (3 views)
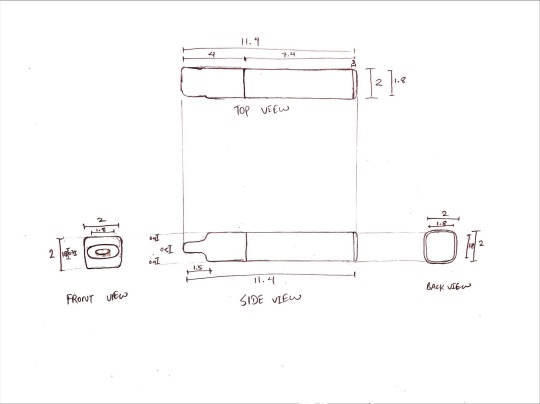
(Image 3)
The sketching part was quite easy for me as the item was pretty straightforward and did not have any hidden curves or meanders. The only issue was that the item was a bit too small for precise measurements using plastic ruler (parallax and human eye-sight error) so I used metal ruler.
Part 3. Construct the orthogonal drawing accurately using using your drafting equipment
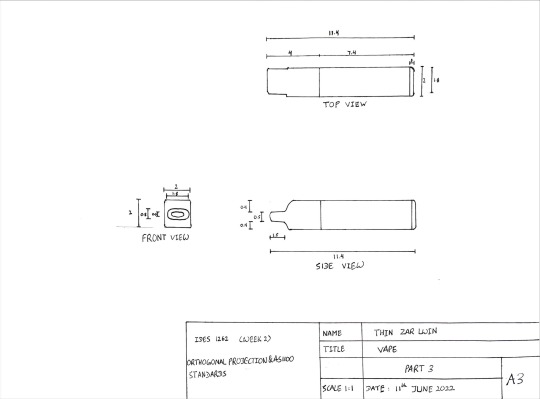
(Image 4)
Constructing the orthogonal drawing was a smooth sailing for me as I already practiced the 1:1 scale drawing for the item. Choosing a small item paid off in a way. I just had to roughly sketch with the pencil first then traced back with the pen to get the final results. Curves had to be hand-filled in but I think it was a good job. The only obstacle being the line weight and old pen.
This activity is simultaneously painstaking and rewarding for me. I do have to use suitable pen and measuring materials to be very very precise next time.
2 notes
·
View notes