
embroideryoutlet
Custom Embroidery Designs, Embroidery Patterns and Patches
34 posts
Don't wanna be here? Send us removal request.
Last Seen Blogs

largando
Untitled

perfectlywrongformend3s
and if i have to, i'll wait forever

puritecequipos
Puritecequipos
rusatus-art
impish or admirable?
Text
0 notes
Text
Mastering Embroidery Design Packs: Your Step-by-Step Guide
Intro
Embroidery Design Packs are a incredible way to require your embroidery projects to the following level. These pre-made designs can spare you time and motivate inventiveness. In this step-by-step direct, we are going walk you through the method of acing Embroidery Design Packs, from selecting the correct devices to finishing touches and care instructions.
Understanding Embroidery Design Packs
Embroidery Design Packs offer a curated determination of designs, each assembled by a specific topic, creative fashion, or event, allowing for consistent integration into different ventures. These packs change broadly, enveloping everything from regular themes and botanical courses of action to theoretical plans and character-based subjects. By familiarizing yourself with the run of packs accessible, you'll pinpoint the one that adjusts superbly together with your project's tasteful or the message you would like to communicate through your work. Whether you're aiming to form a arrangement of facilitated things, such as a kitchen set, or a standalone piece with a particular theme, understanding the breadth and differences of Weaving Plan Packs will empower you to tackle their full potential, in this manner lifting your embroidery to a better level of design and creativity.
Selecting the Right Embroidery Machine and Tools
Setting out on your embroidery journey starts with preparing yourself with the correct machinery and devices. The choice of an embroidery machine ought to be influenced by its compatibility with the advanced designs of your chosen Embroidery Design Packs. Also, it's foremost to consider the machine's ease of use, accessible highlights, and capacity to oblige different project sizes. Alongside the machine, selecting the proper loop measure is basic, because it ought to coordinate the measurements of your project to avoid texture stretching or distortion. Needles moreover play a critical part, with distinctive sorts and sizes accessible depending on the fabric and string you arrange to utilize. String choice, in both color and quality, will specifically affect the tasteful and solidness of your finished piece. Ensuring you have got a collection of the fundamental apparatuses, counting scissors, stabilizers, and marking devices, will encourage streamline the arrangement and execution of your embroidery projects.
Downloading and Organizing Your Design Packs
After selecting your favorite Embroidery Design Packs, proceed to download them to your computer. Most packs are available in common digital formats, compatible with a variety of embroidery machines. Creating a dedicated folder on your computer for these files can significantly simplify your workflow. Within this folder, consider organizing the design packs by category, such as theme, occasion, or project type, to easily navigate and select the appropriate designs for future projects. This organizational system will not only save you time when searching for specific patterns but also help you keep track of which designs you’ve already utilized and which ones are awaiting their debut in your embroidery adventures.
Preparing Your Fabric and Hooping
To embark on the embroidery process, the preparation of your fabric is a pivotal step. Initially, ensure your chosen material aligns with the requirements of your Embroidery Design Pack. Different fabrics may necessitate specific needle types and stabilizers to maintain integrity during the stitching process. Once your fabric selection is finalized, proceed to the hooping phase. This involves stretching the fabric tightly across the embroidery hoop to create a flat, taut surface for precise stitching. Carefully adjust the hoop's tension to avoid fabric distortion, which can impact the outcome of your design. Positioning the fabric correctly in the hoop not only facilitates smoother machine operation but also enhances stitch quality and overall project aesthetics. This preparatory phase sets the foundation for a successful embroidery project, ensuring your design materializes as envisioned.
Selecting Colors and Stitching Your Design
Embarking on the color selection process, refer to your Embroidery Design Pack's color guide to meticulously choose hues that complement each element of your design. This critical step is essential for bringing the intricate details of your embroidery to life with vibrancy and depth. After finalizing your thread colors, proceed with the stitching phase, adhering closely to the instructions provided with your design pack. This stage demands patience and attention to detail, as following the pattern's sequencing and technique recommendations is key to achieving a polished and professional-looking result. Through careful execution of these steps, your embroidery project will gradually transform from a digital design into a tangible work of art, embodying both your skill and the unique essence of the Embroidery Design Pack you've selected.
Finishing Touches and Care Instructions
After your embroidery design is completely stitched, the following step is to include those vital wrapping up touches. Start by carefully trimming any excess strings that will degrade from the tidiness of your work. Gently discharge your embroidered piece from its band, taking care not to stretch or misshape the fabric. It's fitting to lay the fabric on a level surface and use an press on a reasonable setting to smooth out any creases or wrinkles, ensuring the piece looks cleaned and professional. Also, follow to the particular care instructions that go with your Embroidery Design Pack. These may incorporate rules on washing, drying, and ironing, which are crucial to preserve the appearance and integrity of your embroidery. By following these suggestions, you'll be able help guarantee your delightfully weaved creations hold their color and structure, allowing them to be cherished for a long time to come.
Conclusion
Setting out on the travel of acing Embroidery Design Packs can change your embroidery projects from simple to spectacular. By carefully selecting the proper instruments, organizing your design packs, and meticulously preparing your fabric and strings, you've taken critical steps towards achieving shocking results. Keep in mind, that the beauty of embroidery lies within the subtle elements and the individual touches you bring to each project. As you proceed to investigate and utilize different Embroidery Design Packs, your aptitudes will thrive, and your creations will reflect the profundity of your creativity and craftsmanship. Keep testing with diverse topics and methods, and do not waver to thrust the boundaries of your embroidery endeavors. Your energy and dedication to the create will sparkle through in each piece you make, taking off a lasting impression on all who see them. Cheerful stitching, and may your embroidery travel be filled with endless inspiration and delight.
0 notes
Text
The Art of Embroidering: Exploring Max Grinch Designs
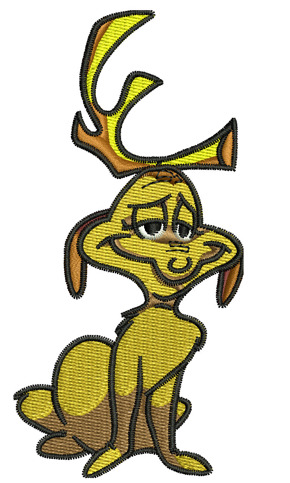
Intro
Are you a fan of the iconic character Max Grinch and looking to add a festive touch to your embroidery projects? Look no further, as we delve into the world of Max Grinch embroidery designsin this comprehensive guide. From gathering your embroidery essentials to perfecting your embroidery techniques, we've got you covered. Let's explore the art of embroidering Max Grinch designs together!
Gathering Your Embroidery Essentials
Setting out on a Max Grinch embroidery journey requires gathering a number of key supplies. Basic devices incorporate a assortment of embroidery hoops to suit diverse project sizes, sharp needles appropriate for string or floss, and a determination of embroidery floss in colors that coordinate your chosen Max Grinch design. Select a high-quality fabric that complements the surface and color prerequisites of your project, guaranteeing it's reasonable for the nitty gritty work ahead. Furthermore, having get to to a Max Grinch embroidery design design is crucial—whether it's a computerized design you've acquired or one you've designed yourself. Setting up your workspace with satisfactory lighting and a comfortable seating course of action will advance encourage a smooth and agreeable embroidery experience. With these basics at hand, you're well-prepared to bring your Max Grinch embroidery project to life.
Choosing Your Max Grinch Design
Selecting the right Max Grinch embroidery design is a crucial step in the creation process. The internet offers a plethora of patterns ranging from simple outlines to intricate scenes featuring Max, ensuring options for embroiderers of all skill levels. When browsing for your design, take into account the project's scale and your comfort level with detailed embroidery work. A larger fabric might accommodate a more complex scene, while a smaller piece may benefit from a simpler, more focused design. Reflect on the purpose of your project—whether it's a festive decoration, a personalized gift, or a piece of fan art—to guide your design choice. Additionally, consider the colors you wish to incorporate. While traditional Max Grinch hues are essential, feel free to explore and incorporate additional colors to make your embroidery piece stand out. Remember, the design you choose sets the foundation for your project, so select one that both challenges and excites you to bring to life.
Transferring Your Design to Fabric
When it's time to bring your chosen Max Grinch design to life on fabric, the method of transfer you select is key. Various techniques can be employed based on the tools available and your personal preference. If opting for a transfer pen, ensure your fabric is tightly secured within the embroidery hoop before tracing the design directly onto the material. For those preferring tracing paper, place the paper between the design and the fabric, then use a stylus or empty ball-point pen to press the design onto the surface. Alternatively, a lightbox can be invaluable for more intricate designs, illuminating the pattern from beneath so it can be easily traced onto the fabric positioned above. Whichever method you choose, accuracy is paramount. Take care to align the design precisely where you want it, checking for proper orientation and positioning within the hoop. This careful preparation sets the stage for a successful embroidery project, ensuring your Max Grinch motif is perfectly placed for stitching.
Embroidery Techniques for Max Grinch Designs
Embarking on the actual embroidery of your Max Grinch design begins with outlining. A backstitch, due to its strength and simplicity, is ideal for delineating the contours of Max Grinch, ensuring that every detail is crisply defined. For larger areas that require filling, the satin stitch offers a smooth, texture-rich finish that can bring to life the unique characteristics of Max Grinch, from his expressive eyes to his furry texture. To add a playful element or to replicate smaller details such as his mischievous grin or delicate facial features, consider incorporating French knots. These provide a raised, tactile aspect to your embroidery, infusing your design with a sense of depth and dimension.
For areas requiring a more nuanced approach, blending stitches or layering colors can create gradients and shadows, adding a realistic or whimsical flair to your depiction of Max Grinch. Remember, the beauty of embroidery lies in the freedom to adapt and personalize your project. Feel free to experiment with a combination of stitches, adapting techniques as you progress, to perfectly capture the essence of the beloved Max Grinch character in your embroidery work.
Finishing Touches and Care Instructions
After your Max Grinch embroidery piece has been meticulously stitched, the next steps involve giving it a polished look and ensuring its preservation. Begin by carefully trimming away any excess fabric, leaving enough edge for framing or mounting. Secure loose threads on the backside to prevent unraveling. If you opt to display your work in an embroidery hoop, consider backing it with felt or another protective fabric to both stabilize the piece and give it a clean finish. For those choosing a decorative frame, make sure the glass doesn't directly touch the embroidery to protect it from moisture damage. Maintenance of your Max Grinch embroidery requires gentle care. If cleaning is necessary, lightly hand wash or spot clean the fabric, avoiding harsh chemicals that could fade or damage the threads. Air dry your piece away from direct heat or sunlight. By adhering to these care guidelines, your Max Grinch embroidery will remain a vibrant and cherished creation for years to come.
Conclusion
Embarking on a journey to create Max Grinch embroidery designs is not just an exercise in craftsmanship but a way to infuse your projects with the joy and whimsy of one of the most beloved holiday characters. Through selecting the right design, transferring it with care, and employing various embroidery techniques, you can bring Max Grinch's mischievous charm to life. Each stitch not only adds to the visual appeal of your project but also connects you deeper with the spirit of creativity and festive celebration. As you finish your piece and incorporate it into your holiday decor or gift it to someone special, remember that the time and love invested in each thread weave a story of passion and holiday cheer. May your Max Grinch embroidery projects not only decorate your surroundings but also inspire others to explore their creative horizons. Happy embroidering, and may your holidays be filled with as much joy and color as your embroidery work!
#max grinch embroidery design#custom embroidery#embroidery design#embroidery#branding#apparel#design#modern design
0 notes
Text

#Custom embroidery designs#Embroidery Patterns and Patches#Custom embroidery patterns#Embroidery Designs shop#Embroidery Design Packs#Animals Embroidery Designs#Birds Embroidery Designs#Brands Embroidery Fonts#Cartoons Embroidery Designs#Max Grinch embroidery designs#design#branding#apparel#embroidery design#embroidery#custom embroidery#designning
0 notes
Text
#cartoon embroidery design#cartoon embroidery#embroidery design#apparel#branding#design#modern design#designning
0 notes
Text
#embroidery design#apparel#embroidery#modern design#designning#embroidery digitizing#design#branding#custom embroidery#bird embroidery#bird design#design art#animal art
0 notes
Text
0 notes
Text

Transforming your designs into stitches, day or night! ✨ Our 24/7 digitizing service ensures your creativity never sleeps. Experience the magic of round-the-clock embroidery solutions! 💫 #EmbroideryMagic #DigitizingRoundTheClock
#Custom embroidery designs#Embroidery Patterns and Patches#Custom embroidery patterns#Embroidery Designs shop#Embroidery Design Packs#Animals Embroidery Designs#Birds Embroidery Designs#Brands Embroidery Fonts#Cartoons Embroidery Designs#Max Grinch Embroidery Design#apparel#branding#design
1 note
·
View note
Text
#birds embroidery deisgns#bird design#bird embroidery#branding#custom embroidery#modern design#apparel#designning#embroidery#embroidery digitizing#design#custom embroidry digitizing#embroidery design
0 notes
Text
#embroidery design#embroidery#modern design#designning#custom embroidery#branding#apparel#design#embroidery digitizing#custom embroidry digitizing#embroidery fonts#brand embroidry
0 notes
Text
#embroidery design#embroidery patterns#custom embroidery#apparel#embroidery#branding#modern design#design#embroidery digitizing#custom embroidry digitizing#designning
2 notes
·
View notes
Text
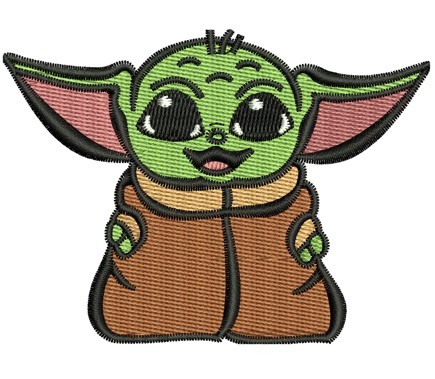
#Yoda#yoda design#yoda embroidery#custom embroidery#branding#modern design#designning#embroidery#custom embroidry digitizing#embroidery digitizing#apparel#embroidery design#design
1 note
·
View note
Text

#max grinch embroidery design#max grinch#embroidery design#cartoon design#cartoon art#apparel#embroidery#custom embroidery#modern design#embroidery digitizing#custom embroidry digitizing#designning#cartoon art style#branding#design
1 note
·
View note
Text
#embroidery design#embroidery#custom embroidery#modern design#embroidery digitizing#designning#custom embroidry digitizing#apparel#branding#design#design art#embroidery art
1 note
·
View note
Text
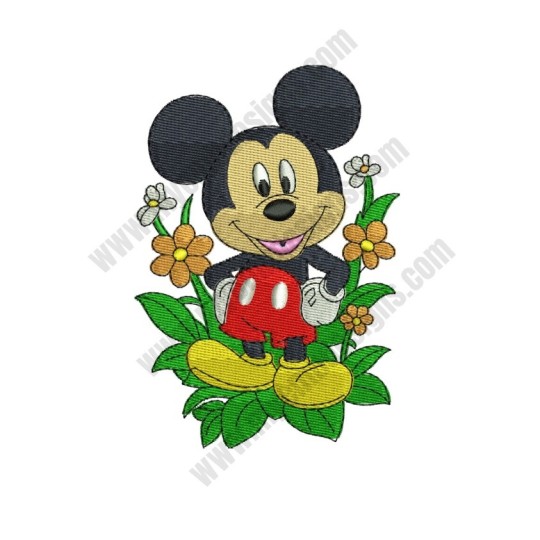
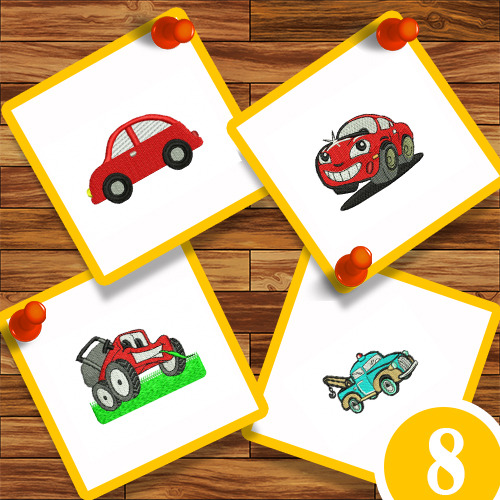
Mastering the Art of Cartoons Embroidery Designs
Intro
Cartoon embroidery Designs are a fun and unconventional way to include a touch of identity to your embroidery projects. Whether you are a fledgling or an experienced embroiderer, acing the craftsmanship of cartoon embroidery designs can be a fulfilling and enjoyable experience. In this direct, we'll walk you through the steps to form lovely and dynamic cartoon embroidery designs that will unquestionably inspire you.
Choosing the Right Materials
Setting out on a cartoon embroidery project starts with the cautious determination of materials, fundamental for guaranteeing the victory and magnificence of your work. You'll require an assortment of embroidery floss colors to strikingly bring your chosen designs to life. The fabric acts as your canvas; pick one that complements your project, like cotton or cloth, which are both amazing for embroidery. An embroidery circle is irreplaceable, keeping the fabric stretched and giving a steady work surface. Do not neglect the importance of choosing the correct needles - embroidery needles come in completely different sizes, so choose ones that suit the thickness of your floss and fabric. At long last, having a design template is significant. This will either be a pre-made design or one you've made yourself, which is able to direct your stitching. Selecting quality materials from the beginning not as it were upgrades the delight of your embroidery project but contributes to the finished piece's longevity and stylish offer.
Selecting Your Cartoons Embroidery Designs
Choosing the ideal cartoons embroidery designs is a creative step that should reflect both your passion and skill level. The internet and embroidery pattern books are rich sources of designs, ranging from classic cartoon characters to modern animated favorites. It's important to select a design that not only resonates with you but also matches your embroidery expertise. For beginners, simpler designs with larger areas of color and fewer details are advisable. Conversely, more experienced embroiderers might opt for complex designs that challenge their skills and allow for intricate detailing. Consider the scale of the design in relation to your project's size; smaller projects like patches or handkerchiefs might benefit from a compact, simple design, while larger projects like wall hangings offer a canvas for more detailed and expansive works. Always ensure the design you choose is one you're excited about bringing to life, as this excitement will keep you motivated throughout the embroidery process.
Preparing Your Fabric and Hoop
To properly set the stage for your cartoons embroidery endeavor, the initial steps involve fabric and hoop preparation, which are critical for a smooth stitching experience. Firstly, position your chosen fabric firmly within the embroidery hoop. Ensure it's stretched evenly to prevent any puckering during the embroidery process. This stage is akin to stretching a canvas before painting, offering you a stable and flat surface to work on. The next pivotal step is transferring your selected cartoon design onto the fabric. This can be achieved with a transfer pen or pencil, which allows for precise and erasable markings. Carefully trace or draw your design onto the fabric, making sure it's centered and positioned exactly where you want it. This blueprint will guide your needle through the embroidery journey, ensuring each stitch contributes to the vibrant and character-filled final piece. Proper preparation of your fabric and hoop not only facilitates a smoother embroidery process but also sets the foundation for a successful and enjoyable crafting experience.
Embroidering Your Design
Embarking on the embroidery process begins with threading your needle with the embroidery floss color that matches the first section of your cartoon design. Start with simpler sections to get a feel for the fabric and the design's flow. Employ basic stitches - backstitch for outlines, satin stitch to fill larger areas, and French knots for small details like eyes or dots. Ensure each stitch is tight and uniform to avoid any gaps or loose threads that could detract from the overall appearance. As you work, you may switch colors according to the design requirements, always knotting and trimming the floss ends neatly on the fabric's reverse side to maintain a clean look. Proceed with patience, allowing your design to gradually take shape. Remember, this stage is not only about following the pattern but also about adding your personal touch to bring the cartoon character to life in your unique style.
Finishing Touches and Care
After completing your embroidery magnum opus, carefully expel it from the circle and check for any stray strings, trimming them as required for a flawless appearance. Pressing your work can dispose of wrinkles, but keep in mind to utilize a defensive cloth over your embroidery to avoid coordinate warm harm. Appropriately caring for your cartoon embroidery design guarantees its life span. Delicately hand wash it employing a mellow cleanser and cool water when it needs cleaning. Rather than wringing out the water, which may mutilate the fabric and stitches, press the piece between two towels to evacuate an abundance of dampness. At that point, lay it level to discuss dry. This cautious approach makes a difference protect the dynamic quality and judgment of your embroidery, permitting you to appreciate the energized charm of your creation for a long time to come.
Conclusion
In conclusion, acing the craftsmanship of cartoon could be a delightful journey that combines imagination, tolerance, and aptitude. By carefully selecting your materials, choosing plans that start to delight and challenge your capacities, and meticulously preparing and executing your project, you'll be able to make weaved pieces that are not as they were wonderful but moreover brimming with identity and charm. Keep in mind, that the key to success lies in getting a charge out of the method, from the introductory design choice to the ultimate stitch. Each step offers a special opportunity to precise yourself and bring your favorite cartoon characters to life in an unused and energizing way. With hone and devotion, your embroidery aptitudes will thrive, permitting you to handle progressively complex designs with certainty. So, grasp the unconventional world of cartoon embroidery designs, and let your inventiveness sparkle through your stitches. Upbeat embroidering!
#embroidery design#design#branding#custom embroidery#embroidery digitizing#designning#embroidery#modern design#apparel#cartoon#cartoon embroidery designs
0 notes