
c3304851-3djournal
Brandon Lowe 3D Motion Journey
Documenting my progress and process on my journey to mastering 3D motion/Animation.
20 posts
Don't wanna be here? Send us removal request.
Last Seen Blogs

xluvdidix
tw

mata28v1p
MATA28 | Link Utama Situs Mata 28 Auto Wins Everyday
le-ophelia
Bittersweet

13vampqueen
hello kitty princess
disorder

retro-machine-tw
Retro Machine
Video
Final Clip 2 (Mouth Sync): Animating this scene was quite fun and humorous while trying to match the shapes to the sound, I was able to render this scene without any problems... BUT it took 3 hours and 20 minutes to render!!!! But I am happy with how it turned out. All and all, I will have PTSD from maya.
0 notes
Video
Final clip 1 (Object interaction) : I animated the Zoma model similar to how I planned in my storyboard but due to issue with my rig I was not able to get the entire sequence I had intended. Also I did not factor in the duration of my initial plan was far too long for the necessary submission for this assessment. I had intended to fully render this clip in maya, however, I had problems getting the lighting to work, then things had primary visibility unchecked, then I had 7 consecutive fatal errors whilst finally rendering. So I concluded with a low quality playblast. (with so touch ups after so it is watchable). I found the whole experience traumatising, to be frank. I spent hours going through every solution possible to fix the many problems that arose to having to accept defeat.
0 notes
Video
Week 13 & beyond: Continuing the setting up of my Zoma rig, I have created the necessary blend shapes and targets I will be using in my final piece. This process is quite fun... unlike skin weights which have betrayed me and deteriorated my very soul. The geometry is quite odd beneath the surface. For some reason the creator decided to place multiple copies of same geometry with the character which make it confusing to find what is being influenced by the joints and which one is connected to the rest.
0 notes
Photo
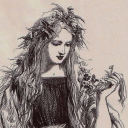
Week 12: In this class we looked into camera angles and how they can define a scene, portraying its atmosphere and depth through the perspective of the camera (the viewer). Using the tutorial as inspiration, I then created a storyboard depicting key shots and motion I want to depict in my final piece as a combined interaction and lip sync clip. although I may animate them in two separate maya files of the same rig for insurance in case something happens to the file I don't lose both. For my scene I plan to have Zoma interact with a small suit case that is infinitely heavy in a whacky impossible weight animation. He then yells his line of speech at the suit case to which it topples over alluding it is actually weightless.
0 notes
Video
Week 11: This week we lip synced an audio file with a scripted model using blend shapes and a controller. This was a fun exercise, besides the irritating voice of the character played on repeat to sync with, I found the animation with blend shapes to be like a whacky puzzle - figuring out which mouth movement fitted the sounds.
0 notes
Video
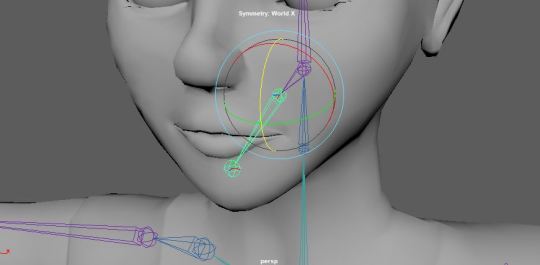
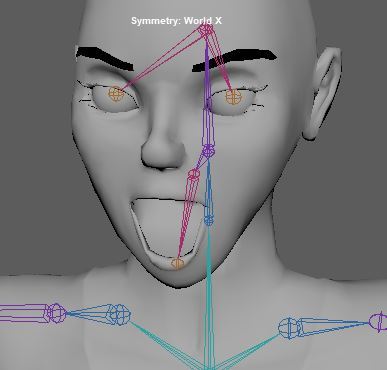
Week 10: This weeks focus was facial Blend Shapes, rigging the face to control expressions. This exercise was fun, I liked working on the blending process - especially when using symmetry as you are able to see the end result as you develop the expression poses.
0 notes
Video
Week 9: we explored further into Rapid rig and how to use script rigs. I found the process quite straight forward and easy to get the hang of the set up controls. One issue was I forgot to switch the Ik handles on the hands which took me a while to realise why I could not move the arms.
0 notes
Photo
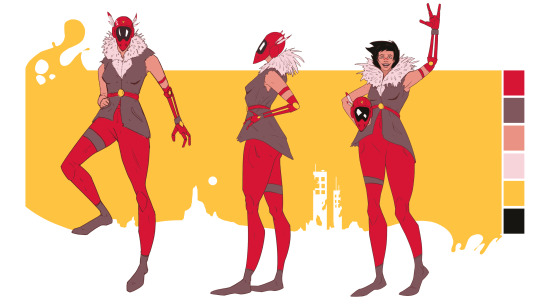

During the mid-semester break I worked on a 3D animated film pitch called Cloud Chasers. This was a really enjoyable project to be in the mindset of creating and conceptualising an exciting new world and its characters. However, I found its placing in the timeline of the projects very stressful and it consumed my entire break as I had started it just as the previous project ended.
Rationale
Cloud Chasers is an action/adventure 3D animated short film that presents a future Earth boiled dry by the effects of Climate Change, aimed at thought provoking and expressing the need to move towards a sustainable future. Whilst also reminding viewers of their humanity and the value of water as our world gets closer to the dystopia of Cloud Chasers. This thrilling tale explores a new world of imaginative culture purely revolved around the thirst for water.
Synopsis
Set on the sandy planes of a long-forgotten Earth, where desert stretches from coast to coast and the people live in nomadic clans. Fresh water is the most valuable resource, also the rarest. To survive in this harsh world ‘Chasers’ from each of the seven clans must patrol the skies for clouds using airships built from remnants of the old ones to harvest water. But with so many thirsty mouths only one clan can get enough water from a single cloud. By the law of the desert the first ‘Chaser’ to the cloud has the right to its water. It has been weeks since the last cloud was seen, tensions are high, and water reserves are low. Until an enormous storm cloud is spotted on the horizon and it is up to the courageous Nakoha, Chaser for the Sparrow clan, to be the first to the cloud.
0 notes
Video
I had a lot of fun animating with the deformer rig I made for the tooth brush, I decided to have the tooth brush interact with an obstacle course that would show the different deformers; squash/stretch, Nod & tilt. I could not think of a way to included twist however.
0 notes
Video
I completed a walk cycle using my character rig that was a mix of two walks from the 100 ways to walk on a treadmill video, combining sleep walking and ‘mummy’. This was mainly a fast solution to not being able to open the character’s eyes and using the ‘mummy’ walk to add character to a simple sleep walker. I was not able to fix the problem with the geometry moving away from the skeletal rig so I used a floor plane that gave the impression the character was walking across it.
0 notes
Video
I completed my rig setup, bound the skin, but the skin weights on this model as default were okay enough to do the animation. Previously I had spent hours touching up the weights for every joint, however the model did not react well to the changes. This resulted in a super distorted movement from the model. It was beyond recovery so I had to unbind the skin to set it back to the automated weights. I chose not to retouch the weights in case the same reaction happens again. I also could not get the geometry to stay with the skeleton when I moved the master controller to simulate the character walking across a plane.
0 notes
Video
I also finished some animation clips for the upcoming project showing what we have learnt, I am currently finalising the rig and skin weights for my biped character walk cycles/rig setup.
0 notes
Video
In Week 8 we explored walk cycles of quadrupeds and how to interpret the motion using pre-rigged models. For this exercise I chose the bull model as it looked fun to animate, which it was. I enjoyed animating the quadruped, I find arms are my weakness when animating in Maya.
0 notes
Photo


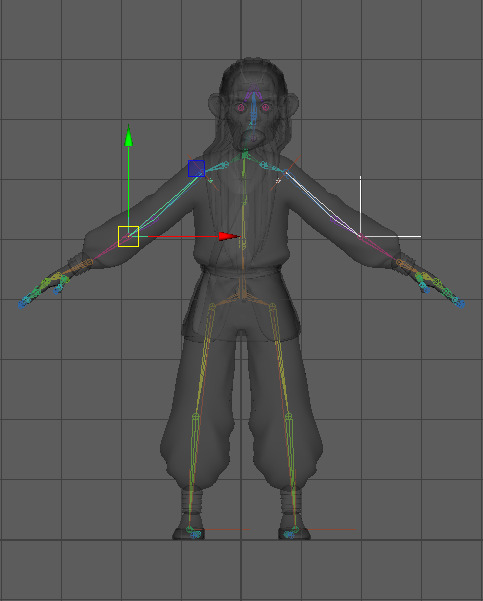
Week 7; Moving on with rigging more extensively we explored adding handles to the limbs of the skeletal rig. We rigged the wrist with a box handle to control the twisting motion of the arm and hand. I was able to set the rig but my model had skin weights and binding applied at the time so the model reacted oddly to the rig. In particular the twist motion of the arm created weird folding of the mesh. We also looked at creating constraints for the mobility of the limb so that it would not be able to extend past points in motion. We briefly touched on rigging other joints with handles also such as the shoulder and ankle.
0 notes
Photo

Week 6, we’ve ventured into skin weights and properly binding the skin. I found this process hard to follow at first but eventually caught up. I used a more basic rigged model rather than the Wukong model as it had facial hair and a non-human face, thought it may have been an extra challenge I was not ready for. Learning the skin weighting process was mind straining but ultimately intriguing to see the model mesh move more naturally and human like with the rig. I will explore this further with the model I choose to rig for the assessment.
0 notes
Photo
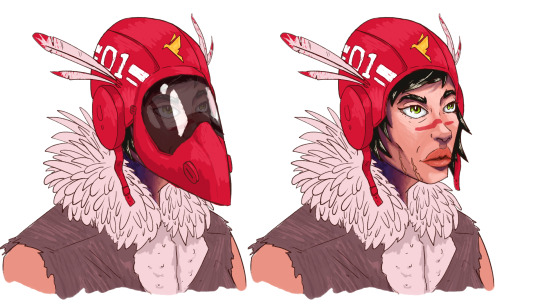
In week 5 we explored manual rigging of a character model, using a skeletal rig and IK handles to operate the joints. I found this process fairly straight forward setting up the skeleton. However, when I moved my rigged model’s limbs they were very unnatural and awkward. I later discovered my skeleton was not sitting right under the skin and without skin weighting applied. I chose the Wukong model as it looked interesting but I might change my selection as the wukong model has a very long tail and the baggie clothing, this made it difficult to determine where the bones (skeletal rig) needed to be placed. It was interesting working with a full formed model oppose to the more simplistic models like the ball, fox, and tooth brush.
0 notes
Video
This week (#4) we explored rigging more extensively and how to build a controller for the rig. Using this Tooth Brush model I set up a control panel that is linked to the deformer assets of the model. This allowed me to manipulate the deformers in real time with simple sliders oppose to selecting the individual deformer layers and altering them in the channel box. Once I adjusted to the process the set up became easy to repeat.
0 notes