
Last Seen Blogs

aokiji-kuzan
Aokiji/Kuzan

paleblackdot
willow

helgereumann
HELGE REUMANN

maharshi87k
Blood Scribbler

jetmuzikbeats
JetMuzikBeats
Text
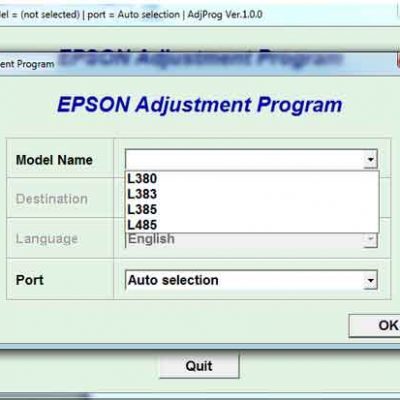
Epson Adjustment Program Software
Epson Adjustment Program Software
Epson Adjustment Program software, free download
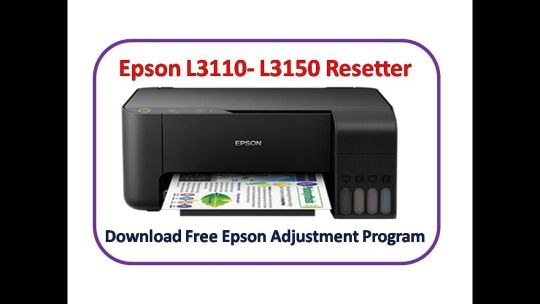
Today We share a Epson Adjustment Program. That’s called Epson L120 Adjustment Program or Re-setter. Why this software or Program. Because, This is Epson Waste Pad Cleaning software.
Epson Service Required. The Epson L120 Software for Resetter Adjustment is a program that can be used to reset your printer’s waste ink pad counter. Now your printer displaying the “Service Required” message, you can use this software to reset the factory condition printer. Download Epson Adjustment Program of Epson Popular Models like ⭐ L380 L360 L3110 L3115 L3116 L3150 L3160 L4160 L4150 more EPSON Adjustment Program offered by https://epson-adjustment-program.blogspot.com.
Epson Adjustment Program Software Download Compatible systems: Windows 10 64-bit, Windows 8.1 32-bit, Windows 8.1 64-bit, Windows 8 32-bit, Windows 8 64-bit, Windows 7 32-bit, Windows 7 64-bit, Windows XP 32-bit, Windows XP 64-bit, Windows Vista 32-bit, Windows Vista 64-bit. Epson Adjustment Program. Reset Waste Ink Pad Counter, Clean Heading, EEPROM initial setting, Initial Ink Charge, Head ID Setting, Top margin Adjustment, Bi-D Adjustment, USB ID Inp. EPSON XP-342 (XP-340), XP-343, XP-345, XP-243, XP-245, XP-247, XP-442 (XP-440) Adjustment program Ver. 1.0.1 (EURO) is a service program for the specified printer model, the program allows you to reset the diaper counters (testing, absorber), prescribe the printhead ID, initialize the printer and other functions.
When your Epson Printer Reach the limit of printing then your printer show message to you. “Service management requirement” like this. Then Download This Epson L120 Free. Download more Epson L110 L210 L300 L350 L355 Resetter .
How to use this resetter:
First Download it (Epson L120 Resetter).
After Unzip file & click the Adjpro.Exe .
Now Click the Particular adjustment mode.
Then show this image & select the Waste ink Pad Counter & Click OK.
Now Check the Two box like this Top image & Click Initialization Button. Carefuller this time, Properly connect your printer with computer. When you click that button it show you below image.
Now Click OK & wait for install the reset program in your Printer. Let after it will show you a message “Please turn off your printer”. Then Turn off your printer & click the OK button & Again Power on your printer.
Now see your Printer is OK.
Now Download the Re-setter file Bellow Download Link. Or If you have any question then ask us in Below comment. We will try to answer your question.
If you need More resetter then Go this link: L110 L210 L300 L350 L355 Resetter .
Adjustment Program Help PagesCartridge ProblemsClean your print headsClear Print Queue Epson Printer (pre 2007) Reset(Free)IPR Program (1400 / R260 / RX580)Other Resetting MethodsOther Resetting SoftwarePaper Jam Error R265Procedure 11(has new IPR info)Reset RX500Reset R265 / 360Reset PX820Reset SX410 / 415Reset XP600 / 700 / 800SSC Service Utility(Models up to 2007, Free)TestimonialsTurn your printer 'Online'Using Windows Vista / 7 / 8WIC Reset(all models, all operating systems $9.99)
All programs on this page are acquired from the Internet and from customers and placed here for your free use, they are not created by us and therefore, they are not our responsibility. Please only use any programs on this page at your own risk.
Do not contact us for help
this is a free service and all the information you need or we can give, is on this page somewhere.
All the problems you encounter have been made by Epson and we are simply trying to help here.
Unfortunately, not all models can be reset using this free page, but there are links to some paid services should you need them, but our new Help pages should allow most models to be reset.
No responsibility will be taken by The Ink Store for any problems caused to computer files, programs or printer firmware & settings as a result of using any of the programs or methods available on this website. None of the software programs or procedures available here were written or modified by us in any way and it is not known if any harbour any unforeseen malicious intentions.
Resetting your Epson printer (FREE)
Modern Epson printers have built in software / firmware that counts the prints that you do and each model has a set limit that will generate messages, saying something like 'your printer requires maintenance' or 'parts inside your printer may be worn'. These messages will continue unless you reset the 'Protection Counter', this period is called the 'Overflow'. Each model also has a set amount of prints allowed on the Overflow, after which your printer will stop working and lock you out completely (we call this 'Lock Out'), usually with two alternating flashing lights on the printer.
All is not lost!
You can unlock it, reset the overflow and reset the protection counter, bringing your printer back to life.
The reason for having to do this according to Epson, is that your Ink Pads are full and need replacing.
I had an Epson C86 printer reset under warranty by an Epson dealer and the ink pads were not replaced.
This means that, all you really need to save your printer is the resetting software.
If you have not already downloaded the program click here to download.
How to use the software
Note: this software will not work on certain Epson printer models such as the RX500, so to manually reset this,click here
It also only works on the older models, so for newer models such as the SX series and R / RX series we are currently trying to gather resetting software for your specific models. We have some new ones here for the SX410 & SX415 (TX410 & TX415) and R265 / R285 / R360 / RX560, to download and for information, see below.
Email from a user:
It may help some of your customers to know that if using Windows 7 and needing to re-set an Epson Stylus Photo 915 you need to set the software to Compatibility mode Windows 7 before running the installer.
Many thanks for your work in making this page! It was a great help.
Philip
(see full testimonials below)
Installing and opening the software ( SSC Service Utility ):
Install Software ( ssc service utility ) by double clicking on the 'Set Up' file or 'sscserve.exe' you downloaded (first unpack / unzip it if required).
When Installed, Click on the (Start Button) on your computer desktop, then click on (Program Files) or (Programs) and select SSC Service Utility from the list, this will open the program. If you chose to have a desktop shortcut when you installed the program, click this to start the program.
Click on the (Configuration) tab and select your printer from both the (Installed Printers) and (Printer Models) lists.
Please Note: Some models are listed with an 'x' in the model number, this means that the 'x' can be a variety of numbers, for example, if you had an Epson C44 printer the selection for you would be the one that looks like this 'C4x'. This is because the selection is the same for the C42, C44 & C46 printers.
Also for R265 users, your printer isn't listed so select the R270 with this version (v4.3) until a newer version is available, I've been told this works.
Now close the program and it will continue to run in your Task Bar on your computer desktop (Blue bar at the bottom of your computer screen).
The icon looks like this
You can now click the right mouse button on the icon in the Task Bar to use the menu you require.
Using the software, tips and advice:
If you require more images and simpler instructions for using this software, click here for the sscserve information page.
Standard Reset
If your printer is giving warnings that your printer is due maintenance, this usually means that the printer has counted the prints it has carried out and reached a predefined limit, the only requirement now is to reset the counter which will then release your printer hardware and start counting your prints from zero once more.
Click the right mouse button on the program icon and select protection counter like so
Click on 'Reset protection counter' and you'll be asked if you have replaced the ink pad, select Yes or OK, it will then say counter reset.
If you now select 'Show current value', it should show the counter as 0 (zero). If there are any numbers in the counter overflow, click on 'clear counter overflow'.
You are now ready to continue printing as normal as if your printer is brand new.
Locked Out
If the printer has passed the maximum prints and you've continued printing throughout the warning, after an 'overflow' amount of prints, it may lock out completely giving you two flashing lights on your printer which you can't reset without this software or without pressing a sequence of buttons.
If you are completely locked out:
Firstly, you will normally need to reset the 'Counter Overflow' under the menu listing of (Protection Counter).
Now you will need to use the 'Soft Reset' utility on the menu under (Extra). Wait about 5 minutes for the printer to reset.
This will reset your printer and stop the lock out.
If both lights are still flashing or there are any other problems see additional information below and then return here to continue.
Once your printer is unlocked, the 'Protection Counter' will still need to be reset after this under the menu listing of (Protection Counter).
You will be asked 'Has the Ink Pad been replaced / emptied'? Say (Yes) or (OK) to this, it will then say 'counter reset'.
You are now ready to continue printing as normal as if your printer is brand new.
If your printer is listed but this procedure didn't work for you, first try switching computer and printer off and then restarting, still not, then read on or use the links at the top to check other things that can be stopping it.
The Ink Pads
Don't worry about the ink pads themselves as they are on a flat enclosed tray and as the ink is water based, the water evaporates leaving behind the pigment only, which just means discoloured pads. Liquid ink is only present in the pads shortly after cleaning. However, if you've had to clean the heads a lot due to prolonged lack of use, there will be quite a lot of liquid in the pads for a while until it evaporates so don't lean your printer on its side or back for a few days or a week.
The SSC Service Utility should work with most operating systems, but if not, try using Compatibility Mode:
You may have to use “Compatibility mode” if you are using Windows Vista or Windows 7 and to do this:
Right click on the 'sscserve' icon (where you downloaded it).
Select (Properties) at the bottom of the list
Select (Compatibility) at the top
now under compatibility mode, tick the box and select Windows XP (service pack 3) for Windows 7
or Windows XP (service pack 2) for Vista and click (Apply) at the bottom right, then (Ok).
Now you can start again from the top.
If there are any further problems.
At this point a variety of events could take place, such as the printer software may have switched to offline, the printer buffer could be holding unprinted tasks and many other hardware and communication blocks, which may still stop you continuing with normal use of your printer.
If so, simply just;
(Shut Down) your Computer, (Switch Off) your printer with the power button, (Unplug) your printer by removing the power lead from the back of your printer, (Wait) at least 2 minutes, (Reinsert) the power lead into the printer, (Switch On) the printer using the power button, (Start Up) your computer.
The printer should now work as normal, but for printers with LCD displays, still follow any instructions your printer gives you on the LCD display (Printer Screen).
Printer Online / Offline.
If your computer printer software has switched itself offline, open 'My Computer' or click on the (Start) button, click on 'Control Panel', click on 'Printers & Faxes', select your printers icon with left mouse button, press right mouse button on the icon to get a menu, select 'Use printer online'. If this menu choice is not available, the printer is already online and ready for use. If your printer icon does not have a small black / green circle with a white tick, it is not set as the default printer, to do this click the left mouse button once on your printer icon to highlight it, then click the right mouse button to get the menu and select 'Set as Default'. Close all windows and carry on printing as normal.
Print jobs are still queued
Make sure your printer is switched on and connected to your computer with a USB lead before continuing.
Open 'My Computer' or click on the (Start) button, click on 'Control Panel', click on 'Printers & Faxes', open your printer queue panel, with left mouse button click twice. This will show any jobs / tasks / errors holding up the printer. Click on the (Printer) tab then in the list click (Cancel all documents). Wait until all queued jobs are cleared from this screen.
This utility also has other features such as separate colour cleaning and deep cleaning. Beware of the deep cleaning, this is for very bad clogging on the heads through prolonged lack of use and uses nearly half a cartridge of ink from all colours to clear the blockages.
These other utilities are only available to some Epson printer models.
You can also carry out your nozzle checks and other normal utility functions using this software. Use it separately to your normal Epson printer software and close the program from the taskbar once you have finished with the utility.
The program will normally shut off when you shut your computer down and will not run again unless selected from your programs list.
*Because the software has unknown features meant for printer engineers, your antivirus program may see it as a threat, just tell it to ignore it.*
Soft Reset:
This sorts out a multitude of problems.
Some printers are designed to stand alone as well as work with a computer, therefore they have 2 different software programs controlling them, 1 within and 1 from the computer. This can sometimes throw up a continuous problem or rejection when an error occurs. Control from the computer is always the best form of printer control as there is so much more you can do with the diversity of the computer as opposed to the set built in software in the printer.
So when a cartridge circuit fails, your printer will recognise this and tell you of a problem. Unfortunately, printers don't have the extra facility of 'error message clearing' and may keep showing the same error from that point on unless the printer 'firmware' is reset in some way.
With the service utility, there are extra functions that can be used for full control of your printer, depending on the model and level of support supplied for that model. One such useful tool is 'Soft Reset', this will reset anything in the printer 'buffer' (storage area) and the built in software (firmware). This will normally set your printer back to its default settings.
To find Soft Reset, click the right mouse button on the SSC Service Utility icon which will be running in the blue task bar at the bottom of your desktop screen, then select 'Extra'. There you'll find 'Soft Reset'.
When you click the left mouse button on the soft reset, it will take a few minutes to reset so the best advice to give is to go and make a cup of tea once you've selected it and do absolutely nothing to the computer or printer for at least 5 minutes. Make sure the printer is completely silent (not operating) before closing any programs or switching off the printer.
Now shut down the computer, switch off the printer, unplug the printer for 2 minutes, plug in the printer, switch the printer on & start up your computer.
Your printer should now be reset completely with all previous tasks, errors and set-ups forgotten by the printer.
Whatever the problem was before resetting the printer, may still need to be put right. Therefore, if your problem was cartridge error messages persisting, then you'll need to use the normal 'Maintenance' screen on the computer printer software and use the 'Ink Cartridge Replacement' button and either pretend to change the cartridge if a replacement cartridge has already been used to replace a failed one that was giving the error by physically removing it and reinserting it as if you were changing it or actually change the cartridge if you have not already done so.
If error messages continue to appear after changing more than two cartridges of the same colour, then it is very possible that the printer circuitry controlling that particular colour has malfunctioned and if still under guarantee (1 year standard), should be put in for service or replacement. Remember that Epson dealers will always try to blame the use of compatible cartridges for any fault with the printer so it may be advisable to buy an Epson brand cartridge of the same colour as the failing colour port or if you are a confident person, instruct the dealer or store to repair or replace your printer with the full backing of the law that allows you to use any brand of cartridge manufactured to suit your printer.
You may be told that using new cartridges made by OTHER companies (compatible to your printer) nullifies your guarantee. This is not so! Please mention your rights under the Sale of Goods Act and Consumer Protection Directives of the European Union, which allow the customer to have an electronic / mechanical item repaired or replaced if faulty / not serviceable respectively, within 1 year of date of purchase, standard.
There is nothing built into a 'compatible' cartridge that can harm your printer and is rarely the cause of a printer malfunction / breakdown provided that the correct cartridge has been fitted to the correct location in the printer and all removable items have been removed from the cartridge. e.g. The pull tab tear off strip and spring clip protectors / wedges.
Epson Adjustment Program Software
How to unlock your Epson RX500 printer
If your RX-500 printer has stopped printing and can't be reset, you will usually see either a steady red light or alternating red and green lights and the printer will not respond. There may also be a message in your computer status monitor saying 'communication error' / 'printer requires maintenance'.
This is caused by built in software / firmware which counts the amount of prints you've made and stops when the protection counter reaches a predetermined limit, also giving the message that your ink pad is full. You will be allowed a certain amount of overflow prints to the protection counter limit, after which the printer will completely stop.
There is software online that will normally reset most Epson printers that have reached this limit and is used by Epson Service Engineers called SSC Service Utility (sscserve.exe), however this does not reset the Epson RX-500 protection counter / firmware.
All is not lost, you can manually reset the firmware using the following sequence of actions:
Close down all Epson programs
Exit all Epson printer programs that may be running in the background or on your task bar.
The quickest way to do this is to press Ctrl, Alt & Del on your keyboard and release, which will open your Windows Task Manager.
Click on (Processes) and a list of all processes running on your computer will appear, look for any in the list that say Epson, highlight it and select (End Process). Carry this out for any Epson programs running.
Now to reset your printer.
Switch off the printer using the power button.
PRESS and HOLD all following printer buttons: Power, Load/Eject, Stop, B&W, Color and continue to hold until 'Init eeprom' appears on the printer screen, then RELEASE ALL BUTTONS.
Next press the Color button to clear the protection counter.
Follow any other instructions given by the printer.
Clean your print heads if print is not perfect.
If your print is not perfect, this may be because your printer has not been used for a while and so the fixed print heads have dried ink on them.
Simply open any document on your computer, click on (File) then (Print). When your printer properties box opens click on (Properties) / (Preferences) then click on (Maintenance) / (Utility).
You will need to carry out 3 head cleans with no printing of nozzle check patterns. To do this, click on (Head Clean), when finished it will ask you to 'Print Nozzle Check Pattern'. Don't allow this, click (Finish), then select (Head Clean) again carrying out the same process until you've cleaned the heads three times, then allow it to print the nozzle check pattern to check your print quality. If improved but not perfect carry out the above process again. If perfect, continue to use your printer as normal and try to use it at least once per fortnight.
If absolutely no improvement is seen after cleaning the heads 3 times or more, your heads are severely blocked and will need cleaning solution to resolve this. Please order the appropriate colour cleaning cartridge for your Epson printer model, these are reusable and can be kept and stored for future use.
If you have trouble following these cleaning instructions, please use our information page for step by step procedures with pictures.
Cartridge Rejection Problems:
With limited information on any actions you carried out prior to any error messages, I shall try to help you get your printer running correctly.
My assumption would be that your printer was out of ink on 1 cartridge and you changed a few cartridges at the same time.
1) This normally confuses the printer software, as it only expected 1 cartridge and will normally still show empty for those cartridges that were changed and didn't yet need changing.
2) If any one of the cartridge microchips fail when you change more than 1 cartridge (when not required), the printer will NOT tell you which chip has failed, it will mark them ALL as failed.
Both problems above should be straight forward to sort out.
The solution, is to use your printer maintenance software that is installed on your computer.
If you are using a printer which has a small screen and a (Menu) / (Set Up) button, you can clear your problems in the same way as below but, by using the printer maintenance software instead of the computer software.
To get to the maintenance screen on the computer:
Open any document such as a letter or a picture, click on (File) then (Print), when the printer properties box opens, click on (Properties) / (Preferences), then you'll see a (Maintenance) tab on the next screen, click on this and you're there.
A lot of Epson printers have different maintenance tools and buttons.
The one you need is called something like (Ink Cartridge Replacement).
If you haven't got a button for this, click on (Head Clean) and it will refuse to clean the heads as you have a cartridge problem or a cartridge needs replacing. Select (Replace) and you will start a 'wizard' in the same way as it would start for an (Ink Cartridge Replacement) button, which is a step by step program. Read the screens that appear and keep clicking next as if you were about to change a cartridge, until you have to click (OK) to move the print head to the 'Change' position.
___________________________________________________________________________________________________________
For problem 1) above:
If you are sure that all the applicable cartridges giving incorrect levels are full cartridges, open the flap that holds the cartridges down and (one at the time) unclip and lift each cartridge and press them back into place. This will trigger the software into accepting the (not yet recognised) cartridge/s as new.
Close the flap when finished and carry on with the on-screen step by steps.
While the printer charges the ink nozzles, it will check your microchips on the cartridges.
For problem 2) above:
Open the flap that holds the cartridges down and unclip and lift the left-most cartridge and press it back into place. This will trigger the software into checking its chip, click OK to charge the nozzles and if this was the failed cartridge chip, the other cartridges will suddenly become recognised and that cartridge you just re-inserted (if still showing as failed) is the failed one that needs replacing.
If you still have all cartridges unrecognised or showing failed. Start the wizard again in the same way and re-insert the next cartridge in sequence. keep doing the whole procedure for all cartridges in sequence only until the software shows all other cartridges as recognised except the one you just re-inserted, or all cartridges as recognised (if it was just previously seated badly). Once a specific failed cartridge has been replaced with a new cartridge, all should be well.
___________________________________________________________________________________________________________
You may now get some messages telling you they are not Epson cartridges and (Yes) / (No) to continue using the cartridge, obviously click (Yes).
At this point, if there are any failed chips or empty cartridges that need replacing, you will be told to replace those applicable before the wizard can complete.
For any unrecognised chips, you can do the same process and just remove and refit that cartridge, incase it didn't make a perfect contact with the printer, this usually sorts that problem out, but if the software still tells you the cartridge is not recognised or has to be replaced then please replace it.
This is one occasion where it pays to have spare cartridges ready to use.
On fitting all relevant full cartridges, your printer should now show reasonably accurate ink levels and all cartridges will be accepted and ready for use.
If you have used some ink from cartridges that are now showing full then further down the line you might find that you've completely emptied a cartridge before the software thinks it's empty. This cartridge colour will disappear from your pattern on the 'Nozzle Check' and must now be replaced, but if you haven't got an (Ink Cartridge Replacement) button and the software isn't asking for a cartridge to be replaced yet, this can be tricky.
You will now have to clean your heads a few times, to use up some ink until a cartridge is recognised as empty, then you can activate the wizard by clicking on the (Head Clean) button again, as above.
For future information:
If you are changing cartridges by pressing your ink button on the printer, only change the cartridges that are being asked for and nothing else.
If you are able to access the Ink Cartridge Replacement wizard on the computer, you can change any cartridge at any time, but consider how much ink you are throwing away by changing cartridges before they are empty.
If you are using a printer which has its own small screen and a (Menu) / (Set Up) button, you can and should clear your problems in the same way as above, but by using the printer's maintenance software instead of the computer software.
This information should be sufficient to clear 90% of Epson inkjet printer cartridge problems.
For printer maintenance problems such as 'Maintenance Required' or 'Ink Pad Full', see above to download the resetting software and view the Epson printer resetting information.
Alternative Resetting Methods and Software
Epson Adjustment Program software, free download
Occasionally, some users will experience the error on their printer where it stops printing and all the lights start flashing. Different printer models may have different descriptions of this error, but it seems to be generally described as an ‘Unknown Printer Error’.
Technically, this condition requires an Epson service engineer to resolve. It is however, possible that you could fix it yourself by resetting the printer and clearing the counter of how much ink has gone to those pads. You can do this as follows: (this seems to work on numerous Epson desktop printers, but we make no claims about it’s reliability on your printer. Use them at your own risk!)
However, we now have 9 separate manual procedures!
Additionally, there are known problems that are not errors and the printer should warn of the pending shut off before it just stops printing! The message you will see says something like ‘Parts inside the printer are nearing the end of their service life’. After an 'overflow' of prints it will just refuse to print, unless the counter is reset. If you experience this problem with an Epson printer, you may like to try the button methods outlined below, or just use the SSC Service Utility above. Alternatively, if you have a newer model not covered by the SSC utility and your printer is not completely locked out, see Procedure 8 below.
Procedure 1
Factory Reset
We found this procedure to work for the Stylus SX535WD type printer and may work on a number of SX type printers.
Select change cartridge either by using computer printer utility or on the printer itself using a menu or ink button.
When the carriage has parked in the change position, remove all cartridges.
Unplug the printer whilst the cartridge carriage is in the change position.
Leaving the scanner unit raised, leave the printer for at least an hour.
Plug the printer in and switch it on if required, wait until it requests the cartridges and replace the cartridges.
The printer should now reset itself to factory conditions which should get rid of any errors & counters.
This may show your cartridges as full even though they may be part used, be advised, don't let them run dry or you'll have to use the 'Priming' procedure on this page to rectify the air in the system.
Procedure 2
We found this procedure to work for the Stylus Photo 1270 type printer, and understand that it also works for the Photo 870 range and even earlier models like the Stylus Color 740. The error is indicated on these printers by all four lights on the printer flashing. Even if you press the power switch on the printer, the lights continue to flash, and the printer does not turn off!
Turn off your printer, ensuring that the print head is at it’s home location and locked in place as normal;
Power off the printer at the wall or by removing the power cable, for at least 20 seconds;
When you restore power to the printer at the wall socket or by reinserting the cable, if the lights come back on straight away, the printer’s power switch was ‘on’ - switch it off and return to step 1;
Hold down the paper-feed button and the button with the ink-drops next to it, and then turn on the printer, still holding the buttons down;
When the paper-out LED flashes, release the buttons;
Press and hold the Cleaning button, until several lights flash - this will take a few seconds (i.e. then release the button);
The printer will now attempt to reset, including resetting the EEPROM memory and running a short (about 10 seconds) cleaning cycle.
Procedure 3
Turn off your printer, ensuring that the print head is at it’s home location and locked in place as normal;
Hold down the paper feed button only;
Turn on the printer;
As the paper feed light starts flashing, release the button;
Immediately hold down the ink-drops button for some 10-20 seconds or until the printer springs into life;
Allow printer to complete it’s processing, then turn off for a few seconds, and back on again for a newly working printer!
Procedure 4
For Epson Photo 1290 and possibly Epson Photo 890 printers
1290 printer with green (power / data) and red (ink / paper feed) lights flashing alternately:
Switch off printer with panel switch;
Switch off printer at mains switch - leave off for 20+ seconds;
Hold down roll feed and sheet feed buttons;
Switch on at mains;
Switch on at printer panel;
Continue to hold down roll and sheet feed buttons until both green and red lights flash together in synchronisation, not alternately;
Switch printer off and then, after a few seconds, on again at mains switch;
When red and green lights are both flashing in synchronisation, release the roll and sheet feed buttons;
Press and hold down the ROLL FEED button (the one at the extreme left) and keep it down until the machine finishes whirring, cleaning etc and the green light comes on steady;
Release the roll feed button and all should be well.
Procedure 5
Perform a Factory Reset and a Cartridge RESEAT to reset the ink counters and enable it to put ink on the paper. Make sure the ink cartridges are installed in the STYLUS COLOR 500 printer.
Factory Reset:
1) Shut printer off. Disconnect parallel printer cable at rear of printer.
2) Hold down the all three buttons (Load button, Black Cleaning button, and Color Cleaning buttons) while powering on the printer (continue holding for approx. (1) one second and release).
3) Then within one second
4) Hold down the Load/Eject button for (2) two seconds only.
5) Release Load/Eject; the complete sequence must be done within (3) three seconds.
NOTE: A FACTORY RESET WILL RESET BOTH INK COUNTERS AND THE OTHER INK CARTRIDGE MAY NOT REGISTER OUT OF INK WHEN OUT OF INK, THE OUT OF INK LIGHT MAY NOT FLASH OR TURN ON.
There is no other way to correct your situation so you will need to monitor the other ink level and change it if poor color quality cannot be corrected by cleaning cycles.
Reseat the Ink Cartridge COLOR 500:
1) Pause the printer, hold down the Load/Eject button for 6 seconds; power light will blink.
2) The print head will move to left to cartridge installation position.
3) Lift the Gray Clamp that holds the ink cartridge all the way open then clamp it back down
*** MAKE SURE YOU DO NOT TAKE INK CARTRIDGE OUT ***
4) Once the clamp is closed, press and release the Load/Eject button to recharge the Ink Delivery system (takes about 2 minutes).
Procedure 6
Epson PictureMate Factory Reset:
You can reset the print settings to their original, default values.
Press and hold down the Cancel button for 3 seconds.
When the message to reset the printer to default settings appears, press OK to reset the print settings.
Note: This reset does not affect LCD contrast, Print Confirmation, or PictureMate Print Wizard settings.
I have found this on the Internet, but as yet am unsure if it resets the firmware / hardware for the printer, which would also reset any counters or error messages still held after rectifying a fault. Any feedback would be appreciated!
Procedure 7
This is one found on a forum for resetting an Epson Stylus Photo RX620:
You can try this: press the STOP and B&W start buttons while hitting the Power-On button.
You can also reset the counter using SSC service. It may not support your printer yet.
Asker's Comment: this was great thank you very much it works now.
It's not known if the person asking the question used the manual reset method above or the ssc service utility also mentioned, but apparently they got the printer to work, so it's worth trying the manual method if you are unable to use the SSC Service Utility, be it because you use a MAC or a new Windows operating system that is unsupported, as the RX620 is supported on the latest utility version we have above.
Procedure 8
Other Software Reset Programs
WIC Reset
If your printer is not supported by our free SSC Service Utility or other resetting methods, you can download one specifically for your Epson printer model from the company below. You then have to purchase an unlock key to complete the resetting process. Only 1 key is required per printer and they are single use.
The Key prices are as follows:
Prices in March 20191 Key2 Keys5 Keys10 Keys25 KeysPer Key$9.99$8.99$6.99$5.99$3.99Total$9.99$17.98$34.95$59.90$99.75In UK currency @ $1.31 / £1£7.63£13.73£26.68£45.73£76.16
I have just successfully reset my Epson XP322 & XP425 printers, using this program and by purchasing 2 keys.
If purchasing multiple keys, the shopping basket reads '1 X key', but below that, it states how many keys.
Method:
Go to the company website to download the wicreset.exe file, you will need to create an account with a current email address, because the key will be sent to your email on file after you purchase one.
Once downloaded and saved on your computer, open / run the program and it will show all installed printers on your computer, (if 2 printers of the same model are showing, it's because it's a wi-fi printer connected with a USB lead and shows both connections) follow the selections:
'select printer', 'continue', 'I want to reset waste counter', 'reset beforehand' (if not yet fully locked out).
Once you've selected what you want to do and with which printer, you'll see just 2 required buttons, click the (Reset Waste Counter) button.
You'll get a window asking for the Key, if you haven't already purchased one, there's a link there (Buy Reset Key). After purchasing one, it arrives in your email inbox.
Copy & Paste the key into the window, click (OK) and it will quickly reset and say 'Shut down your printer now'.
Reset is now complete, but to be sure, turn on the printer and click on the (Read Waste Counter) button and see that it is now 0%.
This company is not associated with our company, please do not contact us for information or help, please only contactwww.2manuals.com
Here is a direct link to purchase a key for the WIC Reset program ( https://www.2manuals.com/product_info.php?products_id=1138 ), but it is best to purchase it through the WIC program, as it will have your reference number on it and will automatically assign the key to you and your email address.
The new program and methods above, supersede the old program and methods below.
_________________________________________________________________________
The old method 2010, now outdated.
Adjustment Programs can be downloaded at: www.2manuals.com
This company is not related to our company in any way, so please do not write reviews or ratings on our Facebook page or contact us for any help / info.
The link above is a paid service, so the company is obliged to support whatever concerns you have regarding their software / procedures.
*New Information:
There have been known problems using this software from feedback and self trial. There are new Help instructions for this in the PX820 reset below (Procedure 11).
There is a software reset method that can be used to reset ink levels, which is used in Epson service centres. Each printer model has a specific service (adjustment) program, which has options such as Reset Protection Counter when you need to reset the value of Waste Ink Counter. You can learn more about software reset method at this link: About Service Programs.
This programs can be used to reset a number of counters in the printer. Please note that CIS users should probably steer clear of any resetting of cartridge ink levels in the printer, and you will probably need to look for the ‘Protection Counter’. Due to the risks of resetting this protection counter, it may be preferable to use the software once to reset the counter, then uninstall it so you do not inadvertently reset the counter more than once.
According to it’s own readouts, it did reset the ‘protection’ counter... but pretty much did so of it’s own accord. It then seemed to interfere with printing! However, the access to advanced cleaning function control etc looks useful. Nevertheless - use with caution as per the notes above!
Reset Error Light Conditions Summary
OK - so whilst we have heard this resolves the problem, it may not do so for you, and whilst we have heard that the ink-pad error is most likely way before the ink pads are actually full, we think it will be OK. However, you should be aware that IF your ink pads were full then resetting the counter on the printer without replacing the pads could ultimately cause damage to your printer and surrounding areas as inks starts to pool inside the printer base and potentially leak out. We suspect that this will not happen for the vast majority of people, but it is certainly possible. We have now heard of this occurring for a couple of people.
Instructing you how to dismantle the printer to examine the waste ink pads is currently outside the scope of our support assistance (though we have done this task ourselves with minimum fuss). You may like to refer to our Service Manuals page and Spares Printers Parts UNICOMP site.
Using the Adjustment Program to reset waste ink counter
Since your printer consumes ink not only for printing but also for other operations like cleaning, a certain amount of ink is wasted and it is collected by the waste ink pad. Therefore, you'd think the printer counts the amount of waste ink, but it actually just counts the amount of page prints.
Once the amount reaches the predefined limit, the printer indicates 'MAINTENANCE REQUEST', you must reset the maintenance error condition and the waste ink counter value stored in EEPROM on the main board of the printer.
The adjustment program enables you to perform maintenance and adjustment functions such as:
EEPROM initial setting
Ink Pad Counter reset
Initial Ink Charge
Head ID Setting
Top margin Adjustment
Bi-D Adjustment
USB ID Input
Note: This example shows you how to reset waste ink counter of Epson R280, R285, R290 printers. Other printer models may have different set of functions, and you must double check the service manual for a specific printer that you are going to troubleshoot.
Warning: misuse of a program may damage printer's EEPROM! Run the program under Window XP only.
How to reset waste ink counter by adjustment service program for Epson R280, R285 and R290 printers.
1. Download the Epson R280 adjustment program from www.2manuals.com.
2. Save archive and unpack using WinZip
3. Change PC date to 10 April 2008 or another earlier date. Just double click in the right bottom of your screen and change date.
4. Run AdjProg.exe program using Windows XP. Press ( ACCEPT ).
5. In new window, check Particular Adjustment mode.
6. Then check Waste Ink Pad Counter option.
7. Click ( CHECK ) to check the current counter value (if required).
8. To reset waste ink counter, check both boxes and press ( INITIALIZATION ).
9. Then press ( OK ).
10. Resetting process will take a few seconds:
11. To finish, power off the printer. The data will be saved in the printers EEPROM.
A Message will appear: 'The waste ink pad counter has been initialised properly'
Switch the power ON and check the counters value.
Other printers adjustment programs work the same way.
New Epson adjustment programs are connected to one PC and can work with one PC only
Adjustment Service programs can be downloaded at www.2manuals.com and cost $20.49 which is about £13.33 for an unlock key (March 2010)
Be warned, in my experience, this program only works providing you have not ignored the printer warnings and gone over the overflow allowed, meaning it will not reset your printer if it is completely locked out.
There have been known problems using this software from feedback and self trial. There are new help instructions for this in the PX820 reset below (procedure 11). This has a folder with help pages as well as the program (the program is specific for PX820, but the help pages will be universal).
Procedure 9
This is a new reset program we have acquired, which is known to reset the Epson Stylus Photo 1400, it may also work on other models that use the T801 - 806 ink cartridges. (feedback required for other models please!).
Download the IPR program here.
List of supported printers:
1280 / 1290 / 1400 / 1410 / C45 / C46 / C48 / C65 / C66 / C67 / C68 / C79 / C85 / C86 / C87 / C88 / C88+ / CX3500 / CX3700 / CX3800 / CX3805 / CX3810 / CX3900 / CX4000 / CX4100 / CX4200 / CX4500 / CX4600 / CX4700 / CX4800 / CX4900 / CX5000 / CX5900 / CX6000 / CX6600 / CX7700 / CX7800 / R1800 / R200 / R210 / R220 / R2400 / R260 (might cover R265 too, feedback please) / R270 / R300 / R320 / R340 / R380 / R390 / R800 / RX580 (might cover RX585 too, feedback please) / RX590 / RX600 / RX620 / CX6500 / RX700 / + some picturemate printers.
You'll notice there are a lot of printers in the above list that are already covered by the SSC Service Utility also above, but there are a few printers in this list that the service utility can't reset and therefore this program will be necessary for those.
Epson Ink Pad Reset (IPR) info:
To reset the Ink Pad Counter, download the Ink Pad Reset Utility here or if you prefer, from the website www.epson.com/ipr.
The Ink Pad Reset Utility software currently runs on Windows operating systems: XP(32/64) and Vista(32/64).
You do not need to have the printer driver or status monitor software installed to use the utility.
Once downloaded, launch the program and follow the prompts.
Some older products do not need a reset utility and can be reset by holding several panel buttons down during power-up of the printer (see above).
Procedure 10
Paper Jam Error on Epson R265, R285, R360, RX585, RX560, RX685, P50, PX650, PX700W, PX710W, PX800FW, PX810W printers.
To reset a Paper Jam Error, unplug the USB Lead & unplug the Power Lead, then press the printer Power Button 3 times.
Plug in all the leads and start the printer, the error should now have reset.
This may also work on other printer models.
Procedure 11
Resetting the PX820 / PX820FW / PX820FWD / TX820FWD.
Download the zipped folder containing the reset program and all of the Help Pages, from here.
This was given to me by a customer that said it worked for their printer and it has Help Pages that allow you to overcome the errors that previous Adjustment Programs were giving.
This specific software should essentially work for all printers that use the T801 - T806 inks, however, you may have to download the specific software for your particular model first from www.2manuals.com or anywhere on the Internet that gives you the Adjustment Program for your printer model. The Help Pages in the above link should be able to resolve all known errors and issues.
Resetting XP600 / XP605 / XP700 / XP750 / XP800 / XP850 (Listed on CD)
This is a zip file from a CD donated to us, which was purchased by a customer who claims that it worked on their printer and that you do not need a key to unlock it (this could mean that either it's a cracked version or that the key is supplied in a text file).
File Download Size: 154Mb
The printers above are those listed for resetting on the program CD. These XP models are two different kinds of printer, one uses the T26 inks (X5 inks) and the other uses the T24 inks (X6 inks).
Therefore, I would assume that the program will reset all printers that use those inks.
This is an uploaded version of the CD and is a large folder, please ensure that you have plenty of spare disk space to unzip the program on your computer.
The download may start automatically when you click the left mouse button on the link below. It normally opens a download window on the bottom of the computer screen and usually places the downloaded file into your Downloads folder on your Hard Drive.
Please follow the instructions on the Read First pages.
Do not call us for help, this is a free service and all the information you need or we can give, is on this page somewhere.
If this Program is outdated, then please download and read the new Help Instructions for Epson PX820 seen above,(the procedure is normally the same for all printers).
Download Zipped Folder
Resetting SX410 / SX415 (Free)
If you have not already done so, download the 'Adjustment Program'.
This will be in ZIP format so you will have to unzip / unpack the file before use.
Please follow the steps below to reset the protection counter effectively.
XP users just skip to 'Now you can start'
You will have to use “Compatibility mode” if you are using Windows Vista or Windows 7 and to do this:
Right click on the 'Adjprog' icon
Select (Properties) at the bottom of the list
Select (Compatibility) at the top
now under compatibility mode, tick the box and select Windows XP (service pack 3) for Windows 7
or Windows XP (service pack 2) for Vista and click (Apply) at the bottom right, then (Ok).
Now you can start
Make sure your printer is switched on and connected to your computer via a USB cable.
------------------------------------------------------------------------------------------------------------------------------------------------
Click (twice) on AdjProg.exe.
Click (Accept) button
You will notice at the top it says TX410/TX415, this is ok as the SX410 and SX415 share the same reset.
Click (Particular adjustment mode) button.
Select on “Waste ink pad counter” and click (OK) button.
Put a tick in the two boxes (Main pad counter and FL Box counter)
Click (Check), you will get a reading in the points and % boxes
now make sure the ticks are still in the boxes as above
Click on (Initialization) button and the program will reset the protection counter.
Turn off the printer as instructed then turn on again.
(if not instructed you will still need to turn the printer off and then back on again)
Click (Finish) button. and its done.
If unsuccessful, view information above and try again.
Resetting R265 / R270 / R285 / R360 / RX560 (Free)
If you have not already done so, download the program by clicking here(no longer a download link, because a file system error was reported).
This will be in ZIP format so you will have to unzip / unpack the file before use.
Please follow the steps on the 'notepad' text file which is within the zipped file.
You can try this program and method for all the printers that use the same cartridges (T801 - 806 or T791 - 796), they may well use the same software, these are:
R265, R285, R360, RX585, RX560, RX685, P50, PX650, PX700W, PX710W, PX800FW, PX810W and possibly even newer models such as PX720 / PX730 / PX820 / PX830 & Stylus Color Photo 1400. It can't hurt to try.
If unsuccessful, view information above and try again.
To reset a Paper Jam Error, unplug the USB Lead & unplug the Power Lead, then press the printer Power Button 3 times.
Plug in all the leads and start the printer, the error should now have reset.
Testimonials
------------------------------------------------------------------------------------------------------------------------------------------------------------------------------------------------------
Your info just helped me reset my Epson RX620, many thanks - I was so wild with the machine (I will never ever ever buy an Epson again)! Appreciate so much you sharing the info.
Emmaleigh
------------------------------------------------------------------------------------------------------------------------------------------------------------------------------------------------------
SSC Service Utility:
OMG! It worked!!!! Thank you very much. A further argument against Epson's claim is that I have been using only the scanner part of the printer.
Anonymous
------------------------------------------------------------------------------------------------------------------------------------------------------------------------------------------------------
A big thank you!
Your Reset Procedure #7 for the Epson RX620 took just a minute to do and
worked perfectly.
After doing the very simple instruction of holding the STOP and B&W
buttons down while turning the printer on, I got a message saying
something about the EEPROM. I then turned the RX620 off, turned it
right back on and everything worked fine. This must work on many other
Epson's I would guess.
A couple of years ago I used some other reset procedure for this
computer which meant running a little program I downloaded. At that time
too I installed an auxiliary external tank for the waste ink, a
procedure which I recommend since a half-cup of ink had collected in two
years or so. This procedure is well demonstrated on YouTube.
Thanks again! Much!
Larry Lewis
(I must point out that ink in a bottle stays as a liquid, but ink in the pads evaporates and so is not as big a problem as Epson make out or as people would assume... The INK Store)
------------------------------------------------------------------------------------------------------------------------------------------------------------------------------------------------------
It may help some of your customers to know that if using Windows 7 and needing to re-set an Epson Stylus Photo 915 you need to set the software to Compatibility mode Windows 7 before running the installer.
Many thanks for your work in making this page! It was a great help.
Philip
------------------------------------------------------------------------------------------------------------------------------------------------------------------------------------------------------
Thanks to all at The INK Store, for getting me out of a pickle, with my Epson Stylus Photo R220 printer.
This is an essential service, to the general public, who is getting ripped off, left, right and centre.
When it comes to technology, the ordinary public don't have a clue, where to begin, when things go wrong.
Thanks for your help.
Baris Ozgur
------------------------------------------------------------------------------------------------------------------------------------------------------------------------------------------------------
Just to say thanks for your very helpful page on the process enabling me to reset my Epson Stylus Photo 915 printer
I had tried the process before on another printer but without the comprehensive instructions which you provide I was unsuccessful.
I followed your instructions and after a couple of hiccups was able to bring my printer back into life for many years to come.
Dr Bryan Roe
------------------------------------------------------------------------------------------------------------------------------------------------------------------------------------------------------
Nice one ink store, my Epson R220 printer now prints again.
Even though there was nothing wrong with it I couldn't use it because of the counter and your web page has helped me reset it.
Thanks a lot, very much appreciated.
Steven Hargate
Oxford
------------------------------------------------------------------------------------------------------------------------------------------------------------------------------------------------------
Excellent! I paid for a program online which said it would reset my epson printer and it didn't, what a waste of my time and money. Found your site on the net and thought I have nothing to lose it says free, but I didn't expect it to be this good, I got the reset program absolutely free with no adverts or search bars thrown in and easy to follow instructions as well as all the other solutions I had to do for my printer which were stopping it from resetting. I didn't even have to log in, set up an account or give any personal details at all, just click the download button and it was on my computer. Why aren't all sites like this?
Mike Bradley
A future ink customer without doubt!
------------------------------------------------------------------------------------------------------------------------------------------------------------------------------------------------------
Just wanted to say a huge thanks for the time and effort you have put into your free printer reset page. I wish I had found this information years ago, it would have saved me throwing away a few printers.
Kind Regards
David Green.
------------------------------------------------------------------------------------------------------------------------------------------------------------------------------------------------------
Dear The Ink Store
I was having problems with Google Cloud print and a firmware upgrade finished it off completely until I followed the reset instructions on your website. Thanks it worked a treat!
Regards,
Tim.
------------------------------------------------------------------------------------------------------------------------------------------------------------------------------------------------------
Hi
thanks for getting back to me, sorry I had already sent the email before i read the dont send email enquiries sorry. I did fix the printer all i did was take out the power cable from the back of the printer and left it all day plugged it back in and pressed all 3 buttons agian as the printer was starting up and it made a really loud clunking noise asked me if id changed ink pads i said yes and hey presto it now works (thank goodness). Thank you for all your hard work on the ink issues it is very much appreciated. I will try the new link for my other printer later fingers crossed. :)
Lyn
------------------------------------------------------------------------------------------------------------------------------------------------------------------------------------------------------
Dear Sir (may I?) Thank you so very much for the huge amount of time you've spent on your excellent dead printer webpage. I am a total novice of 70+ years and was dreading trying to resurrect my R300 until a kindly neighbour of about 19 summers, blast him! suggested I visit your site.
Your procedure 9 download did the trick within a few clicks of the mouse, and my printer is now back in good fettle.
Grateful thanks, and I hope you have a peaceful weekend.
Cordially yours, Keith Bennett
------------------------------------------------------------------------------------------------------------------------------------------------------------------------------------------------------
Thank you so much for making a frustrating issue with my Epson printer simply evaporate. I'm certainly not versed in techy downloads etc, but with your user-friendly site you solved my problem so quickly I still can't quite believe it.
C Linton Newcastle upon Tyne
------------------------------------------------------------------------------------------------------------------------------------------------------------------------------------------------------
Hello,
I came across your webpage when trying to search for ways of changing waste ink pad count.
Could you help me please. My printer is an Epson Stylus SX445W. I have removed the waste ink pads and cleaned them. They are as new. I cannot however find the software to change the count on this style printer. Please could you tell me what I do. The printer was in excellent working order until the notice appeared on it to change ink pad etc. I also have a lot of ink cartridges for this model which will go to waste if I have to purchase another model.
Thank you
Sister Irene
Corran, Leap, West Cork
(this person was directed to the WIC Reset above)
------------------------------------------------------------------------------------------------------------------------------------------------------------------------------------------------------
Had the waste ink pad problem with my Epson Stylus Photo 1290. Started to look around for another printer and then googled to see if anyone else had the problem. Stumbled across your site, followed the instructions and printer sorted. Buy you a pint next time I’m in Swansea!
Cheers Chris
------------------------------------------------------------------------------------------------------------------------------------------------------------------------------------------------------
Dear sir,
my name is Durgesh Saini,
Epson services all software arenje adj program.
Thank you Sir.
------------------------------------------------------------------------------------------------------------------------------------------------------------------------------------------------------
Just successfully re-set the waste counter on my RX620, using your procedure 7 instructions - no software needed - saved me a fortune !
Many thanks.
Anne the OAP
------------------------------------------------------------------------------------------------------------------------------------------------------------------------------------------------------
For info. / feedback - Epson Stylus Photo R220 reset.
My Epson Stylus Photo R220 was locked out with the two red lights flashing alternately.
The SSC Service Utility was unable to access it (Windows 10 ) showing 'Printer Off, or some other problem'
The IPR program, referred to in your Alternative Resetting Methods and Software Procedure 9 worked on this printer.
JRW
------------------------------------------------------------------------------------------------------------------------------------------------------------------------------------------------------
If you would like to add a comment, good or bad about this webpage, just email us using the Contact link.
You don't have to give your name and you can remain anonymous on this page if you wish.
Any reference to OEM (Original Equipment Manufacturer) for compatible items is purely for compatibility reference. The trademarked names are also for reference to the printer make & model. We do supply Trademarked OEM and these are listed under their own category, Originals (OEM). All competitors / manufacturers prices (Retail Prices / RRP) are referenced to the published prices on the World Wide Web in July 2002.
For Further Information Telephone: 01792 548731
Email
The INK Store
101 Clase Road, Morriston, Swansea, UK. SA6 8DY
Tel: 01792 548731
Page last updated: 9 March 2019
Rules & conditions apply, Click to view Terms, Conditions & Customers Rights.
No VAT to be added
Credit / Debit cards accepted
0 notes
Text
Tetragrammaton Donald Tyson Pdf Free
Welcome,you are looking at books for reading, the The Kabbalah Magic Of Angels, you will able to read or download in Pdf or ePub books and notice some of author may have lock the live reading for some of country. Therefore it need a FREE signup process to obtain the book. Tetragrammaton by Donald Tyson Book Resume. Tetragrammaton Donald Tyson Pdf To Doc Lenovo K4 Note Baseband Hatsune Miku Anime Download Keys to the Apocalypse. Uloz.to is the largest czech cloud storage. Upload, share, search and download for free. Credit allows you to download with unlimited speed. Abou+ +he Au+her Donald Tyson has been writing about the Tarot and other New Age. The word Yahweh is. Tetragrammaton Donald Tyson Pdf File Online. Download free tintenherz rapidshare downloads full. Donald Tyson (Nova Scotia, Canada) is an occult scholar and the author of the popular, critically acclaimed Necronomicon series. He has written more than a dozen books on Western esoteric traditions. Tetragrammaton Donald Tyson.
Tetragrammaton Donald Tyson Pdf Free Printable
Tetragrammaton Donald Tyson Pdf Free Online
Donald Tyson's Supernatural World
Donald Tyson is a Canadian from Halifax, Nova Scotia. Early in life he was drawn to science by an intense fascination with astronomy, building a telescope by hand when he was eight. He began university seeking a science degree, but became disillusioned with the aridity and futility of a mechanistic view of the universe and shifted his major to. In his book Tetragrammaton, Donald Tyson points out the phrase 'God of Righteousness' quoted in the ninth Enochian key (quoted earlier) is given as IAD. (including free and online) it is best represented in The Equinox Vol. Frances Yates' Art of Memory and Giordano Bruno and the Hermetic.
On the heels of his widely successful trilogy of works honoring H. P. Lovecraft, Donald Tyson now unveils a true grimoire of ritual magic inspired by the Cthulhu Mythos. The Grimoire of the Necronomicon is a practical system of ritual magic based on Lovecraft's mythology of the alien gods known as the Old Ones.
Fans of Lovecraft now have the opportunity to reliably and safely get in touch with the Old Ones and draw upon their power for spiritual and material advancement. Tyson expands upon the Old Ones' mythology and reintroduces these 'monsters' in a new, magical context―explaining their true purpose for our planet. As a disciple, you choose one of the seven lords as a spiritual mentor, who will guide you toward personal transformation.
Grimoire of the Necronomicon features ritual forms and invocations for the daily and yearly rites of the Old Ones, individual rituals devoted to each of the seven major figures of the mythos, and most importantly, a grand ritual for personal attainment. The daily rituals provide an excellent system of esoteric training for individual practitioners. This grimoire also provides structure for an esoteric society―Order of the Old Ones―devoted to the group practice of this unique system of magic.
Donald Tyson (Nova Scotia, Canada) is an occult scholar and the author of the popular, critically acclaimed Necronomicon series. He has written more than a dozen books on Western esoteric traditions.
---Llewellyn.com
50 works Add another?
Most Editions | First Published | Most Recent
Showing all works by author. Would you like to see only ebooks?
123Next >
Subjects
Magic, Accessible book, Protected DAISY, Occultism, Miscellanea, Ritual, Fiction, Runes, Tarot, Angels, Astrology, Bible, Cabala, Criticism, interpretation, Fiction, occult & supernatural, Fortune-telling by runes, Imaginary books and libraries, Magicians, Middle east, fiction, Necronomicon (Imaginary book), Nonfiction, Tetragrammaton, magic, occult, Alchemists
Tetragrammaton Donald Tyson Pdf Free Download
Places
Czech Republic, England, Middle East, Nova Scotia
People
H. P. Lovecraft (1890-1937), John Dee (1527-1608), Edward Kelley (1555-1595), Edward Kelly (1555-1598)
Links (outside Open Library)
No links yet. Add one?
Tetragrammaton Donald Tyson Pdf
History
Tetragrammaton Donald Tyson
Created April 1, 2008
Tetragrammaton Donald Tyson Pdf Free Printable
Download catalog record: RDF / JSON
Donald Tyson Pdf
February 20, 2017 Edited by AnonymousEdited without comment.February 20, 2017 Edited by AnonymousEdited without comment.February 20, 2017 Edited by AnonymousAdded new photoSeptember 2, 2008 Edited by RenameBotfix author nameApril 1, 2008 Created by an anonymous userinitial import
Donald Tyson is a Canadian from Halifax, Nova Scotia. Early in life he was drawn to science by an intense fascination with astronomy, building a telescope by hand when he was eight. He began university seeking a science degree, but became disillusioned with the aridity and futility of a mechanistic view of the universe and shifted his major to. In his book Tetragrammaton, Donald Tyson points out the phrase 'God of Righteousness' quoted in the ninth Enochian key (quoted earlier) is given as IAD. (including free and online) it is best represented in The Equinox Vol. Frances Yates' Art of Memory and Giordano Bruno and the Hermetic.

On the heels of his widely successful trilogy of works honoring H. P. Lovecraft, Donald Tyson now unveils a true grimoire of ritual magic inspired by the Cthulhu Mythos. The Grimoire of the Necronomicon is a practical system of ritual magic based on Lovecraft's mythology of the alien gods known as the Old Ones.
Fans of Lovecraft now have the opportunity to reliably and safely get in touch with the Old Ones and draw upon their power for spiritual and material advancement. Tyson expands upon the Old Ones' mythology and reintroduces these 'monsters' in a new, magical context―explaining their true purpose for our planet. As a disciple, you choose one of the seven lords as a spiritual mentor, who will guide you toward personal transformation.
Grimoire of the Necronomicon features ritual forms and invocations for the daily and yearly rites of the Old Ones, individual rituals devoted to each of the seven major figures of the mythos, and most importantly, a grand ritual for personal attainment. The daily rituals provide an excellent system of esoteric training for individual practitioners. This grimoire also provides structure for an esoteric society―Order of the Old Ones―devoted to the group practice of this unique system of magic.
Donald Tyson (Nova Scotia, Canada) is an occult scholar and the author of the popular, critically acclaimed Necronomicon series. He has written more than a dozen books on Western esoteric traditions.
---Llewellyn.com
50 works Add another?
Most Editions | First Published | Most Recent
Showing all works by author. Would you like to see only ebooks?
123Next >
Subjects
Magic, Accessible book, Protected DAISY, Occultism, Miscellanea, Ritual, Fiction, Runes, Tarot, Angels, Astrology, Bible, Cabala, Criticism, interpretation, Fiction, occult & supernatural, Fortune-telling by runes, Imaginary books and libraries, Magicians, Middle east, fiction, Necronomicon (Imaginary book), Nonfiction, Tetragrammaton, magic, occult, Alchemists
Tetragrammaton Donald Tyson Pdf Free Download
Places
Czech Republic, England, Middle East, Nova Scotia
People
H. P. Lovecraft (1890-1937), John Dee (1527-1608), Edward Kelley (1555-1595), Edward Kelly (1555-1598)
Links (outside Open Library)
No links yet. Add one?
Tetragrammaton Donald Tyson Pdf Free Printable
Tetragrammaton Donald Tyson Pdf
History
Tetragrammaton Donald Tyson
Tetragrammaton Donald Tyson Pdf Free Online
Created April 1, 2008
Tetragrammaton Donald Tyson Pdf Free Printable
Download catalog record: RDF / JSON
Donald Tyson Pdf
Donald Tyson's Supernatural World
February 20, 2017 Edited by AnonymousEdited without comment.February 20, 2017 Edited by AnonymousEdited without comment.February 20, 2017 Edited by AnonymousAdded new photoSeptember 2, 2008 Edited by RenameBotfix author nameApril 1, 2008 Created by an anonymous userinitial import
0 notes
Text
Download Pes 2012 Psp Highly Compressed

This Game Is Cracked And Highly Compressed Game. Specifications Of PES 2012 PC Game Genre: Simulation, Sports, Football Platform: PC Language: English Size: 3.27 GB Publication Type: RePack By RG Mechanics Pro Evolution Soccer 2012 PC Game Overview This Game Is 11th Game Of Pro Evolution Soccer Series. MediafireNeed For Speed: Hot Pursuit (Compressed)(50MB). Adobe cleaner tool for mac. Colorschemer studio for mac. MediafirePES 2010 Super Compressed(9MB) MediafireSuper Mario. Windows XP - Microsoft Windows PSP Game Requests Archive - Page 7 - PSPISO ∞FREE FULL COMPUTER (PC) GAMES DOWNLOAD - pradeepstar111. Pes 2012 compressed under 50mb WinRAR archiver, a powerful tool to process RAR.
Download Pes 2012 Psp Highly Compressed Torrent
Download Pes 2012 Psp Highly Compressed Full
One of the best, high performing, most loved as well as played game in the world. GTA V is the greatest legendary game one has ever witnessed. Now you can download GTA V highly compressed for PC from us. Open world category is famous just because of it. Almost every single individual has played it one in its entire life. Its a package full of entertainment and suspense. Sold over millions of copies and till today it has touched all the individual’s heart. Single player and multiplayer both mods are…

Download Pes 2012 Psp Highly Compressed Torrent
Checkout
Download Pes 2012 Psp Highly Compressed Full
This Game Is Cracked And Highly Compressed Game. Specifications Of PES 2012 PC Game Genre: Simulation, Sports, Football Platform: PC Language: English Size: 3.27 GB Publication Type: RePack By RG Mechanics Pro Evolution Soccer 2012 PC Game Overview This Game Is 11th Game Of Pro Evolution Soccer Series.
5.open the folder ps2012 highly compressed. Please note:- Sorry but by mistake it's written PES 2012 instead of 2010. 6.Now open the folder PES2010.double click on setup and enter the serial given which is provided in the folder ps2012 highly compressed only.
0 notes
Text
Adobe Cleaner Tool For Mac

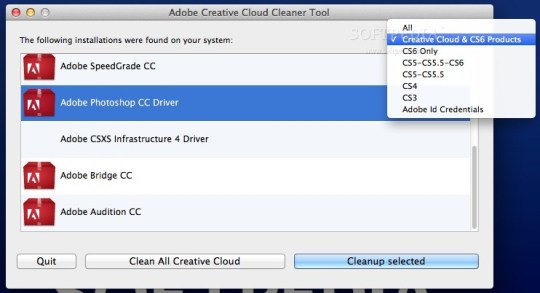
Adobe Creative Cloud Cleaner Tool For Mac
Adobe Creative Cleaner Tool Download
Adobe Reader and Acrobat Cleaner Tool
The Adobe Reader and Acrobat Cleaner Tool removes a standalone installation of Reader or Acrobat, including any preferences and settings that may be preserved during a standard program uninstall.
The tool can clean up install records for any pre-release (beta) installations of Creative Suite 5 products. The Adobe CS5 Cleaner Tool is designed to not interfere with existing installations of previous versions of Adobe Creative Suite products, but it allows you to specify if you wish to remove them as well. Back-up all data stored in Adobe. Uninstall Adobe Reader on Mac OS X Adobe Acrobat Reader is a free software tool to view, print, and comment on PDF files. Adobe Reader and Acrobat Cleaner Tool fully removes a standalone installation (not a Creative Suite or other Adobe suite install) of Reader or Acrobat. Description: It let you create, edit, sign, and track PDFs from. Enterprise IT Tools for Adobe Acrobat and Reader preview — Try Acrobat Cleaner for Acrobat versions above 9.x. May 22: Adobe SWF Investigator preview 5 — Perform static and dynamic analysis of SWF applications with just one toolset. The Adobe Creative Cloud Cleaner tool is intended for advanced computer users and can fix many common problems (such as removing old Adobe software, cleaning corrupt installation files, and fixing your host files to establish a connection with Adobe servers).
While most installs, uninstalls, and updates operations happen without incident, there are cases where a user may not be able to complete such tasks due to some registry or file conflict on the machine. This is particularly problematic when permissions set on plist entries or files prevent the successful installation of new installs and/or updates. The Adobe Reader and Acrobat Cleaner Tool is designed to fix such issues by cleaning up corrupted installations, including removing or fixing corrupted files, removing or changing permissions registry entries, etc. The tool provides options for removing problematic Acrobat items only while leaving Reader untouched and vice versa.
Note: JavaScript is disabled in your browser. To access the Adobe Reader and Acrobat Cleaner Tool, please enable JavaScript and reload the page.
Adobe Reader DC and Acrobat DC Cleaner Tool
AcroCleaner for DC and later
This download provides the Adobe Reader and Acrobat Cleaner Tool for Windows and Mac.
Ableton mac crack. MASSIVE is a sonic monster – the ultimate synth for basses and leads. The analog concept belies the contemporary, cutting-edge sound it generates. The high-end engine delivers pure quality, lending an undeniable virtue and character to even the most saturated of sounds.

IMPORTANT:
1. THIS TOOL IS NOT FOR USE WITH ANY CREATIVE SUITE PRODUCTS INCLUDING SUITES THAT CONTAIN ACROBAT. IT CAN ONLY BE USED WITH STANDALONE VERSIONS OF ACROBAT AND ADOBE READER.
2.The Windows version of the tool only supports cleanup of DC products (both Continuous and Classic tracks). If you want to remove any older versions of Acrobat and Reader products then please refer to “AcroCleaner for 10.x and later”.
3. In some scenarios Cleaner tool for Windows might affect some preferences common between Acrobat and Reader. Hence it is advised that if both Acrobat and Reader products are installed on machine then the installed product be repaired after running the cleaner Tool.
Click done tocontinue,” don’t freak out about it. An external hard drive for mac. This will immediately wipe the entire drive.If you get an error message that states, “Erase process has failed.
Windows
Version4DateJune 10, 2015
Use the AcroCleaner Version 4 for DC and later on Windows to cleanup failed or partial uninstalls of DC products.
English
Download Adobe Reader DC and Acrobat DC Cleaner Tool for Windows version 4.0 (ZIP, 468 KB)
Mac
Version1DateDec 13, 2017
Use the AcroCleaner Version 1 for 11.x, DC and later on Mac to cleanup failed or partial uninstalls of of 11.x and DC products.
English
Download Adobe Reader DC and Acrobat DC Cleaner Tool for Mac version 1.0 (DMG, 416 KB)
Adobe Reader and Acrobat Cleaner Tool
AcroCleaner for 10.x and later
This download provides the Adobe Reader and Acrobat Cleaner Tool for Windows.
IMPORTANT:
THIS TOOL IS NOT FOR USE WITH ANY CREATIVE SUITE PRODUCTS INCLUDING SUITES THAT CONTAIN ACROBAT. IT CAN ONLY BE USED WITH STANDALONE VERSIONS OF ACROBAT AND ADOBE READER.
VersionPreview 2DateJune 17, 2013
Use the AcroCleaner Version 2 for 10.x and later to cleanup failed or partial uninstalls of 10.x and 11.x products.
English
Download Adobe Reader and Acrobat Cleaner Tool for Windows version 2 (ZIP, 651 KB)
AcroCleaner for 9.x
VersionPreview 1DateJune 17, 2013
Use the AcroCleaner for 9.x to cleanup failed or partial uninstalls of 9.x products. Youtube download and converter for mac.
English
Download Adobe Reader and Acrobat Cleaner Tool for Windows version 1 (ZIP, 614 KB)
User Instructions
Follow either the User Interface Workflow or the Command Line Usage instructions below to use the Adobe Reader and Acrobat Cleaner Tool. Once you are done, please send us your comments and let us know about your experience.
Your computer will only share the information in the cookie with the Web site that provided it, and no other Web site can request it. In the spirit of transparency, this Cookie Policy (“Policy”) provides detailed information about why, how, and when we use cookies on our Site, Software, and/or Services, as defined in our Terms of Service.What is a cookie?A cookie is a small file that a Web site transfers to your computer to allow it to remember specific information about your session while you are connected. What is a free photo editor for mac shortcut. There are two types of cookies, session and persistent. Cookies PolicyIntroWe have integrated these statements into a single posting for ease of use. Session cookies last only as long as your Web browser is open.
Windows
User Interface Workflow
Do not proceed if you installed Acrobat or Reader as part of Creative Suite. This tool can only be used with standalone versions of Acrobat and Reader.
Double click the AdbeArCleaner.exe file.
Verify you want to continue, and choose Next.
Accept the EULA and choose Next.
Choose the standalone product to clean and choose Next.
If the product to be cleaned is installed on the machine, tool directly proceeds to cleanup.
If the product is not found, then Acrobat/Reader is cleaned from default installation location at ProgramFilesFolderAdobeAcrobat *.* folder. The user is also given an option to select and add any other additional installation.
If more than one product is detected, choose which product to remove and whether or not to remove any files that may be shared between Adobe Reader and Acrobat.
Choose Clean Now. Cleanup begins.
When finished, restart the machine.
Command Line Usage
Do not proceed if you installed Acrobat or Reader as part of Creative Suite. This tool can only be used with standalone versions of Acrobat and Reader.
Open a command prompt.
Run tool with the desired command line parameters as follows:
ProductIdIdentifies the product:
0 = Acrobat (Default)
1 = ReaderInstallPathSpecifies the product installation path. Default = the product’s default location; e.g. C:Program Files (x86)AdobeReader 10.0. You must use this parameter when using ScanForOthers = 0.CleanLevelSpecifies the level of cleanup; i.e. shared components should be cleaned or not:
0 (Default) = clean only components for the selected product.
1 = clean components for the selected product as well as shared components.ScanForOthersSpecifies whether to search for and delete only the installation directory identified by InstallPath or all directories on the machine:
0 = Search for and delete only directories found on the path specified by the InstallPath parameter.
1 (Default) = Search for and delete installation directories system wide. This search includes non-default paths as well as default paths such as C:Program FilesAdobeAcrobat 10.0. /?Invokes the tool’s Help; for example: AdbeArCleaner.exe /?
Mac
User Interface Workflow
Adobe Creative Cloud Cleaner Tool For Mac
Double click to mount the AdobeAcroCleanerTool.dmg
Double click the file: AcroCleanerTool.app
Verify you want to continue, and choose Next.
Accept the EULA and choose Next.
Choose the product to remove and click Next.
Applications found installed are listed separately for both Acrobat and Reader. By default, all the listed applications will be selected for clean-up. Following buttons below the lists can be used to customize the list.
Remove button: Select the application you don’t want to uninstall and click ‘Remove’ button below that particular list.
Refresh button: You can repopulate the full list again using ‘Refresh’ button below that particular list.
Click on Clean button to remove the listed applications
Press OK to confirm.
Provide admin password in the admin prompt dialog.
Cleanup processing begins.
Press OK once finished dialog is shown.
Press Quit button to quit the CleanerTool app or ViewLog button to view the logs.
Frequently Asked Questions
What products and versions work with the cleaner tool?
The tool supports both Acrobat and Reader versions 11.x , DC, and Classic Tracks – 2015 and 2017.
Does running the tool write to a log?
During execution, a log file is created at:
Windows 7: C:Users(USERNAME)AppDataLocalTempRaftLogsAdbeArCleaner.log
Windows XP: C:Documents and Settings(USERNAME)Local SettingsTempRaftLogsAdbeArCleaner.log
Mac: ~/Library/Logs/Adobe/AcroCleanerTool.log
If the cleaner tool executes the MSI uninstaller as part of the cleanup process, then an additional log file named Msi(RANDOM_NUMBER).tmp.log is created in the above location.
What are the system requirements?
The tool can be used on any system that is supported by product versions 9.x and 10.x.
Mac: The tool can be used from OS X 10.9 and onward.
When should the tool be used?
The tool should be used when the regular uninstall fails for Adobe Acrobat, or when you want to remove Adobe Reader from your system.
How do I uninstall the tool?
To uninstall the tool, just delete it.
How do I provide feedback?
To submit feedback or ask a question, use the Enterprise Forum .
Known Issues
Adobe Creative Cleaner Tool Download
If you have both Acrobat and Reader installed, removing the product that is the default PDF viewer can result in the other product failing to become the new default PDF viewer. When this problem occurs, run Repair on the remaining product and reboot the machine to make the remaining product the default PDF handler.
For Acrobat Pro Extended 9.x, the tool leaves the Acrobat entry in Add Remove Programs. To manually remove this entry, run an uninstallation from the ARP entry or manually remove the following registry entries:
Windows 32 Bit OS: HKLMSOFTWAREMicrosoftWindowsCurrentVersionUninstall<Product-Code>
Windows 64 Bit OS: HKLMSOFTWAREWow6432NodeMicrosoftWindowsCurrentVersionUninstall<Product-Code>
The product code is language specific. For example, for EFG it would be (AC76BA86-1033-F400-7761-000000000004)
The Cleaner Tool removes the Reader 9.x or Acrobat 9.x installation even if the user chooses Cancel at the Files in Use dialog during uninstallation. The File in Use dialog appears when you try to uninstall a product that is already running.
Adobe Reader and Acrobat Cleaner Tool

You must check the box above to indicate your agreement to the agreements listed above to activate the download link.
0 notes
Text
Colorschemer Studio For Mac

ColorSchemer Studio is a useful application for Windows designed to automatically create color schemes.
The main screen of ColorSchemer Studio displays a wheel where you can see the tones of other colors that go well with the color you provide.
The other two tabs will show you the colors that match yours so that you can use them when working on your creation and as an outline of what your webpage could be with the color scheme that you have made.
ColorSchemer Studio also includes a tool that allows you to extract the most prominent colors from an image or photograph and then work with them.
ColorSchemer Studio for Mac Free to try Color Schemer Mac OS X 10.5 Intel/PPC/.6 Intel, Mac OS X 10.6/Intel Version 2.0 Full Specs Download Now Secure Download.
GIMP: Feature Complete With a Steep Learning CurveIn terms of features and flexibility, open source stalwart is the best free Mac image editor you can find. Here are the best choices. This layer-based editor supports most file formats, and has all of the tools you need to touch up photos: adjustments for things like color balance and contrast, yes, but also filters and simple drawing tools. What is a free photo editor for mac. But if you’re willing to put up with limitations, or put in the time to learn something that’s not necessarily intuitive, you can edit your photos for free.
Purchase at colorschemer.com for $49.99 Purchase. Latest versions of ColorSchemer Studio. 2.1 (latest) Dec 6, 2012. Alternative software Photo Frame Studio. Tool that adds frames to photos. Soft4Boost Photo Studio.
ColorSchemer Studio 2 also includes color-managed environments that allow you to work with RGB and CMYK colors more accurately and efficiently. More Version 2 Features: Color Management/Profiles: Work with color more accurately and efficiently with built-in color management and ICC color profile support. Use specific color profiles to ensure.
ColorSchemer Studio makes it fun, fast and easy to find the perfect palette for your next creative project. Whether you're designing a web site, magazine layout, picking wedding colors, or painting your living room, get your colors right the first time with ColorSchemer Studio. CREATE. Work with RGB and CMYK colors in a color-managed.
Restrictions
15-day trial version. Massive for mac ableton.
On this page
Description
ColorSchemer Studio 2 is a professional color-matching application that will help you build beautiful color schemes quickly and easily.
Use ColorSchemer Studio to identify color harmonies for the web (RGB) or print (CMYK), create palettes from photos, search over a million existing color schemes, mix colors, create gradient blends, and much more!
Rate:
Release Date:03/10/2011
License:Shareware
Category:Multimedia & Graphic Design
Developer:ColorSchemer
Downloads:71
Size:2.35 Mb
Price:$49.99
To free download a trial version of ColorSchemer Studio, click here
To buy software ColorSchemer Studio, click here
To visit developer homepage of ColorSchemer Studio, click here
Advertisement
System Requirements
ColorSchemer Studio requires Windows.
ColorSchemer Studio v.2 1 Copyright
Shareware Junction periodically updates pricing and software information of ColorSchemer Studio v.2 1 full version from the publisher using pad file and submit from users. Software piracy is theft, Using crack, password, serial numbers, registration codes, key generators, cd key, hacks is illegal and prevent future development of ColorSchemer Studio v.2 1 Edition. Download links are directly from our publisher sites. Links ColorSchemer Studio v.2 1 from Bittorrent, mediafire.com, uploadfiles.com, hotfiles.com rapidshare.com, megaupload.com, netload.in, storage.to, depositfiles.com and other files hosting are not allowed. The download file is obtained directly from the publisher, not from any Peer to Peer file sharing applications such as Shareaza, Limewire, Kazaa, Imesh, eDonkey, eMule, Ares, BearShare, Overnet, Morpheus, BitTorrent Azureus and WinMX.
Review This Software
More ColorSchemer Studio Software
Advertisement
ColorSchemer Studio v.2 1
ColorSchemerStudio 2 is a professional color-matching application that will help you build beautiful color schemes quickly and easily.
Category: Multimedia & Graphic Design
Developer: ColorSchemer - Download - Buy: $49.99
color - color scheme - color schemes - web color schemes - color wheel
ColorSchemer Studio for Mac OS X v.2.0.1
ColorSchemerStudio 2 is a professional color-matching application that will help you build beautiful color schemes quickly and easily.
Category: Miscellaneous Tools
Developer: ColorSchemer - Download - Price: $49.99
color scheme creator - color matcher - create color palette - color palette - color scheme
Color Schemer Studio v.2.1
Are you a web page designer or anybody who have work relate to graphics and color then a powerful and easy to use color schemer is the most necessary tool which you must have.
Category: Graphics Editors
Developer: colorschemer.com - Download - Price: -
color - color scheme - color schemes - web color schemes - color wheel
Color Schemer v.3 1
Colorschemer is a small, yet powerful color scheme pick and management utility.
Category: Multimedia & Graphic Design
Developer: ColorSchemer - Download - Buy: $34.99
color - color scheme - color schemes - web color schemes - color wheel
Color Schemer Studio OSX v.1.0
About Color Schemer Studio OSXA professional color matching solution for anyone from hobbyists to advanced professionals.
Category: Multimedia & Graphic Design
Developer: Color Schemer - Download - Price: $22.00
schemer - osx - mac osx - studio - picture studio
Awave Studio v.11.2
Awave Studio is a multi-purpose audio tool that reads 300 audio file formats from different platforms, synthesizers, trackers, .. - It can be used in a variety of ways - as file converter, as an audio editor, or as a synth instrument editor.
Category: Sound Editors
Developer: FMJ-Software - Download - Buy: $80.00
awave - studio - audio - sound - converter
Zoner Barcode Studio
Zoner Barcode Studio is a complete solution for barcodes. It creates, prints, and manages the UPC A, UPC E, ITF, Code 128, EAN 13, EAN 8, UCC/EAN 128, Code 39, Code 93, Codabar, Postnet, and 2/5-type codes. It exports to ZMF, WMF, EMF and BMP (including
Category: Miscellaneous
Developer: ZONER software - Download - Price: $49.00
zoner - barcode - studio
ArtixMedia Menu Studio (Christmas Ed.)
ArtixMedia Menu Studio (Christmas Edition) is multimedia CD creation tool, with a wide variety of options intended for special CD-gifts making. Using the program you may create for your relatives, friends and beloved ones a stunnig gift CD including
Category: Miscellaneous
Developer: ArtixMedia.com - Download - Price: $49.95
autorun - autorun cd - autorun html - autorun program - autorun software
Media Catalog Studio Lite
Is your music and video file collection growing out of control, making it impossible to find anything? Fight the problem with Media Catalog Studio, a handy software application for classifying and tracking media files or CDs. This database is capable of
Category: Sound Editors
Developer: ManiacTools - Download - Free
cd manager - id3 mp3 tag editor - ipod m4a tag editor - wma tag editor - musepack mpc tag editor
Top PHP Studio

Top PHP Studio is an Integrated Development Environment for PHP, providing comprehensive and easy-to-use solution for developing PHP based web applications. Top PHP Studio offers built-in HTTP server and internal web browser, convenient code editor
Category: Web Programming
Developer: Top Systems Ltd. - Download - Price: $39.00
cayoren software - php studio 2009 - perl studio 2009 - php studio - perl studio
Image Studio Pro
Image Studio Pro is an image viewer and manager, designed to help you organize and share your digital photos. It allows you to create collect, send images by email and create a (simple) HTML gallery. The program offers a CD indexing feature that can store
Colorschemer Online
Category: Graphics Editors
Developer: Belltech Systems - Download - Price: $29.95
WebPod Studio
WebPod Studio(tm) is comprehensive, intuitive, feature rich, and affordable Software. Designed to allow and encourage new and experienced computer users to create, gather content and produce polished audio and video broadcasting over the
Category: Utilities
Developer: Lionhardt Technologies - Download - Price: $89.95
what is a blog - blogs - rss - syndication - weblog
Other products of this developer ColorSchemer
Color Schemer v.3 1
Colorschemer is a small, yet powerful color scheme pick and management utility.
Category: Multimedia & Graphic Design
Developer: ColorSchemer
ColorSchemer ColorPix v.1.1
ColorPix is a useful little color picker that gr..rms it into a number of different color formats.
Category: Miscellaneous Tools
Developer: ColorSchemer
ColorSchemer Studio for Mac OS X v.2.0.1

Colorschemer Studio For Macbook
ColorSchemer Studio 2 is a professional color-ma..uild beautiful color schemes quickly and easily.
Colorschemer Studio For Mac Os
Category: Miscellaneous Tools
Developer: ColorSchemer
0 notes
Text
Sophos Home For Mac

Sophos is a UK tech company offering two versions of their Mac security software. Macs are already well protected, but there are some extra features in the package worth taking a look at.
Sophos Home For Mac Download
Sophos Home For Mac Reviews
Sophos Free Antivirus For Windows
Sophos Home Free For Mac Review
Sophos Home For Mac Update
If protections are disabled via Sophos Home dashboard, Sophos Home will reflect that on the Shield. To check protections are enabled, follow these steps: The real-time protection is disabled. Scenario 4 - The Mac doesn't have available slots to load Sophos Home. This issue occurs when the Mac runs out of virtual slots to load applications (this. The latest antivirus software for Mac, from Sophos, comes in two flavors. They offer Sophos Home Free and Sophos Home Premium. Both versions get you real-time antivirus, parental controls, and their remote web-based management application. The paid version also gets ransom-ware security software and basic privacy tools.
An unnecessary extra step
Sophos offer their proprietary antivirus software for Mac with ransom-ware protection and cloud-based configuration. You might not need it, though.
The latest antivirus software for Mac, from Sophos, comes in two flavors. They offer Sophos Home Free and Sophos Home Premium. Both versions get you real-time antivirus, parental controls, and their remote web-based management application. The paid version also gets ransom-ware security software and basic privacy tools. As en extra bonus there’s live, daytime chat and email access to their support team. You can also protect up to ten devices with the premium edition, as opposed to three with the free version.
Best external drive for mac. To configure the software you access the controls through a web-app. This cloud-based system has several advantages. You can configure your system protection remotely. Also, updates to virus libraries and ransom-ware watchlists install on the interface without the need for a download.
Apple has a solid reputation for protecting their devices, and it’s debatable whether this product is necessary. All Mac OS X versions from 10.6.7 come with built-in malware detection. Massive for mac ableton. They update their database daily, so it’s difficult to see what advantages Sophos provides.
Gimp (Free) Gimp is a free open-source photo editing app that has been on the market for over 22 years and is available for Windows, Mac, and even Linux. Unlike many free apps, Gimp doesn’t have any ads or in-app purchases. Its grey interface might seem a little old-fashioned and it may be a bit sluggish when it comes to complex effects, though. Adobe Photoshop Elements. Where you can use it: Mac and Windows Why we love it: While not truly a free photo editor, Photoshop Elements does have a free trial, and it’s far and away among the best photo editing software for Mac and Windows.The suite of automated editing tools — including for exposure, color balance, and reducing the effects of camera shake — make short work of the. Photo editing program mac.
So, naturally, there's a lot of demand for ways to convert YouTube videos to downloadable MP4 videos.But while YouTube provides a way to do this on mobile devices , the site offers no official means for saving YouTube clips on a Mac. So, here we'll turn to the unofficial YouTube downloaders for Macs, including the safest option and two free methods.Wondering what you risk by going against YouTube's rules? You don't always have an internet connection, and you can't expect YouTube videos to live online forever. Best youtube converter for mac.
Tests have shown that the virus detection is less than perfect. In one basic trial, it failed to recognise the EICAR file, an industry-standard virus test. This is worrying because the in-built Mac protection will pick this up every time on a standard directory scan.
Sophos Home For Mac Download
Where can you run this program?
Sophos runs on all Mac OS X from 10.11 onwards and all Windows from Win7 up.

Is there a better alternative?
Sophos Home For Mac Reviews
Yes. The Mac comes out of the box with most of the protection that this package offers. McAfee offers similar protection but at a higher cost per device. Whether it’s necessary is another matter altogether.
Our take
Sophos Free Antivirus For Windows
This is a well-priced product if you need to protect a large number of Macs. Apple technology is subject to viruses and malware attacks like other devices, but they are better equipped straight out of the factory, to deal with them.
Should you download it?
Sophos Home Free For Mac Review
No. If you’re looking to expand on the protection on your Mac, you should consider looking elsewhere.
Sophos Home For Mac Update
1.1.3
0 notes
Text
Youtube Download And Converter For Mac

initialize
To convert a video, copy the YouTube video URL into our converter, choose a format and click the convert button. As soon as the conversion is finished you can download the file by clicking on the download.
If you are looking for speed up to 90 times faster and high quality, UniConverter will be.
Multimedia software for everyday use. Download YouTube videos or save them as MP3, track channel or playlist updates, convert between lossless audio formats, record helpful voice notes and much more.
By using our converter you can easily convert YouTube videos to mp3 (audio) or mp4 (video) files and download them for free - this service works for computers, tablets and mobile devices.
The videos are always converted in the highest available quality. Please note that we can only convert videos up to a length of 1 hour - the limitation is necessary, so the conversion of any video will not take more than a couple of minutes.
Our service is for free and does not require any software or registration. By using our service you are accepting our terms of use.
To convert a video, copy the YouTube video URL into our converter, choose a format and click the convert button. As soon as the conversion is finished you can download the file by clicking on the download button.
Enjoy! We hope you like our service.
The easiest way to download
YouTube videos to MP4 or MP3
Get Free YouTube Download
Microsoft Windows
Offline Installer, 81.8 Mb
100% antivirus
protection
Discover Free YouTube Download for PC, Mac and Android
Get all the videos you like for offline watching!
Download all the videos you want with the simple and smart downloader!
Get it for your PC or Mac or Android.
Ableton 10 mac. Free YouTube Download is the most popular YouTube downloader application now, released in 2006 and updated on a regular basis. It lets you download and convert YouTube videos, so you can watch them whenever you want.
Instructions (step by step)
Download and run the app
Copy YouTube URL and click 'Paste' button
Click the 'Download' button and enjoy!
Download videos in bulk!
Download YouTube Playlist, user channels, videos from personal playlists (History, Liked, Favorites, Watch later), videos from different categories.
Download videos super fast!
Free YouTube Download is known for its lightning fast multistream downloading.
Adobe Photoshop Elements. Where you can use it: Mac and Windows Why we love it: While not truly a free photo editor, Photoshop Elements does have a free trial, and it’s far and away among the best photo editing software for Mac and Windows.The suite of automated editing tools — including for exposure, color balance, and reducing the effects of camera shake — make short work of the. Lightroom is another photo editor Mac users have been using for a long time. However, the default Mac photo editor, Photos, is a built-in piece of software that many take for granted even though it’s suitable both for beginners and for anyone who needs to quickly fix their photos in an image editor Mac provides for free. Gimp (Free) Gimp is a free open-source photo editing app that has been on the market for over 22 years and is available for Windows, Mac, and even Linux. Unlike many free apps, Gimp doesn’t have any ads or in-app purchases. Its grey interface might seem a little old-fashioned and it may be a bit sluggish when it comes to complex effects, though. It is a free photo editor for Mac which is available in 26 languages. This can handle a large number of images by editing them in one go only. It has a feature of non-destructive editing which can. What is a free photo editor for mac.
It allows you to download several videos in original quality in just a few seconds.
Features
get YouTube stream in any format, choose between MP4, MKV up to 8K UHD, WEBM, and MP3
perform conversion to MP4, AVI, and MP3
apply output name format patterns
open lists of links from any text files
transfer videos to iTunes automatically and convert them to iPhone / iPad / iPod
download subtitles
How to download YouTube videos using Free YouTube Download
1. Run Free YouTube Download
2. Get URL for the YouTube video you want to download
Copy YouTube video link from the browser or right-click on the video itself and choose 'Copy video URL'.
3. Click '+ Paste' button
The item will be added to the download list.
Repeat this operation to add as many URLs as you need!
4. Press 'Download' button
Youtube Download And Converter For Mac
Done!
Enjoy this wonderful video brought to you by the best YouTube downloader!
Full Specifications
What's new in version 4.3.28.916Version 4.3.28.916 may include unspecified updates, enhancements, or bug fixes.
Performance improvement.
Youtube Downloader For Mac Pc
GeneralApplication nameFree YouTube DownloadDescriptionA lightweight and easy-to-use application that supports audio and video streams downloading from Youtube and converts them to all popular formatsRelease DateSeptember 16, 2020Date AddedSeptember 16, 2020Version4.3.28.916Operating SystemsWindows 10, 8, 7, Vista, XP SP3
CategoryCategoryInternet SoftwareSubcategoryDownload Managers
Youtube Mp3 Downloader Mac
Download InformationFile Size54.58 MBFile NameFreeYouTubeDownload_4.3.28.916_u.exe
0 notes
Text
An External Hard Drive For Mac

Thunderbolt External Hard Drive Mac
Setting Up An External Hard Drive For Mac
Format An External Hard Drive For Mac

Sep 27,2020 • Filed to: Hard Drive Recovery • Proven solutions
'How to format an external hard drive Mac? What format system to use when reformatting my storage drive for a Mac?'
To format an external hard drive for Mac with Time Machine, you must follow the steps below. Step 1 Open Finder, Applications, then go to Utilities and Disk Utility. Step 2 Follow the steps above to format the drive, and then you can use it with Time Machine on your Mac system. Part 3: Bonus Tip – Data Recovery from Formatted Hard Drive on Mac. Otherwise, use an external hard drive formatted with FAT32 or exFAT file systems. A Mac running macOS can read drives formatted with FAT32 or exFAT, as can Windows PCs. A FAT32 drive can only. Transferring Data From a Mac to PC via an External Hard Drive. Mac OS X and Windows can both read and write to disks in the FAT or ExFat format. Because Mac OS X Mountain Lion does not natively. External hard drives, thumb drives, USB drives, Flash memory cards, and devices like iPod are examples of storage devices that you can connect to your Mac using Thunderbolt, USB, or FireWire cables, or connect wirelessly using Bluetooth. Storage devices (such.
Discover the world of external hard drives for Mac. Compare portable, USB and external hard drive models for office and home and shop online.
This is a frequent question asked by first-time, as well as the not-so-tech-savvy, macOS users. Learning how to format an external hard drive Mac is essential. Because saving all your data on the Cloud is nice and all, but physical storage is still popular. Especially if you don't have a stable internet connection or if most of your files are large.
Luckily, you don't have to learn rocket science to be able to format an external hard drive for Mac or PC. The operation is pretty straightforward. When it comes to your iOS device, we have listed two methods for you, read below and explore more.
Part 1: What Is the Best Format for External Hard Drive Mac?
The first step to formatting your external drive for a Mac computer is choosing the right format. There are four possible choices:
Massive Ableton Mac Free Edition Ableton Mac Download Audio plugins,Free plugins for Logic Pro X,Free music software,free audio app and free plug-in downloads,free VST/AU plugins for your PC or Mac. The download links for Mac and PC versions will be sent to your email address. MASSIVE is a sonic monster – the ultimate synth for basses and leads. The analog concept belies the contemporary, cutting-edge sound it generates. The high-end engine delivers pure quality, lending an undeniable virtue and character to even the most saturated of sounds. https://vetfox544.tumblr.com/post/655775087637692416/massive-for-mac-ableton.
APFS (Apple File System)
HFS+ (Mac OS Extended)
exFAT (Extended File Allocation Table)
FAT (MS-DOS)
To understand which is the best for you, let's have a comprehensive overview of each of them.
1. Apple File System
The APFS was first introduced in 2017 as a replacement for the HFS+. Nowadays, all new Macs come with the operating system preinstalled on APFS, as this system is optimized for use with SSD and flash storage drives. However, it still works with traditional HDD drives too.
This is the best format to pick if you have an external SSD or USB flash drive that you don't intend to use with a Windows device.
The biggest strength of this system is the speed, as well as the encryption and metadata handling. However, you won't be able to use this system with Time Machine.
2. Mac OS Extended
The HFS+, or Hierarchical File System plus on its real name, was the main file system used for Mac until 2017.
This type of file system is suitable to use with both HDD and SDD drives, but the latter will perform slightly better with the APFS mentioned above. If you have an older Mac, though, choosing the HFS+ is your best bet.
In general, all external drives formatted to HFS+ work nicely with older Mac versions but are incompatible with Windows.
3. Extended File Allocation Table
Designed by Microsoft, the exFAT is a good choice if you plan to use the external hard drive with both macOS and Windows systems. Yet, you won't get top performance on either. This choice is more appropriate for USB flash drives, although you can still use it for SDD and HDD units too.
The main issue with exFAT is that your drive will be more prone to fragmentation when used with Apple devices and is less stable than NTFS on Windows. If you really have to share the drive between Mac and Windows machines, that's your best option though.
4. MS-DOS
Macs also support FAT32 drives, marked as FAT in Disk Utility. This format should be avoided at all costs unless you're dealing with a really old Windows computer, which you really have to use in parallel with your Mac system.
Typically, there is no reason to choose this option unless you're planning to use the external hard drive on a Windows XP or earlier machine.
Part 2: How to Format an External Hard Drive Mac?
Now that you know which format to choose, it's time to learn how to format an external hard drive for Mac. There are essentially two methods, with Disk Utility or Time Machine function.
New Objects: Magnifier, Filter object (Mosaic, Jitter, Blur, Crystalize, and Newsprint). Best free photo editing programs. New Brushes: Dodge, Burn, and Sharpen. New Filters: Film Grain, Channel Mixer, Tint, Threshold, Emboss, Swirl, Wave, Motion Blur, Zoom Blur, Radial Blur, and Glass Tile. Objects support styles of Outline, Drop Shadow, Outer Glow, and Gradient.
Note: If you plan to format an older external drive, perhaps one you used with another device, make sure to backup all data before proceeding. Formatting is a permanent procedure that can't be reversed. While there are data recovery software you can use if you lost data, it is always better to prevent.
That said, here's how to format an external hard drive Mac:
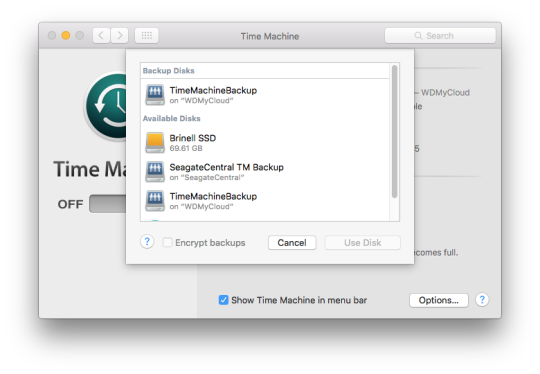
Method 1: Format Mac Hard Drive with Disk Utility
Disk Utility is a utility application proprietary to macOS that is used to both format and manage internal and external disks. Here's how to use it:
Step 1 Connect the external hard drive you want to format to your Mac, then start the Disk Utility app that you can find under Applications -> Utilities.
Step 2 On the left side of the Utilities screen, find the name of the external hard drive you want to format and select it. Then, on the top side under the Disk Utility, click on the Erase button.
Step 3 Follow the on-screen prompts to select the desired file system and allow the drive to format. That's it! After the process is complete, you can either start using the drive or choose to create partitions on it.
Method 2: Format Mac Hard Drive with Time Machine
Formatting an external hard drive with Time Machine is as easy as formatting it with Disk Utility. Time Machine, however, gives you the possibility to create an automatic backup of the data on your hard drive before formatting it.
Before you proceed, therefore, you should first set up the external drive to use with Time Machine. To do this, open System Preferences and select Time Machine after you've connected the external drive to your Mac.
Now, click on Select Disk and select the desired drive from the list. Click on the Use Disk button. At this point, the system will run an automatic backup two minutes after you've clicked on the Use Disk button, or you can proceed with the formatting if the hard disk is empty.
To format an external hard drive for Mac with Time Machine, you must follow the steps below.
Step 1 Open Finder, Applications, then go to Utilities and Disk Utility.
Step 2 Follow the steps above to format the drive, and then you can use it with Time Machine on your Mac system.
Part 3: Bonus Tip – Data Recovery from Formatted Hard Drive on Mac
Sometimes, it may happen that you accidentally formatted an external hard drive containing important data. Whether it's your wedding pictures or your bachelor's degree thesis, chances are you want to get that data back as quickly as possible.
If you have a newer version of Mac, you can use the Apple Time Machine to recover your canceled files, or you could choose to use external software, such as Recoverit Data Recovery.
1. Recover Data with Apple Time Machine
In the former hypothesis, you can try to recover your data with the Time Machine. This app is Apple's backup feature present on the newer systems. If you followed the steps above before formatting the hard drive with Time Machine and allowed the app to execute the backup, then there are high chances that you can recover any lost data without too much hassle.
To do so, just launch the Time Machine and browse through the folders to see if it has saved the files you require.
For easier browsing, you can use the time stamp feature on the right side of the screen and select the date or time when you executed the backup. Once you found the files, simply click on Restore to get them back.
2. Recover Data with Recoverit Data Recovery
If you didn't use the Time Machine function or couldn't find the files you need, you can try to recover any lost files with trusted third-party software, such as Recoverit - Data Recovery.
Recoverit (IS)
A Life Saver to Solve Your Data Loss Problems!
It allows you to recover unlimited lost or deleted files from your Mac device, including photo, video, and audio data, document files, and more.
It supports all types of Mac files irrespective of their extension.
Compatible with both internal and external drives, USB pens, memory cards, and other hardware, so you can rest assured it will retrieve your data if it's there.
Retrieve data from accidentally deleted files, lost or formatted partitions, data lost due to virus attacks, system crashes, or data lost by the Time Machine.
It is free to download and supports all leading macOS versions, including the 10.14 release.
3,165,867 people have downloaded it
This system is also very easy to use, in just three easy steps:
Step 1Install the application and choose the desired location
Download and install the software on your Mac computer, then open it and select the external hard drive, partition, or location where you want to retrieve data.
Step 2Start the scan to retrieve your lost data
Click the Start button. The software will now scan the selected drive and display all retrieved data in an easy-to-scour list.
Step 3 Preview the recovered files and save them in your chosen location
Review and select the target files, then launch the recovery process. That's it. The software will restore your lost data.
Conclusion
As you can see, how to format an external hard drive Mac is not particularly complicated. The Disk Utility allows you to format the desired drive to the desired system in a blink of an eye. Backing up the data on your drive with Time Machine also allows you to avoid the recovery hassle. If you still lost some data, you even know which software to use to recover all lost files.
Now it's your turn. Use this guide to format your unreadable external drive, download, and use the data recovery software if needed, and don't forget to share this article with your Mac-addicted friends. They might make good use of it too.
Most external hard drives are designed to work for Windows computers. So if you’re trying to connect an external hard drive to a Mac, you might have to format the drive before you can use it. Here’s how to do that:
How to Format a Hard Drive for Mac
Note: If you already used your external hard drive on a PC, be sure to back up any files on it. Formatting your drive will wipe out all the data in it.
Connect an external hard drive to your Mac. Some external hard drives need to be plugged into an outlet to work.
Go to Spotlight Search, type in Disk Utility, and click the first option. This will open the Disk Utility app, where you will find all the internal and external drives that are connected to your Mac.
Then click View in the top-left corner of the window and select Show All Devices.
Click the external hard drive you want to format. You can find this on the left-hand side of the screen under External Hard Drives. For the best result, select the disk (the highest option in the external tree).
On the top menu, click Erase. This will open a small pop-up window with a warning that erasing the drive will delete all data stored on it and that it can’t be undone.
Choose a name, format, and scheme for your drive. You can choose whatever name you want, and you should choose GUID Partition Map for the Scheme in most cases. However, you can choose between the following formats:
Mac OS Extended (Journaled) is the best option for most Mac users since it is compatible with all Macs.
APFS (Apple File System) is only for newer Macs running macOS 10.13 or later.
exFAT is compatible with both PC and Mac.
MS-DOS (FAT) is also compatible with Mac and PC, but you can only transfer files smaller than 4GB.
When you’re done with providing the setup details, click Erase. This will immediately wipe the entire drive.
If you get an error message that states, “Erase process has failed. Click done tocontinue,” don’t freak out about it. This is an issue caused by Time Machine running on your externaldrive.
You will need to turn off Time Machine. You can do this by opening System Preferences and unchecking the boxnext to “Back Up Automatically”.Then click Options beside “ShowTime Machine in menu bar.” This will open another window. Click Cancel and it will turn off the Time Machine.
After you turn off the Time Machine, redo steps 4 to 6.
How to Partition anExternal Hard Drive on Mac
If you have formattedyour drive, you can then partition the drive, which will splitthe drive into two formats. This is perfect for anyone who uses Macs and PCsand wants to transfer files between the different operating systems with anexternal drive. Here’s how to do that:
Open Disk Utility and select the drive that you want to partition. It is best to click View > Show All Devices so you can selectthe disk rather than a container.
In the top menu, select Partition.
Then click the plus sign at the bottom of the pie chart. Every time you click this plus sign, a new partition will becreated.
Choose a name, format and size for each partition. You can also change the size of each of the partitions bydragging the white dots at the edge of the circle.
Finally click Apply.
Why Partition a Hard Drive?
Partitioning an external hard drive allows youto have separate drives for Mac, PC, and any other operating system. Now youdon’t have to go out and buy hard drives for every computer you use.
Thunderbolt External Hard Drive Mac
A partition also gives you a dedicated space foryour Time Machine back-up files or a bootable backup of your operating system.It also helps protect your data if your drive gets infected with malware, as itwould be contained within one of the partitions.
Setting Up An External Hard Drive For Mac
Now that you know how to format an external drive for Mac, check out our blog on the difference between an HDD and an SDD.
Was this article helpful?
Format An External Hard Drive For Mac
Related Articles
0 notes
Text
What Is A Free Photo Editor For Mac

Easily edit your photos with Canva's photo editor! Add filters, frames, text, and effects with our free online photo editing tool! It is a free photo editor for Mac which is available in 26 languages. This can handle a large number of images by editing them in one go only. It has a feature of non-destructive editing which can.
Best Free Photo Editor For Macbook
Free Mac Photo Editor Download
Free Photo Editor For Mac Desktop
Download Free Photo Editor For Mac
What Is A Free Photo Editor For Mac Shortcut
Free Photo Editor For Mac Like Photoshop
January 02, 2020
18 min to read
Most free photo editors available on the App Store are quite basic, offering just a limited number of filters and allowing you to easily and quickly liven up your photos before posting them on social media.
But if you’re an aspiring or professional photographer, you probably need a more powerful app with a broader set of tools to use your creativity to the fullest. Besides, you probably use your Mac for photo editing because working on a large screen makes it possible to adjust the slightest details.
1. Apple’s Photos (Built-in app)
Apple’s Photos app is included for free on all recently released Macs. It does a good job at organizing your photos, but its collection of photo enhancement tools leaves much to be desired. Hopefully, our selection of the best free programs for photo editing on Mac will help you choose the right app to suit all your creative needs.
2. Luminar (7 days trial)
Luminar is another full-featured photo editor that’s popular with both Mac and Windows users. It can work as a standalone app as well as a plugin for such popular programs as Apple Photos.
Luminar uses Artificial Intelligence to enable sophisticated yet quick photo enhancements. Among these AI features are Sky Enhancer, which adds more depth and detail to the sky in your photos while leaving other areas untouched; Accent AI, which analyzes a photo and automatically applies the best combination of different effects to enhance your image; and Sun Rays, which allows you to place an artificial sun and adjust the lighting to your liking or make the sun rays already in your photo look even more incredible.
Best Free Photo Editor For Macbook
Luminar has over 60 filters you can apply to your photos to enhance them in a moment. Luminar also provides a set of powerful tools for cropping, transforming, cloning, erasing, and stamping, along with layers, brushes, and many more incredible features. Luminar supports the Touch Bar on the latest MacBook Pro, making photo editing even more effortless and pleasing.
3. Photolemur 3 (Free Version with watermark)
Photolemur is a relative newcomer on the photo editing market but it has all the chances to win the favor of beginner photographers and hobbyists. Running on Artificial Intelligence, Photolemur is a completely automatic photo enhancer, meaning that it does all the editing for you in no time. It has the simplest interface, with only a few buttons and sliders to adjust the enhancement to your liking and view the before and after results.
All you need to do is choose a photo (or a few) that you want to improve, drag and drop or import them using the Import button, and let the program make enhancements. After it’s done, you can compare the edited version with the original image by using the before–after slider and, if you want, adjust the skin tone or even enlarge the eyes using additional sliders. Pretty easy, huh?
Photolemur also offers a number of impressive styles to touch up your photos and give them a sophisticated and professional look. With this app, you don’t need to stuff your head with photo editing nuances and terms. Just run Photolemur and watch the magic happen!
4. Aurora HDR (14 days trial)

As you probably can tell from the name, Aurora HDR is designed to help photographers enhance their HDR photos, making them even more detailed and beautiful. It’s an ideal tool for editing your photos, with an extensive collection of more than 20 tools including details, tone, mapping, color, glow, and vignette. Each tool has its unique selection of controls to adjust its effects.
Aurora HDR enables you to work with brushes, layers, and masks, and provides a number of automatic AI tools for recognizing and removing noise, enhancing colors, lighting, and details, improving clarity, and adding contrast to dull areas while leaving other areas untouched.
Aurora HDR does a great job dealing with difficult lighting situations and creating full-of-life images while being easy to use.
5. Pixelmator (Trial 30 Days)
Pixelmator is a photo enhancer beloved by many Mac users, as it offers a good combination of a modern and simple interface, the ability to work on multiple layers, and powerful features that take photo editing to a whole new level. With so many editing tools, brushes, and effects, you can enhance your photos to your liking. You can choose between two versions of Pixelmator – standard and pro – depending on your needs. The standard version is great for basic photo editing with its selection of essential tools and filters, while the pro version is packed with extra brushes, tools, and effects that let you push your creativity to new boundaries. You can decide which version is suitable for you according to what features you’re looking for in a photo editing app.
6. Adobe Photoshop Elements 2020 (Trial link)
Photoshop Elements isn’t as affordable as other photo enhancers for beginner photographers. But luckily there’s a trial version available, so you can check it out before deciding whether this app is worthy of your money. Photoshop Elements acquired many powerful features from Photoshop, only Elements is simplified for amateur photographers and enthusiasts. It includes a good number of effects and filters, plus automated editing options for improving lighting, color balance, and exposure, and even opening closed eyes and reducing the effects of camera shake.
In addition to all of these awesome features, Photoshop also offers editing modes for beginners, intermediate users, and experts. Beginners will probably prefer Quick mode, as it focuses on essential tools to quickly enhance your photos by improving color, lighting, and other basic settings. Guided mode provides intermediate users with step-by-step guidance with more professional features like artistic effects, skin tone correction, and background replacement. Expert mode gives you full access to the app’s really powerful editing features and is ideal for creating stunning images.
7. Affinity Photo (Free Trial)
Affinity Photo’s interface may seem overwhelming at first, especially for novices, but when you come to grips with it you’ll find that the app is just what you’ve been looking for. Its numerous professional tools, effects, and filters encourage you to get creative with your photos. Among the coolest features Affinity Photo has to offer is a before and after view to compare the original photo with its edited version.
Affinity Photo works with 15 file types, including common ones like PDF, PSD, JPG, and GIF as well as some less popular ones. The app amazes with its abundance of basic and top-notch editing tools, allowing you to tweak your photos using all possible kinds of instruments. Affinity Photo allows you to edit HDR photos, apply artistic filters and effects, play with masks and layers, and create breathtaking compositions by combining several images in one. If you find its interface a bit much and are afraid of getting lost in all those advanced tools, you should probably look for something more suitable for your level. But Affinity Photo is worth mastering.
8. Google Photos
Google Photos is a popular cloud storage service for photos and videos. It can’t boast countless masterly tools like other photo enhancers that we review in this article, but it includes some fundamental features like filters, color adjustment sliders, and transformation tools.
Although Google Photos may not be that helpful when it comes to editing photos, it does a pretty good job at storing high-resolution images and videos with 15GB of free online storage, compared to iCloud’s mere 5GB (which you can upgrade to 50GB for a monthly fee). If you’re planning to go on a trip and take plenty of photos, then it might be smart to sign up for Google Photos to use that extra storage space when you come back.
9. PhotoScape X (Free)
A relatively new photo editing app, PhotoScape X has been gaining popularity with many Mac and PC users since its release in 2008. Its interface is simple but unconventional, with a number of tabs running along the top of the window. Each is responsible for a specific stage of editing. The Viewer tab allows you to browse and organize your photos. After you pick a photo, you can switch to the Editor tab, which includes a broad set of instruments, filters, and effects and a useful feature that enables you to compare the adjusted photo with the original.
The next tabs, including the Batch tab, mainly concentrate on editing and renaming multiple photos at once. The GIF tab allows you to easily create an animated GIF from a group of selected photos.
The downside of PhotoScape X is a lack of selection tools, so all changes are applied to the whole image rather than to a selected part.
10. Gimp (Free)
Gimp is a free open-source photo editing app that has been on the market for over 22 years and is available for Windows, Mac, and even Linux. Unlike many free apps, Gimp doesn’t have any ads or in-app purchases. Its grey interface might seem a little old-fashioned and it may be a bit sluggish when it comes to complex effects, though.
Gimp offers a vast collection of advanced tools that hardly any free photo editor can boast. It has numerous enhancement options such as clone and heal brushes, layers and channels, accurate selection tools, a number of transformation instruments, and, of course, color adjustment controls. Gimp is one of the most powerful tools for enhancing photos and is beloved by so many users for its price (free) and versatility. But if you can’t come to grips with Gimp’s interface, it may be worth paying some cash for a more user-friendly program.
In an era when people like selfies and adding filters and stickers, in addition to photo recovery, there comes another ravishing feature i.e. photo editing. Luckily, there are a number of free photo editing software for laptop and desktop, which can optimize an ordinary picture into a breath-taking panorama, and help people out with more photo editing phenomena, including restoring old image.
With best photo editing software free application, one can easily covert their simple images into Instagram styled stills. Resizing, cropping, filter application and reconstructing the images are some of the features that a photo editing tool holds, but you can expect more from the following best 17 free photo editing software for Windows & Mac.
1. GIMP – Best Open-Source Free Photo Editing Software for Windows 10
GIMP is an open source free software that is compatible with Windows 10. It is incredible in functioning and gives you flawless results. Adorned with power pack photo editing tools, it has an interface similar to Photoshop. Healing tools, custom brushes, clone stamps are ravishing tools in the toolbar. Selection of isolated areas and editing them to become perfect is what the application offers further. One can eliminate the flaws and makes it up to a picture-perfect standard.
Open source and totally free.
Similar functionality to Photoshop.
Cost a little longer time to get familiar with the operation.
Support RAW image only after installing RAW loader
2. Paint.net – Best Free Photo Editing Software for Beginners with Windows 10
The functionality of Paint.net makes it easy to use and simplicity becomes a main selling point (It is actually free). The application carries fine manual control along with accessible interface. Used for trivial tasks, it is there to turn your picture into something wonderful. The toolbar carries the options of layers, undo history, filters, plugins and 3D rotate/zoom function.
Easy to use for beginners
With minimal options but able to complete almost all tasks
Poor support for RAW image
3. Photo Pos Pro – Best Free Photo Editing Software for Both Beginners and Experts
With an interface more accessible than GIMP, Photo Pos Pro carries two modes. For experts, it plays as a role close to Photoshop. For beginners, it provides a lot of preset templates, filter effects and auto fix function. Accompanied with advanced photo editing tools, there is an optional “novice” layout. While the advanced layout carries both i.e. layers and layer masks. It can remove the flaws with brushes to eliminate blemishes and carry scripts to save time and refine the photo to maximum.
Friendly to both beginners and experts
Rich templates and presets
Good support for RAW image, though not for all. See how to preview RAW image.
4. PhotoScape – Best Free All-in-One Photo Editing Software for Windows 10
Free Mac Photo Editor Download
Packed with advanced tools, PhotoScape is absolutely free and compatible with Windows 10. A beginner can easily use it to reform the images and feel the change. The filters incorporated in the app are outstanding. The features include raw conversion, photo splitting and merging, animated GIF creation. The images are going to get a new and outlook with this amazing application.
Limited editing functions
Not only a photo editor but also photo viewer, batch editor, RAW convertor, GIF maker and printer.
Poor support for RAW image editing
5. Fotor – Best Free Online Photo Editor for Windows 10
Fotor is getting limelight with a ravishing feature of online accessing and fashion elements. Users can easily upload and save images from/to cloud, like Dropbox, Facebook and its own cloud database, as well as Windows 10 computer. The images can be redesigned with ravishing filters and healing tools. You can feed a pile of images at once and the software is going to edit them simultaneously. At the end you are going to get a candid still that is worth saving.
Upload and save photos from/to cloud
Eye-pleasant UI
Fashion and various automatic beauty functions, effects and stickers.
Poor support RAW image
6. Pixlr
Pixlr is a world-class photo editor with a lot of newly optimized features to provide excellent finishing to the edited photos and videos. It is available for Android, iOS, and computer browsers for the users. If you want to do simple editing with the photos and videos on your device, then the basic free version of Pixlr is enough to meet your demands. And if you want to edit the photos professionally, then the Pro version of this app is available for you. The simple to use interface of this software is pretty much appealing for the users. That’s why Pixlr is having a lot of fans without any doubt. The total installation size of this software is also not so big, which is indeed the best part of it. So, definitely, we would suggest you Pixlr software for your PC to accomplish your task of editing photos and videos hassle-free.
7. Picasa (Predecessor of Google Photos)
Picasa is yet another very brilliant choice for the users which is certainly having one of the fascinating editing tools for the users. Picasa software is compatible both with Windows and Mac OS. This free online editing tool was launched by tech giant Google way back in the year 2002. That’s why Picasa is having a lot of popularity among the PC users because tech giant Google itself certifies this software. Picasa is having one of the finest photo and video editing tools in it, which are very useful for the users. Additionally, you can also add customized features in this software online which you can use to edit your photos and videos hassle-free. Users can also add some of the latest launched video and photo effects like Super MO video mode, Live Focus mode, Ultra-wide-angle mode, Hyper lapse mode, Panorama, etc. Because this editing software is Google certified software, that’s why there is no doubt that it will deliver the best possible stuff to its users. The edited videos and photos can be shared directly from Picasa using the Google Plus file sharing feature. So, definitely, Picasa is a great choice for the users as an excellent photo editing tool.
8. Pic Monkey
Pic Monkey is another trendy choice for the users as an excellent photo editing software. You will get all the editing tools and features in a single editing window, which is an excellent feature for sure. The output edited file can be downloaded in a variety of different file formats. Some new and latest themes and effects are also added in this software by its developers, making it look more attractive. Overall, Pic Monkey software is a fantastic option for the users, which is delivering the quality stuff in the way it was meant to be. The quick-to-learn feature of this software will help you out to learn about the basics and working of the Pic Monkey software.
9. BeFunky
The only positive about this photo editing software, which makes it unique from other online photo editing software packages, is its intuitive graphic user-interface. The easy to use interface of BeFunky software is very well developed and maintained by the developers and due to this compatibility feature, BeFunky software become a great choice of all time for the users. Users will get all the basic photo editing features right on the first launch window of this software. The advanced and newly released photo editing features can be browsed in the Pro version of this software, which is not very costly like other software packages are. The graphic user-interface of BeFunky software is very well developed by the developers of this photo editing software. Moreover, this software is also compatible with almost all devices without any restrictions. So definitely, BeFunky is a good option as an excellent photo editor tool for sure. You can use this software on your PC according to our recommendation, and we hope that you will get satisfactory results for sure.
10. PhotoCat
Free Photo Editor For Mac Desktop
Another very decent kind of Photo editing software for the users developed with a lot of optimized photo editing tools. Inside the preview window in this software, you can apply as many filters and themes on the photos to make a preview of them. Moreover, several other basic editing features like photo cropping, exposure, composure, and insertion of the text can be experienced in this software as well. The graphic user-interface of this software is also pretty much decent, which is easy to use and understand as well. Some newly launched and optimized photo editing tools can be used experience in the Pro version of this photo editing software. There are a lot of different insertion tools available in PhotoCat software, which can be very handy for the users. Most of the reviews regarding this software are positive, and we too hope that you will like the features and functioning of this software after installing it on your PC. Though it is not so easy to use, once you learn about its functioning, then you will surely get satisfactory results.
11. SumoPaint
Basically, SumoPaint is not a typical online photo editor. There are very few basic photo editing tools available on this software that can be accessed offline as well. The overall interface of the website is pretty much decent. Once you click on the URL of the SumoPaint website, the website will launch in a fraction of seconds, which shows the optimization power of the SumoPaint website. Furthermore, if you want to experience some more editing features/tools apart from basic features, then you may switch to the premium version of this software. To purchase the premium subscription, you have to spend 4USD per month. You will get login credentials which you can use to login to this website for an excellent editing experience like a professional.
12. DarkTable
DarkTable is another absolute stunner performer of this list, which is certainly one of the best photo editing software for the users. The main reason why this software is so popular is that this software is compatible with all three major Operating systems of PC, which are Windows, Mac, and Linux OS. Furthermore, this software is open-source software, which means that any user can use this software hassle-free without any charges. DarkTable software is pretty much similar to Lightroom photo editing software, which is another trendy choice for the users. However, DarkTable is having the edge over the Lightroom software because the overall features provided by DarkTable is more than Lightroom. The graphic user-interface of DarkTable is also more attractive than Lightroom, and that’s why majority of the users uses the former in their PC’s. The editing tools available on this software are excellent in their respective fields.
13. Picktorial
If you want a photo editing software which is only compatible with Mac OS, then there is no other choice better than Picktorial software. The enhanced features with which this software was developed are just magnificent for the users. Picktorial has a decent rating of 3.5 stars out of 5 stars, which is a very awesome part. Picktorial is very much popular among users from all around the world. The main downside of this software is that it is a bit more expensive than other premium photo editing tools of this segment. The annual premium subscription of PickTorial software will cost you around 60$. Picktorial software is a good choice for users with a lot of incredible features and editing tools in it.
14. InPixio Free Photo Editor
InPixio photo editor is another incredible choice for the users, which is having impeccable features to attract the users in large numbers. There are more than 100 different themes and photo effects available on this software which users can use to edit photos and videos hassle-free. As per our thinking, InPixio is a beginner level photo editor which is ideal for all the beginners in this photo editing industry. The graphic user-interface of InPixio is also pretty much enhanced and developed. The overall layout and texture of this software justify that InPixio is an excellent choice for the users whatsoever the reviews and ratings are. If you seriously want to learn most of the basic photo editing techniques, then you must get switched to InPixio free Photo Editor tool. You will surely observe that you are making the most out of this software.
15. Capture One Express
Capture One is another big name in the industry, which is having some excellent stuff for the users. This editing software is not having too much popularity, probably due to the professionalism for digital camera users. There are separate editions for Sony and Fujifilm cameras.
16. Snapseed
Another very advanced and optimized photo editing tool available for both iOS and Android users. Snapseed is one of the most significant kinds of photo editing software that can provide some excellent results to the users for free. Moreover, any user can use this software for editing purposes. It does not matter whether you are a beginner, intermediate, or expert. You can use this software to accomplish editing purposes hassle-free without any problem. There is a wide array of filters and themes present in this software which makes edited photos and videos to look more attractive, composed and beautiful as well. Snapseed is going to be your next sure shot choice for sure.
17. Photoshop Express Mix/Fix
Last but not the least, Photoshop Express Mix becomes our last choice to end this great list of top photo editor software packages for PC users. This excellent photo editing software offers a lot of exciting photo editing features to its users who are adorable for many reasons. The customizable settings of this software will surely let you feel that you are editing photos and videos like a professional. The main advantage of installing and using this software on your PC is that you will get to experience a great kind of graphic user-interface with a brilliant layout and graphics as well. However, to use this software, you need to login to this software using any of your social media apps like Facebook or Twitter, etc. So, it is up to you whether you are going to use this software on your PC or not because it requires a login process to be done.
Download Free Photo Editor For Mac
So, what are you waiting for? The list is out for you to enjoy best free photo editing software for Windows & Mac computer. Now you can modify your images on your desktop and give a new life to the stills, then convert images to video.
What Is A Free Photo Editor For Mac Shortcut
Related Articles
Free Photo Editor For Mac Like Photoshop
Please enable JavaScript to view the comments powered by Disqus.
0 notes
Text
Massive For Mac Ableton

Massive Ableton Mac
Massive For Mac Ableton Plugins
bo9.netlify.com › Massive Ableton 9 Download ► ► ►
Free DJ Mixer Software Download. Features include Auto BPM, recording mixes, adding samples and loops, live effects and more. Powerful for professionals, easy for beginners. Try now on Mac or Windows. Zulu dj software for mac itunes.
Massive Ableton Mac
Direct Download link
Ableton Live 9 Standard Download
Benefits of shopping at Ableton. Short shipping times (1-4 days) 1 year of warranty; 30-day refund period for Push - learn more; Questions? Don’t hesitate to get in touch with us if you have any questions before you buy Live or Push. Ask us a question. Make some space. ValhallaSupermassive has been designed from the ground up for MASSIVE delays and reverbs. Blow your mind and your music to new levels of consciousness and experience. Get ready for luscious clouds of reverb, otherworldly delays, swelling waves of feedback unlike any you’ve heard before. All Valhalla plugins are self documenting, so just roll over the controls for the tool tip. Massive plugin free download. Multimedia tools downloads - Native Instruments Massive by Native Instruments and many more programs are available for instant and free download. Massive Ableton 9 Download For Mac; Ableton Live 9 Standard Download. Feb 16, 2015 The Beginners Guide to Ableton Live 9 - Understand the Basics of Music Production in Ableton Live 9 - Duration: 55:36. Tomas George 210,097 views. Apr 19, 2017 Direct Download link. Ableton Live 9 Free Download is the incredible audio software which is designed.
Feb 16, 2015 The Beginners Guide to Ableton Live 9 - Understand the Basics of Music Production in Ableton Live 9 - Duration: 55:36. Tomas George 210,097 views. Apr 19, 2017 Direct Download link. Ableton Live 9 Free Download is the incredible audio software which is designed for your help to produce the record and edit multiple musical forms. It may seem some strange because the instrument comes prepared with the number of a dedicated parameter. It offers you the helpful standard and reliable tutorial to learn how to install software.
Ableton Live 9 Free Download is the incredible audio software which is designed for your help to produce the record and edit multiple musical forms. It may seem some strange because the instrument comes prepared with the number of a dedicated parameter. It offers you the helpful standard and reliable tutorial to learn how to install software.
provides the users the opportunity to record and change clips, set the flow of signals, make new clips. You can also modify the speed of unit playback, set the speed, access and edit satisfied even many audio results and tool by using its warping feature. Users can also add the working conditions You can also download Microsoft Toolkit.
Download vst plug in file ableton. Hi,dll files are the engine of a specific vst instrument or fx.don't bother to click on them as nothing will happen mate.here's what to do to install your vst's.1 - copy and paste all of your dll files.the ones with the little cogs on to a new folder and name it vst plugins or whatever you like2 - open up live and go to preferences3 - here you can set where your vst plugins and fx are located4 - press scan5 - all done!!!just remember to copy all contents including any patch banks that came with your cd to the same folder as your dll files.hope this helpsrob.
Ableton Live 9 Crack:
Ableton Live 9 lite Serial number offers you to the automate tools and converter controller, select many audio and its results. Its many other great features make use-able to produce unique music and use this music in the song which can play onto the stage. With Ableton Live 9 reviews you can also set the sound for a start and the end of the audio cuts, perform primary editing forms like the copy, paste, cut, start, resize, crop, split, fix the timing error and mix any number of the track. It proves to be fully-featured software which is helpful for users to play many editing and mixing services.
Ableton Live 9 standard is the best music creating software. It gives you the simple and easy method to produce, record and editing music. You can easily play music from the whole natural interface. Ableton Live 9 suite saves everything in the system and works in the real-time. Users can design and adjust their musical thoughts without any issue. It provides its vast selection of tools, volumes, kits for making any form of music.
Massive For Mac Ableton Plugins
Features of Ableton Live 9:
Record and edit music
Produce your song
Reliable tutorial
Change the speed of playback
Chang and set the volume
Easy to use
User-friendly interference
How to use Ableton Live 9?
Start download
Start installation
All is done
Enjoy now
Download link
(sociallocker)Download(/sociallocker)
Massive Ableton 9 Download Full
Ableton 9 Download
Related posts:
Magix Music Maker free. download full Version With CrackEasy Video Maker Serial Key free. download full Version With CrackSony Vegas Pro free. download full Version Crack
Massive Ableton 9 Download Torrent
Movavi Video Editor Full Version Free Download
Massive Ableton 9 Download For Mac
error: Content is protected !!
1 note
·
View note