
Last Seen Blogs
juliette-s-diary
Juliette's diary
divorce-enjoyer
NEWSFLASH, ASSHOLE!
trone-jurnacist
Why Hello There Trevelers

arturocastillojh
Melt

shadowquirkuser
Shadowquirkuser
Text
KNB217_DigitalCreatures
Assignment_2
Vergil Lin (N9634819)
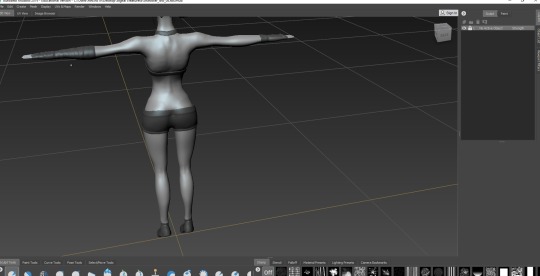
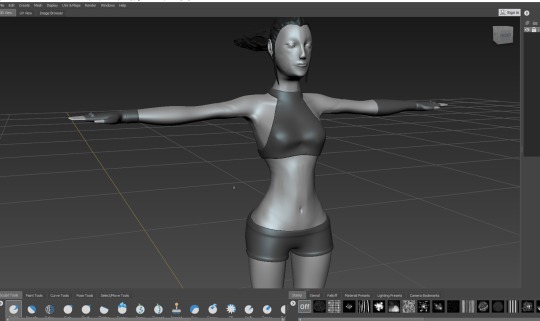
In this assignment, we are required to create a human base creature and rig for it. The whole process of this assignment was attracted me very much because I am pretty interested in character design. On the one hand, this assessment is a test which is not only for our technology skills but also for our design abilities. During this process, this blog is working on recording to help me find out the problems and reflection.
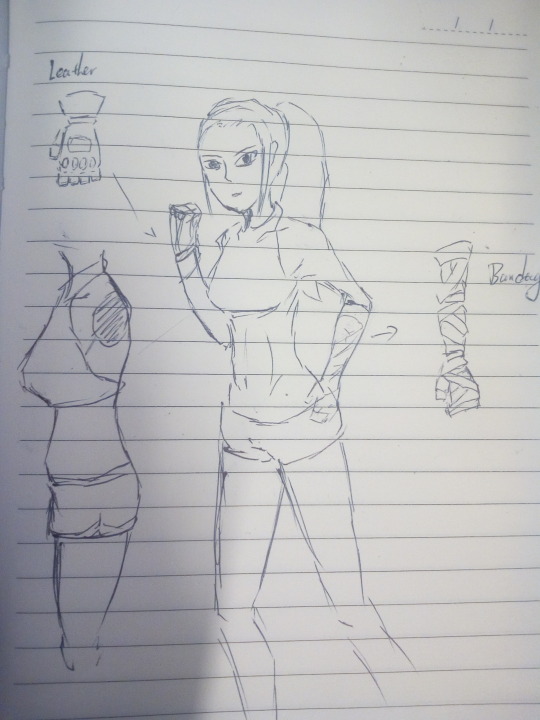
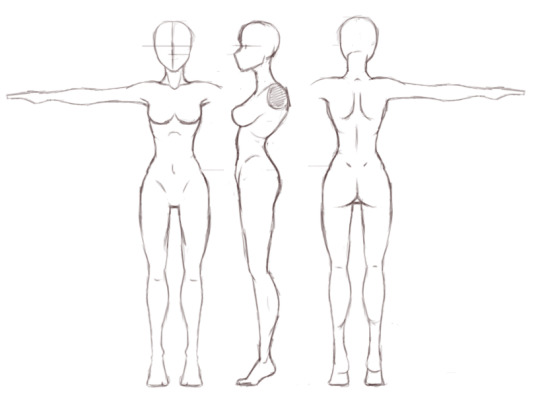
1.Design
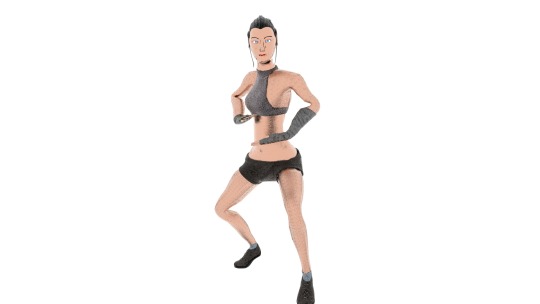
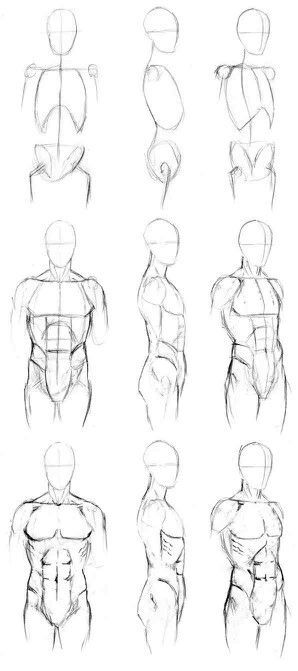
For this assignment, we need to design a simple human base creature, and then draw textures and rigging for it. I was planing to design a woman who is just back from boxing gym. So that she wearing a vest, a short pants, a pair of gloves and sport shoes. I designed a ponytail haircut for her to make the design as real as possible. Although I don’t want this character looks too boring, I still not skilful enough to put some very difficult design. Based on that, I only draw two different gloves that won’t be too monotonous.
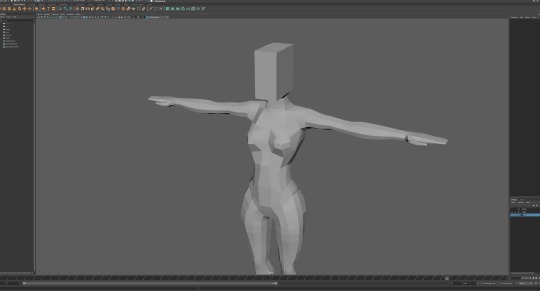
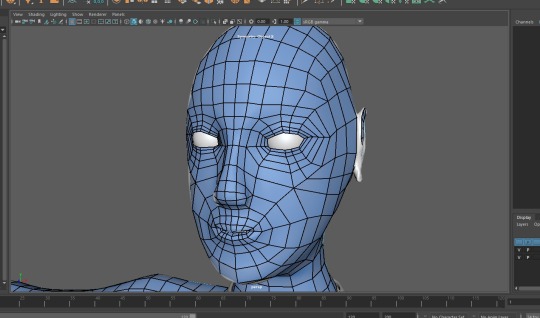
2.Base Mesh
This step should be my favourite part of the whole process. I already have some experience about base mesh modelling and the structure of human. during this process, I rewarmed my knowledge about human structure and find out some very interesting things such like I realise that the waist is the most beautiful part of woman body...
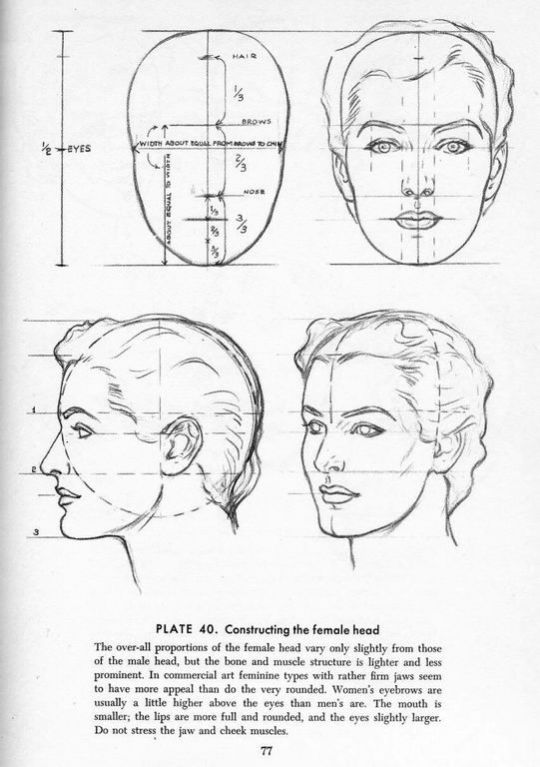
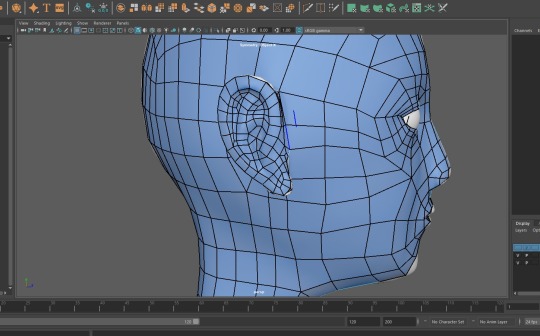
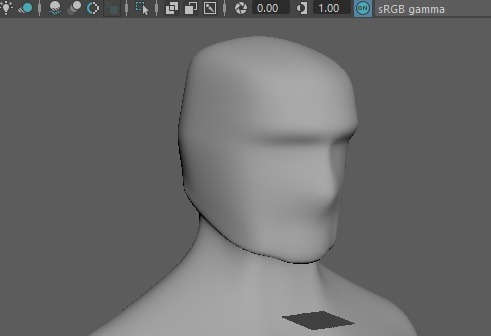
Any how, there still few challenge for me. For example, I still remember the shame about last assignment that I draw a face to my create. This time, I spend lots of time and find some tutorial about how to create human head. After a series of practice, I think I got a not bad human head. Meanwhile, I also learned a lot about the structure of human’s ears. I can’t imagine how many work I will get when I retopo the mesh of ear.
3.Craving
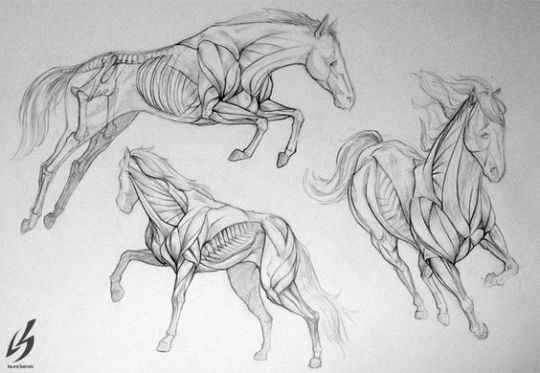
High poly mesh craving is a meticulous work that testing the understanding of the muscles and bones. I spend lot time on researching the structure of the boxing athletes and really pay pretty much attention on the firm abs. maybe the result is not satisfactory enough, but I really enjoyed in it. In this step, I learned some new knowledge about how to use Mudbox better. I believe that the interest and skill can be the hardest base stone of my career in the future.
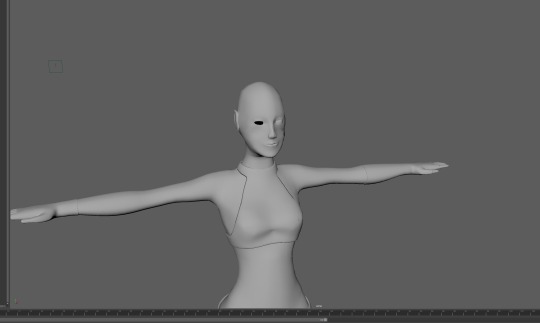
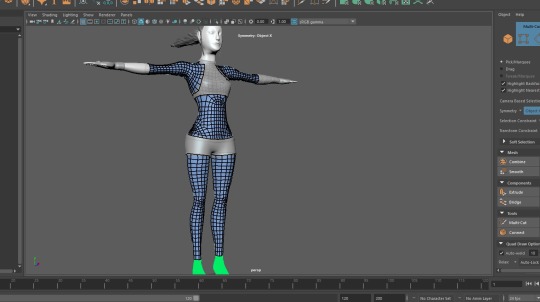
4. Retopologize
The retopologize part is the hardest ordeal about the patient. On the one hand, you have to make sure that the distribution of faces must be logical and connect with the details from high poly mesh. But overall, this part is not very difficult if keep be careful and patient. Another important thing is that I got a good point about the mesh. I knew the low poly mesh can be smooth after a communication with classmate. After I learned how to use the “soften edge”, I have never worried about the clear and sharp edge of low poly meshes.
5.Rigging
I have np experience about rigging before. B ut Rigging is so important that all the 3D animation and video game characters needs be rig. Basic rigging is not vert difficult. Tutorial and workshop gave lots of detail about how to rig. Although the rigging is finished, I still need many practice because I think my character skinning have a huge space to improve. In the rigging part, the worst problem I met is the orientation of the knee and elbow. At the begining I found out that my shoulder controllers were not in the correct position. After asking tutor I knew that the orientation of the knee and elbow were wrong. I spend two days to find a balance in rotations and found out that every time I correct the position of joint, the rotation will change. It was really makes me disappointment. One day I was struggling in the rigging, I discovered that the orientation is depends on the orientation of curves. After that, I solved this problem very soon.
movement testing:
youtube
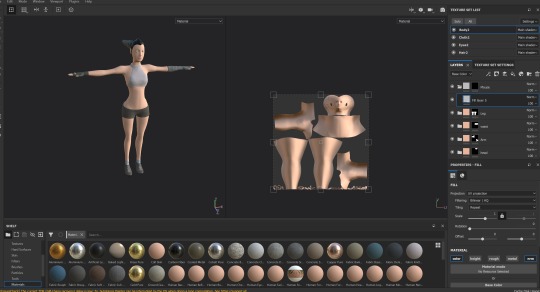
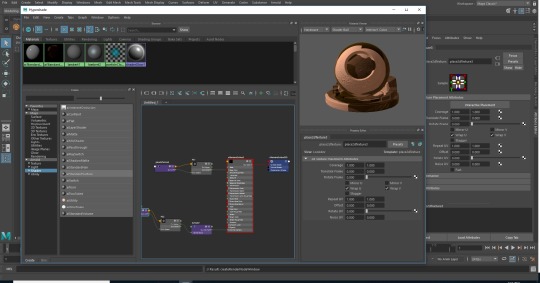
6.Texture
Texture part is a familiar part for me because the time I draw textures for modelling has been not very short. A clean UV map is really helpful for this step. Of course I knew there are many details are presented by texture, but I still have no good idea about those details in textures. I think I need to get a deeper understanding about colours.
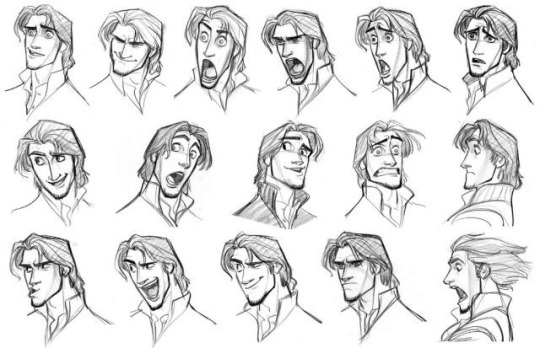
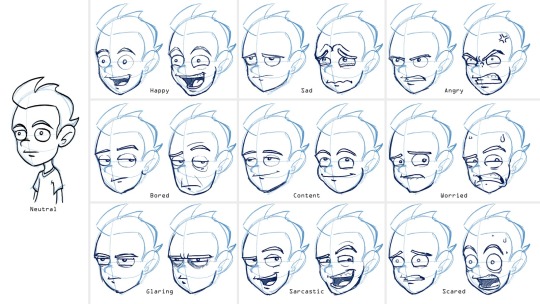
7.Emotion design
To make characters more realistic, their behaviour must be logical. Their emotions are same. I made some emotion design and analysed that how should present the. Unfortunately, my drawing skills and rigging skills limited my present.
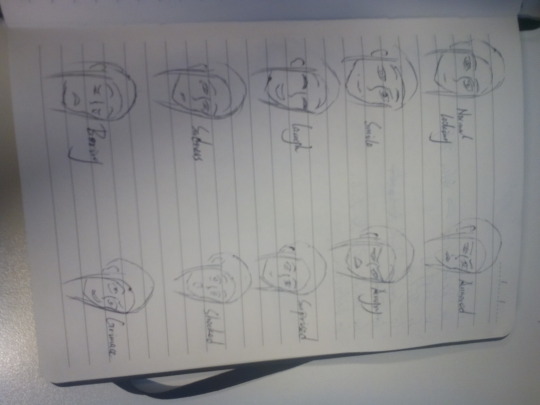
(I don’t know why the position is not correct....)
youtube
8. Render the Pose
9. Reflection
At the end of this whole process, I think I still need more practice to improve. The most important problem I have is not doing well in the detail. Next step I am going to do is read some book which talking about the drawing and color. I think it can be helpful for me to understand them. Also, I will practice my basic skills.
This is the Model of my character:
https://skfb.ly/6L8sB
0 notes
Text
KNB217_DigitalCreatures
Assessment_1
Vergil Lin (N9634819)
In this assessment, we are required to create two different creatures, practice and experience whole the process since design to final render. This process makes me uderstand that how those professionals work and the gap between me and them. Based on that, this blog is going to record the process, mistakes and where can be improved.
Exercise 1: Australia animal
Step 1: Design
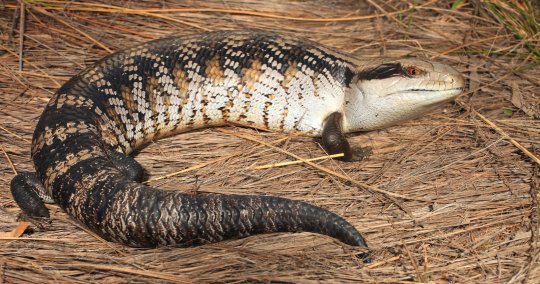
When I know I need to design a stylise australia animal, I am focused on the blue tongue lizzaed because I really like reptiles. When I finish the primary design and tring to model I realized that there is a contradiction. To prestente the characteristics of the lizzaed, I have to model a opening mouse and tongue for mesh. I gave this design up after consideration because I decided to try the exercise to improve the process concept rather than challenge the difficulty.
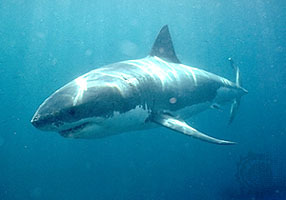
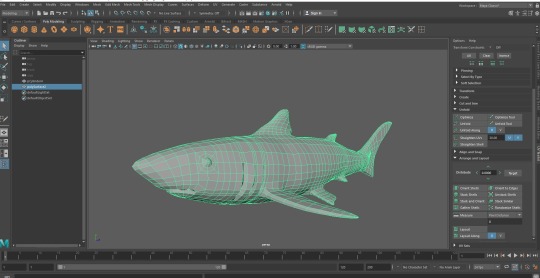
For the new design, I choice the shark to be my model. The great white shark is very famous animal in over the world but I only have a very impression of it. I did some research about this animal and got a basic detailed design of the shark.
Step 2 : Modeling
After finish the design, I started modeling. Because of the experience of props modeling, I start with cube and image plan. But when I finish the profile of one side. I find out that my model looks like a big bullet and too hard to finish the model. I have to give it up and start a new one.
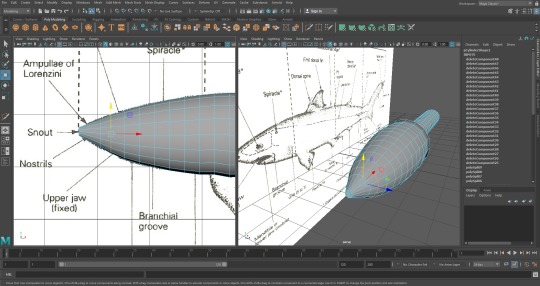
For the new mesh, it is much easier when I got some experience so that it is finished very soon. Overall, the mesh of shark is match with my design.
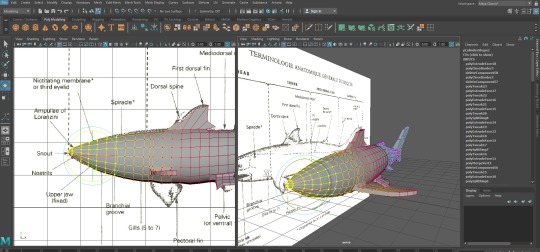
Step 3 : Craving
This step was completed in Mudbox. In this process, I created the eyes, mouse, tooth, gills and precaudals for the shark. The main thing in this process is I found out that the controling of Mudbox is not as easy as I thought. Shape I caved is not neat enough. But overall, it can finish my plan so that I didn’t pay too much attention on that.
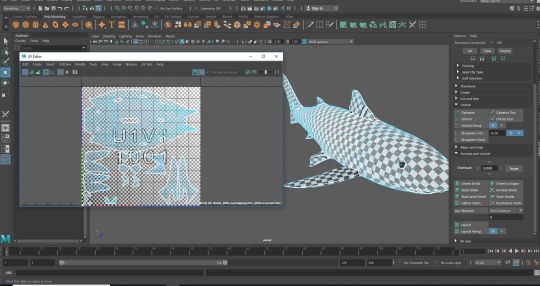
Step 4 : Retopologize
It is the first time I contact the Retopologize. I was very excited at begining because it is a really good way to re-planning the structure of mash and met the psychological needs of my OCD patients greatly. But very soon I realized that it is a easy work, but not simple. I have no plan about the retopologize so my first retopologize is very messy.
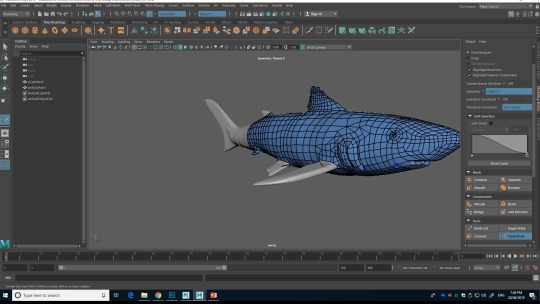
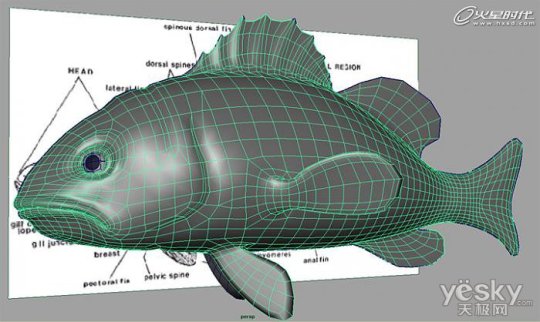
Fortunately, I find a blog which is talking about how to build a model of fish. It described whole peocess about work and gave me a overall cognition about this kind of work. I really learned a lot from this blog and I decided to re do my retopologize.
After that, I cutted a new UV map and it looks much better than before. That is a good basement for next step.
Step 5: Texture
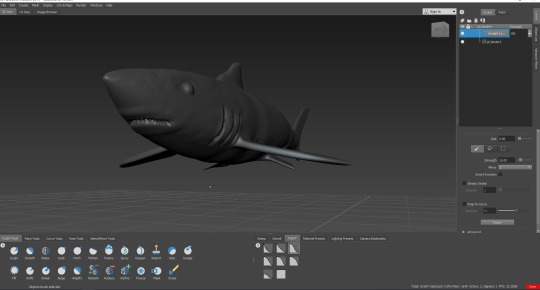
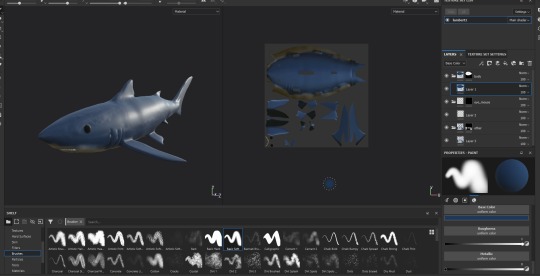
In texture part, I did it in Substance Painter because I am more familiar with this software. The main thing in this step is bake the normal map. All the work we did is service for it to let the model have better details while having the lowest possible number of faces. I also drawed the color for the model and simulated some detail of shark’s skin.
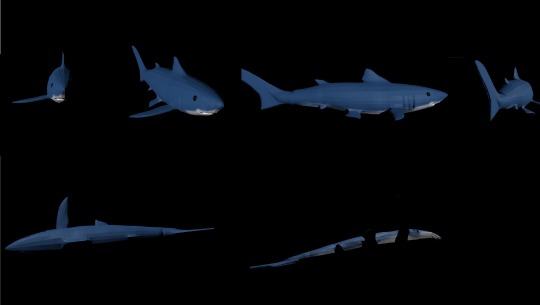
Step 6: Render in Maya
This step is not very hard for me baceuse most knowledge has been learned. I created lights and material for the mesh, imported the texture and rendered it. In this part, I find out that my normal map cannot cover the low poli mesh very well. Simultaneously, I find out that there are lots of knowledge of Maya I have not grasped. As a highly professional software, I think it is necessary for me to spend more time practicing and understanding this tool in the future.

Round Render for Model:
Final Model:
https://skfb.ly/6JLLQ
Exercise 2: Fintasy Creature
Step 1: Design
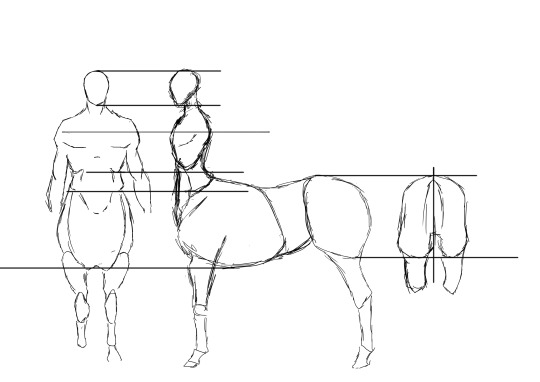
For creative the fantasy creature, I spend some time and decided to practice on Centaur. On the one hand, this creature is based on human and horse and I am not strange for those two kinds of creatures. On the other hand, I also want to try a different model and texture of creature. Based on that, I did some research od centaur, include some concept design of centaur, dissection structure of human and horse. After analysis about those research, I drawed a design for my centaur.
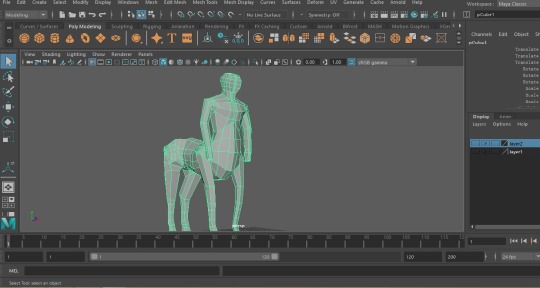
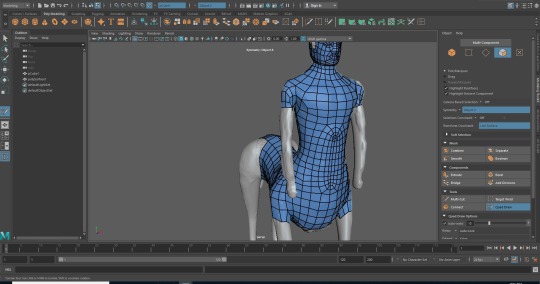
Step 2: Modeling
Model the mesh of centaur is not a very hard work theoretically, especially it is a low poli mesh. But I was a little over excited that I made too much detail on my low poli mesh and wasted too much time. I thought it will save my time if I did more on this step. On the other hand, I find out that for human model area, I have never build a human head so that my first mesh have a very sobot style head. After that, I spend few time and found a tutorial about how to build human head and then the head of my mesh looks a little bit better.
youtube
Step 3: Creving
Craving detail for centaur is the hardest part in the whole process because I found out that all the functions of Mudbox is uncontrolable. Every thing I want to crave gave me a massey shape on my mesh and makes it very absurd. Especially when I going to crave the muscle for the mesh, everything expands irregularly and makes the entire model resembles a skin tumor patient. I have to gave up most of muscle craving. Meanwhile, craving about tail of horse is a good attempt for me because I got some experience about how to crave hair in model craving software.
Step 4: Retopologize
Retopologize of centaur is also pretty hard for me not only brcause of the greater workload cause the time pressure but also because of the messy mesh gave me lots of confuse. So that my first retopologize ignored few retopologize rule of human and I almost finished it then found the problem.
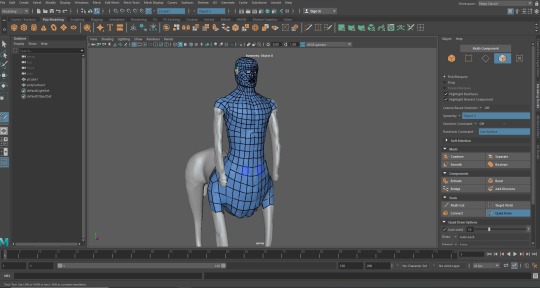
I deleted my old retopologize and made a new one. This time I planed the face and chest retopologize and got some summary about how to retopologize for human mesh.
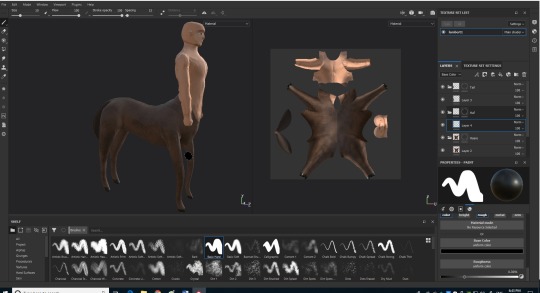
In the part of UV cutting, I was inspired by the leather cutting. I researched about the cowhide cutting and used it in to my UV cutting.
Step 5: Texture
This step is really humoristic because when I finished normal map baking and decided to drew texture for my model I found that I have not mdel enough detail fot face. But I have no time to restart whole work so that I have to draw a face for the centaur. On the other hand, human skin and hours fur got a good result instead and it is my first time to try texrure for animal fur.
Step 6: Render in Maya
This step basically repeats the rendering process of the previous model. Although there was a problem that my texture was not match with my mesh. It was solved very soon when I repeated the process and then it restored to normal.
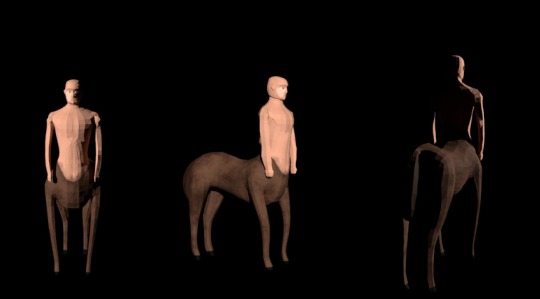
Final Model:
https://skfb.ly/6JLUL
Summary
This assessment is really inspired my enthusiasm and curiosity. I really enjoy this process. Those exercise also makes me understand the distence between me and those processionals. I already got a direction about how to improve myself and I will pay more resource and time on it.
Thanks for endure my nagging.
Reference List:
Britannica, E. (2019). Great white shark [Image]. Retrieved From https://www.britannica.com/animal/white-shark/media/642606/14265
David Dba (2019) Animal anatomy: Horse [Image]. Retrieved from https://www.pinterest.com.au/pin/400750066827395988/?lp=true
Lörd∞wörM (2019). How to draw male body structure. Retrieved from https://www.pinterest.com.au/pin/398779741990635155/?lp=true
Mahony, S. (2019). Blue Tongue Lizard [Image]. Retrieved from https://australianmuseum.net.au/learn/animals/reptiles/eastern-blue-tongue-lizard/
Riven Phoenix. (2017, April 23). Blender Modeling | Character | For Beginners | The Human Head-Part 2 [Streaming video]. Retrieved from https://www.youtube.com/watch?v=xXnMHD5LhgM
Vaibhav shah. (2011, November 7). Maya software makes weird style works: fish in the bathroom [Web log post]. Retrieved from http://design.yesky.com/3d/384/11632884all.shtml
0 notes
Text
KNB310_AdvancedAnimationProduction
Assessment_01
Vergil Lin (N9634819)
Object_01
Object_02
youtube
Object_03
youtube
Object_04
youtube
0 notes
Text
KNB_227 CGI Technology
Assessment 2_part C
Vergil Lin (N9634819)
In this assessment, our group was required to remake the environment in the animation Grandma’s House. After the discuss, we were going to remake the Lucy’s room.
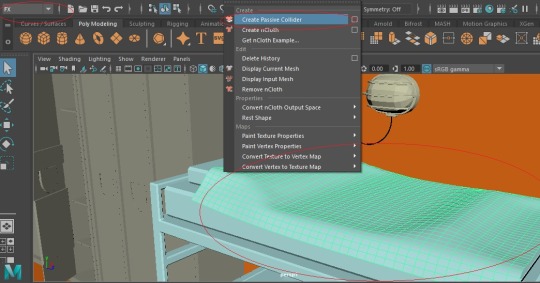
During the process of planing, we portioned the mition of each other. Because I thought I m good at modelling, so I decided to work more on modelling. Based on that, I worked on the bed, the door, the cup and the globe. At the later time of our work, I also made the texture of the shelves and pencils. For the functionality texture, I made a very simple functionality texture for the cup. It is a simple function to change the material and color. Of course, I also made the same functionclity texture for those pencils when group needs me did that.
It’s not so hard to finish the work because we paied much time on reference to that we all have very clear plan. I think the preparation is one of the most important parts of work. A good preparation can guide you finish the work quicker and beter.
When talk about the team work, I think the most important part in team work is the communication and the responsibility. When we met together, we exchanged our opinions of our work and I think that was a good communication because we improved our work and also improved ourselves. Also, responsbility is the basic of the team work. If there is some one who always cannot finish fis part of the team work, all the team will be influenced.
As for me, I learned few new things in this assessment. Although all the information has been taugh, you can still learn something such as issue fixing or detail improving. Meanwhile, I also rewarm the functionality texture in this process because it is really useful in our career. I know it took much time on reference or internet tutorial, but I also got lots of knowledge. It is worth.
So it is the thing I can talk about our assessment. I think I tried my best to be a good teammate. Of course there are still many things could be improve, I also will spend more time on practice and keep improve.
Thanks for watching.
0 notes
Text
KNB-225 Advanced Animation Performance
Assessment 2B
Vergil Lin (N9634819)
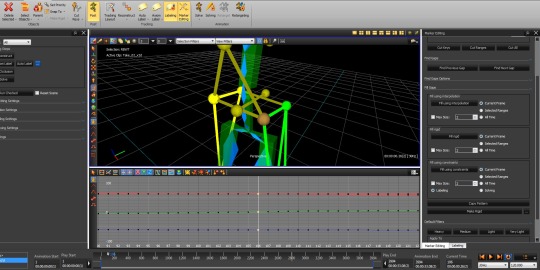
In this assessment, we learned about the Motion Capture Studies. This technology has a great future and has been used in huge areas.
In this part, we need to work with the nearly finished motion capture, clean it up and transform to a recognizable file in a more common area.
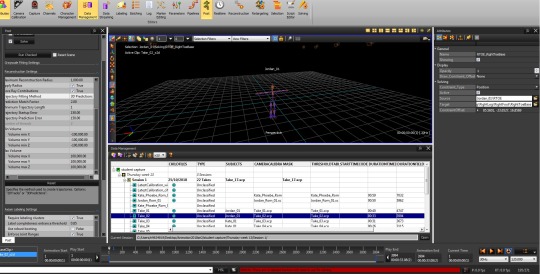
During the process of work, it is easy to find out that all the animation prinspile are generic. Fix bad data in motion capture looks is a easy work, but in this process, animators need to face a fact that lots of motions need to improve because they might make some issue when repair the missed data.
youtube
At the end of this process, I got a animation with rig. There are still few motion issue out of my expect. this assessment gives me lots of new knowledge about digital technology and a more clear cognition for the future of animation.
Thanks for watching.
0 notes
Text
KNB-225 Advanced Animation Performance
Assessment 2A
Vergil Lin (N9634819)
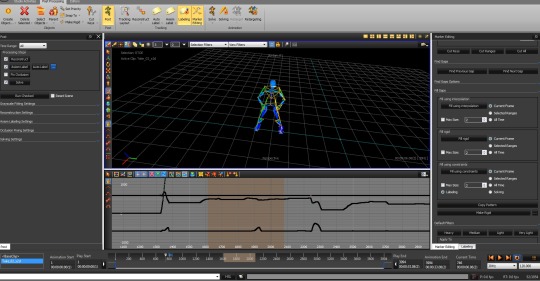
In this assessment, I learned a process which use a new rig to instand the animation with old rig. During this process, also practiced the animation princepile in the animation and learned how to transform the animation into the real-time animation project to use in the VR area.
The animation part I practiced are the shot 57 to shot 59. In this animation, did few work about how to imporve the motion in the animation.
youtube
For this #57 shot, its talk about how grandma wake up. In this part, I change the space between the key poses to make the motion quicker, because the motion in the old version is too slow to present that grandma is pressing and worried when she heared the lucy’s scream.
youtube
Number 58 shot is talking about grandma rush to the lucy’s room and push the door open. in the old version of this animation, because the carema was locked soo that the leg of grandma didnot set any animation. For the same reason, lucy didnot in the root file. To fix those issue, on the one hand, I created a step motion for grandma to make her motion more logical. On the other hand, I created a Lucy in this shot and made some animation for her to make it work in the VR area. Futhermore, After few times tests, I find out that if a human really rushed to open a door, when he push the door very powerful, there is no energy to make another step. meanwhile, I tried to let te geandma’s left hend stay on the handle of door, but when I really did it, I found out that grandmas’s arms are not long enough. based on that, I designed to let grandma’s hand stay on the door.
youtube
The number 59 shot is talking about lucy answer the grandma. because of the carema reason, grandma only have very few motion on head. because of that, I created some blink and breathing motion to make this character more like a real human when work in VR. For the Lucy part, I tried to improve her motion, not only change the arc of motin but also chande the speed of motion to make whole motion more logical and reasonable. Afterall, I also did some work to make the location of every parts could be match with the last shot, I think it will be helpful to give a better experience to the audiences when it work in VR.
Those are my works so far. during this process, I met lots of problem. some of them are the technological problems and others are the skillness problem. I think in this process, the most important thing is not what I learned to slove the problems. The more important thing is that how to find a way to slove the problem when it happen.
Thats all, thanks for watching.
0 notes
Text
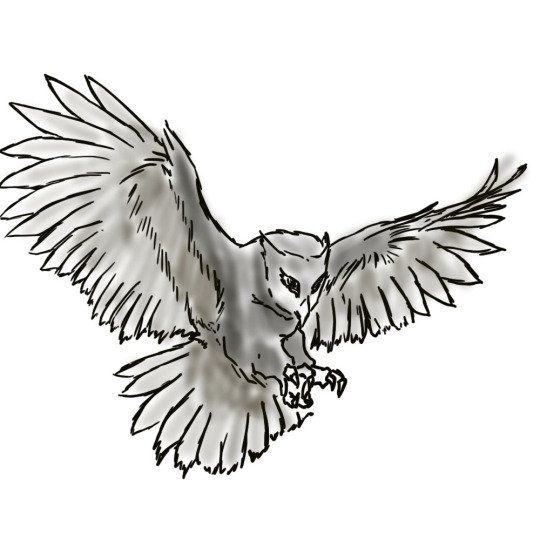
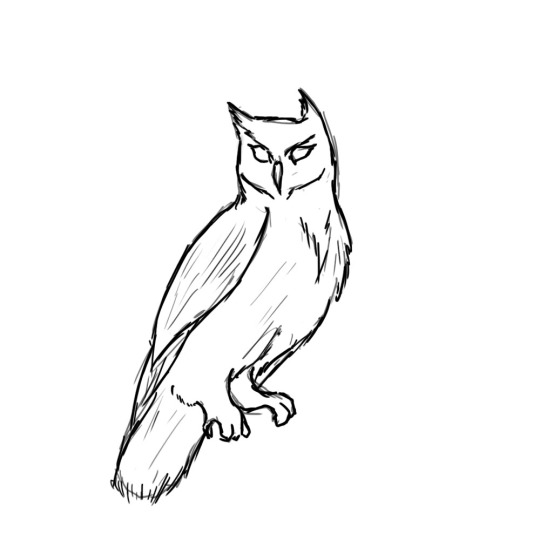
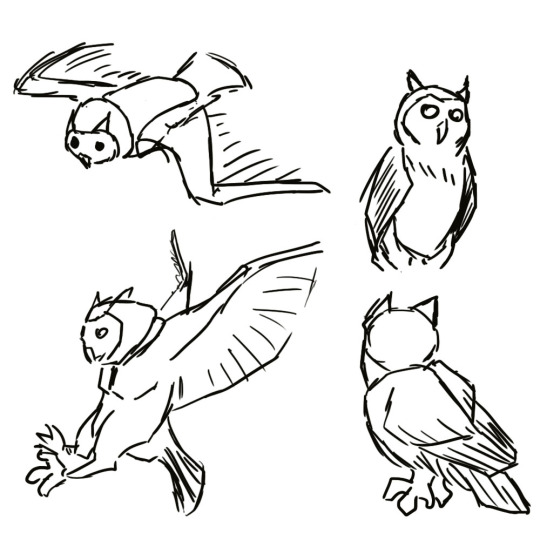
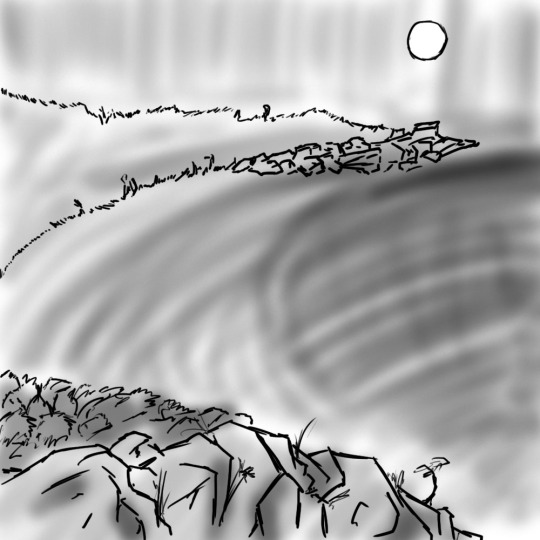
KNB-226 Visual Storytelling: Animation Pre-Production
Assessment 2
Vergil Lin (N9634819)
Index.................................................................................................................
Synopsis
Story
Script
Concept Art
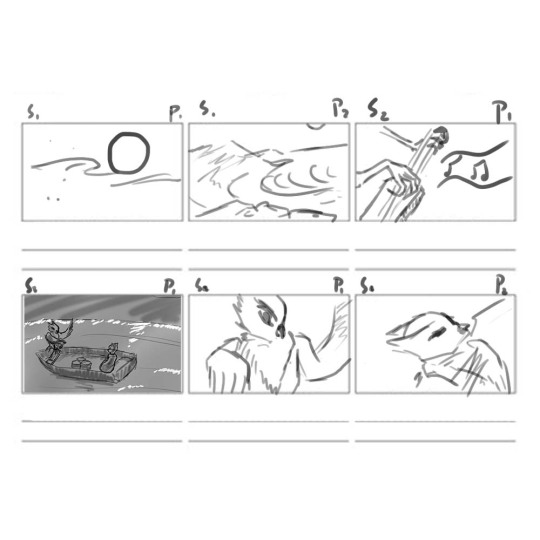
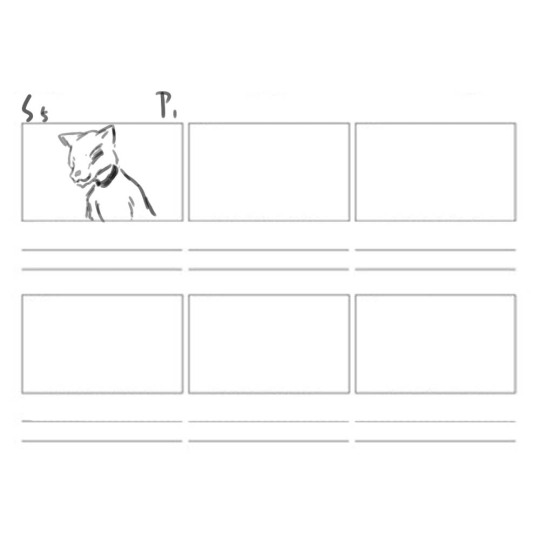
Storyboard
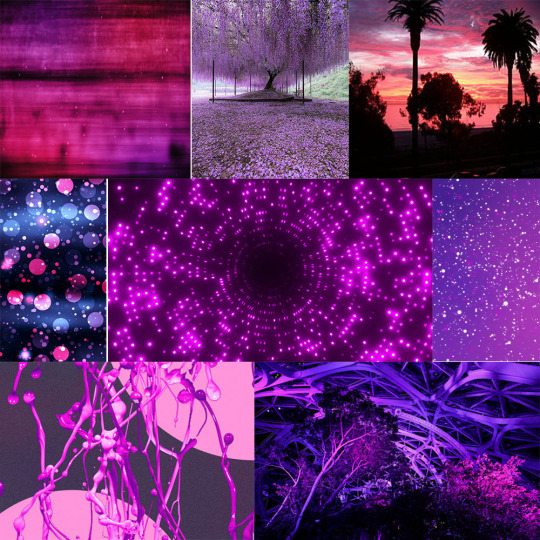
Moodboard
Shot list
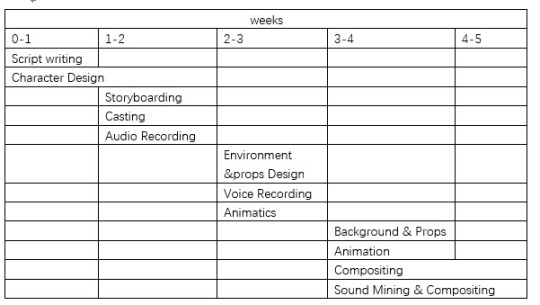
Schedule
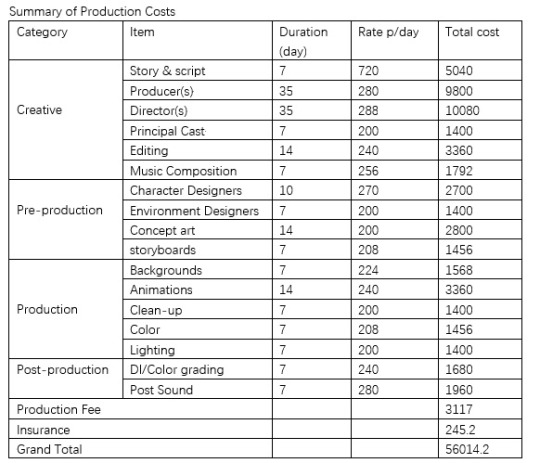
Budget
Contact detail
..............................................................................................................................
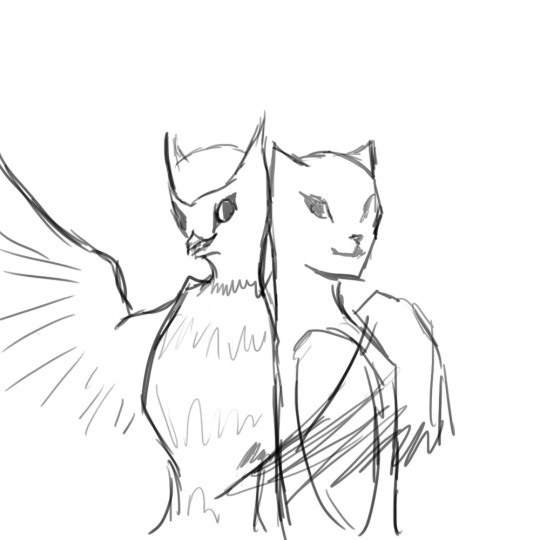
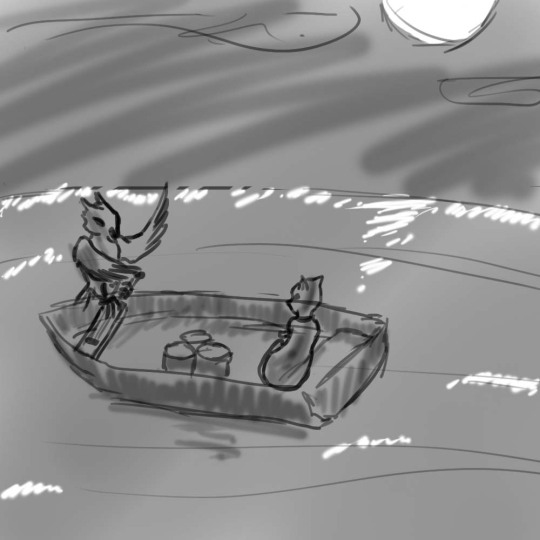
Synopsis:
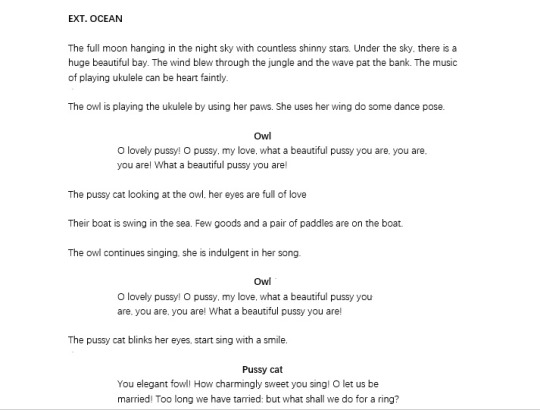
This story is talking about the love and the freedom. An owl and a pussy cat fall in love and they are going to far ocean to find out their own future. The goods on their boat are the honey and song, their wedding and wishes are waiting for them on the other side of the sea
Story:
This story, the owl and the pussy cat, tells a love story between an owl and a cat. Their love is pure and unconstrained by the world. When they going to trip, even tiny boat can cross the sea, the boat is full of sweet and song. When they decided to get married, there is a pig is willing to give a wedding ring, the turkey is happy to host the wedding. Ture love can through all limit in this world, this is this story going to tell this world.
Script:
Concept art:
Storyboard:
Moodboard:
Shoot list:

Schedule:
Budget:
Contact detail:
Vergil Lin
Reflection:
This assessment simulated how a real animation object should looks like. During in this process, I learned how to think like a real animator and how to manage the time and cost. for this assessment, the drawing part really despond me because I realize my drawing ability cannot support my work. I have lots of great idea in my mind, but I cannot present them on paper. On the other hand, design whole animation is really interesting. How ever, I realized that my thinking mind still be limited in a inherent mode. I always try to find out an standard to measure my work. it is not good for a creative worker.
I will keep practice this process and try my best to be better.
Thanks for watching.
0 notes
Text
KNB226_Visual Story Telling Assessment 1
Vergil Lin
N9634819
This story is telling about a owl and a pussycat. they went to the sea and the owl play the ukulele to cat. then they full intoo love.
this story is going to present by 2D animation form. the reason I chose this mode is because this way can present characters more mind style and less limit.
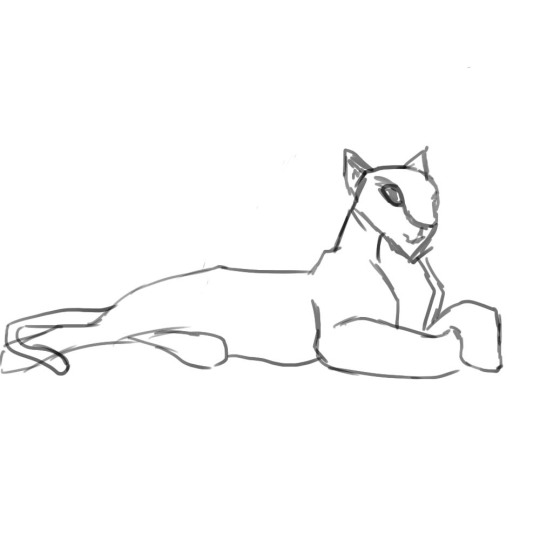
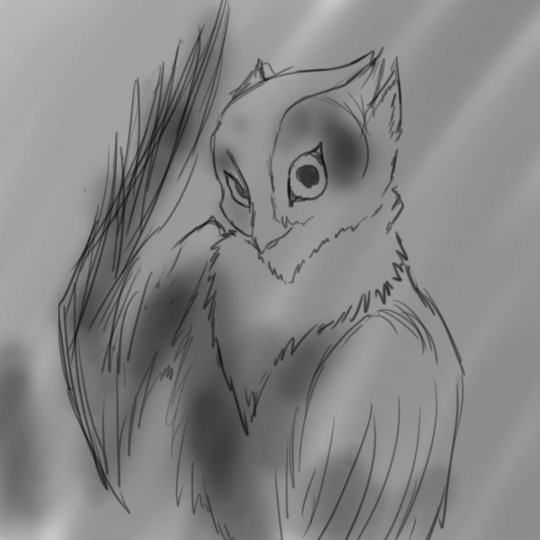
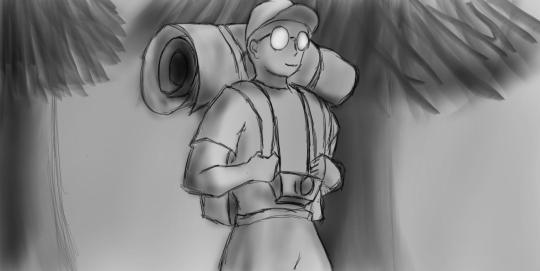
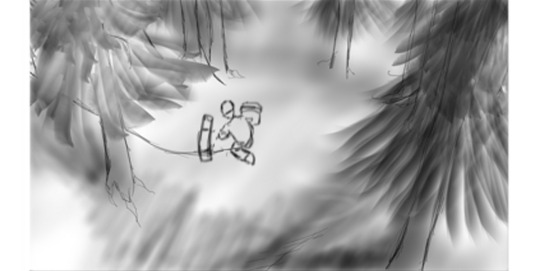
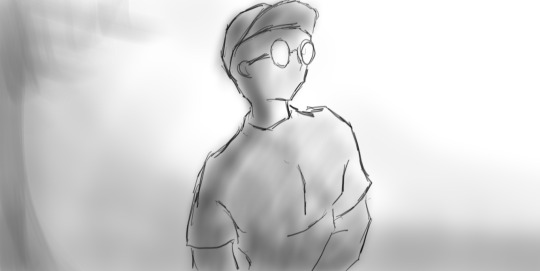
concept arts:
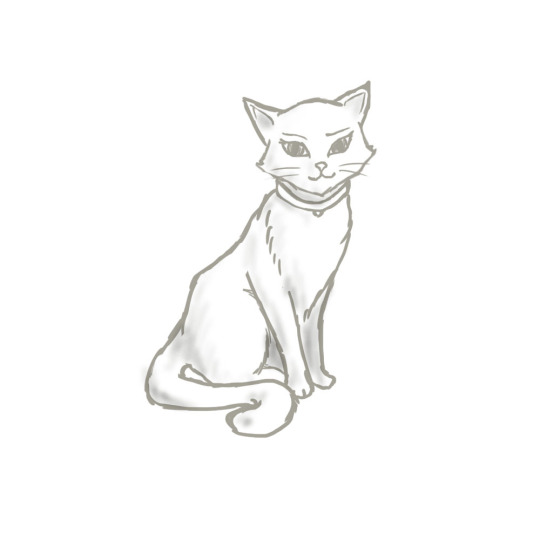
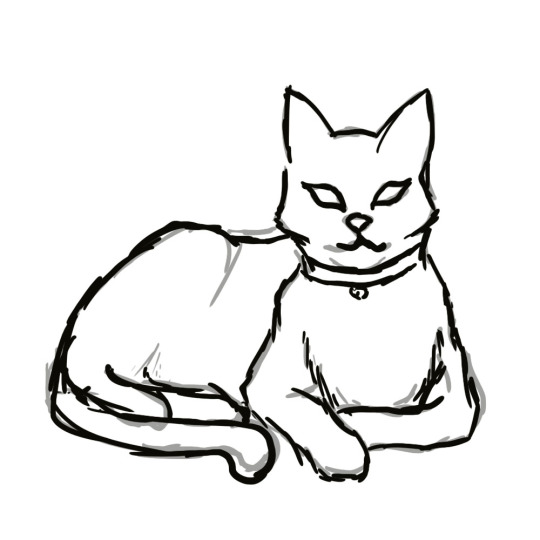
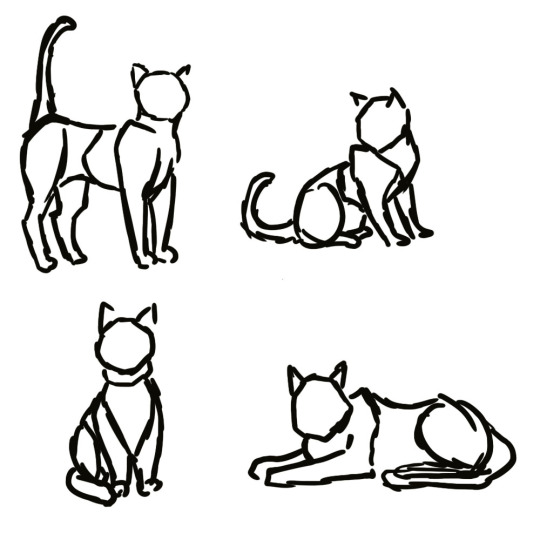
the cat
the owl
evironment:
few pros:
0 notes
Text
KNB225-Advanced Animation Performance
Assessment 1B
Vergil Lin (N9634819)
First plasts/Key poses:
youtube
Second plasts (Back ground voice mached):
youtube
emotions added:
youtube
References:
lips acts added:
youtube
references:
0 notes
Text
KNB225-Advanced Animation Performance
Assessment 1A
Vergil Lin
N9634819
Video Essay:
vimeo
Thanks for watching
0 notes
Text
KNB 137-Digital World Assessment 3
Vergil Lin (N 9634819)
In this assessment, I created a room to practice my building skills. During this process, I met lots of funny events but also many troubles. Of course, there are also many skills I learned.
Firstly, is the skill which use a picture to build lay out.
Lock the carema and change the location of object to get the correct position, this is a new way I learned to recreated the sence in modelling software.
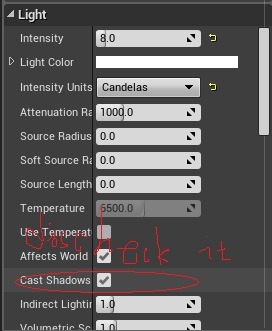
Secondly, is light function. In UE4, there are three types of light are aviliable. Normally the point light is enough to use. Explore the functions of light is a very interedting process.
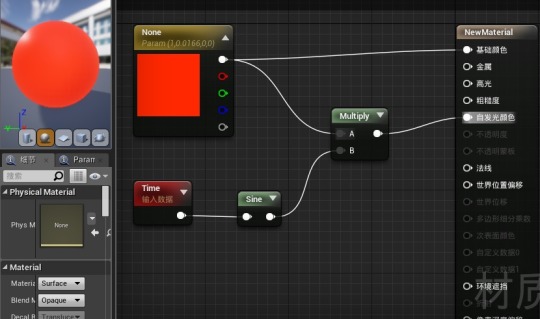
There are some hot key of logic editorneed to be record. “1” is add a vule from 0 to 1. “V” is add a color. “M ” is mix or make up(?). And I also get some really interesting functions and I have to notice myself, never forget to add a TIME before the SINE.
Thirdly, I have something need to discuss about modelling.
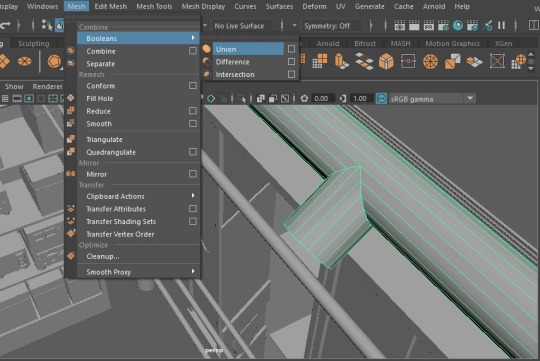
“UNION” is a very useful function with full of trouble. I used it to created the bigest plastic pipe and it get a good result. So I used this function to created a lot objects. Unexpectedly, all of them made me met troubles when I did the UV work. The faces and edge loops are just mixed together roughly and crush together.
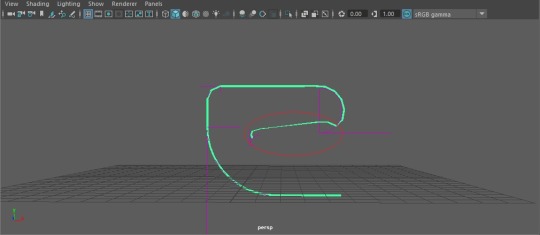
“BEND” is a function which gives the object a reasonable curved shape. I used this function to create the electricity lines and the spineof chair.
But htere is a ridiculous crush if this function is that, when you curve an object several times and makes it turned a cycle, it will have this thing.
I still can not understand what happen so I had to give up some mesh in the block out.
“FX” mod is working on something soft. In this mod we can create sonething like sheet and hair.
In this assessment I only need the shape of the sheet to make it looks more “soft” so that I expend the sheet by the obj file to get the shapeand re-import it again. Then it can get a good texture in subspainter.

When talking about the subspainter, I have to admit that I forgot something because there were couples of weeks I haven’t tauch it since last time I used it to finish the last assessment. Fortunately, I can find the tutorial video and found them out so I got the correct texture at end.
99 items.
In UE4, there is no too much things need to be discuss. when you create a lamp with a shell, you might need this function.
(I write: discheck it)
Then you can push the point light into the mesh and makes it looks like real.
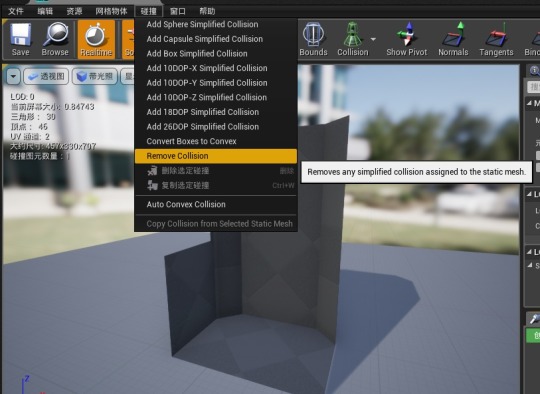
Also, when the object finish, you might find out that your view was in the room at first and it will jumps out when you try to move. If this event happen, you need to chose the mesh of wall and close the function of collision then it will turns back to noemal.
Those are all of my assessment journal. I know there are lots of thing I haven’t leard and a lot of things can be improve. But I can say that I tried my best and I will never stop improve. That’s it!
Thanks for watching~
0 notes
Text
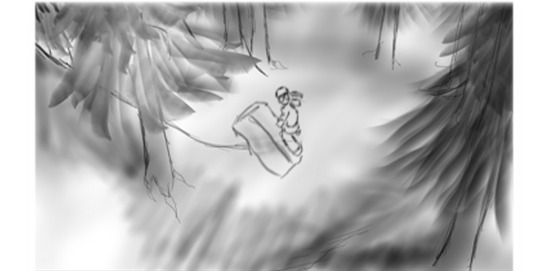
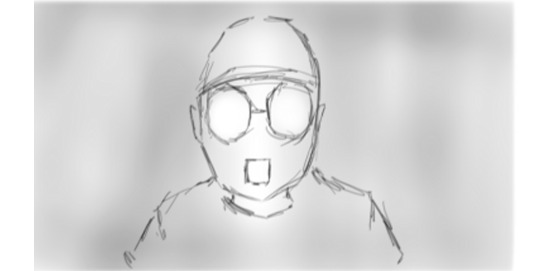
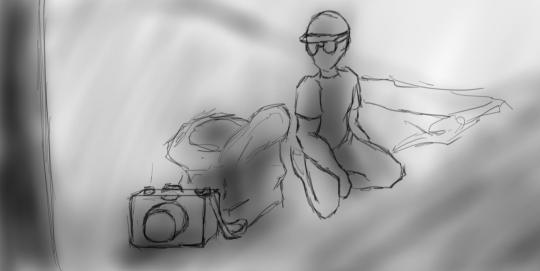
KNB-216 Virtual Story Telling Assessment -2
Some practice of another storyboard:
During this process, I tried to consider how should I use the Montage skills into my storyboard. I also did some reading to understand that is Montage and whats the difference between the Montage and editor. After some research, I tried some things and it looks not so bad.
The sketches of final storyboard:

In order to get a good view, I even used Maya to build a sence to draw.
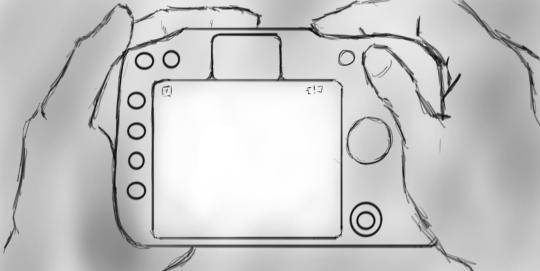
And found a picture of camera to draw.
Also, to prepare the final assessment, I drawed some pictures and the final storyboard and animatic were editored from them.


The final storyboard:
Final animatic:
vimeo
Thanks for Watching!
0 notes
Text
KNB 215-Assessment 2
Planning:
1.Action
The action I chose is the hacking. I always believes that the Strenuous exercises are able to show the beauty of the force and body of human. Although the hacking is just a simple and short action, I still can distinguish lots of difference between two characters. By present those difference, the features of characters are able to identified.
2. Character Descriptions
The first character is a young character likes twenty to thirty years old. It is not very heavy but should looks like full of muscles. This character is very active and always full of energy to do something and because of that, this character is a little bit impetuou. At the moment of action happen, this character is angry so that it’s action should be very exaggerating and large.
The second character is a middle-aged character like forty years old. It is lighter than normal people but it doesn’e means this character is weak. Long time training makes this character is very skillful and enough experience let it can deal with every thing dispassionately.This character is quite but it also can be very staunch if it make a decision to do something. At the moment of action happen, this character is calm and ready to do.
3.Story Beats.
First character story beats:
1.the character stand behind the stake with a huge blade in it’s right hand.
2.the character one step forward and hold the knife with two hands, blade is on side of the character and it is an action to accumulate power.
3.the blade rise up and character put forth on it’s strength then hack dowm and hit the stake.
4.the character pull up the blade and hack again then the stake is cut in half.
5.the chatacter pull out the blade very exaggeratedly.
Second character story beats:
1.the character stand behind the stake. There is a blade in the sheath between it’s left waist.
2.the character one step forward, left hand hold the sheath and right hand put on the handle of blade .
3.the charatcer pull out the blade from sheath and weild up, the blade hit the stake and then cut it in half.
4.the chatacter hack down the blade and hit the upper stake and cut it in half again.
5.the character push the blade into sheath and then bow down to the stake.
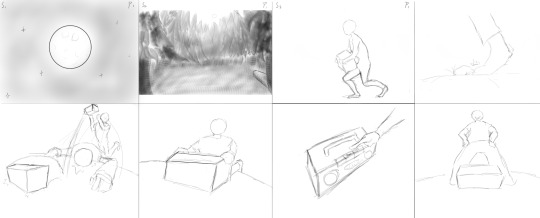
4.Story Board.
5.Video Reference:
action 1:
youtube
action 2:
youtube
youtube
6. Rigs:
0 notes
Text
KNB-137-Assignment 2 Project 3
with in this assessment, I ‘m Building a production journal for this project.
Asset List:
Bedstead x1
Wardrobes x2
Shelves x1
Desk x1
Chair x1
Cabinet x1
Door x1
Vanitation Pipes x2
Metal Pipes x2
Metal pipes x2
Mattress x2
Pillows x2
Bed lights x2
Emergency lights x1
Lights x2
Warning light x1
Loudspeaker x1
Monitor x1
Radar x1
Oscilloscope x1
Telegraph x1
Carton x1
Unknown instruments x6
Metal boxes x5
Film traies x5
Fire appliances x2
switches x5
Wiring Harness serveral
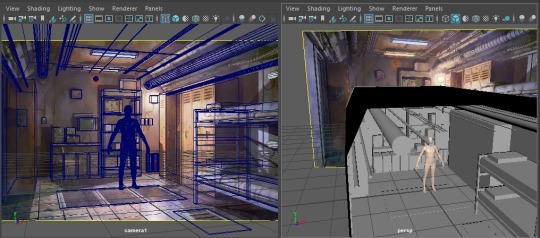
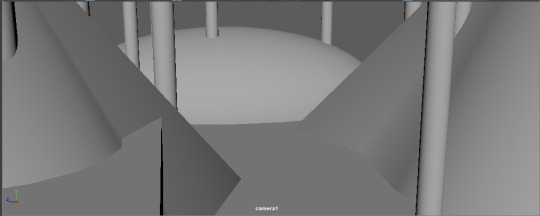
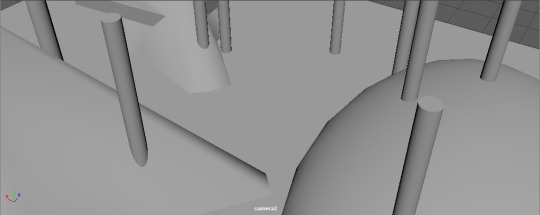
Describe:
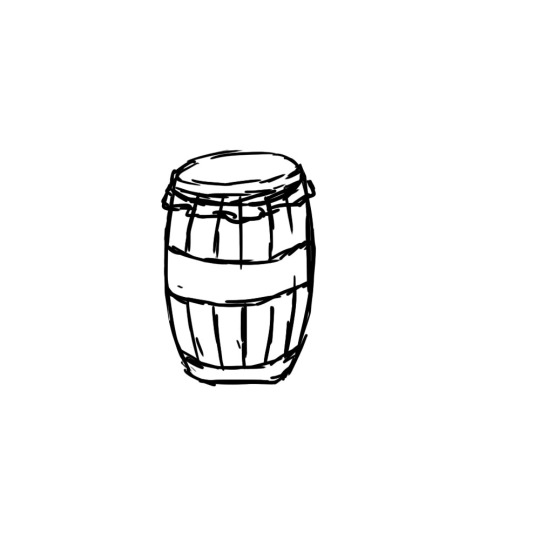
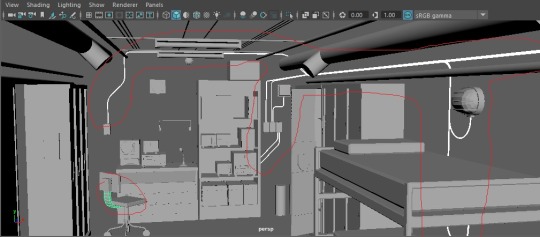
When I first time saw this picture, the thinking of mine is that this is a closed, caliginous, rough room and full of industry style. This room must underground or onder water. I saw the gas mask, warning light, steam lamp and loudspeaker so that I guess it is a duty room which services for some scientific drilling activitive in a mine or some where.
One of the gas mask was on the ground and the wardrobe didn’t locked so the people who leave must very hasty but it is not an urgent emergency because the warning doesn’t flashing.
0 notes
Text
KNB 137-Assessment 1-Mechanics of Motion
Vergil Lin (N9634819)
Hello everyone, this is an unacademic essay and in this bolg I am going to talk about my assessment.
At the first, I have to admit that I didn’t understand all knowledge I learned so that I didn’t finish the second truck in the UE4. I try to understand and follow the process in the video but the exhaustion of me limited me. So what am I doing is talking about my mistake and confusing.
When I started this work, honestly I walked too far away in an incorrect way and it leads me got a very miscellaneous Maya object and a messy UY map. Now I got a good habit is that keep the document clear.
In the Substance Printer, I also met some troubles. Firstly, I found that few UV shells were missed. I back to Maya, check and remake the UVmap, but there were still few missed. Secondly, the normal baking also gave me some trouble. I tried all the value and it just can’t match with the mesh. I gave it up and going to talk with my tutor tomorrow. Thirdly, I ignored a setting when export the texture and then I got lots of png texture and actually we need the tga texture.
In the UE4, the only thing I met is my object is too small and it was really hard to control it. I will remember build the modeling a little bit bigger next time. I am very interested in UE4 and I think I will pay more attention on this interedting softwore.
Thats it. Thanks for reading.
0 notes
Text
KNB 215-Assessment 1 (Part 2)
youtube
youtube
youtube
vimeo
youtube
Lynda Certificates Of Completion
0 notes
Text
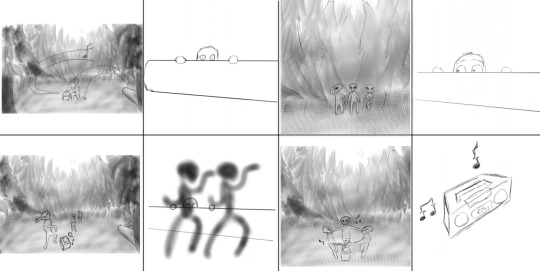
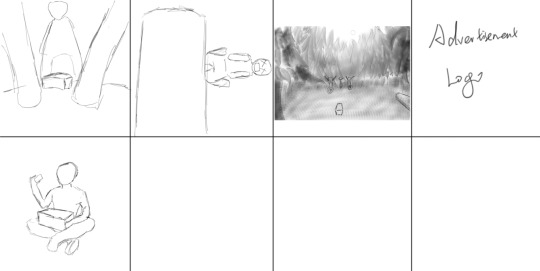
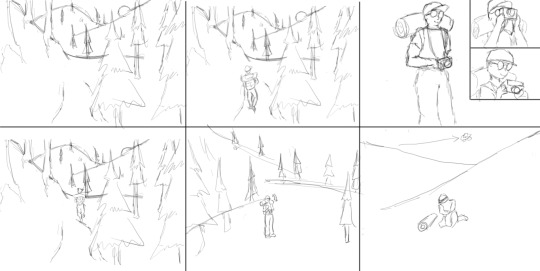
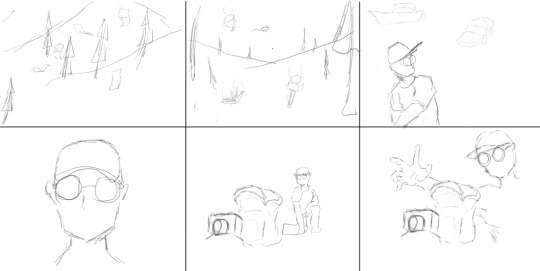
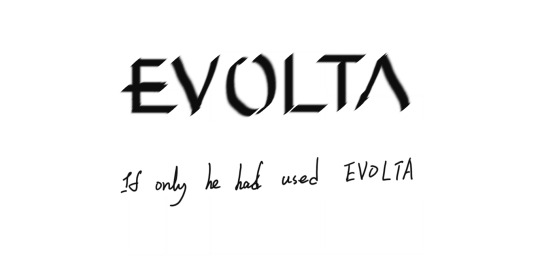
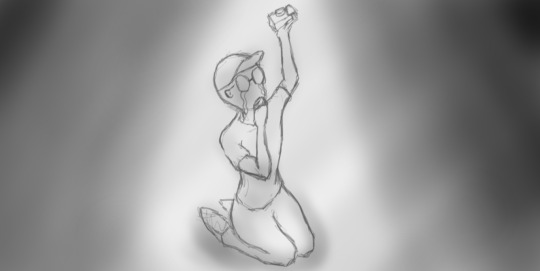
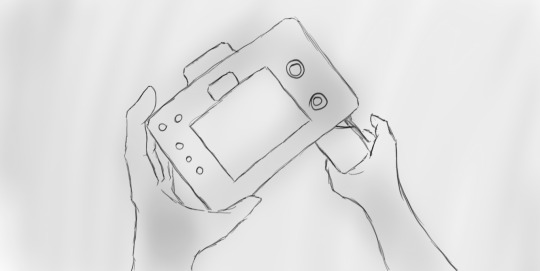
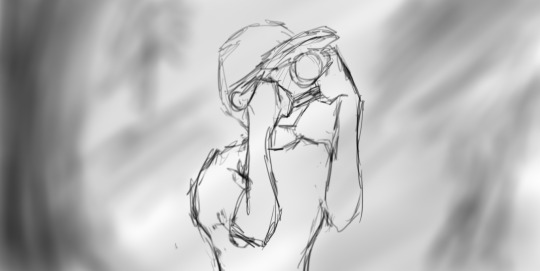
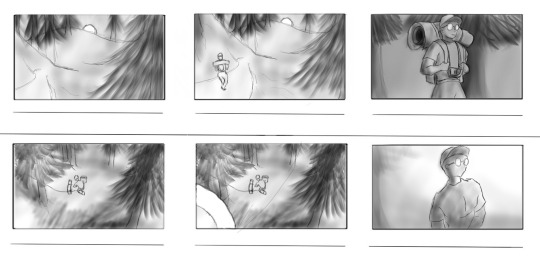
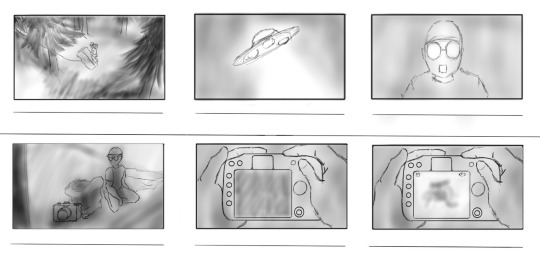
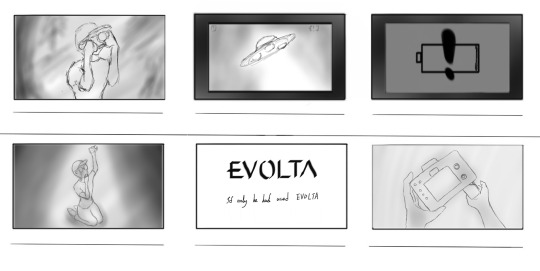
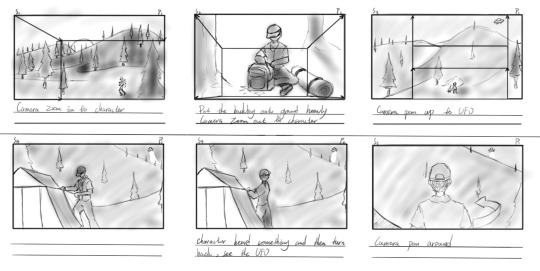
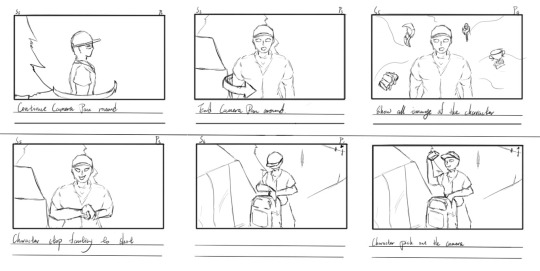
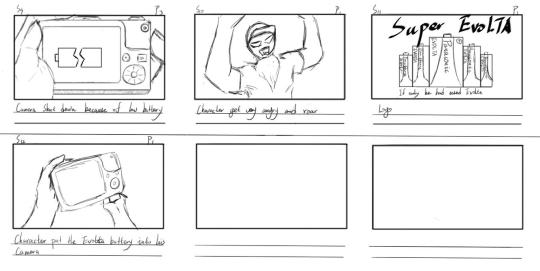
KNB 216-ASSESSMENT 1
Vergil Lin (N9634819)
the storyboard about the Panasonic

0 notes