
Last Seen Blogs

gentleaffirmations
Gentle Affirmations

bumperboi
Boiz&Men

thisspaceisleftblank-blog
This Space is Intentionally Left Blank

maribelad
Camino en Dios

myashleypark-blog
제목 없음
Text
Call Of Duty 4 Multiplayer For Mac

Welcome to Android Flash Tool. You can use this tool to install Android builds on your devices. This tool allows you to flash Android onto recent Pixel phones and some Android development devices ( view full list) and requires 10GB of available storage on your computer. Flash tool for android download. Odin is undoubtedly the best flashing tool that can be use to flash stock ROM and to unbrick a.
Call Of Duty 4 Multiplayer For Mac Pc
Download Call Of Duty 4 Modern Warfare Multiplayer Mac
Call of duty 4 multiplayer free download - Call of Duty: Mobile, Call of Duty: Mobile, Call of Duty 4 Patch, and many more programs.
Call of Duty® 4: Modern Warfare® (Mac) Regular Price: £13.99. Now only: £11.45. The community-oriented Call of Duty 4 multiplayer gameplay features a robust leveling system, variety of unlockable perks, hot-join and matchmaking, as well as create a class and party capabilities to ensure that players of all skill levels can join in the.
Call of duty Modern Warfare Mac Overview: Call of Duty: Modern Warfare is a first person shooter video game developed by Infinity Ward and published by Activision. So The fourth installment in the Call of Duty series, it was released in 2007 for the PlayStation 3, Xbox 360, and so Microsoft Windows, Developed for over two years, the game uses a.
Everytime I try to join a multiplayer server, the 'mod.ff' file starts downloading, and after that the loading screen shows up, always saying 'Shipment cod41 mod', then the game closes, I'm on a Mac, please help:u.
There is not a big surprise that Call of Duty Black Ops 4 does not feature a single-player campaign mode. The multiplayer madness is growing day by day and all the big producers try to keep up with the players’s demands. Call of Duty Black Ops 4 Mac OS X is the first COD title without a singleplayer mode, which we’ll see if it’s good or bad. This game has received generally good reviews from both critics and players. The new features were implemented very nice and made from the 5th title of Black Ops series a big success. We can’t say the same about the main competitor, Battlefield V, but that’t another story… Now you can proceed with the download and get Call of Duty Black Ops 4 for Mac, 100% FREE!
CHECK ALSO: Apex Legends Mac OS X
The FPS games for mac category has now a new important title. We are sure that Call of Duty Black Ops 4 Mac OS will become one of the best shooter games ever presented here. The solo missions mode, which is based on the background of the multiplayer’s Specialists, is the most important update since the last title, COD Black OPS 3. This one was the most downloaded FPS, so we have at least the same expectations from the sequel.
One important feature of the multiplayer mode is that the health regeneration is no longer present. Also new ballistics system is present, alongside new predictive recoil feature.
The zombies could not be missing and also a battle royale mode is available. Call of Duty Black Ops 4 OS X is the most complex game released in this series, so you must definetely give it a try. You can get COD Black OPS 4 for macOS from the button below and enjoy one of the best multiplayer shooters ever made.

Call of Duty Black Ops 4 Mac OS X
– Minimum System Requirements –
CPU:Intel Core i3-4340 / AMD FX-6300
CPU Speed:2.1 GHz
RAM:6 GB


OS:OS X 10.10
Video Card:GeForce GTX 660 / Radeon HD 7950


Call Of Duty 4 Multiplayer For Mac Pc
HDD Space:26 GB
Download Call Of Duty 4 Modern Warfare Multiplayer Mac
NOTE: This game is FREE TO DOWNLOAD, but in order to get acces to this game you need to create a FREE account (more details on the download page). By this way you can download all the DLC packs for this game and a lot more games and software for your Macbook/iMac.
0 notes
Text
Scan For All Mac Address On Network

How would you communicate with a device when you don’t have the IP?
Mac Address Changer
Mac Address Scanner
Advanced IP Scanner. Reliable and free network scanner to analyse LAN. The program shows all network devices, gives you access to shared folders, provides remote control of computers (via RDP and Radmin), and can even remotely switch computers off. It is easy to use and runs as a portable edition. It should be the first choice for every network. This command will scan your network from 192.168.0.1 to 255 and will display the hosts with their MAC address on your network. In case you want to display the mac address for a single client, use this command make sure you are on root or use 'sudo' sudo nmap -Pn 192.168.0.1 this command will display the host MAC address and the open ports.
You might be in a situation where you don’t have the IP address of a device in a local network, but all you have is records of the MAC or hardware address.
Or your computer is unable to display its IP due to various reasons, and you are getting a “No Valid IP Address” error.
Finding the IP from a known MAC address should be the task of a ReverseARP application, the counterpart of ARP.
But RARP is an obsolete protocol with many disadvantages, so it was quickly replaced by other protocols like BOOTP and DHCP, which deal directly with IP addresses.
In this article, we’ll show you how to find IPs and device vendors using MAC addresses with different methods for free.
Understanding ARP
ARP (Address Resolution Protocol) is the protocol in charge of finding MAC addresses with IPs in local network segments.
It operates with frames on the data link layer.
As you might already know, devices in the data link layer depend on MAC addresses for their communication.
Their frames encapsulate packets that contain IP address information.
A device must know the destination MAC address to communicate locally through media types like Ethernet or Wifi, in layer 2 of the OSI model.
Understanding how ARP works can help you find IPs and MAC addresses quickly.
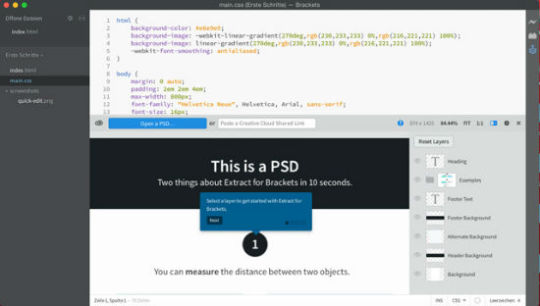
The following message flow diagram can help you understand the concept:
The local computer sends a ping (ICMP echo request) to a destination IP address (remote computer) within the same segment. Unfortunately, the local computer does not know the MAC address… it only knows the IP address.
The destination hardware address is unknown, so the ICMP echo request is put on hold. The local computer only knows its source/destination IP and its source MAC addresses. ARP uses two types of messages, ARP Request and Reply.
The local computer sends an ARP REQUEST message to find the owner of the IP address in question.
This message is sent to all devices within the same segment or LAN through a broadcast MAC (FF:FF:FF:FF:FF:FF) as the destination.
Because the remote computer is part of the same network segment, it receives the broadcast message sent by the local computer. All other computers in the LAN also receive the broadcast but they know that the destination IP is not theirs, so they discard the packet. Only the remote computer with destination IP, responds to the ARP REQUEST with an ARP REPLY, which contains the target MAC address.
The local computer receives the ARP REPLY with the MAC address. It then resumes the ICMP echo request, and finally, the remote computer responds with an ICMP echo reply.
Finding IPs with ARP
You can use ARP to obtain an IP from a known MAC address.
But first, it is important to update your local ARP table in order to get information from all devices in the network.
Send a ping (ICMP echo reply) to the entire LAN, to get all the MAC entries on the table.
To ping the entire LAN, you can send a broadcast to your network.
Open the Command Prompt in Windows or terminal in macOS and type.
ping 192.168.0.255
My subnet is 192.168.0.0/24 (mask of 255.255.255.0), so the broadcast address is 192.168.0.255 which can be calculated or found with a “Print Route” command in Windows or a “netstat -nr” in macOS. Or can also be obtained with a subnet calculator.
For Windows:
Step 1.
Open the CMD (Command Prompt)
Go to the “Start” menu and select “Run” or press (Windows key + R) to open the Run application
In the “Open” textbox type “cmd” and press “Ok”.
This will open the command-line interface in Windows.
Step 2.
Enter the “arp” command.
The arp command without any additional arguments will give you a list of options that you can use.
Step 3.
Use the arp with additional arguments to find the IP within the same network segment.
With the command “arp -a” you can see the ARP table and its entries recently populated by your computer with the broadcast ping.
Step 4.
Reading the output.
The information displayed in the arp-a is basically the ARP table on your computer.
It shows a list with IP addresses, their corresponding physical address (or MAC), and the type of allocation (dynamic or static).
Let’s say you have the MAC address 60-30-d4-76-b8-c8 (which is a macOS device) and you want to know the IP.
From the results shown above, you can map the MAC address to the IP address in the same line.
The IP Address is 192.168.0.102 (which is in the same network segment) belongs to 60-30-d4-76-b8-c8.
You can forget about those 224.0.0.x and 239.0.0.x addresses, as they are multicast IPs.
For macOS:
Step 1:
Open the Terminal App. go to Applications > Utilities > Terminal or Launchpad > Other > Terminal.
Step 2:
Enter the “arp” command with an “-a” flag.
Once you enter the command “arp -a” you’ll receive a list with all ARP entries to the ARP Table in your computer.
The output will show a line with the IP address followed by the MAC address, the interface, and the allocation type (dynamic/static).
Finding IPs with the DHCP Server
The Dynamic Host Configuration Protocol (DHCP) is the network protocol used by TCP/IP to dynamically allocate IP addresses and other characteristics to devices in a network.
The DHCP works with a client/server mode.
The DHCP server is the device in charge of assigning IP addresses in a network, and the client is usually your computer.
For home networks or LANs, the DHCP Server is typically a router or gateway.
If you have access to the DHCP Server, you can view all relationships with IPs, MACs, interfaces, name of the device, and lease time in your LAN.
Step 1.
Log into the DHCP Server. In this example, the DHCP server is the home gateway.
If you don’t know the IP address of your DHCP Server/ Gateway, you can run an ipconfig (in Windows) or ifconfig (in macOS/Linux).
This particular DHCP Server/Gateway has a web interface.
Step 2.
Enter the IP address on the search bar of the web browser, and input the right credentials.
Step 3.
Find the DHCP Clients List.
In this TP-Link router, the DHCP Server functionality comes as an additional feature.
Go to DHCP > DHCP Clients List. From this list, you can see the mapping between MAC addresses and their assigned IPs.
Using Sniffers
If you couldn’t find the IP in the ARP list or unfortunately don’t have access to the DHCP Server, as a last resort, you can use a sniffer.
Packet sniffers or network analyzers like Nmap (or Zenmap which is the GUI version) are designed for network security.
They can help identify attacks and vulnerabilities in the network.
With Nmap, you can actively scan your entire network and find IPs, ports, protocols, MACs, etc.
If you are trying to find the IP from a known MAC with a sniffer like Nmap, look for the MAC address within the scan results.
How to find the Device and IP with a Sniffer?
Step 1.
Keep records of your network IP address information.
In this case, my network IP is 192.168.0.0/24. If you don’t know it, a quick “ipconfig” in Windows cmd or an “ifconfig” in macOS or Linux terminal can show you the local IP and mask.
If you can’t subnet, go online to a subnet calculator and find your network IP.
Step 2.
Download and open Nmap.
Download Nmap from this official link https://nmap.org/download.html and follow its straightforward installation process.
Step 3.
Open Nmap (or Zenmap) and use the command “sudo nmap -sn (network IP)” to scan the entire network (without port scan).
The command will list machines that respond to the Ping and will include their MAC address along with the vendor.
Don’t forget the “sudo” command.
Without it, you will not see MAC addresses.
Finding out the device vendor from a MAC address
Ok, so now you were able to find out the IP address using “arp -a” command or through the DHCP Server.
But what if you want to know more details about that particular device?
What vendor is it?
Your network segment or LAN might be full of different devices, from computers, firewalls, routers, mobiles, printers, TVs, etc.
And MAC addresses contain key information for knowing more details about each network device.
First, it is essential to understand the format of the MAC address.
Traditional MAC addresses are 48 bits represented in 12-digit hexadecimal numbers (or six octets).
The first half of the six octets represent the Organizational Unique Identifier (OUI) and the other half is the Network Interface Controller (NIC) which is unique for every device in the world.
There is not much we can do about the NIC, other than communicating with it.
Android flash tool for pc. Allows you to flash an Android build to your device fordevelopment and testing. To get started, you need a development machine and anAndroid device.
But the OUI can give us useful information about the vendor if you didn’t use Nmap, which can also give you the hardware vendor.
A free online OUI lookup tool like Wireshark OUI Lookup can help you with this.

Just enter the MAC address on the OUI search, and the tool will look at the first three octets and correlate with its manufacturing database.
Final Words
Although the RARP (the counterpart of ARP) was specifically designed to find IPs from MAC addresses, it was quickly discontinued because it had many drawbacks.
RARP was quickly replaced by DHCP and BOOTP.
But ARP is still one of the core functions of the IP layer in the TCP/IP protocol stack.
It finds MAC addresses from known IPs, which is most common in today’s communications.
ARP works under the hood to keep a frequently used list of MACs and IPs.
But you can also use it to see the current mappings with the command arp -a.
Aside from ARP, you can also use DHCP to view IP information. DHCP Servers are usually in charge of IP assignments.
If you have access to the DHCP server, go into the DHCP Client list and identify the IP with the MAC address.
Finally, you can use a network sniffer like Nmap, scan your entire network, and find IPs, and MACs.
If you only want to know the vendor, an online OUI lookup like Wireshark can help you find it quickly.
The first step of troubleshooting any network problem is by pinging the IP address. Well, for that you need to know the IP address of the device or in cases IP address of all the devices in the network. There are several ways to do this and it entirely depends on the type of OS you are using. So, here are ways to find the IP Address of other devices in your network whether it is Windows, Android, iOS, Ubuntu and macOS.
Find IP Address of Other Devices on Your Network
In this article, we would be dealing with ways to find the private IP address of devices. Since the public IP address of all the devices within the same network remains the same i.e. the IP address of your router. In case, you are surprised by the word public and private IP address, it’s fairly simple. We have a detailed article on the difference between Public and Private IP and how to find the IP address of your own device.
1. How to Find IP Address in cmd For Network
The simplest way to do that in Windows is via the command line. To open the command prompt, type “cmd” on the Start menu. When you see the command prompt, right click on it and click on “Run as Administrator”.
In case you are using windows 10, you can directly run Command Prompt as an Administrator. Just right-click on the Start icon and click on Command Prompt(Admin).
Once you get the Command Prompt window, type the following command.
This will display the entire list of ARP entries. In case you are wondering, ARP is a network utility which maintains a track of all private IP addresses in the network.
Find IP Address of all Devices on Network Using Windows App
Find IP addresses through the command line might be the simplest way but not the most intuitive one. If you are not good with command line then you should download this Nirsoft utility called Wireless Network Watcher. The app has a portable version as well as exe.
As soon as you open the app, it starts scanning your network. Give it some time and it will list up the active connections in your network. The app will display all computers, smartphones and smart homes devices that are currently connected to the network. Along with the Device Name and IP address, it also presents other relevant information like MAC Address, Device Information etc along with its IP Address.
Read: Useful NirSoft Utilities That Every Windows User Should Try
2. Find all IP Address on the Network on Ubuntu
If you are working with Ubuntu or any Unix based OS then following are the ways. You can find the IP address using arp utility on the terminal. To open the terminal, right-click anywhere on the desktop and select “Open Terminal”.
Alternatively, you can also click on the Activities button at the top-left corner. This will bring up a search bar. Type Terminal on it and click on the Terminal icon once it pops up.
Once the terminal window opens, type the following command.
Another intuitive way to do this is through GUI. You have to install a tool called Angry IP Scanner. To install the Angry IP Scanner, you need to add an entry to the APT repository. APT (Advanced Packaging Tool) will then be able to fetch Angry IP Scanner from that particular location. To add the entry to the repository, type the following command
In case you are facing any issues with IP Scan Installation, make sure you have disabled gpg signatures check. You can do that by using the following command.
Once the entry is successfully added, we need to update the apt-get repository. To do that, type the following command
Once the apt repository is updated successfully, we can install the Angry IP Scanner application. Type the following command to fetch and install the application
Alternatively, if you have a browser you can also choose to install from the Angry IP Scanner website directly. Once you launch the app, it will the network you are connected to. Once, it is completed you can see the active connections in your network.
It has advanced tools like opening an FTP, Telnet, SSH connection for any of the IP devices. One thing it lacks is the inability to show hostnames for the devices. Most of the devices come up as N/A in the hostname. This can, however, be found out by using the host command but that takes an extra step.
Read: How to use Angry IP Scanner – Beginners Guide
3. How to Find who is on my WiFi on macOS
On macOS, the steps are quite similar to that of Ubuntu. To find the IP Address of other devices in your network via the command line, we need to first open the terminal. To do that, hit Cmd + Space to trigger Spotlight Search. Type “Terminal” on the search bar. Click on the Terminal icon when the search results populate.
Once the terminal window opens, type the following command.
This will list down the IP’s in your local network with their MAC Addresses. IPs are listed in round brackets followed by the MAC Address.
You cannot see the hostname (name of the computer or smartphone) through the command line. For that, you will have to do a host search separately for each IP. For example, if I need to find the hostname of 192.168.1.105, then I have to execute the following command
host 192.168.1.105
If the commands sound too much work, you can download a freeware from the Mac App Store called LAN scan. This app will list the IP addresses connected to the Local network along with other details like MAC addresses, Vendor etc. This app does not grab he Hostnames like Wireless Network Watcher. In order to get the hostnames of the devices, you need to get the premium variant. It can be purchased at a one-time fee of $7.
Also Read: Find Out Who’s Connected to Your WiFi
4. Android & iOS
On Android and iOS, there is no native way to check the IP Address of all the devices in the network. Hence, you will have to download a third-party app for this. Fing is a powerful network utility available for both Android and iOS which lets you scan your network. All you have to do is open the app and it will automatically start scanning all of the devices on your network. You’ll see all of their IP addresses, their names.
Unlike all the other apps we tested for Windows and Mac, Fing was the only that can figure out your connected devices brands and models. It can even fetch the device icon – wheater it’s an iPhone, MacBook, Router or Printer etc.
Check out Fing (iOS, Android)
Apart from just scanning IPs, you can also ping them or see the open ports on the particular device.
5. Router
One of the most popular ways to check who is connected to your WiFi network is by using your router’s web interface.
In case you have access to the router web interface, you can simply log in to the web portal and check. The web portal address, username, and password are mostly printed behind the router. In case you don’t have physical access to the router, the web portal URL is mostly the PC’s gateway address. To find that, open command prompt and type the following command.
The default username and password depends on the router’s manufacturer. Mostly, the username and password is “admin”. In case this doesn’t work for you, visit the official manufacturer site to get the default credentials.
Once you are logged in, look out for the Wireless or DHCP option. We need to navigate to the DHCP client’s list. On this page, you can see the entire list of devices connected to the network with their Client Name and MAC Address. You can also choose to block particular devices from this interface. To read more about it, check our article on how to block someone from your network.
The good thing about this approach is that you don’t have to install any software because you can access your router from any device. However, the only downside is that you need to know the router’s login credentials. If you are in a work environment then you might not have access to these details to log into the routers admin page. In that case, you will have to use the methods mentioned above.
Mac Address Changer
Final Say
Mac Address Scanner
Once you have found the IP address of the devices in your network. You can start configuring your network accordingly. You can start assigning Static IP Addresses to your device, configuring SSH, access your computer remotely etc.
0 notes
Text
Quickbooks 2016 For Mac

Quickbooks 2016 For Mac For Sale
Quickbooks 2016 For Mac Free Download
Quickbooks 2016 For Mac
Quickbooks For Mac Versions
Macs are becoming increasingly popular among accountants and business owners many of whom need QuickBooks Desktop installed on them. Intuit has customized QuickBooks Desktop for Mac for such users. However, such users might have to send their QuickBooks files to an accountant or another user with a Windows machine. The files used in QuickBooks Desktop for Mac (.dmg or .qbxxx) are different from those in QuickBooks Desktop for Windows (.qbw). This implies that such users have to know how to import QuickBooks File in Mac to QuickBooks Desktop for Windows. Let us explore how to exchange QuickBooks files between users of machines with dissimilar operating systems and alternate solutions.
Why Import QuickBooks File in Mac to QuickBooks Desktop for Windows?
While one of the most common reasons for importing QuickBooks for Mac files into the Windows machine is to allow other users to access the financial records on these systems, the launch of macOS Catalina has exposed more vulnerabilities in the former version. Many users have experienced data losses and crashes. While Intuit has resolved the issue for QuickBooks Desktop for Mac 2019 (R7) or 2020 (R2 or later) for macOS Catalina users, the company has made it clear that QuickBooks Desktop for Mac 2015 and 2016 users must upgrade to later versions or migrate to QuickBooks Online.
Data loss or crashes may occur while using an unsupported version of QuickBooks Desktop for Mac (2016 or earlier) on Apple’s new macOS Catalina or when not using the latest versions of supported QuickBooks Desktop for Mac products (2019 and 2020). Quickbooks Desktop Downloads for Windows and Mac. © 2014 Intuit, Inc. All rights reserved. Intuit and QuickBooks are registered trademarks of Intuit, Inc.
Quickbooks 2016 For Mac For Sale
However, there could be changes in functionalities if you migrate from the desktop version to the online version. Flash tool mac android.
How to Convert QuickBooks for Mac Files to QuickBooks For Windows?
© 2020 Intuit, Inc. All rights reserved. Intuit, QuickBooks, QB, TurboTax, ProConnect and Mint are registered trademarks of Intuit Inc. Terms and conditions. Learn QuickBooks Pro 2016 training tutorials for beginners. Get the full 8-hour course here: https://www.simonsezit.com/courses/quickbooks/learn-quickbooks-p. QuickBooks for Mac accounting software by Intuit makes it easy to manage your small business finances. 50% off QuickBooks for 3 months. Limited time only. 50% off QuickBooks for 3 months. Limited time only. Support For Sales.
Intuit has designed the solution in such a way that users on machines running either operating systems can open the file with simple conversion steps. Here’s how you can convert your company file from QuickBooks for Mac to QuickBooks for Windows.
Preparing the Company File in QuickBooks for Mac
Ensure that the updates for the latest release for QuickBooks for Mac are available on your system.
If you have added transactions with memos, ensure that the latter do not have more than 50 characters or special characters.
Ensure that the transactions are closed before moving on to the next record.
If you notice that some data is out of place in any list, re-sort them to set them to default.
Verify the records and rebuild the company file before initiating the conversion.
Converting Company File for QuickBooks for Desktop
Quickbooks 2016 For Mac Free Download
After you have ensured that the company file is formatted by verifying the data, you can proceed with the export.
Ensure that you are opening the company file with admin rights.
Click on File>Export and select the option To QuickBooks for Windows.
Click on Verify if you are prompted before taking the back up.
Save the backup file in an appropriate folder.
Importing QuickBooks File in QuickBooks Desktop for Windows
Quickbooks 2016 For Mac
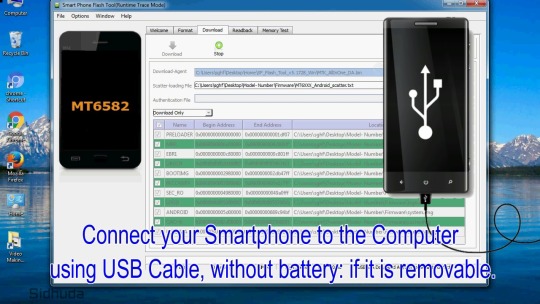
While smaller files can be emailed to users with a Windows machine, larger ones have to be imported into QuickBooks Desktop for Windows using a physical device such as a USB flash drive or using cloud storage. Eventually, it can be restored on the Windows version of QuickBooks.
Launch QuickBooks Desktop on the Windows system.
Navigate to the File menu and select Open or Restore Company…
Import the company file saved in qbw format from the storage device/ drive you saved on the Mac machine.
Open the company file and type in your credentials to start working.
Apps4Rent Can Help with Hosted QuickBooks Desktop
Quickbooks For Mac Versions
Most users find QuickBooks Desktop for Windows to be a superior product in comparison with both QuickBooks Online and QuickBooks for Mac. As an Intuit Authorized Hosting Provider, Apps4Rent can host QuickBooks Desktop on the cloud so that you do not have to import and export files frequently. Apart from 24/7 phone, chat, and email support, you are protected from data loss with frequent backups to ensure that you can leverage the powerful tools in QuickBooks Desktop without compromising on the mobility and safety of QuickBooks Online. Contact us today for the best prices on QuickBooks hosting plans.
0 notes
Text
Flash Tool For Mac Android


Google is committed to advancing racial equity for Black communities. See how.
Latest Samsung Flash Tool ( the best Samsung Smart Phones tools ) is released and available to download without waiting. So, If you already using its (Samsung) old version on your PC / laptop, Then you are required to new update Samsung-setup file. SP Flash Tool - Download SmartPhone Flash Tool Download SPFlash Tool v5.1924 SP flash tool is an application which mainly helps you to flash Stock ROM, Custom recovery and fixing in some extreme cases ( firmware update, Flash recovery, unbrick bricked Android device etc.). Flash tool is required to install Android OS on mobile and tablet without box. Download the latest version of flash tool for free. Every CPU has different supported Tool. In order to use Flash tool, Driver has to be installed prior to Flashing.
Download Spflashtool Mac Software SP Flash Too v.5.1524 SP flashtool smartphone flash tool is the best tool for MTK based android devices Download sp flash tool now. SP flash tool v.3.31351.01 sp flash tool helps you to flash any Android smartphone ot tablet pc with stock ROM or custom ROM.
Android Flash Tool allows you to flash an Android build to your device fordevelopment and testing. To get started, you need a development machine and anAndroid device.
Development machine requirements
Your development machine must meet these requirements:
Browser: Any browser supporting WebUSB, such as Chrome or Edge 79+.
Platforms:
Linux
macOS
Chrome OS
Windows (requires an additional USB driver)
Installing Windows drivers
To work with fastboot and flash devices on a Windows machine, you need acustomized USB driver from the Android SDK. For more details, seeInstall OEM USB drivers on the Android Developers site.
Caution: If you have Android Debug Bridge (adb) installed on your machine, stop the adb service with the command below before proceeding as the service interferes with the flashing process.
Device requirements
You can flash a new version of Android to thesesupported devices:
Pixel 4 XL
Pixel 4
Pixel 3a XL
Pixel 3a
Pixel 3 XL
Pixel 3
Pixel 2 XL
Pixel 2
Preparing your device
Before you can flash a build to your device, you must prepare your device:
EnableDeveloper options and USB debugging.
Enable OEM Unlocking in the Developer options menu. If yourbootloader is already unlocked, this option is grayed out withBootloader is already unlocked.
If you're having trouble enabling OEM Unlocking, make sure:
Your device is connected to the internet.
Your device has checked in with Google, which may not be the case justbecause your device recently connected to the internet. To force a checkin, enter *#*#CHECKIN#*#* (*#*#2432546#*#*) in the Dialer (no SIMrequired). After entering the number (no need to press call), the textdisappears and a success notification appears.
Note: Some devices require carrier intervention to be unlocked. Contact yourcarrier for more details.
Flashing your device
Connect your device directly to your development machine(no hubs, adapters, extenders, or monitors).
Open flash.android.com in abrowser on your development machine. It opens to the Welcome page.
Allow the flash tool to communicate with your test device through adb byaccepting the popup that says Allow site access to your ADB keys inorder to communicate with devices.
Click Add new device.
Select your device from the list and click Connect. This list maynot contain the full device name.
On your device’s screen, select Always allow from this computerand click OK to accept the USB debugging connection.
Select the connected device in your browser.
Search for and select your desired build from the list. You can also selectoptions, such as wiping the device or force flashing all partitions.
Click Install to start the process. The device reboots and enters fastboot mode.
After Flash Complete appears, disconnect the device from the USB cable.
Note: If this is the first time you're flashing this device on this machine,your machine loses the connection to the device and asks you to find it again.The next time you flash the same device on that same machine, you won't see therequest to refind the device. After reconnecting, the flashing resumes andstarts downloading the images and performing all the required steps.
USB transfer errors
Best Android Flash Tool
Sometimes Android devices have trouble communicating through certain USB portsor hubs due to the high throughput of data. To improve reliability:
Android Flash Tool Free Download
Don't use USB hubs. This includes connections through monitors.
Don't use USB extension cables or adapters if possible.
Try a different USB port. Rear ports are often more reliable thanfront ones.
If you're using a USB C port, try a USB A port instead.
Back to latest public build
Flash Tool Android Mac Os X
If you want to return your Pixel device to the public build you can flash backto the latest factory image and lock your devicehere.
SP Flash Too v.5.1524SP flashtool smartphone flash tool is the best tool for MTK based android devices Download sp flash tool now ...
SP flash tool v.3.31351.01sp flash tool helps you to flash any Android smartphone ot tablet pc with stock ROM or custom ROM. Download sp flash tool latest version with user friendly interface and many improvements. SP flash tool runs on Windows and Linux.
Flash Tool For Android Download
Spflashtool software by TitlePopularityFreewareLinuxMac
Today's Top Ten Downloads for Spflashtool
SP flash tool sp flash tool helps you to flash any Android smartphone ot
SP Flash Too SP flashtool smartphone flash tool is the best tool for MTK
Flash Tool For Mac Android Windows 10
Visit HotFiles@Winsite for more of the top downloads here at WinSite!
0 notes
Text
Html5 Editor For Mac

Javascript Editor For Mac
Css Editor Mac
In the TextEdit app on your Mac, choose File New, then choose Format Make Plain Text. Enter the HTML code. Choose File Save, type a name followed by the extension.html (for example, enter index.html), then click Save. When prompted about the extension to use, click “Use.html.”. The web editor for Mac is back.For people who make delightful, innovative and fast websites — in an app to match. Espresso helps you write, code, design, build and publish with flair and efficiency. Sophisticated text features, amazing Live Preview with Browser Xray, CSSEdit tools, the Navigator, Dynamo auto-building, and Server Sync.
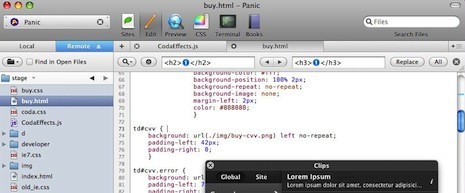
Good question. Coda is everything you need to hand-code a website, in one beautiful app.
While the pitch is simple, building Coda was anything but. How do you elegantly wrap everything together? Well, we did it. And today, Coda has grown to be a critical tool for legions of web developers around the world.
More than anything else, Coda is a text editor. It’s got everything you expect: syntax highlighting for tons of languages. Code folding. Project-wide autocomplete. Fast find and replace. Indentation guides. Automatic tag closing. Fast commenting and shifting of code. The works. But Coda’s editor has features you won’t find anywhere else. For example, the Find and Replace has this revolutionary 'Wildcard' token that makes RegEx one-button simple. And as you type, Coda Pops let you quickly create colors, gradients, and more, using easy controls. There are nice touches everywhere.


But an incredible text editor is just a nice typewriter if you can’t easily handle all of your files — from anywhere. Coda has battle-tested, deeply integrated file management. Open local files or edit remotely on FTP, SFTP, WebDAV, or Amazon S3 servers. Use the Files tab and move, rename, copy, transfer from server-to-server... anything. Track local changes for remote publishing. There’s even support for Git and Subversion.
Then you’ll want to see what your code looks like. Use our WebKit Preview, which includes a web inspector, debugger, and profiler. Then, on top of that, we added AirPreview, a revolutionary feature that lets you use your iPad and iPhone with Code Editor to Preview pages as you code on your desktop.
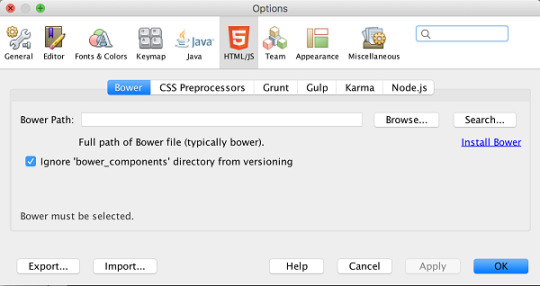
Believe it or not, we’ve just scratched the surface. Open Coda’s Sidebar to discover a rich set of utilities that make you work better. Like Clips, which let you create frequently used bits of text that you can insert into your document with special triggers. And project-wide Find and Replace that’ll work across multiple files. There’s also an HTML Validator, a Code Navigator, and more.
Javascript Editor For Mac
Finally, hiding behind the Plus button in the tab bar is a built-in Terminal and MySQL editor, two amazingly powerful Tab Tools. The Terminal can open a local shell or SSH. MySQL lets you define structure, edit data, and more.
Css Editor Mac
And it’s all wrapped up in our Sites, which get you started quickly. Opening a Site sets your file paths, your root URLs, where your files Publish to, source control settings, and more. And with Panic Sync, our free and secure sync service, your sites follow you on any computer.
Coda is a very good app.
Html5 Editor For Mac
1 note
·
View note