#samsungroot
Text
Unlock Bootloader On Samsung Galaxy Devices 2023

From an Android Developer's point of view
Unlocking the bootloader on Samsung Galaxy devices is a necessary step if you want to customize and install custom ROMs, kernels, or recoveries. It allows you to gain administrative access to the device and make changes to the system software.
However, the process of unlocking the bootloader is not straightforward and requires some technical knowledge. In this article, we will guide you on how to unlock the bootloader on Samsung Galaxy devices in 2023.

What is Bootloader?
A bootloader is a program that runs when you turn on your device. It loads the operating system and other necessary files to run the device. The bootloader also checks the system for any errors and allows the device to enter into different modes such as recovery or download mode.
The bootloader is locked by the device manufacturer to prevent users from making unauthorized changes to the system software. However, unlocking the bootloader allows you to make modifications to the software and install custom firmware.
Why Unlock Bootloader?
Unlocking the bootloader on Samsung Galaxy devices allows you to install custom firmware, custom kernels, and recoveries. It gives you administrative access to the device and allows you to make changes to the system software. This can help you to:
- Install custom ROMs that offer more features and customization options than the stock firmware.
- Increase the device's performance by installing custom kernels.
- Backup the entire system, which can be useful in case of data loss or software issues.
- Flash custom recoveries that can be used to install custom ROMs and other software updates.
Requirements:
Before you proceed to unlock the bootloader on your Samsung Galaxy device, you should make sure that:
- You have a computer running Windows, macOS, or Linux.
- You have a USB cable to connect your device to the computer.
- You have installed the Samsung USB drivers on your computer.
- You have enabled USB debugging on your device by going to Settings > Developer options > USB debugging.
Note: If you cannot find the Developer options on your device, go to Settings > About phone and tap the Build number seven times to enable Developer options.
Also read: Getting Started With Magisk Modules
How to Unlock Bootloader on Samsung Galaxy Devices?
Now that you have met the requirements, you can proceed to unlock the bootloader on your Samsung Galaxy device by following these steps:
Step 1: Back up Your Data
Unlocking the bootloader on your device will erase all data on the device. Therefore, you should back up your data before proceeding.
Step 2: Get Your Device's Unique Identifier
To unlock the bootloader on your Samsung Galaxy device, you need to get the device's unique identifier. To do this, follow these steps:
Turn off your device.
- Press and hold the Volume Up + Volume Down buttons and connect your device to the computer using a USB cable.
- Release the buttons when the warning message appears.
- Open a command prompt or terminal window on your computer and type the following command:
- Windows: "adb devices"
macOS/Linux: "./adb devices"
If your device is connected, you will see a message that says "List of devices attached" followed by your device's unique identifier.
Step 3: Unlock the Bootloader
To unlock the bootloader on your Samsung Galaxy device, follow these steps:
- Go to the Samsung Developer website and create an account.
- Download the latest version of Odin on your computer and extract the files.
- Download the bootloader unlocking file for your device and extract the files.
- Open Odin on your computer.
- Boot your device into download mode by pressing and holding the Volume Down + Power buttons.
- Connect your device to the computer using a USB cable.
- In Odin, click on the "AP" button and select the bootloader unlocking file you downloaded.
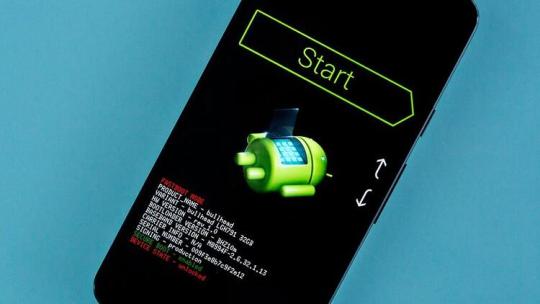
- Click on the "Start" button to begin the bootloader unlocking process.
- Wait for the process to complete, and your device will automatically reboot.
Step 4: Verify Bootloader Status
After the device reboots, you can verify if the bootloader has been unlocked by following these steps:
Turn off your device.
- Press and hold the Volume Up + Volume Down buttons and connect your device to the computer using a USB cable.
- Release the buttons when the warning message appears.
Open a command prompt or terminal window on your computer and type the following command:
Windows: "adb devices"
macOS/Linux: "./adb devices"
If your device is connected, you will see a message that says "List of devices attached" followed by your device's unique identifier.
Type the following command in the command prompt or terminal window:
Windows: "fastboot oem get_unlock_data"
macOS/Linux: "./fastboot oem get_unlock_data"
- You will see a long string of characters. Copy the string and paste it into a text editor.
- Remove all spaces from the string.
- Go to the Samsung bootloader unlock website and paste the string in the designated field.
- Click on "Confirm" to verify the status of the bootloader.
If the bootloader status is shown as "Unlocked," you have successfully unlocked the bootloader on your Samsung Galaxy device.
Also read: How To Fix An Android Stuck In Fastboot?
Conclusion
Unlocking the bootloader on Samsung Galaxy devices is a necessary step if you want to customize and install custom ROMs, kernels, or recoveries. It can help you to increase the device's performance, backup the entire system, and install custom software updates.
However, the process of unlocking the bootloader requires some technical knowledge and can potentially void your device's warranty. Make sure to follow the steps carefully and back up your data before proceeding. With the right tools and knowledge, you can unlock the bootloader on your Samsung Galaxy device and gain administrative access to the system software.
Read the full article
#samsungroot#samsungunlockbootloader#unlockbootloaderofanysamsungdevice#unlockbootloaderofanysamsungphone#UnlockBootloaderOnSamsungGalaxyDevices#UnlockBootloaderOnSamsungGalaxyDevices2023#UnlockBootloaderOnSamsungGalaxyphones2023
0 notes
Text
https://youtu.be/FpqehERjsCQ
youtube
0 notes
Text
Root Nedir? - Android Cihazlara Root Nasıl Yapılır?

Android cihaza root atmak demek, sistem dosyalarının her türlü değişikliğin yapılmasına imkân tanımak demektir; bu da sistemde çeşitli değişikliklerin yapılabilmesine ve root erişimi gerektiren uygulamaların kullanılmasına olanak tanır. Peki Root nedir? Android Cihazlara Root Nasıl Yapılır konusunu detaylı olarak inceledik. Detaylar yazımızda.
Root Nedir?
İşletim sisteminde halihazırda bulunan ya da Play Store'daki uygulamaların yapamadığı işlemler olabilir. Bu işlemler sistem kök dizinine erişilerek yapılan işlemler olabilir ve sistem güvenlik nedeniyle her ne kadar açık kaynak bir sistem olsa da bu işlemlere izin vermez. Bizim sistem kök dizinine erişim izni alabilme durumumuza Root yapmak denir. Root yalnızca Android cihazlara yapılır, iOS cihazlar için Jailbreak ile benzer işlemler yapılabilir.

Android Root Nasıl Atılır? Root Hazırlığı Nasıl Yapılır?
Cihazınıza Root atmak için, cihazınızın ayarlar bölümüne gidin ve geliştirici seçenekleri kısmını açın. Eğer geliştirici seçenekleri kısmını bulamadıysanız, ayarlar uygulaması içinde derleme numarası kısmını bulun ve üstüne 8 defa hızlıca tıklayın. Sonrasında geliştirici seçenekleri kısmı açılacaktır. Geliştirici seçenekleri menüsüne girdikten sonra USB Hata Ayıklama Modu'nu açmalısınız. Bu işlemi gerçekleştirdikten sonra cihazınız Root işlemi için hazır hale gelecektir.
Cihazınızı hazırladıktan sonra, root işlemi için çeşitli araştırmalar yapmanız gerekmekte. Her marka ve her model için root işlemi adımları değişiklik gösterdiğinden dolayı bizler nasıl Root yapacağınız hakkında net bir bilgi veremiyoruz. Ancak, piyasadaki birçok cihazı Root'layabilen Kingo Android ROOT isimli uygulamayı deneyebilirsiniz. Bu şekilde hiçbir bilgi sahibi olmadan cihazınızı kolaylıkla rootlayabilirseniz. Eğer program çalışmazsa internetten cihazınıza özel olarak araştırma yapmanız gerekmekte.
Peki sizler cihazınıza root yapıyor musunuz? Root yaparken nelere dikkat ediyorsunuz?
Read the full article
#androidrootyapma#huaweiroot#lgroot#romyükleme#rootatma#rootnasılatılır#rootnasılyapılır#samsungroot
0 notes
Last Seen Blogs

a-stirling
Aaron Stirling

chained-prometheus
I, Titan

haruhidaily
Haruhi Suzumiya Daily


just-a-bagel-rus
Hi!