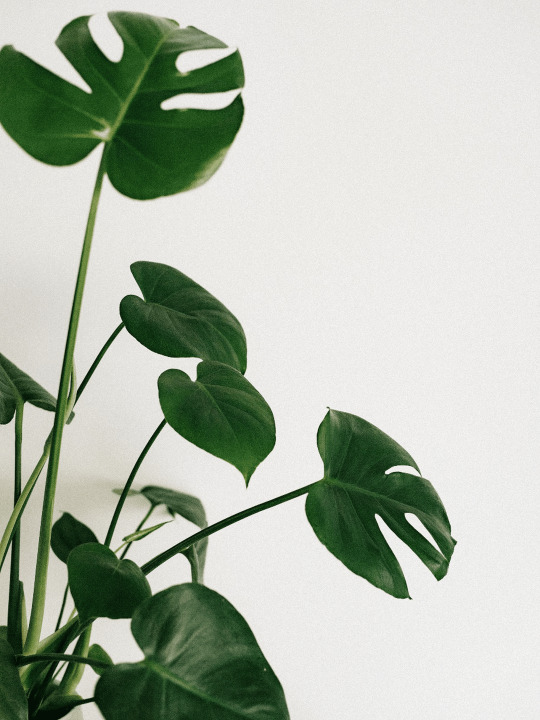
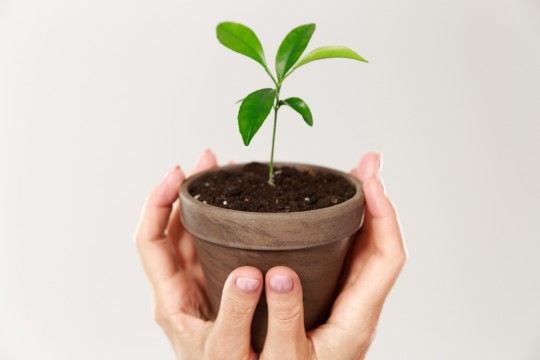
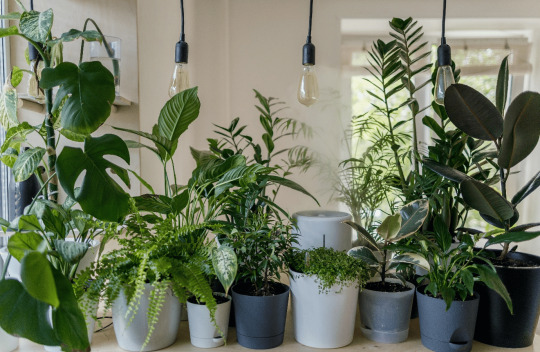
#releasepots
Photo
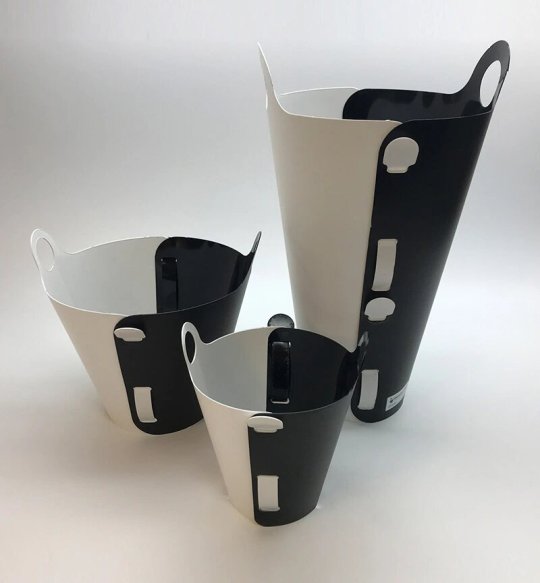
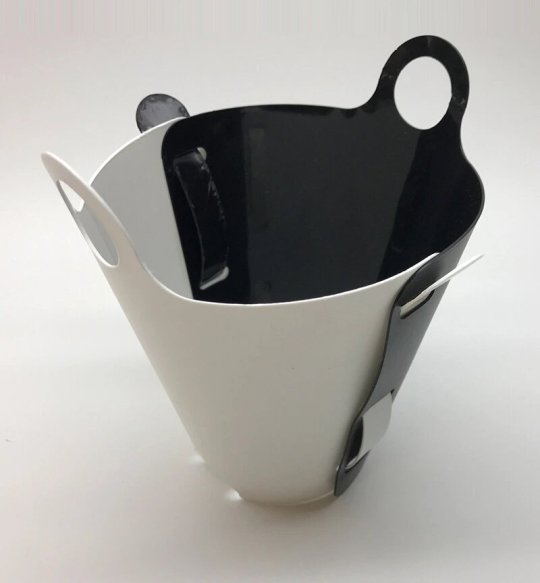

ReleasePots
The only reusable potting system that easily releases the root ball first time, every time. ReleasePots are made in the USA with recycled materials and are 100% recyclable. Release pots are available in 3 stock sizes and 2 stock color combinations. Multi packs include 1 of each size. Other sizes and colors available for custom orders. Visit our website to place an order at https://releasepots.com/product/releasepots/
0 notes
Text
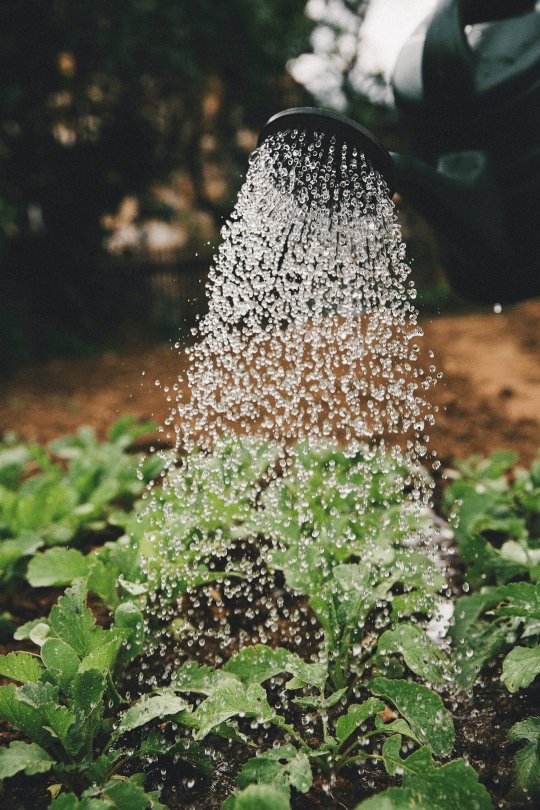
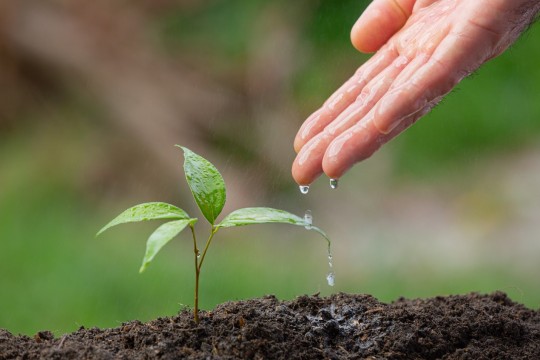
How Often Should You Water Plants & Flowers in Pots?
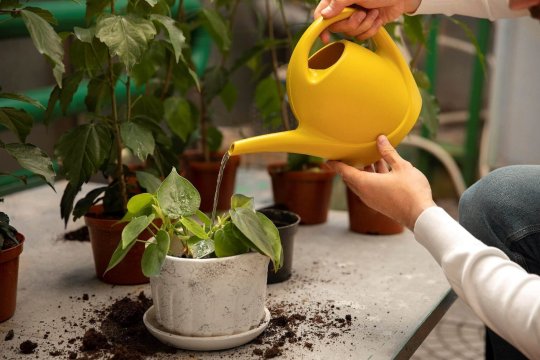
Watering potted plants and flowers is a crucial part of plant care, but it can be difficult to know exactly how often to water. Overwatering can lead to root rot and other problems, while under watering can cause plants to wilt and die. So how often to water pot plants?
In this article, we’ll explore the factors that influence how often you should water potted plants and flowers, and provide some general guidelines to help you keep your plants healthy and thriving.
How often should you water your potted plants?
The frequency of watering potted plants depends on a number of factors, including the size and type of the plant, the size and type of the pot. Here are some general guidelines for watering potted plants:
Water small plants (such as herbs and succulents) more frequently than larger plants, as they have smaller root systems and dry out faster.
You should water plants in clay pots more frequently than those in plastic pots, as clay pots tend to dry out faster.
Water plants in well-draining soil more frequently than those in soil that retains moisture, as the latter can stay too wet and lead to root rot.
Those in dry environments should be watered more frequently than those in cooler, more humid environments.
Finally, water plants that are actively growing more frequently than those that are dormant.
One way to determine when to water your plants is to check the moisture level of the soil. Stick your finger about an inch into the soil. If it feels dry, it’s time to water. If it feels moist, wait a few more days before watering.
Watering techniques for potted plants

There are several watering techniques that can be used for potted plants, depending on the size, type of the plant and the soil. They include the following:
Top watering
This is the most common method of watering potted plants. To top water, simply fill the pot with water until it begins to drain from the bottom. This method is easy and convenient, but it may not be as effective at reaching the roots of the plant, especially if the pot is large or the soil is dry and compacted.
Bottom watering
In this method, fill a tray or saucer with water and place the potted plant in it. The plant will absorb water through the holes in the bottom of the pot. This method is more effective at reaching the roots of the plant, but it’s important to make sure the pot is not left standing in water for too long, as this can lead to root rot.
Drip watering
With drip watering, a hose or watering can with a long spout is used to slowly and evenly water the soil around the base of the plant. This method is good for plants that need a lot of water, but it can be time-consuming and may not be suitable for plants with small pots or shallow root systems.
Watering can
A watering can is a convenient tool for watering small potted plants. To use a watering can, fill it with water and gently pour it over the soil until it is evenly moistened. It is ideal for plants that need a moderate amount of water.
Self-watering pots
Self-watering pots have a reservoir at the bottom that holds water, which is gradually absorbed by the soil as needed. This method is good for plants that need a consistent supply of water, but it’s important to monitor the water level in the reservoir and refill it as needed.
It’s important to choose the watering method that is most suitable for your plants and their needs. Overwatering can be a problem, so it’s important to be cautious and not water your plants too often.
Signs for overwatering potted plants
There are several signs that a potted plant may be overwatered:
Soggy or waterlogged soil
If the soil in the pot feels soggy or waterlogged, it may be a sign that the plant is being overwatered.
Yellowing or wilting leaves
Plants that are overwatered may develop yellowing or wilting leaves, as the excess water can cause the roots to rot and prevent the plant from getting the oxygen it needs.
Foul smell
If the soil in the pot starts to smell sour or rotten, it may be a sign of overwatering. This is because excess water can cause bacteria and fungus to grow in the soil, leading to a foul smell.
Stunted growth
Overwatering can cause plants to stop growing or grow more slowly than they should. It is due to dilution of nutrients that support plant and flower growth.
Mushy or black roots
If the roots of the plant look mushy or black, it may be a sign of root rot, which is often caused by overwatering.
If you suspect that your potted plant is overwatered, it’s important to reduce the frequency of watering and allow the soil to dry out slightly between waterings. It may also be necessary to repot the plant in fresh, well-draining soil to help prevent further damage.
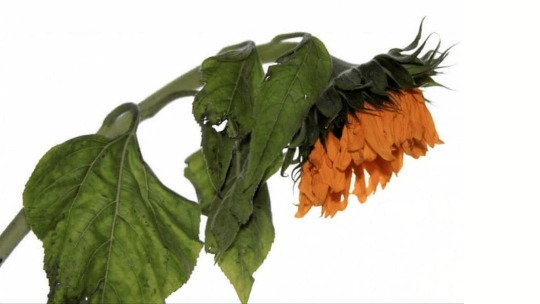
Signs that a potted plant is underwatered
Here are several signaling a potted plant may be underwatered:
Dry or brittle soil
If the soil in the pot feels dry or brittle, it may be a sign that the plant is not getting enough water.
Yellowing or wilting leaves
Plants that are underwatered may develop yellowing or wilting leaves, as they are not getting enough moisture to support their growth.
Stunted growth
Underwatered plants and flowers may grow slowly or stop growing altogether.
Dry, crispy leaves
If the leaves of the plant feel dry and crispy to the touch, it may be a sign that the plant is not getting enough water.
Curling leaves
Some plants may curl their leaves to reduce surface area and conserve water when they are underwatered.
Best watering techniques for potted plants and flowers
Here are some best practices for watering potted plants:
Check the soil moisture level before watering: Stick your finger about an inch into the soil to check the moisture level. If it feels dry, it’s time to water. If it feels moist, wait a few more days before watering.
Water thoroughly, but not too often: When watering, it’s important to make sure the soil is evenly moistened. However, it’s also important not to water too often, as overwatering can lead to root rot.
Avoid getting water on the leaves: Watering the leaves of a plant can cause fungal diseases to develop, so it’s best to avoid getting the leaves wet. Instead, focus on watering the soil around the base of the plant.
Use lukewarm water: Cold water can shock the roots of a plant and cause stress, so it’s best to use lukewarm water when watering.
Use the right watering tool: Choose a watering tool that is suitable for the size and type of your plant. For example, a watering can may be suitable for small potted plants, while a hose or drip watering system may be more appropriate for larger plants.
Water at the right time of day: It’s best to water potted plants in the morning or early evening, as the cooler temperatures and lower light levels will help prevent evaporation and minimize the risk of fungal diseases.
By following these watering practices, you can help ensure that your potted plants are getting the moisture they need to thrive.
Now that you know when to harvest potted plants, let’s look at the benefits of planting in pots:
Watering indoor plants potted plants Vs. outdoor potted plants
Watering outdoor potted plants and indoor potted plants can have some similarities, but there are also some important differences to consider.
One similarity is that both types of plants need to be watered regularly to ensure that they receive sufficient moisture. Both types of plants will also benefit from being watered thoroughly, so that the water reaches the roots and the soil is evenly moistened.
However, there are a few key differences to consider when watering outdoor and indoor potted plants:
Climate
Outdoor potted plants are exposed to a range of weather conditions, including sun, wind, and rain. This can affect how often they need to be watered, as well as the amount of water they require. Indoor potted plants are typically protected from these elements and may need less frequent watering as a result.
Soil type
Outdoor potted plants are often grown in potting soil that is designed to drain well, while indoor potted plants may be grown in a variety of soil types, including potting soil and soil-less mixes. The type of soil you use can affect how quickly it dries out and how much water your plant needs.
Light levels
Indoor potted plants are typically grown in lower light levels than outdoor plants, which can affect their watering needs. Indoor plants may need less frequent watering than outdoor plants because they are not exposed to as much sunlight and heat.
Overall, it’s important to pay attention to the specific needs of your outdoor and indoor potted plants and to water them accordingly. This may involve checking the soil moisture level regularly and adjusting your watering schedule as needed.
Conclusion
In general, potted plants and flowers should be watered regularly, but the specific frequency will depend on a variety of factors such as the type of plant, the size and type of pot, the climate, and the soil mix. Since you know how often to water pot plants, ensure to follow the tips to have healthy plants in your backyard or balcony.
Original Source:
https://releasepots.com/how-often-should-you-water-plants-flowers-in-pots/
0 notes
Text
When Should You Harvest Different Potted Plants?
Most novice and, interestingly, avid growers don’t know when to harvest pot plants. Unlike conventional gardening, pot plants do not have a distinctive harvesting season since you can grow them anytime. This article looks at the popular potted plants and when they are ready for harvesting.
Vegetables
● Beans
Beans are one of the most popular staple foods worldwide. You can grow greens in pots, whether indoors or outdoors. You can choose between the bushy option, which grows with minimal maintenance and climbing variety that needs trending. Whichever the case, the minimum pot depth should be 12 inches. You should harvest your beans within 45 to 64 days.
● Beets
Beets are another ideal potted plant. They are easy to grow and require little to no monitoring. There are several varieties to choose from, such as Chiogga and Detroit dark red. You should, however, provide them with a deep pot for optimal growth. Ideally, the minimum depth should be 12 inches. You should harvest your beets after 6 to 8 weeks.
● Chard
Chard is some of the most colorful veggies to grow in a pot. With varieties such as ruby red and rainbow mixture, it will make your balcony or backyard colorful. They are fast-growing and do not require deep containers. With an 8-inch-deep pot, you will get your harvest within 8 to 10 weeks.
● Chili peppers
Let’s face it; chili peppers are some of the most popular species in the world. Thanks to their small size, they can be planted in pots in balconies, backyards, and kitchen gardens. That said, they need ample sunlight and warmth for ample fruition.
You can choose between jalapeno early and Thai hot, depending on how hot you want. It requires a pot with a minimum depth of 12 inches. On average, pot chili peppers take between 65 and 85 days to mature.
● Kale
Kale is a nutrient-rich vegetable ideal for planting in pots. The best part? You can plant several kales in one pot. You can add them to your smoothie or use them in salads. With a handful of kales, you will surely supply your family with a month of harvest. They require a pot with a minimum depth of 8 inches and are ready for harvest within 30 days.
● Onions
Onions are among the best vegetables to grow in containers. They are easy to propagate and can grow in different places in your home. A small container can accommodate at least five plants. White Lisbon and Tokyo Long White are the most popular onions grown in pots. All require a pot within a minimum depth of 4 inches. The former can be harvested after 60 days, while the latter is ready after 100 days.
● Radishes
Like onions, radishes can grow in small containers with ease. All you need is to scatter the seeds and water them regularly. If you choose the Solaris Hybrid variant, it should be ready for harvesting after 24 days. The Cherry Belle variant will be ready after three weeks.
● Spinach
Like kale, spinach is another green, leafy vegetable you can add to your pot. It is easy to grow in different conditions, such as partial shade. But a balcony or backyard is the best option.
The best part is that they don’t require a deep pot. A 6-inch-deep port is enough and ready for harvest within 45 to 55 days.
● Tomatoes
Its no doubt tomatoes are one of the most popular potted plants. They are cheerful and delicious, making them a staple for almost any dish. Besides, they are productive in pots as they tend to grow well when restricted. With one plant, you can harvest up to 10 pounds per season.
Since they need ample sunlight, you can plant them around sunny windowsills or backyards. The pot should have a minimum depth of 12 inches. Tomatoes are ready to harvest after an average of 75 days, depending on the variety.
● Sweet peppers
If you want a versatile potted plant, sweet pepper is the perfect choice for you. You can use them in stir fries and salads for that added flavor. They are loved for their crisp and sweet taste. The ideal sweet pepper varieties to plant in a pot include Confetti Hybrid and Jungle Parrot. They require a pot with a minimum depth of 12 inches. They should be ready for harvest between 55 and 85 days.
Fruits

You can also grow different fruits in pots. The most popular include:
● Apples
Dwarf apples grow well in large pots. Ideally, the pot should be about 23 inches wide. They, however, require a sheltered and sunny spot to grow well. You can grow a self-fertile variety, from which you will graft the rest of the apples. You can opt for the M26 or M9 variety. Apples take at least 1 to 3 years to mature. You can harvest them between August and the end of September.
● Blackcurrants
If you want to add color to your backyard, consider planting blackcurrants. They also attract pollinators such as bees. As such, they can help pollinate other plants and flowers in your backyard. The grit should be planted at least 6cm below the potting soil, and the pot should be 20 inches wide. They should be ready for harvesting during summer.
● Blueberries
Unlike most potted plants, blueberries require acidic soil, which is easy to use as a potting mix. They are attractive thanks to their flowers and fruits. And once in autumn, you will love the colorful leaves. Blueberries require a sheltered and sunny spot to grow optimally.
If possible, water with rainwater instead of tap water. Ensure to protect the plant from birds. The pot should be 12 inches wide. You should harvest blueberries between June and August.
● Cherries
Cherries are yet another fruit you can plant in your pot. They blossom in spring and have elegant leaves in autumn. Sweet varieties such as Gisela 5 require ample sunlight, while soar varieties like Colt can withstand shade. The pot should be at least 23 inches wide. Generally, they are ready to harvest between December and February.
● Figs
The fig tree grows well when its growth is restricted. And one way to go about it is to grow them in pots or containers. Grow them in a warm, sunny spot and provide ample water. The potting mix should allow water to drain if you want your fig tree to grow to maturity. The container should be 18 inches wide. You should harvest the fruits in autumn.
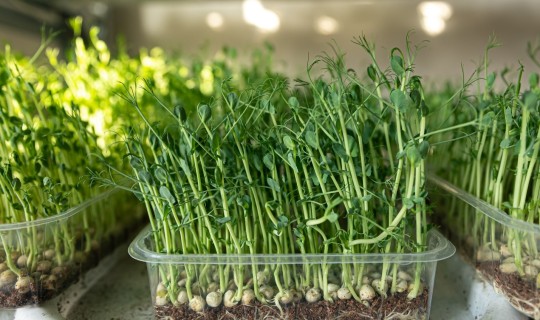
Benefits of growing plants in pots
Now that you know when to harvest pot plants, let’s look at the benefits of planting in pots:
● You can plant anytime
Outdoor gardening has season restrictions and is not ideal for all plants. For example, in temperate regions, you can only plant as you approach winter, while in the tropics, planting starts in the rainy season. Fortunately, you don’t need to wait for the perfect season with container gardening.
Instead, you can garden anytime, especially if your containers are on a balcony or a greenhouse. The best part is that some vegetables, such as onions and tomatoes, can grow indoors.
● You don’t need to worry about space
It is normal for city dwellers to think they don’t have space to plant vegetables or other potted plants. However, you can turn it into a thriving garden with a few containers on a balcony. While you won’t deal with large plants, you can garden small veggies such as radishes, kale, spinach, and onions. Besides, you can grow different varieties in one container.
● You can grow plants indoors
There are thousands of plants that do well in indoor environments. Vegetables are the best fit, but you can still grow fruits under the right conditions, and thanks to technology, you can use artificial light to garden your plants. For example, cool white light in the blue spectrum produces lush leaf growth on compact plants.
● Saves water
Gardening outdoors requires a lot of water, most of which is wasted. Evaporation causes water to evaporate from the soil’s surface. As such, you’ll end up watering at least twice per day. Plants in pots require less water since there’s minimal water loss through evaporation. However, you need to monitor soil dampness which can cause the roots to rot.
Conclusion
There are many plants you can garden in a pot. You can plant something from fruits, flowers, and vegetables regardless of the current space. The benefits are many ranging from saving on fertilizers to reducing water wastage. Now that you when to harvest pot plants, which one will you garden? Let us know in the comment section.
Original Source: https://releasepots.com/when-should-you-harvest-different-potted-plants/
0 notes
Text
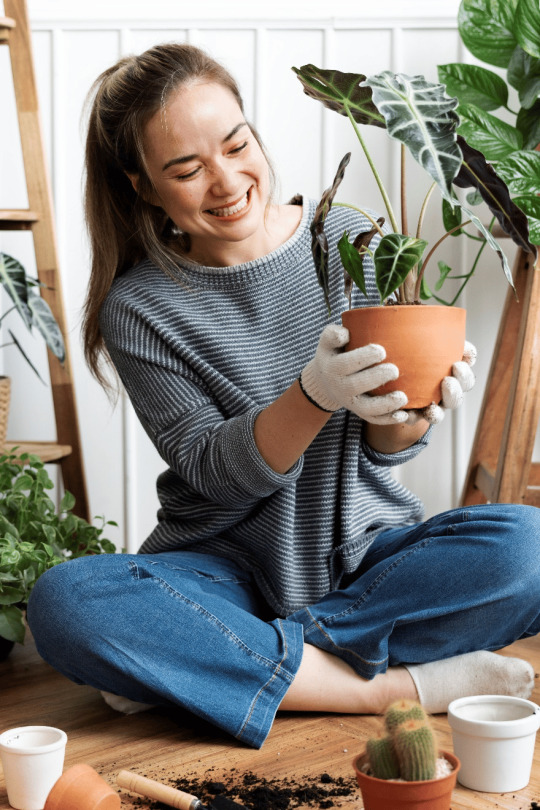
How to Properly Transplant a Potted Houseplant?
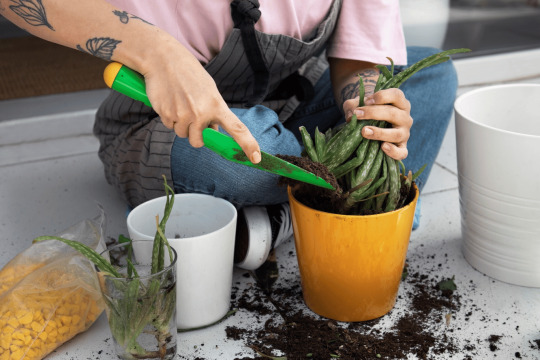
If you’ve been looking over at that plant that needs some love but are too scared to know how to transplant a plant, then look no further. Release Pots is here with all of your questions answered. Transplanting a potted plant can be daunting. While it may seem like a small task for some, when it’s your favorite plant, the pressure is on.
Having your home filled with houseplants is one of the great joys in life. The best part about having houseplants is you really can’t have too many. Who knew adding greenery to every room could be so much fun?
But it gets to a point where the plant starts slowing down in growth and isn’t looking green anymore but rather yellow and brown. These are some telltale signs to watch when deciding if your houseplant needs a new home.
Roots Growing Through The Existing Pot
Seeing those roots sticking out the bottom of the pot is a big sign that your plant needs a new home. Although you want your plant to grow to the restrictions of its current pot, you don’t want it to exceed this. When a plant becomes root bound, it will grow its roots right to the edges of the pot, with no more room to grow. Leaving your plant to become root bound can make for a tricky swap if you’re not using Release Pots.
Slower Growth
Unless it’s the middle of Winter, your houseplant shouldn’t be slowing down all that much in terms of growth. Slower growth without any reason behind it can be a sign of suffering without you even knowing it. This can be due to the roots being suffocated and not receiving the oxygen they need to ensure the plant is thriving.
Losing Leaves Or Yellowing Leaves
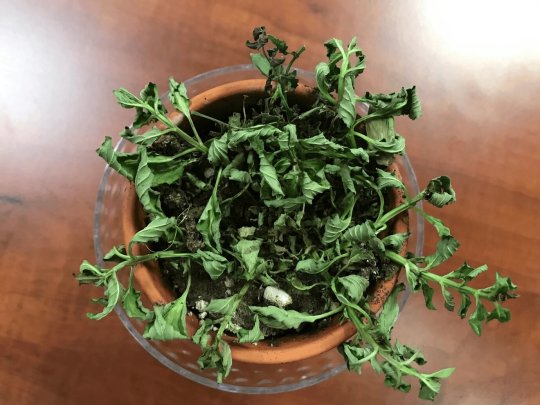
When your houseplant loses its leaves or the leaves start to turn yellow, while it’s a generalization this usually means there are issues with watering or the current pot it’s in is too small. Check your water situation and see what’s really going on in that soil. If the water isn’t affecting the plant, then it’s most likely the roots needing some more room. The roots are key to a healthy plant, so using pots like Release Pots is a great way to keep your houseplant happy and keep an eye on those roots.
Two Thirds Pot, One Third Plant
While this isn’t necessarily a sign, it’s definitely helpful when it comes to assessing each individual plant. Stick with the rule of thumb; you should have two thirds of pot to one-third plant. It needs to be repotted if you’ve got too much plant-to-pot ratio. But if you’ve not got enough pot for the little plant, you may need to size down. It’s a great way to keep the right proportions of a healthy houseplant.
When Is The Best Time To Transplant Plants
Before we get into the process of how to properly transplant a plant, we need to look at when is the best time to do so.
If your plant can hang out until Spring, then leave it until then. Springtime is the perfect time for transplanting. Not only is it when everything in nature is in full force, but it’s also the perfect temperature for plants. When you transplant a plant, you put it into shock. This is maximized even more so if you were to transplant during Winter. If you can’t wait until Spring to repot, then anytime during the warmer months will be your best bet.
How To: Transplant A Potted Houseplant, The Steps
These are our broken-down steps of how to properly transplant a houseplant.
1. Identify The Problem
As we’ve mentioned in the list above, there are signs to look for when determining if a houseplant needs to be repotted or not. As an added note, this process is much easier to complete if the soil is dry. This doesn’t mean you need to skip months of watering. However, consider skipping its weekly water the week before your transplant.
2. Prep Your New Pot
If you’re using Release Pots, go ahead and easily set up your pot. If not, make sure you’ve got the desired pot ready to go. In your desired pot, fill the bottom inch or so with soil and a small amount of fertilizer. How much soil you need for each plant will depend on the pot size.
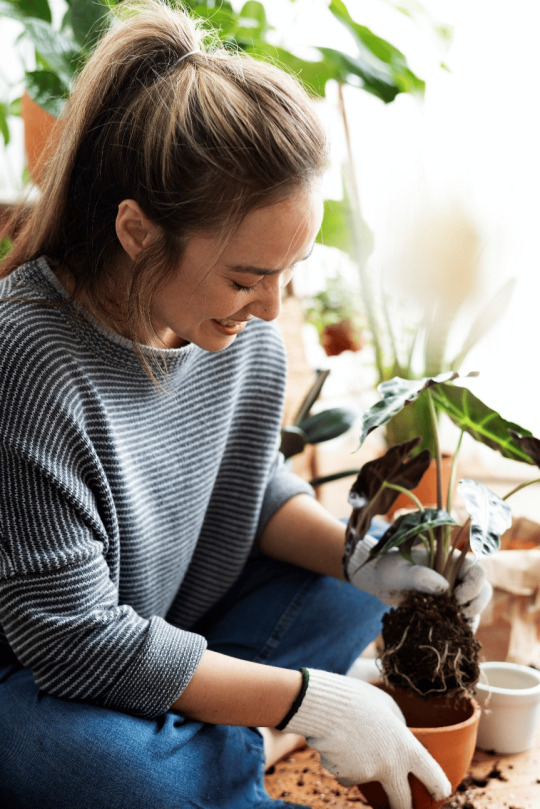
3. Remove Plant From Existing Pot
If you’re not using a Release Pot, this is where it could get tricky. But if you happen to be using a Release Pot, you’re in luck, as they make this step easy and quick. For those who are using a regular plastic pot, you’ll want to gently squeeze the side of the pot, loosening the roots. Roots should easily come away from the sides of the pot. Once you’ve loosened the soil, place your hand gently over the top of the soil, carefully holding the plant in place, and tip the plant upside down. The plant should fall out gently into your hand.
4. Put Into New Pot
Once the plant is gently in your hand, this is where you can carefully place it into its new pot. When you complete this step, be sure to separate the roots gently, so they have room to grow. This can be done gently with a small hand rake, or with your hands working perfectly. Once you’ve placed the plant in its new pot, add some soil to fill in the gaps.
5. Water And Sunlight
Once you’re happy with how your new plant is looking in its new home, give it some much-needed water and sunlight. Your plant will go into temporary shock after being transplanted, so it’s time to give it all of the much-needed love and care.
Final Thoughts
Release Pots is a fantastic solution when transplanting pots and needing to keep plants healthy. Not only are you able to ensure the plant’s root ball is kept intact when repotting, but you’re also able to ensure correct drainage, keeping those roots and plant happy. So, if you’re wondering the best way to transplant a houseplant or how to transplant a plant, Release Pots is your ideal solution
Original Source: https://releasepots.com/how-to-properly-transplant-a-potted-houseplant/
0 notes
Text
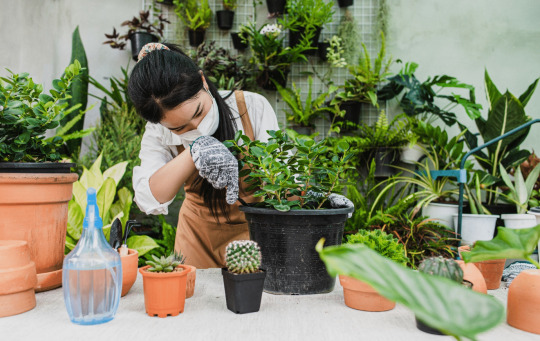
Tips On How to Move a Potted Plant
Physically Moving the Plant
Drainage holes in pots are crucial to the plant’s health. However, most growers ask one question: are pots without drainage holes bad? This article will show why they aren’t bad when used on several plants such as pothos. But first, what are drainage holes?
Check Plant Hydration
The first thing you need to do before moving your plant is to determine whether it needs water by checking the soil. If it is dry, add water to the pot and let it soak in. Do not overwater as you need to provide the soil time to soak up the water before adding more.
Secondly, you need to check your plant’s leaves for signs of dehydration, such as wilting or dryness on leaves and stems. If there are any visible signs of dehydration, give your plant water before moving it so that it does not lose too much moisture during transport.
Release Pots use less water than standard pots. They are designed to drain more slowly, allowing more water to be absorbed by the roots. At the same time, it prevents stagnant water by using patented angled bottoms to allow for drainage.
Test Plant Weight
You must also be sure to test how heavy the plant is before you move it. Potted plants can vary in weight based on their size and composition, so it is important to know if yours is too cumbersome for you to move alone. It might also affect how intact the plant will be once it reaches its new spot.
Using a Release Pot in this process will provide a sense of ease when transferring plants into the ground or transferring a larger pot, as it saves you precious time and lowers your labor costs. They have large and manageable carry handles for smaller plants so that you will never have a pot slip out of your hand again.
If the plant does feel too heavy, consider enlisting the help of a friend or family member to assist you. If the pot is too big for you to transport safely by yourself, consider breaking it into smaller pieces first, which will also make the transporting process easier.
Physically Moving the Plant
Once you have assessed your plants before the move, the next step is physically transferring the plants from one location to another. Knowing how to move a potted plant correctly is vital to keeping it secure, healthy, and intact in its new home.
Lifting the Plant
If you are transferring a relatively small plant to a new pot, grasp the stem in one hand while holding the stem close to the top of the soil with your other. Lift carefully while keeping your hands close together for better control and avoid spilling soil from your potted plant’s container.
To lift plants in a large container, place one hand under the rim of the container while you cup your other hand over the top of the soil. With your hands positioned this way, you can easily move the pot without damaging its roots or spilling dirt all over your floor.
As an even better solution, Release Pots offer large and easy-to-carry handles and are available in multiple sizes so that the plant, no matter what size, is easier to carry and transport from one place to another.
Transporting the Plant
If you are driving to a new location, there are strategic ways to transport your plant safely and securely. Place your plant in a box or use newspaper or packing material to keep the pot from sliding around during transport. Make sure to place your plant on a level surface. If it is an uneven surface, you can use a towel to protect seats or floors from getting wet or dirty should the plants or soil spill over.
It is best to place your plant in your vehicle at the last possible moment to prevent it from being exposed to drastically different temperatures and it can still have good airflow.
Securing the Plant in a New Spot
You can use a dolly or wagon to transport a plant if it is too heavy. This will protect the roots from being squished and allow you more control over how much weight is distributed across them. It also prevents the plant from tipping over during transit; if your pot has drainage holes on its bottom, then water could spill out onto whatever surface is below it – which is also not good!
Release Pots are new and versatile plant containers that are the only guaranteed way to safely transplant your plants or trees into the ground if moved outside or into a new pot. Have a look here for how easy it is to place in fresh soil.
Additional Points for How to Move a Potted Plant

Potted plants can be moved in a variety of ways, so here are a few more basic tips that will help ensure your plant stays happy and healthy during the process:
Move the plant while it’s still healthy and hydrated. It will recover faster if there aren’t any leaves damaged or bruised on its way to its new home.
Make sure you keep an eye out for bugs like mites or aphids, which are tiny insects that suck sap from leaves. If these critters make their way into your potted plant, try using products made especially for getting rid of them, like insecticidal soap spray or insecticidal bags of dust from your local hardware store. Or you could also call an expert gardener if you need help with handling infestations.
You may also want to cut off any dead leaves with water before moving; this helps the plant focus its efforts appropriately and also reduce the chances of spreading disease between pots.
Account For Plant Stress After Move
Replanting as soon as possible will reduce further stress on the plant so it is somewhat vital that you know how to move a potted plant fairly quickly. When you move a potted plant, the process can be stressful for both the plant and its new environment. Here’s why:
Moving plants essentially take them out of their natural environment and place them in an unfamiliar one. Plants are used to having certain conditions that they need to survive – including soil, light, temperature, and air circulation – and if these conditions are not met when they are moved, they might die.
Some plants may also need time to adjust to their new environment. In reaction to the move, they might lose their leaves or wilt, but it is normally only a temporary defensive reaction that should pass after you and the plant have settled in.
If you don’t move your plants soon after transplanting them into new containers or into completely different soil, they may become ill or die due to a lack of water or nutrients, so hydration is also another key factor to their survival.
Some plants just do not like being uprooted from their original environment; others will thrive no matter where you put them! Either way, it’s always good practice to move a plant with care. It not only helps reduce strain on the plant but because there is less chance of damaging roots, if done properly, before putting into a new potting mix with added fertilizer.
Conclusion
Whether you’re transplanting to a bigger pot, relocating, or just redecorating, it’s important that you take extra care when transporting your plant and know the relevant steps to move a potted plant. Potted plants can be heavy and awkward to carry, but there are many ways to make the process go smoother. And with the right tools and tips, it can be a breeze! With the simple steps that have been outlined in this article, you will be able to move any plant with ease. If you would like to make your life transplanting and moving your plants, then a Release Pot is your answer! Check out our array of pots and get repotting today!
Original Source:
https://releasepots.com/tips-on-how-to-move-a-potted-plant/
0 notes
Last Seen Blogs

lohtom
My Life, My Heart!

taexguk
HIATUS

pedrohenriquelaham
Untitled

annaaninha12313
Leitora Voraz

bigchunkyrocksss
rocky