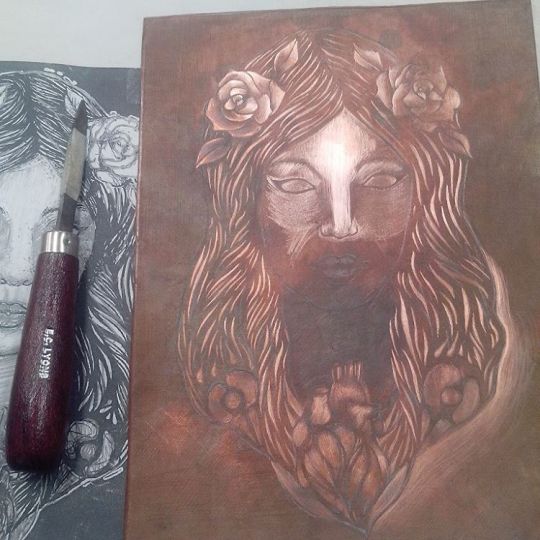
#mezotint
Text
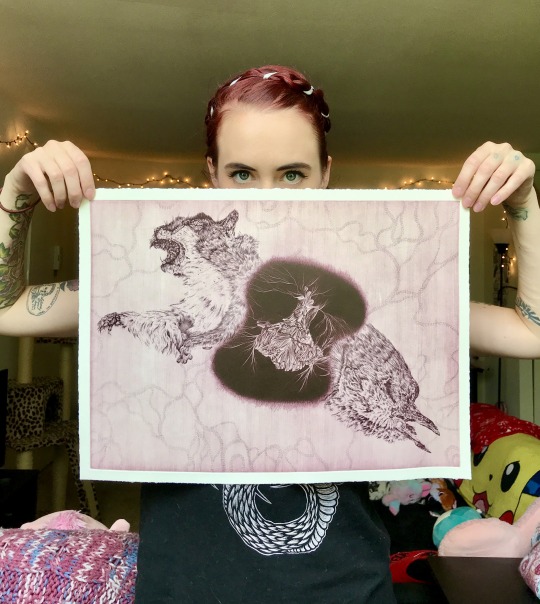
X-ray vision 👀
#artist#contemporary artist#contemporary printmaker#printmaking#print#mezotint#red head#female artists#roadkill#roadkilldiaries
6 notes
·
View notes
Text
Intaglio Drypoint
For our first print workshop, we began with the intaglio/etching printing technique, where (traditionally) we treated a metal plate with acid to achieve the desired image. In our case, we were to scratch into acetate using a scraping tool, which is called drypoint.
There are many different types of intaglio:
Engraving - a design is incised with a cutting tool (burin) into a metal plate (usually copperplates). Engraving only produces linear marks, so shadows can only be made with crosshatching.
Etching - as described above uses a metal plate incised by acid to achieve the image.
Drypoint - this is an engraving method in which the design is scratched directly into a metal plate with a sharp instrument, explained above.
Aquatint - a variety of etching, this produces prints which resemble watercolour paintings, in which a metal plate is exposed to acid through a layer of resin. This allows a variety of different tones to be achieved as the metal plate can be exposed in the acid for various different periods of time, giving different strengths.
Mezotint - is a method of engraving a metal plate by evenly pricking it’s whole surface, like dot work.
After etching our image, we then used a brush to push oil based inks into the etched acetate. Using blue roll we then clean off the excess ink from the un etched areas. Then, we dampen a piece of cartridge paper and put both the paper and acetate through the press.
There are a number of intaglio artists:
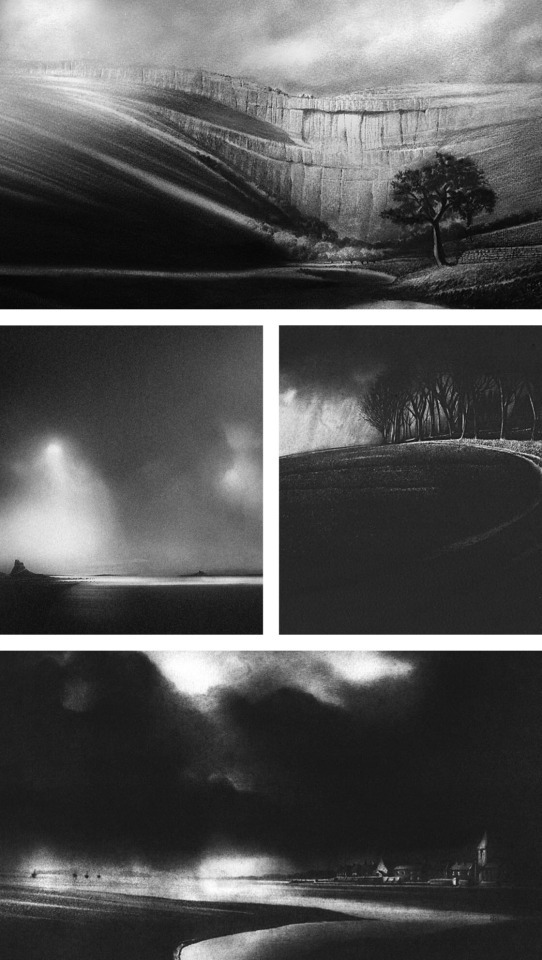
Chris Knox - Knox specialises in printmaking, producing mainly intaglio prints. His work captures the English countryside, highlighting the romance and moody aura it presents. His graphic style (influenced by fine art photography) uses high contrast and deep shadows.
Mikael Kihlman - Kihlman is a printmaker and painter, using the drypoint technique explained above. His pieces are extremely detailed, using many lines and crosshatching to build up shadows and darkness. I particularly Kihlman’s work, as I feel that they have a beautifully illustrative feel, as oppose to extremely realistic. Whilst they are realistic depictions, they look much softer than Knox’s, and somewhat more cheery and playful, which I think is why I prefer Kihlman’s work.

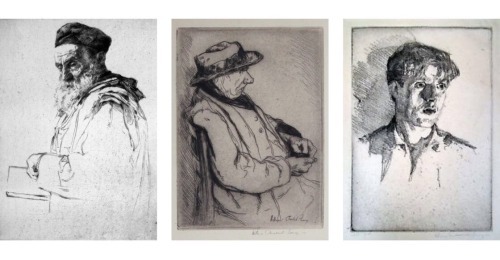
William Auerbach-Levy - Auerbach-Levy was a Belarusian born artist, best known for his paintings, etchings and caricatures. I really love his work, as other etching/intaglio artists specialise in dark, moody landscapes, whereas producing portraiture from etching is a completely different field, and one that Auerbach-Levy does extremely beautifully, especially by leaving the clothes and body areas just simple outlines.
I intend to use these artists as inspiration throughout the next two weeks of print workshops.
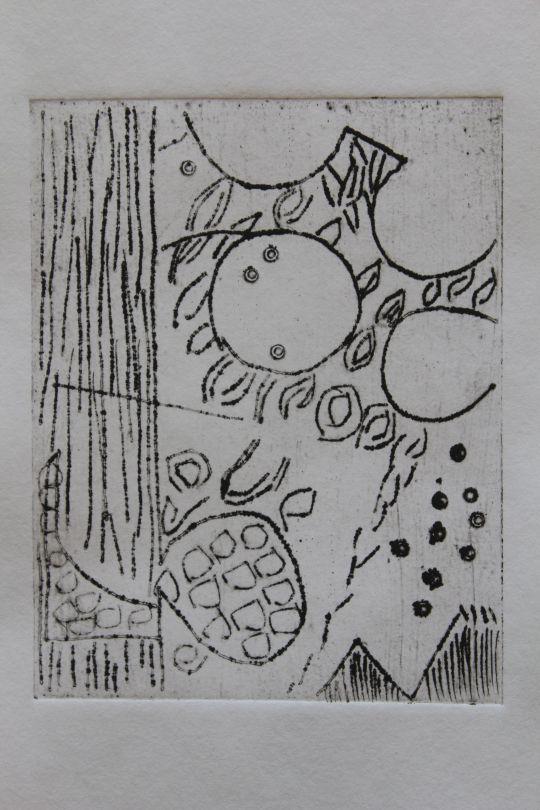
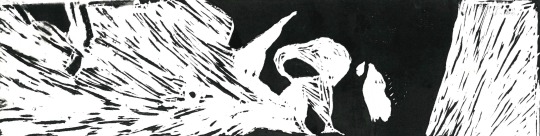
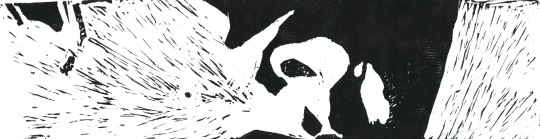
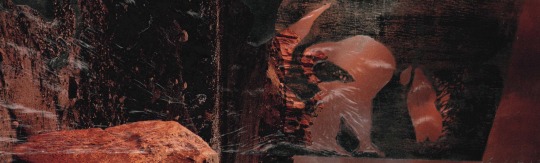
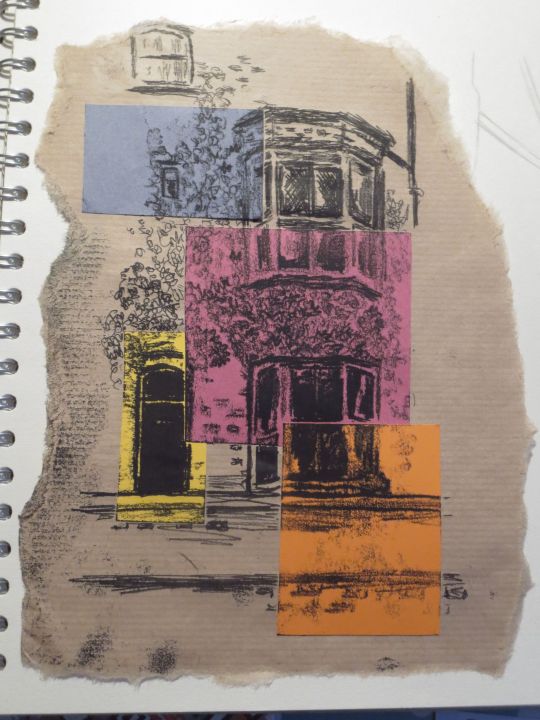
The image I chose to work with for my intaglio workshop, was one of a very spindly, textured tree. I wanted to produce only the outline and shadow, as oppose to the background of the image, as I knew I wanted to experiment with the page itself due to previous experience in intaglio printing.
Below are my initial intaglio prints, done in brown oil based ink for a more natural and less stark finish than black ink. Oil based inks allow us to work back into the print with any medium we wish, such as watercolour or brusho.
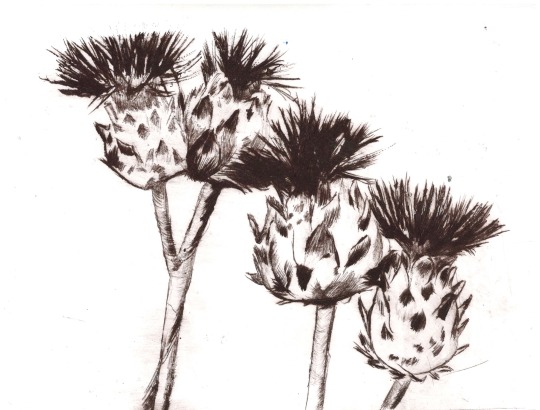
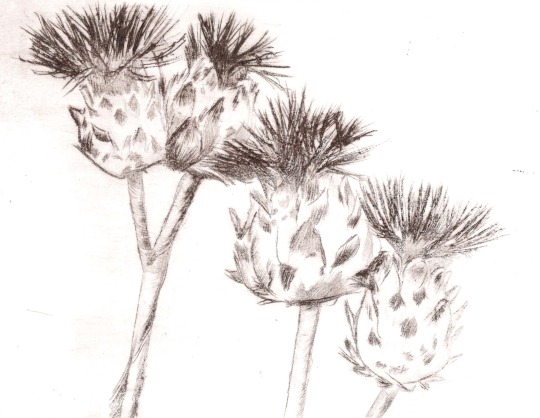
The print above was the best and clearest of the batch, with the perfect ink and pressure ratio. The print below had too much excess ink surrounding the etch, hence the smudged surroundings, and too little ink in the grooves, hence the weaker print.
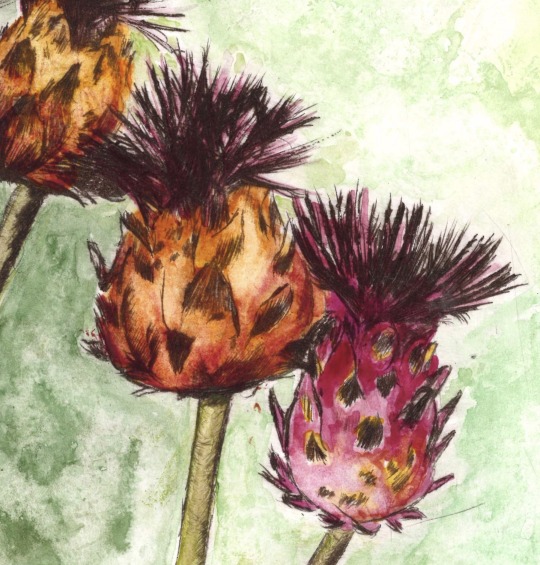
I worked into the first print above with watercolour, which I felt was very very effective and I was very pleased with my outcome. Here, I have cropped into my favourite part of the print, where the blending of the watercolour amongst the shadows of the print itself is very effective and realistic, whilst the two tone watercolour washed background adds depth.
Here I printed onto coloured paper, which I didn’t feel was anywhere near as effective as the watercolour, due to the single toned base, which made the print flat and dull.

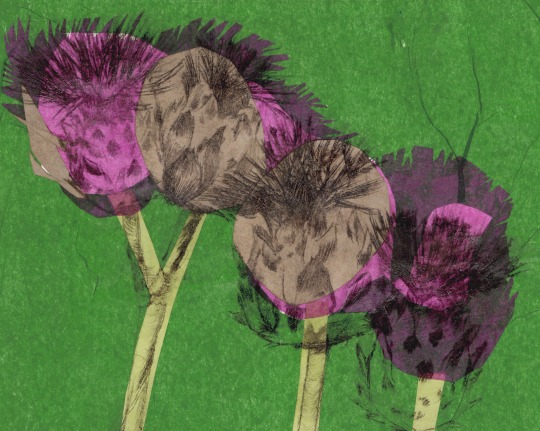
Finally I used the weaker intaglio print as a base for a collage of tissue paper and sugar paper, in which I would then print over the top of. Whilst in theory I felt this would work very well, lining up the print with the collage exactly was very hard and clearly something I didn’t manage to do at all. If I were to try this technique again I would need to use a much less detailed print which would therefore allow room for error.
Overall, whilst I felt that the watercolour and intaglio print was very effective, I felt that alone I wasn’t a fan of the intaglio drypoint printing technique. The detail is very precise and I prefer a looser, thicker way of working (like lino) as oppose to something so intricate that doesn’t give a lot of depth or change for colour options when printing.
Intaglio - Mirrorcard
Mandy Bray - Bray uses mirror card to produce her “intaglio” prints, by etching into the mirror card with a scalpel (not all the way through as this would just cut up the mirror card). She then peels the etched areas of mirror card off, and rollers the ink across the card before printing through the press onto paper. This is a simple way of producing a print, and produces quite geometrical prints.
I produced my own mirror card, then rolled water based ink over and printed through the printing press onto plain and coloured papers.

Whilst this was a simple printing method, I didn’t feel I would be able to produce any precise prints of particular subjects as I find scalpels quite difficult to use, especially for curves and circles. For simple geometric shapes and patterns, however, it was fairly effective; more so on the top strip, as on the bottom strip (my first attempt), I hadn’t pulled enough of the mirror card off, therefore there wasn’t enough difference between the two surface heights and it instead just produced a blurred mess.
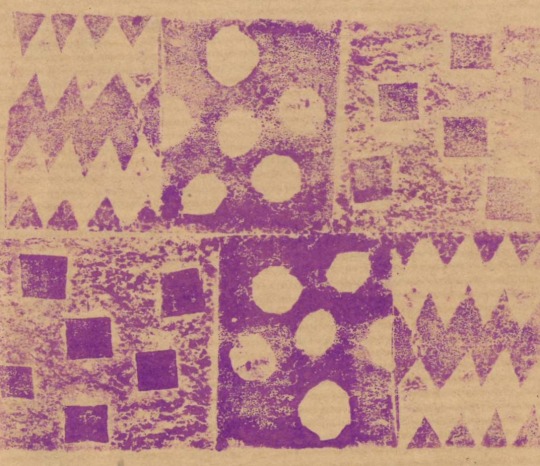
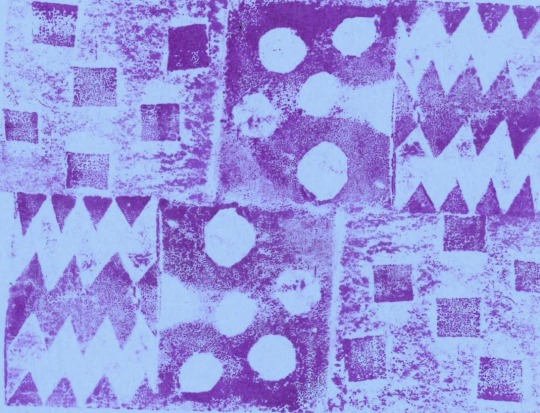
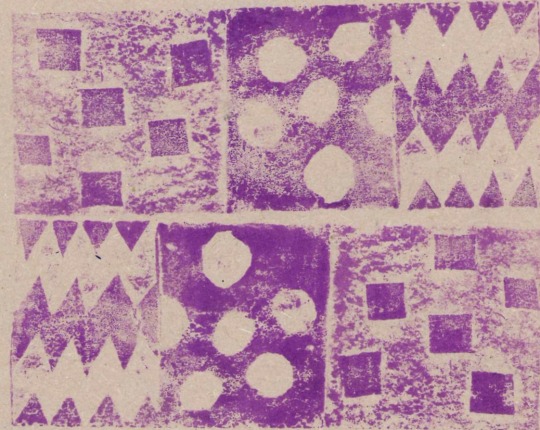
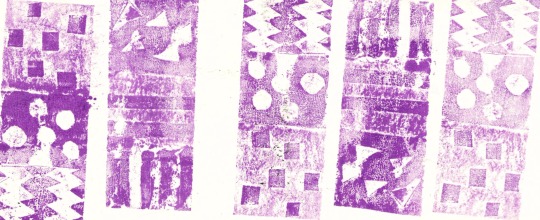
I tested the mirror card printing on plain paper, brown sugar paper, blue coloured paper and finally on brown striped paper. I felt it looked most effective on the sugar paper and the blue paper, as the colours stood out. I also think it could be effective to produce a repeating pattern, maybe even on fabric.
Lino - One Layer
Linocut prints are relief prints in which the image is cut from lino. Areas that are cut from the block leave the paper beneath, and areas that are left behind will be inked using an ink roller, and print the image. Paper is then laid on top of the lino once it is inked, and the two are put through a press, leaving the imprint of the image on the page.
There are many different types of lino print:
One layer
Multiple layers (using the key block method)
Reduction
We will be experimenting with all of these lino printing techniques within the next two weeks.
To produce a one layer linoprint, we firstly selected the image we wanted to use, and edited it in Photoshop to be a black and white stencil using the halftone pattern. We then printed this stencil, and traced it onto the lino using the graphite method. Once transferred, we then were able to use our cutting tools, a guard and a bench hook to remove the white areas from the stencil. Then, using water based inks, we inked up our lino using rollers and put this through the printing press with our damp piece of paper (which allows the ink to be better absorbed).
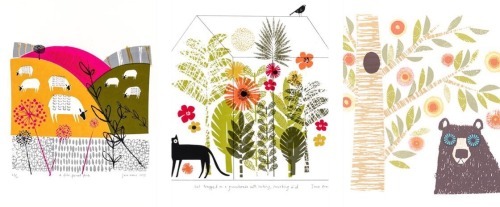
Sarah Robley - First viewed at the Rheged Print Fest, Robley’s work is playful and bold, featuring friendly animals and florals, inspired by the individuality medieval artists gave their animal subjects, alongside the wildlife of the Lake District and Folk Art. Her work is minimalist and illustrative due to the bold simplicity of line she uses.
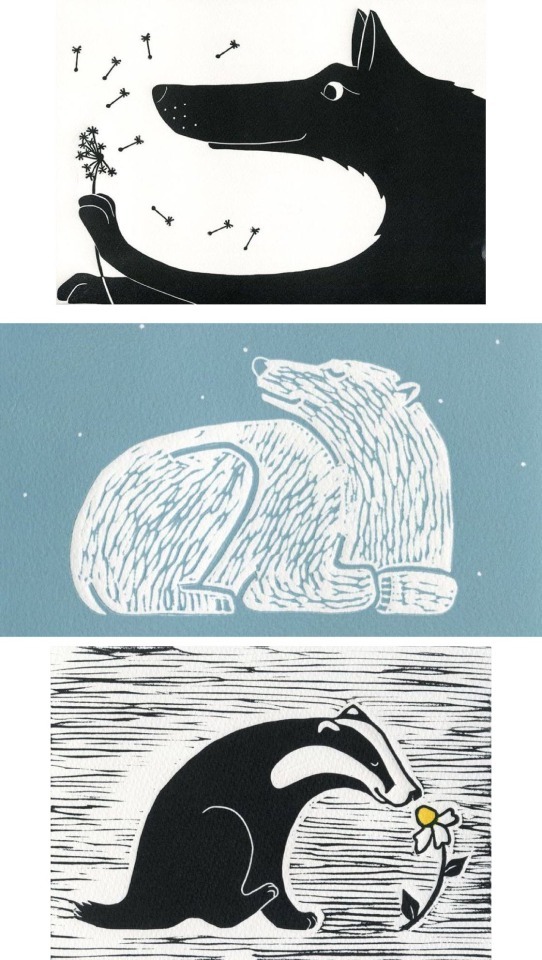
Melanie Wickham - Wickham produces single layer lino cuts of cute illustrations, inspired by her small children and allotments. I love how sweet and funny her compositions are and I love that they aren’t as serious as other lino prints and whilst they have a lot of white space they still tell their own stories through their details. She explains the best piece of advice she ever received was to draw what you know, as this means you can be constantly inspired by small observations of every day life.
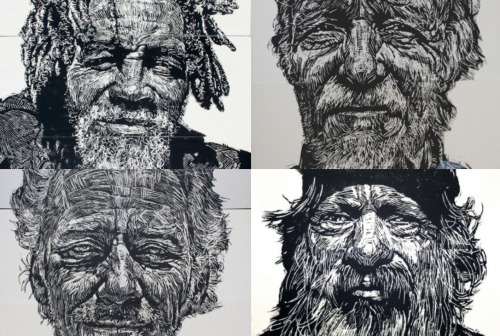
Neil Shigley - Shigley’s one layer lino prints capture the incredible character that life on the streets has given individuals in San Diego. He uses beautiful, bold line work to remove areas of the lino in the cutting process, producing messy, almost spiky marks of highlighted areas, and a deep, dark black contrast. I love the character and depth in Shigley’s work, as the emotion and years of life in each subject can be seen so clearly through his bold portraits and use of texture, mark making and line.
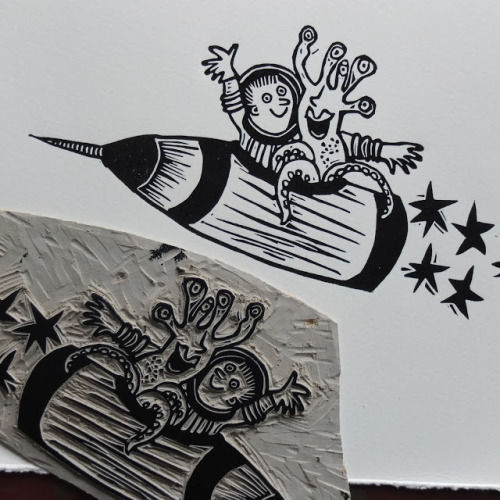
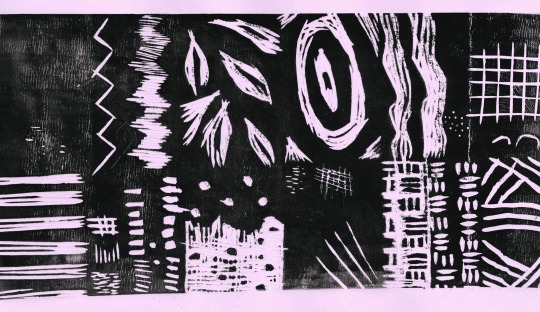
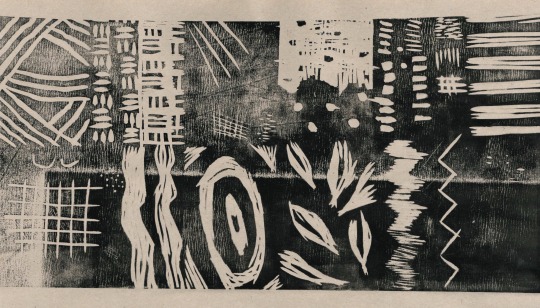
To begin with, we produced a mark making section of lino, to master the technique and understand the sort of marks that can be made, both positively and negatively. Below, both the lino plate and the print itself can be seen.
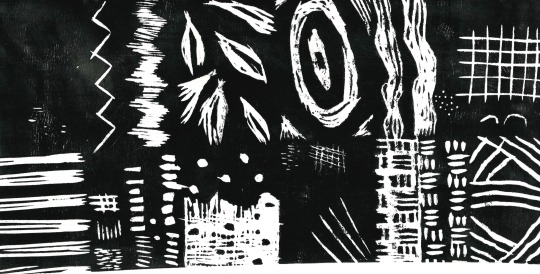

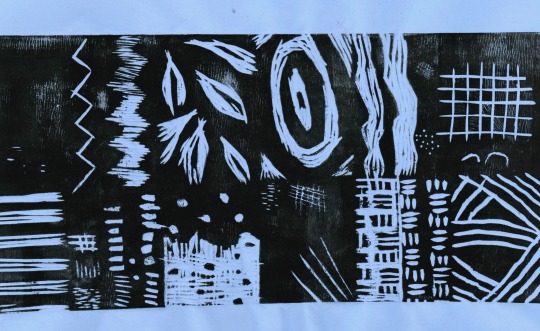
Individually, we all then were to create a section of a larger print using the one-layer technique previously described. This will then be printed onto a large piece of paper in sequence. We will also separately be able to print onto various papers and backgrounds to fully explore and test the technique. Below, my mark making prints can be seen on coloured paper (which I felt was extremely effective), and brown sugar paper (which I didn’t).
From here, I went on to cut and print my section of the collaborative print.
First, I printed with my first cut piece, but found that the areas I wanted fully removed were still picking up ink.
Then, seen above, after continuing to remove sections, I had completely cleared the nose area, but still wasn’t able to stop the main face from picking up the ink. My solution, rather than to cut out that area with scissors, was simply to only roller the ink over the parts where I wanted it, and therefore came with my final prints, seen below.

Again, I felt that the coloured paper worked best, and particularly liked these three matching tones, which I would put forward as an idea for the background paper for our collaborative piece.
I then also experimented by printing onto magazine pages, specifically ones which were images as oppose to text. Some were too dark ( the final two below), however I felt that the first one pictured below was somewhat effective, as coincidentally the shadows and highlights actually lined up and the nose itself could still be seen.
Overall I really enjoyed this technique, and when we continue on to do both key block printing and reduction lino printing, I would like to develop this further, by experimenting more with mark making techniques and by continuing to use different backgrounds, such as newspaper and book pages.
Collagraph
A collagraph consists of a collage of materials glued to the printing plate (cardboard). When all of the materials are glued to the plate, paper is then pressed onto the surface, creating the print. The ink will be in the negative space of the texture, and the raised areas will not be printed. Instead, the grooves and wells will provide the print.If a smooth surface is inked up, the relief can be faint/ subtle; however if a textured surface is inked the relief will instead be strong and defined. Some textured items include wallpaper, twigs, corrugated cardboard, string and hot glue. Some subtle textures include thread, tissue paper, plastic bags, fabric and tinfoil. Once all are stuck to our printing plate, we then need to varnish over the entire plate. Once complete, we are then able to try both water-based inks and oil-based inks, using a paintbrush to apply, then after removing excess ink we can produce a print by running it under the print press with a damp sheet of paper.There are a number of artists who use this printing technique, including Amanda Taylor, Lyn Bailey and Bill Flowers. This technique can additionally be used to produce a collagraph plate of a subject such as an animal or portrait.
Jet James - James’ collagraphs depict portraits, using often experimental materials and processes, regardless of the fact collagraphy is under the ‘traditional printmaking’ umbrella. He creates a tactile surface; etching, spraying, collaging, embossing and even burning the surface. He is inspired by the experimental mind and expressive linework of Brett Whiteley. I love James’ work as his portraits are so clear, yet so intricately detailed and filled with texture, producing tonal values alongside contrasts.
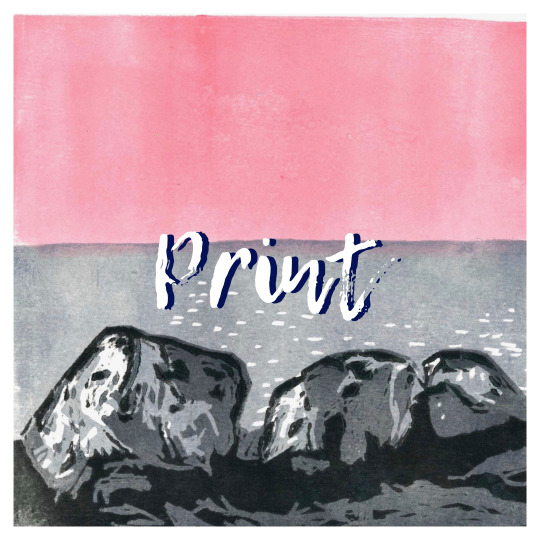
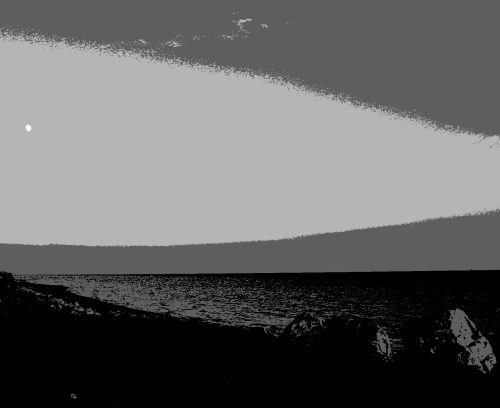
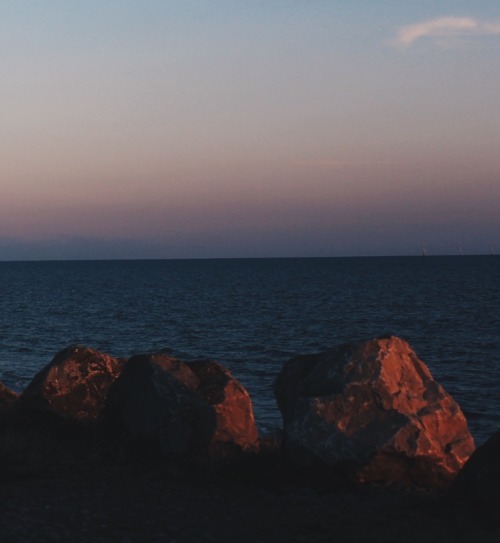
Sue Lowe - In contrast to Jet James’ portraiture prints, Lowe’s work focusses on textures and surfaces, drawing her inspiration from landscapes and organic forms, with her work depicting growth, erosion and decay. I particularly love Lowe’s work as I love how heavily textured yet intricate her outcomes are, and I also love that her pieces make the viewer feel how where the piece is inspired by. Her prints inspired by the sea front, seen below, make the viewer experience the raw and organic forms found at the sea, and her perfect colour palettes emphasise the deep, moody and mysterious aura that the sea brings.

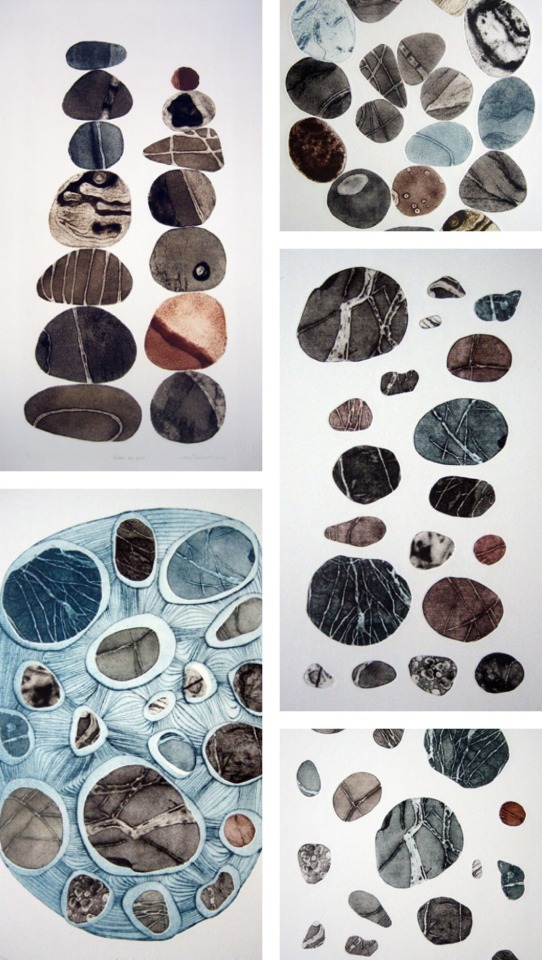
Tessa Horrocks - Similar to Lowe’s work, Horrocks produces collagraphs which depict natural and organic forms, creating images about ‘worlds within worlds’, matching the feelings and energies inside herself to her surroundings. She uses the collagraph technique due to its simplicity and the textures it gives. My favourite collection of Horrocks’ work, is her recent series of prints celebrating the pebble. I love the simplicity of her pieces and her natural, dark and raw colour palettes. I also feel inspired by her work as such a simple concept can be made so interesting due to the un uniformed textures and patterns collagraphs produce.
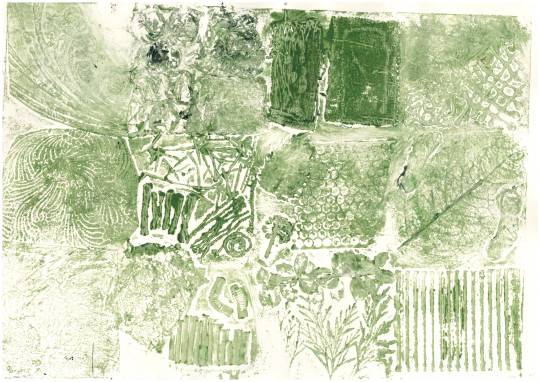
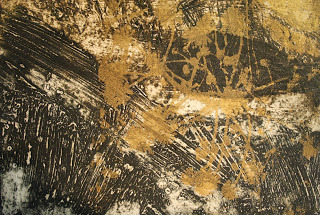
To produce my collagraph plate, I used twigs, pieces of bush, tissue paper, tin foil, straws, string, hot glue, wax, bubblewrap, plastic, etc. Then, I applied oil based ink with a brush to the varnished plate, before running it under the printing press with a damp sheet of paper.
After my first print run, I realised that my prints weren’t producing “negative” prints, because I hadn’t remembered to buff the ink off the raised areas of the collagraph plate.
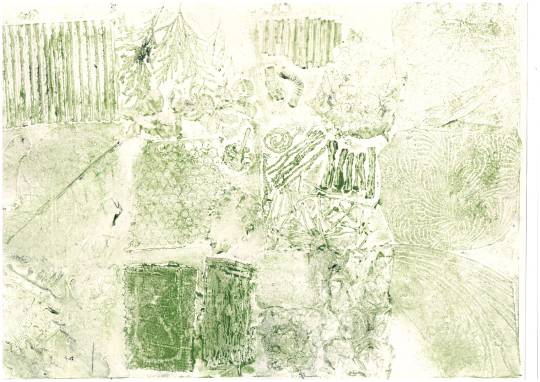
Green on plain paper worked the best in my opinion, as it gave a natural, raw aura which matched the recycled materials used to produce the collagraph board.
I wasn’t as much of a fan of printing onto sugar paper as oppose to plain paper, as seen below it made the print seem dull and wasn’t very effective at picking up the ink.

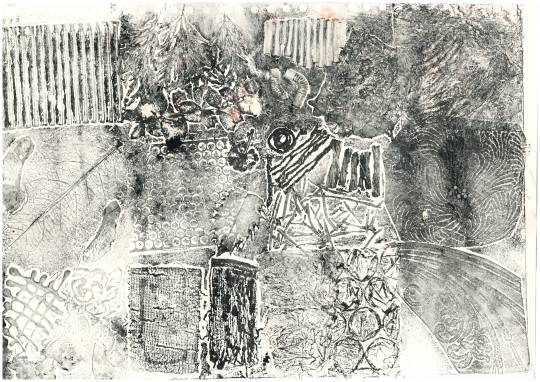
Once I had remembered to buff the raised areas it began to print correctly, as expected, and these prints can be seen below.
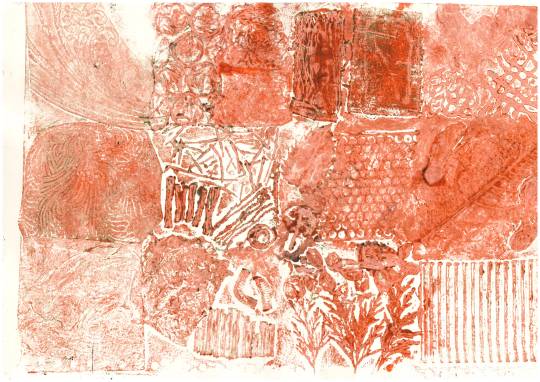
I didn’t feel the red coloured paper worked very well at all and thought maybe it was too thin. so picked up too much ink in some areas and not very much in others.
The print onto green sugar paper worked best as the raised areas are clearly blank, leaving the negative spaces inked up to allow a print to be produced.
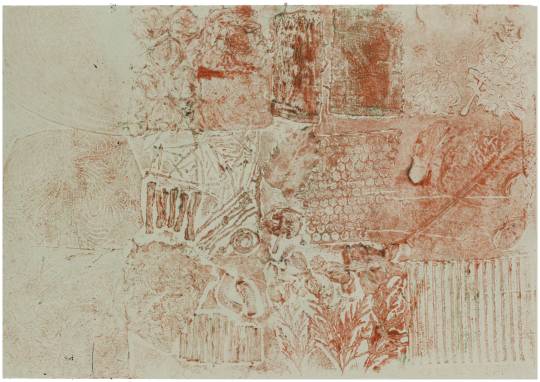
Overall I felt that it was difficult to produce the negative print properly, due to my objects being fairly raised which meant it was hard for the paper to catch the ink from the negative space due to the height difference. I was quite pleased with the prints that were printing the positive space as oppose to the negative, regardless of if they technically didn’t reflect the collagraph technique. If I were to do this again, I would ensure that my collagraph board didn’t have such raised elements which would allow it to properly print the negative areas. Whilst I really enjoyed the process of building up the collagraph plate, I am informed that it is very difficult to produce a print of an actual subject, and therefore if I were to return to this technique I would do so in Horrocks’ style, producing sheets of prints and then collaging them to produce an outcome.
Lino - Reduction
Reduction lino printing begins with us carving into a lino block, the same as in single layer lino printing. We then do one round of printing onto each sheet of paper in one colour. Then, we carve out more of the same block, removing different sections and areas, and doing another round of prints in another colour. This carving and printing continues until the final round of printing is complete; with many artists described below using the technique.
Ian Phillips - Phillips specialises in consecutive series of prints taken from drawings done whilst walking long distance footpaths in his explorations. He explains that he ‘tries to catch the delicate sensibilities of seasonal weather and dramatic natural compositions’, focussing on the process of gouging and cutting, producing textures and pattern; regardless of the initial scribble.
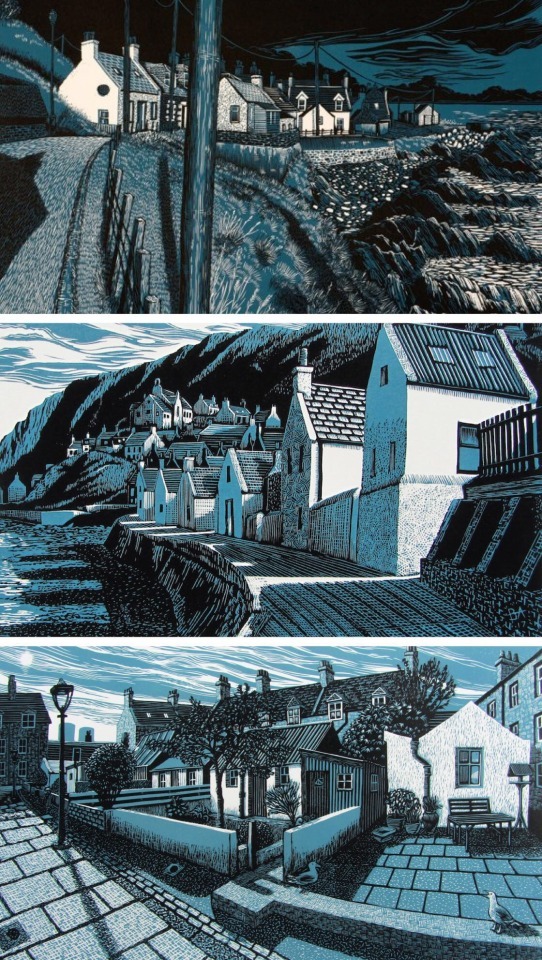
Bryan Angus - Angus is a Scottish visual artist who’s reductive lino prints depict the ‘drama of the land and weather, enriched by the history of the people and their towns’, influenced greatly by 20th century Scottish and English illustration traditions. I love the immense detail Angus portrays, whilst still consistently having a recognisable illustrative style and beautiful colour palette.
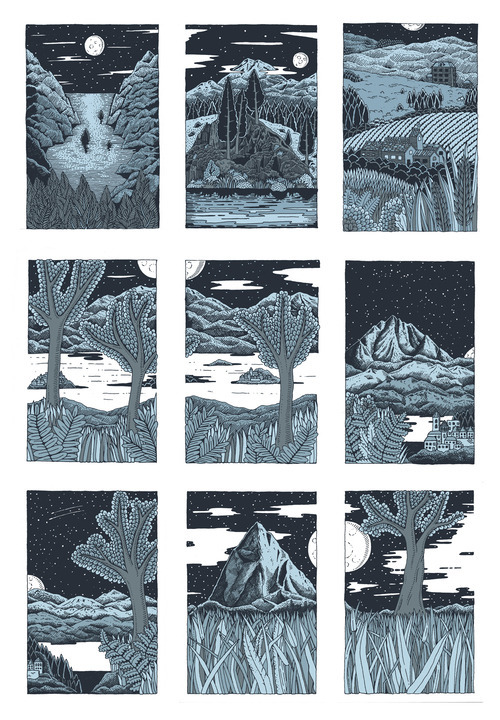
Claire Scully - Scully is a multi-disciplinary illustrator, author and educator. Her work focusses on pattern, line and details, looking at ‘landscape and memory’, the environment and the world and space around us. I love her work as it is very illustrative and works effectively in the reductive print technique.
These artists have influenced my style of reduction lino printing, specifically Angus and Phillips’ colour palettes, which will be seen later.
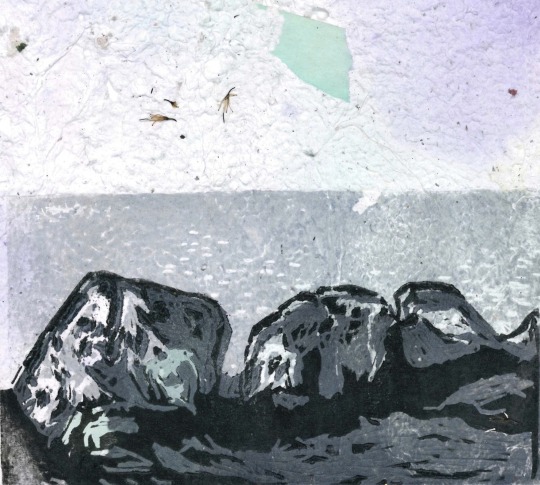
First we began creating the initial image from which we will produce our print in Photoshop. To do so, we needed to open the image in Photoshop, and set the size of the document to the size of the lino (15x15cm). Next, when the image has been resized to the size of the lino and the layer has been duplicated 3 times, we use the Threshold image adjustment on the top layer, making sure the only black is a heavy outline; not shading. Next, we hide this layer and do the same for the second layer, this time allowing a more dispersed shadow. Lowering the opacity of the first layer should now give an image in black, grey and white; seen in the three tests below.
From here, I decided the rocks were most effective, however I felt that the immense level of minute detail would be too difficult as a first time, so cropped the image, focussing on the rocks themselves, seen below.

From here, I transferred the image onto the lino, and first printed the skyline without anything else. Once complete on around 15 prints, I then cut out the white areas first, and printed with my lightest colour (duck egg blue). Next, I went on to cut the next lightest area, printing with a shade darker of the blue. I then did the same again on the second to last darkest areas, printing with another shade darker blue. This stage of the printing process can be seen below.
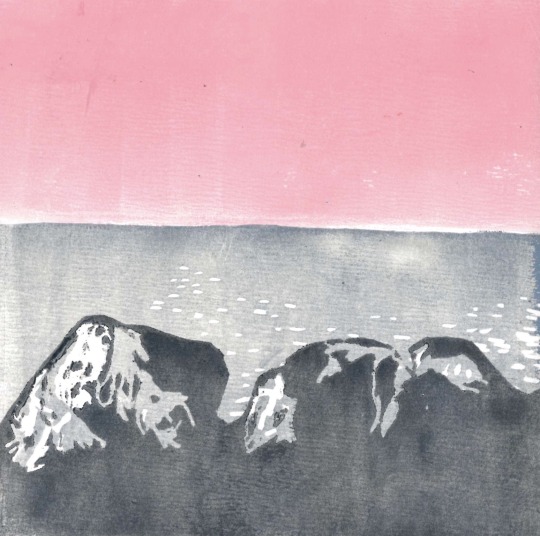

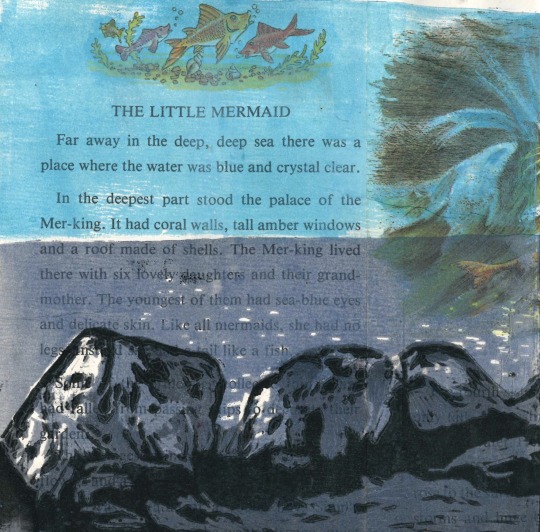
Finally, I was left with the shadows and printed these in black, with my final prints pictured below. I tested this printing technique not only on plain paper with different coloured skylines, but also on torn newspaper and book pages backgrounds, as well as onto handmade paper. My favourite can be seen directly below, which I felt was very effective due to the “The Little Mermaid” title, which matches the theme of the print, and the accidentally appropriately placed mermaid, who looks as though she’s sitting on the rocks. I also felt the handmade paper was very effective, as the colours in the papers were so different and allowed the highlights to stand out.


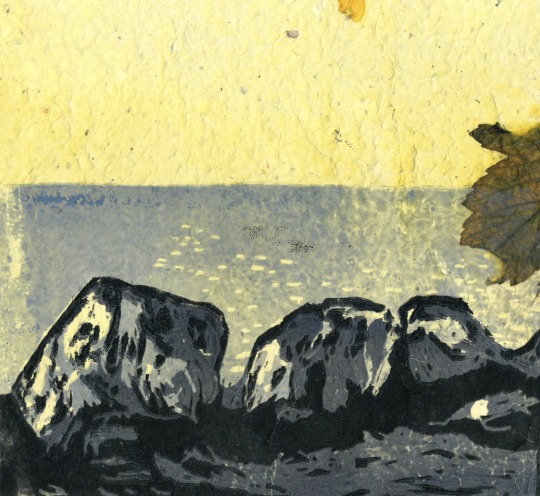
I loved this printing technique the most out of everything we have tried so far, as I not only found it very effective, it was also very satisfying to do and I found that the gradual build of the outcome made me really enjoy this technique.
Key Block
Key Block lino printing involves using one lino cut in order to produce more than one lino plate copies to work with; in turn producing a multiple layered print. This is different to reduction lino printing as key block uses more than one lino plate, and therefore doesn’t destroy any of the plates.
The ‘key’ lino plate is an outline, used as a template on other pieces of lino the same size. The other lino prints are the colouring in of the ‘key’ lino plate, and the ‘key’ plate is printed last. There are many artists who use the key block printing method:
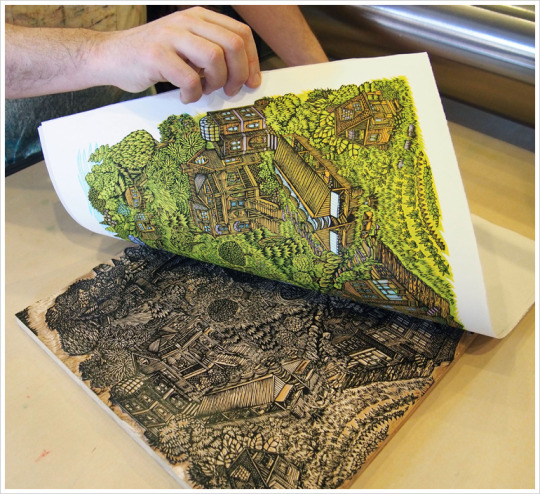
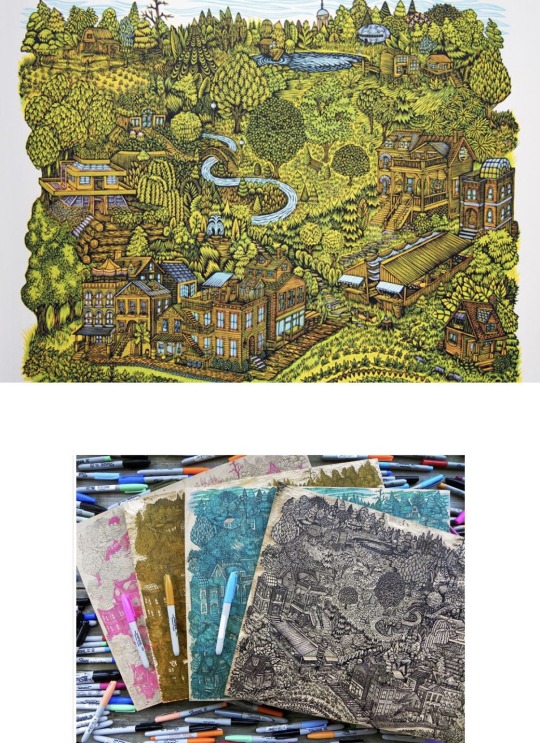
Valerie Lueth + Paul Roden - a husband and wife team, they use traditional printmaking to produce contemporary artwork, as they feel printmaking is the most accessible of the fine arts. Their prints are original drawings, drawn onto blocks of birch plywood as oppose to lino, but carved and printed using the key block method. Each block adds separate layers of colour and wood grain texture to the finished print, adding the key detail (black) last. In the print pictures below I love the immense detail obtained from 4 hand drawn and hand carved woodblocks; I feel the intricacy is amazing and can’t believe the amount of time and work that must have been put in to produce such detail.
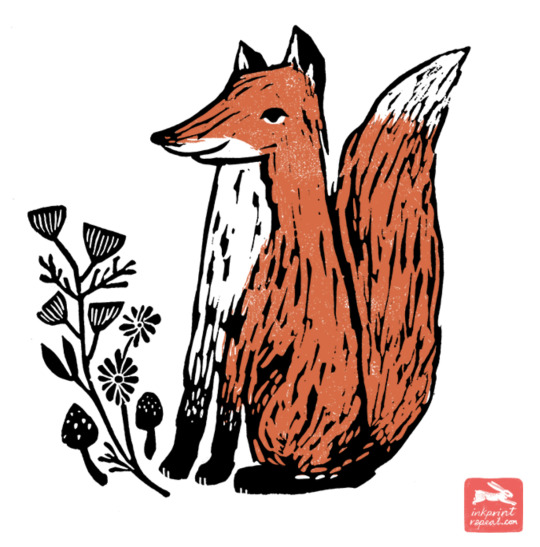
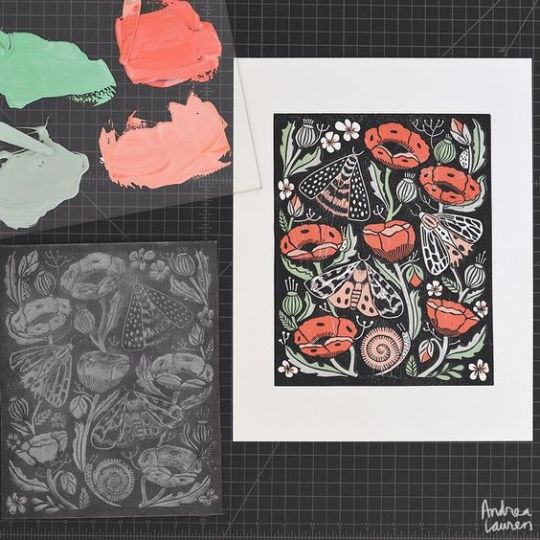
Andrea Lauren (Ink Print Repeat): Lauren’s work is delicate and wholesome, where she focuses heavily on her colour palettes for her prints, focussing on nature and creatures at the forefront of her pieces. I love how soft cute and full of character her animal prints are, yet how detailed and intricate her wildlife prints are.
To produce our outline for the ‘key’ plate, we were to find an easy, simple object and use Photoshop to make a line drawing of this image (or this bit can be done by hand by simply drawing the outline straight onto the ‘key’ plate), then cut out all of the lino except the lines. Using oil based printing ink, we then transfer a print onto a piece of acetate (using a baron as oppose to a printing press). Then, we line up the print onto a new piece of lino and print onto the lino (with the baron again). After leaving to dry, we then cut out the line as oppose to the inside and background and print again. This print will fill in the image.
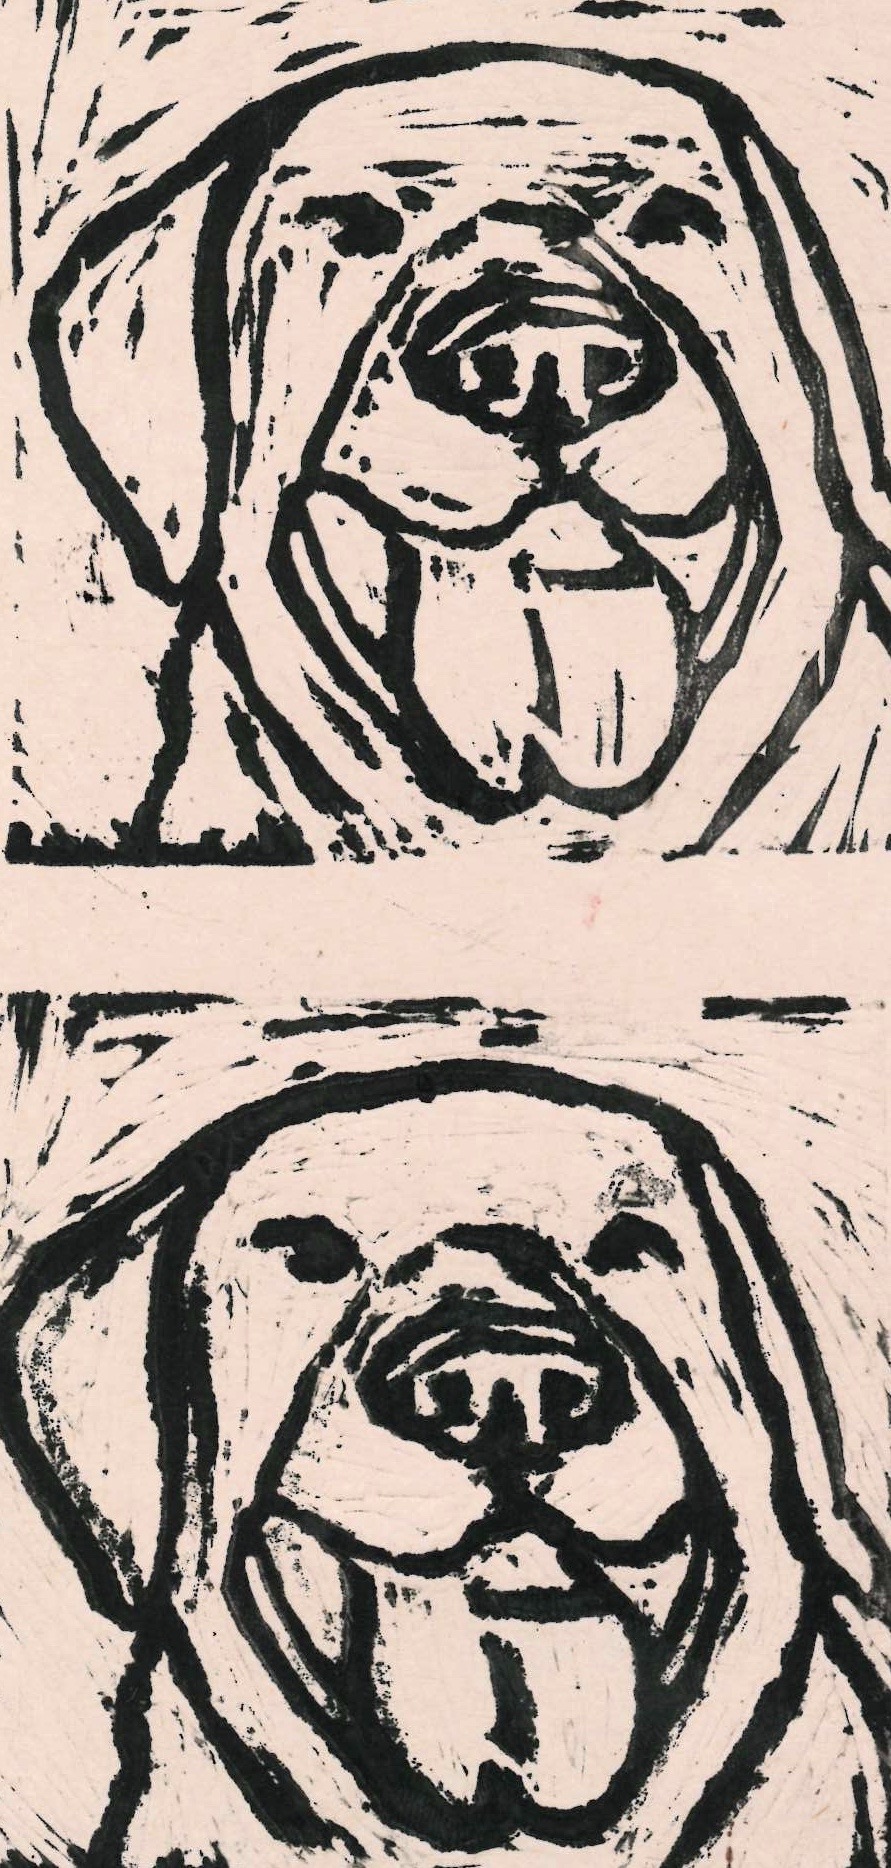
Inspired by Lauren’s character filled animal prints, below is my initial print from my ‘key’ plate, in which the areas I wanted plain were still picking up ink. I went back in with my lino cutter and removed some more, then printed again, seen below. From here, I follow the steps explained above, and made both plates, then printed with them.
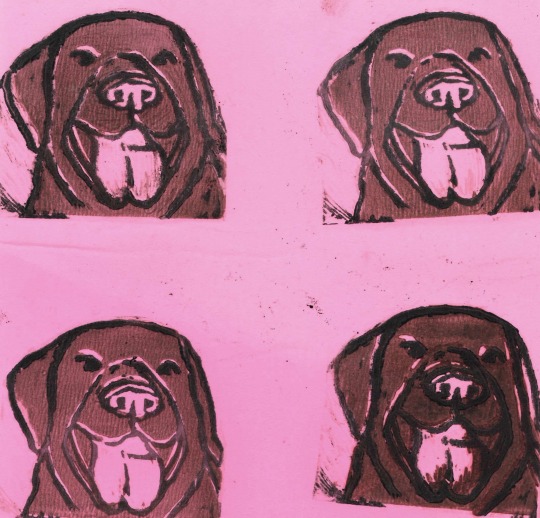
Firstly, I printed on cream paper, which I didn’t feel was as effective as it could have been, due to the fact I had cut out the tongue and nose to allow them to be a different colour to the body of the dog.
From here, I tried a pink background to allow the colour of the tongue and nose to match and be realistic. This shade of pink was too neon and came through the brown colour of the dog’s fur, which I didn’t like as I didn’t feel it was very effective.
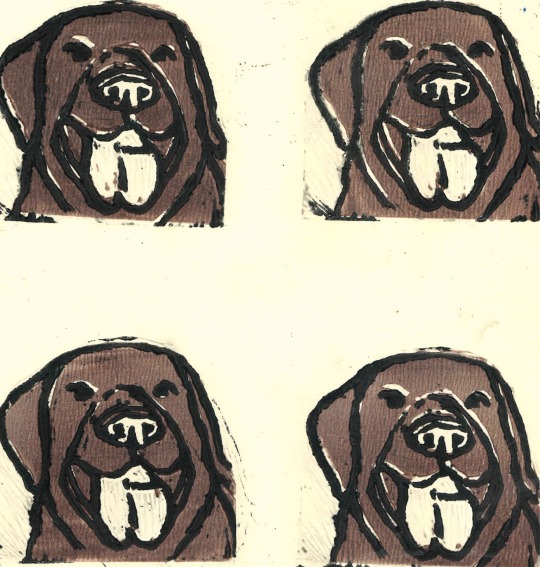
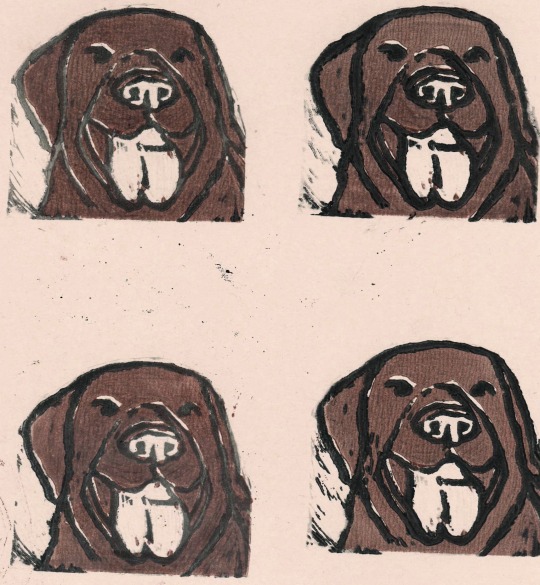
Here, I went on to use more muted colours, starting first with a soft taupe colour, which I felt was effective and matched the tongue and nose realistically. The better looking prints were those with a much darker outline (the two on the right), as they were considerably clearer.
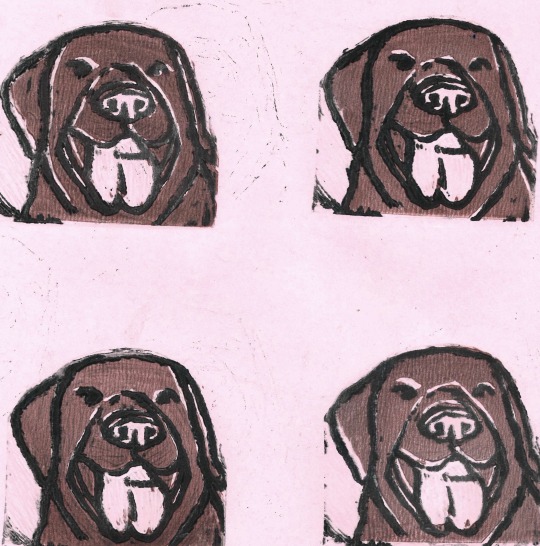
I stuck with the pale coloured background as I knew this worked and moved onto a very pale baby pink paper. This was by far the most effective and my favourite print, as I felt it was the perfect colour to add character and wasn’t too bright that it seemed unrealistic.
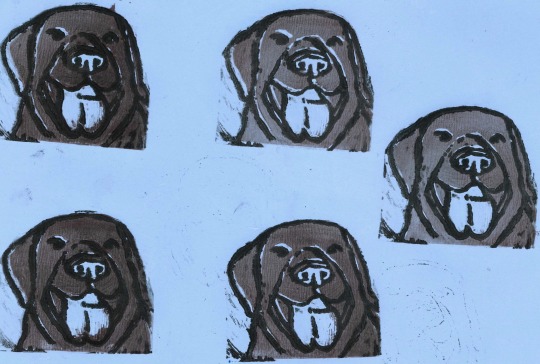
Surprisingly, I also really liked the outcome on blue paper, however the pink was still my favourite. The blue added a more playful, interesting element and made the fur more cooler toned.
Overall, I really enjoyed the key block printing technique, the same as I enjoyed the rest of the lino techniques. I think if I were to revisit printing at all in the future it would definitely be lino that I return to as oppose to intaglio, as I feel it produces the most illustrative, character filled outcome that can be applied to anything, be it portrait, landscape or inanimate objects.
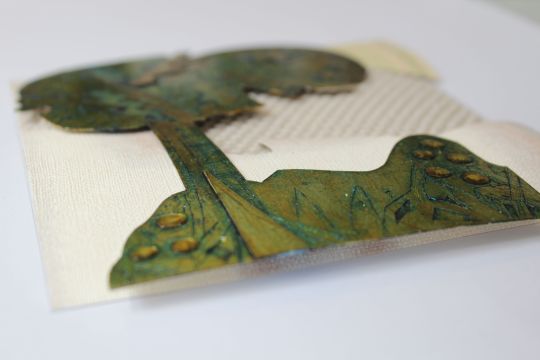
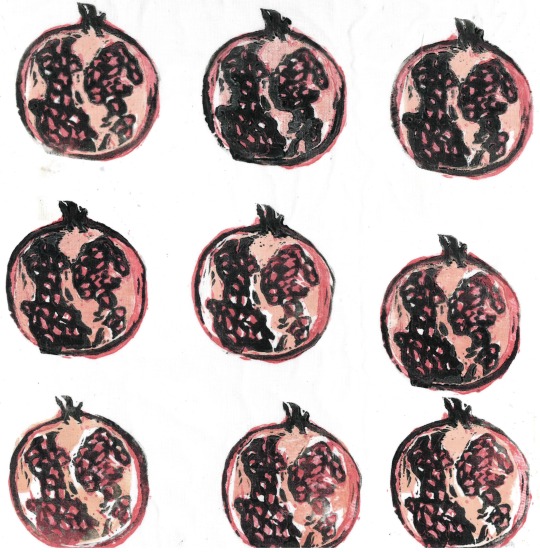
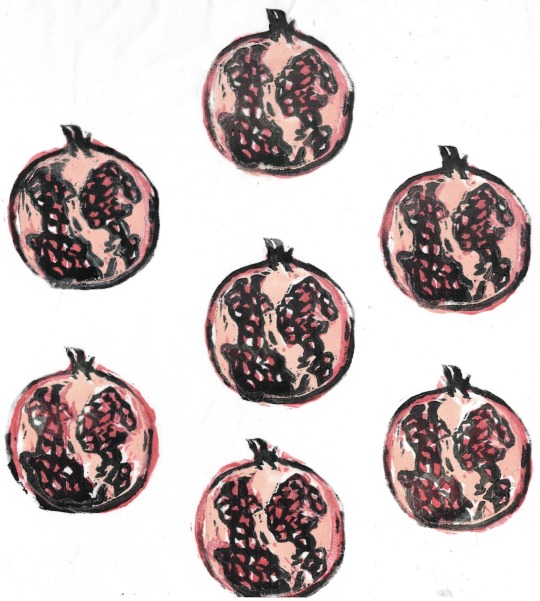
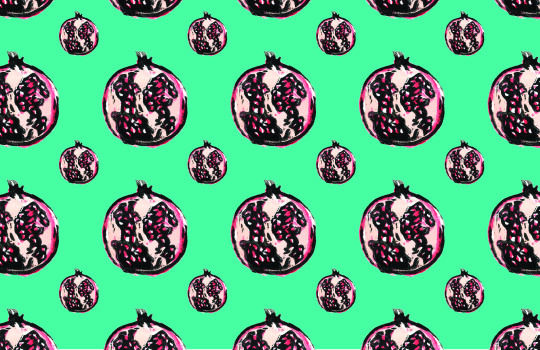
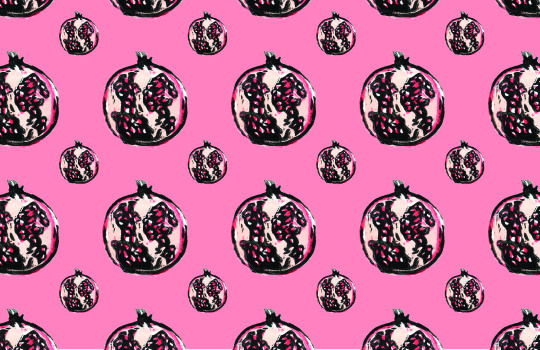
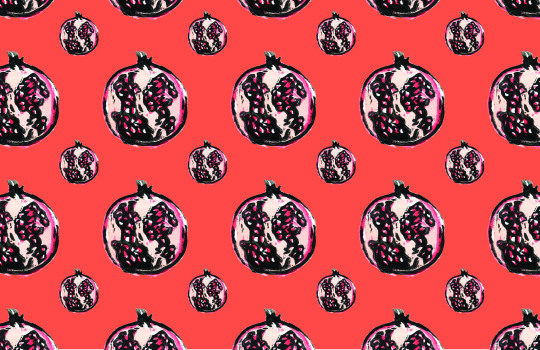
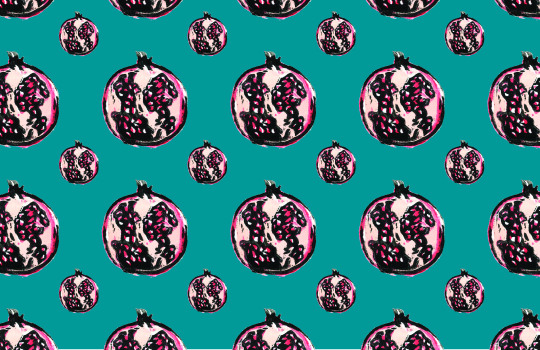
As we were told we would be using our key block prints in our textiles workshop later, I decided that I would create a new print of something that would work better as a pattern, for when we experiment with surface design and embellishment. I decided to go for a pomegranate, and cut out three layers this time. I printed this as a pattern first onto white cotton fabric, which worked well.
I then went on to try printing using a ‘drop’ pattern, the way bricks are placed. I liked this pattern more than just rows, so if I were to print a wider range of fabric I would use this repeat pattern technique.
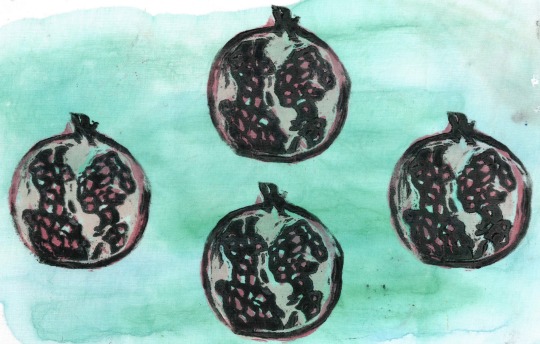
I also tested printing onto a patterned fabric, and again onto plain paper to use later. Finally I tested printing onto a blue watercolour on fabric background.
I really liked this effect and from here decided to scan in the prints on the plain fabric and crop the best one, then create a repeating pattern, following the tutorial from illustrator Polly Vadasz linked here.
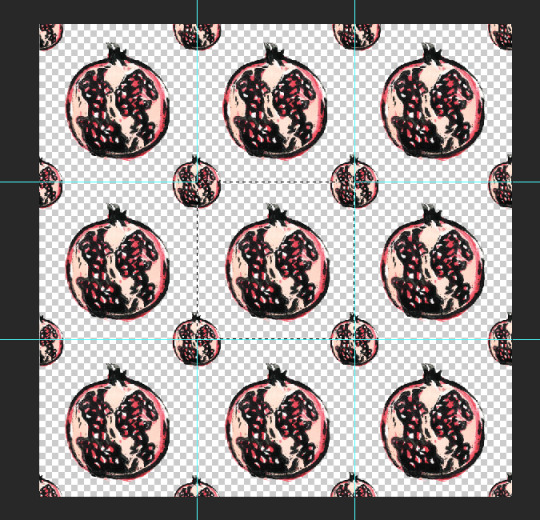
I loved this process and found placing it all together very exciting and rewarding, and saving it on Photoshop as a pattern meant I could then go on and put this pattern on any sized canvas and on any background. I varied the size of the pomegranate to try and make the pattern more interesting, but wasn’t sure if this was effective, therefore in the future I would like to do more fruit or maybe leaf prints and add them to this pattern to make it look less uniform.
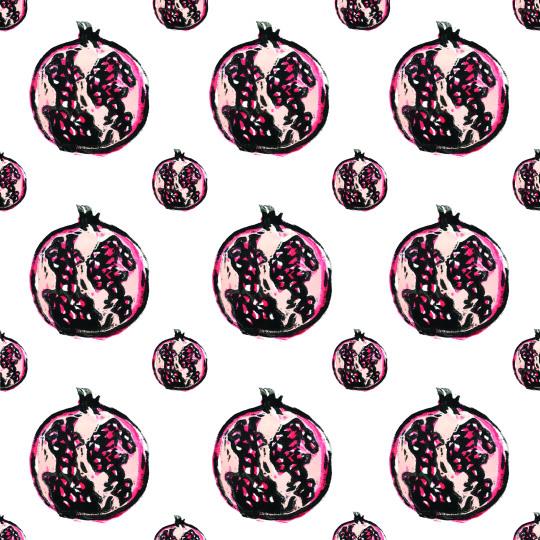
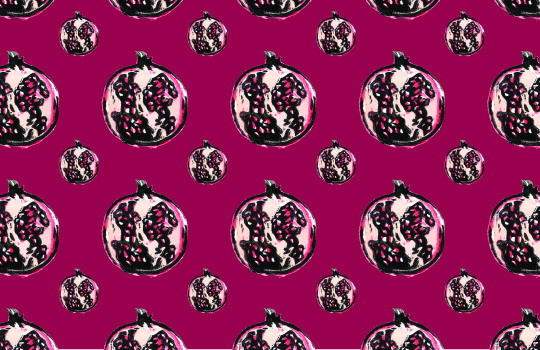
I also tested lots of different colour ways for the background of the pattern, which was effective and with different prints included would be even more effective.

From here, I intend to print these patterns and colour ways onto fabric and sew into them, adding freehand machine embroidery and beading/embellishments, as well as doing the same again with the original prints on fabric. I really enjoyed doing these prints and learning how to produce patterns in Photoshop, as I felt it was very effect and therefore in my own time I intend to continue to built upon these skills and develop my prints and patterns further, especially as we come to our textile workshops.
Stencils
Stencils are a very rigid way of printing which produces a print through the black areas of an image, and can be done many times repeatedly in different colours and with different techniques. There are a multitude of artists who use stencils, famous ones including Banksy and Shephard Fairey.
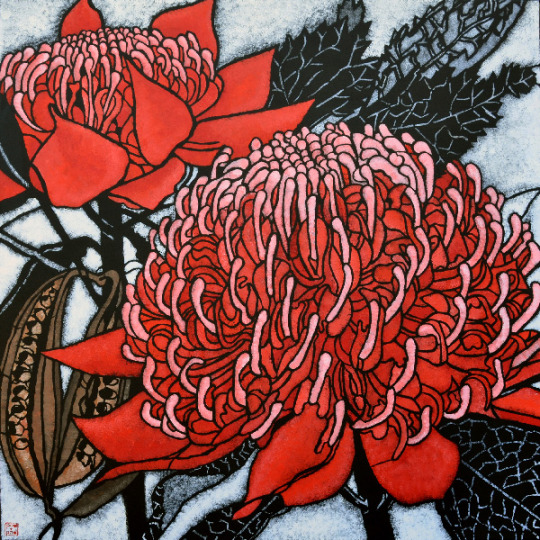
Julie Hickson - Hickson uses stencils in her pieces alongside acrylic paint, producing her “prints” of Australian botanicals and coasts on canvas in limited series. Her work reflects organic line and shape due to the stencil, which is combined with painting to add colour, combing ‘the best of both worlds’. She draws to begin with, following this by arriving at her final design which she then cuts through either the positive or negative to produce her stencil. I think her work is effective due to her distinctive mix of both painting and stencil, which is beautiful and almost is more of a surface pattern design than a traditional painting.
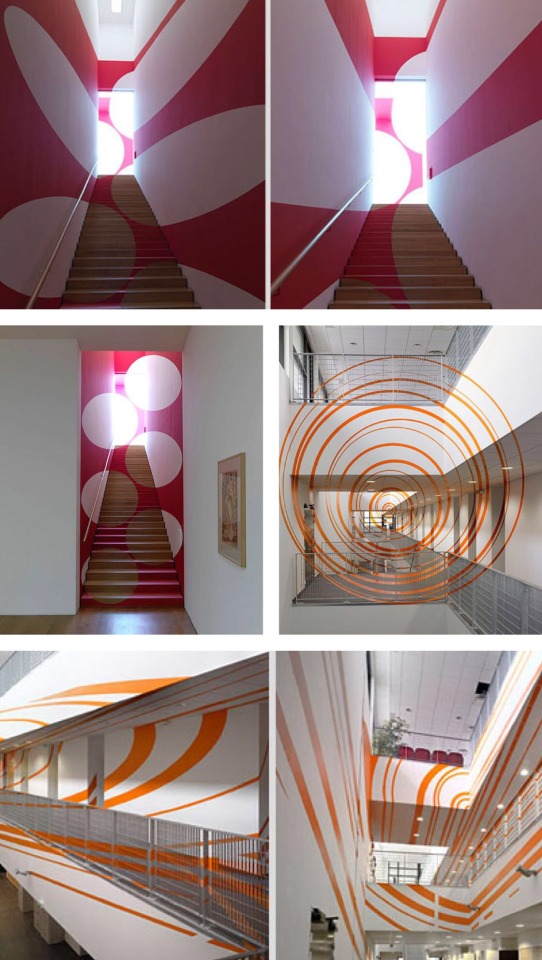
Felice Varini - known for his geometric paintings in rooms and other spaces, Varini uses a different style of stencil work, projector-stencil techniques. He creates illusions of flat graphics by superimposing them onto 3D surroundings using an eye-deceiving technique called anamorphosis. The shapes can only be seen at certain angles. I love how different this technique is to the rest, blending the world of stencils, architecture and graphic design.
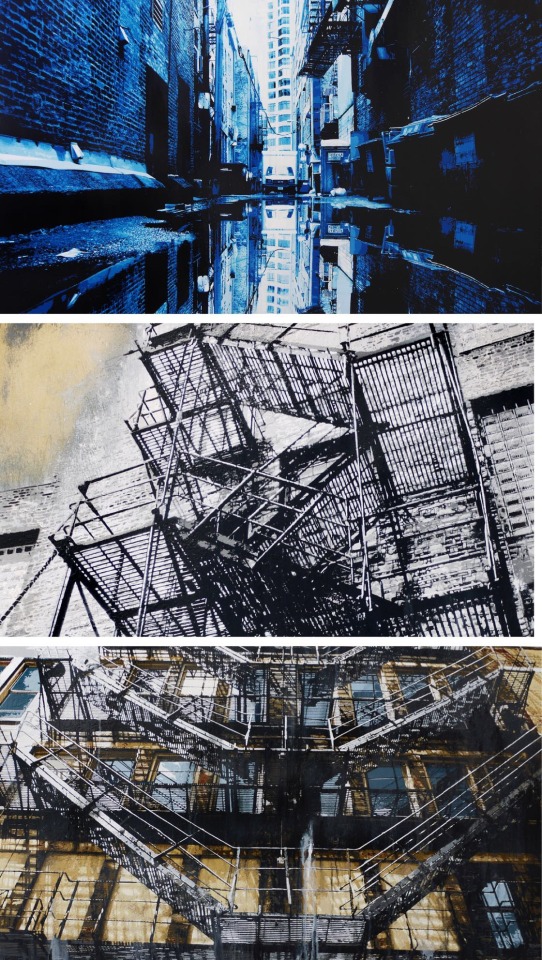
David Soukup - Soukup produces hand-cut stencil prints of urban architecture, cataloguing city life and the decaying alleys and fire escapes from simpler times. His work, however, is not simple in any means, and his stencils are so intricately detailed that they provide heavy textures to the point where his work is a blend between stencil art, graphic design and photo-realism. I am amazed by the detail in Soukup’s work, and feel in disbelief that these beautiful ‘paintings’ are actually produced with a stencil. It has made me realise that stencils don’t have to be used for big, simple, geometric shapes or portraits, they can in fact be cut into on a tiny, busy scale to produce something unbelievably detailed.
To produce our own stencil, we first use the threshold technique on Photoshop to produce a black and white image. We then transfer our image onto a sturdy piece of card, following the black in the image, outlining the shadows and filling them in with black marker. Using a scalpel, we then trace around the outlined shadow and remove the pieces from the card, leaving the white behind and ‘bridging’ any areas of white that are alone in the midst of soon to be removed black so we don’t lose them.
Two layer - The two layer stencil process begins with making two copies of the image we will be using, in black and white. First we follow the black in the first image, outlining the shadows and filling them in with black marker. Using a scalpel, we then trace around the outlined shadow and remove the pieces from the piece of card, labelling this sheet ‘dark’. For the second stencil, we do the same again, this time following the mid grey values, labelling this sheet ‘medium’. Finally, we place the medium stencil on the desired surface, spraying in a light colour through the stencil. Once dry, this stencil can be removed and the dark stencil can be put in its place; when this time we take a darker colour and spray through the stencil.
Stencils can be used on top of previous mark making, plain paper, wood, newspaper and other surfaces. There are different techniques for printing with the stencil, including using a sponge to dab acrylic paint through, spray paint, flicking paint, dribbling paint, splashing paint and scribbling. It is also possible to use other stencils as masks.
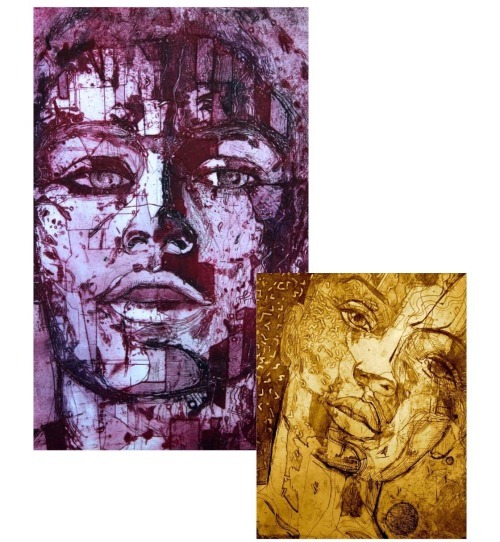
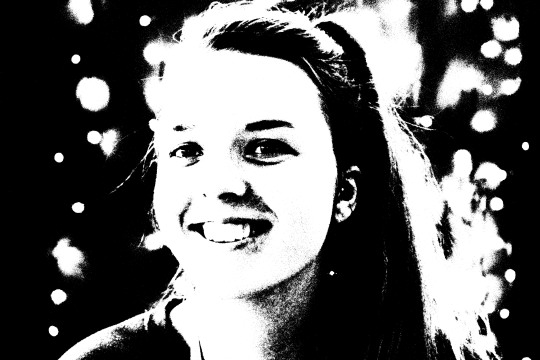
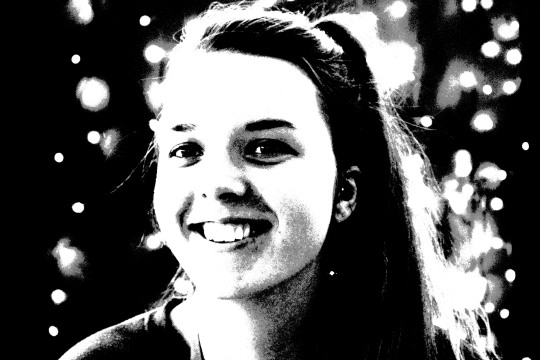
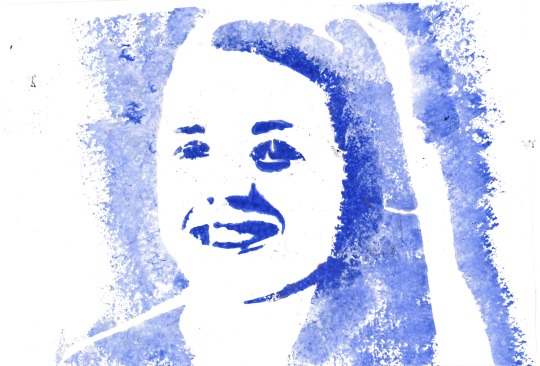
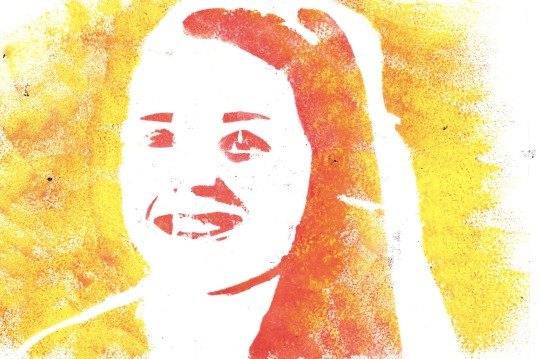
I produced only a one layer stencil, but experimented heavily both with the background and the application technique. Below, I used blue acrylic applied through the stencil onto plain paper with a sponge. I focused a heavier application around the darker areas of the face (facial features) and a lighter one around the outskirts of the stencil, which I felt was effective, so did it again in two tones - red and yellow, which I felt was even more effective.
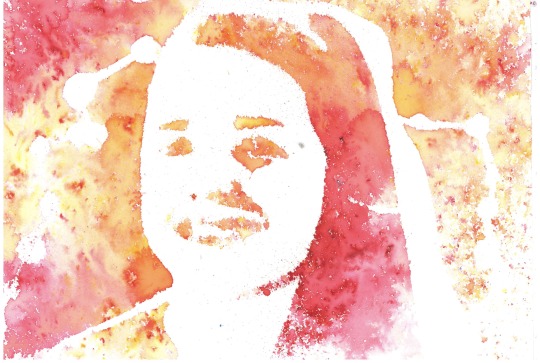
Here, I used sprinkled brusho through the stencil, using “ost. red” and “orange”, then spraying water through the stencil gaps. I was surprisingly pleased with this outcome, however due to the fluidity of the liquid, it dampened the stencil itself and bled under it in some areas, particularly the smaller details such as the facial features.
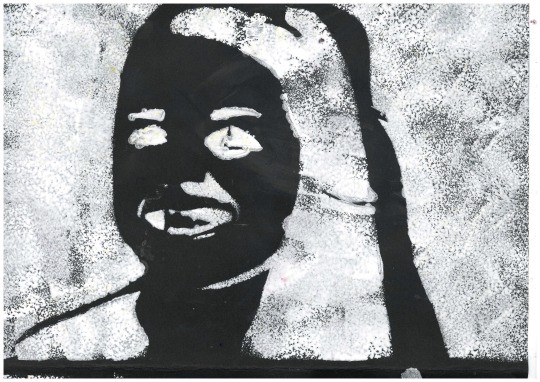
Next, I tried to make a negative version of the stencil, done by sponging white paint through the stencil onto black paper.
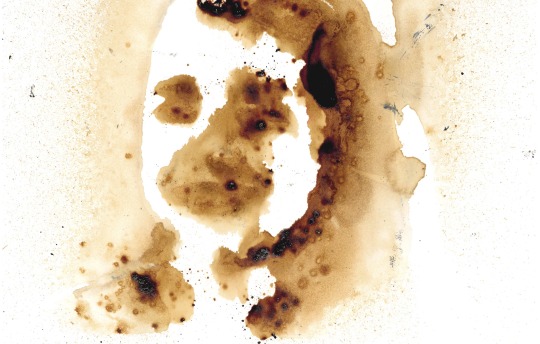
Towards the end of my experimenting, I tried the water spray onto coffee technique in the same manner as the brusho I had previously done. Unfortunately, the coffee needed considerably more water in comparison to the brusho and therefore the already soggy stencil was now soaked through. This meant that the coffee bled completely beneath all areas of the stencil, and there are therefore no facial features. I then finally tried flicking and splattering ink onto textured paper through the stencil. Due to the stencil being broken and soggy I therefore was unable to get any defined features, so ended my stencil testing here.
Overall, I felt that whilst the stencil was fairly effective to begin with, I wasn’t too excited by the outcomes and felt the image looked too rigid; then after a few “prints” the stencil was soggy and broken and therefore the prints didn’t work. If I were to revisit this technique I would definitely ensure I made my stencil out of something waterproof and sturdier, however I doubt that I will return to stencils due to their rigidity.
Screenprinting
Screen printing can produce intricate prints using a selection of photographs. It is used a lot in industry for repeating, predominantly in furniture and fashion design as it is an affordable way of repeating patterns.
Many of my favourite artists (illustrators in particular) use screenprinting to print their illustrations:
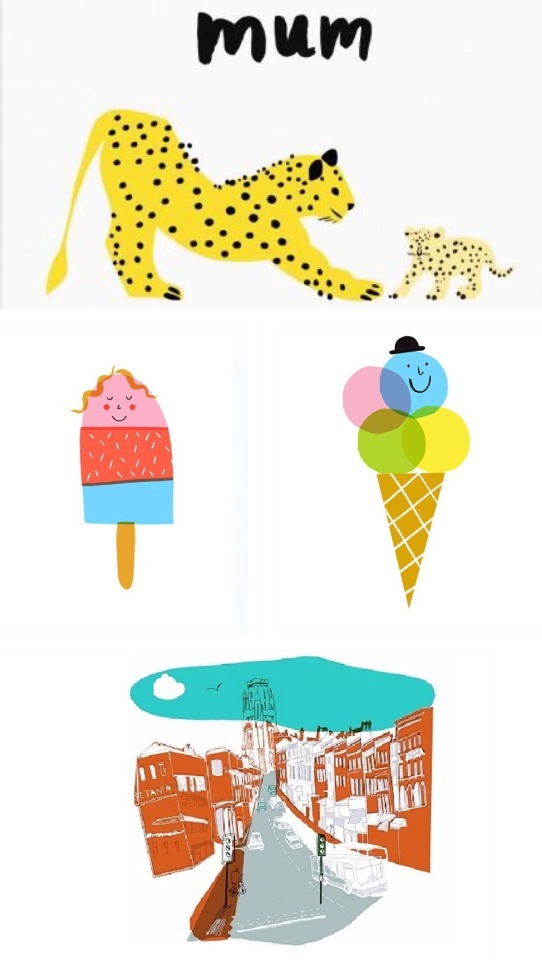
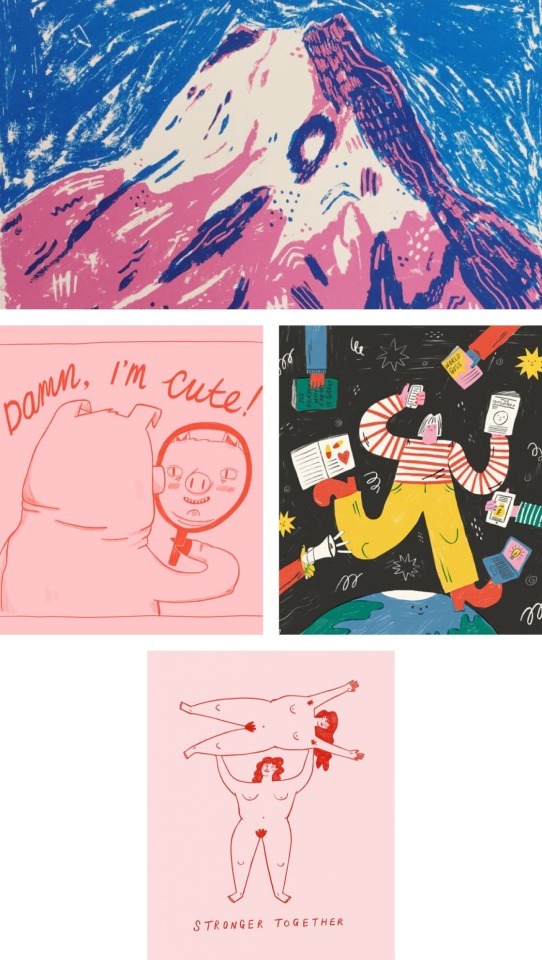
Lucie Sheridan - Sheridan’s work is very illustrative and focusses on bold, vibrant colours, shapes and characters. I love the layering she uses in her screen prints, specifically on the icecream on the right hand side where she clearly demonstrates her use of the screen print technique due to the transparency of the blending coloured circles. I find her work humorous, cute and I really enjoy the diversity she displays, mixing between illustrations of characters but also of landscapes and buildings, seen below, which are still clearly in her style but immensely detailed regardless.
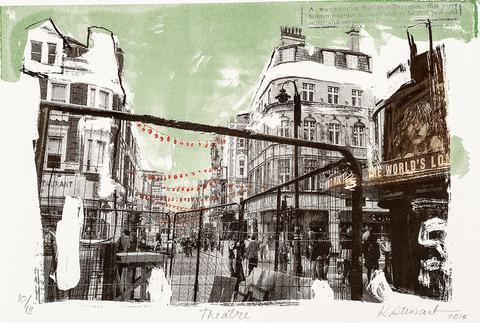
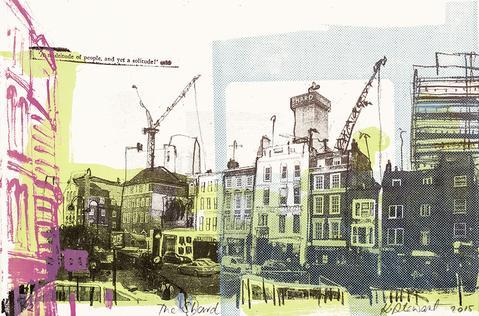
Kelly Stewart - Stewart’s work is very sketchy and rough, but beautifully intricate and detailed in her quick style. I like how different her work and style is to all the other artists I have included, as it is a completely different outcome produced using the same technique as everyone else. I also think her individual colour palette of rough black and geometric regions of neon shades really makes her work stand out as her own amongst the rest, which can be hard as a lot of illustrators who use screen printing all have similar outcomes, which can be seen specifically in Sheridan and Roberts’ works, both included here which are very similar in style and substance.
Jane Ormes - I first viewed Ormes’ work at the Print Fest, which is very illustrative, using block colours alongside mark making to produce textures, characters and their surroundings. I love that she uses such block colours and shapes as the basis of her prints, seen on the left below for the hills, then works into them with mark making techniques to give the prints depth and texture.
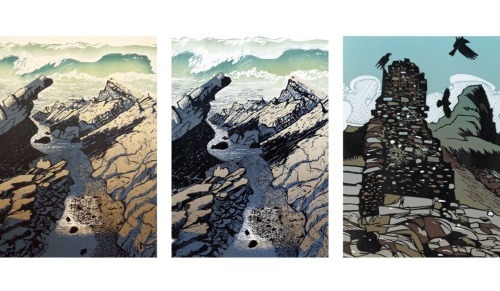
Tess Smith Roberts - Roberts’ screen prints are by far my favourite. I love how clear the layers are in her prints, seen clearly below in the two layers of the mountain, and I adore her illustration style which she draws first before using as her image for her screen. I think this technique gives her work a great deal of character, as do her humorous words of wisdom which are at the heart of most of her prints. I also am a big fan of her colour palette, which consists of a lot of bold pastels, specifically pink.
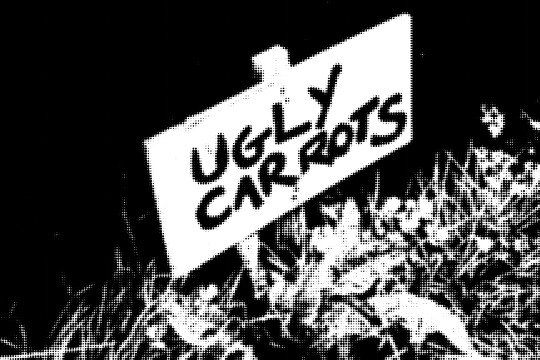
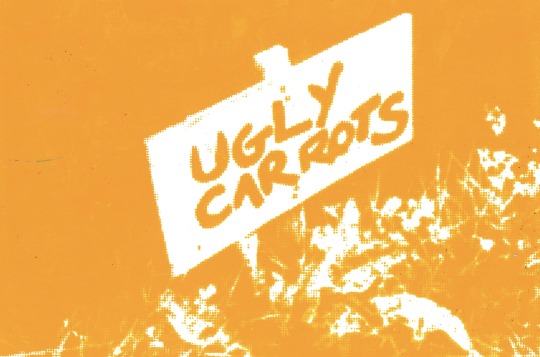
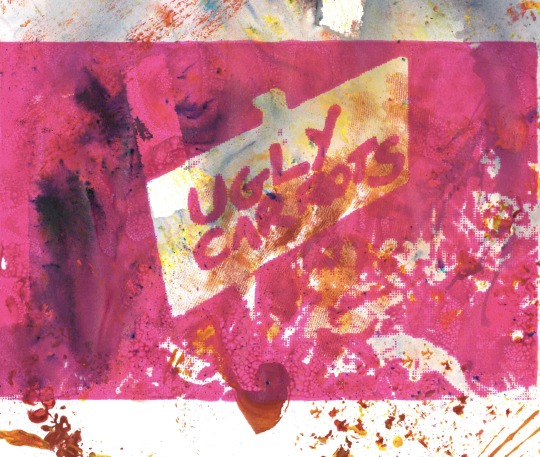
To produce our own screen, we first begin by selecting an image and use a halftone pattern and the threshold method to edit the image and turn it into black and white. I chose three images to test, and from there chose the best one that I felt was most effective.

I added threshold to said image, and once I was happy then added the colour halftone filter, setting all the channels to 0 and setting the maximum radius to 17 (the higher this number, the bigger the halftone dots are). Then, I printed this image onto a sheet of A4 acetate and the screen printing process could begin:
Light sensitive emulsion is coated onto a silk screen and left to dry.
Once dry, our image is exposed onto the coated screen using UV light for 9 minutes.
Then, the screen is cleaned with water, loosening and removing the protected areas blocked by the black acetate areas. This provides a negative image.
Once dry, the screen is then ready to print with by pushing the ink through the uncoated areas of the screen using a squeegee.
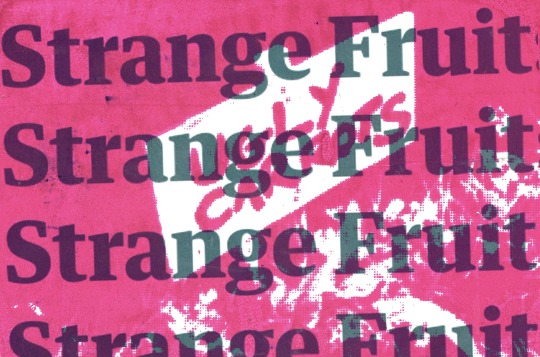
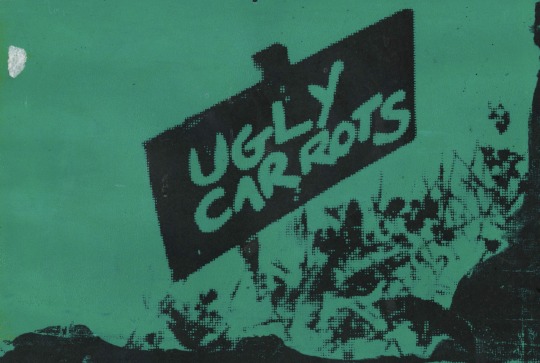
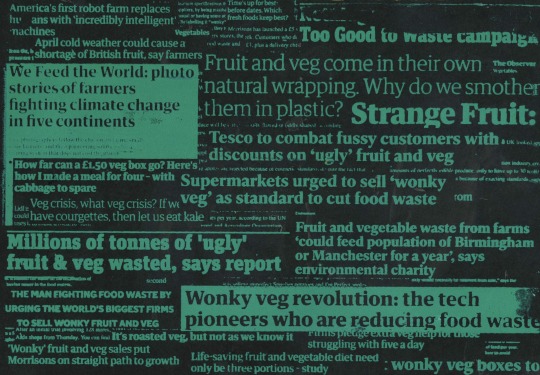
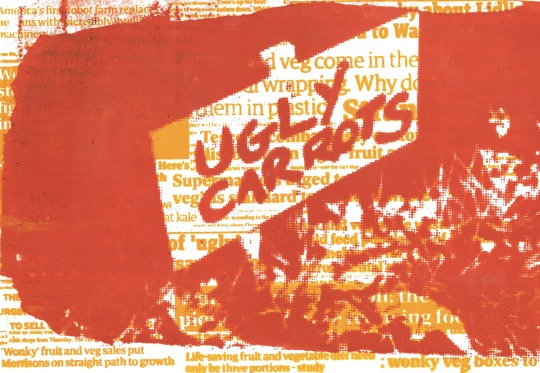
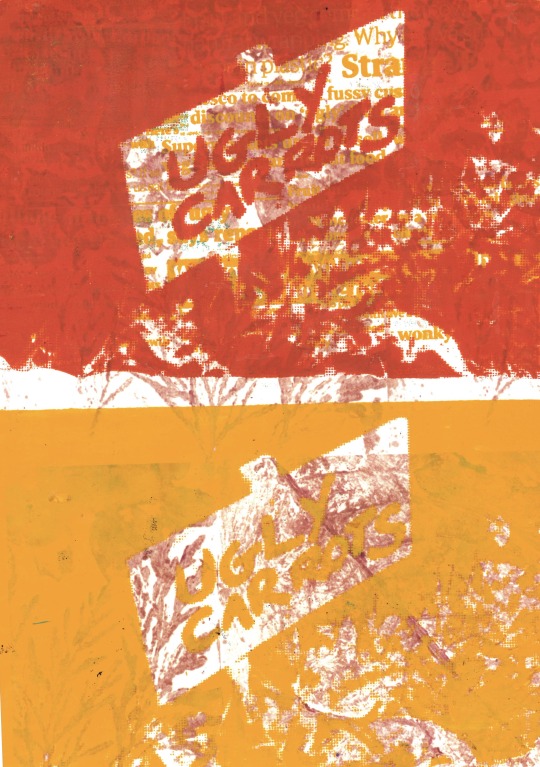
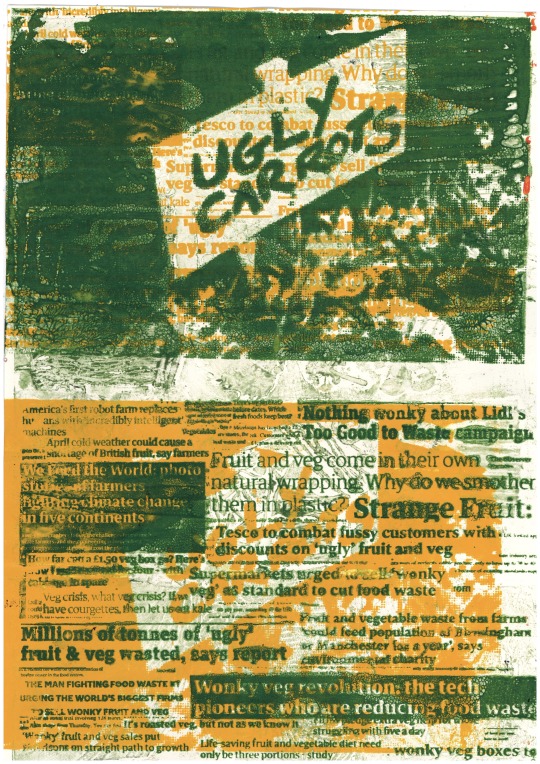
We did this whole process not just with our first image (my chosen was ‘ugly carrots’, but additionally with newspaper clippings assembled on A4 paper. I chose newspaper clippings that were relevant to the ‘ugly carrots’ sign, as I intended to print them over each other during my experimenting. Once complete, this collage can then be edited in the same way again with the threshold technique.
Likewise to stencils, there are many background options in which we can print onto, alongside even printing on top of other designs. Firstly, I screen printed onto plain cartridge paper. This was effective and gave a clear print, however I wanted to experiment more than this.
I tried again, printing over a repeated page of my favourite newspaper heading. Unfortunately my choice of colour didn’t work and meant that the print itself could barely be seen. If I were do try this again I would have to use a light coloured text and print over in a darker ink.
Here, I used duck egg blue ink on black paper. I was very pleased with this outcome, which was a negative print and didn’t want to do anything else to it.
Yet again, I made the same mistake in choosing colours which weren’t different enough to show the print over the text background.
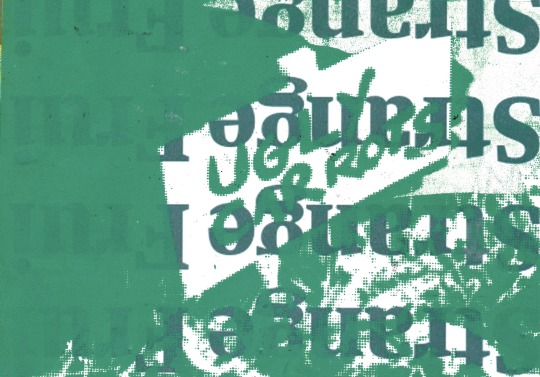
Here I began to get more experimental and creative. I started by layering both of my screens, starting with the headlines which I printed in warm yellow ink, left to dry and then printed my image screen above in orange. I was very pleased with this outcome as I felt it was effective and I had chosen appropriate colours, especially as the orange matches the carrot image.
I continued with this orange ink and printed on top of my previous mark making sheet. I was pleased with this outcome also, however I didn’t feel it was as clear as I would like due to the splattered brusho background.
I did the same again, but with a magenta ink. I was very pleased with this outcome, more so than the one above as I felt the words were clearer on a less splattered background.
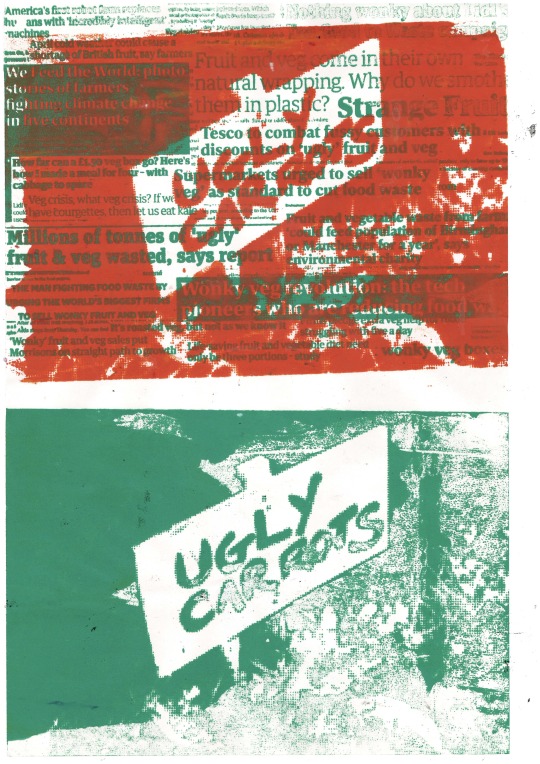
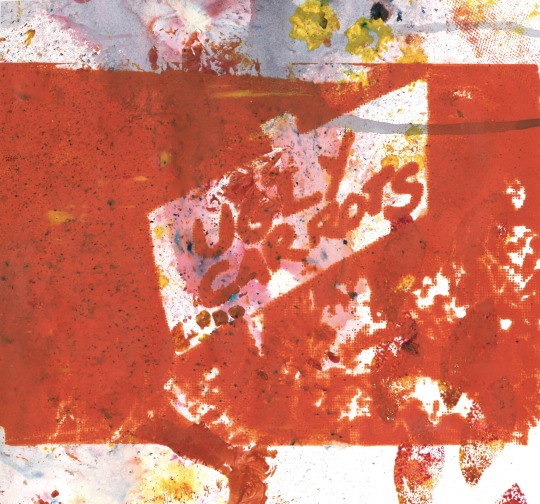
Here, I began to really experiment. I began by printing off a copy of an enlarged section of my collagraph print which I had made rust coloured. Then, I layered my headlines print in warm yellow, and finally once dry printed the ‘ugly carrots’ print on top with an orange ink. This was very effective due to my choice of colours which all allowed layers of transparency but still allowed the words to be read. Below that I simply printed the image screen onto just the enlarged collagraph. I felt this would have been effective if I had taken into account the colours as once again a lighter colour as the top layer and a darker as the base doesn’t work effectively and makes it unclear to read.
As I felt the three layer idea worked very well I went on to do this again, using my original green collagraph (as oppose to a printed enlarged copy) as a base, then printed using my headlines screen in warm yellow and finally went in with my image screen in dark green. Again, I felt this combination worked well, however when I did the inverse below it didn’t work and put the headlines at the forefront of the print, regardless of the order I had printed in. I didn’t like the green as much as the orange as didn’t feel it linked as much to the ‘carrots’.
Overall I really enjoyed screen printing and felt that it was a good technique to allow me to get multiple different styles of prints using any colours and any backgrounds at once. It also allowed me to get perfect layers and therefore if I were to do this again I would try with an image that could be layered, such as a portrait.
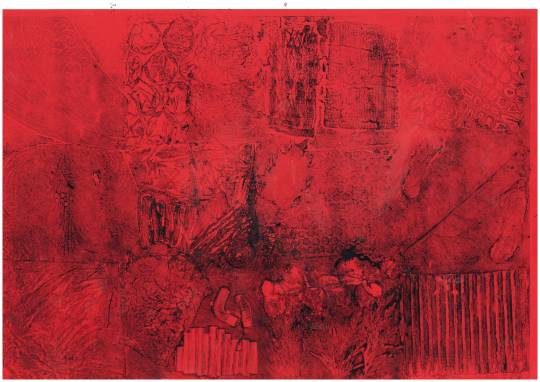
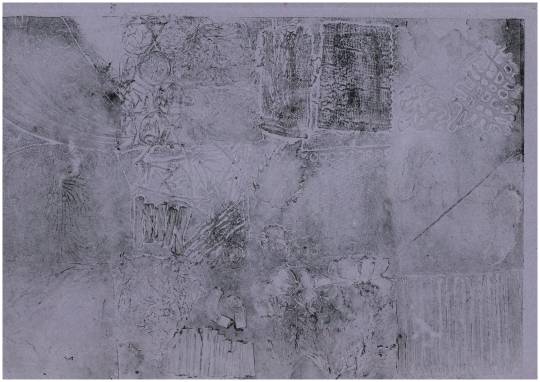
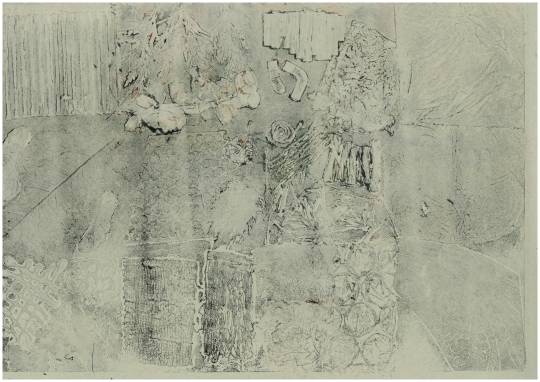
Gum Arabic
Gum Arabic is a transfer printing technique that produces a stencil like multi layered print that produces interesting textures in a vintage/distressed style.
To produce the print, firstly a thresholded image needs to be printed multiple times on different sheets of A4.
The first image needs to be covered, front and back, in gum Arabic solution on a magazine page (to prevent it from sticking).
Then, a mixture of linseed oil and oil paint is rolled onto the image and the inked copy is taken to a sheet of perspex in the sink, allowing us to spray water onto the white areas to remove the excess ink.
We then leave this to drain before placing the copy face down onto cartridge paper, adding a scrap piece of paper to the back and rubbing with the bottom of a spoon, and the transfer is then produced.
This technique can be done using multiple layers, however I really struggled getting a clear print at all using one layer, never mind three. If I were to use layers, however, I would have to do the same thresholding as in the reduction lino technique, with the first layer to print using the lightest ink and the most black on the image, then the second layer being a shade darker with less black and finally the third layer being the darkest ink with very little black.
Sue Brown - Brown uses the Gum Arabic printing technique to usually start her sketchbook pages and as a way of including photographic elements in her compositions. She not only uses the method as we will be, she also uses it as a colour separation technique, and additionally layers her transfers above collagraphs, seen in the image below.
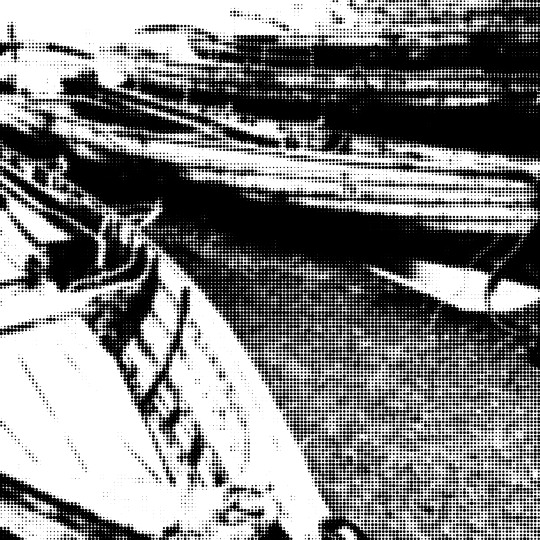
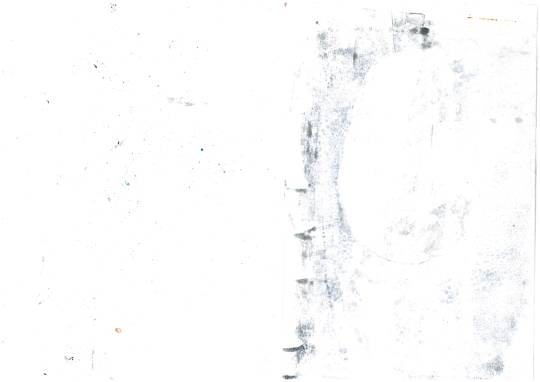
Below is my first two attempts at transfers, which didn’t work at all. Whilst there was a happy medium of both white and black areas, the transfer didn’t manage to pick up any of the tiny details on the tyres and therefore the two just ended up looking like white circles which wasn’t even slightly effective.
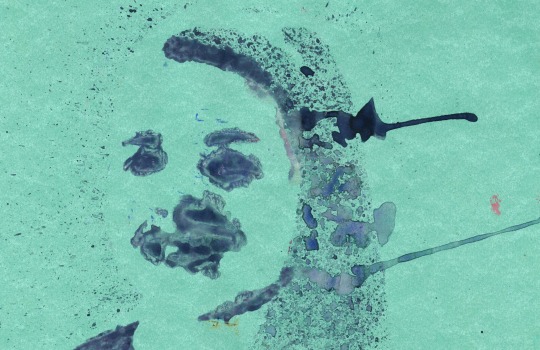
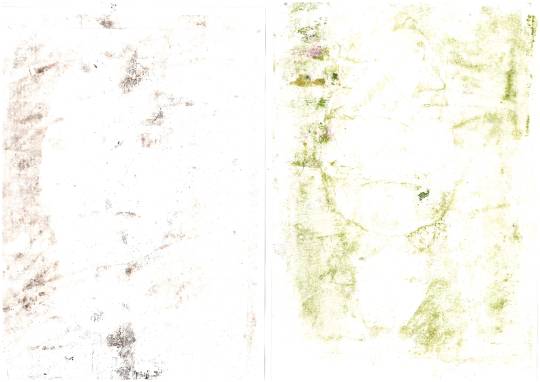
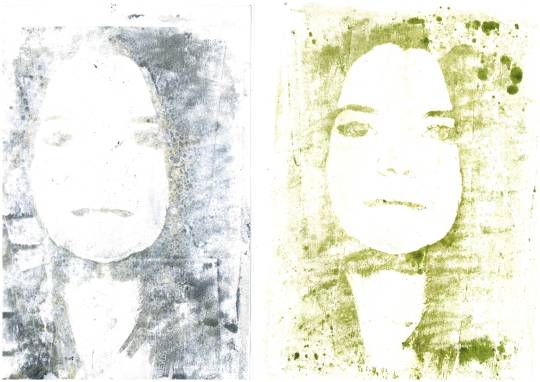
From here, I decided to attempt transferring a different image, and instead tried a portrait. Again, I really struggled getting a print at all, as can be seen by the four attempts that didn’t pick up any facial features below.
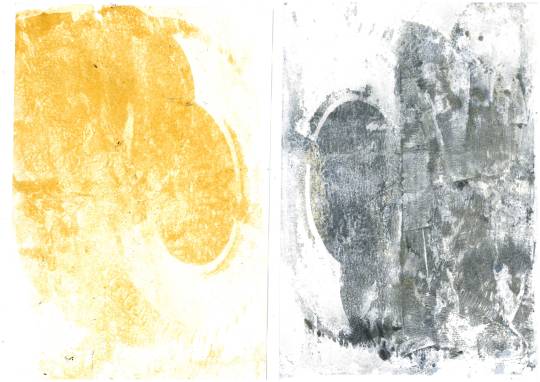
Finally I made a much thicker concoction of oil paint and linseed oil, and left the paper to drain on the perspex for longer, which allowed me to actually produce the two prints below. The green worked considerably better than the blue/grey, and whilst I found the worn, vintage, distressed look quite interesting, I wasn’t overly pleased with the outcome and didn’t feel it picked up enough detail alone, therefore I didn’t even attempt to do more than a one layered transfer print.
Overall, I wouldn’t revisit Gum Arabic as I found it too unpredictable and I wasn’t overly excited by the outcome even when it did work. Although it is supposedly quite a fast printing technique, I found that in practice it wasn’t producing a clear print no matter how long the process took.
Monoprinting
Monoprinting is a print making technique which only allows lines to be made once, therefore only producing single, unique prints. We have visited monoprinting before in A-level, with the technique allowing a print of an image to be produced by rolling printing ink onto a sheet of perspex, then placing our plain piece of paper on top, with the image above. We draw around the image, producing an imprint onto the plain paper beneath, which picks up the printing ink and produces a print of the image we have drawn. This can be done to not only trace a photograph, but can be drawn straight onto freehand. There are many artists who use the monoprinting technique:
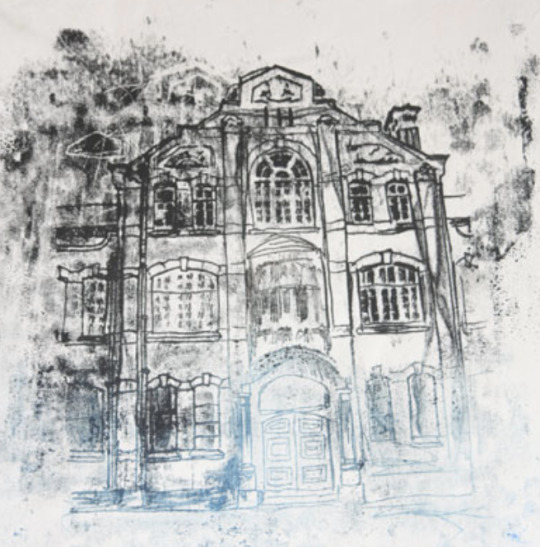
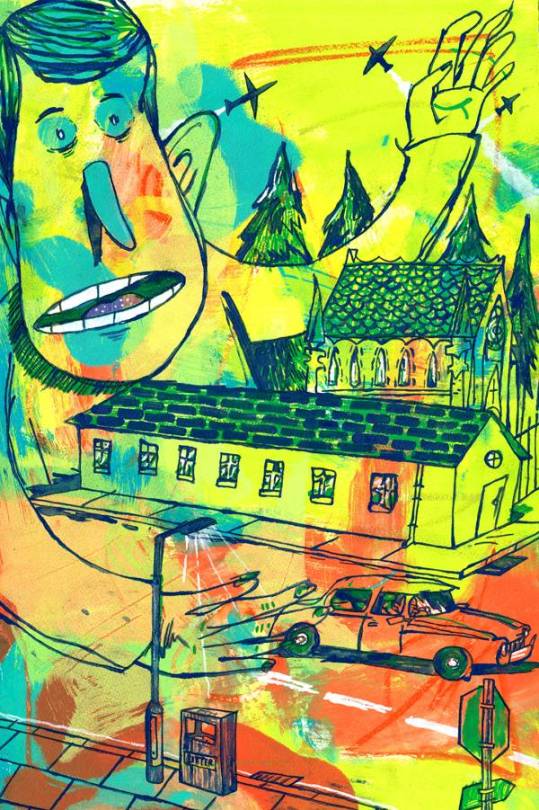
John Parkinson - is an illustrator and print maker, using ever changing techniques and colour choices. He uses freehand monoprinting in his work, producing detailed printed illustrations. I specifically love this architectural monoprint, as I feel the detail he manages to capture with a monoprint is admirable. Below that is a monoprinted illustration on a screenprinted experimental background, which I think is very effective, especially the colour palette.
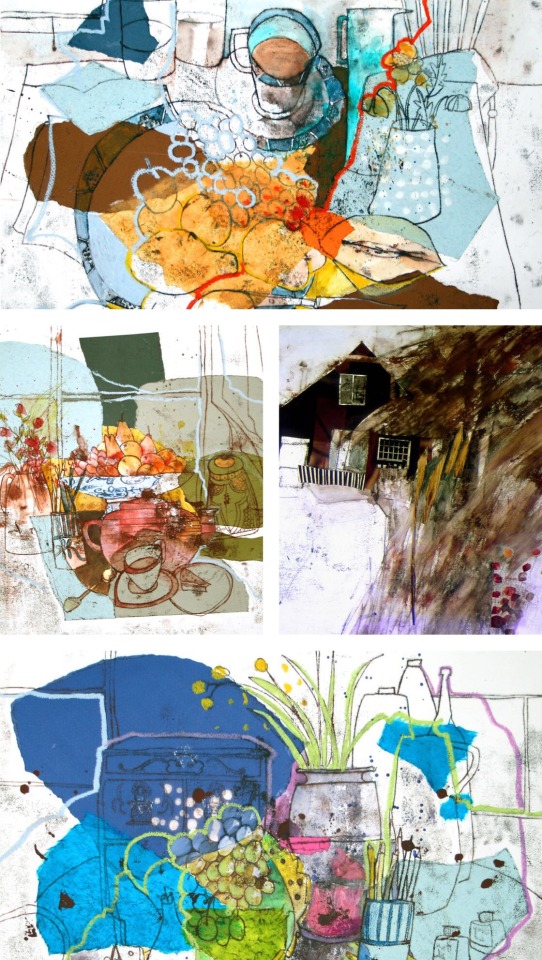
Shirley Trevena - works with collage, monoprint and watercolours to produce her mixed media still life creations. I love how homely her compositions are and I love how mixed the materials she uses are but how recognisable and strong her compositions are; I also love her mixed colour palette and mark making.
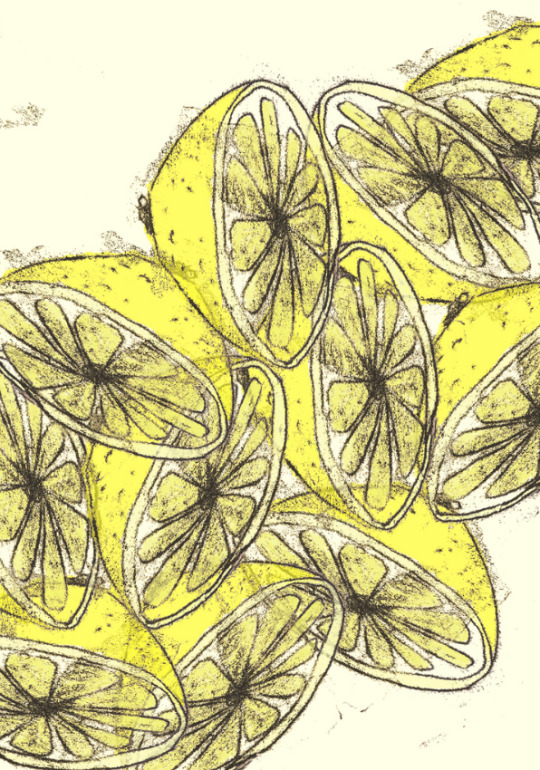
Unknown Artists - I have collected a few images from artists which I can’t find their names but have still caught my eye and inspired me, found on Pinterest. I have decided that I am most impressed by works that are a mixture of monoprint alongside other mediums, such as the lemons monoprint below which has been scanned into photoshop and edited digitally, or the one below that uses collage beneath the print, similar to Trevana’s work above.
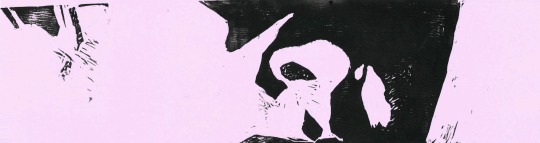
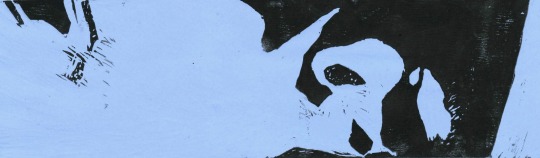
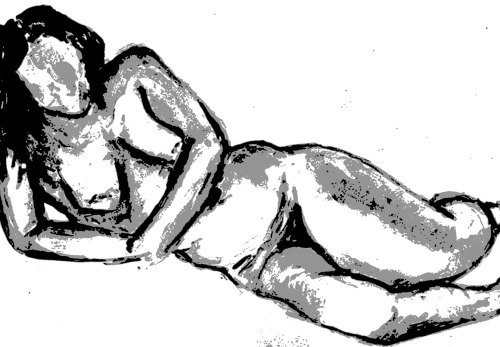
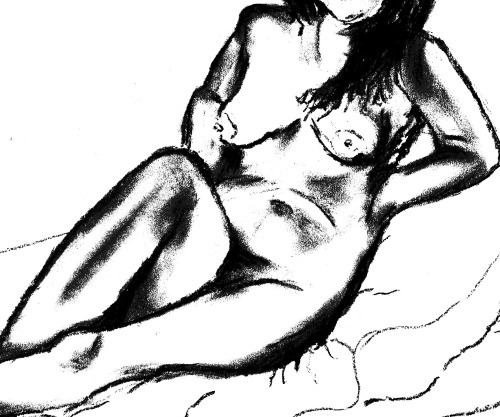
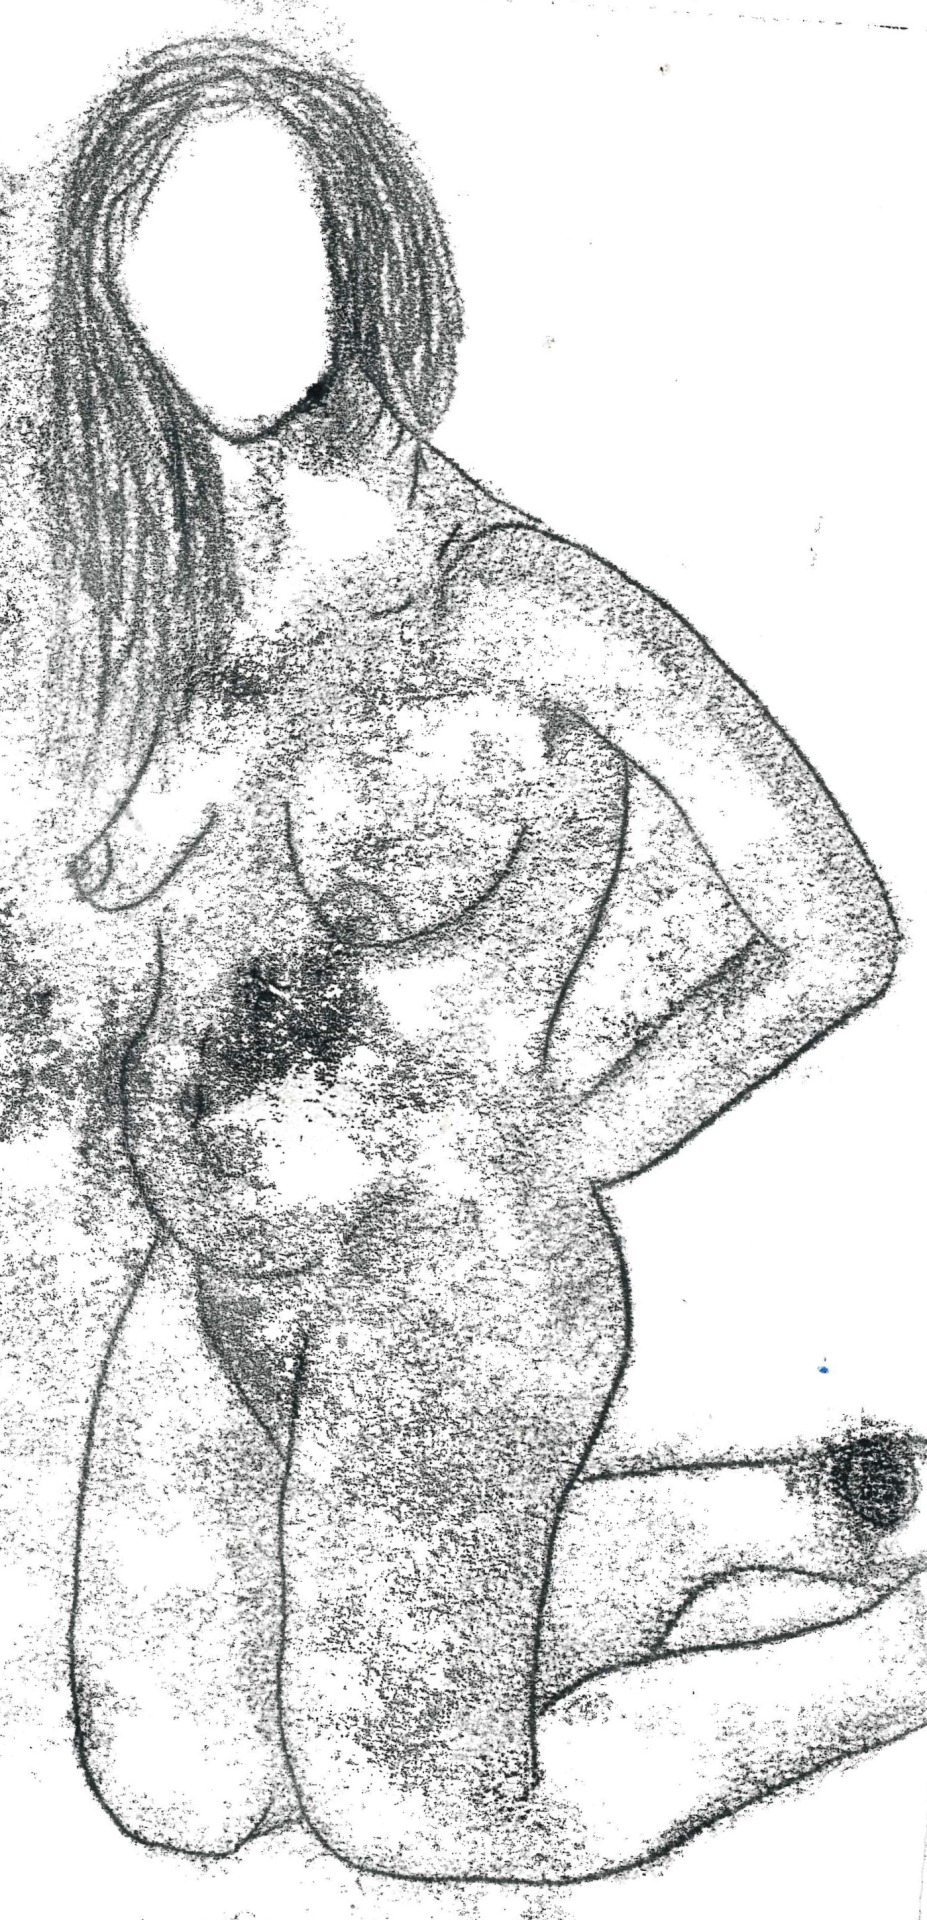
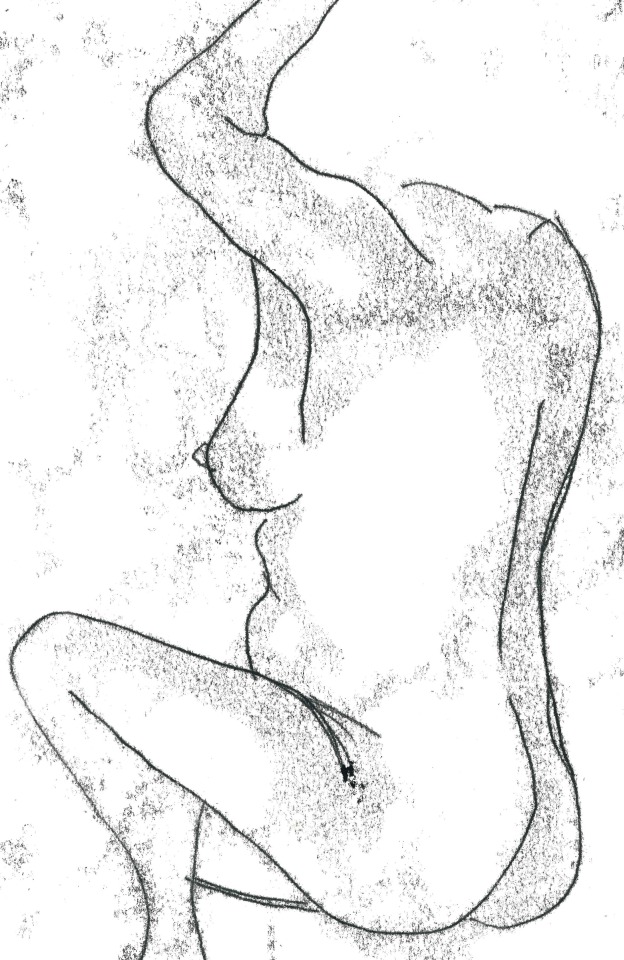
After researching these artists we then went onto use the monoprinting technique in life drawing. I found this technique quite enjoyable as I find print relaxing, so I didn’t feel uptight about the life drawing. My outcomes, however, are a bit messy, due to the paper picking up the ink from my leaning hand.
10 minutes, monoprint on plain paper.
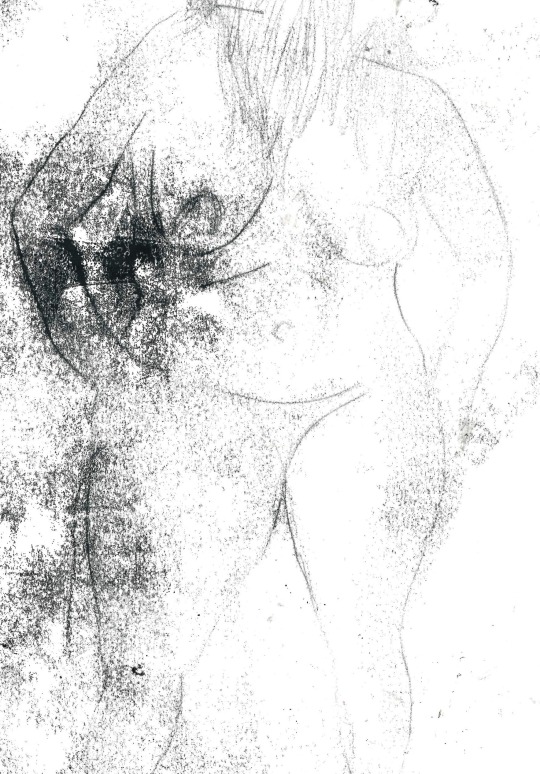
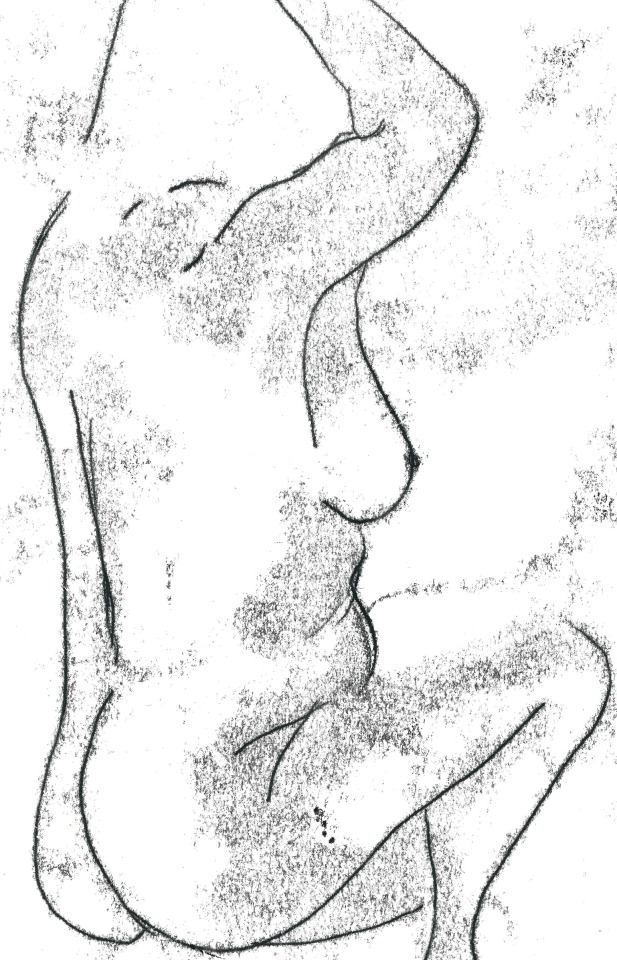
5 minutes, plain paper.
5 minutes each, monoprint on plain paper.
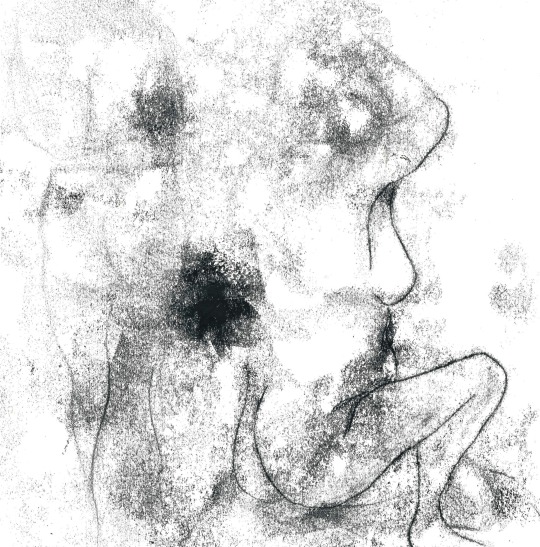
I would like to revisit the technique at a later date, now that I know I have to press hard with the pencil and that rubbing areas of shadow with my nail works extremely well to get soft shadows, however I need to remember to spread the ink thinly as it picks up too much on the paper, and need to remember to be careful about leaning my hand.
After life drawing, I did just that; revisiting the same monoprint seen above, scanning in the original outline and reprinting it, ensuring now to press very hard on the outlines and to remember to rub the shadowed areas for depth.
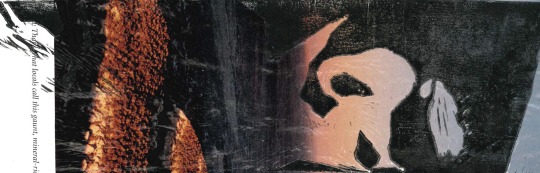
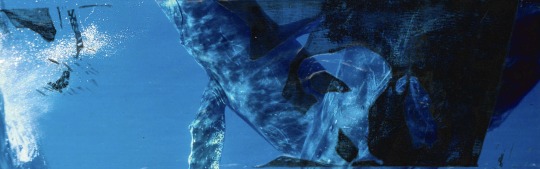
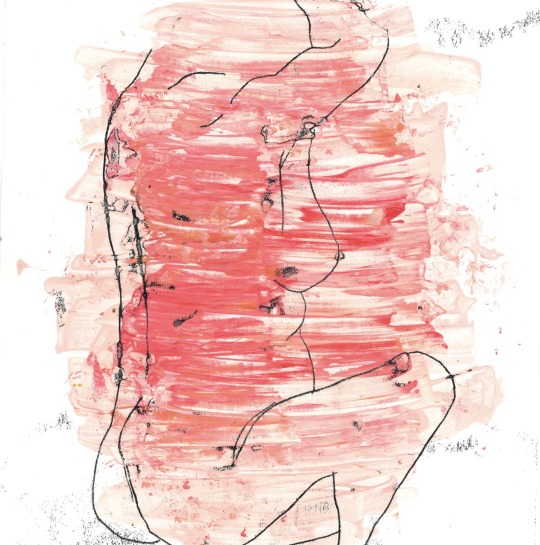
I continued experimenting with this same process, printing over a messy impasto red and pink acrylic base. This wasn’t as effective because I usually like to stay within the outlines.
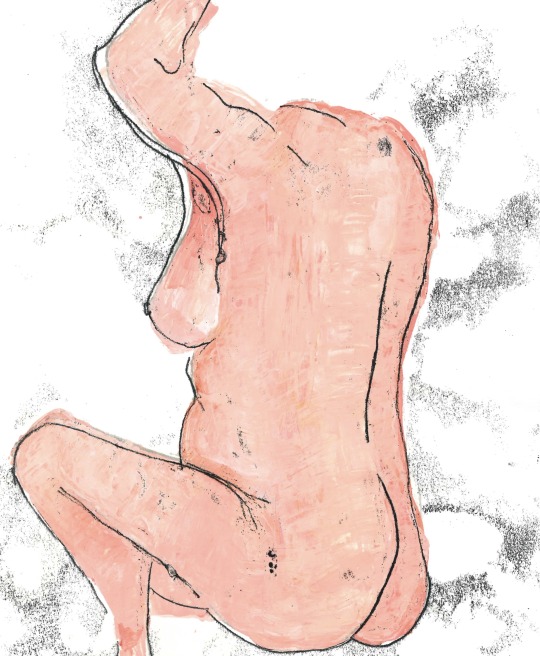
Finally, I painted into the thin outline, adding darker fleshy tones for shadows, and once dried printing the outline back on top. I was very pleased with this, and although the rubbing for shadows didn’t work quite as well as it did on plain paper, I still had the shadows from the darker fleshy tones, so I was very pleased with the outcome and felt it was effective.
Overall, print has been my favourite of the workshops so far, which may have partly been because I have already used it a lot and had experience with it from A-level so was able to already have the basics down and could then experiment a lot further with bases and more interesting techniques than I would’ve if I hadn’t used it before. It has also made me excited to take these skills further, onto the textiles workshops and use them as bases for embellishments and appliqué.
0 notes
Last Seen Blogs

annaxlexi
Anna Lexi

questionswithoutillusions
Happy But Annoyed At The Same Time
tabu
tabu

iero-fucker
saved url

sapphire-drawings
Don't Starve till I get bored of Maxwil