#ik anime is like that but i still just couldnt stomach the show after that
Text
chainsaw man makes you think its a sick action anime where a horny guy made of chainsaws murders a bunch of guys and gets a sorta fucked up found family along the way, but then you watch it and its actually about a 15 year old boy getting groomed and everybody hates everyone else but theyre mostly busy hating themselves and then everyone dies
#csm spoilers#chainsaw man spoilers#they introduce like 8 characters in one episode and then kill them like two episodes later#half the characters in the intro dont show up until yhe very last episode and they all get like one line apiece#not eyepatch finding out denji is a minor and then STILL TRYING TO SLEEP WITH HIM???#'i didnt take advantage of you last night right? oh good i totally wouldve gone to jail'#HELLO????? DO YOU HEAR YOURSELF????????#ik anime is like that but i still just couldnt stomach the show after that#she died like 5 minutes later tho so it was fine#you lied to me i was promised found family#and i got a bunch of fucked up teens who need therapy but instead get groomed#feel bad show of the year#i get its not supposed to make you feel good by the end#and maybe its really effective for that#but i was upset by the wrong things i think#i didnt care when any of the characters died because they had just been introduced like one episode agu#i didnt even remember any of their names#honestly not a good show#ive never liked mappas stuff#theyre allergic to filler and thats their proboem#they dont take the time to make me care about the characters before they kill them#tl;dr i didnt like it#chainsaw man#csm
12 notes
·
View notes
Photo
Sorry for being abscent tumblr, I’ve been super busy with the work! I’ll make a mega update here to get us caught up, and ill upload more photos after.
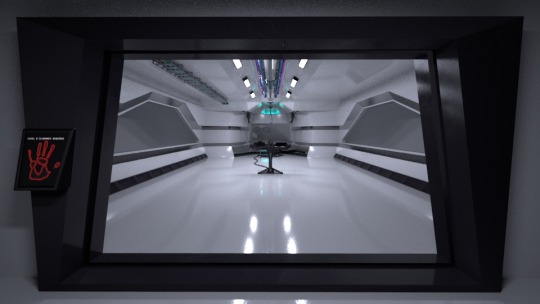
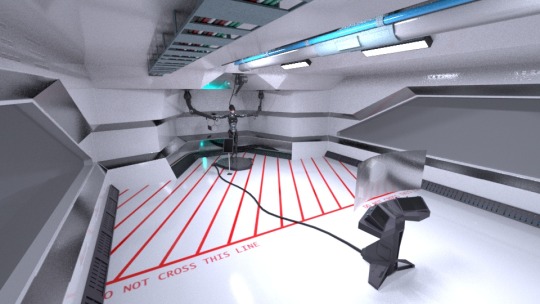
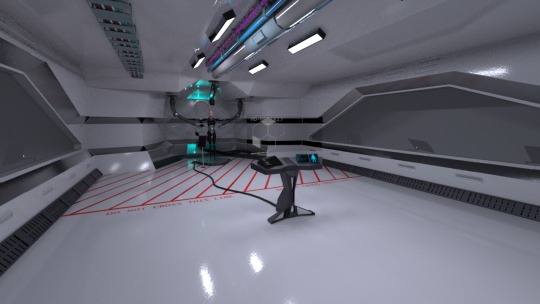
Since unwrapping the environment I have taken it to substance, got all the maps generated, made some optimisations on render time (Still some noise but render time is at 18minutes at some points so wont push it any more - waiting to hear back from Sang on how good the render time is/optimised the scene is before i send render farm requests) and done my animating!! Phew!
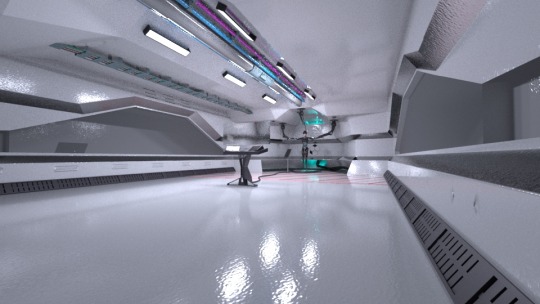
The substance painter stuff was good fun - I learend some lessons with the character, and knew the best way to approach this was to put everything under one material that I wanted on one map. To that end I put the entire room (walls floor etc) as one material (due to its physical size and wanting to put text on the floor) and the objects within the room - computers, piping, platform etc - on another atlas. Both atlas’ were 4k, and the only exceptions to that was a few individual maps - one for the robotic arms holding her, as I made them seperate and couldnt/dont know how to combine maps, and one for the pistol (ill show in next post) as I did that after (I decided a couple days before starting animation to test myself to model, wrap and texture a pistol in one day - I did it!! :D
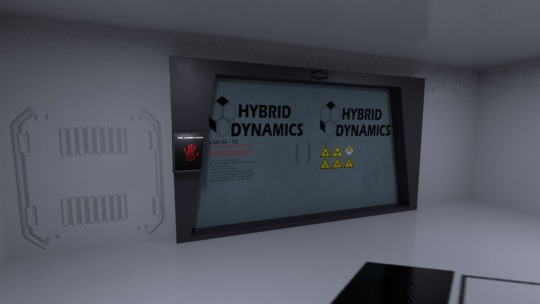
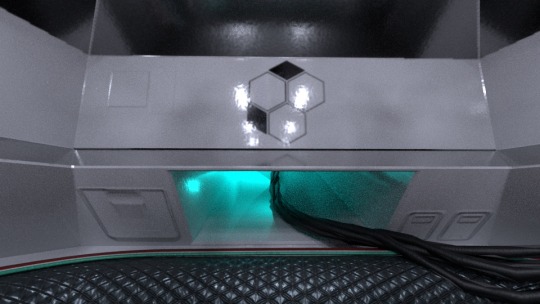
I messed around with colour palette a bit with the room. I wanted a dark ominous room, but felt that showing the room with grey or dark surfaces lost the clean room/labratory feel. I think its vitally important in a sci-fi environment to try to keep real world links as close as possibly as they act like markers for the viewer to follow. I.e. by maintaing an aesthetic in this room or a labratory or hospital with the clean shiney surfaces, and the screen terminals using words like testing etc, the viewer will hopefully understand that its a lab/test facility of some description for the robot - That’s the plan anyway. By making the room darker, it might all into question the use or purpose of building. For example. is she there to be interogated? Has she been captured? As opposed to thinking oh this is a new technology...
I’ve not done any animation before, so was both excited and concerned to start, although it was a nice change of pace and helped keep me interested with a change of the usual workflow.
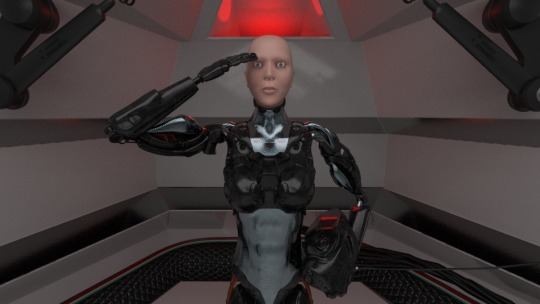
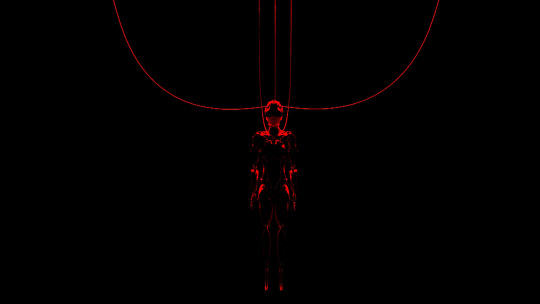
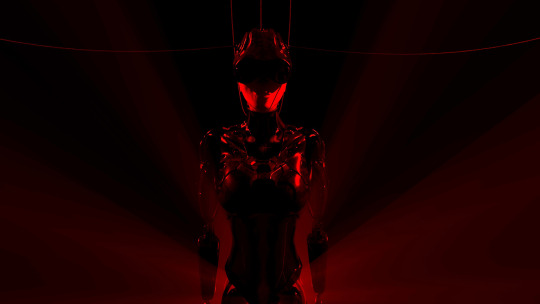
Luckily, as my story focuses on her being restrained for a large majority of the film, I didn’t have any massively challenging animation to do. However this didn’t mean I would coast the work and get it done as soon as possible. I wanted to make sure her acting and performance read as clearly as possible, as I need her movements to be one of the key indicators of her “state” i.e. human, or robot. I also quickly created blendshapes for her - I planned on her being unable to emote, but I felt this was a bit of a cop out. I didn’t want her to open her mouth, sure, as I felt that was a one way trip to uncanny that I coulnd’t use within the story, and would make her impossible to empathise with (if I had time, sure it would be a fun experiment to see what worked better, but time isnt on my side). This did mean that her emotions were slightly limited , BUT, because i wanted her to see trapped in her own body, and like her faculties were limited (due to the fact her head has been removed and put on a robot!!) I think it worked well. I created blendshapes for fear, sadness, anger, a blink, and a frown (to augment the other emotions). I’m so glad I did these, as the became key in a few of the shots, and really make them pop, and make her “come to life”, so I’m pleased I took the time to do them.
The animation was fun, a few issues came up however, but for the most part it was pretty straight forward. I took some videos of myself doing some of the movements as reference for the animations. I tried to do it in a week or less, which I managed, to make sure that I stay on target time wise, and as I opted to use After Effects to show the screens, I wanted extra time to learn - I want the screens to flash and change, and thought it would also be a good oppotunity to learn how to use After Effects as I’ve not used it at all.
I’ve spent a bit of time too working on camera movement and set up. I’ve weant for a 25mm focal length for most shots to show as much of the set as possible, situating the camera more. I try to frame each shot as well as possible to make it look good, draw the viewers eye to key information, and on a few shots, frame screens so that they can get plot information as to what is going on. It’s been difficult to make sure the camera looks as natural as possible, and not like a maya camera, which is tough. Camera work itself is an entire artform in itself...
So, I want to discuss a few of the issues I’ve had and how I got around them or solved them.
So, as I mentioned I had some issues with the animatiom. These came from the rig, and the blendshape.
First of all the blendshapes for her face - as I think I mentioned before, I did blenshapes for her bicepts so that when she moves her arm, her biceps will tense and relax to show that movement. It’s very subtle and probably never be noticed, but it looks cool when you look for it, and it was a great learning experience. I had to move its order in the channel editor to make sure it moved at the right time within the rig, and it worked totally fine, and easier than I thought! I did the same with the shoulder muscles, but more as corrective blendshapes as the rig/deformations isnt perfect. However, the face blendshapes wouldn’t play ball... I tried adjusting their order, I tried every combination, I tried deleting their history and their transforms, nothing worked - everytime I applied them, her head would shoot off into the distance. I spoke with both Sang and Michael and Patrick Sloan, eventually the 2 Sloans worked out that by deleting the meshes post, and applying them all as one blendshape (originally I did them one by one) it worked. I tried doing them as one BS without deleting them and for some reason it didnt work. I took it as it was and even asked Sang if he knew why (he didnt). As long as it worked though, I didnt care...
The next issue with the rig was something that totally slipped by somehow; When I rotate her global control her chest and abdomen wouldnt deform right AT ALL. I had no idea how it happened and started freaking out. The 2 Sloans couldn’t work it out either. If I grabbed her chest and her global, she would rotate better, but her stomach would twist up strangely. Eventualy Sang diagnosed that the issue was the IK Spine not twisting right, and that I must have done something wrong during the rigging stage. This was super frustrating as I took my time with the rig and followed Sang’s video perfectly. It must have been one little step, a constrain or a parent, that i missed, omited, or applied incorrectly, and more than a month later, it came to the surface. I was especially confused/frustrated as I tested the rig post completion and binding to check, but obviously hadnt used the global control to twist her. Sang found a work around, but it did mean that one of her spine controls was lost. I then realised towards the end of the animating that a few of her poses caused strange deformations, like verts jutting our, or generally not following the rest of her body too well. I would go into weight paints and smooth out the issue as best I could even though I couldnt see anything glaringly obvious, like an arm joint effecting her lower stomach, but now that I’m processing this, I wonder if perhaps losing a handle reassigne weights and didnt do it right??
Another issue I had was her armor and torso/muscles being SUPER Shiny. I couldn’t work this out especially as she looked totally fine within substance. Initially I assumed it was an arnold render setting and that I hadn’t turned samples high enough, but after optimising the samples using Sang’s tutorla (which made the render time too high unfortunately) I realised the issue remained. One day I eventually decided it wasn’t right and that it wasn’t just me - it was too much. I worked my way through Arnold’s material settings, turning this up, down, off, every which way, to see if it effected the shine. I eventually found the culprit was Diffuse Roughness and nothing more, and that by simple adjusting the exposure/alpha in the settings, it reduced this shine completely. The way I set up my materials meant that it effected her whole texture (even though muscle/skin and armor are in different graphs) so I lost a tiny bit of shine to her skin, but I think it still looks fine - if anything before hand her lips looked too shiney, as if she had on lip gloss.
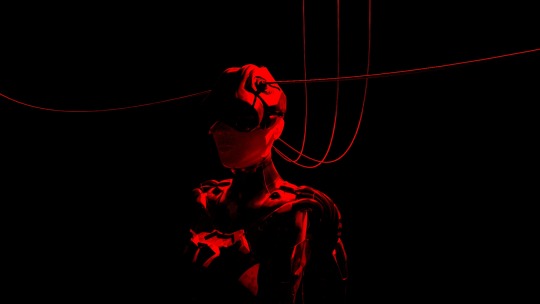
I also had some issues creating the cabling for her helmet. I needed the cabes to flex and bend with her as they moved. In my head the best way would be and IK set up. Initially I tried this, and I use a cube to measure the start and end points, and used an arc to create a perfect bend over the 90 degrees. This was a good idea, and the cable could go from a 90 degree bend to perfectly straight, but any additional bend didnt work and just turned the cable. I then started thinking about IK Splines, and watched a few tutorials online but couldnt get it to work. It made sense though, a spline would allow the perfect movement! Evnetually me and Sang spoke a few times and he was able to find a solution. An spline set up that didnt work like an IK and meant I had to do lots of manual adjustments, but for the most part it looks great. So for the small cables on the sides of her helmet, i kept the simple but effective “fire and forget” IK cables, and for the rear of her head I used the spline, as this area would move and twist much more. It took a while to create and solve, but meant that it looked good and only took a small amount of additional work to animate.
I will upload some more images, such as test shots, the pistol (which barely gets any screen time, but only took a day to work on so not a massive loss.
Only a few weeks to go! Waiting for Sang to get back to me on scene set up and optimisation, once that gets the green light I’ll start sending render farm requests!
1 note
·
View note
Last Seen Blogs

spiritualthoughtleader
Untitled
stunninginteriors
House. Interiors.

hardswae
*HARDSWAE

wheatley-silver
Wheatley Silver

justpicsofstuff
P.I.C.T.U.R.E.S