#focal plane shutter working on manual speeds only
Text
Zenza bronica s2a bedienungsanleitung panasonic
#http://vk.cc/c7jKeU#<p> </p><p> </p><center>ZENZA BRONICA S2A BEDIENUNGSANLEITUNG PANASONIC >> <strong><u><a href= rel="nofollow#<br>#<br> </p><p> </p><p> </p><p>Zenza Bronica G-18 Extension Tube ring for GS-1#MINT- condition. Excellent+++ Zenza Bronica Helicoid Ring Lens Adapter For S S2 EC TL From Japan.#summer scenery#118 by moonchild1111 Via Flickr: Zenza Bronica S2 Nikkor-P .tumblr.com/post/691614757860655104/md-84393-bedienungsanleitung-panasonic#Käufer haben sich auch folgende Artikel angesehen · ZENZA BRONICA ZENZANON 300mm F/4.5 F 4.5 Lens S S2 C2 EC TL#3313 · Carl Zeiss Flektogon 50mm f4 9570826 Jena#Bedienungsanleitung Panasonic C-900ZM 35mm Compact Camera Instructions Bedienungsanleitung Zenza Bronica ETR E-T-R etr Schnelltransporthand#Leica Stereo-Vorsatz `Stereoly` Gebrauchsanleitung (1931); Leica Universalsucher Rollei A110 (Made in Germany) (1975); Zenza Bronica EC (19#Hi#habe hier eine Zenza Bronica SQ-A. Die Kamera war Jahre nicht in bzw wird nicht mehr hergestellt und hat mir eine Panasonic 4LR44#A Zenza Bronica EC-TL 6 x 6cm SLR Camera#serial no CB362066#body G-VG#dust on mirror#focal plane shutter working on manual speeds only#Zenza Bronica Bedienungsanleitung Anleitung f. Mag. S2 6x6 / E 6x4#5 in Englisch - Zenza Bronica Bedienungsanleitung für Magazine Type S2 6x6 / Type E. in#</p><br>https://ranojawul.tumblr.com/post/694234132941799424/david-fx-handbuch-maschinenbau#https://ranojawul.tumblr.com/post/694234132941799424/david-fx-handbuch-maschinenbau#https://ranojawul.tumblr.com/post/694234189204226048/vodafone-vsdm-handbuch-in-deutscher#https://ranojawul.tumblr.com/post/694234189204226048/vodafone-vsdm-handbuch-in-deutscher.
1 note
·
View note
Text
A Complete Guide to Landscape Photography
There is little that compares to the grand majesty of nature. The allure of impossible rock formations, the breadth of expansive beaches, and the fairytale feel of canopied forests never ceases to stun even a well-seasoned landscape photographer.
Capturing stunning landscapes is an art in itself. Landscape shots require a deep knowledge of sense of scale, and how best to utilize the right time of day to one’s advantage. Follow the landscape photography tips below to land a great shot.
What Is Landscape Photography?
Landscape photography is photography that occurs in the great outdoors. It is separate from what we know as nature photography. Usually, landscape photography captures an impressive natural scene—an imposing mountain range, a serene, sprawling field, a river roaring by—untouched by human presence (besides the photographer’s, of course).
For all beginner landscape photographers seeking to explore the earth while capturing their own magnificent images, here is a complete guide to get started.
What’s the Best Camera for Landscape Photography?
While it is possible to take photographs with any camera, consider investing in a mirrorless digital camera or DSLR for your landscape photography needs.
Mirrorless and DSLR cameras provide maximum control over camera settings, which means not only is the baseline quality of the image automatically superior, the possibilities of creating professional-looking pictures are endless.
Mirrorless and DSLR cameras also allow the photographer to swap lenses.
For sweeping landscape images, like canyons and caverns, go with a wide-angle lens such as Nikon’s 14-24mm.
For more detailed and close-up images, don’t be afraid to use a zoom lens or telephoto lens, like Canon’s 70-200mm.
Experiment with different focal lengths (the distance in millimeters between the lens and the camera’s sensor) to see how the same vista can render in different ways.
Do You Need a Tripod for Landscape Photography?
A sturdy tripod is a landscape photographer’s best tool. Manfrotto manufactures a professional-grade line at an affordable price point. The basic function of a tripod is to act as an extension of the photographer. The tripod stabilizes the camera so you can take the exact shot you want.
A tripod is ideal in low-light situations or during night photography, as the steadiness allows you to lower the shutter speed without sacrificing ISO, or grain. A tripod is also useful for experimenting with angles and perspective; depending on the landscape, you may choose to photograph shooting up, across, or down to produce the desired effect.
What Are the Best Settings for Landscape Photography?
A competent landscape photographer possesses the fundamentals of good photography: knowing how and when to adjust exposure, aperture, shutter speed, and ISO. It is particularly important to have a good grip on these elements since most landscape photography occurs in the great outdoors, where weather and light can change dramatically—and quickly.
Aperture is the size of the lens opening, which lets in light.
Shutter speed is the duration of time the lens is open; low-light or long exposures depend on lower shutter speed to bring in as much light as possible.
ISO increases brightness, however, depending on the strength of light, ISO might also add grain. Know the difference between a lower ISO and higher ISO and the advantages and disadvantages of each.
Some photographers use grain to their advantage, but for a crisp image, try not to rely too heavily on ISO to compensate for light. All of these elements lead to exposure, which is the combined light that enters the camera sensor after adjusting aperture, shutter speed, and ISO. Manual mode controls each element separately, aperture priority favors the lens opening over other settings, while Automatic mode adjusts all elements automatically.
How to Focus on the Subject in Landscape Photography
Most landscape photography relies on wide-angle lenses and a large depth of field to adequately capture the subject. A high aperture, adjusted with the f-stop, allows most of the subject to come into sharp focus.
Use the gridlines in your viewfinder or screen to find focus.
Begin at either the top or bottom third of the frame, but don’t be afraid to experiment.
While there are some examples of landscape photography that prioritize the foreground, resulting in a blurred background (known as a shallow depth of field, or portrait effect), most landscape photography captures the entire scene at once.
If you have trouble getting clear focus across the entire frame, it is always possible to take a few shots with different areas of focus then layer them together in Photoshop during the editing process.
RAW vs. JPEG: Which Is Better?
There are a variety of file formats, the most popular and familiar of which is JPEG. JPEG files automatically compress details, which results in image quality loss. RAW files, however, retain all data and information.
While the processing time for RAW files is longer, the resulting images are easier to edit and higher in quality. All DSLR and large format cameras offer RAW as a file format. Advances in smartphone technology means your iPhone or Android can also shoot in RAW, with assistance from camera apps like Lightroom or ProShot.
How to Properly Compose a Landscape Photo
An easy tip for beginner landscape photographers is to build your scene around the horizon. Refer to the Rule of Thirds, which is a popular trick for composing perfectly balanced and aesthetically-pleasing photographs.
The Rule of Thirds crosses three horizontal lines with three vertical lines
You can set these up through your viewfinder or on the back screen of your camera
The points where those lines meet are the points of interest; place the most dynamic or compelling parts of your subject here
Take care to keep the horizon along that middle horizontal line, and you should have a foolproof formula for a picture-perfect scene.
How to Find the Best Light
The best light is soft and diffused, with a dreamy quality to it. True tones pop against that subtle light, which makes natural landscapes look all the more breathtaking. Early mornings before sunrise and late evenings, just before sunset, offer this “golden hour” light that photographers chase. When preparing for a shoot, make a note of sunrise and sunset times to plan accordingly.
You can also buy some lens filters to aid when the light is not to your advantage. A neutral density filter, for example, reduces the intensity of light and color coming through the lens, while a polarizing filter can help with things like darkening the sky and suppressing glare from reflective surfaces, like bodies of water.
Once the sun goes down, an entirely unique scene emerges. Experiment with long exposure photography to capture shooting stars, light trails left by passing cars, and other natural phenomena. Long exposure builds upon the basics of photography, but requires a few extra tools along with some additional know-how.
In order to take a proper long exposure photograph, set up your tripod and set the frame.
If the tripod is in a precarious position, weigh it down with a bag filled with rice, sand, or rocks.
Next, you’ll want to set the camera to bulb mode through the DSLR camera settings. Bulb mode manually forces open the shutter past the typical standard of 30 seconds. The longer the shutter is open, the longer the exposure.
A remote shutter release or cable release connects to the camera so you don’t physically have to hold down the shutter button to capture the exposure. Once you’re ready, click down to open the shutter and start the photograph. Once you’re done, click down again, and you will have completed a long exposure photograph.
How to Edit Landscape Photos
Post-processing is an important finishing step for landscape photography. Upload the RAW files into Adobe Photoshop or Lightroom, where you can adjust everything from exposure to contrast.
If the perspective angle is off, use the Edit > Perspective Warp tool to adjust the plane.
Lightroom is good for making quality edits to an image, whereas Photoshop offers a larger variety of options for transforming an image, down to the pixels. This is useful if you need to airbrush, smooth, or add other effects.
How to Become a Better Photographer
Being in nature is a pleasure and a privilege. There is an unspoken rule to leave the environment as you found it. But that being said, exploration is key to landscape photography. For beginners, it may seem daunting to go off the beaten path; this, however, is precisely where you will find the best scenes. Take hundreds, if not thousands, of photos experimenting with different techniques, perspectives, and angles. The best way to become a better landscape photographer is to simply get out there, enjoy the great outdoors, and capture as many images and experiences as possible.
Master photographers like Jimmy Chin honed their craft for decades before embarking on full-time creative careers. With Jimmy Chin’s MasterClass, learn to form the principles of your visual narrative, how to pitch, land, and work with clients, and which gear is essential for shoots--and how you can leverage the editing process to full effect.
Become a better photographer with the MasterClass All-Access Pass. Gain access to exclusive video lessons taught by photography masters, including Jimmy Chin, Annie Leibovitz, and more.
#studioserraphotography#beachscape#landscape photography#professional landscape#fine art photography#portrait fine art photography#commercial photography#scenic photography#san diego photographer#san diego photography
2 notes
·
View notes
Text
HSS Does Not Freeze Motion: Light is the Key, Not Shutter Speed
How do photographers freeze motion? With shutter speed, of course! This is something fundamental that everyone starting out in photography learns to do. If you’re shooting sports, for example, just crank the ISO up, set a high shutter speed, and expect a good frozen-in-time image. However, when using a flash, things are a little different. In fact, shutter speed is by far the worst way to freeze motion. Here’s why.
As this is an article that aims to debunk a myth, let me open with a comparison image:
The left photo was shot with a shutter speed of 1/200th of a second while the right one was shot at 1/1000th of a second. So then… why does the photo with a much longer shutter speed have tack-sharp detail, while the photo with the highest shutter speed barely have any sharpness at all?
The secret is in the light.
Light is often a lot more important than the camera itself. Let’s go on to discuss how you can use light to freeze motion a lot better and with crispier results than with any possible shutter speed.
What is a Flash?
When used below or at the sync speed, a flash is essentially a short release of light to artificially brighten up the exposure of the photograph. This flash will have a few basic characteristics, the most relevant being the flash duration.
Flash duration is a measure of how long the flash is lit up. Some flashes such as the Profoto Pro-11 can have durations as short as 1/80,000 of a second. This means that the flashbulb is only emitting light for a very short period of time — much shorter than your camera’s shutter speed.
Different lights will have different flash durations at different powers, so it is best to check your flashes manual to get the exact numbers.
A Word on Shutter Speed
Modern shutters have two curtains. Here is a video showing a camera shutter at work:
youtube
As you can see, even when the first curtain starts to open, it is already being chased by the second one. The shorter the shutter speed, the closer the two curtains are to each other. However, even if your shutter speed is 1/8000th of a second, it still takes the same time (usually 1/200th of a second) to expose the frame from start to finish. Therefore, a short shutter speed means less light reaching the sensor, not overall faster shooting.
In a way, the time it takes to capture at 1/8000s and at 1/250s is the same. If it weren’t, cameras would be able to have some ridiculous burst rates at extreme shutter speeds.
Sync Speed
The sync speed is a shutter speed at which the whole sensor is exposed to light before the second curtain comes in. That means there isn’t a gap that controls the shutter speed, as the whole sensor is exposed from top to bottom. At this shutter speed, of course, the sensor will see the whole flash, and it will not have any dark strips. Importantly, this applies to focal plane shutters (in which the curtains move to reveal the sensor or film).
Flash that is out of sync
Leaf shutters work on a different principle, so if you have a camera with a shutter in the lens, you can sync at any shutter speed without worrying.
How Does HSS Work?
As you now know, at high shutter speeds, the shutter has to be illuminated for longer in order to cover the whole sensor. For example, at 1/8000th of a second, it takes 1/200th of a second for the curtains to go from top to bottom, this means the flash has to illuminate the whole sensor in bits, not in one burst. Basically, the flash pulses over and over again producing multiple bursts.
HSS and Flash
You have an idea of how HSS works now. Some flashes may have a smaller power range when working in HSS. This is due to the fact that the flash actually pulses rather than pops. In order to have a consistent power output during this pulsing, the flash must recycle fast enough, and this is only possible at lower powers.
Moreover, because the flash has to pulse, it will illuminate the frame for longer — much longer than a regular flash.
Classic Flash at Sync Speed
Because the flash no longer has to illuminate a frame for a long time, it can focus on what it does best: give short powerful bursts of light at consistent power and color output.
Freezing Motion
You are faced with two options:
1. Use HSS and have a shutter speed of 1/8000s and flash of 1/200s.
2. Don’t use HSS and have a very fast (shorter than 1/8000s) flash duration, and 1/200s shutter speed.
Given that there is no ambient light, the second option is the best, as light makes the image, and the shorter the light burst, the better the image will be frozen in time. Therefore, it can be wise to use a shutter speed below HSS to freeze motion
This is why I am able to shoot at 1/15th of a second and still get tack-sharp results when I use flash.
Shutter speed: 1/200s
Shutter speed: 1/1000s (Exposure pushed higher in post to match previous image)
Further Tips and Tricks
1. The lower the power, the shorter the flash duration. Let’s say your light has 2400W total power and gives a flash duration of 1/1000s at 1000W, and 1/25000 at 250W. If you take 4 lights and turn them into 1 light source, you will get 1000W total power at 1/25000 of a second. A trick many photographers use is taping multiple speed lights together and firing them at low power. You have to watch out for multiple shadows, putting a layer of diffusion will smooth those out.
2. If you have to use HSS to make the background darker, e.g outdoors, you may want to consider taking two photos: a backplate and an exposed flash plate (front plate). The backplate will be exposed for the background and have it as you want, while a front plate will have the flash freezing the motion precisely as it should: not in HSS.
In Conclusion
No, HSS does not freeze motion. Myth busted.
About the author: Illya Ovchar is a commercial and editorial fashion photographer based in Budapest. The opinions expressed in this article are solely those of the author. You can find more of Ovchar’s work on his website and Instagram.
from PetaPixel https://ift.tt/3AmoZUl
0 notes
Text
Photography for Beginners
I updated this post here: https://artres.xyz/post/ultimate-guide-to-photography/.
Note– The tumblr editor scrambled some of my paragraphs upon importing, but I think I fixed most of it! Let me know if you see some messed up errors. Anyways, I hope you enjoy this post! It’s a little long!
Thank you to @thelittlestprincess7 & @sashakazanov for responding to my question on @art-res.
I'm by no means a pro, but I have worked on my artistic photography on both DSLR & compacts for over 4-5 years.
Step 1: Purchase a cheap DSLR/Compact where you can access manual mode. I personally have the Canon T3i & the Sony RX100 (the first version), both are great cameras and now more affordable because they are older models. Of course, you can start with a $2k camera, but that's pretty overkill, especially when you're starting out and maybe on a budget.
On Amazon
Check out my camera buying guide here!
If you decided to get a DSLR/compact, you also need to get an SD card to store the images. I use class 10 because it's fast enough for video and has good transfer speeds. They’re pretty cheap, so I don’t recommend going slower than class 10, if you can help it.
To get a cheap camera, consider going refurbished, used (without too much use, otherwise the shutter might die on you quickly), or buying an older model.
OR: just use your phone and access pro mode/get an app where you can access manual mode. Phone cameras have gotten good lately!
To really learn how to photograph properly, you want to get off of auto mode and switch to manual mode, aperture priority mode(my personal favorite) or shutter priority mode.
Experiment a little now, just change some stuff and see what happens. A little experimentation goes a long way in learning what does what. You might be a little overwhelmed at first by all the dials and controls, but it's alright! Just tweak some stuff and experiment. Live view will be really helpful when you’re first starting out.
Now for a bit more guidance on what does what on your camera. Exposure depends on 3 things: shutter speed, aperture, and ISO (exposure sensitivity)
Shutter speed, which is displayed by a fraction, ie, 1/80, 1/4, 1/2000, determines how fast your camera closes the shutter, or basically, the time out of a second (fraction!) the sensor is exposed to the light.
To prevent camera shake, a useful rule of thumb is to take the focal length (For example, your kit lens, 18-55mm lens, is set to around 55 ) take the number 55 & put your focal length at 1/60 or above. Or you might not need this tip if you have sniper photography skills.
Slower shutter speeds blur motion. Good for motion trails, light trails, blurring waterfalls.
Faster shutter speeds freeze motion. Good for action shots of your cat or dog.
Aperture, which is measured in f-stops, determines how wide open your lens hole is. Yes, the blades actually will open up. You can take a look.
Lower f-stop number, ie, f/1.2, f/1.4, f/1.8, means your lens is wider open, and thus, letting in more light.
Lower f number also yields a more thin depth of field, meaning only a thin plane of the image is sharp, while rest of the frame is blurred out, and then you get the lovely bokeh effect.ex:
following ex w the blurry background

Higher f-stop number, ie, f/8, f/11, f/22, means your lens is more closed and letting in less light.
Yields a larger/wider depth of field, which means more of your background will be in focus
Great for landscapes!
the following ex: f/11

Advanced note: if you're using a macro lens, you want a high enough f number that enough of the subject is focused. Or you can focus stack, but that's a bit above the basics.
ISO - with this, you can increase your sensor's sensitivity to light, though higher numbers (ie, ISO 1600 & up) often results in more noise, or grainy color/luminance artifacts.
All three of these variables work together, which is sort of complicated. If you use aperture priority mode or shutter priority mode, you can adjust either aperture or shutter speed, and then the camera will automatically set the other variable in order to create the correct exposure. You can also set ISO or have the camera automatically calculate it. I recommend experimenting with this to learn if you are overwhelmed with manual mode.
For general shooting, I like aperture priority mode because manual mode makes it harder to quickly react to rapidly changing light conditions and action. However, for some shots where I am looking for a particular effect, I go manual! (Macro shots, waterfall shots, exposure/focus stacking, and anything with tricky lighting)
A practical example of what goes on in my head for indoor shot of something, which is sort of low light.
I want to take a picture of this small statue, and I want a blurry background (shallow depth of field). That means I want a low f/ for a wider lens hole so more light can come in. That’s great because I don’t need to push my ISO too too far, 800 will do. It won’t be too noisy at this level, but too much lower will force me to use a super slow shutter speed to expose the picture correctly, which will result in a blurry image because of camera shake. The focal length of my lens is at 50, so now I am going to put my shutter at 1/60.
Metering – the way exposure is determined by the camera, examples include spot metering (measure a small area), center weighted average, or multiple zone (matrix/evaulative/etc) metering.
Experiment with these and how they interact with different lighting conditions.
Spot metering is useful for high contrast scenes
Average metering is great for landscapes because it takes into account both the sky and the landscape.
There is a lot of other terminology to cover, but for now, I think this is a good start for the absolute fundamentals. I hope this helped!
I also wrote a post explaining RAW vs JPG, if you're interested in learning about that!
Thanks for reading! I hope it helped!
Instagram | Art Tutorial Tumblr | Links
#photography#art tutorial#photography tutorial#masterpost#article#artists on tumblr#beginners#photography basics#how to photograph#astrikosart#myart
731 notes
·
View notes
Photo
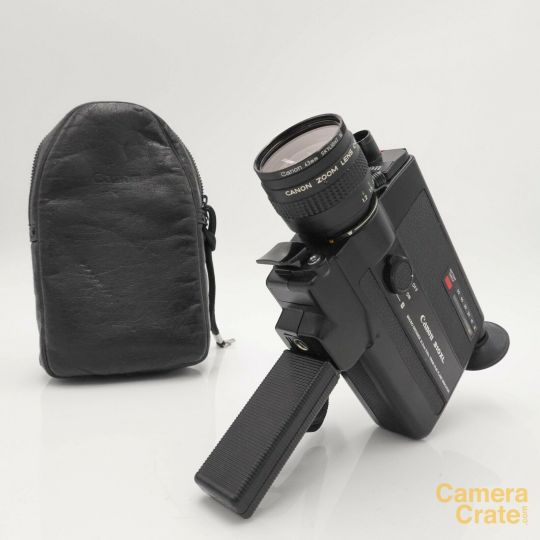
Canon 310XL Super 8 Cine Film Movie Camera & Case Tested & Fully Working S8-2326
Canon 310XL Super 8 Cine Film Movie Camera & Case Tested & Fully Working S8-2326
Tested & fully working, this is in lovely condition, with the original case
Lens - clean
Power zoom - fully working
Focus - fully working
Motor - fully working
This was a sister model of the 514XL developed at the same time. Both models shared the same body base. To reduce its costs, this model applied given an external metering system, and the self-timer function was omitted. The major feature of this model was its world’s fastest lens speed (at the time) of f/1.0, with a 3x zoom. Macro shooting was possible as close as 215 mm from the film plane mark if the zooming lever was set at “Macro.”
TypeSuper 8 type 8mm movie cameraImage Size4.2 x 5.7 mm (Projection image size: 4 x 5.4mm)FilmSuper 8 film cartridgeLensFocal Length/Speed8.5- 25.5mm f/1.0 (13 elements in 11 groups). Spectra-coating.Zooming Ratio3xFocusingManual (Front lens group rotating method) Guess Focusing, 1.2 m to infinityMacro ShootingClose distance shooting by turning the zoom ring to “Macro.” Close-up shooting at approx. 215 mm from the film plane mark is possible when the focusing ring is set at infinity. Field of view: approx. 84.4 x 118 mmZoomingPower zooming (approx. 6 sec. at 18 fps) coupled to film drive and manual zooming with zooming ring. Rotation angle: Approx. 90 degrees.Filter Size43 mmViewfinderTypeSingle-lens reflex aerial image type (built-in eyecup)RangefinderNot availableDioptric Adjustment-4 to +2 diopterViewfinder InformationUnder exposure warning mark, film transport indicator, battery check lamp and macro indicationExposure ControlTypeTTL Servo EE with a CdS exposure meter. Automatic aperture setting coupled to loaded film speed and filming speed. Built-in sliding type exposure control plate.Metering RangeISO 250, f/1.0, 18 fps – ISO25, f/45, 18 fps and single frameFilm SpeedAutomatic ISO setting by film cartridgeTungsten type film: ISO 40, 160 and 250Daylight type film: ISO 25, 100 and 160CCA FilterA Color Conversion filter A is built-in. The CCA filter is automatically cancelled with loading of a daylight type film cartridge. Manual cancellation of the CCA filter is possible.Film DriveTypePower filming by a high performance micro-motorFilming Speed18 fps and single framePower SourceTwo AA batteries for film drive, power zooming and exposure metering.Battery LifeSufficient power for approx. 5 film cartridges under normal temperature (Approx. one cartridge for single frame shooting)Footage CounterCounts up. Automatic resetting by unloading of a cartridge.Battery CheckA lamp in the viewfinder activated by the battery check button.ShutterShutter Opening220 degreesRelease SocketCable release socketMain SwitchThree way switch for on, off and single frame. Works as a safety lock also.Safety DeviceSwitch indications for battery power saving and preventing mistakes on shooting, various viewfinder information to prevent mistakes on shootingRemote ControlNot available.GripFolding type.Dimensions (W x H x D)39 x 112 x 176 mmWeight545 g (Body only), 580 g (Including batteries)
Model: 310XL
Colour: Black
Film Format: Super 8
Brand: Canon
Product Type: Movie http://nemb.it/p/7o2AshgU6D
0 notes
Link
Canon 1DX Mark II Specifications
Camera TypeDigital, AF/AE single-lens reflex cameraRecording MediaCF Card (Type I; compatible with UDMA 7 CF cards) and CFast Card (CFast 2.0 supported)Image FormatApprox. 36 x 24mm (35mm Full-frame)Compatible LensesCanon EF Lenses (excluding EF-S and EF-M lenses)Lens MountCanon EF mountImage Sensor TypeHigh-sensitivity, high-resolution, large single-plate full-frame CMOS sensorPixelsEffective pixels: Approx. 20.2 megapixelsTotal PixelApprox. 21.5 megapixelsAspect Ratio3:2 (Horizontal: Vertical)Color Filter SystemRGB primary color filtersLow Pass FilterFixed position in front of the image sensorDust Deletion Feature1. Self Cleaning Sensor Unit
2. Dust Delete Data acquisition and appending
3. Manual cleaningRecording FormatDesign Rule for Camera File System 2.0 and EXIF 2.3Recording Image FormatStill Image: JPEG, RAW (14 bit Canon Original), M-RAW, S-RAW, RAW+JPEG, M-RAW+JPEG, S-RAW+JPEG
Video: MOV (4K Movie: Motion JPEG, Full HD Movie: MPEG4 AVC/H.264*; Audio: Linear PCM), MP4 (Movie: MPEG4 AVC/H.264*; Audio: AAC)
* Variable (averaged) bit rateFile SizeLarge: Approx. 20.0 Megapixels (5472 x 3648)
M1: Approx. 12.7 Megapixels (4368 x 2912)
M2: Approx. 8.9 Megapixels (3648 x 2432)
Small: Approx. 5.0 Megapixels (2736 x 1824)
RAW: Approx. 20.0 Megapixels (5472 x 3648)
M-RAW: Approx. 11.2 Megapixels (4104 x 2736)
S-RAW: Approx. 5.0 Megapixels (2736 x 1824)
Exact file sizes depend on the subject, ISO speed, Picture Style, etc.Recording FunctionsStandard
Recorded to the selected card
Auto switch card
When the current card becomes full, the camera switches to the other card automatically
Record separately
The CF card and CFast card record the same image at a different image recording quality (L, M1, M2, S, RAW, M-RAW, S-RAW)
Record to multiple
Both the CF card and CFast card record the same image at the same image recording quality (Also applies to RAW+JPEG)Backup RecordingN/AFile NumberingThe following three types of file numbers can be set:
1. Continuous numbering
2. Auto reset
3. Manual resetRAW + JPEG Simultaneous RecordingOne of three types of RAW images and one of four types of JPEG images can be recorded together.Color SpacesRGB, Adobe RGBPicture StyleAuto, Standard, Portrait, Landscape, Fine Detail, Neutral, Faithful, Monochrome, User Defined 1-3*
* [Standard] is the default setting for [User Def. 1-3]White Balance - SettingsAuto (Ambience priority/White priority), Daylight, Shade, Cloudy*1, Tungsten Light, White Fluorescent Light, Flash, Custom (Custom WB) 1-5*2, Color Temperature, PC-1-5*3 (Personal WB)
*1 Also effective in twilight and sunset.
*2 [Select image on card], [Record and register WB] and [Edit WB name] can be used.
*3 Up to five white balance data settings set with EOS Utility.Auto White BalanceOption between ambience priority and white priority settingsColor Temperature CompensationBlue/amber bias: +/-9 levels
Magenta/green bias: +/-9 levels
Corrected in reference to the current WB mode's color temperature.Color Temperature Info TransmissionProvidedViewfinder TypeEye-level pentaprismCoverageApprox. 100% vertically and horizontallyMagnificationApprox. 0.76x (-1m-1 with 50mm lens at infinity) / 35.1deg. angle of viewEye PointApprox. 20mm (at -1m-1 from eyepiece lens center)Dioptric Adjustment Correction-3.0 to +1.0 m-1 (diopter)Focusing ScreenEc-C6 provided, can be changed to Ec-A, B or LMirrorQuick-return half mirrorViewfinder InformationAF area selection mode
AF point information
Area AF frame
Spot metering circle
Electronic level (dedicated indicator)*
Grid*
Shooting mode*
Metering mode*
White balance*
Drive mode*
AF operation*
Flicker detection*
Warning symbol
AF status indicator
* Asterisked items can be displayed or not with [Show/hide in viewfinder].Depth Of Field PreviewProvidedAutofocus TypeTTL secondary image-forming phase-difference detection system with AF-dedicated CMOS sensorAF PointsMax. 61 points (Cross-type AF points: Max. 41 points)Focusing ModesAutofocus
One-Shot AF
Predicitve Al Servo AF (Al Servo AF III+)
Manual focusAF Point SelectionSingle-point Spot AF (Manual selection)
Single-point AF (Manual selection)
The checkmark cannot be removed from this option.
AF point expansion (Manual selection, 4 points: Up, down, left and right)
AF point expansion (Manual selection, surrounding 8 points)
Zone AF (Manual zone selection)
All AF points divided into nine focusing zones.
Large Zone AF (Manual zone selection)
All AF points divided into three focusing zones.
AF point Auto selection AFAF Function Registration/SwitchingCustomizable with Custom ControlsSelected AF Point DisplaySuperimposed displayActive AF Point IndicatorDisplayed in viewfinder area
Displayed outside viewfinder areaAF Assist BeamWhen an external EOS-dedicated Speedlite is attached to the camera, the following options are available:
Enable
Disable
Enable external flash onlyExposure Control: Metering Modes216-zone (18 x 12) metering with approx. 360,000-pixel RGB+IR metering sensor. The following metering modes selectable:
Evaluative metering (linked to all AF points)
Partial metering (center, approx. 6.2% of viewfinder)
Spot metering (center, approx. 1.5% of viewfinder)
Center spot metering
AF point-linked spot metering (Custom Function)
Linkable to all AF points.
With automatic AF point selection, center spot metering will apply.Exposure Control: Metering Modes Cont.Multi-spot metering
Up to eight multi-spot meter readings can be taken.
Center-weighted average metering
The selectable metering modes can be restricted (Custom Function).Exposure Control: Metering RangeEV 0.0 - EV 20.0 (at 73deg F/23deg C, ISO 100, with evaluative metering)Exposure Control SystemsProgram AE (Shiftable)
Shutter-priority AE (Safety shift possible)
Aperture-priority AE (Safety shift possible)
Manual exposure
The metering mode can be specified.
Bulb
Three custom shooting modesISO Speed Range: Manual SettingNormal ISO Speeds: ISO 100-51200 (in 1/3-stop increments)
Expanded ISO Speeds (Equivalent): L: 50, H1: 102400, H2: 204800, H3: 409600
For [Highlight tone priority], the settable ISO speed range will be ISO 200-51200.
ISO speed safety shift possible with a Custom Function.
All the expanded ISO speeds, even for movies, are only "equivalent speeds."ISO Speed Range: Auto SettingP, Tv, Av, M:
No Flash: ISO 100-51200*1
With Flash: ISO 400
During Bulb shooting: No Flash: ISO 400 fixed*1
With Flash: fixed*1,*2,*3
*1 It depends on [Minimum] and [Maximum] of [Auto range].
*2 If overexposure will result with fill flash, the minimum ISO speed will be set to ISO 100 (except in the M and bulb modes).
*3 In the P mode, using bounce flash with an external Speedlite will have the ISO speed set automatically within ISO 400 1600 to suit the brightness.Exposure Control: Exposure CompensationManual: +/-5 stops in 1/3- or 1/2-stop increments
AEB: +/-3 stops in 1/3- or 1/2-stop increments
* Indicated up to ±3 stops on the LCD panel and in the viewfinder.AE LockAuto AE lock
In the One-Shot AF mode with evaluative metering, AE lock takes effect when focus is achieved.
Manual AE lock
With AE lock button in P, Av, Tv and M modes. (AE lock is updated each time you press the button.)
Enabled in all metering modes.Shutter TypeVertical-travel, mechanical, focal-plane shutter with all speeds electronically-controlledShutter Speeds1/8000 to 30 sec., bulb (Total shutter speed range. Available range varies by shooting mode.) X-sync at 1/250 sec.
Shutter speed's control range can be set.Shutter ReleaseSoft-touch electromagnetic releaseSelf Timer10-sec. delay, 2-sec. delayBuilt in FlashFlash Exposure Compensation: +/-3 stops in 1/3- or 1/2-stop incrementsEOS Dedicated SpeedliteE-TTL II autoflash with all EX Series SpeedlitesZooming to Match Focal LengthProvidedFlash MeteringE-TTL II autoflashFlash Exposure Compensation+/-3 stops in 1/3- or 1/2-stop incrementsFE LockProvidedExternal Flash SettingsExternal flash control
Flash firing
E-TTL II Flash metering
Flash sync. Speed in Av mode
Flash mode
Radi wireless flash shooting
Optical wireless flash shooting
Zoom
Sync setting
Flash exposure compensation
FEB
Clear settings
Flash Custom Function settingPC TerminalProvided
* No polarity.
* Sync speed: Since the flash duration of studio flash units vary, set a sync speed within 1/125 sec. to 1/30 sec. and check if the flash sync works.
* Both the accessory shoe (X-sync contact with maximum sync speed of 1/250 sec.) and the PC terminal can be used simultaneously for simultaneous flash firing.Drive ModesSingle shooting
High-speed continuous shooting
Low-speed continuous shooting
Silent single shooting
Silent high-speed continuous shooting
Silent low-speed continuous shootingContinuous Shooting SpeedViewfinder shooting
High-speed: Max. 14 shots/sec.
Low-speed: Max. 13 shots/sec.
Silent high-speed: Max. 5 shots/sec.
Silent low-speed: Max. 4 shots/sec
Live View shooting
High-speed: Max. 16 shots/sec.
Low-speed: Max. 13 shots/sec.
Silent high-speed: Max. 5 shots/sec.
Silent low-speed: Max. 4 shots/sec
* Continuous shooting speed may vary depending on the shutter speed, the aperture, the lens being used, the battery charge and various camera settings.Shooting ModesStill photo shooting and video shootingLive View: FocusingDual Pixel CMOS AF
Dual Pixel CMOS AF is possible with all EF lenses.
Manual focus
Magnify the image by 5x or 10x and focus manually.Metering ModesEvaluative metering (linked to all AF points)
Partial metering (approx. 6.5% of viewfinder)
Spot metering (approx. 2.8% of viewfinder)
Center-weighted average metering
AE lock possible. The active metering timer can be changed.Metering RangeEV 0.0 - EV 20.0 (at 73deg F/23deg C, ISO 100, with evaluative metering)Grid DisplayOff
3x3
6x4
3x3+diagExposure SimulationSame as with viewfinder shootingSilent ShootingProvidedVideo File FormatMOV (4K Movie: Motion JPEG, Full HD Movie: MPEG4 AVC/H.264; Audio: Linear PCM), MP4 (Movie: MPEG4 AVC/H.264; Audio: AAC)
Internal monaural microphone
External stereo microphone jack availableVideo File Size4096 x 2160 (4K)
1920 x 1080 (Full HD)Video Format4K:
MOV
4096 x 2160p / 59.94 fps (800 Mbps) / 50 fps (800 Mbps) / 29.97 fps (500 Mbps) / 25 fps (500 Mbps) / 24 fps (500 Mbps) / 23.98 fps (500 Mbps)
High Definition:
MOV 1920 x 1080p / 120 fps (360 Mbps) / 100 fps (360 Mbps) / 59.94 fps (180 Mbps) / 50 fps (180 Mbps) / 59.94 fps (60 Mbps) / 50 fps (60 Mbps) / 29.97 fps (90 Mbps) / 25 fps (90 Mbps) / 24 fps (90 Mbps) / 23.98 fps (90 Mbps) / 29.97 fps (30 Mbps) / 25 fps (30 Mbps) / 24 fps (30 Mbps) / 23.98 fps (30 Mbps)Video Format Cont.High Definition:
MP4
1920 x 1080p / 59.94 fps (60 Mbps) / 50 fps (60 Mbps) / 29.97 fps (30 Mbps) / 25 fps (30 Mbps) / 24 fps (30 Mbps) / 23.98 fps (30 Mbps) / 29.97 fps (12 Mbps) / 25 fps (12 Mbps)FocusingDual Pixel CMOS AF
Manual focus
* Magnify the image by 5x or 10x and focus manually (not possible during movie shooting).Exposure CompensationUp to +/-3 stops in 1/3- or 1/2-stop increments
* If AE Microadjustment is performed, the settable exposure compensation amount will decrease by the amount of the AE Microadjustment. For example, if you set the AE Microadjustment to +1 stop, the exposure compensation amount will be limited to a maximum +2 stops on the positive side.LCD TypeTFT color, liquid-crystal monitorMonitor Size3.2-inchesMonitor PixelsApprox. 1.62 million dotsMonitor CoverageApprox. 100% vertically and horizontally
Viewing angle: Approx. 170deg vertically and horizontallyBrightness Control7 levels providedInterface Languages25 (English, German, French, Dutch, Danish, Portuguese, Finnish, Italian, Norwegian, Swedish, Spanish, Greek, Russian, Polish, Czech, Hungarian, Romanian, Ukrainian, Turkish, Arabic, Thai, Simplified/Traditional Chinese, Korean, Japanese)Single Image Display FormatNo information display
Basic information display
Detailed shooting information display
Basic shooting information
Lens information and RGB histogram
White balance
Picture Style
Color space and noise reduction
Lens optical correction
GPS informationIndex Display Format4-image index
9-image index
36-image index
100-image indexHighlight AlertOn the single-image display, highlight areas without any image information will blink.Image Protection and EraseProtection: Erase protection can be applied or canceled for a single image, all images in a folder or all images in the card.
Erase: Erase a single image, selected images, all images in a folder, all images in a card or erase only unprotected images.Direct PrintingCompatible Printers: N/A (Direct printing not possible)DPOF: Digital Print Order FormatDPOF: Version 1.1 compatibleDirect Image TransferCompatible Images:
JPEG images, RAW images and movies
RAW+JPEG images can be transferred JPEG only, RAW only or RAW+JPEG. If JPEG or RAW images are appended with a voice memo, the voice memo file will also be transferred.CustomizationCustom Functions: Total 34
Camera User Settings:
Current camera settings can be registered to C1, C2 and C3 on the Mode Dial.
Automatic updating of the registered settings can be set to Enable or Disable.
My Menu Registration:
Up to six top-tier menu options and Custom Function settings can be registered.
Up to five My Menu tabs can be added.InterfaceUSB Terminal: SuperSpeed USB (USB 3.0)
For computer communication
Image transfer
For Connect Station CS100 connection
Video Out Terminal: AV/OUT terminal not provided.
HDMI mini OUT terminal is Type C (Resolution switches automatically) / CEC compatible.
The correct video format of [NTSC] or [PAL], matching the connected TV, must be set or the video image will not appear.
Extension System Terminal: For connection to WFT-E8A and WFT-E6APower SourceBattery 1x LP-E19 Rechargeable Lithium-ion Battery Pack, 11.1 VDC, 2750 mAhOperating EnvironmentWorking Temperature Range: 32 to 113deg F (0 to 45deg C)
Humidity: 0 - 85%Dimensions (WxHxD)Approx. 6.22 x 6.60 x 3.25" (158.0 x 167.6 x 82.6mm)WeightApprox. 53.97 oz (1530g) (Based on CIPA guidelines)
Approx. 47.27 oz (1340g) (Body only, without battery, cards, body cap or eyecup)
0 notes
Text
Các dòng máy số EOS của Canon luôn thu hút người dùng bởi tính chuyên nghiệp và công nghệ tiên tiến, dễ sử dụng cho người dùng mới. Kết thúc dòng cuối cùng EOS Elan 7E của film, ngày nay các chuyên gia máy ảnh luôn săn lùng và mong muốn sở hữu 1 trong 2 body của Canon đó là EOS 1HS /1V và EOS Elan 7E. Khi trãi nghiệm chụp film trên 1 trong 2 body này bạn hoàn toàn yên tâm về chết lượng ảnh, tự do sáng tác và làm chủ khung hình, ánh sáng khi sử dụng các body này.
Canon EOS Elan 7 với cảm biến hình ảnh độc đáo CMOS Canon, lấy nét tự động đa điểm trên 7 điểm cho phép tự do sáng tác bất kể vị trí chủ thể. So với máy ảnh chuyên nghiệp EOS-3, thời gian phản hồi phát hiện chuyển động của mắt đối với lựa chọn khung AF giảm khoảng 15%.
EOS Elan 7 cung cấp các phím chức năng mặt sau body thân máy cho phép người dùng chọn thủ công, các phím mũi tên điểm lấy nét ở mặt sau nhanh chóng cho phép lựa chọn nhanh điểm và trực quan của điểm lấy nét. Ngoài ra, EOS 7 là máy ảnh EOS đầu tiên có điều khiển mắt và hiển thị điểm lấy nét với công nghệ SI để kết hợp điều chỉnh dioptric điều chỉnh thị lực trong cùng một máy ảnh, mang lại cho nó một khung ngắm tinh tế nhất.
EOS Elan 7 trang bị hệ thống cơ và cơ tốc độ cao 4fps và các chế độ AF dự đoán AI Servo tương tự với hệ thống cơ của EOS-1V hàng đầu. Thiết kế thân máy nhỏ gọn hơn các dòng chuyên nghiệp EOS-1 với công nghệ tiên tiến và mới nhất của Canon thời bấy giờ.
EOS Elan 7 trang bị cảm biến đo sáng 35 vùng đánh giá được liên kết với điểm lấy nét hoạt động kết hợp với hệ thống tự động xóa E-TTL Speedlite EX và 13 chức năng lập trình tùy chỉnh.
Thông số kỹ thuật:
Loại camera 35mm AF/AE single-lens reflex camera with focal-plane shutter and built-in motor drive, flash, and auto date back. Kích thức ảnh 24 mm x 36 mm Tương thích với các dòng lenses Canon EF lenses Loại ngàm : Canon EF mount (electronic control) [Viewfinder] loại view ngắm Fixed eye-level pentaprism Picture coverage 90% vertical and 92% horizontal coverage Eyepoint 19.5 mm Magnification 0.70x (-1 diopter with 50mm lens at infinity) Standard diopter -1 diopter Dioptric Adjustment Built-in, -2.5 to +0.5 dpt. Focusing screen Fixed, New Laser-matte focusing screen with focusing points Mirror Quick -return half mirror (transmission: reflection ratio of 40:60). (no mirror cut off with EF 600mm f/4L IS USM or shorter lens.) Viewfinder information (1) On the screen: Focusing points
(2) Below the screen: Shutter speed, aperture (FEL, DEP, CAL, END), AE/FE lock, exposure level (AE exposure compensation amount, flash exposure compensation amount, manual exposure level, AEB range, red-eye reduction lamp ON indicator), flash-ready indicator, FE lock underexposure warning, high-speed sync (FP flash), Eye Control icon, flash exposure compensation icon, AF/MF in-focus indicator Depth-of-field Preview Depth-of-field preview button. [Exposure Control] Metering modes TTL max. aperture metering with a 35-zone silicon photocell.
(1) Evaluative metering (linked to all focusing points)
(2) Partial metering (approx. 10% of viewfinder area at center)
(3) Centerweighted averaging metering Exposure Control Methods (1) Program AE (shiftable)
(2) Shutter speed-priority AE
(3) Aperture-priority AE
(4) Depth-of-field AE (non-shiftable)
(5) Full Auto (non-shiftable)
(6) Programmed Image Control modes (Portrait, Landscape, Close-up, Sports, Night Scene)
(7) E-TTL program flash AE
(8) A-TTL program flash AE
(9) TTL program flash AE
(10) Manual exposure
(11) Bulb Metering range EV 1-20 (at 20-degree with 50mm f/1.4 lens, at ISO 100) ISO Film speed range ISO 6-6400 (Set automatically with DX-coded film at ISO 25- 5000.) Exposure compensation (1) Manual exposure compensation: +/-2 stops in 1/2-stop increments.
(2) AEB: +/-2 stops in 1/2-stop increments (Correct exposure, underexposure, and overexposure sequence). AE lock (1) Auto AE lock In One-Shot AF mode, AE lock applied when focus is achieved.
(2) Manual AE lock (Enabled in all metering modes with AE lock button.) Multiple exposures Max. 9 multiple exposures (cancelable and resettable anytime). Cancels automatically after all multiple exposures are taken. Camera shake warning In the Basic Zone modes, if the shutter speed set automatically is slower than the reciprocal of the lens focal length, the shutter speed display blinks at 2 Hz. [Autofocus] Type TTL-SIR with a CMOS sensor Focusing points 0.7 AF working range EV 1-18 (at ISO 100) Focusing modes (1) One-Shot AF
Autofocus stops and locks when focus is achieved.
(2) AI Servo AF
Focuses the moving subject continuously up to the start of exposure. When focus is achieved, the in-focus indicator does not light (blinks at 2 Hz only if AF fails) and the beeper does not sound.
(3) AI Focus AF
Switches automatically between One-Shot AF and AI Servo AF to suit the subject.
(4) Manual focusing
Enabled with the focusing ring when the lens focus mode is set to MF (or M). In-focus indicator (1) Flashing focusing point superimposed in viewfinder.
(2) In-focus indicator in viewfinder.
(3) Beeper sounds (can be disabled). Focusing point selection (1) Automatic selection: Camera-selected.
(2) Manual selection: One of 7 focusing points user-selected with focusing point selector and focusing point selection keys.
(3) Eye Control: Focusing point eye-selected. Selected focusing point indicator..Superimposed in viewfinder and displayed on LCD panel. AF-assist light Built-in flash fires intermittent burst automatically. Effective range: Approx. 4.5 meters at center, Approx. 4 meters at periphery. [Eye Control] Type Eye position detected by IREDs. Calibration Up to five calibration settings can be stored (Intelligent feature provided). [Shutter] Type Vertical-travel, focal-plane shutter with all speeds electronically-controlled. Shutter speeds 30 sec. to 1/4000 sec. in 1/2-stop increments, bulb, X-sync at 1/125 sec. Shutter release Soft-touch electromagnetic release. Self-timer Electronically-controlled with 10-sec. delay. [Film Transport] Film loading Automatic advance to frame 1. Film advance Automatic film advance with built-in motor.
(1) Single (2) Continuous (approx. 4 fps max.). Film rewind Automatic at the end of the roll. (Silent or high-speed rewind enabled with C.Fn-1.)
(Rewind speed switchable with midroll rewind button during rewind.) Film rewind time and noise with 24-ex. film (36-ex. film) Silent mode: Approx. 13 (18) sec. / Approx. 48 dB High-speed mode: Approx. 5 (8) sec. / Approx. 55 dB [Built-in Flash] Type Retractable TTL automatic flash (serially controlled) on pentaprism with auto pop-up and focusing point-linked, 3-zone autoflash metering. Guide No. Guide No. 13 (at ISO 100 in meters) Recycling time Approx. 2 sec. Flash coverage 28mm lens angle covered. Firing preconditions (1) Automatic pop-up and firing in low-light or backlit conditions in the Full Auto, Portrait, Close-up, and Night Scene modes.
(2) In Creative Zone modes: Manual pop-up and firing. Flash exposure compensation +/-2 stops in 1/2-stop increments. [Date and Time Imprinting (QD Model only)] Type Quartz clock with built-in auto calendar and liquid-crystal display. Time span Jan. 1, 1994 to Dec. 31, 2019, 0:00 to 23:59 Imprinting format (1) Month, day, year (2) Day, month, year (3) Year, month, day (4) Day, hour, minute (5) Blank Power source One CR2025 lithium battery [Other Specifications] Flash contacts X-sync on hot shoe. Speedlite compatibility Compatible with E-TTL/A-TTL/TTL autoflash. Custom Functions 13 Custom Functions (C.Fn-1 to C.Fn-13) with 34 settings Remote control (1) Wired remote control with RS-60E3.
(2) Wireless remote control with RC-1. Power source Two CR123A (or DL123A) lithium batteries Battery check One of four battery levels is displayed when the Command Dial is released from OFF. Dimensions 146.7 x 10³ (H) x 69 (D) mm (5.78 x 4.06x 2.72 in.) Weight 580 g (20.5 oz) (body only, excluding batteries)
Non-QD model: 575 g (20.3 oz) (body only, excluding batteries)
EOS Elan 7 vs Sigma 24/70 Kodak color 200
This slideshow requires JavaScript.
Canon EOS Elan 7 cảm xúc cùng film Các dòng máy số EOS của Canon luôn thu hút người dùng bởi tính chuyên nghiệp và công nghệ tiên tiến, dễ sử dụng cho người dùng mới.
0 notes
Text
The Ihagee Exa IIa was a development of the Exa II camera and produced by Ihagee in the early 1960s. Most of the changes between the models were cosmetic, style changes although there were also upgrades to the viewfinder and film advance that made the camera a bit nicer to use.
#gallery-0-5 { margin: auto; } #gallery-0-5 .gallery-item { float: left; margin-top: 10px; text-align: center; width: 20%; } #gallery-0-5 img { border: 2px solid #cfcfcf; } #gallery-0-5 .gallery-caption { margin-left: 0; } /* see gallery_shortcode() in wp-includes/media.php */
Ihagee Exakta IIa 35mm camera – front view
Ihagee Exakta IIa 35mm camera – side view showing flash sync
Ihagee Exakta IIa 35mm camera – rear view
Ihagee Exakta IIa 35mm camera – side view showing shutter release
Ihagee Exakta IIa 35mm camera – rear view with back removed
Ihagee Exakta IIa 35mm camera – top view showing control layout
Ihagee Exakta IIa 35mm camera – rear view with back
Ihagee Exakta IIa 35mm camera – front view with Tessar 50mm f/2.8 fitted
Ihagee Exakta IIa 35mm camera – front view with lens removed
My Camera
I bought this camera from eBay at the same time as I bought my Exa 500. The same seller had both cameras listed and I got them both for £8.50.
As with the Exa 500, the camera was listed as ‘Spares or Repair’, but when this camera arrived, there initially didn’t seem to be anything mechanically wrong with it. I checked all the speeds and everything seems to be in order, but after a bit of use I discovered that the film advance / shutter interlock is not working allowing the camera to advance the film without firing the shutter. I will need to get the camera apart to see what is causing that problem.
Cosmetically there is a little bit of damage to the shutter speed dial. It looks as if at some point the camera has been dropped and there are a couple of big dents in the top cover and the dial. Fortunately it hasn’t stopped the dial from turning, but it’s a bit of a shame.
There is a bit of paint loss and rubbing on the camera body, but it’s not excessive considering the age of the camera.
Exa IIa Description
This is a short description of the Exa IIa because, as you would expect, it is very similar to the Exa II. The internal shutter arrangement is the same; a cloth, vertical travel arrangement with shutter speeds of 1/250 to 1/2 second and bulb and a shutter lock which can be used to lock the shutter open. The basic layout of controls is also very similar, although the film advance control has been improved because it is a much shorter throw than the Exa II. On the Exa II the advance control moved about 180 degrees to advance the film, on the IIa it is only about 90 degrees.
The other big improvement over the Exa II is the change from a ground glass focusing screen in the II to one which includes a split image rangefinder in the centre of the viewfinder. I remember thinking that focusing would be difficult on the Exa II as I was looking at it and saw in the handbook that a version was made with a split image focusing aid, so I think this version was the one referred to.
As I said above the other changes are more style than substance; the model II has a hinged back door, the IIa has a removable back, the II has a square plate around the lens mount, the IIa is a more rounded design. Once I get the camera apart I will find out if the internal mechanism is different from the Exa II, and see if there are any more extensive changes.
By the way, my article on the Exa II is here.
Ihagee Exakta Exa IIa specifications
Exa IIa 35mm slr camera
Focal plane shutter with speeds 1/2 sec to 1/250sec + bulb
Film Type reminder and frame counter on film advance
Front mounted shutter release
Front mounted flash sync socket
Exakta bayonet mount
Non return mirror
Top plate mounted film rewind button
Shutter release lock which doubles as the shutter T release
Removable take up spool
Tripod bush
Ser No: 179068
Manual available on-line here.
Ihagee Exakta Exa IIa 35mm slr camera The Ihagee Exa IIa was a development of the Exa II camera and produced by Ihagee in the early 1960s.
1 note
·
View note
Text
cannon call!!! im looking for IMAGE SENSORType22.3 x 14.9mm CMOSEffective PixelsApprox. 18.0 megapixelsTotal PixelsApprox. 18.7 megapixelsAspect Ratio3:2Low-Pass FilterBuilt-in/Fixed with Self Cleaning Sensor UnitSensor CleaningEOS integrated cleaning systemColour Filter TypePrimary ColourIMAGE PROCESSORTypeDIGIC 4LENSLens MountEF/EF-SFocal LengthEquivalent to 1.6x the focal length of the lensFOCUSINGTypeTTL-CT-SIR AF-dedicated with a CMOS sensorAF System/ Points9 AF points (f/5.6 cross type at centre, extra sensitivity at f/2.8)AF Working RangeEV -0.5 -18 (at 23°C & ISO100)AF ModesAI FocusOne ShotAI ServoAF Point SelectionAutomatic selection, Manual selectionSelected AF Point DisplaySuperimposed in viewfinder and indicated on LCD monitorPredictive AFYes, up to 10m ¹AF LockLocked when shutter button is pressed half way in One Shot AF mode.AF Assist BeamIntermittent firing of built-in flash or emitted by optional dedicated SpeedliteManual FocusSelected on lensEXPOSURE CONTROLMetering ModesTTL full aperture metering with 63-zone SPC(1) Evaluative metering (linked to all AF points)(2) Partial metering at center (approx. 9% of viewfinder)(3) Spot metering (approx. 4% of viewfinder at center)(4) Center weighted average meteringMetering RangeEV 1-20 (at 23°C with 50mm f/1.4 lens ISO100)AE LockAuto: In 1-shot AF mode with evaluative metering exposure is locked when focus is achieved.Manual: By AE lock button in creative zone modes.Exposure Compensation+/-5 EV in 1/3 or 1/2 stop increments (can be combined with AEB).AEB3 shots +/- 2 EV, 1/2 or 1/3-stop incrementsISO Sensitivity*AUTO(100-6400), 100-6400 Expandable to H (approx 12800) in 1-stop incrementsSHUTTERTypeElectronically-controlled focal-plane shutterSpeed30-1/4000 sec (1/2 or 1/3 stop increments), Bulb (Total shutter speed range. Available range varies by shooting mode)WHITE BALANCETypeAuto white balance with the imaging sensorSettingsAWB, Daylight, Shade, Cloudy, Tungsten, WhiteFluorescent light, Flash, Custom.White balance compensation: 1. Blue/Amber +/-92. Magenta/ Green +/-9.Custom White BalanceYes, 1 setting can be registeredWB Bracketing+/-3 levels in single level increments3 bracketed images per shutter release.Selectable Blue/Amber bias or Magenta/ Green bias.VIEWFINDERTypePentamirrorCoverage (Vertical/Horizontal)Approx. 95%MagnificationApprox. 0.87xEyepointApprox. 19mm (from eyepiece lens centre)Dioptre Correction-3 to +1 (1/m) (dioptre)Focusing ScreenFixedMirrorQuick-return half mirror (Transmission: reflection ratio of 40:60, no mirror cut-off with EF600mm f/4 or shorter)Viewfinder InformationAF information: AF points, focus confirmation lightExposure information: Shutter speed, aperture value, ISO speed (always displayed), AE lock, exposure level/compensation, spot metering circle, exposure warning, AEBFlash information: Flash ready, high-speed sync, FE lock, flash exposure compensation, red-eye reduction lightImage information: White balance correction, SD card information, monochrome shooting, maximum burst (1 digit display), Highlight tone priority (D+)Depth of Field PreviewYes, with Depth of Field preview button.Eyepiece ShutterOn strapLCD MONITORType7.7cm (3.0") 3:2 Clear View TFT, approx. 1040K dotsCoverageApprox. 100%Viewing Angle (Horizontally/Vertically)Approx 160°CoatingDual Anti-reflection, anti smudgeBrightness AdjustmentAdjustable to one of seven levelsDisplay Options(1) Quick Control Screen(2) Camera settingsFLASHBuilt-in Flash GN (ISO 100, meters)13Built-in Flash Coverageup to 17mm focal length (35mm equivalent: 27mm)Built-in Flash Recycle TimeApprox. 3 secondsModesAuto, Manual Flash On/offRed-Eye ReductionYes - with red eye reduction lampX-Sync1/200secFlash Exposure Compensation+/- 2EV in 1/2 or 1/3 incrementsFlash Exposure BracketingYes, with compatible External FlashFlash Exposure LockYesSecond Curtain SynchronisationYesHotShoe/ PC TerminalYes/ -External Flash CompatibilityE-TTL II with EX series Speedlites, wireless multi-flash supportExternal Flash Controlvia camera menu screenSHOOTINGModesAuto, Portrait, Landscape, Close-up, Sports, Night Portrait, No Flash, Movie, Program AE , Shutter priority AE, Aperture priority AE, Manual, A-DEPPicture StylesStandard, Portrait, Landscape, Neutral, Faithful, Monochrome, User Defined (x3)Colour SpacesRGB and Adobe RGBImage ProcessingHighlight Tone PriorityAuto Lighting Optimizer (Basic and Creative modes)Long exposure noise reductionHigh ISO speed noise reductionPeripheral illumination correctionDrive ModesSingle, Continuous, Self timer (2s, 10s+remote, 10s + continuous shots 2-10)Continuous ShootingMax. Approx. 3.7fps. (speed maintained for minimum of approx 34 images (JPEG)¹, 6 images (RAW)) ²LIVE VIEW MODETypeElectronic viewfinder with image sensorCoverageApprox. 100% (horizontally and vertically)Frame Rate30 fpsFocusingManual Focus (Magnify the image 5x or 10x at any point on screen)Autofocus: Quick mode, Live modeMeteringReal-time evaluative metering with image sensorActive metering time can be changedDisplay OptionsGrid overlay, HistogramFILE TYPEStill Image TypeJPEG: Fine, Normal (Exif 2.21 [Exif Print] compliant) / Design rule for Camera File system (2.0), RAW: RAW (14bit, Canon original RAW 2nd edition), Digital Print Order Format [DPOF] Version 1.1 compliantRAW+JPEG Simultaneous RecordingYes (RAW + Large JPEG only)Image SizeJPEG: (L) 5184x3456 (M) 3456x2304, (S) 2592x1728RAW: (RAW) 5184x3456Movie TypeMOV (Video: H.264, Sound: Linear PCM)Movie Size1920 x 1080 (29.97, 25, 23.976 fps)1280 x 720 (59.94, 50 fps)640 x 480 (59.94, 50 fps)Movie LengthMax duration 29m 59sec, Max file size 4GBFile Numbering(1) Consecutive numbering(2) Auto reset(3) Manual resetOTHER FEATURESCustom Functions12 Custom Functions with 36 settingsMetadata TagUser copyright information (can be set in camera)LCD Panel / IlluminationYesPlayback Zoom1.5x - 10x enabled in 15stepsDisplay Formats(1) Single image with information (2 levels) (2) Single image (3) 4 image index(4) 9 image index(5) Jump DisplaySlide ShowImage selection: All images, by Date, by Folder, Movies, StillsPlayback time: 1/2/3/5 secondsRepeat: On/OffHistogramBrightness: Yes RGB: YesHighlight AlertYes (Shooting information display only)Image Erase/ProtectionErase: Single image, Checkmarked images, Unprotected imagesProtection: Erase protection of one image at a timeData VerificationOriginal image verification data can be appended to the image (OSK-E3 required for verification)Menu Categories(1) Shooting menu (x4)(2) Playback menu (x2)(3) Setup menu (x3)(4) My MenuMenu Languages25 LanguagesEnglish, German, French, Dutch, Danish, Portuguese, Finnish, Italian, Norwegian, Swedish, Spanish, Greek, Russian, Polish, Czech, Hungarian, Romanian, Ukrainian, Turkish, Arabic, Thai, Simplified Chinese, Traditional Chinese, Korean and JapaneseFirmware UpdateUpdate possible by the user.INTERFACEComputerHi-Speed USBOtherVideo output (PAL/ NTSC) (integrated with USB terminal), HDMI mini output (HDMI-CEC compatible), External microphone (3.5mm Stereo mini jack)DIRECT PRINTCanon PrintersCanon Compact Photo Printers and PIXMA Printers supporting PictBridgePictBridgeYesSTORAGETypeSD card, SDHC card or SDXC cardSUPPORTED OPERATING SYSTEMPC & MacintoshWindows XP (SP2/SP3) / Vista inc SP1 (excl. Starter Edition) / 7 (excl. Starter Edition)OS X v10.4-10.6SOFTWARE
6 notes
·
View notes
Text
Best Portrait photography tips and techniques
Tip 1. Focus on the eyes
While eye contact is not always desirable in a portrait, sharp eyes certainly are. Manually select an AF point that's positioned over one of your model's eyes, or use the central focus point to lock focus on their eye.
Then, with the shutter release half-pressed to keep the setting locked, recompose your picture before taking the shot.
Related Articles : www.dslrphotographyaccessories.com
Tip 2. Using a standard or telephoto lens
Wide-angle lenses are a great choice for photographing environmental portraits, where you want to show a person within a specific context. However, wide-angle lenses used close-up will distort facial features and creative unflattering pictures.
A better choice for portraits is either a standard lens or a short telephoto lens. The classic portrait focal lengths for a full-frame camera are 50mm, 85mm prime lenses and a 70-200mm zoom.
These will help to compress features and provide a more natural-looking result.
Tip 3. Use Aperture Priority mode
Aperture Priority gives you direct control over the aperture, and as a result the depth of field (DOF).
Fast prime lenses, such as 50mm f/1.4 and 85mm f/1.2 enable you to choose very large apertures for a shallow depth of field. This can help you create those creamy-smooth, out of focus backgrounds that give portraits a professional quality.
Working with such a narrow band of sharpness means that you need to be accurate with focusing - the entire portrait will look soft if you don't focus accurately on the eyes.
Tip 4. Using window light
You don't need an expensive home studio lighting kit to take amazing portraits - a window and a reflector can help you achieve stunning natural results without spending too much.
Position your model at an angle to the window and use a white or silver reflector to open up any shadows across their face. A silver reflector will give a crisper quality of light than a white one, although the effect won't be as subtle.
Be aware of any color casts that may be introduced by features on the other side of the glass as well - a lush green lawn can give skin tones a sickly quality, while late evening sunlight on a patio will reflect lots of warm light.
Tip 5. High-key portraits
Deliberately choosing to over-expose a photo to create a 'high-key' effect results in a light and delicate look that can enhance feminine portraits and pictures of children.
The trick is not to blow the highlights in-camera, but rather brighten up the shot later in software such as Photoshop.
Shooting RAW files will give you the most editing head-room, as you'll be able to extract more detail across the tonal range in raw compared to JPEGs.
Tip 6. Baby portraits
When it comes to lighting baby portraits, natural light is the best choice. Flash will just end up spooking them. Try and position them near to a window and use a reflector to bounce light into any shadows .
The more light you can get onto your subject, the lower ISO sensitivity you can use for the best quality photos .
To catch a baby at their best, photograph them just after a feed or when they've woken up first thing in the morning.
They'll be more active and alert than at other times of the day, and you're more likely to get the kind of cooing baby portraits that parents will love.
Tip 7. Photographing children
Taking photos of children is fun but challenging. Keep a kids' portrait session short and entertaining. Play games with them: ask them of they can see their reflection in the front element of the lens is a good way to get some eye contact.
Fit a wide-angle lens and shoot without looking, poking the camera into their face. Get them used to the shutter sound and not having to look down the lens and smile.
Make the most of opportunities when they're still for a moment, such as when they're concentrating on a toy. Chat to them as you would with adults and once you've taken a few photos show them the results on the LCD screen, so that they feel involved.
Tip 8. Shooting in burst mode
Whether you're taking a child's portrait or a group portrait, set your camera in its fastest drive setting. You don't need to machine gun the shutter release, but shooting in short bursts will ensure you capture a fleeting range of expressions.
It also improves your chances of getting a shot where everyone's eyes are open in a group portrait.
Even if you don't capture everyone's eyes open or their beaming smiles, having a range of shots taken fractions of a second apart means you can easily swap faces in Photoshop.
Tip 9. Posing group portraits
When you're arranging a group portrait, the first thing you'll probably consider is height, putting taller people at the back and shorter people at the front.
However, keep a close eye on clothing too. It's easy to miss clashing colors while you're focusing on everyone's height, and that will be more noticeable in the final picture.
To ensure everyone appears sharp, you need to use an aperture of at least f/8 with a wide-angle lens. But if you're taking an indoor group portrait, you'll need to use a high ISO in order to shoot at that aperture and get sharp handheld photos.
Photos may end up full of noise, and even then the shutter speed may not be fast enough for sharp images. A trick here is to arrange everyone in a line along the same focal plane, then the aperture doesn't have to be so narrow.
Tip 10. Family photo posing ideas
Think about how your arrangement of people in a group family portrait can tell a story about the relationship between the different members.
A simple idea is to place the emphasis on the patriarch or matriarch of the family, or the newest arrival. By grouping the rest of the family around them, you'll be able to create a clear focal point.
For larger family group photos, use furniture - whether that's a sofa for indoor shots or a gate for outdoor portraits - to break the group up. Sit the children in front of it and have the adults standing behind it.
Tip 11. Candlelight portraits
When you're taking photos by candlelight, you'll need to push the ISO to 1600 and beyond and work with large apertures if you're to get a fast enough shutter speed to freeze any motion in your model, the camera or the candle flames.
Turn your camera's flash off and use Manual exposure mode. Switch off any lights, take a meter reading from your portrait-sitter's face and let the rest of the room slip into darkness.
If you're planning a candlelit portrait shoot, use more than one candle. Not only will it increase the amount of light available to make the exposure, but it will allow you to spread the illumination for softer shadows.
1 note
·
View note
Text
Tips For Exquisite Long Exposure Photos
By Christine Patterson
Photography is one of the art types that is indeed aesthetic. This allows people to keep memories in a colored piece of cardboard and keep it as proof that such memories have actually happened. There even is a saying that says photographs are the only thing that does not change which is true, although they are fading in time, they still holds special memories of places a person once have been in and keep it special. Photography has had several types and techniques especially when taking shots on specific areas and environment. One of which is the daytime long exposure photography that normally refers to taking pictures on objects which are continuously moving like waterfalls or trains and so on.
The problem that lies when using these objects as model is that it needs timing so they would end up stunning instead of blurry. Professional photographers know that there are several consideration to make the technique work. Especially trying to ensure that the motion is captured well enough to make it interesting and wonderful.
But then, there are several consideration which are in need to be covered initially before going on through the technique. One would not appreciate and understand how this works without knowing the basic considerations that would make the entire process successful. Now, first and foremost, light is the most important factor that the camera has to play with.
In fact, light is the most important factor which consists photography and apparently all the things that makes this what it is now is through the help and presence of light. Anyway, there are many light source to be played with and each one of those would need right technique so it would come out as great as it should. That also is given that some settings are appropriately set.
So, shutter is one thing that also makes the long exposure happen. For those who are not aware what shutter is, it refers to the opening of the camera and then closing back again so that the image is recorded. Along with that is the shutter speed which is the fastness and the slowness of the shutter. The slowest the shutter speed tend to be set, the clearer the image would end up with.
Now there comes the aperture which basically refers to the setting in the lens. This controls the amount of light that comes in as well as the focal plane or depth of a photo. Now for long exposures, one would normally want the image to focus as much as possible to make the motion less blurry and that would need apertures be set in higher number.
The light that hits the sensor in cameras is one thing to help in capturing the motion well enough. But if it is not controlled accordingly, then it also could blur out and patch the areas making the photo look odd especially with the fact that the shutter speed are supposed to be in slowest setting.
Now, this may really sound quite hard than it should be but practice would help one to know all things they need to know about the technique. Set the camera in a manual mode to change the shutter speed. It could also be something helpful if one has tripod.
To help one get a better grip of the procedure, they may need a tripod to make it happen. This would allow the camera to stay still for the entire capturing without any unnecessary movement to ruin it or cause the blur. Then set the timer for about ten seconds. That is enough time to focus on the motion to capture it effectively and smoothly as possible.
About the Author:
Stop by our online site to view details of our daytime long exposure photography experts. To see all the qualifications and more, check out the following link here on https://ift.tt/2tAvW34 right now.
Tips For Exquisite Long Exposure Photos
from 1creativeart https://ift.tt/2UreNYE
via IFTTT
0 notes
Text
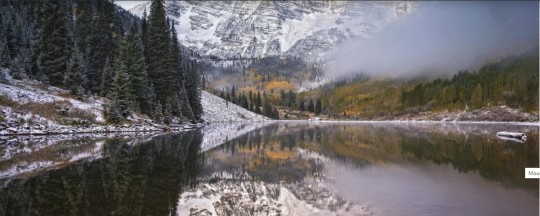
The Ultimate Guide to Forecasting, Shooting, and Post-Processing the Northern Lights
The crown of the (Ant)arctic. Known in the northern hemisphere as the Aurora Borealis (northern lights and as the Aurora Australis in the southern hemisphere, these brightly colored bands of moving and waving light are a majestic display in the night sky.
The sun shoots out a constant stream of charged particles which we call the solar wind. When that stream interacts with the Earth’s magnetic field, these particles are led to the poles through the toroid (donut-like) shape of the field. It’s at our poles where the stream gets concentrated and crashes into particles in the Earth’s upper atmosphere. This high energy reaction emits light in varying visible colors, which we perceive as the northern or southern lights.
Visibility
Sometimes that solar wind stream is stronger and denser than most often is the case. On occasion, it can be so strong that our magnetic field jitters and moves erratically, therefore twisting and bending the aurora in seemingly impossible shapes. But there’s one solar phenomenon that trumps all. The coronal mass ejection. Solar flares can trigger enormous explosions where large chunks of the sun’s mass get flung into space. When those are directed at Earth, it’s a matter for concern. When they’re strong enough, the charged solar particles can destroy electronic circuitry, so naturally we need some kind of warning to protect our modern world.
The strength of such ejections is measured through a fleet of satellites. Some orbit the sun, whereas others orbit somewhere around a point where the Earth’s and the sun’s gravity cancel each other out. The solar wind takes about an hour to travel from that point to Earth. Luckily for us photographers, the satellite data is available to see for ourselves. And if you know how to interpret it, it’s easy to make an aurora forecast for yourself! So let’s talk a bit about the factors that limit or increase your chances to shoot pictures of the magical lights.
1. Your Location
In rare instances, the aurora has been seen as far south as Cuba. But that isn’t the norm. You’re far more likely to capture the lights under pristine skies near the Arctic Circle. There’s almost always some green in those skies, given the fact that it’s clear and if your camera settings are sensitive enough. The images shown in this article are all photographed in the Lofoten or in Iceland, except for one. I’ll tell you about that picture in a minute, but let’s take look at the chart below first.
2. Kp-index
If there’s one thing to learn about forecasting the aurora, it’s the use of the planetary K-index (KP-index). It’s used to characterize the magnitude of geomagnetic storms. Kp is an excellent indicator of disturbances in the Earth’s magnetic field and therefore potential displays of auroras.
The scale goes up from 0 to 9. Where 5 or more indicates a geomagnetic storm. The further up this goes, the farther south the northern lights may be visible.
3. Color
It’s interesting to note that more temperate regions see more colorful displays of the aurora. It’s often misunderstood that the northern lights are green. Magenta, blue and even deep red can be seen and photographed on nights where the aurora is most active. Each gas (oxygen, nitrogen molecules, and atoms) emits a particular color depending on the energy of the precipitating particles, and atmospheric composition varies with altitude.
Since the faster particles penetrate deeper, certain auroral colors, originate from certain heights in the sky. The altitude range at which aurorae can occur is huge. It spans 80 to 1000 km from the Earth’s surface, although typical aurorae are 100 to 250 km above the ground. The color of the aurora at this height is yellow-green, from a specific transition of atomic oxygen. Auroral light from lower levels in the atmosphere is dominated by blue and red bands from molecular nitrogen and oxygen. And above 250 km, auroral light is characterized by a red spectral line of atomic oxygen.
This image was captured in the Netherlands during a very strong geomagnetic storm. Notice that the primary color here isn’t green at all. The color also varies wildly with latititude if the aurora is that strong. The event that sparked visible auroras in Cuba, I told you about? Those looked blood red.
4. Bz
The earlier mentioned Kp-index is derived from the maximum fluctuations of horizontal components observed on a magnetometer during a three-hour interval. In short, it says something about the past three measured hours. That makes it hard to say anything about how it will look an hour into the future. That’s why a couple more advanced measurements should be mentioned before we get into photographing the aurora.
Remember this: When the direction of the magnetic field is southward, geomagnetic disturbances become much more severe than when it’s pointed to the north. In fact, I don’t even try when the Bz is northward. However, this polarity can change at a moment’s notice. And when it does, you have about 45 minutes to get to the location where you want to photograph the lights.
The Bz is a measure of the North/South orientation of the interplanetary magnetic field, measured perpendicular to the ecliptic plane.
5. Solar Wind Speed
Faster speeds mean more interaction with the magnetic field: So stronger aurorae. Normally, that speed is around 375km/s. When the speed picks up to double that amount, it’s reason to dress warmly for the night. Especially if you’re located in the northern States, South Australia, Northern England, or anywhere along those lines. With speeds of around 500km/s, the aurora might photobomb you when pointed towards the poles if you’re anywhere in Scotland, Scandinavia, Canada or New Zealand.
Camera Settings
Milky Way photography is rather easy to get into, but quite difficult to master. That’s because the settings on your camera are almost always identical. That’s certainly not the case for the northern lights. The dynamic nature of the aurora has you constantly adjusting your settings in order to control the exposure. The steep learning curve of aurora photography starts at setting your camera’s ISO, aperture and shutter speed in the complete dark. Especially during a geomagnetic storm when the auroral display warps violently across the heavens, you don’t have time to turn on your headlamp, adjust settings and shoot again. And it’s too dark for the auto-exposure to have an effect anyway. So here’s a quick guide to help you prepare:
Tripod
It goes without saying that a tripod is mandatory. Due to the longer exposures, you don’t want the movement of the aurora to be influenced by the shake of your hands.
Focal length
Make it as wide as possible. Think about 14-20 mm or even a diagonal fisheye on a Full Frame camera. That way you can image the largest structures of the aurora, linking the sky together.
Aperture
Again, go as wide as possible. This is because we’re looking to capture detail in the shape of the aurora, so priority goes to shutter speed and lowering the ISO. f/4 at the minimum.
Focus
Because we’ve set the aperture to a wide setting, it’s imperative to set the focus to manual and focus right before the infinity mark. That way you can have some reasonably sharp outlines of distant objects in your frame, which add to your composition. Oh, and turn off any stabilization you might have on your lens or body while you’re at it. That is counterproductive when you photograph from a tripod.
ISO
Here’s where it gets interesting. On Sony and Fuji sensors, you’re best off with dialing in 400-800 and never look back, because of the ISO-invariant circuitry. But that means you’re not going to get a well-exposed preview when you take a look at your result on the camera’s LCD. Canon users: Go as low as possible, without you having to increase the exposure in post.
The best beginners advice I could give you on any camera is to start at ISO 3200 and adjust it from there. Some cameras can produce clean looking results at 12.800 or even higher, so it’s best to experiment a bit with this until you are happy with your result.
Shutter Speed
The single most important thing to control during an auroral display is the length of the exposure. Your goal is to find the equilibrium between structure (shorter exposures) and brightness (longer exposures). In as far south as the Netherlands, I’ve been happy with 10-second exposures, but in Iceland that would have completely blown out any highlights. The lowest I got there was at 1.6 seconds.
Personally, I always start short at 2 seconds. That way I only have to wait two seconds to shoot the next one. If you would have to wait 25 seconds to conclude your image is blown out, you might miss that one shot where the composition was just perfect.
Post-Processing
With a memory card full of memorable shots, it’s time to tweak those sliders to get the most out of our northern lights. Let’s see what we got here. This shot was fired straight up, with a nice green corona flaring around a more magenta center piece as clouds started to roll in and end the light show.
Personally, I want to create images that I enjoy looking at. So I’m embracing artistic freedom with this abstract photo of the northern lights. I have chosen to work on this image to teach you how to edit just the Aurora. That helps us to concentrate our efforts on something new to learn. Use these techniques to create stunning aurora landscape images or space weather selfies after this.
Now, I would like to emphasize that magenta offset color to obtain a good amount of color separation. So let’s take a look at the color wheel before we make any adjustments. This will help to guide our processing more than anything.
We’re going to pursue a triad color harmony for this image. The most important (or key) color is obviously going to be a shade of green. To offset the bright greens, I like to flood the shadows with a shade of magenta. And orange? Well, there’s a single star in this field of view that looks to be a red giant, but we’ll get to that later.
There isn’t much detail at all in this image. That’s because I shoot my aurora images at a faster shutter speed while keeping the ISO lower. That will underexpose your image, but for Nikon, Sony and Fujifilm, it’s good advice to do so in night photography. If you shoot Canon, you’re better off to raise the ISO and not increase the exposure too much in post.
Boost the Signal, Suppress the Noise
First, we’re going to increase the exposure. Curves are better to do this with than using the sliders because sliders target specific areas of brightness. Curves are more gradual, as they target all tonalities, but make sure you select “Custom” in “Point Curve”.
So I’ve raised the black point here, upped the midtones to create more contrast in the darker areas and lowered the highlights a bit to protect the greens there. The slightest amount of highlight clipping is needed to separate the stars from the noise before we get into noise reduction.
Now scroll all the way down and select “Camera Flat” instead of the “Adobe Standard” profile in the Camera Calibration tab. Faint signals will become more evident, but it also increases noise. So let’s handle that now.
Unfortunately, we can’t stack multiple images to reduce noise here, because our subject isn’t a static one. Dial in the following settings at “Noise Reduction” to suppress that unsightly noise.
Without telling you what the screenshot already shows, there’s one trick I teach at every workshop: Capture sharpening. Because of the way DSLR sensors are constructed, we lose sharpness during raw conversion. Specifically at the demosaicing (or debayering) step. I remedy that by dragging “Radius” in the Detail tab all the way down while turning “Detail” all the way to one hundred.
The other sliders under Sharpening are different in every image, so be sure to tweak those until you’re happy with the result. Your goal here (as with any early step) is to take it slow. Be wary of wanting too much too soon. Gradually build up your image as you go along is key advice.
Finding the White Balance Sweet Spot
Now crank up both the “Vibrance” and “Saturation” sliders, save the image and don’t look back. We’re done!
Kidding of course. This temporary increase will help to locate the point where there’s nearly as much green as magenta in the image. The aurora is almost never perfectly green, so I find it important and satisfying to extract as many shades from my shot as possible. Play around with “Temp” and “Tint” and zero “Vibrance” and “Saturation” again when you’ve found the sweet spot.
Mind the Corners before Applying Clarity
Let’s scroll down and turn on “Lens Correction” and select your lens’ profile. Oh, and put a check mark in “Remove Chromatic Aberration”. That will mostly take care of the colorful halos around stars.
Back up again to the Basic tab. Increase the overall structure of the aurora by dialing in a conservative amount of “Clarity”.
Artistic Local and Global Adjustments
Let’s get creative and emphasize the center a bit. Drag a radial filter around the part of the image that deserves the most attention and dial in the settings at Before:
Your goal now is to separate the greens from the magentas, so close the radial filter and apply the settings at After to make the image pop. I’ve only slightly increased the hue of purple to make it more magenta while lowering aqua into the green. There are your first two of the triad color harmony. Now it’s time to pursue our third but minor color. In order to do that and a couple more enhancements, we’ll jump into Photoshop.
Making the Stars Bigger
Before I ever got into photography, I was a huge fan of so-called space art. You might know this by artist’s concepts that support a story about newly discovered exoplanets. Space art doesn’t have to be about anything though. It can as well be just a pretty picture — it’s art after all.
One of the things that I’ve picked up from that period is enlarging “hero stars”; the stars that play the lead in your image. The way we do this is by making a selection based on the brightness, or luminosity of the stars.
Now, I use Jimmy McIntyre’s Raya Pro to create luminosity masks, but Tony Kuyper’s TK action panel works just as well for this. I’m not going into creating luminosity masks here. Both Tony and Jimmy have excellent tutorials available for this. I’ll hit “Create All” here. And I’m looking for a luminosity mask with the best separation between the stars and the brightest parts of the aurora.
Brights 3 fits the bill well enough. With that selection load, create a new Curves adjustment layer and feather its mask 1px to make smooth transitions between the already pixelated stars. As for the curve shape, increase the midtones with a single point.
Here’s the kicker. Copy that adjustment layer 5 or 6 times, where you double the feather radius of the mask each time. The fifth layer should be feathered at 16px and a sixth at 32px.
It’s not a pretty sight. The adjustment also targets the highlights in the aurora, but to a lesser extent. Here’s how to correct this. Make those adjustment layers invisible and copy the base layer. Select the copied layer and go to Image > Adjustments > Threshold. We’re going to restrict our glow to the stars.
The threshold level should just about leave everything looking black. Except for a couple of white blotches. Hit ok and paint with black over the aurora highlights. We’ve created a star mask, but it has two values. Either black or white. This only targets the brightest stars of the image, so the effect we created earlier will be restricted to these “hero stars”.
Apply a Gaussian Blur (Filter > Blur > Gaussian Blur) with a radius of around 0,6 pixels to make the stars retain their brightness falloff.
You will end up with something looking like a proper star field, but as a selection, it isn’t feathered enough. We’re going to stack 6 copies of this layer. Let me show you what I mean:
Copy the layer five times and set all the copies to the “Linear Dodge” blending mode. Average them out by setting each subsequent layer to an opacity that is one hundred divided by that layer’s position.
The original goes to 100% and the second to 50% opacity. The third and fourth go to 25 and 20%, respectively. We will leave the last layer at 20% though. Hold control (command on a Mac) and select the opacity of this stack by right-clicking the RGB thumbnail in the Channels palette. Now create a new mask on the star enhancement effect:
To enhance the color of these stars, you could apply a simple hue and saturation adjustment layer. And there’s our third color to subtly complete the triad color harmony.
Pareidolia Time
Like clouds, aurorae can be hosts of imaginary figures in the skies. From animals to ghosts, you can make anything come alive with these shots. I found there was some sort of angelic figure with forward-swept wings in my image, so I cropped in on the image to emphasize that.
To finish it off in Photoshop, we’ll add contrast by applying an S-curve. Select the Midtones 1 luminosity mask and add a curves adjustment layer to it.
To give the image a silky smooth finish, we’ll then drop the midtones of Darks 3, while raising the blues:
Here’s the final before and after:
Before
After
Closing Words
You could go back into Lightroom and do some more adjustments before exporting it for the web, or leave it there. It’s a good amount of work, but in the end it will be worth your time. At least you will learn some new tricks from a field that’s related to astrophotography.
Personally, I love to combine the tricks of space art with a photograph as my canvas to maximize the fine-art potential of a single exposure. So this is how I go about post-processing my auroras. Hope you’ve picked up a trick or two because that will certainly help when we dive head first into editing landscape astrophotography in the near future.
About the author: Daniel Laan is a landscape photographer based in the Netherlands. In addition to being a full-time landscape shooter, Laan also teaches photography to students around the world. You can find more of his work on his website, Facebook, 500px, and Instagram.
Sources: NOAA Space Weather Prediction Centre; Dr. Vincent van Leijen; Spaceweatherlive.com
from Photography News https://petapixel.com/2018/10/02/the-ultimate-guide-to-forecasting-shooting-and-post-processing-the-northern-lights/
0 notes
Last Seen Blogs
yuro4katiger
A gathering of fandoms

whatsanta
MOVED!

walrus-tusk-615bc
if I don't do ur mom, who will??

lolaa-235
I don't care
vekkarin
Androbirb