#best 6 inch jointer
Link
Benchtop jointer is a very popular tool for woodworkers because it allows you to make accurate cuts in the wood even when your hands are shaky or you have poor dexterity.
Benchtop jointer has six-inch working width, which makes it much better than basic short-handled table saw. But it’s not any cheaper or bigger than standard table saw, so we can see why people are using it as an alternative to this popular product.
#best deal#jointer#jointers#6 inch jointer#6inch jointer#best 6inch jointer#best 6 inch jointer#best jointer#best jointers#best 6inch jointers#review#toolreview
1 note
·
View note
Text
The Best 6 Inch Jointer of November: Rankings, Reviews You Should Know About
When you first take a look at some of the lightweight and compact jointers on the market, you might wonder if something has gone awry. These machines are just not big enough to be useful, right? Well…no, and yes. These smaller jointers have their place, but they’re also more than capable of tackling most woodworking tasks that smaller bench top models can’t handle. A compact or “lightweight” jointer is perfect for small shops or for an individual who doesn’t have a lot of space to spare. Choosing the right one for your needs, however, can be tricky. There are quite a few considerations to make before buying which one will best suit your style of work and home as well as your budget. Here is a quick look at what to look for when shopping for the best 6 inch jointer .

Source: https://lunchreview.org/best-6-inch-jointer/
#home #homeware #Lunchreview #lunchrevieworg #lunchreviews #homeandkitchenreviews #makeshoppingeasy #jointer #6inchjointer
facebook.com:https://www.facebook.com/lunchreview.org
twitter.com:https://twitter.com/lunchrevieworg
blogger.com:https://homereviewsblog.blogspot.com/
1 note
·
View note
Text
Home

The Best Overview To Choose The Best Benchtop Jointer
When it concerns woodworking, you can select the best benchtop jointer that can be the only difference between being an amateur and a pro. Nowadays, there are several choices of benchtop jointers available in the market, but it can be quite overwhelming. When you are utilizing this benchtop jointer in your woodworking, it works as straight and smooth as possible. For this reason, you must discover the one to suit your needs and requirements as well. For having a far better performance, you understand the necessity of implementing the right tool.
The major function that the benchtop jointer does is to polish the wood surfaces as well as also even them bent on perfection. Nevertheless, these are extensively offered in various forms, sizes, designs as well as additional purchasing decisions. As soon as you decide to buy the benchtop jointer for your woodworking, you must pick the best budget jointer according to your requirements. If you are a carpenter, being able to smooth as well as cut down your wood pieces to a perfect finish is one of the most crucial parts of this work. This is where; the best benchtop jointer comes in.
Improve Your Speed And Also Accuracy With The Best Benchtop Jointer Planer
If you want a woodworking tool to check the uneven surfaces, flatness, and also edges, the best benchtop jointer planer is the appropriate choice for you. Purchasing this good jointer planer can free up the workspace for other things, whereas it provides a couple of essential tools that are more crucial for fine woodworking. Without these tools, you can not also make a hardwood tabletop. By merely acquiring this mixing unit, you can save both money and also the area also.
Naturally, these jointer planers are unique benchtop devices as well as likewise work as a cost-free-standing tool, which free up that worth benchtop jointer for working on. Now, the jointer comes at all sizes and also costs. If you seek a luxury jointer, you can select the best 6 inch jointer that gives a lot of power without even being excessively big or immense. Now, there is a significant selection of 6 inchjointers available on the market for you to select from. Based on your demands, these jointers will fit your woodwork and additionally helps you to understand which features can compose the great jointer too.
An Evaluation Of Benchtop Jointer Planer
When you are looking for the best jointer for your woodworking task, you can simply read out the benchtop jointer reviews as well as get the complete detailed descriptions. You can additionally take a look at a purchasing guide to find out more about the essential features to look for in the best benchtop jointer. You can always ensure to choose the ultimately affordable cost for the non-professional woodworker, and also this jointer always offers the whole features that you can require in a benchtop unit. When compared to comparable jointers, this jointer is running a lot more quietly as well as also maximizes the durability of a blade.Visit our website to know more https://bighomechores.com/best-benchtop-jointer/
1 note
·
View note
Text
MAKE YOUR OWN PUSH BLOCKS
In the event that you use power devices, for example, a table saw, switch table or jointer, you as of now (ideally) know the significance of utilizing push sticks and push squares is critical to protecting your fingers. Making your own push squares is simple utilizing pressed wood scraps and an old mouse cushion.

Materials you'll have to make these push squares:
3/4″ compressed wood
An old (or modest) mouse cushion
Wood stick
1-1/2 inch screws
Instruments:
Drill
Countersink boring tool
Measuring tape
Jigsaw or band saw
Spring clasps
Switch table (discretionary)
Follow the handles
Begin by following out the idea about your pressed wood. Think about the size of your palm. I made mine around 5 inches in length.
Tip: utilize the mouse cushion to help follow the corners.
Cut the handles
Utilize a jigsaw or band saw or far and away superior a parchment checked whether you have one. Pursue the lines to remove your handles. As should be obvious, I need a little practice with the jigsaw… however not to stress, I can fix this.
Round the edges at the switch table
I introduced an adjusting bit in my switch table and adjusted within and outside edges of the handles the make them smooth and round. Wrap up by sanding down the handles totally to make them smooth.
Cut the base
Cut a bit of compressed wood somewhat longer than your handles, around 3 inches wide. For my situation, the base was 6″ x 3″.
Connect the handle to the base
You'll need to bore some pilot gaps in the underside of your handles to anticipate part. At that point move these gaps over to your base. I utilized the notorious green tape technique.
Drill the pilot gaps in the base utilizing a countersink boring tool on the off chance that you have one. At that point, join the handles utilizing wood paste and 1-1/2 wood screws.
Connect the mouse cushion to the base
Pre-cut you mouse cushion in two sections. I began utilizing an utility blade, yet at last discovered that scissors made a cleaner cut. Apply some wood paste to the wood base a spread it equitably on the whole surface. Utilize a few spring braces to append the mouse cushion safely, applying even weight, and let dry medium-term. The following day, remove the overabundance mouse cushion.
Tip: My mouse cushion had an elusive vinyl top, so I stripped away the top layer to ensure it would stick to my wood base. For More Information Visit Here Best Table Saw Push Block
MAKE YOUR OWN PUSH BLOCKS Watch The Video
youtube
1 note
·
View note
Video
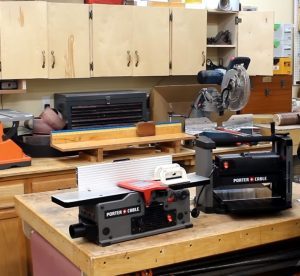
The Best 5 Benchtop Jointers in 2020 Best Benchtop Jointer #Benchtop Jointer #Top Benchtop Jointer #Best Jointer #PORTER-CABLE PC160JT Variable Speed 6 #ET 708457DXK JJ-6CSDX 6-Inch 1 HP Jointer #RIKON Power Tools 20-600H 6 #Grizzly Industrial G0725-6 #best benchtop jointer planer combo #best benchtop jointer for the money #best benchtop jointer planer #best benchtop jointers woodworking #best benchtop jointers reviews #best benchtop jointer 6-inch #best benchtop jointer forums#amazon product #product prices #amazon product reviews #product reviews
0 notes
Text
Setting Up Shop - Stationary Power Tools
In this article we’re going to talk about the big guns; the tools that you see in all the TV shows and all the pictures of “serious” woodworking shops. I’m going to go though the list of stationary power tools that I think make up a basic shop. Again, if you’re just starting out in woodworking and you’re not sure exactly what kind of woodworking you want to do, don’t go out and empty your savings account buying all these tools. The best advise that I got when I first started woodworking was, “buy tools as you need them”. Tool companies do a great job making you think you couldn’t possibly build anything without their latest and greatest tool. Talk to other woodworkers, join a woodworking guild in your area, visit on-line discussion groups on woodworking, (the best known is rec.woodworking), and see what others are saying about tools you’re considering purchasing.
All the power tools that I’m about to mention have less expenses tools that will do the same job. So why do we even need these bigger more expensive stationary power tools? Speed, durability, and repeatable accuracy. Stationary power tools are built to do certain tasks faster, there built to do that same task over and over again, and they are built to cut wood as accurate on the first piece you send through them as the last piece. Let’s take a look at our list.
Table saws: The first machine you’ll probably want to invest in is a table saw. The table saw is the center piece for most shops. If you plan on building cabinets, furniture, doing home repair and remodeling, instrument building, architectural millwork, boat building, etc, this will be your workhorse. Buy the best you can afford. You need one that’s has a flat table top, has a fence that’s parallel to the blade, can accept a 3/4″ dado blade, and the arbor that the blade goes on needs to be parallel to the miter gage slot (or at least be adjustable). The amount the fence can move away from the blade will determine how big a piece of wood the saw can cut. If you plan on cutting a lot of sheet goods (plywood) get at least a 50″ fence.
There are three major types of table saws: Bench top, Contractor style and Cabinet style. Bench top saws naturally aren’t stationary tools but I wanted to include them in this list because they have come a long way in the past several years. This saws used to be small and somewhat dangerous to use. Several manufactures have put beefier, safer, more portable, with larger cutting capacity than ever before. That being said I would still caution against buying one of this saws as a stationary tool in your shop. However if you need something that you can take with you to a job site, then this is the way to go.
Contractor saws are stationary tools. They typically have an open base with the motor hanging out the back. Unlike bench top saws, contractor saws are belt driven so they’re much quite. The better ones all have the things I mentioned early to look for in a quality table saw. I didn’t mention this in my list of types of table saws early, but some manufactures have developed “hybrid” saws that have attributes of both contractor saws and our next style, the cabinet saw. The price difference between a hybrid saw and a cabinet saw isn’t much, so I would buy a contractor or go ahead and make the jump to a cabinet saw. A cabinet saw is the “Big Daddy” of table saws. They’re heavier, which cuts down on vibration, the trunnions are beefier, they’re wired for 220 volts, the base is enclosed which gives them good dust collection, and they have more powerful motors (usually 3 to 5 horsepower) to slice through thick, tough woods. Most professionals and hobbyist that deal with thick pieces of hardwood opt for the
cabinet saw.
Thickness Planer: A thickness planer does exactly what its name implies, it cuts down a piece
of lumber to a desired thickness. Most rough cut lumber is right off the sawmill which means the thickness usually varies along it’s entire length. If you buy a 4/4″ (1″) board from the sawmill and you need it’s finished thickness to be 3/4″ you will have to either use a hand plane or the thickness planer to get there. Hand planes will do the job, but if you have several boards to thickness you’ll appreciate how fast and accurate a thickness planes can get the job done. Thickness planers come in portable or stationary machines. Portable may be stretching it for some planers, some are close to a hundred pounds! Most hobbyist and a lot of professionals opt for the portable planers. Most of these planers have a 12″ capacity which is usually enough for most pieces of wood you’ll come across. A good planer will have a flat table that’s adjustable, a easy to read depth scale, easy to get to and change blades, and good dust collection. The
stationary thickness planers offer all these traits while being heavier, beefier, and offering a larger
width capacity, from 15″ on up.
Jointer: Putting pieces of wood together is easier and much more predictable if you are dealing
with straight, flat lumber. Many people assume that they don’t need a jointer if they have a thickness planer. What they don’t understand is that a thickness planer doesn’t flatten a board, it only makes it a uniform thickness. If you put a bowed board through a thickness planer you’ll get a bowed board when it comes out. The jointer first makes the board flat on one side. It does this by having two flat tables one on each side of a spinning blade. The board is pushed over the blade that is set to take off a certain amount, say 1/32″. The other table on the opposite side of the blade is set 1/32″ lower to compensate for the amount of material removed in our example. By doing this you get a flat surface.
What size jointer is the biggest question to answer when deciding which one to buy. A 6″ jointer is the smallest jointer size that would probably be of any use if you plan on building furniture. The thing to consider is what is the width of the boards that I normally deal with when building projects. If you’re like most 6″ to 10″ is normal. So lets go out and buy a 10″ jointer, right? If you have the money the answer is YES! Just realize that for each 2″ you go up in
capacity above 6″ you increase the price of the jointer roughly by (you may want to get a paper bag to breath in before you read on) $1000.00!
So, buy the biggest one you can afford, 6 to 8″ is what most end up going with just because of price. A good jointer will have a dead flat table top, a fence that slides easily and have stops at 90 and 45 degrees, and have good dust control.
Drill Press: Sure a hand drill can bore a hole but a drill press can do it so that it’s square to an edge or surface or at precise angles. Larger bits are better used in a drill press as well because you can change the speed to a lower setting. You can also use a wider variety of accessories on a drill press like a hollow-chisel mortiser, a biscuit cutter, and even sand curved edges. Drill presses come in bench top models and floor models. Floor models will have a lot more capacity, but you may not need that. Even if you don’t need the extra capacity, the versatility of the floor models make them attractive to many woodworkers. A good drill press will have a table that’s flat and square to the chuck and be able to tilt to 45 degrees. It should have variable speed and be able to accept 1/2″ size drill bits.
Compound Miter Saw: A compound miter saw excels at cross cutting boards to length. Yes, a
table saw can also do this but is difficult with long boards. Also, with a fence setup on either side of a miter saw you can quickly, easily, and precisely cut boards to different lengths all without a tape measurer. A miter saw also excels at mitering boards up to 45 degrees, and beveling boards. A Sliding compound miter saws can also increase the cutting capacity of a miter saw by several inches, so if you cut a lot of wide boards over 8″ you may want to look into one of these. Compound miter saws usually come in 8″, 10″, and 12″ sizes which refers
to the size blade it uses. Naturally the bigger the blade the wider boards it can cut.
A good compound miter saw will have a flat table that is perpendicular to the blade when set to 90 degrees and be adjustable for the times it might get out of square. It should have a degree scale that’s easy to read and have stops at 90, 45, and 22.5 degrees. It should also be able to tilt to 45 degrees for cutting bevels and compound cuts.
Band saw: The band saw is arguably only second in versatility to the router in the woodshop. Here are just some of the things that the band saw can do: cut curves and circular parts, cut small logs into lumber, cut out round blanks for turning on the lathe, resaw thick planks into thinner book matched boards, and cut thin slices into veneers. In my opinion (and it’s worth what you’re paying for it) with this much versatility you want to buy a good saw, much like with the table saw, don’t skimp here. Band saws are sized by the capacity between the blade and the back of the saw (refer to as the “throat”). So if a band saw is said to be 14″ that means it can cut a board that’s 14″ without hitting the back of the saw. How thick a board you can cut is determined by the space between the table and the upper blade guide. If you plan on using your saw to resaw lumber then you need a larger capacity between the table and the upper guide. Some saws are able to have a “riser” added to them which can increase their resaw capacity from 6 to 12″.
There are so many different shapes and sizes out on the market now that it can be overwhelming in deciding which band saw to buy. My advise is not to jump in and just buy one if you’re new to
woodworking. Decide what you like to build first. This will determine more than anything what size saw to buy. If general furniture is in your future my suggestion is to buy a 14″ band saw. You can go back and add a 6″ riser latter if you find you need the extra capacity. As I stated earlier, ask other woodworkers what they use, what do they like about it, what they don’t, search the archives of rec.woodworking to see what others say about a saw you’re looking at buying. By doing some research up front you’re more likely to have buyers remorse.
That’s my list of essential stationary power tools. This is by no means an exhaustive list. But starting out with these tools, along with our list of hand tools, and power hand tools, you’re setting yourself up to be able to build almost anything you like.
Source by Craig Stevens Setting Up Shop - Stationary Power Tools
0 notes
Link
Hello, Looking for the detailed review of Best Wood Jointers? We have tried to show the details in this Review. You can decide which Wood Jointers you should buy and which one is good for you, After reading this exclusive review. Our dedicated team research web and read lots of real user review before creating our top list. You can also find the full text review in our website easily by visiting the link above. You will also find the buying guide for this particular products in our website. Here is the list of 5 Best Wood Jointers. 01. Jet - JJ-8HH 8-inch Helical Head Jointer 02. Powermatic 1610086K Model 60HH 2 HP 1-Phase Jointer 03. Powermatic 1791317K 54HH 6-Inch Jointer 04. JET 708457DXK JJ-6CSDX 6-Inch 1 HP Jointer 05. PORTER-CABLE PC160JT Variable Speed 6" Jointer If you like our video please share it with your friends and also subscribe to our channel for more update. Thanks!
0 notes
Video
youtube
10 Best Machetes 2019 | Machete Reviews 📌Updated Ranking👉👉https://ift.tt/2L3AR3A The Included Items are, ✅10. Camillus Titanium Bonded Carnivore Maxx Machete ✅9. Elk Ridge ER-280 Machete 20.5-Inch ✅8. SOG SOGfari 18" Machete MC02-N ✅7. Whetstone Cutlery Full Tang Rubber ✅6. Condor Tool & Knife, Engineer Bolo Machete ✅5. Schrade SCHKM1 19.7in Kukri Machete ✅4. Whetstone Cutlery 25-H229 'The Brute' Super Machete ✅3. Gerber Bear Grylls Parang Machete ✅2. KA1248-BRK Machete Cutlass ✅1. KA-BAR 2-1249-9 Kukri 📌Updated Ranking👉👉https://ift.tt/2L3AR3A You will get update for the top products list in our website. 🔶Like this video🔶10 Best Machetes 2019 | Machete Reviews►►https://youtu.be/VyWneaOvmiM ▶️▶️Watch 8 Best Jointers 2019 | Jointer Reviews►►https://youtu.be/wujEADUJwho ▶️▶️Watch 7 Best Jack Stands 2019 | Jack Stand Review►►https://youtu.be/fgNAw7wSV-4 ✅Our Website►►https://ift.tt/2NjDqka ✅Subscribe this Channel►► https://goo.gl/qnzg6x 🔔 Stay updated! by Best Reviews
0 notes
Text
8 Easy Steps for Preparing Lumber for Woodworking
8 Easy Steps for Preparing Lumber for Woodworking
Preparing Lumber for Woodworking
No matter what type of lumber you buy for your woodworking projects or where you buy it from, there are steps that you will have to take to prepare the lumber to make it suitable for woodworking. Both rough and surfaced lumber, even if it comes from a specialty store will need some preparation before it can be utilized in a project.
There are two types of lumber you can buy; rough cut or surfaced. The difference between the two is that rough-cut will come straight from the mill and surfaced lumber is lumber that has been smooth on either two or three or all four sides. When you are choosing your wood for any given project, you need to take into about the size of the design you are going to be working on. This will determine how the wood is cut up, taking into account the grain patterns in the wood and any warping of the wood. Rough lumber will always give you more surface area to work with when you are preparing it , so it may be easier to eliminate warping with rough-cut lumber.
Here are 8 easy steps to preparing lumber for your project:
1. Cut the board to length. The first thing you will need to do is make roughly a one-inch slice to the end of a board. What you are looking for is small cracks in the wood, which are known as ‘checks’. These may not be readily visible but they could ruin your project if you don’t find them early on and eliminate them. Then, try to bend the piece of wood. If it breaks, or you see a crack, simply cut off another piece. Continue this process until no more cracks are found. Once you have done this, you can cut the piece that you need from the remaining board.
2. Flatten the face of the board. Using the best face of the board, run it down the jointer. You will probably need to make several passes down the jointer as wood is never straight to begin with. Be careful not to use a planer for this job. A planer just mirrors the other side of the board, so if the other side is warped, they will both be warped.
3. Flatten one edge. Basically the same as step #2, but you are doing the same thing with the edge of the board rather than the face. Again, it may take several pass down the jointer to get it flat. Make sure the jointer fence is 90 degrees to the out-feed bed.
4. Flatten the other face of the board. Run the board through the planer with the initial flattened face down. This will mirror the opposite face to the original flattened one. You can do this as many times as necessary to get the board to the desired thickness.
5. Cut the opposite edge. Use the table saw with the reference edge against the fence to cut this edge to the proper width. You will want to leave about 1/16” extra for smoothing.
6. Joint the edge that you just sawed. You will want to use the jointer to remove the saw marks from the edge you just made. You should use a very thin cut for this, maybe 1/64th inch.
7. Square the best end. Choosing the best end, take a minimal amount off (maybe ¼” max) using a 90 degree on the miter or table saw.
8. Cut the opposite to the proper length. Cut the final length using again, the table or miter saw. You will want to leave about 1/32” for removal of any machine markings.
That’s all there is to it. You should now have the perfect board prepared for your woodworking project. You will want to allow the boards to acclimate indoors for one or two weeks before using them. Humidity varies and it will always be different from wherever you purchased the lumber. Give it a chance to settle in before using it.
A final tip; don’t use green wood. Green wood is wood that has not been dried and therefore has much more moisture still in it. It is unstable because of this and will warp in unpredictable ways.
Learn more at https://www.woodworkingplans.biz
from WordPress https://woodworkingplans2412.wordpress.com/2017/12/02/8-easy-steps-for-preparing-lumber-for-woodworking/
0 notes
Text
The Best Band Saw Blade - woodfordtooling.com
Woodford tooling believe’s in “What you give, you will get back” eventually giving us one of the strongest and most reliable customer base around the globe for all their woodworking needs right from Hand Planer blades to Jointer Knives and Tersa and Bandsaw Blades too. Experienced Engineers and Staff make sure our customers get the best value for product for long term association. Proper systematic warehousing ensure the right product reaches you in timely fashion.
Bandsaw’s being such a versatile tool has become an integral part of any woodworking. Any respectable wood shop has one. So Whatever your saw, it is only as good as the blade you put in it, so always use the best – and at the correct cutting speed too of course! . Apart from the Standard Band saw Blade sizes available in our online shop we also make and deliver huge range of Custom Bandsaw Blade sizes for those very niche market at lowest cost possible, all it takes is an email giving us the details. Using the correct size of blade ensure’s optimum performance of your bandsaw. If you don’t have a manual and there is no marking on the machine, you can use this formula to determine the blade length you need. Set the pulleys or wheels in working position; Measure the center to center distance of the drive wheels.(C) ;Measure the radius of the upper and lower drive wheels. (R1 & R2). Using this balde length can be calculated by below formulae.
Blade Length = (R1 X 3.146) + (R2 X 3.146) + (2 X C)
Another parameter we use width but really it comes down to two things: The maximum capacity your bandsaw can accommodate and the minimum radius you want to cut. If you are doing re-sawing, cant or cut-off sawing, use the maximum blade width for nice and straighter cuts, you’ll get a decent feed rate without breaking blades. On the other end of the scale, if you do contour sawing, you will want to use a blade that is narrow enough to cut the desired radius. Select from wide array of width from 1” to ¼” Wide blades.
Getting a balance between a good finish and a decent feed rate are the two objectives in determining how many TPI or teeth per inch you want. 6-8 range is a good ‘general purpose’ blade. 2 or 3 TPI for re-sawing and thicker materials. 4 to 6 TPI for coarse, fast wood cutting duties in typical 3/4″ material a range of between 14 TPI for slower, smoother cutting. 18 – 32 TPI for thinner metals and plastics under 1/4″.
We always have Bandsaw blades in stock, you are assured of a prompt delivery. Learn more about our possibilities? Please feel free to contact us. We Usually ship within one day for of the shelf Product sizes making one of the fastest shipping worldwide , Express deliveries at additional cost which can be calculated on our checkout page.
0 notes
Text
How To Use Your Router Table As A Jointer
Last updated: March 13, 2017 at 12:12 pm
Whether you are looking to use your router table as a jointer because you simply can’t afford a jointer, or are looking for a way to utilise your router table more, then this guide will help you to achieve that. It will walk you through step by step, explaining what happens at each step, in order to setup your router table to work as a jointer.
Jointing is always one of the first steps when it comes to preparing a material for joining. Before using a planer, it is recommended that the wood is properly jointed. If you are not in possession of a jointer table, then a quality job can still be completed by using your router table. The idea being that the router table will be used in the same way you would with a jointer.
The Steps
It is a very simple process to setup your router for jointing edges, follow the steps below to have your router jointing edges quickly and easily.
1. Unplug
The first thing which should be done before changing any tools, is to unplug the router table. This prevents any accidental movement when working with the tool bit, preventing any harm coming to you or those helping you.
2. Tool Bit Selection
Second step is to choose the router bit you will be using to create the jointed edges, there is a huge range of bits available to purchase, however it is better to use a flush trim bit as these have been known to give the best results.
There are 3 main choices for that perfect jointed edge, we recommend using either a 4 degree sheer angle, a straight bit with no angle or a three quarter inch flush trim bit. The idea behind using these sheer angle bits is that it can carve the wood from stock rather than shaving it off like a jointer blade would.
Note: Larger diameter bits will deflect less, helping to give a smoother and steadier cut.
3. Adding the Bit to the Router
Once you have selected the type of bit you think best suites your needs, it is time to place the router bit in the router. Once you have placed in the bit, raise it so that it is just above the thickness of the wood you are attempting to joint.
4. Offset the Fence
In order to use the router table as a jointer, it is important that you offset the router’s fences so that they are uneven. In most cases, it is best to offset the infeed fence, as this will give a cleaner edge when running the wood passed the router bit.
Setting the router to a small offset will help give you better accuracy when passing the wood through, although this may take more passes, it is better to have more control over the amount shaved off each time.
If your router table is flat and doesn’t contain fences, then it is super simple to setup fences. You will need a piece of plastic laminate, and a straight edge. When looking at a jointer, you can see that it has an out feed which is set to the height of the cutter and has an adjustable infeed table. The out feed being used to support the cutting piece and the infeed to set the amount of material the blade cuts.
This offset created between the infeed and out feed tables can be created by attaching a piece of plastic laminate to the out feed of the router table. Creating a slight bevel on one end of the laminate will simply allow the material to pass over the plastic without catching. We suggest using carpet tape to hold the laminate to the fence, this will prevent there being any inaccuracy between the bevelled end and the cutting edge.
5. Bring the Fences Closer To the Cutting Bit
For a better quality cut, it is best to bring the fences closer to the cutting blade, this will help produce a more smooth edge with each pass. The important thing to note is that the fences shouldn’t touch the blade, but should be as close as possible.
6. Testing the Cut
The next step is to get a piece of scrap wood and test the overall cut of the router table. This testing phase will help you to figure out whether you need to move the fences more or change the height of the cutting bit.
Place the rough side of the wood against the infeed fence and with the router turned on, pass it through the cutting bit, this should now create a smooth edge. The outfeed fence, will help to support the cut piece, which means that the entire piece of wood will be stable. Allowing for a nice and clean, square jointed edge.
7. Adjustments
Take a look at the test board which you have just passed through the router table, is it a clean, straight and square cut? If not then a few adjustments need to be made to both the fences and the cutting blade to ensure that you get the best cut possible. Once you have done this retest using the method in Step 6, repeat until you have the best cut possible from your equipment.
8. Actual Use
When it comes down to using the router to smooth the edge of the wood, it can be used in the same way you would use the router to perform any other operation. Keeping the base of the wood flat upon the table, moving the wood with a slow and unforced feed rate, this will help to reduce splintering or denting the wood.
youtube
Conclusion
Using a router table as a jointer is great for those people who are working in a tight space, meaning that there is no room for any additional equipment, or those who are on a tight budget. The only disadvantage to using a router table in this way is the time it takes to ensure that the fences are setup with the correct offset. Depending on the type of router table you have, for example if you are in possession of a Rockler router table, this whole setup will be quick and stress free.
When it comes to using a router as a jointer in the long run, it is not a sustainable method. This is due the bits used and how the jointing of wood can cause blunting of the bit’s blades. However, this method will still allow you to produce edges which are ready to be glued but, it is still recommended that you purchase a dedicated jointer table if you are looking to joint wood on a regular basis.
The post How To Use Your Router Table As A Jointer appeared first on Best Router Table Picks.
from Best Router Table Picks http://ift.tt/2mD27fU
via IFTTT
0 notes
Video
youtube
8 Best Jointers 2019 | Jointer Reviews 📌Updated Ranking👉👉https://ift.tt/2R42NuH The Included Items are, ✅8. Shop Fox W1744S 12-Inch Jointer with Spiral Cutterhead ✅7. WEN 6560T 6 in. 10 Amp Corded ✅6. Powermatic 1610082 PJ-882HH 8-Inch ✅5. Cutech 40160H-CT 6" Bench Top Spiral ✅4. Grizzly G0725 6 by 28-Inch Benchtop Jointer ✅3. Powermatic 1791317K 54HH 6-Inch Jointer ✅2. JET 708457DXK JJ-6CSDX 6-Inch ✅1. Festool 574447 XL DF 700 Domino Joiner Set 📌Updated Ranking👉👉https://ift.tt/2R42NuH You will get update for the top products list in our website. 🔶Like this video🔶8 Best Jointers 2019 | Jointer Reviews►►https://youtu.be/wujEADUJwho ▶️▶️Watch 7 Best Jack Stands 2019 | Jack Stand Review►►https://youtu.be/fgNAw7wSV-4 ▶️▶️Watch 8 Best Arc Welders 2019 | Arc Welder Review►►https://youtu.be/vrzcmJqiY8w ✅Our Website►►https://ift.tt/2NjDqka ✅Subscribe this Channel►► https://goo.gl/qnzg6x 🔔 Stay updated! by Best Reviews
0 notes
Link
Hello, Looking for the detailed review of Best Jointer? We have tried to show the details in this Review. You can decide which Jointer you should buy and which one is good for you, After reading this exclusive review. Our dedicated team research web and read lots of real user review before creating our top list. You can also find the full text review in our website easily by visiting the link above. You will also find the buying guide for this particular products in our website. Here is the list of 5 Best Jointer. 01. Powermatic 1610086K Model 60HH 02. Delta Power Tools 37-071 6 Inch MIDI-Bench Jointer 03. JET JJP-12 12-Inch Jointer Planer 04. JET 708457DXK JJ-6CSDX 05. PORTER-CABLE PC160JT Variable Speed 6" Jointer If you like our video please share it with your friends and also subscribe to our channel for more update. Thanks!
0 notes
Link
Hello, Looking for the detailed review of Best Benchtop Jointer? We have tried to show the details in this Review. You can decide which Benchtop Jointer you should buy and which one is good for you, After reading this exclusive review. Our dedicated team research web and read lots of real user review before creating our top list. You can also find the full text review in our website easily by visiting the link above. You will also find the buying guide for this particular products in our website. Here is the list of 5 Best Benchtop Jointer. 01. Jet JJP-10BTOS 10-Inch Bench-Top Jointer/Planer 02. Grizzly G0725 6 by 28-Inch Benchtop Jointer 03. Shop Fox W1829 Benchtop Jointer 04. WEN 6560 10-Amp 6-Inch Benchtop Jointer 05. Delta Power Tools 37-071 6 Inch MIDI-Bench Jointer If you like our video please share it with your friends and also subscribe to our channel for more update. Thanks!
0 notes
Last Seen Blogs

f-diaper
えふコレ|@f_diaper Underwear Collection

barrychannel131
Barry channel

susukisan-blog1
Без названия

crabbbbbb
Cangrejo蟹

millenniumfilmjnl
Millennium Film Journal