#The reassembly is now documented should anyone else ever need to fix one of these
Text
Merffet's Polar Cube reassembly
Meet my new blorbo, The Cube
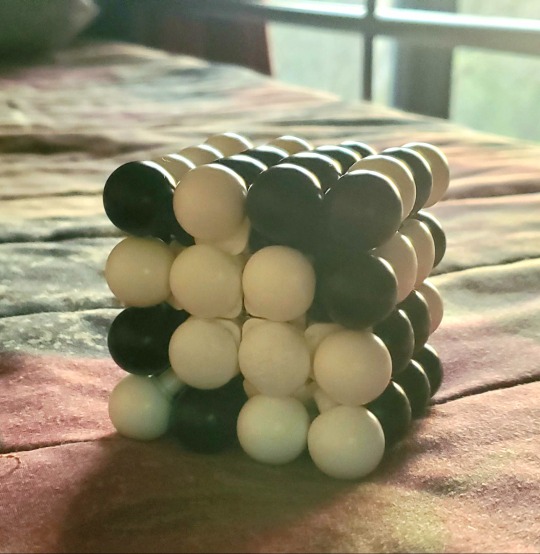
A fidget/puzzle that was on my Christmas list since I couldn't stop playing with the ones at the shops, I took it around with me for like a week.
It's like a rubix cube, but you've got to make the colours alternate.
Sadly, it has been giving me some trouble.
It kept jamming up, despite my attempts to lubricate it, or adjust it using the hidden screws. So I took the plunge and took it apart.
Loosen the top screw enough, and soon the cube was no more.
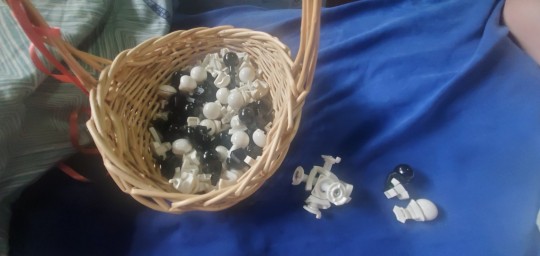
I couldn't find any guides to this cube online, so I'm making this all up as I go. I carefully noted which parts where where as I pulled it to bits.
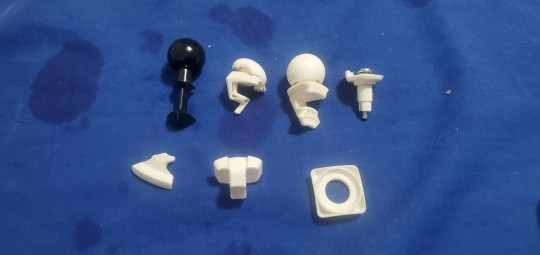
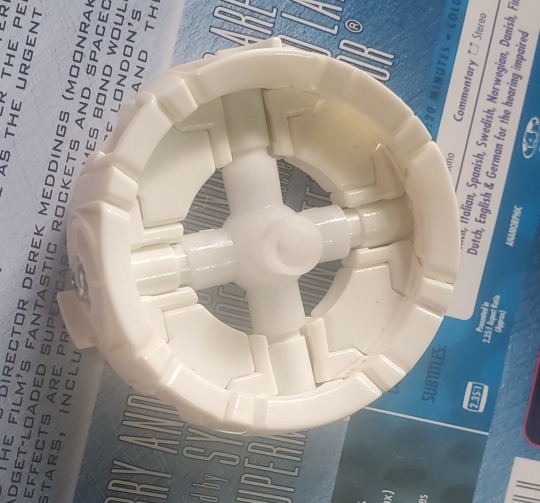
These are the parts I found inside:
Corner
Center
Edge
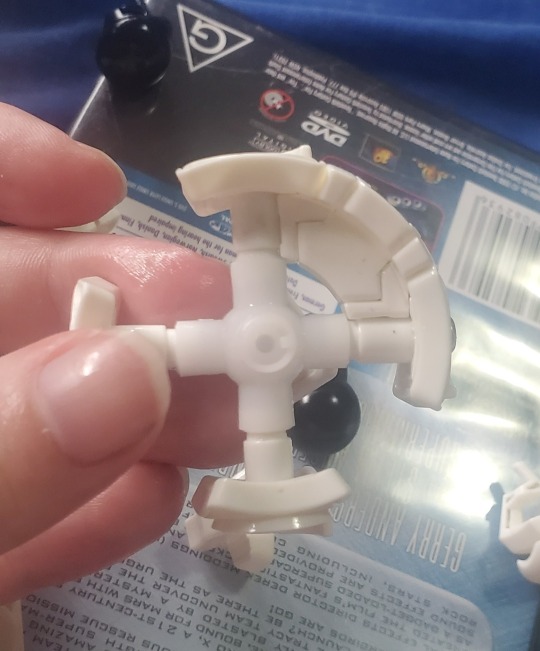
Core attachment link
Inner track bracket
Outer track bracket
Center piece frame
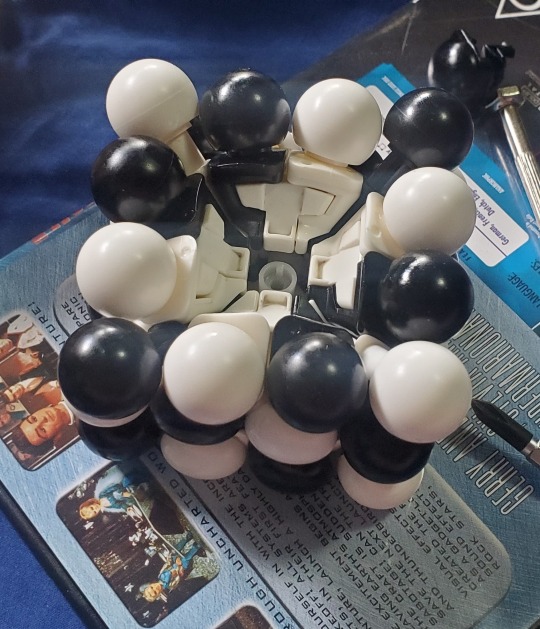
Seeing the cube completely in pieces, after many earlier attempts to fix it, almost makes you want to throw everything out, buy a new cube, and pretend nothing happened.
But I persisted.
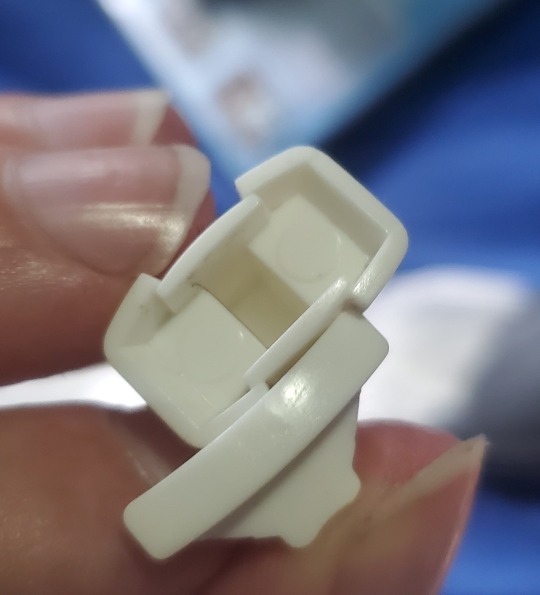
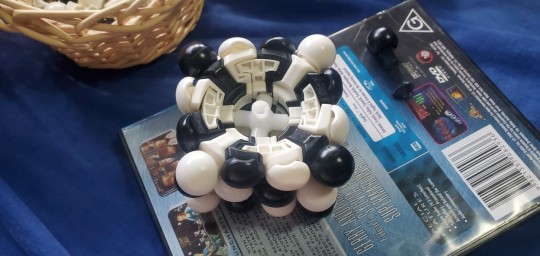
I needed to find a place to start. Eventually I managed to wiggle two inner and one outer bracket between two parts of the core.
You can also see the little mark which the core attachment point must line up with.
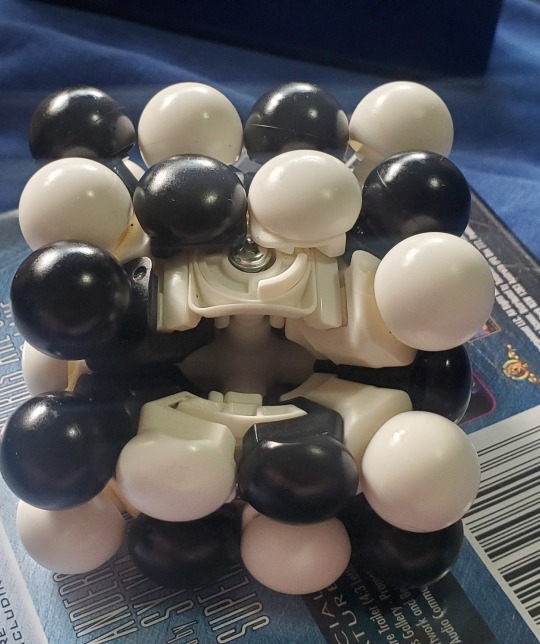
To get the rest in, I had to turn the core plate just slightly. It helps to accept that these parts are intended to slide past each other, and a little unevenness won't cause everything to instantly come undone.
The little gaps in the side seem to be there so you can squeeze the two brackets tight enough that they slip into the gap where eventually, they will sit tight.
Now I have something firmly attached to the core, and that is enough to really get going.
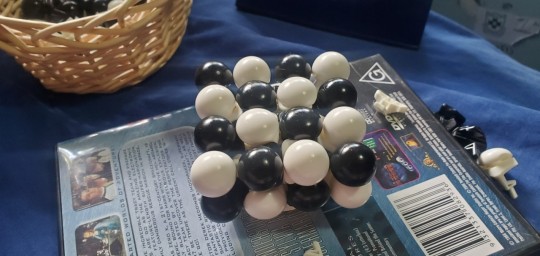
Doing the first layer of ball segments was just a matter of placing them in the right order and orientation:
I also added the brackets.
(I did do the layer below as well, but that fell off later, so we shall ignore that for now)
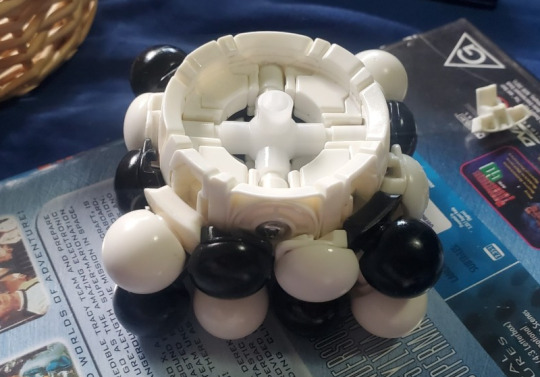
Now the top layer, just got to add the inner brackets and center link,
Then i have to wiggle on the center pieces. The screw needs to be loose enough that can sort of hook them under the plate.
I've left a gap, because the last edge segment and corners need to be jammed in there somehow...

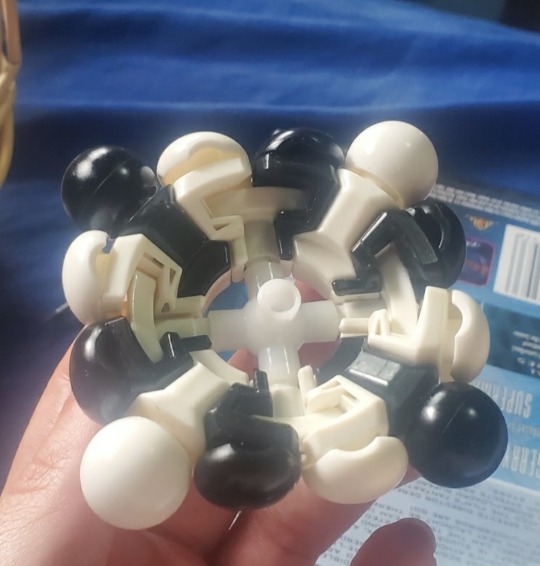
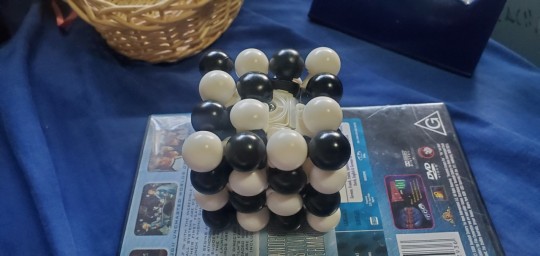
And that's one side done!
Now for the other, which should be much the same
First layer,
Top layer, this time you can see the brackets, ready for me to slip the central link in,

I use a poking tool (awl) to reposition these, when the center pieces go in it helps to be able to slide them to the side so there's more gap to slide the pieces in.
This time I did the last center pieces last, and put the edge in first.
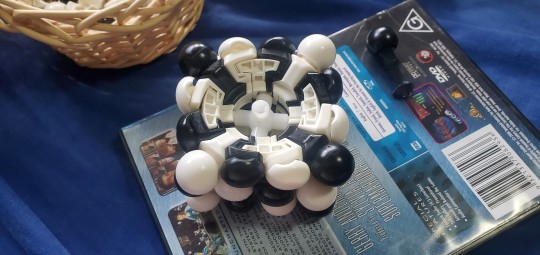
Just got to wiggle in the last pieces, and,
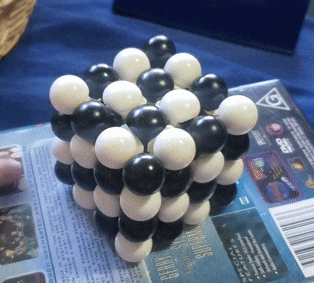
I am done. I also have the puzzle solved, because I needed to make sure it would still be solvable. It's still a little stiff in parts, but now everything is moving again.
I still haven't solved it the normal way.
#The reassembly is now documented should anyone else ever need to fix one of these#look at me using my blog like an actual blog#i did look up videos of 4x4x4 rubix cube reassembly which ha similarities but they weren't the same#i also took the opportunity to clean out all the bits of hair and dust that had got stuck in there - having took this cube with me while#working with children#giving a speedcuber kid a go probably didn't help it's condition#some of the center balls would come of their tracks and the corner got impacted inwards one time#this is hardly the first repair. i had to go on a bit of a run around while on a youth camp to find the guy who could let be use the tech#team's toolkit#anyway this full reassembly took most of the morning. i could probably do it faster now i know how#but i am in no rush to do it again#puzzle cube#puzzle#rubix cube#cube#merfferts puzzles
1 note
·
View note
Last Seen Blogs


fontheight25
The Journaling of Rafn 627

kylervlyk734
The great blog 9290

calamitous-magpie
just a mischievous little fellow

careerbuilding
Career Building