#2009 mac mini ram upgrade
Text
2009 mac mini ram upgrade

#2009 mac mini ram upgrade upgrade#
#2009 mac mini ram upgrade pro#
#2009 mac mini ram upgrade plus#
#2009 mac mini ram upgrade mac#
To open the Mini up, you need the stupid putty knife method - the person who designed this case is a complete idiot. Touch some metal objects to discharge any static. Now shutdown the computer and remove all peripherals and power leads. Reboot the machine holding alt (the alt-key on the new keyboard works finally) and make sure you can boot from the external drive. Download Carbon Copy Cloner (CCC) or SuperDuper - I used CCC - and clone your internal onto the external drive. Format the external drive as GUID partition map (important!) and HFS+ Extended Journaled with disk utility. When you get all the parts, put the drive into the enclosure and plug it into your new machine, which you should have setup (don't setup Bootcamp yet though).
#2009 mac mini ram upgrade mac#
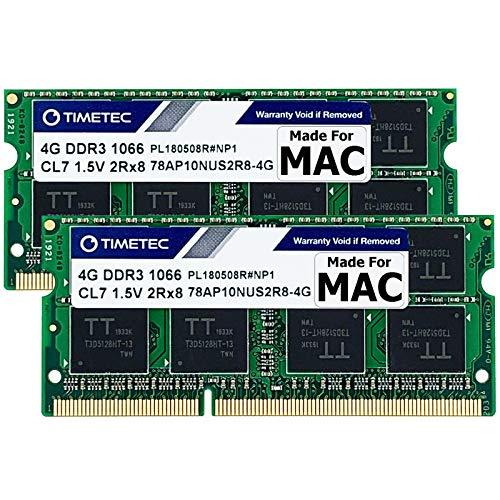
I also got a cheap Mac compatible 2.5" SATA enclosure from ebay for under £10: I opted for 4GB RAM (check Crucial for the right kind) and a 250GB 7200rpm Hitachi Travelstar hard drive (they are supposed to be quieter than Seagates and I can verify they are pretty quiet).
#2009 mac mini ram upgrade upgrade#
What you will need to do first of all is buy your upgrade parts.
#2009 mac mini ram upgrade plus#
What I did was upgrade to 4GB Ram and a 250GB 7200rpm drive for £630 plus I can get £50 back, which I'll explain so overall £580 The 4GB Ram upgrade costs £120 and a 250GB 5400rpm drive is £80. The base Mini is 2GHz Core 2 Duo for £499. If you're not sure about it, pay an Apple Certified Tech to do the upgrade for you but then you won't save much money.Īpple's upgrade prices on the Mini are quite expensive so this can save you some money. There are actually no stickers inside that you have to break to change the RAM or HDD and I didn't find it to be all that bad. If you plan on upgrading yourself, doing any damage inside can void your warranty. Learn more about the new iMac on the Apple site.I thought I would provide a few tips for upgrading the 2009 Mac Mini, which some guides don't cover fully. Delivery will begin the second half of May. You'll be able to pre-order the new 24" iMac next Friday at 8 AM EDT. It's an easy decision that will future-proof your system and deliver performance gains as well. For the top-tier iMac, which already has 512GB of storage, that means spending $200 to increase it to 1TB. That's why I recommend you spend your upgrade money on doubling your SSD storage. Also, if your SSD is full, that means your system can't swap out some of that memory to boost performance as needed. Sure, you can plug an external SSD into one of the Thunderbolt ports for fast transfer (and I'll have a list of excellent ones for you in the near future) but it's not as fast as on-chip storage. While upgrading your storage drive was possible (albeit difficult) with previous iMacs, it's impossible to do so with the new M1 chips. Even offloading storage to my iCloud Drive, I've still nearly filled the entirety of my 1TB SSD drive. While you might not need more than 8GB of unified memory in your new iMac there is one thing that you should immediately upgrade when you configure your new machine.Ĭhances are your current system's storage is already bursting with documents, images, movies, and apps. But your money could be spent better elsewhere. If you have the money, there's no reason to not upgrade. For most users 8GB is going to be more than enough for day-to-day computing tasks. With a unified memory upgrade being so cheap, you might wonder why I'd recommend not spending the money. This number is far from the wallet-blistering Apple-tax that upgraders used to pay for factory RAM. You can upgrade to 16GB for a measly $200. However, if you're editing large 4K videos or doing other extremely intensive tasks, you might benefit from additional unified memory in your system.
#2009 mac mini ram upgrade pro#
Reviews of the first M1 systems (the MacBook Pro and Mac Mini) show that Apple has finally been able to create a system with a base of 8GB of RAM that not only performs well but outperforms previous systems with twice as much RAM (also, it's called "unified memory" now). Everything just works together and borrows processing from each other as needed. The CPU and GPU aren't both trying to access data pathways on the logic board. There's no memory swapping or rewriting of data between your RAM and SSD. The M1 chip can dynamically use whatever it needs, from whichever component it needs, instantaneously. Having everything on a single chip changes that fundamentally. RAM is a system's short term memory and having lots of it means you can do more and larger tasks simultaneously without slowing things down. Traditional thinking has always said, add as much RAM as you can afford. But the more I researched the new M1 chip and how it's performed in the new MacBook Pro and Mac Mini, the less concerned I was. As someone who falls into that category, I expected to be more upset at the change.
0 notes
Text
2010 macbook pro 13 ram

#2010 macbook pro 13 ram mac os x#
#2010 macbook pro 13 ram install#
#2010 macbook pro 13 ram upgrade#
#2010 macbook pro 13 ram portable#
#2010 macbook pro 13 ram pro#
Video out: Mini DisplayPort (VGA and DVI video supported with optional adapters).
VRAM, Intel HD: used 256 MB of system memory.
Graphics: Intel HD Graphics and Nvidia GeForce GT 330M with automatic graphics switching.
RAM: 4 GB, expandable to 8 GB using DDR3 SO-DIMMs.
Level 2 cache: 3 MB shared cache on i5 4 MB on i7.
#2010 macbook pro 13 ram upgrade#
CPU: 2.53 GHz i5 or 2.66 GHz i7, soldered in place, no upgrade options.
#2010 macbook pro 13 ram mac os x#
Mac OS X 10.6 Snow Leopard compatibility.
macOS 10.14 Mojave and later are not supported.
requires Mac OS X 10.6.3 Snow Leopard or later.
introduced 2010.04.13 at US$2,299 add $200 for 2.66 GHz i7 build-to-order option add $50 for anti-glare option replaced by Thunderbolt model 2011.02.24.
#2010 macbook pro 13 ram install#
PowerPC Macs won’t let you install OS X to a USB drive or choose it as your startup volume, although there is a work around for that. Power PC Macs running any version of the Mac OS prior to 10.4.2 cannot mount GPT volumes. Both PowerPC and Intel Macs can boot from APM (Apple’s old partitioning scheme) hard drives, which is the format you must use to create a universal boot drive in Leopard. Only Macintel models can boot from GPT hard drives. Intel-based Macs use a partitioning scheme known as GPT. This will wake up your ‘Book and restore use of the built-in display. To resume use of the internal display, you need to disconnect the external display, put the computer to sleep, and then open the lid. Since all video RAM is now dedicated to the external monitor, you may have more colors available at higher resolutions. The built-in display will remain off, and the external monitor will become your only display. Your ‘Book will go to sleep, but you can wake it by moving the mouse or using the keyboard. Power up your ‘Book until the desktop appears on the external display and then close the lid. To used closed lid mode, your ‘Book must be plugged into the AC adapter and connected to an external display and a USB or Bluetooth mouse and keyboard (you might also want to consider external speakers). If a second high-powered device is attached, it will behave like a normal bus-powered hub and only provide 100 mA per downstream port.Ĭlosed Lid Mode: All Intel ‘Books support “lid closed” (or clamshell) mode, which leaves the built-in display off and dedicates all video RAM to an external display. Unlike pre-2007 models, where every USB port could provide 500 mA of power, only a single high-powered device can be attached to the USB ports, and software will enable one of its downstream ports to supply 500 mA of power. At this time we do not know if it applies to the new model.
#2010 macbook pro 13 ram pro#
This is the oldest MacBook Pro to officially support macOS Sierra.Įditor’s note: The next paragraph is from the profile of the previous version of the MacBook Pro. This is the only current Mac notebook with ExpressCard/34.Īpple uses a true 24-bit display on all 17″ Unibody MBP models. Only the new 13″ MacBook Pro beats it.Īs before, 4 GB of RAM is standard, and it officially supports up to 8 GB of RAM. The new 17″ MacBook Pro retails at $200 less than the previous model, and you can get an antiglare display for an additional $50.Īpple has also improved overall field time – the 95 Watt-hour battery is rated at 8-9 hours of wireless productivity, a big improvement from 8 hours in the 2009 model. The Intel GPU uses 256 MB of system memory, while the Nvidia GPU has 512 MB of dedicated video memory. The other big change comes in the graphics department: These are the first Macs to use Intel HD Graphics – and the first to use Nvidia’s automatic switching GeForce GT 330M GPU. You can’t compare the new i5 and i7 models with previous ones by looking at clock speed, as they are not single clock speed chips. For instance, a 2.53 GHz i5 may outperform a 3.06 GHz Core 2 Duo.
#2010 macbook pro 13 ram portable#
These CPUs brings something new to Apple’s portable line, hyperthreading, which lets the dual-core CPU appear to the operating system as four cores.Ī further advantage of Intel’s “i” family of CPUs is that they can overclock themselves by 25% or more depending on the number of cores and processes in use. However, because they use the mobile Intel i5 and i7 CPUs instead of the older, less efficient Core 2 Duo chips, they are more powerful despite lower clock speeds. The 15″ and 17″ Mid 2010 MacBook Pro models have lower clock speeds than the models they replace.
0 notes
Text
Early 2009 mac mini max memory

Early 2009 mac mini max memory update#
Early 2009 mac mini max memory upgrade#
Early 2009 mac mini max memory Bluetooth#
Early 2009 mac mini max memory mac#
Early 2009 mac mini max memory upgrade#
And don’t forget that ordering the upgrade from Apple is easier and means the RAM is covered under Apple’s warranty. (The $599 model cannot be upgraded to 2.66GHz.)Īpple has even made it less appealing to max out the mini’s RAM on your own: the $799 model is already flush with 4GB, and upgrading the $599 model to 4GB when you order will set you back only another $100-a reasonable price considering current prices on a 4GB RAM kit for the mini. The $599 model can be upgraded, when purchasing from Apple, to a 2.53GHz processor, and the $799 model can be upgraded to 2.66GHz each upgrade costs $150. The system bus on both models remains at 1066MHz, with the CPU hosting a 3MB Level-2 cache. All hard drives remain 5400rpm, 2.5-inch SATA drives while these drives reduce energy use and help keep the mini, well, mini, they also provide poor performance compared to larger desktop drives. The $799 model now sports a 2.53GHz processor, 4GB of RAM, and a 320GB hard drive (improved from 2.0GHz and 2GB the previous $799 model had the same hard-drive capacity). The $599 model now ships with a 2.26GHz Core 2 Duo processor, 2GB of 1066MHz DDR SDRAM, and a 160GB SATA hard drive (up from 2.0GHz, 1GB, and 120GB, respectively). Where the latest models differ from their predecessors are in processor speed, memory, and hard-drive capacity. We’ll be reviewing that model separately.
Early 2009 mac mini max memory mac#
Note that along with the new Mac mini models, Apple released a Mac mini server. However, the current minis use “less than 14 Watts of power when idle”, up slightly from “less than 13 Watts” for the previous models. Both video outputs include High-bandwidth Digital Content Protection (HDCP).Īpple continues to boast of the mini’s green credentials, this time going so far as to publish an environmental report (PDF link) that covers everything from the mini’s energy and material efficiency to its packaging to its recycling-friendly construction. Alternately, you can use Apple’s $99 Mini DisplayPort to Dual-Link DVI Adapter to connect a 30-inch Cinema HD Display ( ). The Mini DiplayPort jack works directly with Mini DisplayPort-equipped displays (such as Apple’s 24-inch LED Cinema Display ( ), or even the latest iMac models, which can be used as a display) you can also connect a standard DVI display using Apple’s $29 Mini DisplayPort to DVI Adapter.Īs with the early-2009 minis, you can connect two displays simultaneously and use either extended- or mirrored-desktop mode. (The $599 early-2009 mini shipped with only 1GB of RAM, which limited the 9400M to only 128MB of video memory.) The 9400M again drives two video ports: a mini-DVI port that uses an included adapter to connect to standard DVI displays, and a Mini DisplayPort connector identical to those found on the current iMacs and MacBooks. Like the early-2009 models, the latest minis include an Nvidia GeForce 9400M video processor however, this time around the 9400M takes advantage of up to 256MB of main memory on both models.
Early 2009 mac mini max memory Bluetooth#
(Apple told Macworld that the mini uses a separate USB bus for every two USB ports USB is also used internally for Bluetooth and the infrared receiver.) You also still get 802.11a/b/g/n wireless, Bluetooth 2.1 + EDR, and an 8X dual-layer SuperDrive. Each continues to offer a gigabit ethernet port, FireWire 800, five USB 2.0 ports, digital/analog (auto-sensing) audio input and output minijacks, a security lock slot, and an infrared receiver for the optional Apple Remote ($19). Both models remain 6.5 inches square and 2.0 inches thick, weighing just under 3 pounds each. The latest Mac mini revisions-which Apple labels Mac mini (Late 2009) this time around-offer comparatively minor improvements at the same price points.
Early 2009 mac mini max memory update#
But that update was the most significant in the history of the line while the two models retained the same $599 and $799 price tags as their 2007 predecessors, nearly every aspect of each was upgraded. Back in March, when I reviewed the previous Mac mini models-officially called the Mac mini (Early 2009)-Apple’s smallest desktop computer had just received a long-overdue refresh: it had been 19 months since the company had touched the Mac mini line.
0 notes
Text
2009 mac mini hard drive upgrade

#2009 mac mini hard drive upgrade mac os x#
#2009 mac mini hard drive upgrade install#
#2009 mac mini hard drive upgrade Patch#
#2009 mac mini hard drive upgrade upgrade#
#2009 mac mini hard drive upgrade mac#
Also why Apple leaves the low end to others, 10.6.2 fixes video playback problem in 27″ iMac, 3D Leopard and Snow Leopard performance, and more.
#2009 mac mini hard drive upgrade mac#
i5 iMac benchmarked, Mac mini ‘shouldn’t be overlooked’, Twitter client for Classic Mac OS, and more, Mac News Review, 2009.11.20.
If Apple won’t offer a midrange Mac, someone should offer a replacement chassis for the Mini with two 3.5″ drive bays.
Maximizing the Mac mini, Dan Knight, Mac Musings, 2010.01.21.
Any Mac can be upgraded, but it’s a question of what can be upgraded – RAM, hard drive, video, CPU – and how far it can be upgraded.
#2009 mac mini hard drive upgrade upgrade#
Know Your Mac’s Upgrade Options, Phil Herlihy, The Usefulness Equation, 2008.08.26.
Even with the cost of upgrades, it’s the value champion. Although the iMac is faster all around, the Mac mini provides plenty of power at half the price.
Mac mini the best value in desktop Macs, Dan Knight, Mac Musings, 2009.08.25.
We called the Mac mini ‘the best value in desktop Macs’ two months ago, and the refreshed Mac mini only improves that value.
The Late 2009 Mac mini value equation, Dan Knight, Mac Musings, 2009.10.21.
CPU can probably be replaced with a faster one.
Power supply: 110W external power supply.
no internal modem external USB modem available.
IR receiver: supports Apple Remote (optional).
SuperDrive DL: SATA, writes DVD±R discs at up to 8x speed, DL at 6x DVD±RW at 8x reads DVDs at up to 8x writes CD-R and CD-RW discs at up to 24x, reads CDs at up to 24x.
Video out: Mini-DVI and Mini DisplayPort, Mini-DIV-to-DVI adapter included, VGA with optional adapter.
VRAM: 256 MB DDR3 SDRAM (shared with main memory).
GPU: Nvidia GeForce 9400M with resolution to 1920 x 1080 (VGA) and 1920 x 1200 (DVI).
RAM: 2 GB, expandable to 8 GB using two 1066MHz DDR3 SO-DIMMs.
#2009 mac mini hard drive upgrade mac os x#
Mac OS X 10.8 Mountain Lion compatibility.32-bit booting only cannot boot 64-bit OS.Mac OS X 10.6 Snow Leopard compatibility.macOS 10.14 Mojave and later are not supported. Broadcom BCM4321 WiFi module, if present, is not supported by Sierra.
#2009 mac mini hard drive upgrade Patch#
shipped with OS X 10.6.1, requires Mac OS X 10.5.8 (may boot 10.5.6, which shipped with the March 2009 model) through 10.11 El Capitan, macOS Sierra via patch tool – see macOS Sierra on Low End Macs.Replaced by redesigned Mid 2010 Mac mini on 2010.06.15 2.53 Mac mini with Snow Leopard Server, 4 GB RAM, and dual 500 GB hard drives retails at US$999. Our Leopard Group is for those using Mac OS X 10.5 and 10.6.Our Mac mini Group is for those using G4 or Intel Mac minis.
#2009 mac mini hard drive upgrade install#
PowerPC Macs won’t let you install OS X to a USB drive or choose it as your startup volume, although there is a work around for that. PowerPC Macs running any version of the Mac OS prior to 10.4.2 cannot mount GPT volumes. Both PowerPC and Intel Macs can boot from APM (Apple’s old partitioning scheme) hard drives, which is the format you must use to create a universal boot drive in Leopard. Only Macintel models can boot from GPT hard drives. Intel-based Macs use a partitioning scheme known as GPT. Mac OS X includes support for remapping the Windows alt and option keys to option and cmd respectively. Apple says buyers can plug in their favorite USB keyboard and mouse – or buy Apple’s offerings. The Mac mini doesn’t include a keyboard or mouse. On the rear, just enough ports to do everything important. On the front, there’s just a slot-loading optical drive (and for the first time, it’s a SATA SuperDrive) and a power light. The tiny Mac mini (6.5″ square, 2″ high, 2.9 lb.) has a minimalist design. Like the Early 2009 model, this Mini has five USB 2.0 ports (up from four on pre-2009 Intel Minis), two monitor ports, and FireWire 800. The Intel-based Mac mini looks like previous models from the front, but the rear is different. And for power users, there’s now a server version with a second hard drive bay in place of the optical drive.įor those who need more processing power, you can order the Mac mini with a 2.53 GHz or 2.66 GHz CPU. Just seven months after overhauling the Mac mini, Apple made some small improvements: The base speed is now 2.26 GHz, 2 GB of RAM is the norm, and the 160 GB hard drive holds more data than the 120 GB drive found in the previous version.
0 notes
Text
Bedienungsanleitung macbook pro 13 2012 ram
BEDIENUNGSANLEITUNG MACBOOK PRO 13 2012 RAM >> DOWNLOAD LINK
vk.cc/c7jKeU
BEDIENUNGSANLEITUNG MACBOOK PRO 13 2012 RAM >> READ ONLINE
bit.do/fSmfG
macbook pro arbeitsspeicher erweiternmacbook pro 2012 ram upgrade
macbook pro 2011 arbeitsspeicher erweitern
ram macbook pro 2021
macbook pro 2021 bedienungsanleitung pdf
macbook pro 2011 ram aufrüsten 16gb
macbook pro mid 2012 16gb ram
macbook pro 2013 ram aufrüsten
Das MacBook Pro (manchmal inoffiziell abgekürzt als MBP) ist ein Macintosh-Notebook des Unternehmens Apple. Die Produktreihe wurde von Steve Jobs am 10.Bedienungsanleitung Apple MacBook Pro 13 Zoll Mitte 2009 Notebook Apple Bedienungsanleitung Apple PowerBook FireWire Arbeitsspeicher Oberer RAM 1 Auspacken. Installieren. Fertig. apple.com/de/macbookpro. Mac-Hilfe. Migrationsassistent Mehr RAM auf Ihrem MacBook Pro, iMac, Mac Mini oder einem anderen Mac? MacBook Pro: 13-Zoll-Modelle von 2009 bis 2012, 15-Zoll-Modelle von 2008 bis 2012
https://vanuxovogo.tumblr.com/post/692617661179445248/neff-tt-4380-bedienungsanleitung-w724v, https://nasanuwufe.tumblr.com/post/692617801016492032/olympus-e-520-bedienungsanleitung-galaxy, https://lafitixicupa.tumblr.com/post/692617745832017920/pg-685-handbuch-windows, https://nasanuwufe.tumblr.com/post/692617862796509184/wagner-project-115-bedienungsanleitung-huawei, https://jexogopuhusi.tumblr.com/post/692617764811194368/bosch-spi-53-m-25-eu-bedienungsanleitung-cafissimo.
0 notes
Text
Top 10 Best ram for macbook pro [2022]
Top 10 Best ram for macbook pro [2022]
1. Timetec 8GB KIT(2x4GB) Compatible for Apple DDR3 1067MHz / 1066MHz PC3-8500 CL7 for Mac Book, Mac Book Pro, iMac, Mac Mini (Late 2008, Early/Mid/Late 2009, Mid 2010) SODIMM Memory MAC RAM Upgrade
Buy On Amazon
DDR3 1066MHz PC3-8500 204-Pin Unbuffered Non ECC 1.5V CL7 Dual Rank 2Rx8 based 256×8 Module Size: 8GB KIT(2x4GB Modules) Guaranteed – Lifetime warranty from Purchase Date Free…
View On WordPress
0 notes
Text
Best Monitor For Apple Mac Pro 2010
ASUS ZenScreen MB16AC 15.6 inch Full HD Monitor This is one of the best portable monitors which can easily fit inside your gear bag.
Best Apple Monitor
I have just bought 3x apple cinema 20' displays (the old school kind) and just wanted to check if I need adaptors and which kind. I'm just unsure of what type/size/resolution requires what. And it's on my 2010 Mac pro with the stock ATI Radeon HD 5770 graphics card with 1 GB of GDDR5 memory.
Whether it's for your MacBook Pro or your Windows laptop you’re looking to buy a USB-C monitor for, the BenQ EW3270U is a great all-around choice. This 4K display delivers beautiful picture quality.
Twelve cores and twenty-four threads—that's what I'm sitting in front of. Even after owning an 8-core Nehalem Xeon Mac Pro, I just wasn't prepared for the 8 extra threads in my new shiny new 12-core Westmere Xeon Mac Pro. It's just that crazy. Sometimes, you look up at the menu bar and you think that Iran has Photoshopped extra iStat CPU bars up there, to convince you of this machine's awesome powers:
Every time that happens, I hear a Black Sabbath guitar solo off in the distance, and my mouse hand does this of its own accord:
But then the smoke machine fog dies down, and I'm left with the rest of my programs that don't cause multi-core god rays to appear. This is life with many cores.
Custom-built Mac Pro 2010 specs
Dual-socket six-core 2.66GHz Westmere Xeon Mac Pro
15GB RAM
OCZ Vertex Turbo 120GB system disk
2TB striped RAID working disk
ATI 5870 1GB
dual NEC 2490WUXi LCDs at 1920x1200
Comparison 2009 Mac Pro
Dual quad-core 2.66GHz Nehalem Xeon Mac Pro
24GB RAM
OCZ Vertex Turbo 120GB system disk
2TB striped RAID working disk
ATI 4870 512MB
dual NEC 2490WUXi LCDs at 1920x1200
Both machines are using the same hard drives—I reformatted the system disk and put it in the new Mac Pro after running the benchmarks on the 2009 Mac Pro.
The Hardware
The 2010 Mac Pro now comes with an 802.11n Wi-Fi card by default. I always use wired, but this was a dumb thing to make an upgrade because there are times you find you need wireless. The new Mac Pros also come with the magic mouse.
Advertisement
There isn't much else to say about the 2010 internals that wasn't said already in my 2009 Mac Pro review. That's no complaint—the internals of this machine are great, and not much was in need of revising. It's still the easiest Mac ever to upgrade, and all the goodies like the thumbscrew PCI card block are still there:
The memory bay count of eight is still unchanged, so users need to be careful not to fill them for the sake of filling them. My 15GB RAM allocation may seem gross as a number, but it's the proper pairing:
Combining three 1GB with three 4GB modules means that the memory is in running in triple-channel mode. Filling all eight slots wouldn't be the best way to go.
The ATI Radeon 5870
Since I do 3D work, I upgraded from the Radeon 5770 to the Radeon 5870. On a purely aesthetic level, it's a beautiful design:
The 5870 has three outputs: one dual-link DVI and two mini DiplayPorts, so it should drive three screens with resolutions as high as the 27' that Apple just released. I wanted to test it with three LCDs, and thought it would work without any hitches, since my triple 1920x1200 screens are on the conservative side. After receiving a second single-link mini DisplayPort to DVI adapter, I've only been able to use two and, it seems, this is not a bug. If you want to connect to DVI displays (no matter the resolution), you have to use the more expensive mini DisplayPort-to-dual-link-DVI adapters. Apple's docs covering this issue are here:
Best Apple Monitor
Just when I was beginning to like mini DisplayPort...
1 note
·
View note
Text
Where To Download Mac Os High Sierra Dmgwizardstree

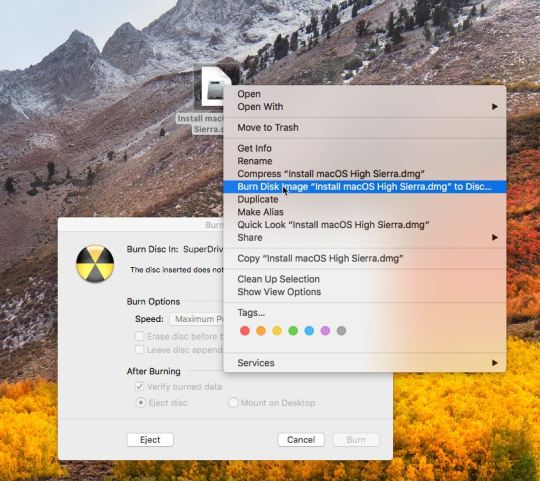
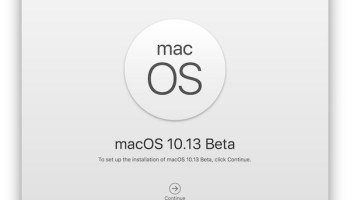
Question: Q: Mac Os high sierra to Mac Os Catalina I am currently running Mac Os High Sierra and am trying to upgrade to Mac Os Catalina. When I try to download it from the app store it won't download. How to install macOS High Sierra on Mac for free. Apple announced their new MacOS High Sierra Download links for all who want install lates MacOS Sierra version on their Macs. It's very nice, because lots of Mac owners want try new features and specs on new OS X. How to install MacOS High Sierra on Mac. Today you can do it now.
How to install macOS High Sierra on Mac for free. Apple announced their new MacOS High Sierra Download links for all who want install lates MacOS Sierra version on their Macs. It's very nice, because lots of Mac owners want try new features and specs on new OS X.
How to install MacOS High Sierra on Mac. Today you can do it now.
Updated new cool method:
1) Download developer profile (free) LINK
2) Open terminal
sudo /System/Library/PrivateFrameworks/Seeding.framework/Versions/A/Resources/seedutil enroll DeveloperSeed
3) Paste command and give password
4) macappstores://itunes.apple.com/app/id1209167288 open this link in safari
5) Click Download
Old complete method:
1. Download MacOS High Sierra
via torrent or dirrent links, open the .dmg
2. Right-click the .app - 'Show Package Contents'
3. Open (mount) InstallESD.dmg, located along the path of 'Install ...app / Contents / SharedSupport /'
4. From the contents of the OS X Install ESD open (mount) BaseSystem.dmg (default BaseSystem.dmg Basesystem.chunklist and hidden. Use the utility 'ShowAllFiles').
5. Run Disk Utility and expand BaseSystem.dmg on the flash drive formatted GUID (the 'Options') and Mac OS coffee (HFS +)
6. Copy the folder OS X Install ESD / Packages folder on the flash drive in the / System / Installation / replacing the file alias Packages.
6. Copy to the root of the stick and BaseSystem.dmg Basesystem.chunklist of Install ESD
Where To Download Macos High Sierra
If you do not - get an error Undefined error: 0 at the very beginning of the installation!
7. Backup
8. Reboot while holding down Alt. Choosing our stick. If necessary, after Disk Utility to erase partitions. We put the system.
9. Now you can install macOS Hign Sierra on your Macs.

We strongly recommend that you make a backup copy to an external drive or using Time Machine before installing last version macOS.
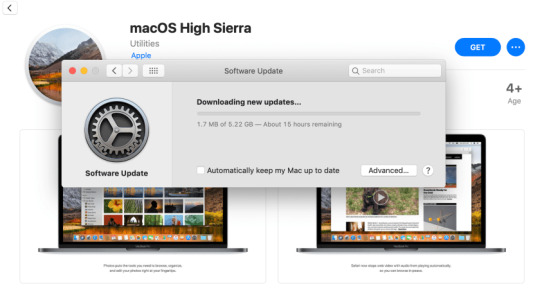
macOS High Sierra is the fourteenth major release of Apple desktop operating system for Macintosh PCs. For the first time, macOS High Sierra was announced at the Worldwide Developer Conference 2017. Finally, the full version was released on September 25, 2017. The name of the macOS High Sierra was taken from a beautiful place located in America California. Also, macOS High Sierra’s latest version code is 10.13.6. This brings many latest features including a new brand file system. The other feature like lots of changes on the Photos App for better editing. Almost, fastest Safari App up to 80% then Google Chrome, the moment of macOS High Sierra.
Download macOS High Sierra 10.13.6 DMG file – Full
When macOS High Sierra released included much bugs, and by the passage of time fixed. However, after macOS High Sierra macOS Mojave released. And now its 2019 and comes time to macOS Catalina 10.15. Now suggest you install macOS Catalina on your PCs because like Windows 7 it might not be safe. macOS Catalina is included many beautiful features than the old version of the macOS operating system.
Furthermore, macOS High Sierra comes with higher internet revel, easily open your favorite website, manage emails, and many other things. The following macOS High Sierra supports the below computers to install.
iMac late 2009 or later
MacBook late 2009 or later
MacBook Pro 2010 or later
MacBook Air 2010 or later
Mac Mini 2010 or later
Mac Pro 2010 or later
For the installation, it requires at least 2GB RAM and at least 15GB of storage.
iMac 2015 or later, Mid 2017 or newer
MacBook Early 2015 or later
MacBook Pro 2016 or later
iMac Pro 2017
MacBook Pro 2016 or later
iMac 2017 or later
iMac Pro 2017
Where To Download High Sierra Dmg
Related:(Ultimate Guide) Install macOS Big Sur on VirtualBox on Windows PC
macOS High Sierra 10.13.6 included features
There are some features of macOS High Sierra 10.13.6 in the below listed. If you got interesting then read it. Also, if you are not familiar with macOS High Sierra features read this.
Improved security and performance in macOS High Sierra 10.13.6
Split to work with multiple programs
Multiple security enhancement and background improvements
Better switching between programs details
A power search spotlight for searching internal language
Related:Download macOS High Sierra ISO for VMware & VirtualBox
Download macOS High Sierra 10.13.6 DMG file
Where To Download Sierra Dmg

You can download the macOS High Sierra DMG file from different platforms. But indeed we have prepared the file and ready for you to download. Here’s the file.
Get the Latest Version macOS Images by Joining our Patreon
Get without password and easy to access and latest version of macOS files on our patreon.
If there’s some problem with downloading, you may fix it with the steps below.
Where To Download Macos High Sierra Dmg
If you are interested to install macOS High Sierra on VirtualBox and VMware Workstation on Windows PC. Then you have to download the VMDK File from the below-given link.
The installation process on VMware or VirtualBox is pretty easy. But again if you don’t know that, don’t worry we covered the installation process for you. Check the below link.
Final Point
That’s all about macOS High Sierra 10.13.6 DMG file. However, if there is something then feel free to share with us below in the comment section. In addition, your feedback is a big support for us to share your feedback about this article.
1 note
·
View note
Text
Dosdude Patcher

Dosdude Patcher Tool Big Sur
Dosdude Patcher Catalina
We talk about a lot of new version of macOS, like Big Sur or Catalina, which is now packed with many amazing features. However, they need to more advanced hardware to run the OS smoothly. If you are using an old model of Mac computer, High Sierra is still the best choice if it was not eligible for upgrading to Catalina or Big Sur.
I'm using the patcher on a properly modified iMac 7,1. I am able to install Dosdude's Catalina without a problem, and I just today installed the latest version with the latest patcher, but no matter which version I install my 'About this Mac' shows only 10.15, never any of he updated versions (10.15.1.10.15.6, etc.) Dosdude has no answer.
Depending on your version of the patcher, a SIPManager.kext or patched boot.efi force-disables SIP at a low level, no matter the state in NVRAM. (dosdude1 and myself recently created the latter solution as a hack-y workaround when the former stopped working, but it's hopefully temporary.) 2.
Currently, Apple only offers High Serria Installer app from Mac App Store. This means you can only create a bootable macOS USB on Mac. It could be a problem if you are trying to build a hackintosh on Windows PC. You need macOS High Serria this way. Don't worry, we will give you the result in this article.
Hardware Requirement of macOS High Serria
OS X Yosemite on Unsupported Macs. MacOS Extractor, OS X Patcher, and MacPostFactor are apps that guide you through patching and installing OS X El Capitan (10.11), Yosemite (10.10), Mavericks(10.9), or Mountain Lion (10.8) on your older Mac. Sierra Patcher Dosdude. The copy will complete successfully. Finally, go to System Preferences - Startup Disk and select your new drive and restart. The first restart may take a little time as your boot files load for the first time. High Sierra Patcher Tool. You can confirm your successful RAID 0 in Disk Utility.
Before downloading macOS High Serria DMG file, it is crucial to know what kind of hardware specification it requires. It is useless and waste of time if the model was not matched. Please check out the list of Mac models that can run macOS High Serria without any problem.
MacBook Pro in mid 2010 or later.
MacBook in late 2009 or later.
MacBook Air in late 2010 or later.
Mac mini in mid 2010 or later.
iMac in late 2009 or later
However, if you want to run macOS High Serria from PC, the CPU should Intel Core i5 and above; RAM should be more than 4GB and free disk space should be 50GB.
Direct Download Link of macOS High Serria DMG File
Below is a set of verified download links for High Serria (macOS 10.13). Click the link one by one and find the best site where gives you the fatest download speed. In addition, some of the download sites requires account login. So you may need to register a new account before download starts.
macOS High Sierra 10.13.6 DMG Download: https://www.mediafire.com/folder/5dvx88
macOS High Sierra 10.13.1 DMG Download: https://sundryfiles.com/8zr
macOS High Sierra 10.13.6 DMG Download (Torrent): https://mactorrents.io/macos-high-sierra-10-13-6-build-17g65/
macOS High Sierra 10.13 DMG Download (for Hackintosh): https://mega.nz/file/lnRQGaCA
macOS High Sierra 10.13.6 ISO Download: https://sundryfiles.com/9tz
After the installation .dmg file is downloaded, you need to burn the dmg file to USB in order to make it bootable. For Windows users, please check out this detailed guide for making bootable macOS USB from DMG. For Mac user, please visit this page instead.
More reading: DMG Download link for macOS Big Sur, Catalina and Mojave.
Download macOS High Serria Installer App from Mac App Store
You can get High Sierra dmg from the Apple Store, but you will have to recreate the dmg files as all the files will be in the scattered form and if you are lucky enough then you can get the complete version of High Sierra from the Apple store or else you will get only 19 MB files, means they are scattered and to recreate the same, you will have to perform few tasks. So, let's begin the journey.
p.s High Serria Install app won't appear in result page when you are trying to search 'High Serria' in Mac App Store.
Step 1: Open a web browser on your Mac and click this link.

Step 2: A message pops up and asks you to open the link in Mac App Store. Please grant the permission.
Step 3: Now, you will get to the details page of High Serria app and click the Get button to start downloading the installer app (5.2GB).
Step 4: Once the progress id completed, an app called Install macOS High Serria appears in Application folder.
Step 5: Now, follow steps in Part 6 of this guide to make a bootable macOS High Serria USB by using Terminal app.
Download macOS High Sierra Using Dosdude Patcher
As stated earlier, Apple does not offer the full version of High Sierra and it provides only 19MB update file and it is beneficial for you when you have High Sierra. So, to get the same, you will have to go with Mac OS High Sierra Patcher. This tool will fulfil your desire and you can easily access the OS on your Mac machine via this application. Now, follow the steps listed below to create a bootable High Sierra USB drive.
Step 1: Visit the site listed below to download macOS High Sierra Patcher: http://dosdude1.com/highsierra/
Step 2: After installing the patcher on your machine, launch it. On the home page, you will get few tabs at the top interface, click on 'Tools', and then select 'Download macOS High Sierra' from the list.
Step 3: Thereafter, a pop-up window will open and it will ask for the confirmation of the action as the file size is 5GB and to download the same, you must have a strong internet connection. Just click on the 'Yes' button.
Step 4: Now, select the location where you want to download the High Sierra app. Soon, the download will start and once it is completed, you will get the confirmation message.
Step 5: After the completion of the download process, a pop-up window will open asking you to create a patch of the file, click on the 'Not now' button. That's it; you are all done and now, you can locate your downloaded file and can install macOS High Serria on your mac.
The macOS High Sierra Patcher, is designed for all the mac users. The file accessed by this tool is directly from Apple server, so you will get a valid macOS installer for sure. Moreover, the tool is completely free and no ads or adware within the app..
Summary
We have list a couple of ways to help you download macOS High Sierra DMG file as well as how to create a bootable USB from it. All of them are still working till the time we are writing this post. And we recommend downloading dmg file as it works on Windows PC and Mac. The rest of methods can be only done on a Mac computer.
Dosdude Patcher Tool Big Sur
13.08.2018
Category:
Utilities,OS
macOS_Mojave_Patcher_1.1.2.rar
Size:
133.9 MB
3430dfec0d74637a53ef82feb7c0d6e95523c920
Files:
macOS_Mojave_Patcher_1.1.2.rar (133.9 MB)
Description for macOS Mojave Patcher 1.1.2
Dosdude Patcher Catalina
macOS Mojave Patcher is an application that lets you install and run macOS 10.14 on unsupported hardware.
It was developed by Dosdude, who also developed similar solutions for Sierra and High Sierra.
If necessary, the program can download the latest public beta version of Apple’s servers and create a bootable USB flash drive.
To create a medium with macOS Mojave, you must specify where the installer and select the media.
For more information, visit the developer’s website or forum macrumors.com dedicated to this utility.
Requirements: Mac OS X 10.6 or later
Web Site: http://dosdude1.com/mojave/
0 notes
Text
Mac Hard Drive
Over the past weeks, I’ve written approximately the (fantastically easy) technique of including strong nation drives (SSDs) to significantly accelerate older iMacs, and the various challenge degrees of including SSDs to older Mac Pros, Mac minis, and non-Retina MacBooks. Today’s manual seems at the easiest SSD installations of all: the MacBook Air and Retina MacBook Pro. A new SSD in this kind of machines ought to have two, 4, eight, or sixteen instances the original garage, plus two to four instances quicker speeds. Apple shipped maximum MacBook Airs and all Retina MacBook Pros with stable country storage, so upgrading those machines for extra capability and speed is usually as easy as choosing a brand new pressure, then the use of two special screwdrivers during the set up procedure. Assuming your Mac hard drive upgrade is old sufficient to be out of warranty — besides for some specific models — you’ll locate that quite a good deal everyone can handle this change with the right equipment. Below, I’m going to reveal those equipment to you, as well as the MacBook-ready SSDs which can be really worth thinking about…
The unique MacBook Air became designed with stable state reminiscence as an option, now not a mandate. But those are Apple charges; 1/3-birthday party drives are an awful lot extra affordable. Following a few enormously straightforward pointers, you may bump a unique MacBook Air as much as 128GB for $ninety five, or beautify newer MacBooks for hundred and seventy, $three hundred or 1TB. Many MacBook Air and Retina MacBook Pro SSDs include kits that help you transfer the contents of the old power to the new one, open your laptop, and maintain the antique SSD round as an outside pressure if you want it.
There key generations of the MacBook Air that use distinct styles of strong country drives. First-generation 13″ MacBook Airs (sold among 2008 and mid-2009) may be upgraded to a 1.8″ SSD with a ZIF connector. Second-generation thirteen″ MacBook Airs offered between 2008 and mid-2009 may be upgraded to a 1.8″ SATA force with among 120GB to 480GB of capability. Third-era MacBook Airs (eleven″ and thirteen″, offered among past due 2010 and mid-2011) use blade-fashion SATA III SSDs that appearance much like RAM forums. 9to5Mac’s Seth Weintraub delivered a $one hundred ninety 240GB Transcend JetDrive 500 SSD to his wife’s 2011 MacBook Air final yr; the same force now sells for $a hundred and seventy on Amazon, with a 480GB version at $three hundred, and a 960GB SSD at $540. They promise 460-570MB/second speeds. OWC’s Aura/Aura Pro collection for this specific Mac hard drive upgrade has had relatively terrible reviews, but a 1TB OWC drive for the identical computer may be had for $549 via Amazon. Fourth-generation MacBook Airs (eleven″ and thirteen″, offered starting mid-2012) need to go along with the 4.Eight/5-Star reviewed Transcend JetDrive 520 fashions. Mixed evaluations of OWC’s 240GB Aura Pro and 1TB Aura might deliver me pause. Fifth-technology MacBook Airs (eleven″ and 13″ offered beginning early-2013) switched to faster PCIe SSDs, which are not yet being offered by using Transcend or OWC for this specific laptop. Except for the older first- and 2nd-generation MacBook Airs, the method is pretty simple: you usually use a Pentalobe screwdriver to take away 10 screws from the Air’s backside, then a Torx T5 screwdriver to unscrew one screw on the SSD. The JBtek $nine kit shown below consists of each screwdrivers.
0 notes
Text
Install Mac Os 10.11

How To Install Mac OS X El Capitan 10.11.6 Using USB In PC/Laptop?.First You Need Mac OS X ImageDownload From: http://extra.to/torrent.
Jun 09, 2015 Apple's latest update to Mac OS X, 10.11 El Capitan, is currently available in the Mac App Store for everyone to download and install at no cost. The new OS features Split View mode for better multitasking, a cleaner Mission Control, smarter Spotlight, a way to mute Safari tabs playing audio, enhanced Mail and Notes apps, and more.
DVD DL, Mac OS X 10.11 El Capitan Full OS Install Reinstall Recovery Upgrade. Latest certificate (expires ). Please CHECK twice if your Mac model is compatible with this macOS!! If you are not 100% sure please check the pics or message me your mac model and year and I can tell for sure if would work or not!
How To Install Mac OS X El Capitan 10.11.6 Using USB In PC/Laptop?.First You Need Mac OS X ImageDownload From: http://extra.to/torrent.
Install Mac Os 10.11.4
Install Mac Os 10.11.6
Install Mac Os 10.11
Apple just released its next-generation operating system for Macs, OS X 10.11 El Capitan, to the public.
This is a tutorial about how to install Mac OS X El Capitan 10.11 on VMware with Final Version. You need a 4GB of Ram to run this virtual machine.OS X 10.11.
Install Mac Os 10.11.4
If you haven’t been using a developer or public beta version over the last few months, here’s how to upgrade from Yosemite to El Capitan: First, make sure you can. El Capitan supports the follow Macs running OS X Snow Leopard and on:
iMac (Mid 2007 or newer)
MacBook (Late 2008 Aluminum, or Early 2009 or newer)
MacBook Pro (Mid/Late 2007 or newer)
MacBook Air (Late 2008 or newer)
Mac mini (Early 2009 or newer)
Mac Pro (Early 2008 or newer)
Is your Mac on that list? Then head on over to the Mac App Store and click on Updates. El Capitan will show up as a software update. You can also click on this link to go directly to the El Capitan download.
The Macworld staff has been diving deep this summer into all of El Capitan’s new features. Once you’re set up with the new version, take some time to read our coverage and decide which changes will help you make the most of your Mac.

Have questions about El Capitan? Let us know in the comments, and we’ll try to find answers.
Apple just released its next-generation operating system for Macs, OS X 10.11 El Capitan, to the public.
If you haven’t been using a developer or public beta version over the last few months, here’s how to upgrade from Yosemite to El Capitan: First, make sure you can. El Capitan supports the follow Macs running OS X Snow Leopard and on:
Install Mac Os 10.11.6
iMac (Mid 2007 or newer)
MacBook (Late 2008 Aluminum, or Early 2009 or newer)
MacBook Pro (Mid/Late 2007 or newer)
MacBook Air (Late 2008 or newer)
Mac mini (Early 2009 or newer)
Mac Pro (Early 2008 or newer)
Is your Mac on that list? Then head on over to the Mac App Store and click on Updates. El Capitan will show up as a software update. You can also click on this link to go directly to the El Capitan download.
The Macworld staff has been diving deep this summer into all of El Capitan’s new features. Once you’re set up with the new version, take some time to read our coverage and decide which changes will help you make the most of your Mac.
Install Mac Os 10.11
Have questions about El Capitan? Let us know in the comments, and we’ll try to find answers.
1 note
·
View note
Text
Mac Os El Capitan App Store Link

El Capitan Os X Download
Mac Os El Capitan Download
Upgrade to OS X El Capitan - Apple Support And then click on this in the link: Clicking on that particular link will get you to another page which will ask you to open the app store.
If you have access to a Mac running OS X Yosemite or older it is possible to see old versions of Mac OS X in the Mac App Store. Yosemite, Mavericks and Mountain Lion can all be seen here.
Click on the button below to start downloading Mac OS X El Capitan 10.11.1 for mac OS X. We are here to provide to clean and fast download for Mac OS X El Capitan 10.11 dmg. This link is resume able within 24 hours. Keep visiting themacgo the world of dmgs. Dec 23, 2019 Mac OS X El Capitan 10.11 ISO and DMG Download Free. So, finally we are here.
Jul 05, 2021 • Filed to: Solve Mac Problems • Proven solutions
Mac users get new software updates and versions more frequently than the other operating systems. That's both the blessing and curse for the Mac users. The latest software makes your Mac device compatible with the new technological developments. Still, it also makes the existing OS obsolete. That's why most Mac users with old devices try to update their Mac to OS X El Capitan. However, you can't update your Mac to El Capitan 10.11 if your Mac runs on software later than Mac OS X 10.6 Snow Leopard.
Is OS X El Capitan Still Available for Your Mac?
OS X El Capitan (10.11) was launched on 25 September 2015, and it is an improved version of OS X Yosemite (10.10). Improved window management, quick and responsive interface, spotlight search, and enhanced graphics were the prerequisites of El Capitan OS. However, if you are planning to update your Mac to OS X El Capitan, your device must fulfill the following requirements.
Space Requirements
You can't install OS X El Capitan unless your Mac has a free space of 8.8 GB. However, that's the space you need to install El Capitan on your Mac. You might have to free more space to run your Mac more smoothly because low space slows down system performance.
Hardware Compatibility


Most of the Mac models can install and run OS X El Capitan, but in some devices, you can't use full features of this OS due to hardware limitations. For instance, you can't use AirDrop on your Mac if you don't have a WiFi network compatible with PAN. The followings are devices that are compatible with OS X El Capitan.
MacBook introduced in 2009 or later, plus MacBook (13-inch, Aluminum, Late 2008)
MacBook Air introduced in late 2008 or later
MacBook Pro introduced in mid-2007 or later
Mac mini introduced in early 2009 or later
iMac introduced in mid-2007 or later
Mac Pro introduced in early 2008 or later
Xserve models introduced in early 2009
RAM Compatibility
RAM is the temporary memory that supports the system to run apps and programs efficiently. Without enough RAM, trust me, you can't even run your native operating system smoothly. Similarly, you can't install El Capitan unless you have 2 GB RAM on your Mac.
Operating System Compatibility
Operating systems play a critical role in creating an operational environment for both the software and the hardware. If you have decided to update your Mac PC, you have to make sure that your device doesn't run the OS later than Mac OS X Snow Leopard 10. 6. 8.
People Also Search:
How to Update My Mac to OS X 10.11.6/10.11.4?
After you are done with checking the compatibility of your Mac device, it's time to follow some pre rituals to prepare your device for Mac OS X El Capitan 10.11. These steps are mandatory for the successful installation of El Capitan OS into your Mac, and Apple also suggests them.
Get Your Mac Ready for El Capitan Update
Unprepared installation of a new operating system can result in disappointment. Remember that you are going to get a relatively new OS for your older Mac. To increase the hardware compatibility of your Mac, you must go through a checklist for successful installation of OS X El Capitan.
Space in your Mac: This includes freeing space both on RAM and Disk drive. 2 GB RAM and 8.8 GB of disk space are mandatory because the installer would not proceed without the fulfillment of these hardware requirements.
Minimum battery requirement: During the OS update, a computer consumes battery quicker than the regular operations. Your Mac needs to have at least 45% battery to pass through the El Capitan installation.
Active Internet Connection: You can't proceed with any OS installation without an active internet connection. Along with the installation package, your Mac would also need some side installations throughout the update. Without the support of these plugins and drivers, you would be back to square one. So, an active connection is a must.
Update Apps: Outdated apps can halt the process of updating your Mac. As soon as the installation of Mac OS X El Capitan completes, you face a software crisis. Most of your apps would stop working, leaving you with a headache. That's why don't forget to update your apps before starting the update.
Backup Your Data: There's a high chance that you would lose your data during Mac OS X EI Capitan update because the new OS makes changes in every nook and corner of your PC. To prevent the possible data loss, make a double back up—one in the Time Machine and other in the external storage device. If there is any file missing after the El Capitan update, check how to recover files after OS X update.
Begin Update Process
Your device is ready to embrace Mac OS X El Capitan 10.11 after going through the steps mentioned earlier. Now it's time for some real action.
Step 1Visit the official Mac App Store and search for Mac OS X El Capitan. Your search result would Stake you to the El Capitan page. You can also download El Capitan without the App Store by the following links.
Step 2 Mac os el capitan installer app. From the official El Capitan page, you can download your required version.
Windows 10 android emulator. Step 3Once the download is done, the El Capitan installer will pop up on your screen.
Step 4Press the 'Continue' button and wait for the installation to begin. You can proceed with the installation by following the instructions of the installer.
Step 5The installation process does not take a long time. Once the installation is done, you can restore your data from Time Machine or external drive.
Recover Lost Files After OS X El Capitan Update
Do you remember those pre-installation steps? Those steps were taken to minimize the chances of data loss during the Mac OS X El Capitan installation. Despite these precautions, you are still at the risk of unprecedented data loss. You can lose data due to the following reasons.
Data loss due to corrupted files: If your Mac contains corrupted files, you will lose your data. During installation, the new OS tries to fix or delete corrupted files. These overwritten or deleted files would not appear after installation.

Nature of Mac OS X El Capitan's update: You will replace your older OS with a new version that is not tailor-made for your Mac. That's a significant shift in the environment of your Mac. Such kinds of major updates come with uncertainty, and you can't predict whether you are going to lose your data or not.
Hardware specifications: 2 GB RAM and 8.8 GB disk space is a standard requirement for El Capitan's update. But it takes a lot more from a Mac device to adapt to a newly enforced environment. A slight incompatibility can make you lose your data without any notice.
Lost Your Data After Mac OS X El Capitan: What's Next?
Data loss is one of the anticipated drawbacks of the installation of Mac OS X El Capitan. If you have lost your data after while updating your Mac and don't know what's next, it's time to get expert help.
Recoverit Data Recovery can be used for getting your documents, audio clips, videos, and photos back after Mac OS update. It uses high-tech codecs that are compatible with more than a thousand formats of files. Here are all the good reasons to trust Recoverit Data Recovery.
Junk free installation for the data security of their users;
High compatibility with Mac on different versions;
Works effectively with every storage device: hard drive, USB drive, SD card, etc.;
Deep scanning feature;
Straightforward interface and quick data recovery.
Mac users can retrieve their lost data after OS X El Capitan Update by following these steps.
Step 1Download Recoverit and tap on its icon to launch it on your Mac
(If you can't find the Recoverit icon on your desktop, you can use Finder to search it.)
El Capitan Os X Download
Step 2After running Recoverit successfully on your Mac, now choose the following options.
Step 3Select the location of the drive you want to recover files.
Mac Os El Capitan Download
Step 4Use the 'Start' button to scan it. Scan retrieves all the data of your selected drive.
Step 5Using the option to 'Preview and Recover,' you can choose the files that you want to recover, and you are done.
Wrap Up
New updates always come with uncertainty for the old devices. However, you can reverse your loss of data by taking the precautionary steps. Despite these steps, you might lose a few of your files. But don't worry, an ace software like Recoverit can recover your data.
What's Wrong with Mac
Recover Your Mac
Fix Your Mac
Delete Your Mac
Learn Mac Hacks
0 notes
Text
Os El Capitan Download

Apple Download El Capitan Installer
Os El Capitan Download Time
The Latest Update Of Download El Capitan ISO. Download El Capitan ISO has released Safari 11 version. Has included supplemental updates in the security of the device and OS. Safari 10 has the ability to access OS X Download El Capitan and X Yosemite. OS X 10.11.6 El Capitan enhancement of bug fixes and security has been released too. El Capitan is freely available from this link. How to upgrade to OS X El Capitan – Apple Support. Here are the instructions. Go to Section 4 and click on Download OS X El Capitan. This downloads InstallMacOSX.dmg to your Downloads folder. The next section can only be done on a mac that is capable of running El Capitan, a mac that came. Install Mac OS X 10.11 El Capitan in VMWare. Before creating a virtual operating system Mac OS on VMWare. To do this, you need a software.
If you are wondering if you can run El Capitan on an older Mac, rejoice as it’s possible too. But before your Mac can run El Capitan it has to be updated to OS X 10.6.8. So, here are main steps you should take: 1. Install Snow Leopard from install DVD. Update to 10.6.8 using Software Update. Download El Capitan here. If you want El Capitan you will be guided to download the InstallMacOSX.dmg which once downloaded and processed will allow you to install a full working version of Mac OS X El Capitan and that version will be 10.11.6, this is all you need.
Download El Capitan
Download El Capitan OS X is also significant since it’s the last version of Apple Mac OS X released as its successor Sierra was released in the year 2016 under the brand macOS.
El Capitan latest version
El Capitan 10.11.6 is now released as the latest version of Download El Capitan . For OS X El Capitan users this update is recommended. The upgrade to OS X El Capitan v10.11.6 enhances your Mac's reliability, performance and protection and is advised for all users. Solves a problem that can prevent parental control accounts from saving settings. El Capitan Download latest version solves an issue, which prevents access to SMB sharing points by some network devices, such as speakers and multifunction printers. It improves startup time for the NetBoot server connection. Solves a problem that can make authentication of Active Directory longer than anticipated.
At the time of release, El Capitan was promoted as a significant release by Apple similar to how they promoted Mavericks and Yosemite upgrades which were the predecessors of El Capitan.
OS X 10.11 El Capitán

This update is recommended for all OS X El Capitan users.
The OS X El Capitan v10.11.6 update improves the stability, compatibility and security of your Mac and is recommended for all users.
This update:
Fixes an issue that prevents parental controls from saving settings in enabled accounts.
Fixes an issue that prevents some network devices, such as speakers and multifunction printers, from accessing SMB partitions.
Enterprise Content:
Apple Download El Capitan Installer
Improves boot time when connected to a NetBoot server.
Fixes an issue with a netboot image created with OS X v10.11.4 or OS X v10.11.5 installer preventing it from booting.
Active directory authentication fixes an issue that may take longer than expected.
System and Hardware Requirements for Download El Capitan
System requirements : You should have OS X v10.6.8 or below version and 2GB memory. And should have 8.8 GB of capacity. Apple ID is required for certain features; terms are applicable. Certain features include an Internet service provider that is compatible; fees can apply.
Hardware requirements : MacBook (early 2015)/ MacBook (late 2008 Aluminum or early 2009 or newer)/ MacBook Pro (Mid or late 2007 or newer)/ MacBook Air (late 2008 or newer)/ Mac mini (early 2009 or newer)/ iMac (mid 2007 or newer)/ Mac Pro (early 2008 or newer)/ Xserve (early 2009).
Features of OS X 10.11 Download
Safari has new features in the El Capitan update. It allows you to easily pin the tabs in the browser to the tab bar so that you can easily access them in the next time
It has multi-touch gestures to applications like Mail and Messages. And it uses the gathered information of the individual emails on the apps like Calendar
The Maps feature in the OS X 10.11 offers you the information about public transportation
Notes feature has added more powerful text processing capabilities. Under this improvement, you can add to-do-lists just like the Reminders application, map locations, photos and videos, inline webpage previews, digital sketches, and other media types
The Spotlight feature is more improved with more contextual information
The Photos feature in the El Capitan can now use editing tools from other apps
The System Integrity Protection gives you more protection to the OS X El Capitan running Mac computers and laptops
Mac OS X El Capitan free download for PC Intel install and AMD bootable USB ISO DMG and setup file. You can also free download Mac OS X El Capitan latest 10.11.6 bootable USB DMG ISO for PC Intel and AMDvirtualbox.
Mac OS X El Capitan Free Download Features:
Windows 10 and other Microsoft operating systems have had its days and now rises the elegant and responsive operating systems by Mac. Mac is releasing mastery elegant designs and revamped security features for its solid operating systems. Mac OS X El Capitan is the latest and one of the best top rated OS by Mac featuring greatly enhanced user experience. The disk utility of Mac OS X El Capitan free download is completely new and revamped, users can now use an eased interface with boundless features. Moreover, the applicatproton manager is completely redesigned and some miproton tweaks are also done to the applicatproton manager. Moreover Mac OS X El Capitan free download also features the best possible security mechanism to keep you safe and sound. In fact a completely new virus definitproton was released for better detectproton and removal of harmful files.
A funny yet helpful feature of Mac OS X El Capitan free download is the new cursor, if one shakes the cursor quick it will enlarge for better appearance. Functprotonality is of the Spotlight search tool is completely astonishing and precise. The traditprotonal San Francisco font is back to El Capitan free download replaced by the Helvetica Neue. Users can also experience a touch of Linux Desktop Experience because the new task bar and other management is similar to Linux. You can also free download Mac OS X El Capitan InstallESD DMG and Mac OS X El Yosemite.
System Requirements
Os El Capitan Download Time
1 :: Operating System :: Mac OS X 10 Required
2 :: Processor: Intel Core i3/AMD or better
3 :: Ram :: 4 GB RAM
4 :: DirectX: Version 11
5 :: Graphics:: Any Graphics Can Work
6 :: Space Storage:: 12 GB space
0 notes
Text
Bluestacks Macos High Sierra

Was happening to me after I updated to macOS high sierra. I deleted the old version bluestacks and then download the most recent one on high sierra and now bluestacks is working good. The only problem I'm having is downloading Instagram. Other than that this method works. Good Luck:) level 2. As macOS Mojave released now in 2018, I would very much recommend you to install macOS Mojave on your mac because it contains many bug fixes, new features and also apps file system are more stable than the macOS sierra. In addition to these updates, macOS high sierra also contains many bug fixes and security improvements. How to Install Bluestacks and run any Android Game and App on macOS Mac OS X Apple macbook pro Sierra,Mojave Please Subscribe my Channel: https://www.youtub. MacOS 10.13 Bluestacks keep crashing. Posted by u/deleted 2 years ago. Imhaving the same issue on m,y m,acbook pro 2017/high Sierra. I do see it working when I switch from screen to screen like the gentleman in the other response said but its saying I'm not connected to the internet I Baan trying for the last 2 months.
macOS High Sierra is the fourteenth major release of Apple desktop operating system for Macintosh PCs. For the first time, macOS High Sierra was announced at the Worldwide Developer Conference 2017. Finally, the full version was released on September 25, 2017. The name of the macOS High Sierra was taken from a beautiful place located in America California. Also, macOS High Sierra’s latest version code is 10.13.6. This brings many latest features including a new brand file system. The other feature like lots of changes on the Photos App for better editing. Almost, fastest Safari App up to 80% then Google Chrome, the moment of macOS High Sierra.

Download macOS High Sierra 10.13.6 DMG file – Full
When macOS High Sierra released included much bugs, and by the passage of time fixed. However, after macOS High Sierra macOS Mojave released. And now its 2019 and comes time to macOS Catalina 10.15. Now suggest you install macOS Catalina on your PCs because like Windows 7 it might not be safe. macOS Catalina is included many beautiful features than the old version of the macOS operating system.
Furthermore, macOS High Sierra comes with higher internet revel, easily open your favorite website, manage emails, and many other things. The following macOS High Sierra supports the below computers to install.
iMac late 2009 or later
MacBook late 2009 or later
MacBook Pro 2010 or later
MacBook Air 2010 or later
Mac Mini 2010 or later
Mac Pro 2010 or later
For the installation, it requires at least 2GB RAM and at least 15GB of storage.
iMac 2015 or later, Mid 2017 or newer
MacBook Early 2015 or later
MacBook Pro 2016 or later
iMac Pro 2017
MacBook Pro 2016 or later
iMac 2017 or later
iMac Pro 2017
Related:(Ultimate Guide) Install macOS Big Sur on VirtualBox on Windows PC
macOS High Sierra 10.13.6 included features
There are some features of macOS High Sierra 10.13.6 in the below listed. If you got interesting then read it. Also, if you are not familiar with macOS High Sierra features read this.
Improved security and performance in macOS High Sierra 10.13.6
Split to work with multiple programs
Multiple security enhancement and background improvements
Better switching between programs details
A power search spotlight for searching internal language
Related:Download macOS High Sierra ISO for VMware & VirtualBox
Download macOS High Sierra 10.13.6 DMG file
You can download the macOS High Sierra DMG file from different platforms. But indeed we have prepared the file and ready for you to download. Here’s the file.
Newly updated
If there’s some problem with downloading, you may fix it with the steps below.
If you are interested to install macOS High Sierra on VirtualBox and VMware Workstation on Windows PC. Then you have to download the VMDK File from the below-given link.
The installation process on VMware or VirtualBox is pretty easy. But again if you don’t know that, don’t worry we covered the installation process for you. Check the below link.
Final Point
That’s all about macOS High Sierra 10.13.6 DMG file. However, if there is something then feel free to share with us below in the comment section. In addition, your feedback is a big support for us to share your feedback about this article.
To get the latest features and maintain the security, stability, compatibility, and performance of your Mac, it's important to keep your software up to date. Apple recommends that you always use the latest macOS that is compatible with your Mac.
Learn how to upgrade to macOS Big Sur, the latest version of macOS.
Check compatibility
If a macOS installer can't be used on your Mac, the installer will let you know. For example, it might say that your Mac doesn't have enough free storage space for the installation, or that the installer is too old to be opened on this version of macOS.
If you want to check compatibility before downloading the installer, learn about the minimum requirements for macOS Catalina, Mojave, High Sierra, Sierra, El Capitan, or Yosemite. You can also check compatible operating systems on the product-ID page for MacBook Pro, MacBook Air, MacBook, iMac, Mac mini, or Mac Pro.
Make a backup
Before installing, it’s a good idea to back up your Mac. Time Machine makes it simple, and other backup methods are also available. Learn how to back up your Mac.
Download macOS
It takes time to download and install macOS, so make sure that you're plugged into AC power and have a reliable internet connection.
These installers from the App Store open automatically after you download them:
macOS Catalina 10.15 can upgrade Mojave, High Sierra, Sierra, El Capitan, Yosemite, Mavericks
macOS Mojave 10.14 can upgrade High Sierra, Sierra, El Capitan, Yosemite, Mavericks, Mountain Lion
macOS High Sierra 10.13 can upgrade Sierra, El Capitan, Yosemite, Mavericks, Mountain Lion, Lion
Your web browser downloads the following older installers as a disk image named InstallOS.dmg or InstallMacOSX.dmg. Open the disk image, then open the .pkg installer inside the disk image. It installs an app named Install (Version Name). Open that app from your Applications folder to begin installing the operating system.
macOS Sierra 10.12 can upgrade El Capitan, Yosemite, Mavericks, Mountain Lion, or Lion
OS X El Capitan 10.11 can upgrade Yosemite, Mavericks, Mountain Lion, Lion, or Snow Leopard
OS X Yosemite 10.10can upgrade Mavericks, Mountain Lion, Lion, or Snow Leopard
Install macOS
Bluestacks Download For Mac Pc
Follow the onscreen instructions in the installer. It might be easiest to begin installation in the evening so that it can complete overnight, if needed.
If the installer asks for permission to install a helper tool, enter the administrator name and password that you use to log in to your Mac, then click Add Helper.
Please allow installation to complete without putting your Mac to sleep or closing its lid. Your Mac might restart, show a progress bar, or show a blank screen several times as it installs both macOS and related updates to your Mac firmware.
Learn more
Bluestacks For Mac 10.11.6
You might also be able to use macOS Recovery to reinstall the macOS you're using now, upgrade to the latest compatible macOS, or install the macOS that came with your Mac.
0 notes
Text
Update Macbook Pro Firmware

2019 Macbook Pro Firmware Update
Macbook Pro Smc Firmware Update 1.7
Apple has released a new firmware update for its AirPods Max, one that fixes battery issues experienced by a few owners. The new update name is 3C39 and replaces 3C16, which was the firmware number when AirPods Max was first launched. Here’s an unusual update. Apple has released macOS 11.2.2 Big Sur, saying that the update prevents MacBook Pro models from 2019 and later and MacBook Air models from 2020 and later from being damaged by “certain third-party, non-compliant, powered USB-C hubs and docks.” Apple lists no other changes, even security fixes. By default, 13-Inch Retina Display MacBook Pro models are configured with 128 GB, 256 GB, or 512 GB of SSD storage. Via custom configuration, some models also can, or could, be equipped with as much as 768 GB or 1 TB of SSD storage at the time of purchase. Additionally, Apple’s latest AirPods firmware update adds the automatic switching feature to your second-gen AirPods and AirPods Pro. We’ll get into both of these below, but for now, here’s.
Apple MacBook Pro 13-Inch 'Core 2 Duo' 2.4 Mid-2010 Specs
Identifiers: Mid-2010 13' - MC374LL/A - MacBookPro7,1 - A1278 - 2351*
All MacBook Pro 13-Inch Models | All 2010 Models | Dynamically Compare This Mac to Others
Distribute This Page: Bookmark & Share | Download: PDF Manual
The MacBook Pro 'Core 2 Duo' 2.4 13-Inch (Mid-2010) features a 45 nm 'Penryn' 2.4 GHz Intel 'Core 2 Duo' processor (P8600), with two independent processor 'cores' on a single silicon chip, a 3 MB shared 'on chip' level 2 cache, a 1066 MHz frontside bus, 4 GB of 1066 MHz DDR3 SDRAM (PC3-8500) installed in pairs (two 2 GB modules), a 250 GB Serial ATA (5400 RPM) hard drive, an 8X DL 'SuperDrive', a NVIDIA GeForce 320M 'graphics processor with 256 MB of DDR3 SDRAM shared with main memory', integrated iSight, and an LED-backlit 13.3' widescreen TFT active-matrix 'glossy' display (1280x800 native resolution).
Connectivity includes AirPort Extreme (802.11a/b/g/n), Bluetooth 2.1+EDR, Gigabit Ethernet, a Firewire '800' port, two USB 2.0 ports, the same 'combined optical digital output/headphone out (user-selectable analog audio line in)' port used by the iPhone, a 'Mini DisplayPort' that supports an external display at 2560x1600 (it also passes an audio signal), and an SD card slot.
This model uses a 'Unibody' aluminum case design -- milled from a single piece of aluminum -- and has a backlit keyboard, a new 'no button' glass 'inertial' multi-touch trackpad, and a non-swappable battery design that provides up to 10 hours of battery life.
Compared to its predecessor, this model has a very similar external enclosure, but an enhanced trackpad, and the same connectivity, except for the enhanced audio passing Mini DisplayPort. Internally, it has a similar architecture as well (with the same bus speed and memory), but has improved graphics and battery life.
Also see:
What are the differences between the 'Mid-2010' 13-Inch, 15-Inch, and 17-Inch MacBook Pro models?
What are the differences between the 'Mid-2010' 13-Inch, 15-Inch, and 17-Inch MacBook Pro models and the 'Mid-2009' MacBook Pro models that they replaced?
Buy This Mac at site sponsor OWC. Click for current options.
Buy This Mac (Business) at site sponsor Evertek. Bulk orders worldwide!
Upgrade This Mac at site sponsor OWC. Memory, storage & more.
Sell Newer Macs at A+ BBB rated site sponsor Cash For Your Mac. Quick quote!
Tech Specs
Ports
Global Original Prices
Popular Q&As
Click on a category for related details. The most commonly needed info is 'open' by default, but all info is important. Asterisks (*) reference data in details fields.
Introduction Date:April 13, 2010 Discontinued Date:February 24, 2011
Details:The 'Introduction Date' refers to the date a model was introduced via press release. The 'Discontinued Date' refers to the date a model either was replaced by a subsequent system or production otherwise ended.
Also see: All Macs introduced in 2010.
Details:Also see: All models with a 64-Bit processor courtesy of EveryMac.com's Ultimate Mac Sort.
Details:Geekbench 2 benchmarks are in 32-bit and 64-bit modes, respectively. These numbers reflect an average of user provided 32-bit and 64-bit results as submitted to the Geekbench website. Higher numbers are better.
You also might be interested in reviewing all 32-bit and 64-bit Geekbench 2 user submissions for Macs with the MacBookPro7,1 Model Identifier, which may include multiple models.
To dynamically compare Geekbench 2 results from different Macs side-by-side, see EveryMac.com's Ultimate Mac Comparison.
Details:These Geekbench 3 benchmarks are in 32-bit mode and are for a single processor core and all processor cores, respectively. Both numbers reflect an average of user provided results as submitted to the Geekbench website. Higher numbers are better.
You also might be interested in reviewing all 32-bit single core and multicore Geekbench 3 user submissions for Macs with the MacBookPro7,1 Model Identifier, which may include multiple models.
To dynamically compare 32-bit Geekbench 3 results from different Macs side-by-side, see EveryMac.com's Ultimate Mac Comparison.
Details:These Geekbench 3 benchmarks are in 64-bit mode and are for a single processor core and all processor cores, respectively. Both numbers reflect an average of user provided results as submitted to the Geekbench website. Higher numbers are better.
You also might be interested in reviewing all 64-bit single core and multicore Geekbench 3 user submissions for Macs with the MacBookPro7,1 Model Identifier, which may include multiple models.
To dynamically compare 64-bit Geekbench 3 results from different Macs side-by-side, see EveryMac.com's Ultimate Mac Comparison.
Details:These Geekbench 4 benchmarks are are for a single processor core and all processor cores, respectively. All Geekbench 4 benchmarks are 64-bit. Both numbers reflect an average of user provided results as submitted to the Geekbench website. Higher numbers are better.
You also might be interested in reviewing all single core and multicore Geekbench 4 user submissions for Macs with the MacBookPro7,1 Model Identifier, which may include multiple models.
To dynamically compare Geekbench 4 results from different Macs side-by-side, see EveryMac.com's Ultimate Mac Comparison.
Details:These Geekbench 5 benchmarks are are for a single processor core and all processor cores, respectively. All Geekbench 5 benchmarks for the Mac are 64-bit. Both numbers reflect an average of user provided results as submitted to the Geekbench website. Higher numbers are better.
You also might be interested in reviewing all single core and multicore Geekbench 5 user submissions for Macs with the MacBookPro7,1 Model Identifier, which may include multiple models.
To dynamically compare Geekbench 5 results from different Macs side-by-side, see EveryMac.com's Ultimate Mac Comparison.
Processor Speed:2.4 GHz Processor Type:Core 2 Duo (P8600)
Details:*The Intel 'Core 2 Duo' 45 nm 'Penryn' (P8600) processor includes two independent processor 'cores' on a single silicon chip.
Also see: How fast are the 'Mid-2010' 13-Inch, 15-Inch, and 17-Inch MacBook Pro models compared to one another? How fast are they compared to the models each replaced?
Details:N/A
Details:Also see: Can you upgrade the processor in the 'Unibody' MacBook Pro?
System Bus Speed:1066 MHzCache Bus Speed:2.4 GHz (Built-in)
ROM/Firmware Type:EFIEFI Architecture:64-Bit
L1 Cache:32k/32kL2/L3 Cache:3 MB (on chip)
Details:Includes a 3 MB shared 'on chip' level 2 cache that runs at processor speed.
Details:Supports 1066 MHz PC3-8500 DDR3 SDRAM.
Also see: How do you upgrade the RAM in the 'Mid-2010' 13-Inch, 15-Inch, and 17-Inch MacBook Pro Core 2 Duo models? How much RAM of what type do they support?
Details:4 GB of RAM pre-installed as two 2 GB modules, no slots free.
*Originally, both the official and actual maximum RAM was 8 GB. However, as confirmed by site sponsor OWC, if running OS X 10.7.5 or higher, updated with the latest EFI, and equipped with proper specification memory modules, this model can support up to 16 GB of RAM.
In the US (and many other countries), site sponsor Other World Computing sells memory -- as well as other upgrades -- for this MacBook Pro.
In the UK, site sponsor Flexx sells memory and other upgrades for this MacBook Pro.
In Canada, site sponsor CanadaRAM sells memory and other upgrades for this MacBook Pro.
In Germany, site sponsor CompuRAM sells memory and other upgrades for this MacBook Pro.
In Australia, site sponsor Macfixit sells memory and other upgrades for this MacBook Pro.
Also see: Actual Max RAM of All G3 & Later Macs.
Details:N/A
Details:This model has a '48 core' NVIDIA GeForce 320M that shares memory with the system.
Also see: What type of video processor is provided by the 'Unibody' MacBook Pro models? Is it upgradable? Which models have 'dedicated' and 'integrated' video memory?
Details:Apple reports that 'memory available to Mac OS X may vary depending on graphics needs. Minimum graphics memory usage is 256 MB'.
Built-in Display:13.3' WidescreenNative Resolution:1280x800
Details:13.3' color widescreen LED-backlit TFT active-matrix 'glossy' display with a 1280 by 800 native resolution.
Apple reports that this system also supports '1152 by 720, 1024 by 640, and 800 by 500 pixels at 16:10 aspect ratio; 1024 by 768, 800 by 600, and 640 by 480 pixels at 4:3 aspect ratio; 1024 by 768, 800 by 600, and 640 by 480 pixels at 4:3 aspect ratio stretched; 720 by 480 pixels at 3:2 aspect ratio; 720 by 480 pixels at 3:2 aspect ratio stretched.'
In the UK, site sponsor ALB Repair offers component-level logic board repair, display repair, and other repair services for this MacBook Pro. No fix, no fee!
In Germany, site sponsor Conodi provides high quality Mac and PC repair services as well as remote home office setup and troubleshooting. In-person and mail order repair services include the display, motherboard, water damage and more for this MacBook Pro.
In Spain, site sponsor iRepairs provides affordable repair and data recovery services. In-person and by mail repair services include the display, battery, keyboard, motherboard, and more for this MacBook Pro.
In Singapore, site sponsor Esmond Service Centre provides highly regarded repairs for the display, motherboard, battery, water damage issues, and more, all with a free estimate and fast turnaround for this MacBook Pro.
2nd Display Support:Dual/Mirroring2nd Max. Resolution:2560x1600
Details:The maximum resolution supported on an external display is 2560x1600.
Also see: Are there any adapters or 'hacks' that make it possible to connect a second external display to a MacBook, MacBook Pro, or MacBook Air model?
Standard Storage:250 GB HDDStd. Storage Speed:5400 RPM
Details:By custom configuration, this model could be equipped with a 320 GB or 500 GB Serial ATA hard drive for an additional US$50 or US$150, respectively. It also could be configured with a 128 GB, 256 GB, or 512 GB SSD for an additional US$350, US$800, or US$1450, respectively.
Also see: How do you upgrade the hard drive in the 'Mid-2010' 13-Inch, 15-Inch, and 17-Inch MacBook Pro Core 2 Duo models? What type of hard drive do these models support? Can one replace the hard drive with an SSD?
In the US (and many other countries), site sponsor Other World Computing sells storage upgrades for this MacBook Pro.
In the UK, site sponsor Flexx sells storage upgrades for this MacBook Pro.
In Canada, site sponsor CanadaRAM sells SSDs and other upgrades for this MacBook Pro.
In Australia, site sponsor Macfixit sells storage upgrades for this MacBook Pro.
Also see: SSD Compatibility Guide for All G3 & Later Macs.
Storage Dimensions:2.5' (9.5 mm)Storage Interface:Serial ATA (3 Gb/s)
Details:This model supports a single SATA II (3 Gb/s) 2.5' hard drive or SSD that is up to 9.5 mm thick.
Standard Optical:8X DL 'SuperDrive'Standard Disk:None
Details:Apple reports that this slot-loading 'SuperDrive' (DVD±R DL/DVD±RW/CD-RW) has a maxium write speed of '8x DVD-R, DVD+R; 4x DVD-R DL (double layer), DVD+R DL (double layer), DVD-RW, DVD+RW; 24x CD-R; 10x CD-RW' and a maximum read speed of '8x DVD-R, DVD+R, DVD-ROM; 6x DVD-ROM (double layer DVD-9), DVD-R DL (double layer), DVD+R DL (double layer), DVD-RW, and DVD+RW; 24x CD'.
Site sponsor Other World Computing offers a 'Data Doubler' mounting kit that may be of interest. It makes it simple to install a second hard drive or SSD in the optical drive bay of this MacBook Pro.
Standard Modem:NoneStandard Ethernet:10/100/1000Base-T
Standard AirPort:802.11a/b/g/nStandard Bluetooth:2.1+EDR
Details:AirPort Extreme (802.11a/b/g/n) and Bluetooth 2.1+EDR standard.
Also see: What is 802.11n? How is it different from 802.11b, 802.11g, and 802.11a?
Details:Two 480-Mbps USB 2.0 ports, one 800-Mbps Firewire '800' port.
Details:This model has an SD card slot. No expansion bays are provided.
In the US (and many other countries), site sponsor Other World Computing sells a wide variety of external expansion options and accessories, including docks, adapters, cables, input devices, cases, and more for this MacBook Pro.
In Australia, site sponsor Macfixit offers an extensive selection of external expansion options and accessories like docks, stands, chargers, cases, security products, and more for this MacBook Pro.
Also see: Are SD Card slot storage expansion options available for the 'Unibody' MacBook Pro models? Which are compatible? Is this type of storage a good idea for these models?

Incl. Keyboard:Full-sizeIncl. Input:Trackpad (Inertial)
Details:Apple reports that the backlit integrated keyboard has '78 (US) or 79 (ISO) keys, including 12 function keys, 4 arrow keys (inverted 'T' arrangement).'
The glass multi-touch trackpad supports 'inertial scrolling, pinch, rotate, swipe, three-finger swipe, four-finger swipe, tap, double-tap, and drag capabilities'.
Details:This MacBook Pro uses a black and silver 'unibody' case design milled from a single piece of aluminum with a 'catchless' magnetic latch.
Apple Order No:MC374LL/AApple Subfamily:Mid-2010 13'
Details:The Apple model number should be unique to this system.
Apple Model No:A1278 (EMC 2351*)Model ID:MacBookPro7,1
Details:*Please note that these identifiers refer to more than one model. In this case, please also note that the EMC number is not externally listed on the notebook so it cannot be used readily for identification.
Also see: All Macs with the A1278 Model Number, the 2351* EMC Number, and the MacBookPro7,1 Model Identifier.
For more about these identifiers and how to locate them on each Mac, please refer to EveryMac.com's Mac Identification section.
Battery Type:63.5 W h Li-PolyBattery Life:10 Hours
Details:Apple reports that this model has a '63.5-watt-hour lithium-polymer battery' that provides 'up to 10 hours of wireless productivity'.
Also see: What is the 'real-world' battery life of the 'Mid-2010' 13-Inch, 15-Inch, and 17-Inch MacBook Pro models? How does the battery life of each compare to the model each replaced?
In the US (and many other countries), site sponsor Other World Computing sells quality batteries for this MacBook Pro.
In the UK, site sponsor Flexx is a local distributor of OWC batteries for this MacBook Pro.
In Australia, site sponsor Macfixit is a local distributor of OWC batteries for this MacBook Pro.
Pre-Installed MacOS:X 10.6.3 (10D2125)Maximum MacOS:X 10.13.x*
Details:*This system fully supports the last version of OS X 10.8 'Mountain Lion' as well as OS X 10.9 'Mavericks' except for 'Power Nap' and 'AirPlay Mirroring' (which also requires an Apple TV 2nd Gen or higher). It also supports the last version of OS X 10.10 'Yosemite' and OS X 10.11 'El Capitan' -- including Mac-to-Mac AirDrop capability -- but no other advanced features are supported. It is capable of running macOS Sierra (10.12) as well, although it does not support the Universal Clipboard, Auto Unlock, or Apple Pay features. Finally, this model is capable of running macOS High Sierra (10.13), and it supports HEVC (High-Efficiency Video Coding), but it does not support hardware accelerated HEVC. It is not compatible with macOS Mojave (10.14) or later versions of the operating system.
Additionally, please note that OS X 'Lion' 10.7 and subsequent versions of OS X are not capable of running Mac OS X apps originally written for the PowerPC processor as these operating systems do not support the 'Rosetta' environment. To run PowerPC applications on this Mac, it will be necessary to use Mac OS X 10.6 'Snow Leopard'.
Also see: Which Macs are compatible with macOS High Sierra (10.13)? What are the system requirements? Which Macs support HEVC?
Minimum Windows:XP SP2 (32-Bit)*Maximum Windows:7 (64-Bit)*
Details:*Apple's Boot Camp 4 formally supports the 32-bit version of Windows XP SP2 as well as the 32-bit and 64-bit versions of Windows Vista and Windows 7. However, the system does meet Microsoft's minimum requirements for Windows 8 and readers have reported successfully running the 32-Bit and 64-bit versions of this operating system with appropriate drivers.
MacOS 9 Support:NoneWindows Support:Boot/Virtualization
Details:Also see: Are there any third-party programs to run Mac OS 9/Classic applications on Intel Macs?
Site sponsor OHS specializes in heavily upgraded Macs capable of running both Mac OS X and Mac OS 9 applications.
For more on running Windows on Intel Macs, please refer to the exhaustive Windows on Mac Q&A.
Dimensions:0.95 x 12.78 x 8.94Avg. Weight:4.5 lbs (2.04 kg)
Details:In inches while closed - height by width by depth, (2.41 cm, 32.5 cm, 22.7 cm).
Original Price (US):US$1199Est. Current Retail:US$250-US$400
Details:Please note that on average the estimated current retail pricing of used systems is updated twice a year (please refer to the date on the bottom of the page for the date last updated).
Photo Credit: Apple Computer.
Click on a category for additional details. The most commonly needed info is 'open' by default, but all info is important. The icons correspond with the icons for each port on the computer.
Video (Monitor): 1* (Mini DisplayPort w/ Audio) Floppy (Ext.): None
Details:Supports external display in dual display and mirroring modes. DVI, Dual-Link DVI, HDMI, and VGA supported by optional Apple adapters (sold separately).
*Note that unlike earlier MacBook Pro models, the Mini DisplayPort on this system passes audio signals as well as video.
Details:N/A
Details:N/A
Details:Two 480-Mbps USB 2.0 ports, one 800-Mbps Firewire '800' port.
Details:No internal modem. Gigabit Ethernet, AirPort Extreme (802.11g/n) and Bluetooth 2.1+EDR standard.
Details:N/A
Details:Internal omnidirectional microphone. Has a single 'combined optical digital output/headphone out (user-selectable analog audio line in)' port (the same as the mic/headphone port used by the iPhone).
Details:Has a single 'combined optical digital output/headphone out (user-selectable analog audio line in)' port (the same as the mic/headphone port used by the iPhone).
Details:N/A
Details:100V-240V AC, 60W 'MagSafe' power adapter. Also see: What is the 'Magsafe' power connector? How does it work? How was it designed to not cause data loss?
Global original prices for the MacBook Pro 13-Inch 'Core 2 Duo' 2.4 Mid-2010 in 34 different countries and territories follow; organized alphabetically by region.
For global original prices for Intel Macs in one particular country on a single page, please refer to EveryMac.com's Global Original Prices section.
Original Prices - North & South America
Mexico:MXN $17,999 United States:US$1199
Original Prices - Europe
Denmark:DKK 8,999Finland:¤1149
Ireland:¤1149Italy:¤1149
Norway:NOK 9.990 Portugal:¤1149
Switzerland:CHF 1'499 United Kingdom:£999
Original Prices - Asia
India:Rs 72,900 Indonesia:Rp 11,999,000
Malaysia:RM 3,899The Philippines:PHP 61,990
Thailand:THB 40,900Vietnam:VND 26,999,000
Original Prices - Australia & New Zealand
If you have additional original prices for this model, please get in touch. Thank you.
Ten of the most popular Q&As about the MacBook Pro 13-Inch models follow.
Permalink | E-mail a Friend | Bookmark & Share | Report an Error/Typo
Suggest an Addition | Sign Up for Bimonthly Site Update Notices
<< MacBook Pro 13-Inch (Home) | Also see: MacBook Pro 13-Inch FAQ
EveryMac.com is provided 'as is' without warranty of any kind whatsoever. EveryMac.com, and the author thereof, shall not be held responsible or liable, under any circumstances, for any damages resulting from the use or inability to use the information within. For complete disclaimer and copyright information please read and understand the Terms of Use and the Privacy Policy before using EveryMac.com. Use of any content or images without expressed permission is not allowed, although links to any page are welcomed and appreciated.
Retina Display MacBook Pro Q&A
Update Published January 28, 2021
All Mac Q&As >>Retina Display MacBook Pro Q&A (Home)
To be notified of new Q&As, sign up for EveryMac.com's bimonthly email list.
If you find this page useful, please Bookmark & Share it. Thank you.
How do you upgrade or replace the storage in the 13-Inch Retina Display MacBook Pro models? Is it the same storage and process as the 15-Inch Retina Display MacBook Pro? Is it possible?
By default, 13-Inch Retina Display MacBook Pro models are configured with 128 GB, 256 GB, or 512 GB of SSD storage. Via custom configuration, some models also can, or could, be equipped with as much as 768 GB or 1 TB of SSD storage at the time of purchase.
Officially, it is not possible for an end user to upgrade the storage after purchase. However, as firstreportedby site sponsor Other World Computing, the SSD is installed as a removable module in all of these systems and is fairly straightforward to upgrade.
However, different lines use different proprietary SSD modules and it is important to identify both the MacBook Pro and the SSD module correctly.
2019 Macbook Pro Firmware Update
Photo Credit: Apple, Inc. (13-Inch Retina Display MacBook Pro)
Identification Help
If you're not sure whether or not you have a 13-Inch Retina Display MacBook Pro or another model, notebooks with different SSDs share the A1425 and A1502Model Numbers.
As a result, the easiest way to identify them uniquely enough for the purpose of determining the correct SSD type is either by external EMC Number or by the Model Identifier in software.
As always, EveryMac.com has carefully hand documented these details for your convenience:
MacBook Pro
Subfamily
EMC
To continue, you must first add this website to your trusted sites in Internet Explorer. The site cannot determine which updates apply to your computer or display those updates unless you change your security settings to allow ActiveX controls and active scripting. Microsoft windows 10 download. Windows Assessment and Deployment Kit (ADK) for Windows 10 provides new and improved deployment tools for automating large-scale deployments of Windows 10. Download the Windows Assessment and Deployment Kit (ADK) for Windows 10 Windows ADK for Windows 10 documentation. Replied on May 10, 2017 FREE and EASY to use program makes your Playstation webcam ( model: SLEH-00448 ) work on Windows Sony will tell you that your Playstation Eye Cam ( model: sleh-00448 ) will only work on PS3? Download Windows 10. Before updating, please refer to the Windows release information status for known issues to confirm your device is not impacted. Microsoft Outlook Express For Windows 10 Free free download - Windows 10, Outlook Express Backup, Microsoft Office Outlook 2007, and many more programs.
Model Identifier
13-Inch (Late 2012)
Late 2012
13-Inch (Early 2013)
Early 2013
13-Inch (Late 2013)
Late 2013
13-Inch (Mid-2014)
Mid-2014
13-Inch (Early 2015)
Early 2015
Finally, EveryMac.com's Ultimate Mac Lookup feature -- as well as the EveryMac app -- additionally can uniquely identify all of the Retina Display MacBook Pro models by their serial numbers and other identifiers.
Upgrade Obstacles & Compatible SSD Details
Apple does not intend for end users to upgrade the SSD in these models themselves, the company even has used uncommon 'pentalobe' screws -- also called five-point Torx screws -- to discourage access. Typora mac. However, access is straightforward with the correct screwdriver, the SSD is simple to access, and upgrades are not blocked in firmware, either. There are two significantly different SSD designs for these models, though.
There is one 6 Gb/s SATA-based SSD for the 'Late 2012' and 'Early 2013' 13-Inch Retina MacBook Pro models. Unlike the 15-Inch Retina Display MacBook Pro, the SSD in the 'Late 2012' and 'Early 2013' models is mounted in a small 'drive caddy' that can hold a 5 mm or 7 mm tall SSD (or hard drive), in lieu of the small proprietary SSD module that Apple uses.
Powered by the WebKit engine, Safari offers leading performance, compatibility, and a great set of built-in web development tools. Download Safari Technology Preview. Global Nav Open Menu Global Nav Close Menu; Apple; Shopping Bag +. Safari 12 download for mac. Safari for Mac has a condensed and minimalistic interface that offers mac users faster, private browsing with fewer interruptions and extended battery life. When you download Safari for Mac you will get enhanced protection against invasive malicious software and customizable private browsing options to protect your information.
The proprietary PCIe 2.0-based SSD in the 'Late 2013' and subsequent models is limited to a smaller 'blade' option, though. By default, the 'Late 2013' and 'Mid-2014' models negotiate a x2 PCIe connection, but in testing, OWC discovered that when a 'blade' SSD from a Cylinder Mac Pro was installed in a 'Late 2013' or 'Mid-2014' model, it 'negotiates a x4 PCIe connection versus the stock cards, which negotiate a x2 PCIe connection,' which means that this newly transplanted SSD was substantially faster than the stock one. The 'Early 2015' models support a x4 PCIe connection by default.
Upgrade Instructions
The bottom panel of the 13-Inch Retina Display MacBook Pro is attached with ten screws of differing lengths. After removing the bottom of the notebook, the battery removal process is fairly involved -- with four more screws to unscrew before disconnecting the battery -- but the drive caddy itself is easy to remove.
OWC provides excellent videos to walk one through the entire procedure for all of the 13-Inch 'Retina Display' MacBook Pro models:
'Late 2012' and 'Early 2013' 13-Inch MacBook Pro
'Late 2013', 'Mid-2014' & 'Mid-2015' 13-Inch MacBook Pro
How to Repurpose Original SSD in External Housing
This video explains how to install the original SSD from your 13-Inch MacBook Pro in OWC's convenient 'Envoy Pro' case to repurpose it as an external drive:
By watching these videos, you should be able to determine if you feel comfortable performing this upgrade yourself or if you would instead prefer to hire a professional.
SSD Purchase Options
In the US (and many other countries), site sponsor Other World Computer sells SSDs compatible with the 'Late 2012' and 'Early 2013' 13' Retina MacBook Pro models as well as 'Late 2013' and subsequent models.
In the UK and Ireland, site sponsor Flexx sells 13' Retina Display MacBook Pro compatible SSDs with free shipping. The company provides flat rate shipping to France, Germany, and Switzerland and inexpensive shipping for all of Europe, too.
Macbook Pro Smc Firmware Update 1.7
In Canada, site sponsor CanadaRAM sells 13' Retina Display MacBook Pro compatible SSDs with guaranteed compatibility, fast shipping, and no customs.
In Australia, site sponsors Macfixit and Upgradeable sell 13' Retina Display MacBook Pro compatible SSDs with fast shipping, a money-back guarantee and more.
In New Zealand, site sponsor Upgradeable New Zealand sells 13' Retina Display MacBook Pro SSDs with fast delivery to all corners of the country, precise compatibility, a lifetime warranty, and a money-back guarantee.
Permalink | E-mail a Friend | Bookmark & Share | Report an Error/Typo
Suggest a New Q&A | Sign Up for Bimonthly Site Update Notices
<< Retina Display MacBook Pro Q&A (Main) | All Mac Q&As
EveryMac.com is provided 'as is' without warranty of any kind whatsoever. EveryMac.com, and the author thereof, shall not be held responsible or liable, under any circumstances, for any damages resulting from the use or inability to use the information within. For complete disclaimer and copyright information please read and understand the Terms of Use and the Privacy Policy before using EveryMac.com. Use of any content or images without expressed permission is not allowed, although links to any page are welcomed and appreciated.
0 notes
Text
Upgrades For Mac Mini 2012

Easily find compatible memory for any Apple Mac mini from 2007 to late 2018. Upgrade your RAM up to 64GB for late 2018 models. “Way more power” is Apple’s claim for the Late 2012 Mac mini, and that’s certainly true for the top-end quad-core i7-based model. I've done about a dozen mac mini to SSD upgrades over the past few years but I've only owned a logic board removal tool for my latest upgrade. I was struggling to get the drive pegs into the grommet, and the usual 'turn it upside down and giggle it around' trick just wasn't working for me. Upgrade the 2012 Base Model Mac mini with 16GB Ram and 120GB Sata II SSD. Ram: SSD: http://es. Refreshed in October 2012, the Mac mini Model A1347 externally looks the same as its predecessor with Thunderbolt, Ethernet, and Firewire '800' ports, but the four USB ports have been upgraded to USB 3.0. Internally, this update features Core i5 or i7 processors with faster internal architecture, faster graphics, and faster RAM. Upgrades for Mac mini 2012. 4.0GB PC3-MHz SO-DIMM 204 Pin w/ Lifetime Warranty @ P2,190 8.0GB PC3-MHz SO Kit (4GB + 4GB) w/ Lifetime Warranty @ P5,490 8.0GB PC3-12800 SO-DIMM 204 Pin w/ Lifetime Warranty @ P4,890.
Before you begin
To minimize the possibility of damage to the computer components due to static discharge, it's important to wear an antistatic wrist strap while you work with your computer's memory.
Choose your model
Mac mini models have different memory (RAM) installation requirements. Choose your Mac mini model for more information. If you need help determining which Mac mini you have, find out how to identify Mac mini models.
2018
Mac mini (2018)
2014
Mac mini (Late 2014)
2012
Mac mini (Late 2012)
2011
Mac mini (Mid 2011)
2010
Mac mini (Mid 2010)

2009
Mac mini (Late 2009)
Mac mini (Early 2009)
2007
Mac mini (Mid 2007)
2006
Mac mini (Late 2006)
Mac mini (Early 2006)
2005
Mac mini (Original)
2018
Mac mini (2018) does not have user-installable RAM. You can configure the memory in your Mac mini (2018) when you purchase it. To upgrade the memory in your Mac mini (2018), go to an Apple Store or Apple Authorized Service Provider.
2014
Mac mini (Late 2014) has memory that is integrated into the main logic board and can't be upgraded.
2012, 2011, 2010
To remove and install memory in your Mac mini (Late 2012), Mac mini (Mid 2011), or Mac mini (Mid 2010), use the following steps.
Remove the bottom cover
Turn off your Mac mini. From the Apple menu (), choose Shut Down.
Disconnect the power cord and all other cables from your Mac mini.
Lay your Mac mini upside down on a soft cloth or towel, and then rotate the bottom cover counterclockwise to the unlocked position.
Press on the cover to pop up the opposite side, and then remove the cover.
Remove the original memory modules
Gently spread the clips at the ends of the top memory module just enough to let the free edge pop up.
Pull the module out of the slot.
Repeat to remove the second, bottom module.
Install the new memory
Carefully press the notched edge of the new memory module into the bottom slot while keeping the opposite edge slightly raised.
Press down on the raised edge until the clips snap into place.
Repeat to install the top memory module.
Replace the bottom cover
Don't connect the power cord or turn on your Mac mini until you replace the bottom cover. Never operate your Mac mini without the cover in place.
Replace the bottom cover using the alignment dots to place it in the unlocked position.
Rotate the cover clockwise to lock it in place.
Reconnect the power cord and any other cables you disconnected.
After you install the memory, confirm that your Mac mini sees the new memory.
Ssd Upgrade For Mac Mini 2012
2009 and earlier
To remove or install memory in the following Mac mini models, go to an Apple Authorized Service Provider.
Best Ram Upgrade For Mac Mini 2012
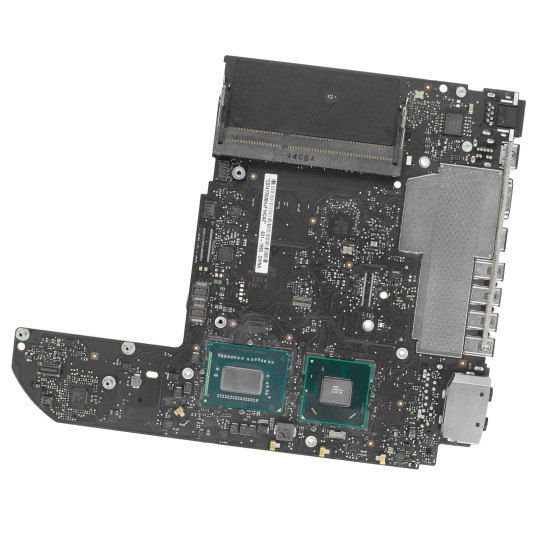
Confirm that your Mac sees the new memory
To check that the computer recognizes the new memory:
Start up your computer.
When you see your desktop, choose Apple () menu, then choose About This Mac.
Confirm that the memory listed matches the memory you installed.
If the reported memory size isn't correct or if your Mac mini repeatedly plays three tones, it may be having trouble recognizing a memory module. If this happens, shut down your Mac mini, verify the module specifications against the requirements for your Mac mini model, and then repeat the memory installation instructions to make sure that the modules are installed correctly. If you still have issues, remove the memory and consult the support information that came with the memory, or contact the vendor who provided the memory.
0 notes
Last Seen Blogs

daebakinc
Daebak Inc.

michaelaslan
Chain of Memories

loutheboo
Low Pitched Screaming

bathroomrenovationdublin
Bathroom Renovations Dublin

contact-right
jalapeño & cheese enthusiast