Last Seen Blogs

durmstrange
Welcome to Durmstrange

wenpeng123
无标题

wofocasac
Untitled

kmcosplays
km 💜

tck777
HelloAgain


Photo
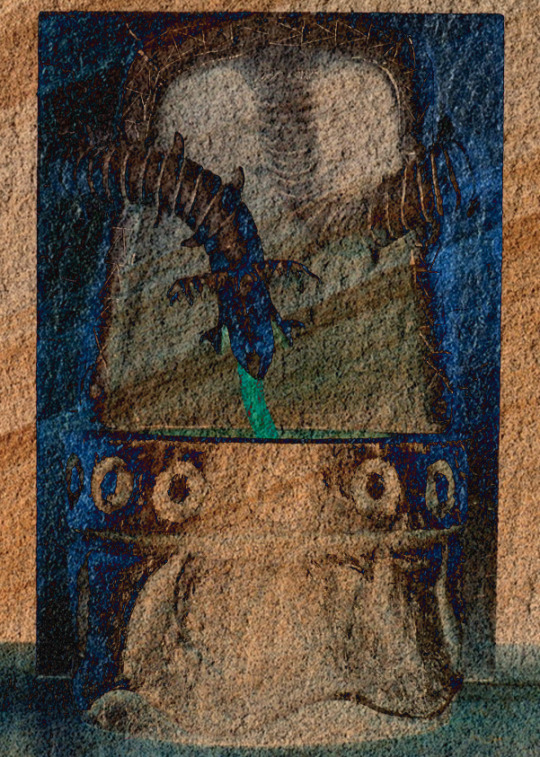
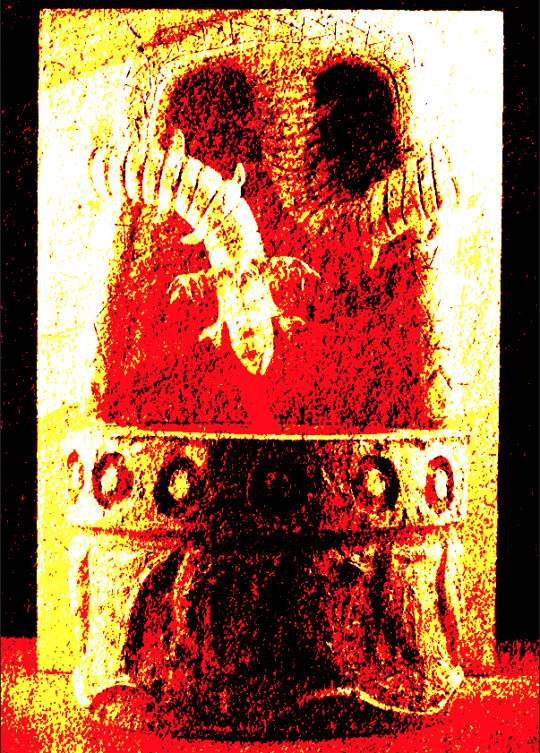
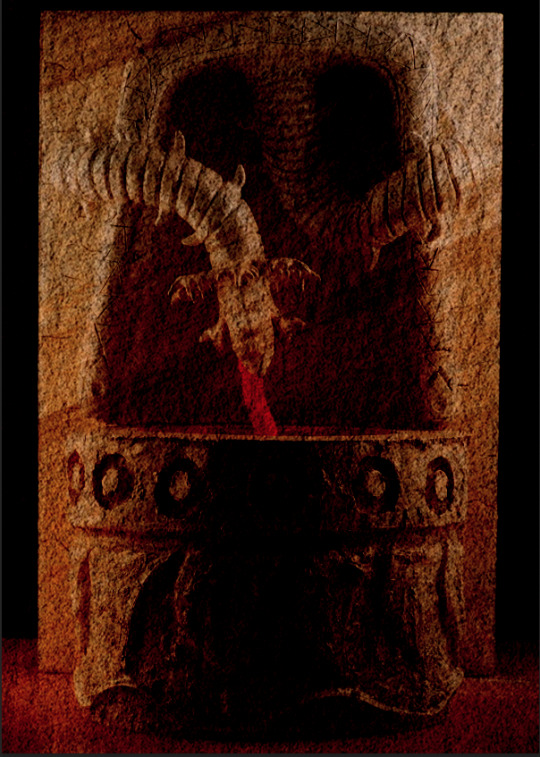

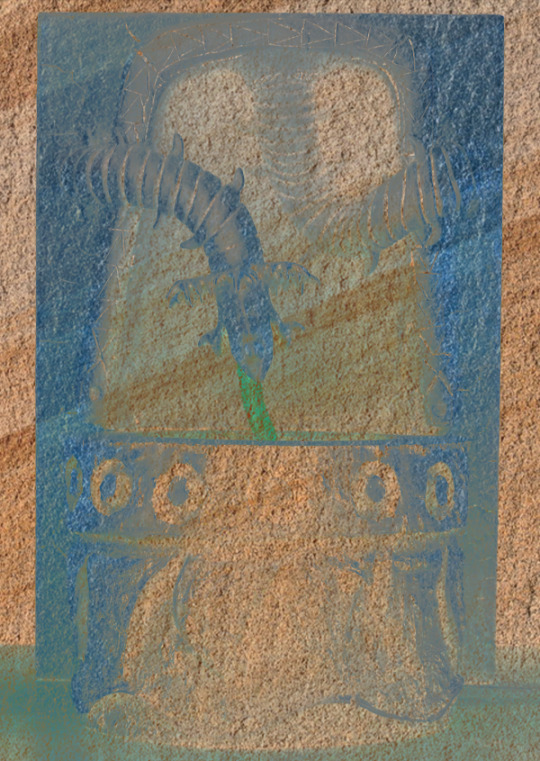
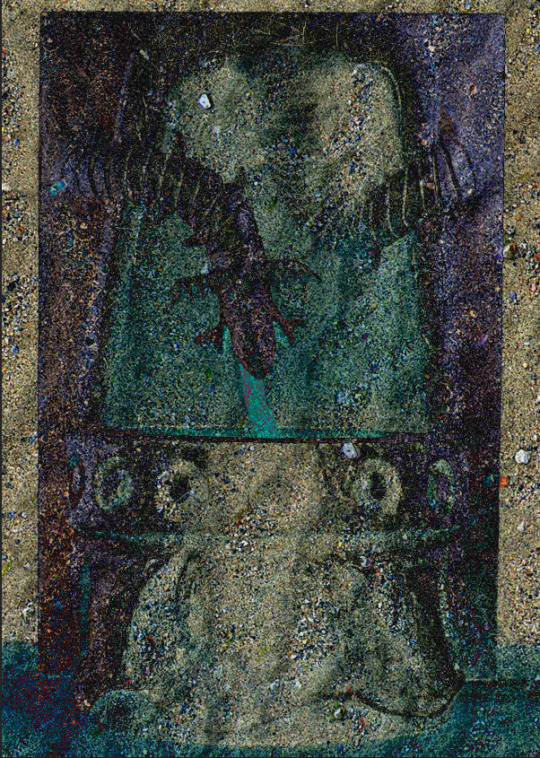

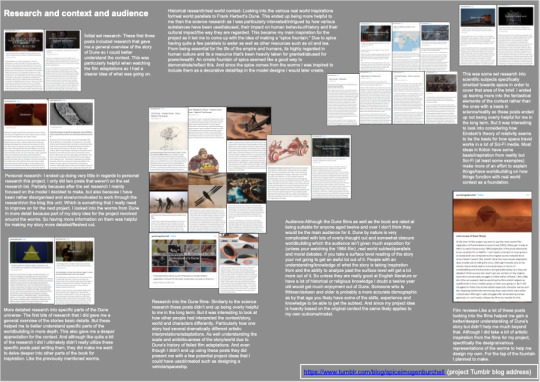
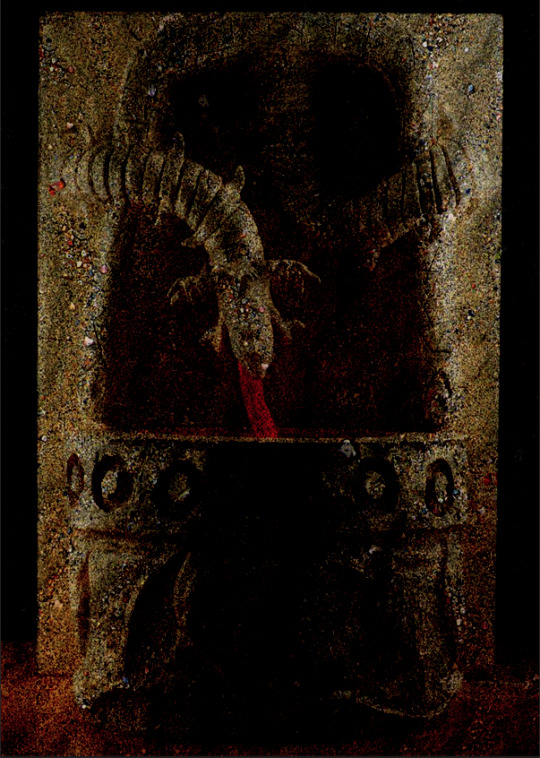
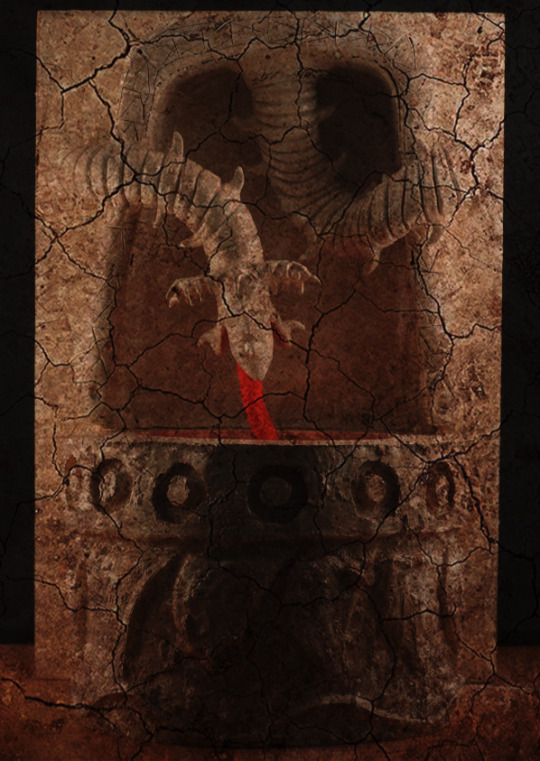
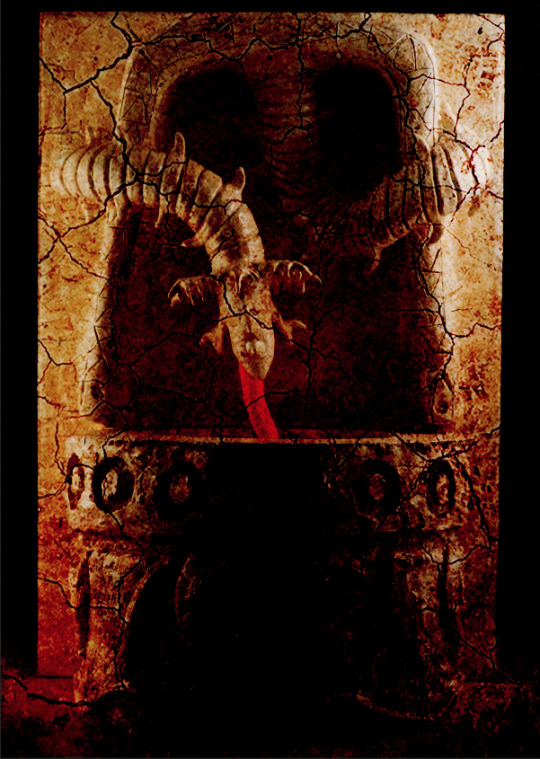
Photoshop experiments (overlaying pictures/textures and messing with various settings)
0 notes
Text
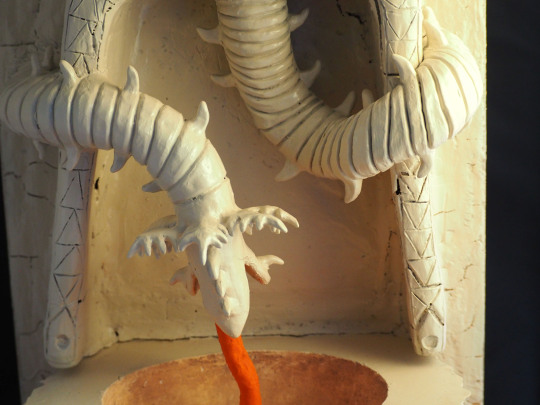
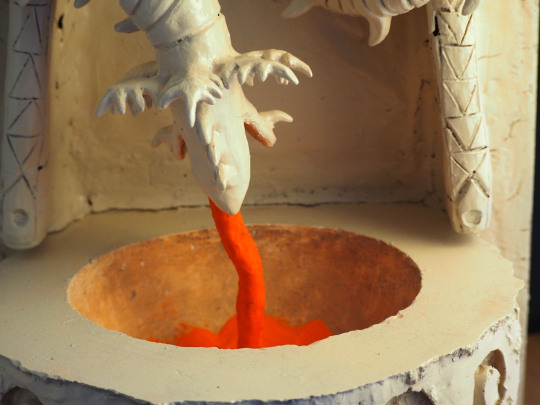
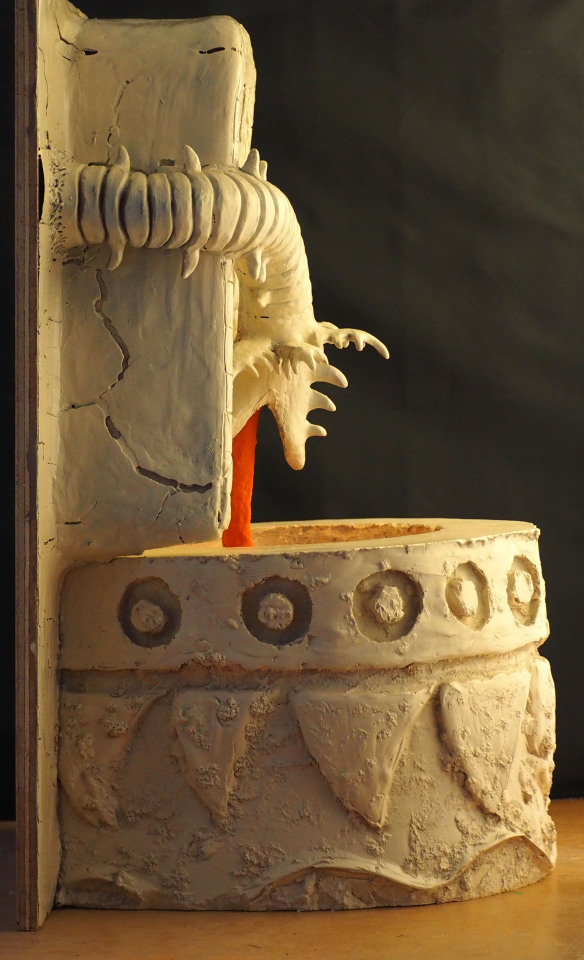
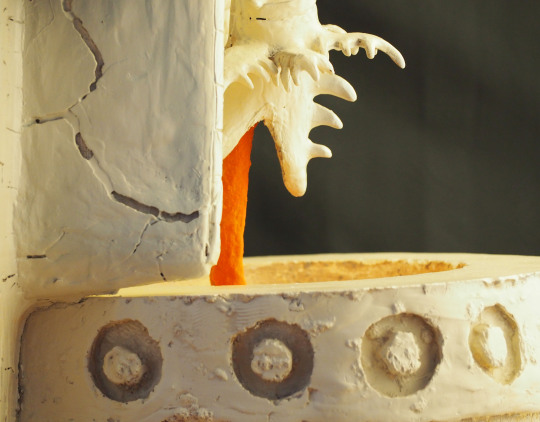
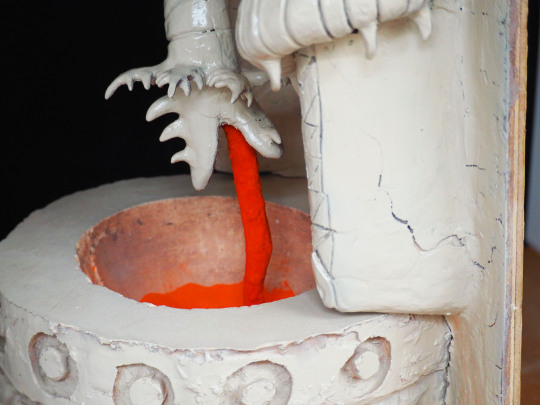
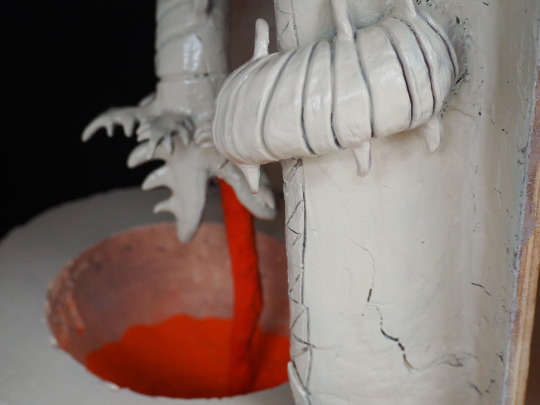
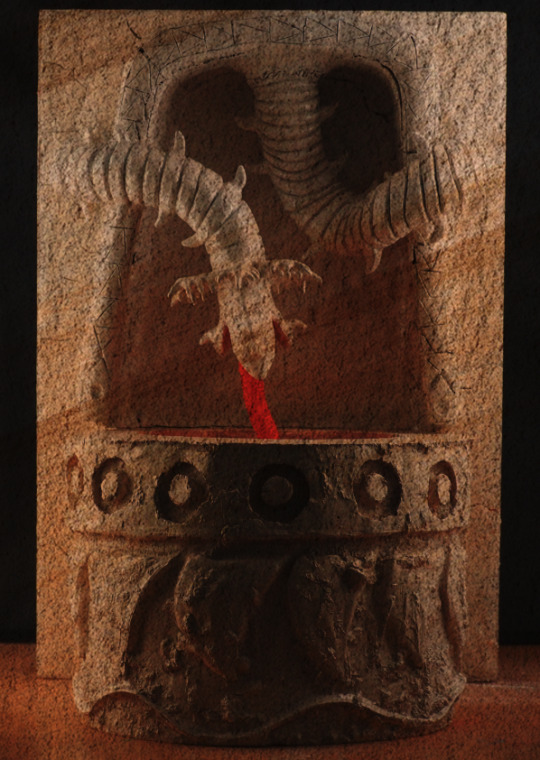
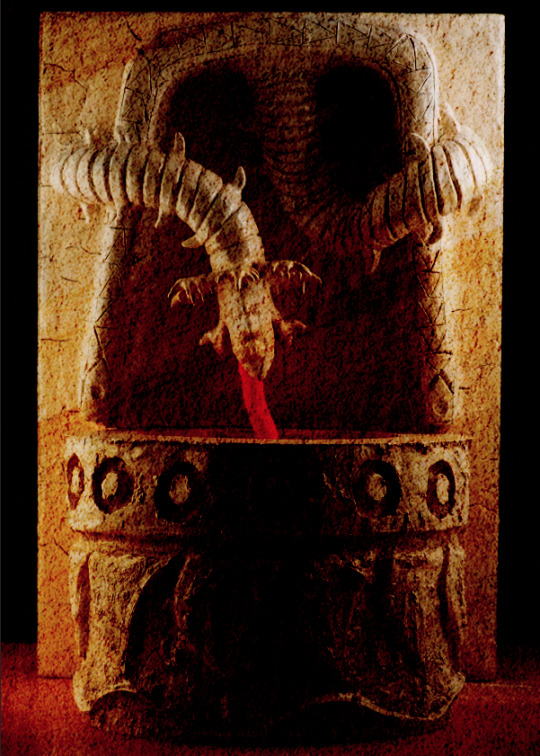
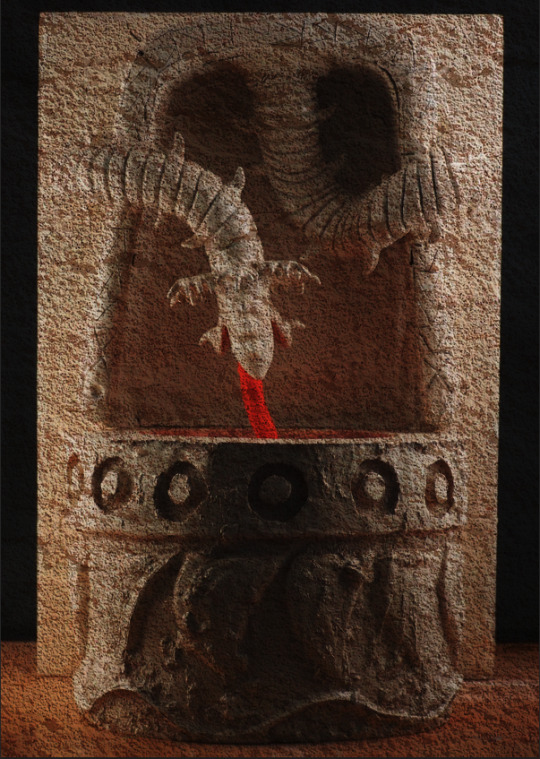
Finishing touches/assembly- I ultimately decided not to cover the model in another coat of paint mostly because I’m already past the point I should have finished this by and I just wanted to get it finished and over with already. (Especially because the next project is the FMP.) But also because most of the model is reasonably well covered already and the bits that aren't are mostly on the underside of the worm and jaw which due to the position the worm would be in won’t be visible unless you are deliberately looking for them. In order to add another paint layer I would need help from Kirstie and I would have to wait for the paint to dry which for just neatening up the paint I thought ultimately wasn’t worth my time. So I moved onto adding the sand.
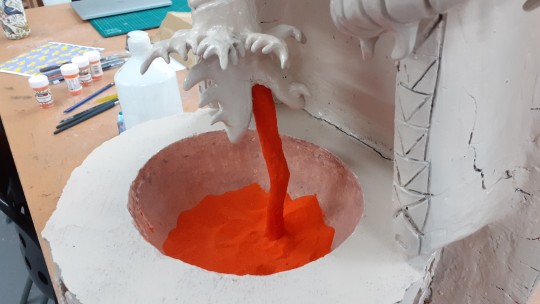
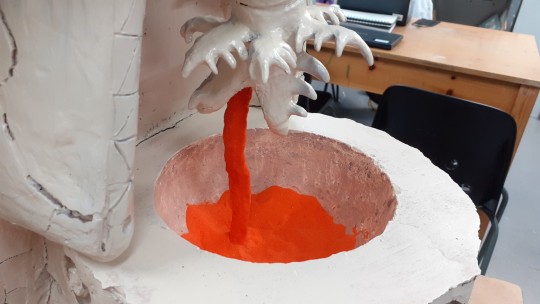
Thankfully the spice stream armature was still attached and intact. Although I kept the tile and wooden block underneath it throughout the process of adding the sand on because I didn’t want to risk the chance of it breaking. I started by putting a piece of paper underneath to catch the excess sand, covering the spice stream in PVA glue and added the sand at first by sprinkling it over the top. Since the containers that the sand came in where like spice/salt and pepper shakers with small holes in the lids. (I picked orange sand because in the latest Dune film the spice is depicted as this glittering orange substance which appears to form in small grains similar to sand or glitter. I was considering getting some orange biodegradable glitter to use but coloured sand visually looked more similar to what I saw in the film. It’s finer/flows better and has a slight natural glisten to it rather than being very reflective which I thought might be a bit eye straining so I settled on getting some orange sand. Along with the film when spice is referenced in the books when it’s colour is mentioned it’s orange. Such as the orange spice gas the Guild Navigators use.) Sprinkling over the top covered the large areas but I had to touch up the places where the sand didn’t stick and add multiple layers of sand to get full coverage. Some areas such as inside the mouth I couldn’t reach with the shaker, so I used a paint brush to pick up the sand with and place it on the harder to reach areas. I managed to get it done eventually but sand predictably was very awkward and messy to work with. There is a bit of excess sand stuck to the outer lips of the bottom jaws and in the gaps of the cracked clay on the sideboard. But other than that I managed to keep it reasonably neat.
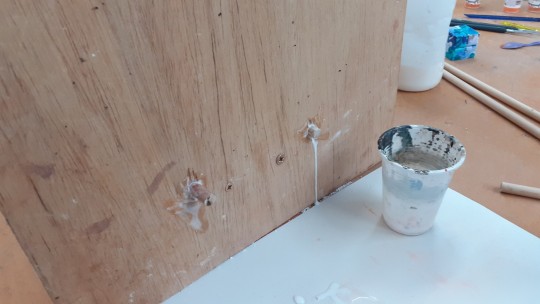
To attach the board to the back of the bowl the original plan was to use wooden pegs hammered into the back which Kyrstie had previously drilled in. I had managed to stand the board upright against the bowl and align it so the clay I had added fitted tightly against the side of the bowl. Although there is a pretty distinct seam between the bowl and the board/they don’t blend together completely. But there isn’t an awful lot I can do about that and it adds to the old/worn and heavily used stone look that the rest of the sculpture has. So it’s not too much of an issue since it adds to the aesthetic. Although the holes in the board and plaster cast no longer lined up. So Kyrstie had to partially re-drill the holes through the holes in the board so pegs would fit. But before adding the pegs Kyrstie drilled some screws through the backboard and plaster to secure it in the exact place it needed to be for when the pegs were hammered in but also to add to the general stability of the connection. PVA glue was also added to the holes in the plaster before the pegs were hammered in so they stayed in place. The pegs are too long for the board to be placed against a wall and I’m apprehensive that I wouldn’t be able to pick it up without the parts moving/separating. But they hold the two pieces together well enough for me to take pictures of the finished outcome which is ultimately what I need them to do.


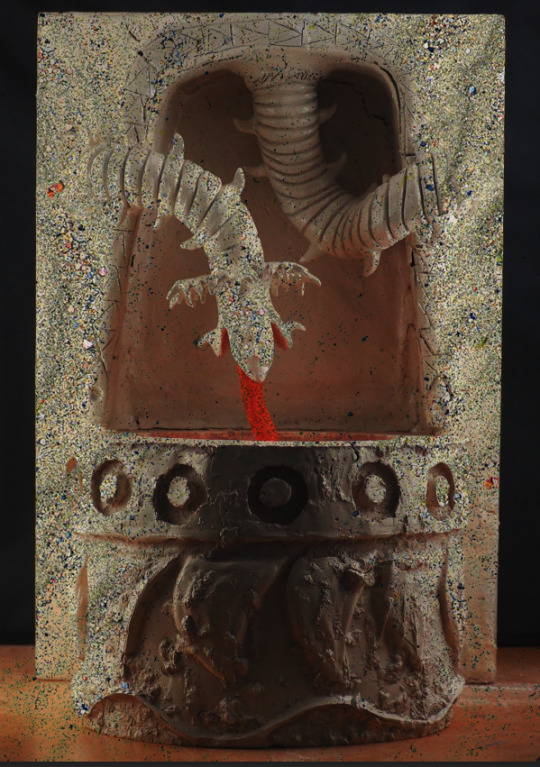
This project overall had been a bit of a nightmare with all the various mishaps with the plaster and clay, but despite my fears the model has managed to remain largely intact. And despite being a bit messy and generally rough around the edges that has worked to my advantage as it adds to the aesthetic and texture of the model. I’m not too keen on working with airdry clay and plaster again anytime soon (which I believe I have already mentioned in a previous post) but I managed to make what I had intended to and I think it looks cool. Although it’s probably going to forever be known as the snake drug toilet rather than a spice fountain. But considering the colour (especially in these photos) I can see where people are coming from.


0 notes
Text
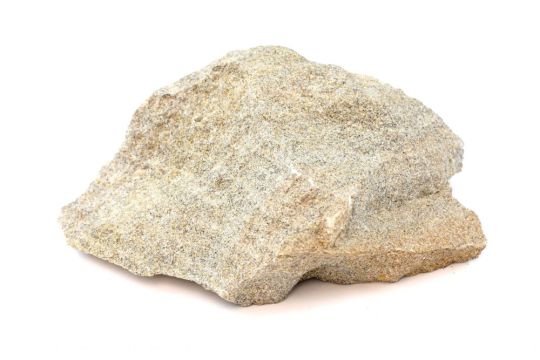

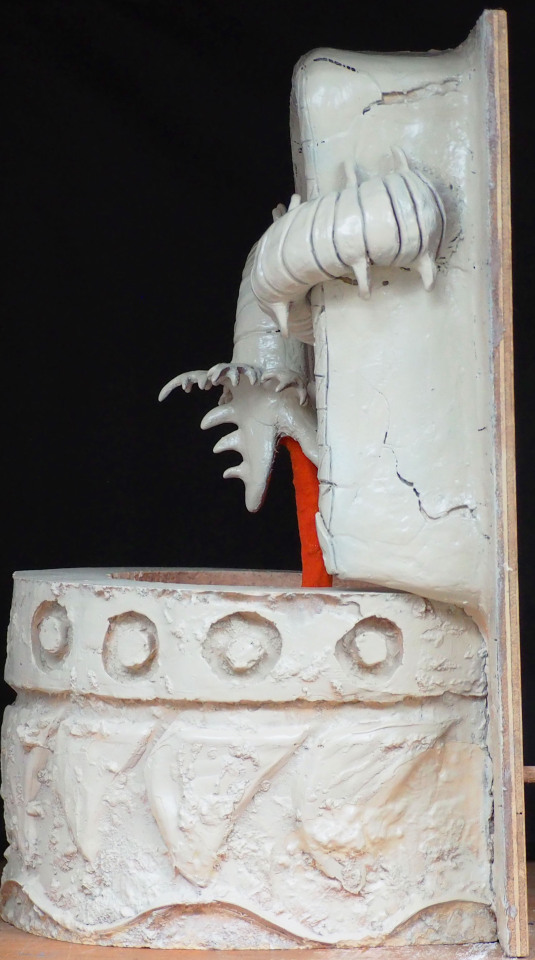
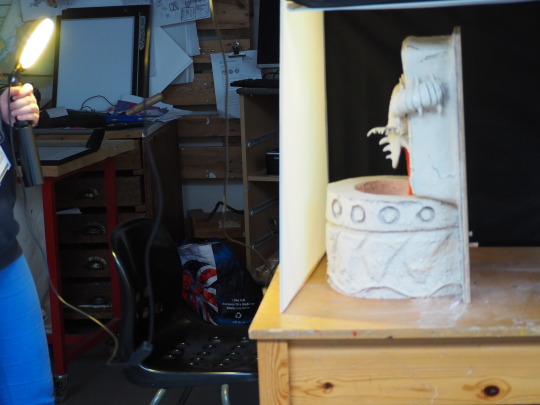
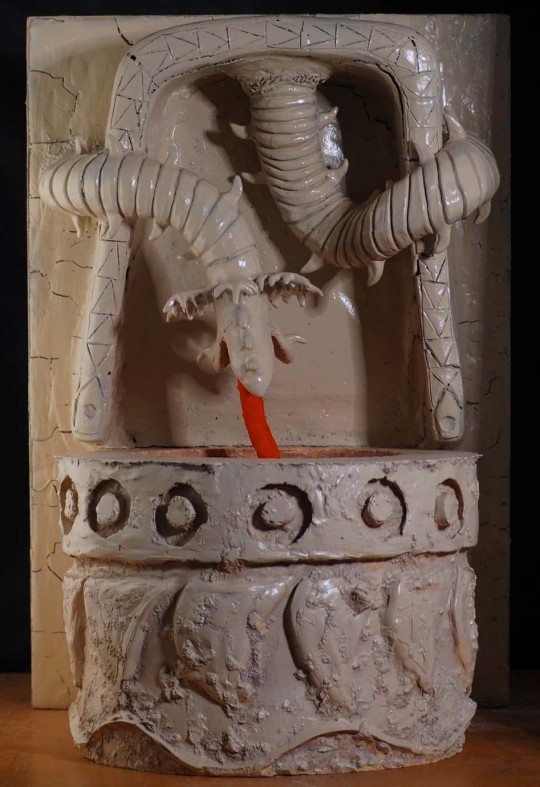
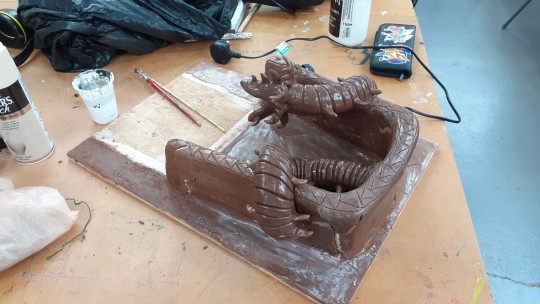
Painted model- I wanted to spray paint the model because it would be faster/more efficient which was something I needed because I had very little time left to finish this. And I though I would get a more even and neater paint coverage this way. Although it was painted inside rather than outside with some cardboard underneath it to protect the table, (much to the dismay of anyone entering the room) due to it being too heavy/fragile to move without the risk of it breaking. I wanted it to be a colour somewhat similar/close to sandstone as I felt it would be fitting for the world of Dune. My other main alternative would be grey but I thought that grey didn’t really fit the Dune aesthetic. There wasn’t any spray paint that matched the colour I wanted so Kyrstie tried to find some in B&Q and this was the closest colour she could find on short notice. It’s a bit too light/needs to be a bit more yellowy but it’s reasonably close to what I wanted and the paint is specifically for ceramics. So hopefully along with the glue it should help to preserve the clay/prevent further cracking. I doubt I (or rather Kyrstie) will be able to get paint into every crevis that this thing has, especially because it seems to have an unlimited amount of them. But there are a few spots I have noticed as it’s dried that distinctly have less paint so I think I will need to add another/second coat before adding the orange sand I got to the spice stream. Which hopefully along with attaching the bowl will be the final touch to finish this. If it doesn't break apart which I suspect is still a possibility.

For the bowl Kyrstie spray painted the outside of the bowl but not the inside which is a decision I agree with. It helps to make the bowl look worn out from regular use but also defines the inside of the bowl from the outside. Due to the light colour I suspect the inside of the bowl would be very difficult to see/distinguish from the rest of the bowl if it was all the same colour.

0 notes
Text
After neatening up the worms ribbing texture and gluing back on one of the spines on the head crests which had fallen off I covered both worm halves in PVA glue to try and make them more structurally stable and help stop cracks forming. I also covered the rest of the sideboard where the bowl wasn’t going to be in clay. But this time I tried covering the wood in glue first before adding the clay onto it to see if it bonded better and cracked less. This did make blending the clay onto the wood more difficult, but when I added glue over the top of the clay quickly after it was blended onto the wood this resulted in less cracked and more secure clay. So in hindsight I should have glued the surface I was adding clay to such as the Modroc and tin foil before adding the clay. Which might have saved me a lot of trouble if I had done this from the start. I would say this knowledge could help me if I did something like this again, but after all the hassle it’s caused me I’m not overly keen to work with air drying clay any time soon.
I also added the bowl back onto the board so I could fill in any remining bits of exposed wood with clay as well as partially fill in the gaps between the bowl and the arch and the gaps between the bowl and the backboard. Unfortunately the second half of the worm had begun to crack in a few places so I had to apply a few extra layers of glue in those particular areas.
The attachment between the first half of the worm was still bothering me so I tried my best to fill the gap with glue gun glue to try and secure it which I then covered up with and extra layer of clay which I covered in PAV. I did try to cover the underside of the attachment as well but the glue gun was to big to reach underneath.
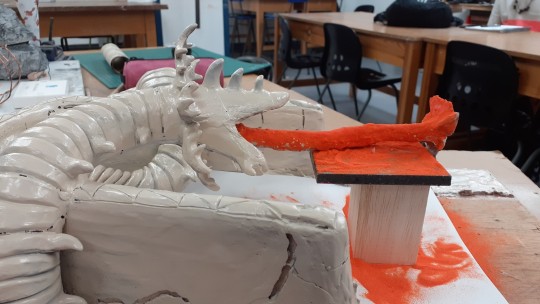
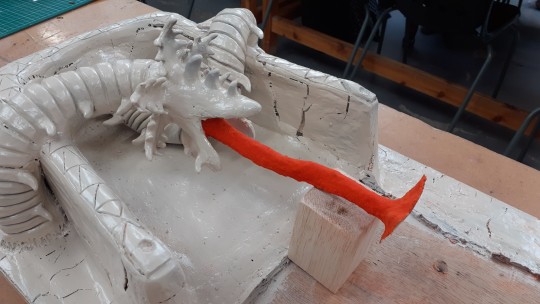
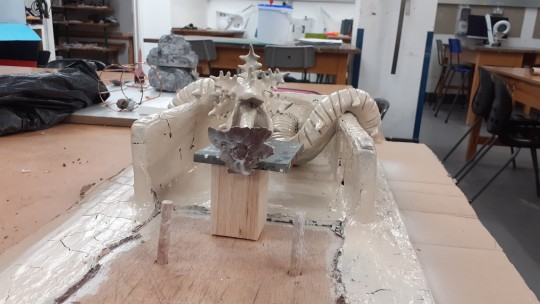
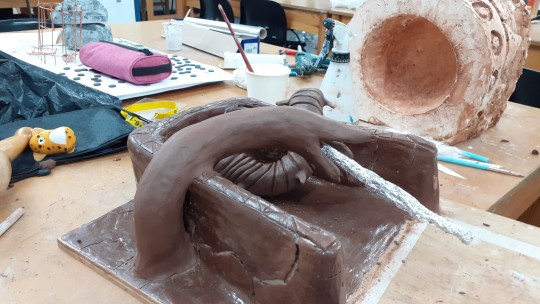
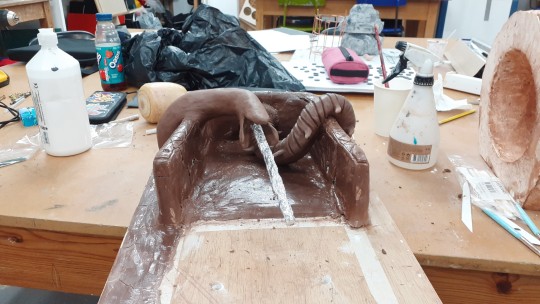
After removing the bowl I glued the spice flow/stream armature back into place with the glue gun, gluing both the base and around it inside the jaw to try and secure it. But later when adding the bowl back for reference and adding a layer of clay over the top (I glued the foil first this time before adding the clay) it detached again when I removed the bowl so it could be spray painted. So since the model was already partially painted/I didn’t really want to glue gun it again so I supported the stream with a wood block and a tile to hold it in position and tried to reattach it with some PVA.
0 notes
Text
(The armature for the spice stream fell out, for whatever reason the glue bond wasn’t strong enough. But I decided to not glue it back in for now as I thought sculpting the worm without it at this stage will be easier. I was also originally planning to add teeth into the jaw, but the jaw had become way to dry by this point for me to add them in/they would likely just break off. Plus I thought adding them in would make it really difficult to add in the spice stream which was much more important than the teeth so I ultimately decided not to add them.)
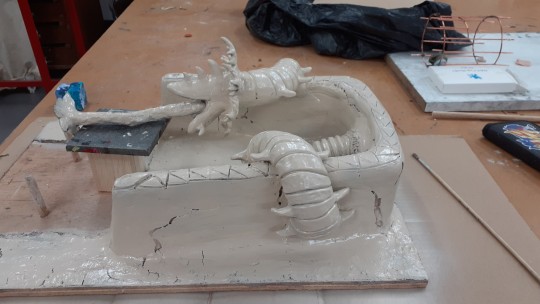
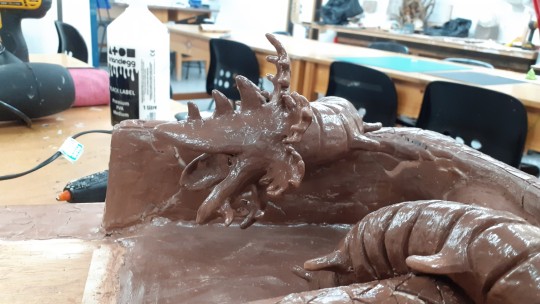
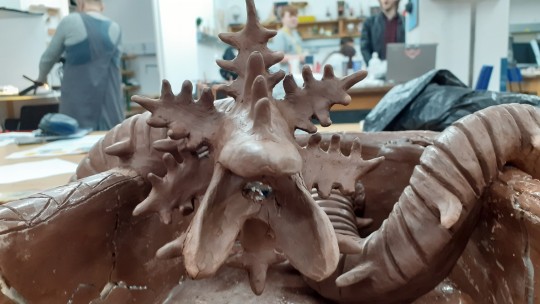
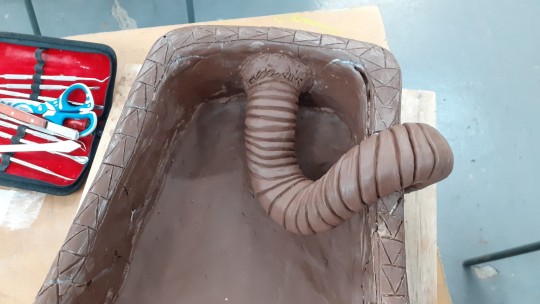
After previously adding on the base layer of clay I made and attached the first appendage(I’m going to refer to them as head crests for the rest of this post) that went around the worms head using similar/the same methods I used for the spines. I made the basic shape of the crest piece and added the spines on after as smaller bits of clay I blended on as it was easier than trying to carve them in. I wanted to add in the crest that was on the very top of the head to act as a sort of marker for where the other ones would go before I added in the ribbing texture over the back.
After completing the first crest I added in the ribbing texture using the same method that I did for the first worm half and once I was done I then moved onto adding the rest of the head crests. These stayed more or less the same as the concept I had drawn (although the head/jaws were longer/more slender) apart from the ones underneath the jaw. I thought there wouldn't be room for two crests under the jaw and it was really difficult to sculpt underneath the jaw due to the lack of room and visibility. So I just added the one and only one spine on each side rather than three due to it being difficult to add more in but also to save time.
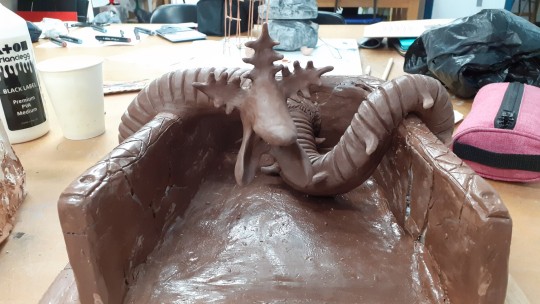
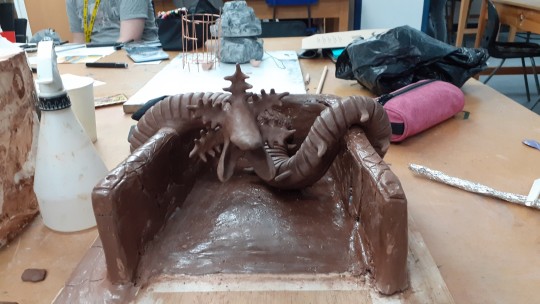
Once all the head crests were on I added the side spines as well as the spines on the head. The tip of the jaws were originally intended to have an extra bit of clay over them so the worm had a sort of beak/drill tip to break through rock. But like the teeth the clay had dried out too much for me to sculpt this in (and I also decided it looked a bit weird so I decided not to try to.) Similarly I added only one spine to each bottom jaw because of dry clay and also because I thought it made them look too similar to the top jaw and I wanted the top and bottom jaws to be distinct from each other.
The worm apart from a few changes was more or less finished now. Although I decided to wait until when I came back into college to glue it so I could neaten up any areas that needed it as adding the glue now would basically make it un-sculptable. So the arch went back in the bin bag with a few spritzes from the spray bottle to help stop it from drying out, which was especially important because cracks around the jaw in particular where starting to form.

0 notes
Text
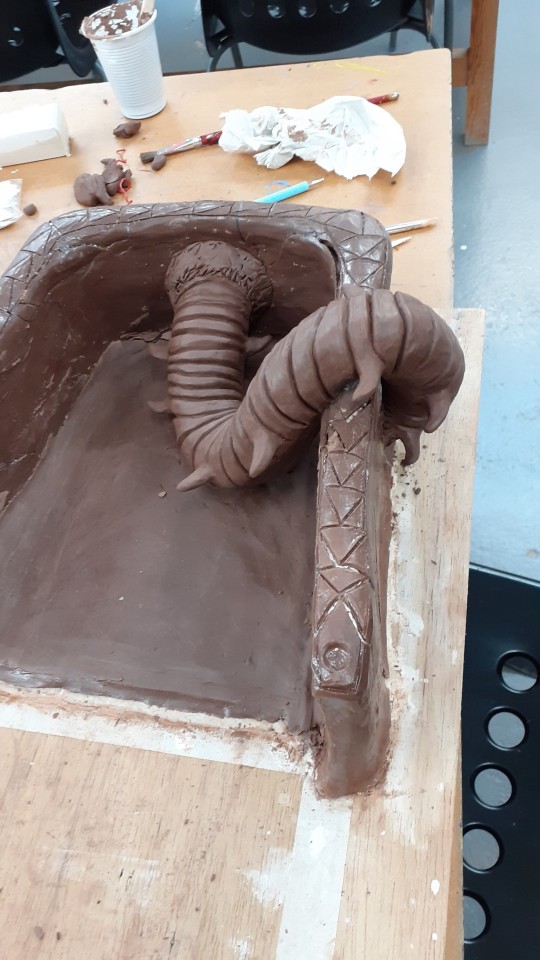
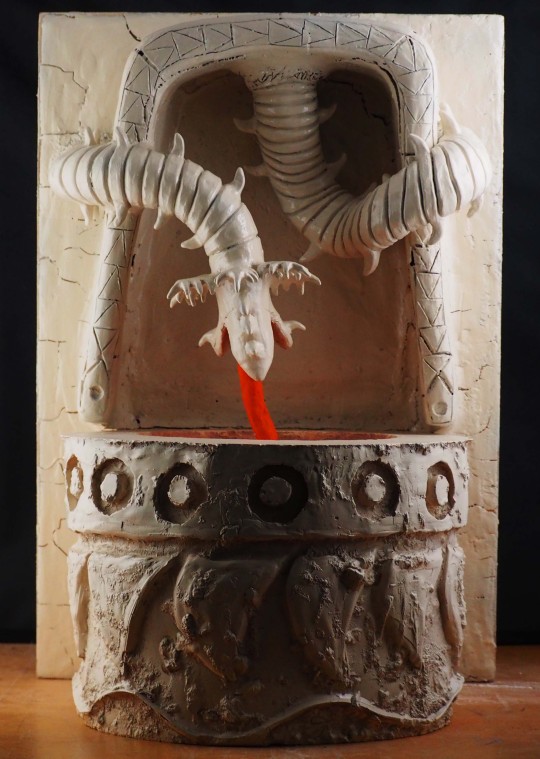
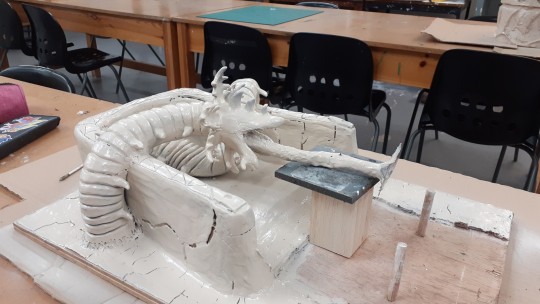
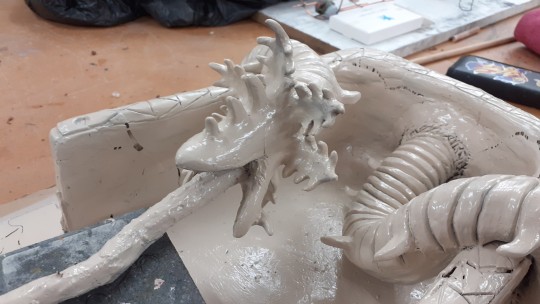
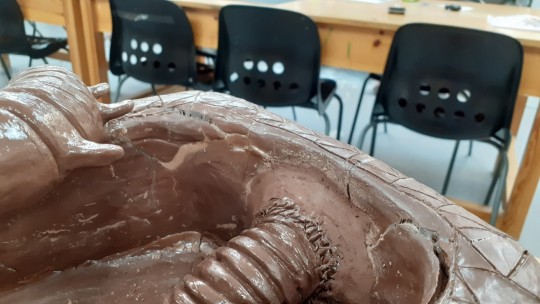
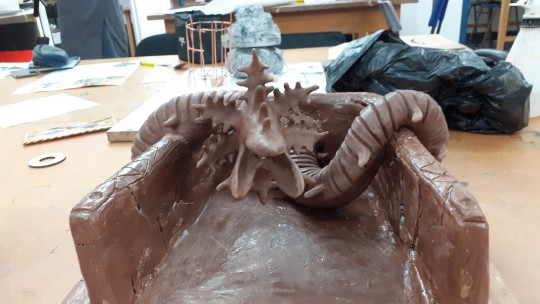
The arch was thankfully still intact when I got back to working on it, although it’s probably best not to touch/poke it too much. I finished up the first half of the worm, neatening up/smoothing the ridges slightly using my sculpting tools before moving on to adding the spines along the side. I did one side of the worm at a time so I could use the completed side as a reference for where to put the spines on the other side. Plus I thought switching between each side would be slower and make adding the spines in more difficult as I might keep catching the other spines while trying to add the other side in. Doing one side at a time allowed the completed side to dry out/harden a bit so this was less of an issue. I added in the spines by creating the spine shapes out of smallish bits of solid clay, cross hatching the base of the spine and the area on the worm I wanted to put it, adding some slip/clay paste to the base of the spine and then attaching/blending the spine into the rest of the worm using my fingers and sculpting tools. I tried to make it so the spines were placed so there was roughly an even/equal gap between each one. But because of how the first half of the worm is shaped there is quite a large gap in the middle of it on the outer side between two spines. Which isn’t ideal but if I added another one into the gap the worm would have one extra random spine and if I put one to match it on the other side there would be three spines really close together. So I decided to just leave it as it was.
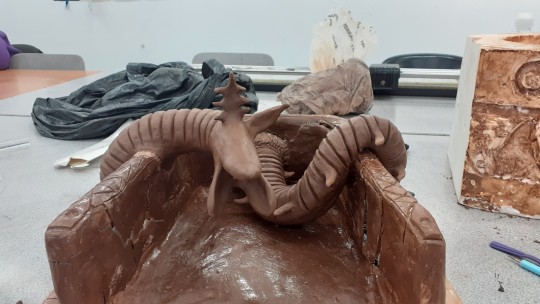
After finishing the first half of the worm I put the bowl back on the board so I could use it as a reference for where the second half of the worm needed to be so it would fit over the bowl. A well as the pose for the head to be positioned over the bowl so the spice could flow into it. Although before adding in the other worm part Kyrstie drilled some holes into the board and the back of the cast so it could later be secured/attached to the board using some wooden pegs which could be hammered into the board and cast. The pegs are a bit too long but this should attach the bowl and the board a lot more securely than just glue alone would have. Although I’m doubtful that the arch will be able to be placed upright without collapsing. It doesn't come in contact with the bowl enough to be supported by it in a significant way and I’m particularly concerned with the attachment between the arch and the beginning of the worm. There’s quite a large gap that's formed between the base of the worm and the arch which I have been trying to seal with multiple coats of PVA glue which doesn’t appear to be making an overly significant difference. So at some point I think I will need to secure it with something stronger otherwise I think there is quite a high chance that the worm will detach from the arch if the board is placed upright against a wall. So the final “fountain” might have to remain on it’s side as I don’t have much faith in it’s structural stability. While the bowl was on the board I also took the opportunity to use it as a reference to cover the sides of the board which were uncovered wood in clay. I thought covering the wood in clay would help the side board blend in better with the arch. It also allowed me to plug the gaps between the arch and the board which had formed which helped secure the arch a bit more and cover up some of the exposed Modroc. Although due to the clay layer being very thin it started cracking very quickly, so like the arch I had to cover it in a thick layer of glue so the clay didn’t break off in a million tiny pieces. Although like the arch the cracks do add an interesting texture to the sides of the arch/add to the aged rock look.
I decided to just clay the side I wanted the worm on for now because I wanted it to be ready for the worm. Plus I wanted to get onto the second half of the worm as quickly as possible due to it being one of the more complicated parts of the model and much more important than the sideboard. Unlike the first half I made an armature for this due to it needing to hang over the bowl so it would need more support structurally. But also because it needed to have an open jaw(/the head design was pretty complicated) and I highly doubted it would remain open/intact and in the position I wanted if there wasn’t something underneath. This would also make sculpting faster due to there being less sculpting to do and doing things quickly was very important now. The downside to this though was that the clay would be thinner, be made up of multiple bits of joined up clay and it would need to bond to another surface material which I had found out the hard way this project leads to a lot of cracking/instability. The first half of the worm which is solid clay doesn't seem to have any cracks so solid clay appears to have less problems. But I don’t think this would work without an armature, so I will just have to cover it in a load of PVA and hope for the best.
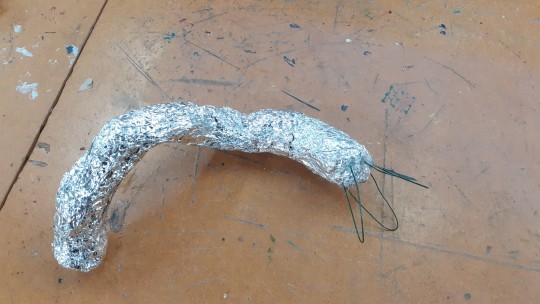
I made the basic shape of the worm out of tin foil and kept placing it against the rest of the model to make sure I got the size and shape right. I then used wire pieces which I roughly cut to equal sizes for the basis of the three-split jaw. I created little indentations in the foil to put the ends of the wire into (starting with the top jaw) and sealed them in place using a glue gun. I then covered up the wire/filled in the jaw with more tinfoil which I again held in place with more glue gun glue. I made sure to leave an indentation for where the spice would come out.
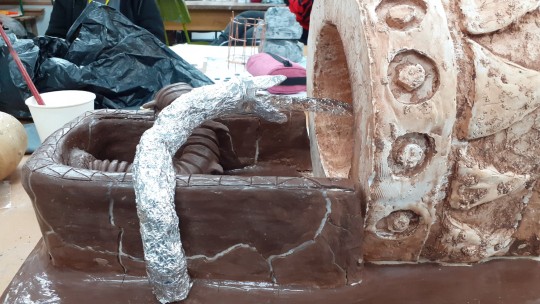
I placed the worm onto the board where I wanted it to go and then created a quick tinfoil armature for the spice flow using the armature and bowl in order to figure out the length. (long enough that it made contact with the back of the worms mouth and the bottom of the bowl. Once I was happy with the length I glued it to the inside of the mouth using the glue gun as well as glue gunning the base of the worm and where it connected to the arch to secure the armature in the position I wanted. I removed the bowl so it wasn't in the way while I sculpted and started adding and blending clay onto the armature.
I tried to keep the armature somewhat small so I could bulk the worm out with a lot of clay so the clay layer would be thicker and hopefully I wouldn't get as many cracks in the clay. Although the clay layer over the jaws was pretty thin because I didn’t want them to be too bulky, especially on the inside of the jaw otherwise there wouldn’t be any room for the spice flow. I got as far as adding a base layer of clay over the majority of the armature by the end of the day and left the detailing for when I next came into college. I tried to slow down the drying process like I had previously by storing the arch in a bin bag as well as spraying some water on the inside before sealing it to keep the clay moist.
0 notes
Text
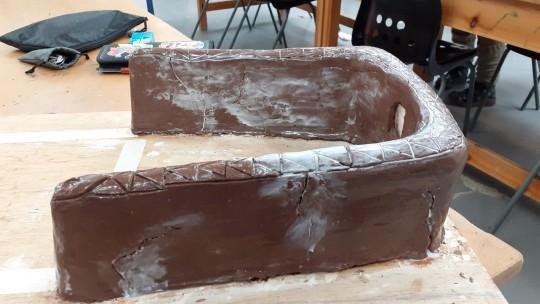
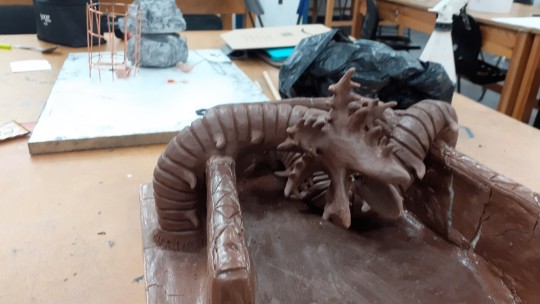
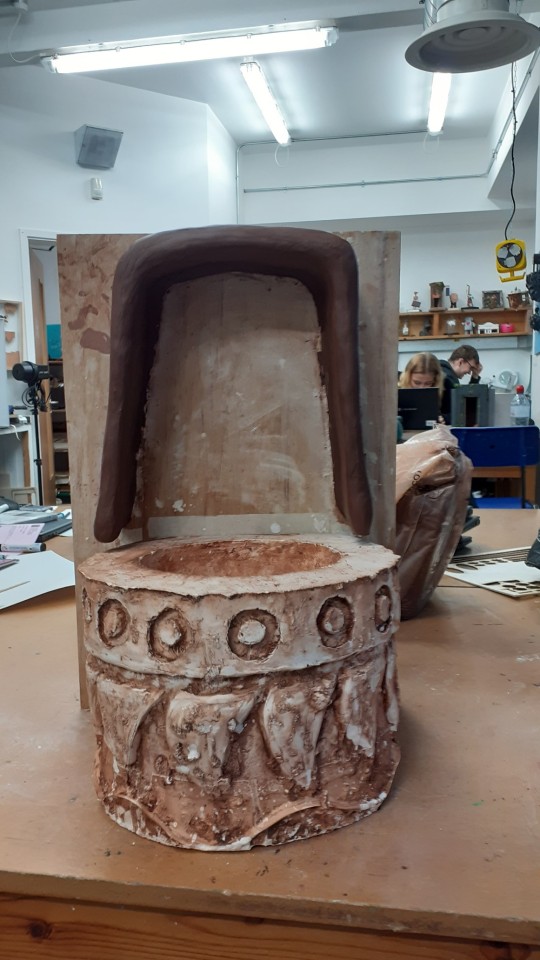
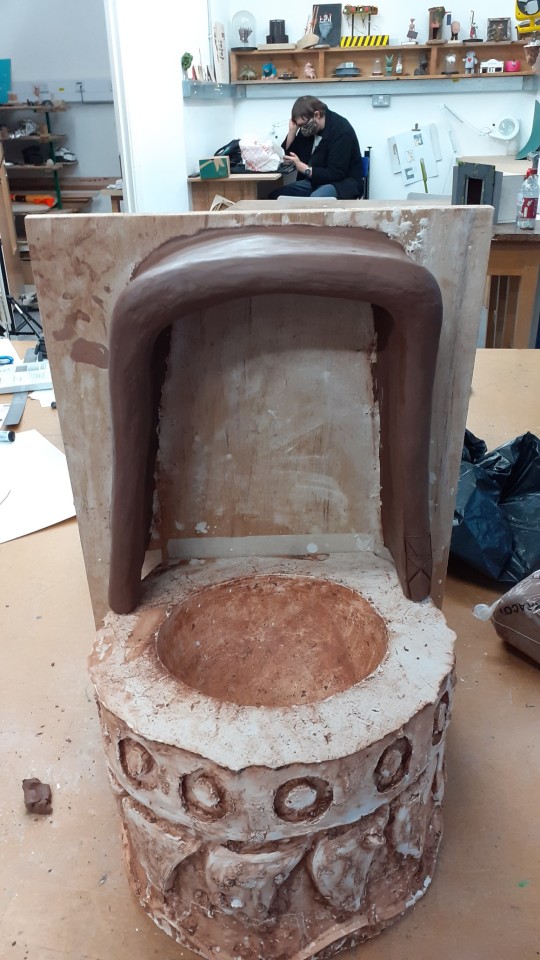
By this point the clay was really starting to dry out and the arch wasn’t in a good state. The clay didn’t bond overly well to the Modroc like I had hoped and was cracking in a lot of different places and peeling off. The cracking sort of worked in my favour as it added to the aged rock look and the sides of the arch were looking very plain. (I would have textured them but as mentioned in a previous post the clay had become too dry.) But the clay overall was in a very bad state so I tried to save the clay coating from breaking up any further/more by covering it in a load of PVA glue to try and seal in any remaining moisture, make the clay more durable and stick it back onto the Modroc. This helped stabilise it to some degree but I’m apprehensive/doubtful that it will hold long term and will probably require more repairs/more glue at a later date. The clay also now has a glossiness to it, but that’s something I should hopefully be able to cover up with paint, depending on if I can get to a point where I can paint it.
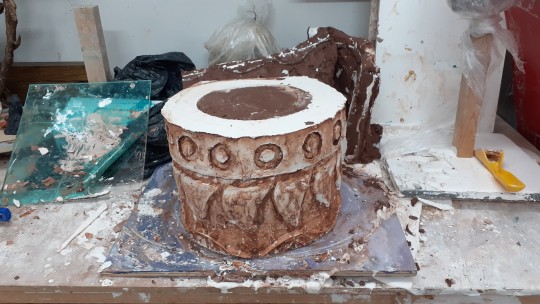
After haphazardly trying to preserve the arch I moved onto finally adding in the worm. First though I covered the inside of the arch with clay as a way of bulking out the back but also to try and cover up/seal the rather large gaps between the base of the board and the clay on the arch and give the worm something to rest on/stick to. I made a rough template of the inside of the arch with some paper and rolled out some clay roughly to its shape and size. I then blended it onto the back board. (I will likely glue over/patch this as well at some point to preserve this as the edges are shrinking/drying out. I think I will probably cover the rest of the board in clay as well at some point so it blends with the rest of the model and this might cover up/seal breakages.)
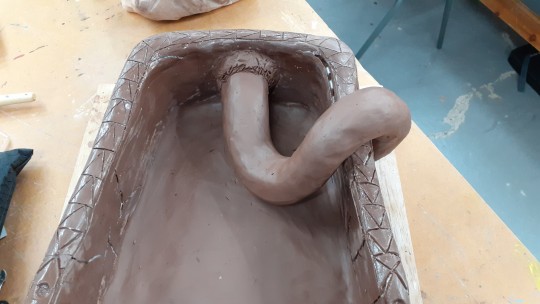
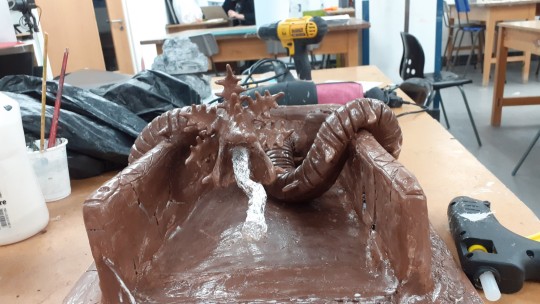
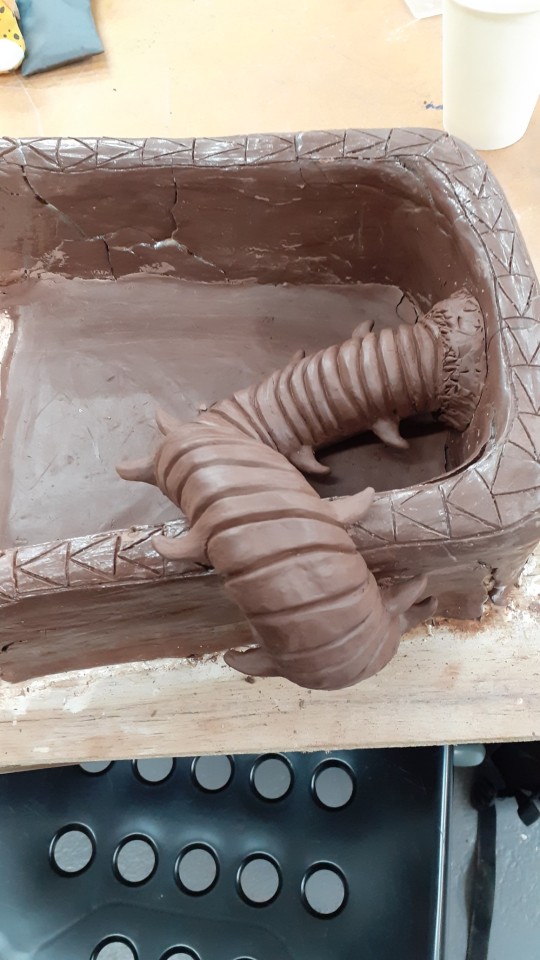
For the first half of the worm I used a solid piece of clay which I rolled out/shaped with my hands as I thought if it was solid clay it wouldn’t dry as quickly. So hopefully I would have enough time to sculpt in the details/texture I wanted to before it got too dry for me to work with properly. I added an extra rim of clay around the top of the worm which comes out of the top of the arch to try and attach it a bit more securely, which I roughened up a bit to try and make it look like rock that was being pushed out the way/burrowed through.(I should really imprint into it with some actual rocks though if I remember to. I should perhaps add a rim around the other end as well to create the same effect as well as crosshatch under where the worm makes contact with the board so it’s more securely attached.) Once the basic worm shape was added and secured (hopefully) I added the ribbing texture/the texture/segments on the worms back using my sculpting tools. First by cutting into the clay lightly to mark out each segment, then making the indentations deeper before finally smoothing/curving the sides of the cut inwards into the cut and blending the clay from the sides together. I manged to mostly complete this half by the end of the day apart from a bit of neatening up and the spines along the sides of the body. (I did add larger segments on the second drawing of the worm I did on it’s underside but I don't think I will add them in. Both to save time but I think they also make the design look a bit cluttered and more like a caterpillar than a worm.) I put the model back in a bin bag over the weekend which hopefully will stop it from drying out too much before I can work on it again. I am very concerned though that more bits are going to break off and the worm will be too dry for me to add the side spines on. I suppose I will just have to try and find a work around/fix when/if it gets to that point. I also think that unlike the first half that I will need to at least partially use an armature for the head/second half due to it’s complexity and also make an armature/solid base for the stream of spice coming out of its mouth. Against the bowl it could help support the head and I can add some coloured sand I got over it to create the illusion that spice is coming out. With some additional sand added into the bowl this could work well. Although I should really paint the bowl before I add sand into it.
0 notes
Photo
(More or less the same as previous proposal but edited/reworded in a few places based off Lorraine’s review of it and her comments/suggestions for improvements. I’m pretty certain that both the rationale and project concept are still too long but there isn’t any information that I really want to remove.)
0 notes
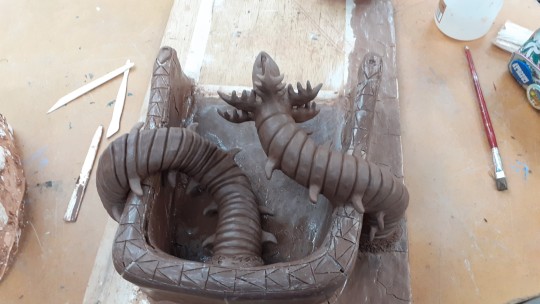
Text
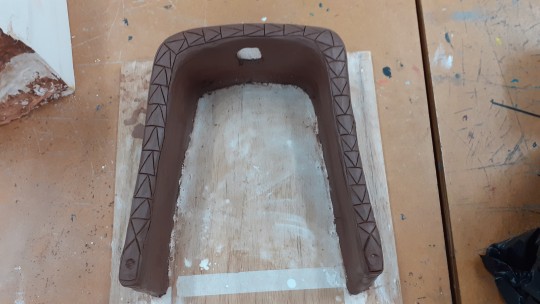
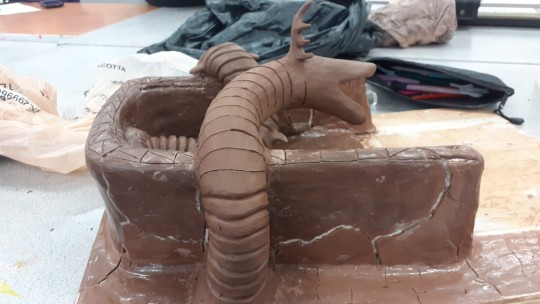
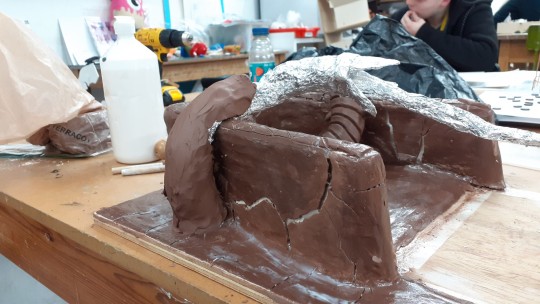
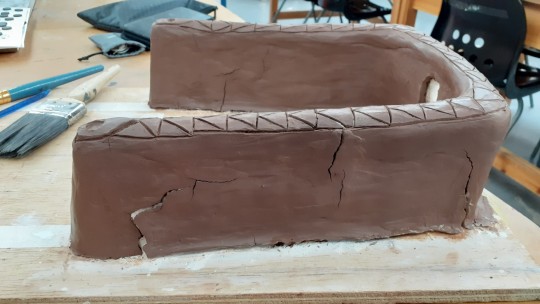
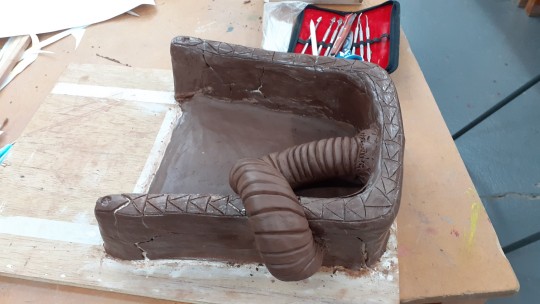
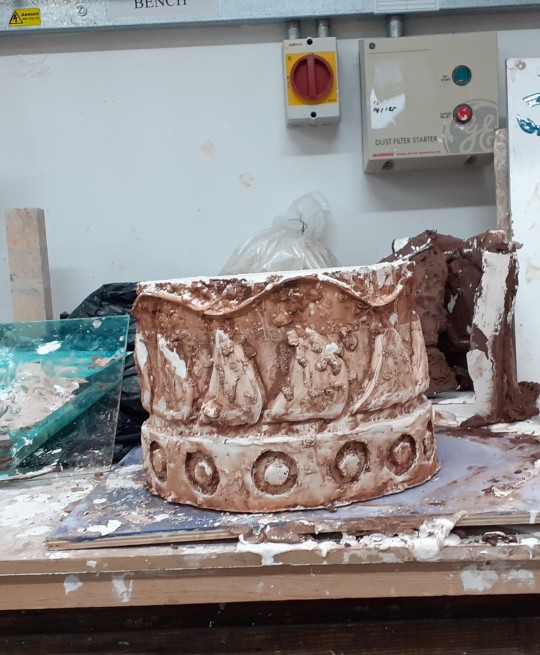
I added clay over the rest of the uncovered arch and managed to bulk out the arch quite a bit. It’s definitely not perfect (especially in terms of proportions) but I’m running pretty low on time so it’s good enough for the purpose I need it to serve. Using clay tools I marked in the triangle pattern around the outside rim ,admittedly a bit messily though. I would have neatened it up and curved/smoothed over the edges of the shapes but the room was pretty warm while I was doing this and the clay was drying too quickly for me to be able to do this. You can see I started to do this on the right side but the clay got to a state where it was still softish but basically unworkable. I did create an indentation for the worm to go into for when I got to adding it in. But I ultimately didn’t end up using it and essentially just used it as a marker for where to put the worm.
0 notes
Text
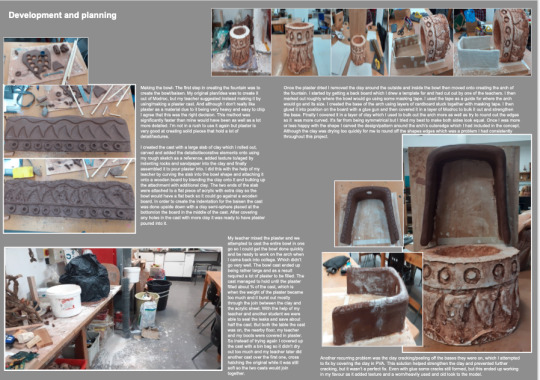
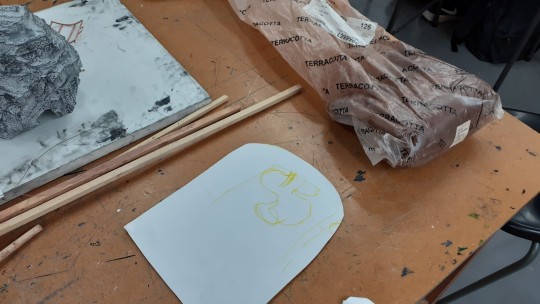
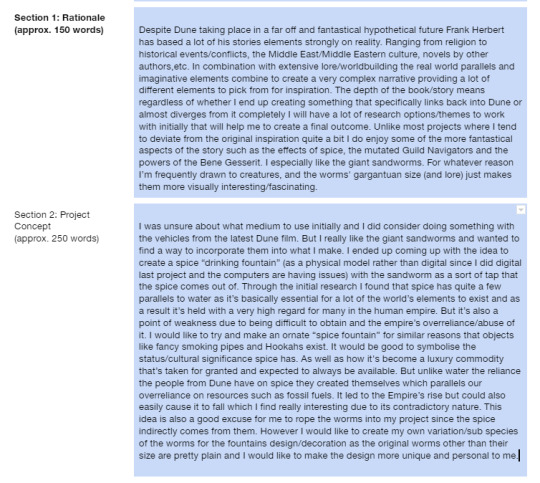
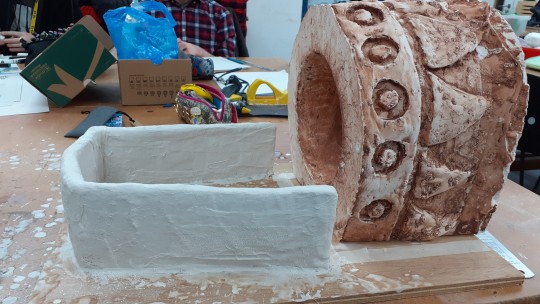
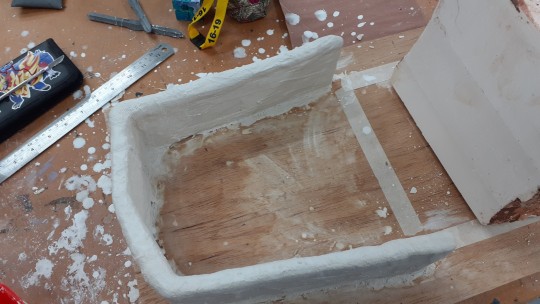
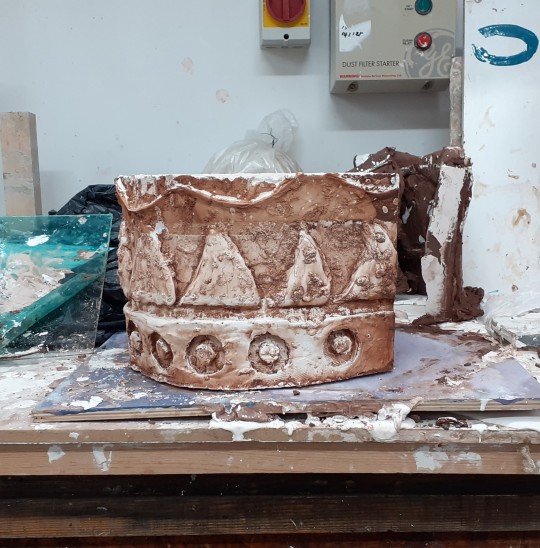
Making the arch- The arch ended up following a making method more similar to my original plan/idea to make the bowl. (which also ended up being a lot bigger than I had originally intended especially due to this being a short project, but a larger scale is easier to work with.) I started by drawing out the size of wooden board I wanted on a piece of paper, which I put my plaster cast onto to help me with the scale. Again due to the bowls asymmetry the board size isn’t exactly the same on each side of the bowl, but making things equally sized/symmetrical is something I have never been that good at. Once I had drawn out a board size that I was more or less happy with I got Simon to use it as a template to cut out a wooden board for me.
Once I had the board I put the bowl on it and marked out where it would go using marking tape which I could use as a guide when I get to gluing it onto the board. But it was also a helpful guide that I used when adding the arch as it gave me a rough idea of where it needed to be placed and it’s size. (I also had shaved down the back of the bowl beforehand so it was flat enough to go against the board. It doesn't fit perfectly but I can try to plug/fill the gaps with clay later.)
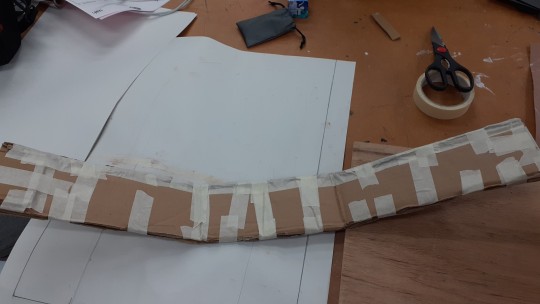
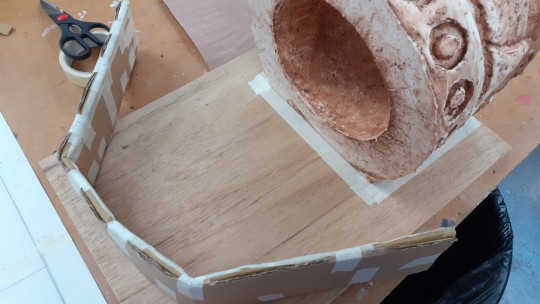

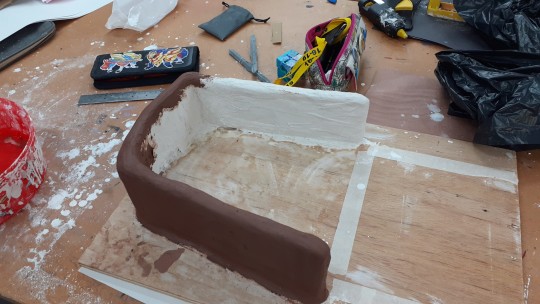
I made the arch first by making a base for it using three strips of cardboard that I attached together using masking tape. Once I was happy with the cardboard base I glued/secured it to the backboard using a glue gun. I went over the outside an inside several times to make sure it was strongly attached.
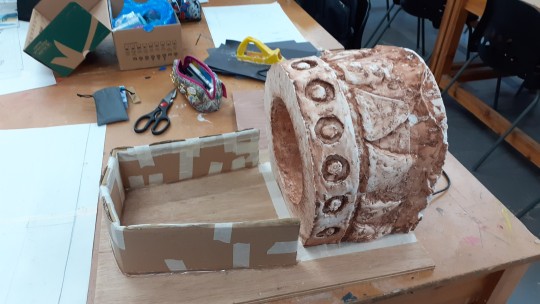
Once the glue had dried I added lots of sheets of cut up Modroc (which is activated my adding a bit of water onto it) over the top of the cardboard to make it stronger/more durable as well as bulk it out a bit and fill/cover gaps in the cardboard. Also I wanted to add a layer of clay over the top which I could bulk out the arch more with/sort out the shape/make the top corners more curved and carve into/texture. I thought that clay would probably bond to Modroc better than cardboard, but whether that’s actually the case I have no idea. I managed to cover about half the arch with clay once the Modroc had mostly dried before the end of the day. But since I still had quite a bit more to add and didn’t want the clay to dry out I put the board into a bin bag to help stop it from drying out.
0 notes
Link
https://dune.fandom.com/wiki/Spice_Melange#:~:text=The%20spice%20originated%20on%20the,form%20a%20pre%2Dspice%20mass.
Sandworms don’t start off as giant worms but instead begin their lives as Sandtrout, the larval stage of the sandworms. They looked similar to large freshwater leeches, but were also described as being blobs without any particular distinguishing features and similar to slugs. Like the worms they live in the sand on Arrakis in large numbers. Many of these Sandtrout die as part of the planets natural lifecycle but the rare few that do survive over thousands of years grow into their much more iconic adult stage of the sandworm. And when a worm dies Sandtrout are released into the sand creating a never ending life-cycle. The Sandtrout if squeezed would release a particularly potent form of spice and are also responsible for the existence of spice in general. The spice which is harvested by humans is created deep under the sand from the fungal excretions of the Sandtrout (essentially their body waste/poop) mixing with water (I presume some kind of chemical reaction takes place between the two substances) which forms a pre-spice mass. When this mass is forced to the surface due to an explosion of pressure the pre-spice mass reacts with the hot air of Arrakis and the intense heat causes it to turn into Spice Melange.
Along with producing the spice Sandtrout are also capable of terraforming planets into deserts so their adult stage/the sandworm is able to survive and they themselves have the chance to metamorphosize into an adult continuing the lifecycle. They do this by absorbing large amounts of water to prevent the planet from becoming waterlogged and killing the worms. This ability is evident from the fact that Leto Atreides II discovered the Sandtrout aren’t actually native to Arrakis. There is evidence from salt beds on Arrakis that is used to be covered in massive seas but when the Sandtrout arrived due to their native ecosystems no longer being able to support them they encysted all the planets water so they could turn into worms.
So the larval/baby form of the worms has no issue with water but that is lost when they grow into worms. The fact that they can terraform the planet sort of derails my idea that they evolve to cope with the planet being terraformed back to its original water covered state because they basically already have. And eventually they will turn the planet back into a desert. Although since the humans/Fremen themselves terraform the planet maybe they are constantly working against the Sandtrout to keep the planet in a waterlogged state. The Sandtrout keep absorbing the water but perhaps the Fremen find a way to increase the water levels again maybe collecting the trout periodically to extract the water from them leading to a never ending back and fourth between them. (An alternate series of events.) So instead of trying to terraform the planet and making minimal progress some of the Sandtrout mutate while trying to metamorphosize into an adult and turn into sandworms better adapted to living in/have some degree of a tolerance for water. These mutants survive and eventually all the Sandtrout turn into a new type of worm adapted to live under the seabed. The Sandtrout live in the oceans and still produce the same waste product which reacts with the ocean water to create the pre-spice mass. But it can’t naturally turn into spice without intervention. So it has to be filtered out of the water by the Fremen who heat it themselves in something like a spice lab or refinery in big furnaces to turn it into spice. It’s then siphoned off through a network of pipes which distributes the spice to the various fountains so people can have easy access to it.
0 notes
Link
Sandworms are giant animals that live beneath the sand on Arrakis. They hold a lot of significance in Fremen culture as well as humanity as a whole for being essential in the creation of spice.
Essentially they are massive worms with the most accurate estimate being that they can reach a maximum length of 450 metres long. Although some believe they can become much larger up to 700 or even 1000 metres in the planets south pole regions. Although this hasn’t been confirmed. Similarly their exact lifespan is very unclear due to it being very difficult to study them, but it’s estimated to be several thousands of years. The worms have thick, rough, orange skin which was comprised of scales which were several feet that overlapped and interlocked to essentially create body armour. This prevented unwanted sand from entering into the worms body while it burrowed through it. Although the Fremen learned how to exploit these scales, by prying open the edge of one the scales the worm would move that scale above the surface at that particular point to minimize the sand entering its body. If the scale was kept open the worm wouldn’t submerge allowing the Fremen to essentially ride the worms and they become a viable transport option.
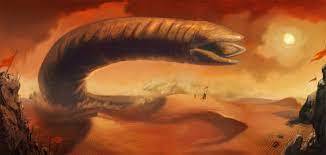
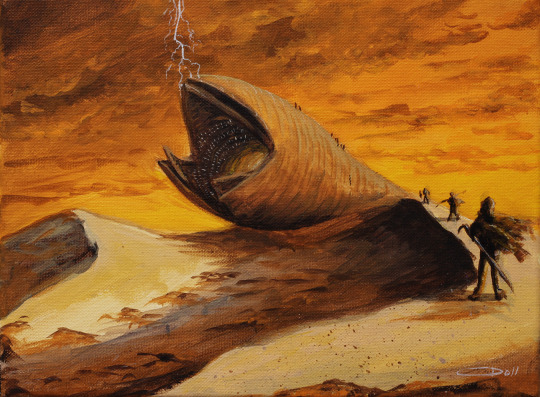
The sandworm predominantly ate sand as well as the inorganic and dry components of the planets crust.(Rather similar to my own idea, but less sand and more rock.) As well as potentially the sand plankton which they could have sifted out. But were also fully capable of consuming objects as large as the spice harvesters. Although seemingly not for nourishment but rather to defend their territory. The worms were extremely territorial in nature and were attracted to rhythmic vibrations, breaching the surface to purse the origin of them in order to defend their land. An indicator of a worms arrival was dry lightening which would appear in/around the area where a worm was about to breach the surface (which explains the lighting in the original film which I found an odd visual choice) which occurred due to static electricity being discharged into the air which was positively charged.
Despite being more or less indestructible the worms did have one fatal weakness, water. Expose to water even in small amounts was fatal to the worms, if it managed to enter into a worms body it would accelerate the worms metabolism to such a high rate that essential biological functions would fail leading to the worms painful death. Although the biproduct of this worm and water reaction created a highly toxic poison called the water of life which is used in an important Bene Gesserit ritual. (Perhaps my worm could have evolved water resistant scales or a way of filtering out/destroying water that enters it’s body. Maybe it’s contained within a new organ in the throat which filters out water in the worms body and pumps in out through worms skin/scales. This water could reduce friction between the worm and rock tunnels making burrowing and moving through tunnels easier/more efficient. Perhaps it could also shoot the water out it’s mouth at high pressures to help break up/erode the rock in front of it. )
Along with using them for transportation the Fremen regarded the worms as spiritual symbol of their faith and physical embodiments of their one God from their original religion, Zensunni. They were also known by various other names including The maker and Shai-Hulud and are essential in a lot of the Fremen’s special ceremonies.
According to this source Frank Herbert was inspired to make the worms based on the mythology of dragons, in particular their function as a protector for some grand treasure in a lot of stories. Such as the Dragon of Colchis from the Greek myth of Jason. They “protect” the spice from the humans trying to harvest it which I suppose could be interpreted as the spice being a resource that shouldn't be accessible to people but they find a way to obtain it anyway. A forbidden/dangerous substance which just makes it more desirable and humans try to get access to it regardless of the danger/consequences. People will always want what they can’t/shouldn't have especially in the pursuit of power.
0 notes
Text
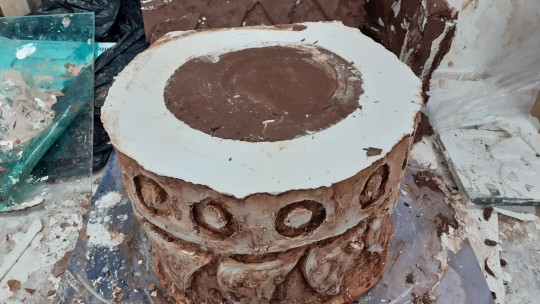


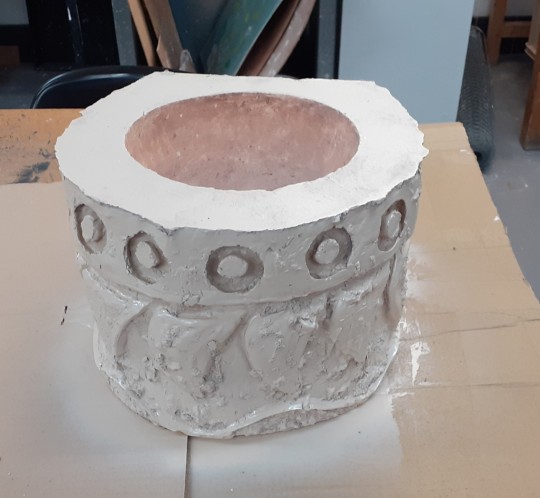
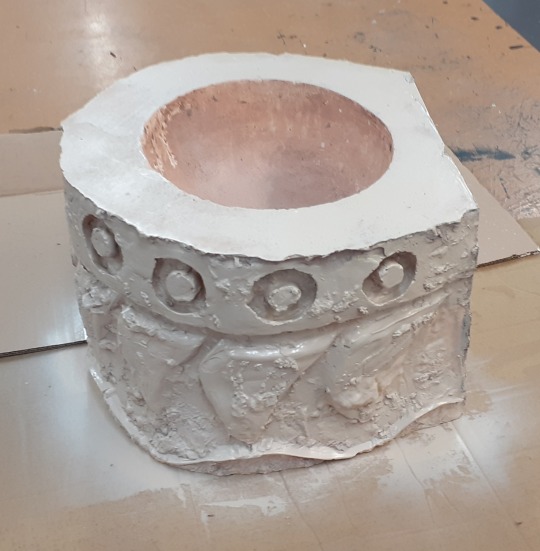
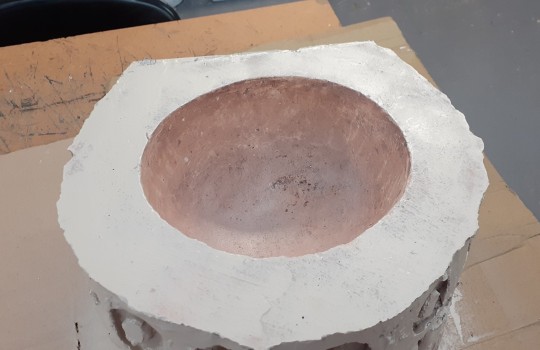
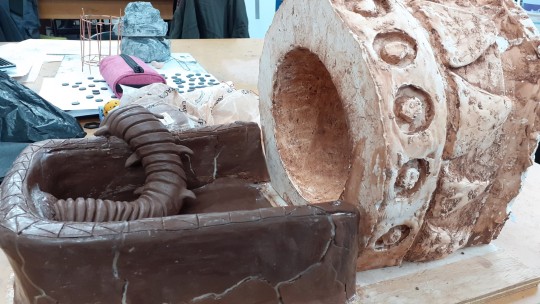
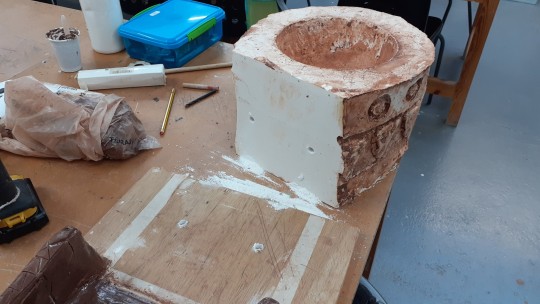
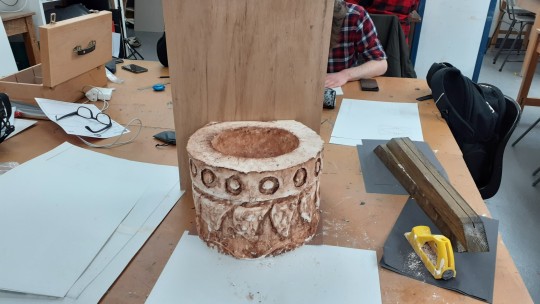
completed bowl cast. Once the cast was dry enough I removed the clay from the plaster cast mainly by pulling it off carefully with my hands. But there were a few bits of clay such as inside the circle indentations that I needed the help of clay tools to remove. After turning the bowl the right way round I found that the clay hemisphere which was hard when the plaster was poured in had turned soft/was almost more or less like new fresh clay. Which likely occurred due to the clay absorbing quite a lot of the moisture/water from the plaster. At first using a clay tool I tried to work around the sides of the clay to try and get underneath it to lift it out as a solid piece. But the clay was too wet and thick for that and it wasn’t until too late that Kyrstie told me that doing that would damage the plaster. So there are a few areas inside the bowl where it’s pretty noticeable I stabbed it with a clay tool accidently. Kyrstie instead drilled down into the clay to loose it up a bit and then dug down into it using a clay tool to thin out/expose the sides. This way it was easier to lift it out as a large solid chunk. Although we (mostly Kyrstie) had to dig pretty far into the clay to do this which took quite a lot of time. Although eventually the clay was removed and I had a reasonably neat bowl shape.
The entire cast itself is a bit asymmetrical, the right side is noticeably bigger than the right, the back isn’t quite flat/has some excess plaster and I wish I had put the spine pattern closer to the bowls rim. Although apart from a bit of chipping (particularly from the wave at the bottom of the bowl) It’s mostly intact, looks nice and it resembles my rough design and a bowl/part of a fountain.
0 notes