signaturesnstitches
Signatures N Stitches
Astra | She/Her | 27Hi there! I make handmade journals and plushies 💕✨https://linktr.ee/Astra_Dark
731 posts
Don't wanna be here? Send us removal request.
Last Seen Blogs

brokensenseofhumor
“Would You Like To Stay Here Forever?”
missmorosis
morosis

clyeee
PICTURESQUE MEMORY
ironedit
we are groot.
Text
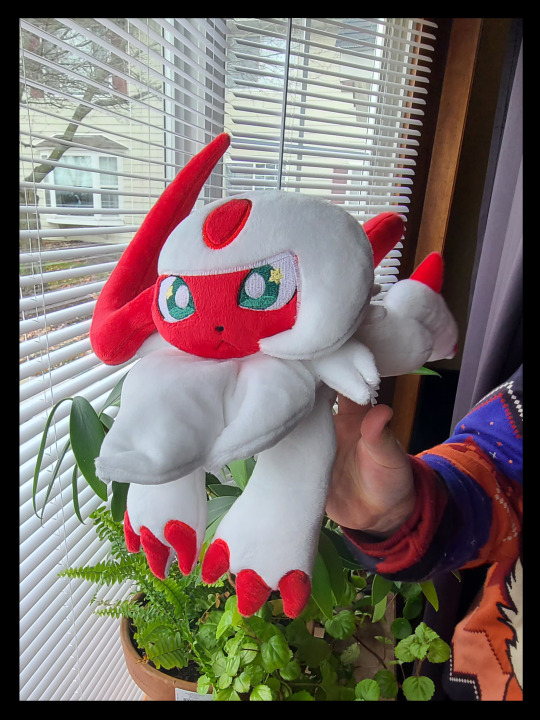


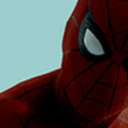
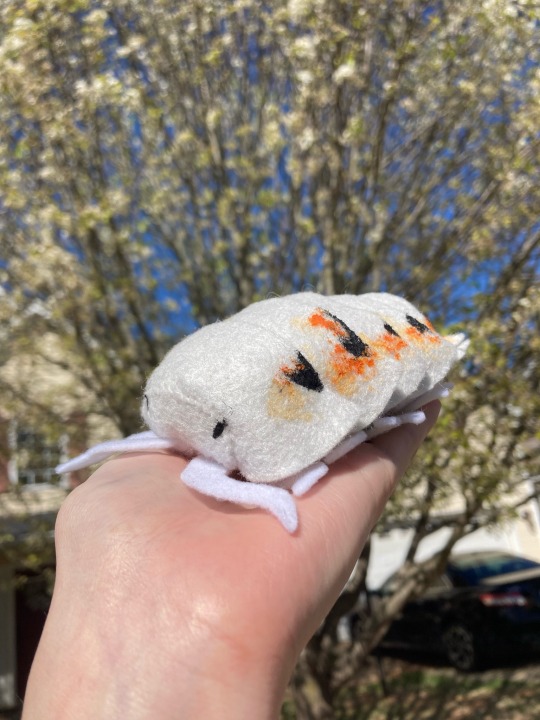
This was my first time making a shiny version of my Absol plush. I really like the contrast between the red and white compared to the blue one. You can pre-order this plushie on my site here: https://studio-fluff.com/product/absol-plush/
4 notes
·
View notes
Text

Because Tumblr keeps eating my post 😭 Details in the google form below!
9 notes
·
View notes
Text
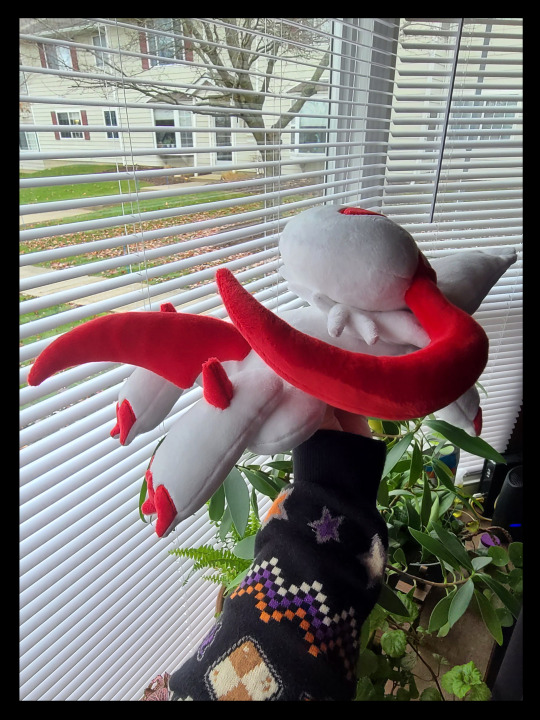
Mini Crochet Vash the Stampede Pattern
Mini crochet Vash the Stampede
This one is the dark palette but it works for any colors

None of this is done in a round as in you have to slip stitch after each round.
I used DMC thread for all of this, but I could not tell you what specific colors just: pale yellow, red, black (or for dark Vash, a dark purple instead of red). I used a 1.15 mm hook for this whole thing and a quilting needle, which is just a really short sewing needle (an inch or so long).
Mc = magic circle
Sc = single crochet, American terms
Sl st = slip stitch
Head: *I used a pale white thread color for this you can obv use whatever* start with a magic circle || sc 6 in the circle, sl st to first stitch (6) || ch 1, sc 2 in each stitch to increase to 12, sl st (12) || ch 1, sc 1, sc 2 in same stitch, repeat 5 times, sl st (18) || ch 1, sc 2, sc 2 in same stitch, repeat 5 times, sl st (24) || ch 1, sc 24, repeat 3 times for a total of 4 rounds of 24 scs, sl st (24) || ch 1, sc 2 dec 1, repeat 5 times, sl st (18) (you can start to stuff it here, I used less than a cotton ball for the whole thing) || ch 1, sc 1 dec 1, repeat 5 times, sl st (12) || ch 1, dec every stitch, sl st (6) || cut the thread but leave enough so you can sew it to the body *Do NOT pull the hole closed. It’s going to be the neck hole where you attach to the body.
Legs: *in black thread* mc || sc 4 in the circle, sl st (4) (Tip: I would recommend waiting to close the hole until the next step because it makes it easier to see where the stitches are) || ch 1, sc1, sc 2 In same stitch, repeat again, sl st, (6) || ch 1, sc 6, sl st, repeat 2 more times for a total of 5 rows (6) || cut the thread and stuff it || you can also hide the thread ends here if you want I just stuffed them at the bottom when putting in the stuffing. For the second leg just repeat the above steps.
Body: *change to red thread* connect to one of the legs anywhere that feels secure | ch 2 (this just gives some distance between the legs), sl st to the other leg, ch 1, sc 5, sc 2 in one side of the ch 2 from before, sc 5, sc 2 in the other side of the ch 2, sl st (14) ||ch 1, sc 14 (14) || ch 1, dec to 11 it doesn’t really matter where you do it as long as they’re evenly spaced, sl st (11) || ch 1, sc 11, three more times for a total of 4 rows of 11, sl st (11) || ch 1, dec to 9, again, it doesn’t matter where, sl st (9) || ch 1, sc 9, sl st (9) || cut the thread and hide the ends
Arms: *change to black thread* mc || ch 1, sc 4 in the circle, sl st (4) (I recommend not pulling the hole closed yet because it is hard to see) || ch 1, sc 4, three more times for a total of 4 rows of 4, sl st (4) || cut the thread and hide the ends. repeat the steps for the second arm. You don’t have to stuff these because they’re so little :D
Decorations (using red thread):
Arm 1- ch 5, sl st to make it a circle || ch 1, sc 5 for two rows, sl st (5) || cut the thread but leave enough to sew securely to arm.
Arm 2- ch 5, sl st to circle || ch 1, sc 5 for four rows, sl st (5) || cut thread and leave enough to sew to the shoulders.
Chest- ch 12, sl st || ch 1, sc 12, slst (12) || ch 1, sc 2 in same stitch (1st and 2nd stitches), sc 6, sc 2 in same stitch (8th and 9th stitches), sc 5, sl st (14) (this is to make the shoulders point out a little) || ch 1, sc 2 in same stitch (1st and 2nd stitches), sc 6, sc 2 in same stitch (9th and 10th stitches), sc 6, sl st (16) || ch 1, sc 2 in same stitch (1st and 2nd stitches), sc 7, sc 2 in same stitch (10th and 11th stitches), sc 7, sl st (18) || sew to the main body by stabbing through the waist line, cut thread

Shoulders- (this one goes in the empty spot between the main body and the chest piece from above) ch 5, turn, sc 2, skip a chain, sl st to last chain, pull through and cut thread (2 ½) || sew into the empty space on the shoulder. You can also attach the arms after finishing this, hopefully I will remember to include a photo to show where to attach them.

Legs? Train? - ch 9, sc 8, sl st (8) || ch 1, sc 8, sl st (8) || repeat 4 more times for a total of 5 pieces and attach to chest piece, one centered around the front, two on either side of that, and two in the back. If there is extra space in the back, you can make a sixth one and space the pieces more evenly in the back.
I would recommend attaching his head at this point, but we will add hair and the face later
Collar- ch 11, sc 15 (inc every other) (15), sew to the neck of the jacket.
Buttons- (using black thread) sew 2 french knots on the collar (you can hide the thread by either going through the back of his head or through his chest), then maneuver the needle to the jacket and sew either 6 or 4 french knots (depends on how much room you have), three on both sides, and then finally, on the train of his jacket, make 12 french knots with 6 on both sides.
Hair: his hair is a little complicated to explain but I’ll try my best. Using a light yellow and black thread, tie a whole bunch of knots to his head wherever you want his hair line (I was just pulling the thread through until it got close to the end, and then tying a knot and cutting it quite long so make sure you have plenty of thread) You shouldn’t be making it too thick at the front because then his hair won’t lay right. It can be a little thicker at the back of his head because we will have to cut it quite short when we get to that point. I don’t know how many knots I tied or where because it really just depends on the shape of his head. But once you’re finished tying all the knots try to press the hair down and shape it a little before cutting it (remove knots if you have to it happens all the time). When everything looks good then go ahead and start cutting. It may take a while to get the shape as you want it but go slow.
Face: I started with a light blue this time (because with the first Vash I gave him black eyes). It just takes some trial and error to get the eyes right because this also depends on the shape of the head but definitely make sure they’re evenly spaced lol. I think I did 4 sets of lines for each eye to get the size right. After that I used black thread pierced through the back of his head to make… eyelashes, I suppose… and the mouth.
34 notes
·
View notes


Text
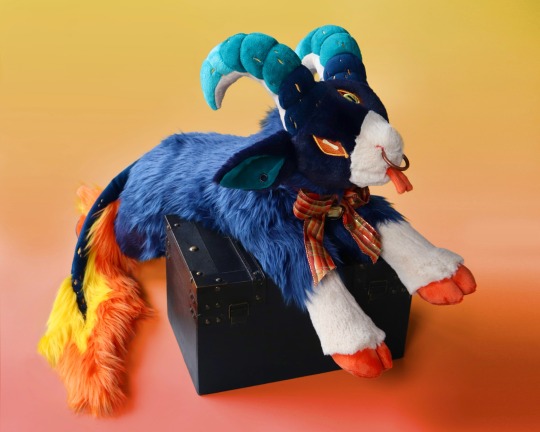

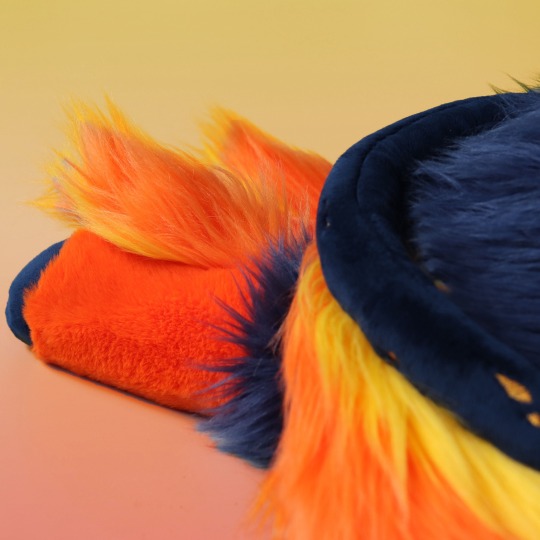
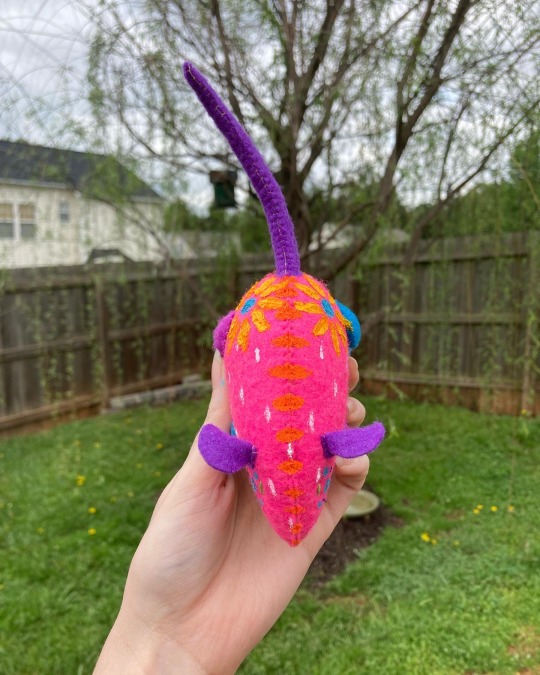
Night falls on the woods, leaving only the warm glow of a campfire beckoning you deeper into the trees. Do you follow the call? Perhaps if you do you’ll find this demon waiting for you. 🔥 🍁
The commissioner of this demon helped us summon a creature with gorgeous coloration and the spookiest of vibes.
The tail was a particularly interesting challenge with its blanket stitched fur and embroidered main tail portion that required rehooping due to its length!
Commissions are currently closed as we work through the last few demons on our queue.
204 notes
·
View notes


Text

10CM WOLFWOOD PLUSH INTEREST CHECK 🚬🐺
🔜 19th April, 10pm GMT+8
41 notes
·
View notes
Text
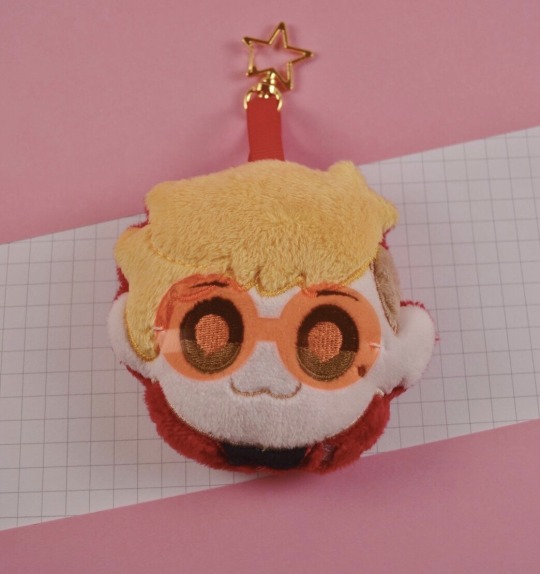
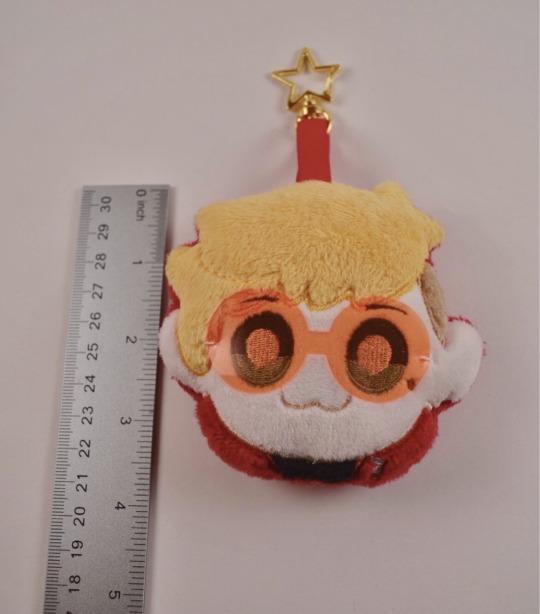

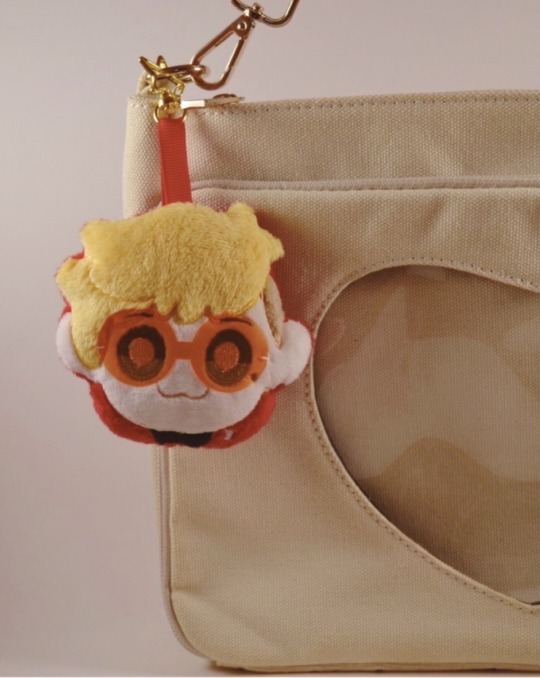
Preorders for my plush Vash charms are now open!! Each charm is made of super soft minky fabric and have vinyl glasses!!
Preorders run from April 10th - April 20th, please check them out 💕✨
60 notes
·
View notes


Text

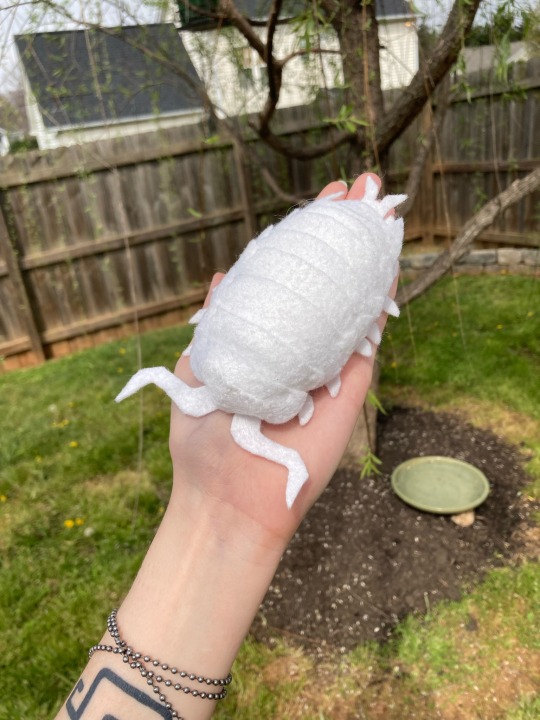
I've been sitting on this pattern and tutorial for a while now! so time to finally share it with you!
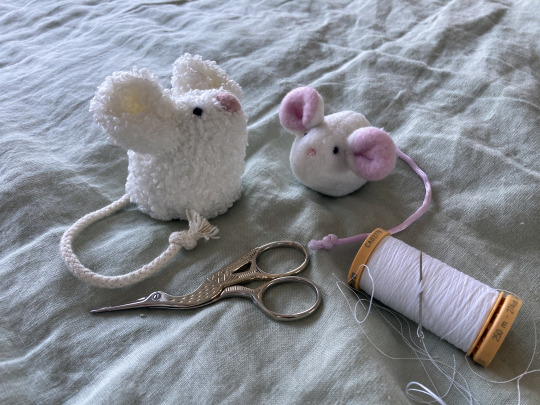
I was lamenting that the jellycat pip and sugar mice were long retired and difficult to get your hands on unless you are willing to pay much more than they retailed for each mouse, so i decided to try and eyeball a pattern and make some myself! they're not exact as i only used constructed visual references but they're close! please note that this pattern set is intended for personal use only. Rough tutorial under the cut!
This pattern is for printing onto A4 but you can check your scale with the measurements I've provided or just play around with how big or small you want to try and make them! i didn't really get any wip photos of pip mouse but it's method is largely the same with the nose being the major change, which i will detail in text in the instructions below.
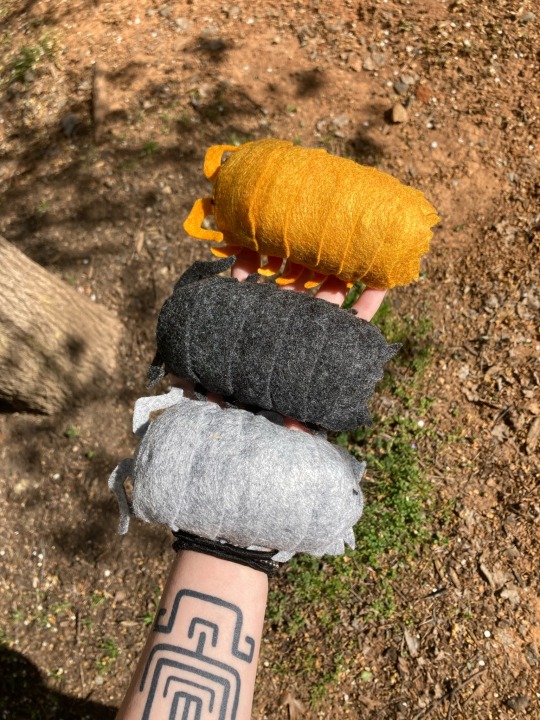
for sugar mouse i would recommend using polar fleece as it will act the right way for the ears to do their squishy marshmallow looking thing. but minky should also work or other similar fabrics! for pip mouse if you can find a similar curly looking fabric with a thin backing that'll be ideal but fleece will also work well, you just wont get the furry texture, you want a fabric with a little bit of stretch to it. i however would not recommend fabrics like felt or non stretch cotton for these guys as it's likely to not take shape the same as there's no give to the fabric.
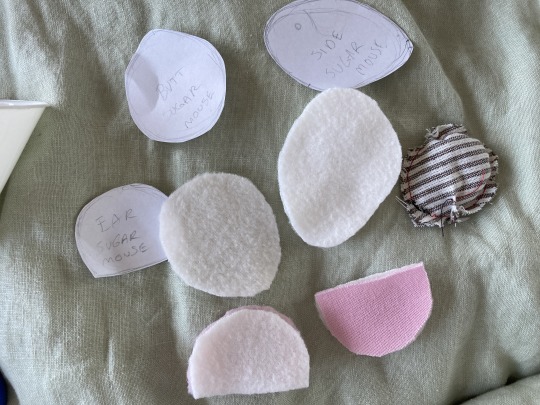
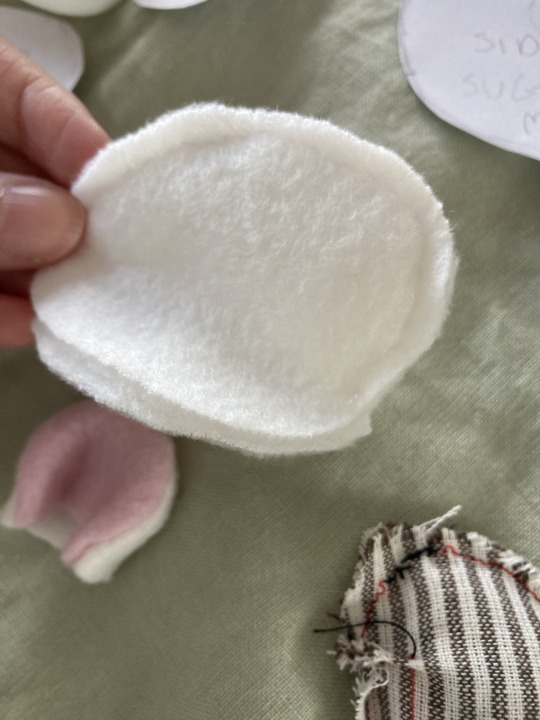
once you have printed out the pattern and cut the pieces in your fabric, you'll want to sew the ears up and turn them inside out, then put them aside for later. just leave them as is for now but here you can see i was playing around with pinching the turned through ear into shape.

Then moving on, sew the back pieces together along the spine and front of face. you then want pull the bottom open ends apart gently and place the open sides flat up against the base piece so that they're aligned, it can be good to pin this in place so it doesn't shift.
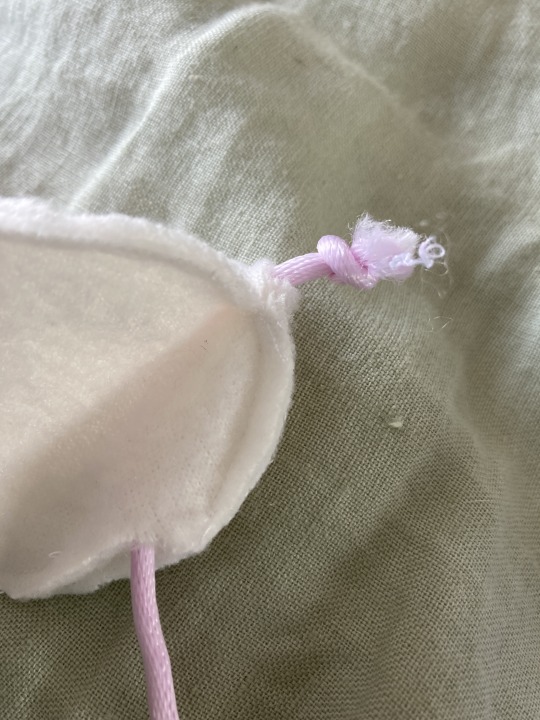
then, get your tail rope, and tie a knot at either end, placing the base of it inbetween the seam at the butt so that it'll sit in the right place, then sew the seam up directly with the tail in place, make sure you sew through the rope to secure it and make sure it doesnt shift. Sew around the bases seam leaving a hole in one side so that you can then turn your mouse through.
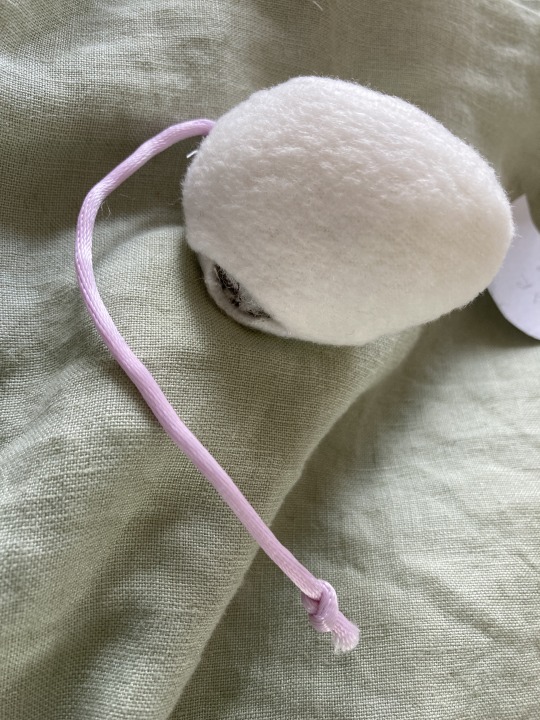
once turned through you will want to stuff your mouse with polyfill quite a bit so it takes shape! i like to put weighted beans in mine for extra effect, you can use dried rice or wheat too, just sew a little circle pouch a bit smaller that the mouses base with scrap fabric and fill and seal! then insert into the turning hole while you stuff. once stuffing is done you can sew the hole up with a ladder stitch. the weight from the beads will allow your mouse to sit up quite well.
next you will want to get those ears you put aside, take each corner and bring the ends together in the middle. then sew them gently together at the ends with one or two stitches in about the same spot. you want them to look 3d so dont sew the ends to the back of the ear, just end to end so they meet in the center.

Then pin the ears in place on the head
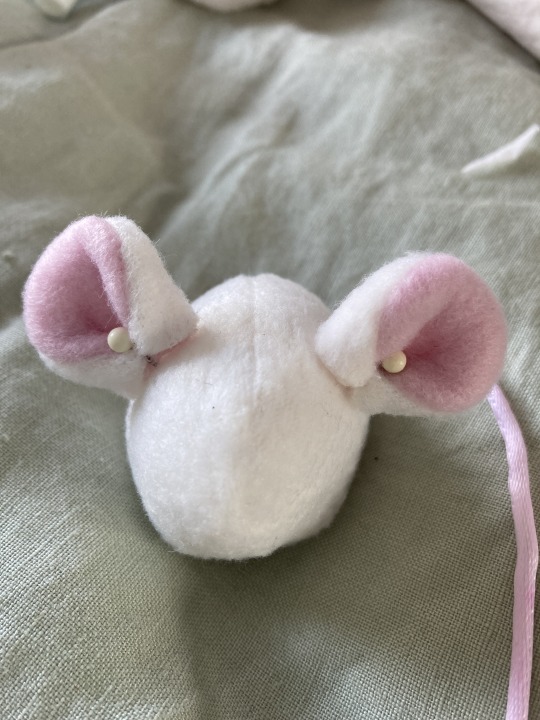
then you need to ladder stitch the ears in place while they're pinned so they dont shift around, go all the way around the outside edge of each.
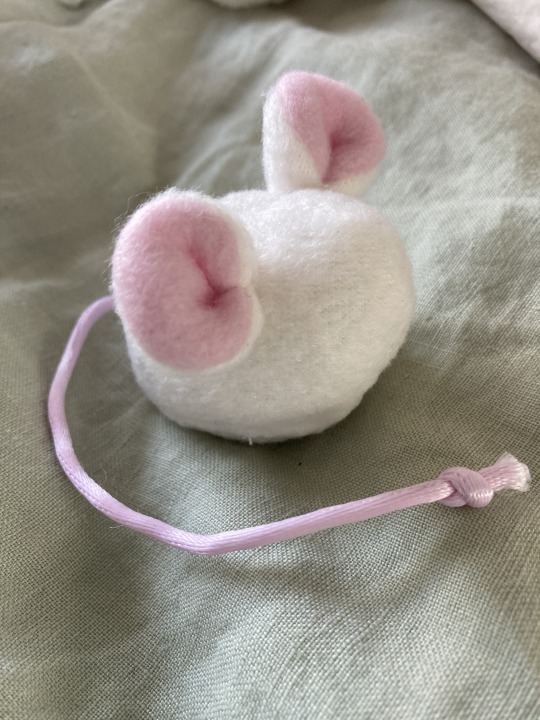
now you're almost done! next they just need a face! sugar mouse only needs embroidery by way of a french knot for both the eyes and nose (you can find good video tutorials on how to sew a french knot online), pip mouse will also need a french knot for the eyes but has a separate process for it's nose.
(for the pip mouses nose you will need to leave the marked nose hole open and then stitch the nose fabric to the square nose backing in line with the dotted direction on the pattern, (it should look kind of baggy when it's unstuffed) sew it up completley with no hole, then cut a tiny slit in the backing and add polyfill there before closing with a basic stitch, then you ladder stitch the nose directly to the marked nose hole)
in order to hide the embroidery anchor knots i find the best way is to start by going down through the middle of the ears and then coming back up where you want the eye to be, and then going back down and up through the ear for the finishing knot, as it creates a very easy cover for them and looks nice and clean!
then you have yourself a little buddy!

haha they're great to squish!
if you use this pattern i'd love to see your results!
2K notes
·
View notes
Text


I finally added my Mashwood stickers to my shop ✨✨
These stickers are 3” x 1.7” and are made of super high quality glossy vinyl!
Here’s a link to my Etsy please check them out if you’re interested 💕
41 notes
·
View notes
Text


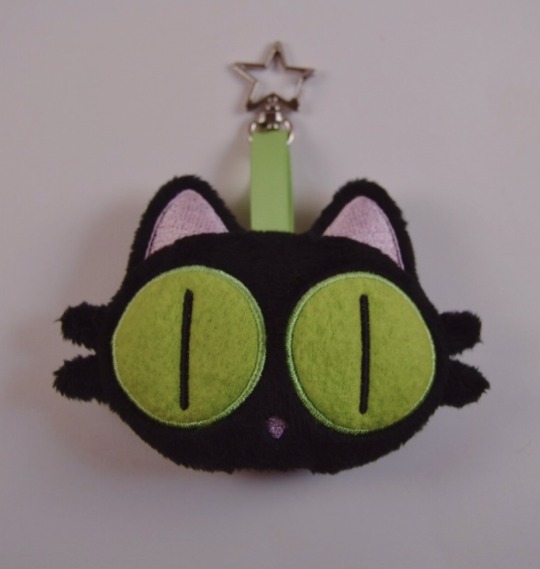

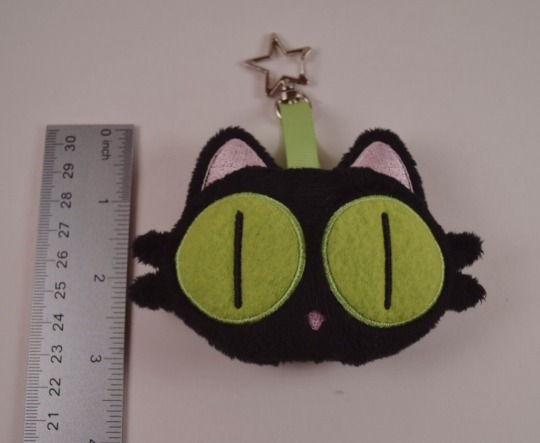

I made plush charms of everyone’s favorite black cat, Kuroneko!! 🐈⬛🖤
I currently have preorders open for this lil gals over in my Etsy shop! Please check them out if you get the chance 💕
Shop link -
142 notes
·
View notes

Text

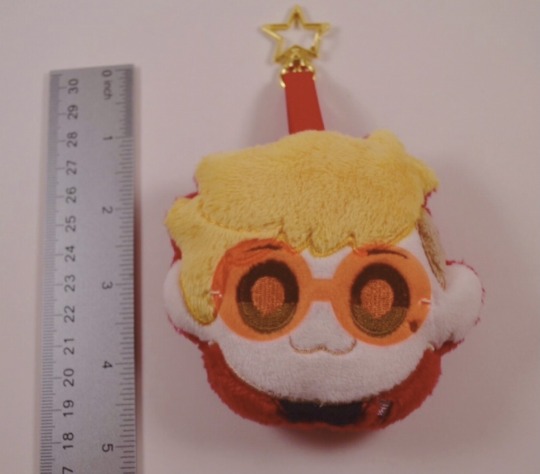


To celebrate the anniversary of episode 12 of tristamp premiering, I made some plush charms of Vash!
I’m super proud of this lil guy because it’s the first embroidery design that I made all on my own!
Want your own Vash? I’ll be opening preorders for this guy soon 💕
(Btw I’m currently running a giveaway for a Vash charm over on my Twitter! More info on that can be found over there, my handle is the same as here ✨)
107 notes
·
View notes

Text
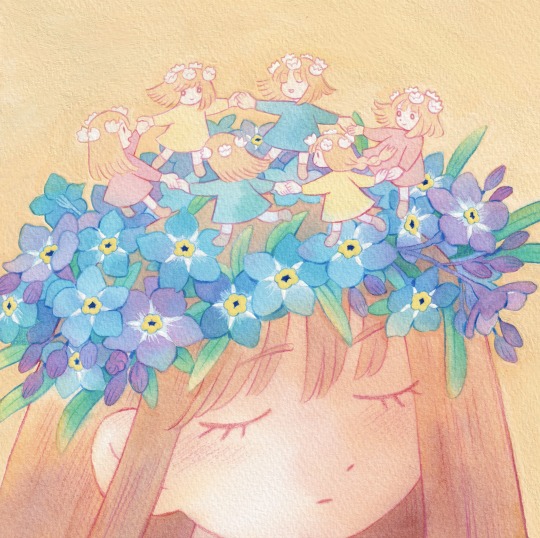
Flower Crown 💙
I’m going to have my first solo exhibition in Tokyo this upcoming May 👀✨
5月に東京で初めての個展を開きます。個展の詳細については、近日中にお知らせします💕
5K notes
·
View notes