
Last Seen Blogs

fromcrossstitchapps
Cross Stitch App

supremeforcebond
The reylo kiss ™️

bestmechanicautorepair1
Untitled

dottieisdotting
Evangeline

sincerely-jeanne
Untitled
Text
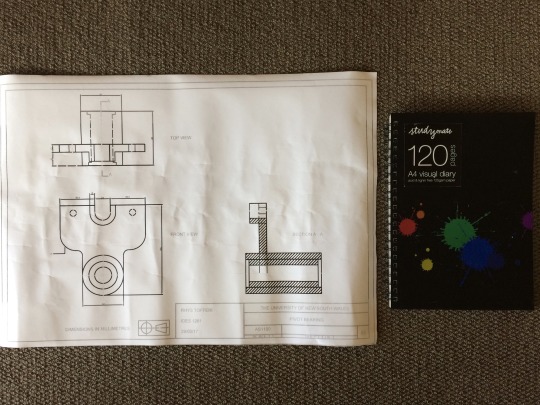
Week 13: Final post
Ultimately, Communications was a great subject.
I think being introduced to the different mediums in parts that spanned roughly 2 weeks each was really beneficial.
We covered many approaches to sketching/rendering/prototyping a product idea.
Using your own resources:
Being taught each alternative definitely helped me, as I wasn’t efficient by any means in each. Having problems with basically every week was ultimately quite useful. It taught me to ask my friends for help if they knew what to do, search the internet for tips and instructions and/or fiddle around to see if I could get the right outcome.
Things I learnt:
I had some late nights/early mornings finishing up projects,partly because my time management wasn’t amazing, but also because I underestimated the skills needed to accomplish each separate task.
The homework was helpful in providing me with the basics necessary to complete the tasks, and as a result of my struggling, facilitated my own learning.
I learnt how to do engineering drawings (rather well, may need to do a bit more standards research) use AutoCad, photoshop (render), adobe bridge (collate images), make prototypes and more.
I learnt skills that are essential to design, and communicating across multiple disciplines.
Looking back:
In hindsight, I wouldn’t change much, I was just really sub par with most of the work, but I think I needed that difficulty, and to see the results others were getting, to push myself. I would probably have gone to the photoshop hairdryer in class tutorial, because that took me way too much time to figure out- even with the help of my friends.
Evaluation:
I think that the subject for me, was invaluable. It really did wake me up to the work that has to go in for results to come out. If you’re not efficient, you’re going to waste time, and I definitely did- but by looking back at that I can change how I go forward.
Cheers to Rob, Will and Max for the work you put into making this course as enjoyable/challenging as it was.
4 notes
·
View notes
Text
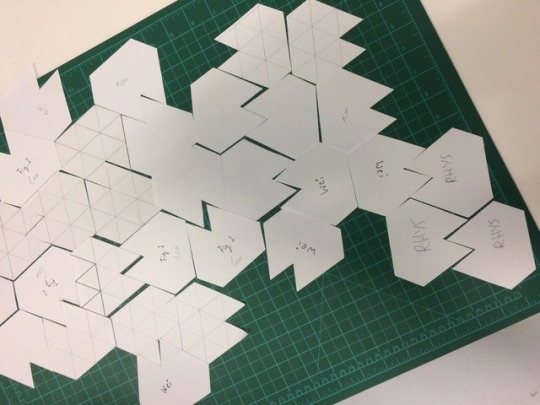
Week 12: Model Making
This week we were getting closer to the due date of Project 3.
This week consisted of more measuring and fine tuning, as well as drawing up the cad file for print.
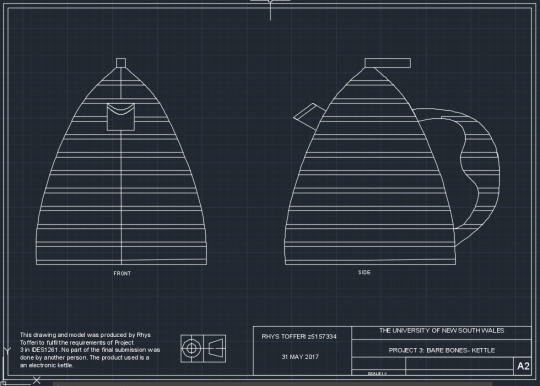
After plotting in all the measurements into cad, I began to cut out the panels.
I ended up cutting the vertical axis out wrong, I cut the protrusion off the top of the lid, and re made the vertical point (didn’t take a photo).
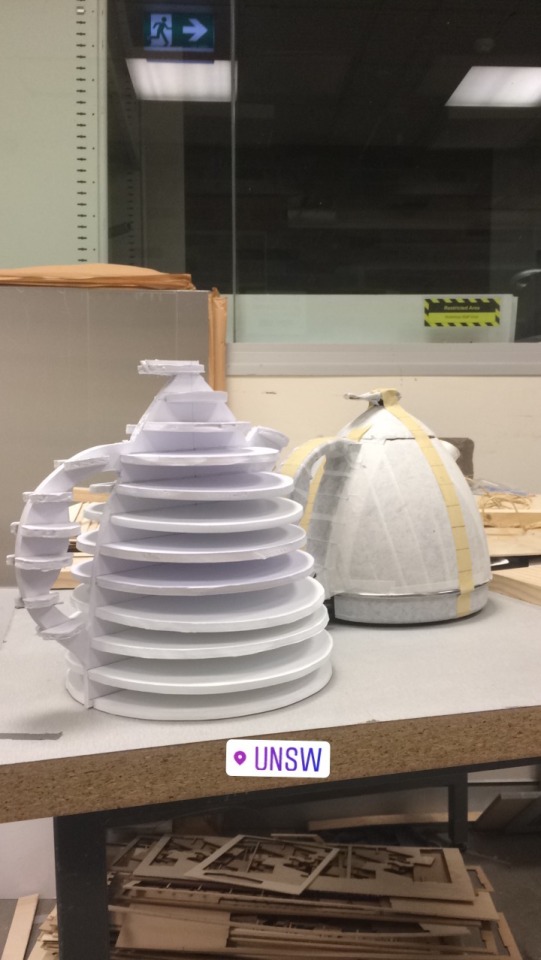
Overall this assignment was tough, especially with our other projects, but I can understand that this is a form of model making that is relatively inexpensive, coupled with the foam modelling of Design Fundamentals, these processes can really help to represent the form of a design.
0 notes
Text
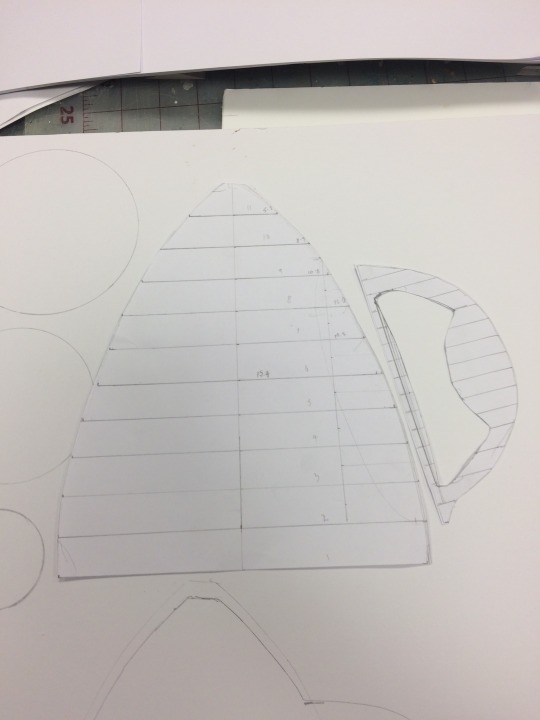
Week 11: Model Making
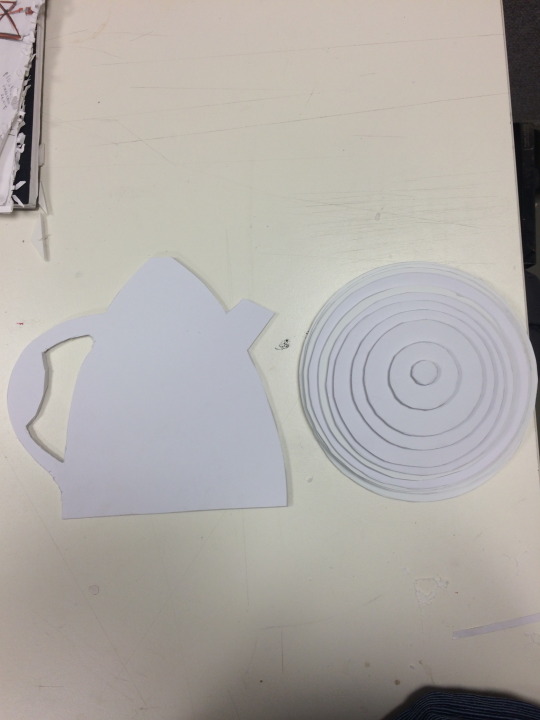
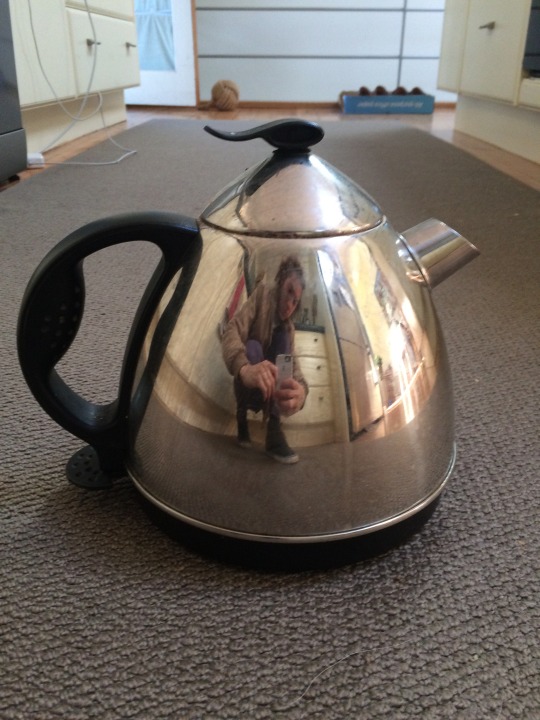
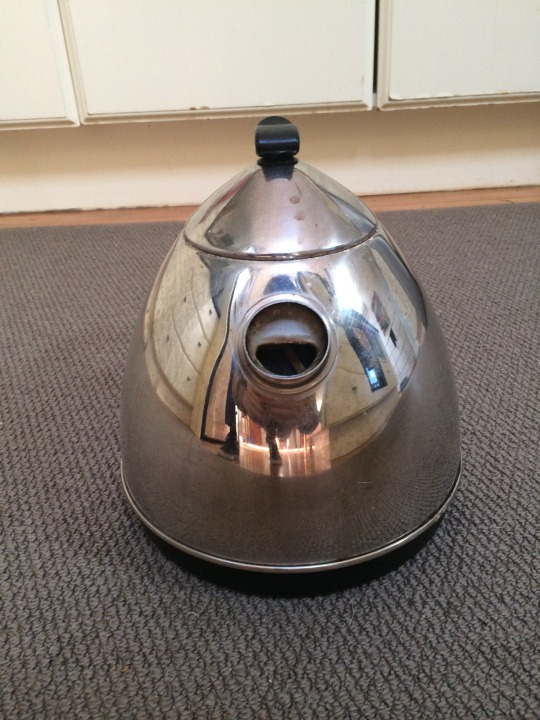
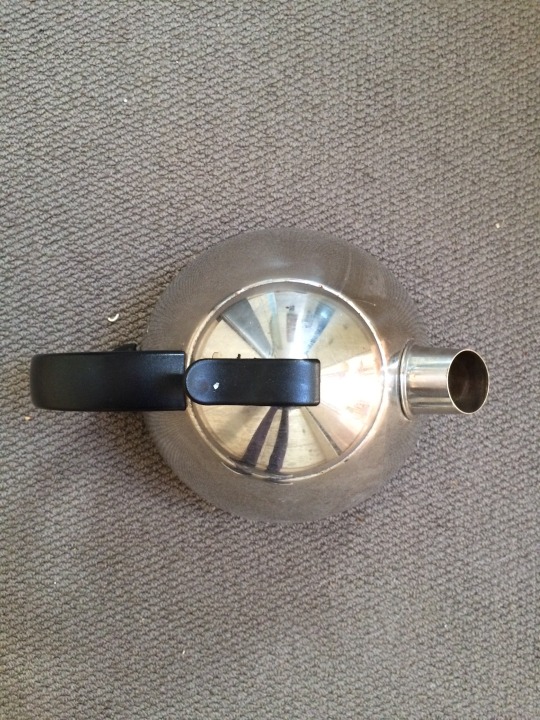
This week I chose the model for my Project 3: Bare Bones.
I decided on a kettle, as we were told that organic shapes were neat to look at, also the objects I had at home were not very easy to transport anywhere.
SIDE VIEW- excuse my face
FRONT VIEW
TOP VIEW
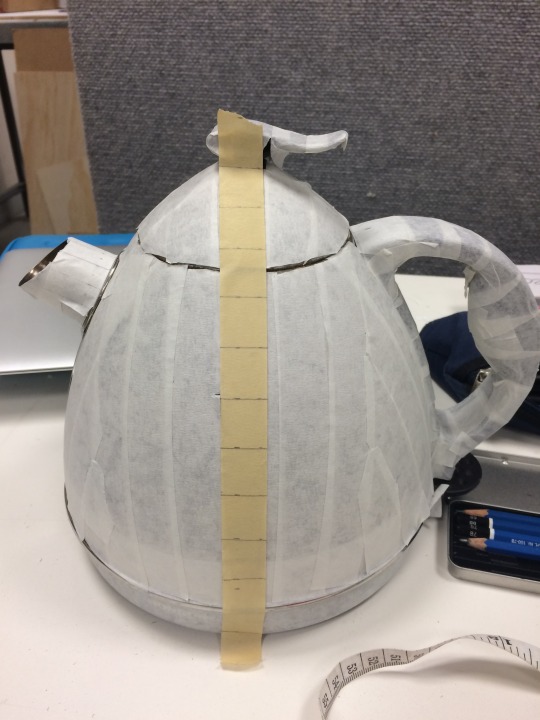
After figuring out how much space is accepted between the ‘ribs’, I decided to measure out distances of 20mm between each part.
Considering the thickness of the foam board I bought was 5mm, so I’d have a 15mm gap between each plane.
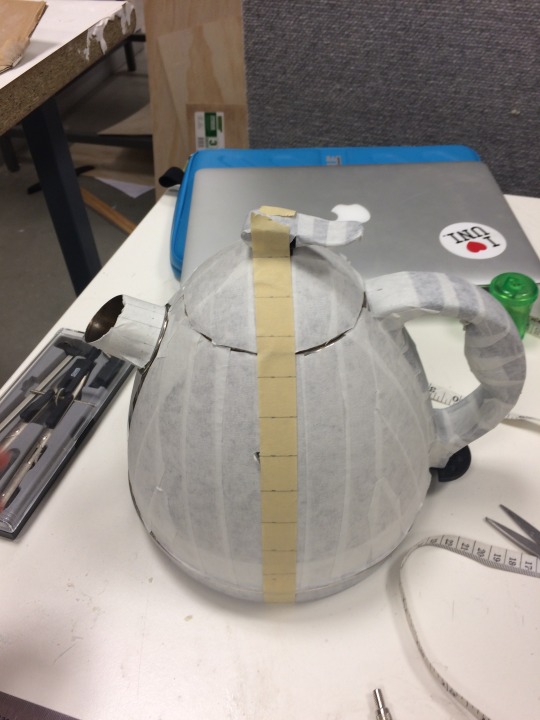
I measured out another piece of tape and marked it off, and stuck it so that I could make sure each side’s panels would be marked at the same heights from the ground.
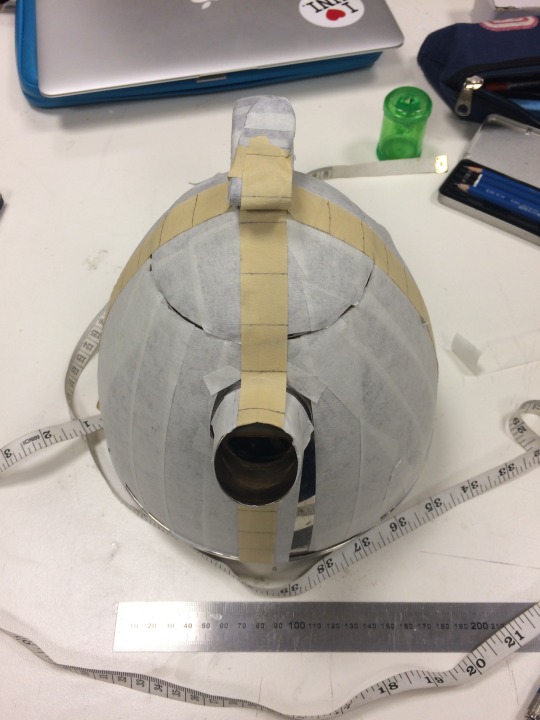
I then added two more reference points, so that I would be able to use my tailor’s tape to circumvent the kettle, and mark the sides at the right height the whole way round.
Looking back, I could have used other methods to measure the circumferences, yet I thought this idea worked.
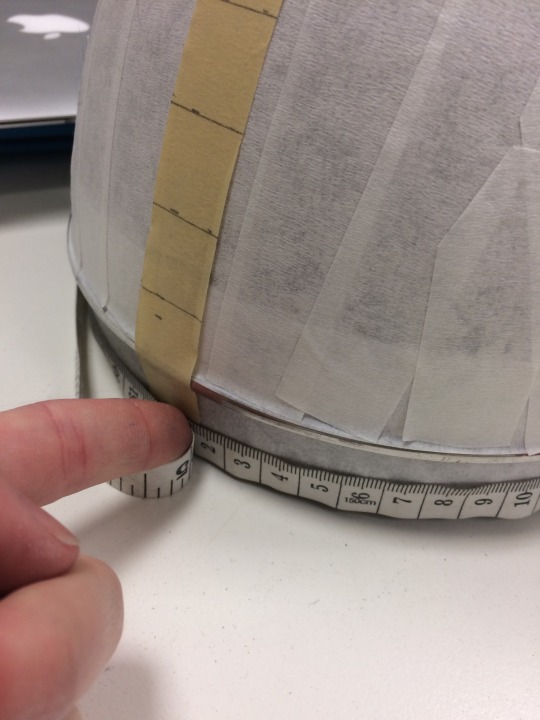
So each mark I made at 20mm intervals represented where a section would go. I followed the tape around the kettle and marked out the diameters of each level.
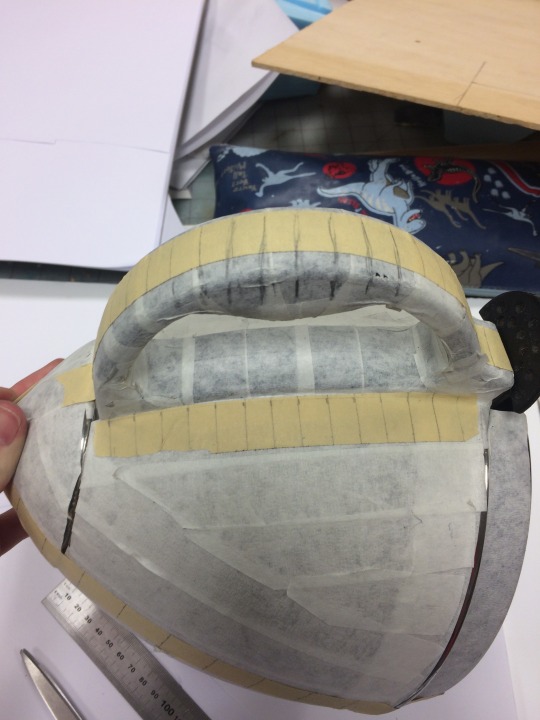
The handle measurements were tricky, I think there was a better way to do this, but I couldn’t think of it.
I measured the length of the handle and separated into 10mm gaps, so that i could measure the curves.
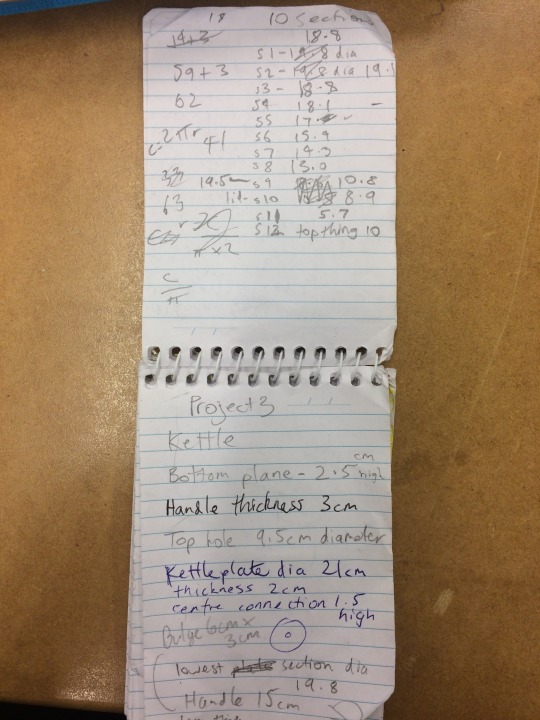
I took all the measurements down into my notepad, and mocked up a rough diagram.
0 notes
Text
Week 10: Sketching w/Tom Skeehan
This week our usual communication lecture was scheduled to allow Tom to provide an introduction to his career in design, what he’s done over the years, and to help teach us some fundamental perspective drawing techniques.
We were introduced to warm up exercises, which helped us get our mind on drawing curves and straight lines.
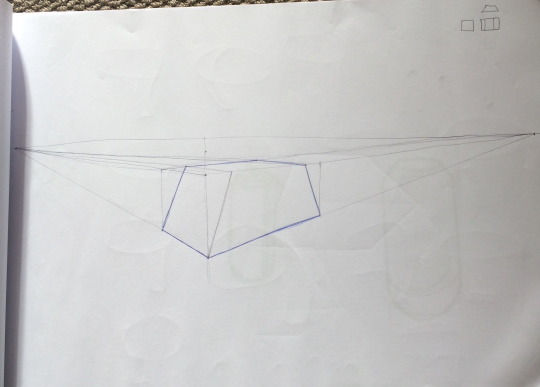
We were given a series of different objects to draw
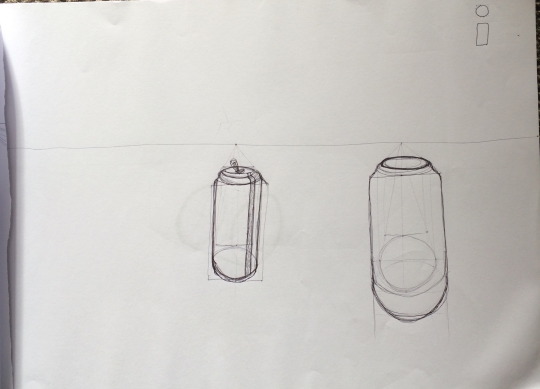
I attempted the can, but I found it hard to get the drawing to have the same perspective as looking at the real object. I couldn’t get the top size to look right, which put the can out of proportion.
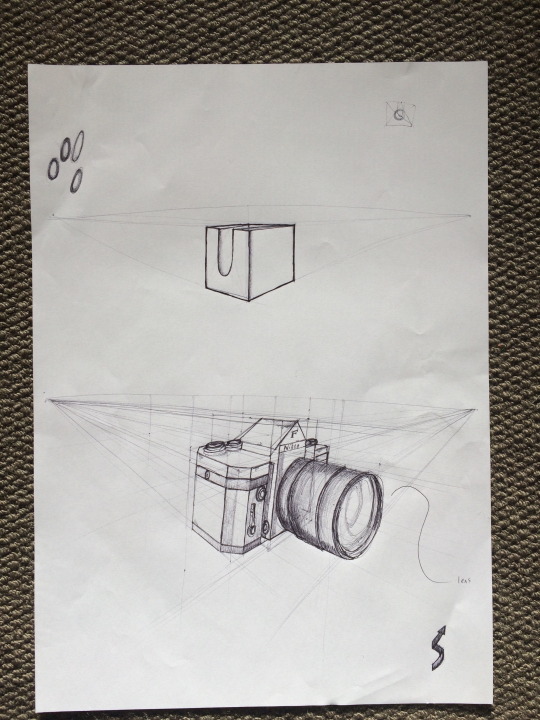
The camera drawing was the most complex item we drew. I think mine went alright, but I realised i was lacking a few parts that really took away from the actual object.
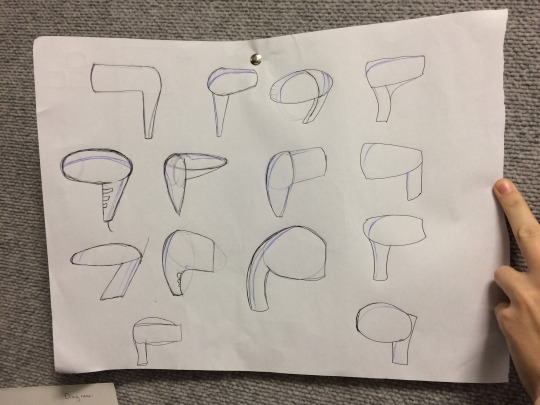
We also were asked to churn out as many designs of an item within a time limit, that had minimal detail but could be expanded upon as potential designs.
I really liked this quick fire sketching, and the tutorial overall was good at reintroducing this kind of drawing.
0 notes
Text
Week 9 Project 2 presentation:
Was I adequately prepared?
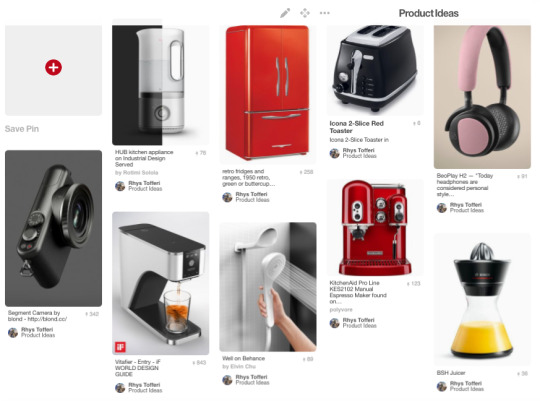
I believed I had prepared myself beforehand, I collated enough images and designs to help me make a decision on my render, and curated my Pinterest board which was great for inspiration.
However for the class presentation, I lacked the physical form, I contemplated using my computer but I figured that would be too hard to display, and decided everyone had looked at similar items anyhow, with the 3 categories that were recommended.
My preparation
First I made 3 seperate boards on Pinterest, and categorised them as:
‘Product Ideas’- possible choices for my project render, designs that were appealing, existing, and not too beyond my ability. I was pretty sure I’d do a kitchen appliance, either a coffee machine or toaster, but only found coffee machines that were pod, way too complicated, or a product that was rendered, but didn’t exist.

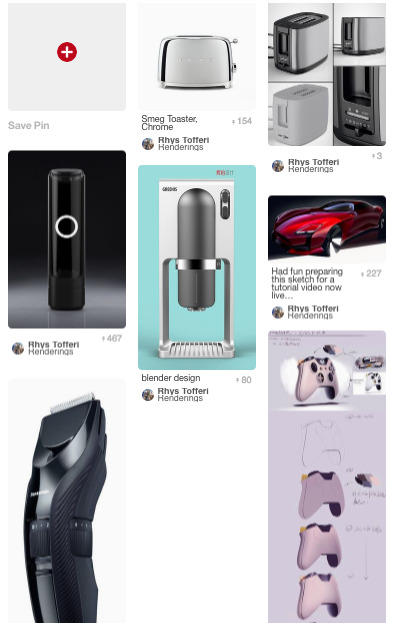
‘Renderings’- for examples of how users of Pinterest/ designers decided to display certain appliances and products. This was helpful in deciding upon the style of presentation, one that fit the target audience of the product and that wouldn’t distract from the design.
This board helped me understand what display I wanted to create, and I chose to do a perspective view as I feel the product details (dials/buttons/shape) I chose can be communicated better in this way.

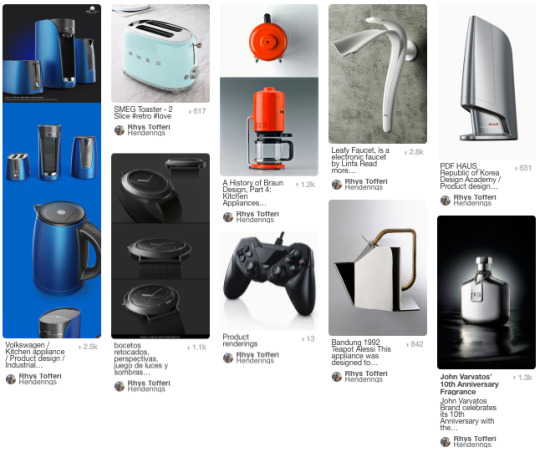
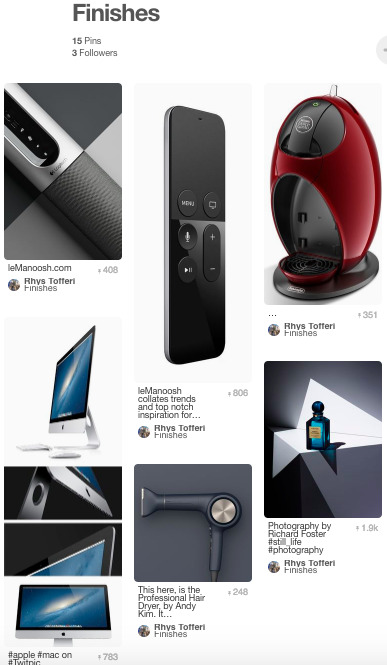
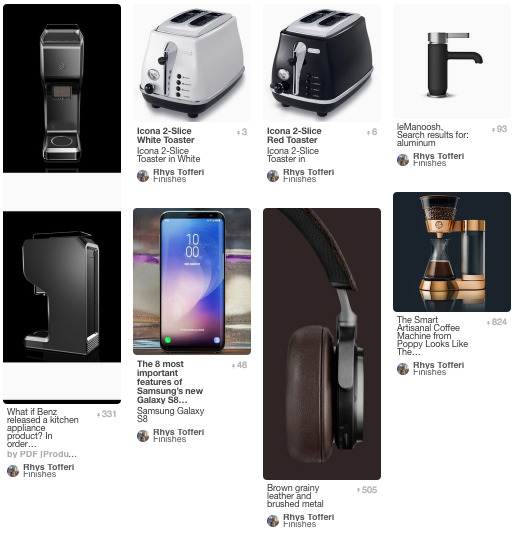
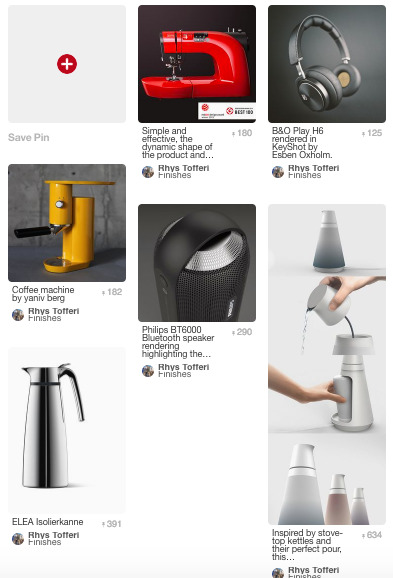
‘Finishes’- which helped me identify a mix of renderings and product images of which the material, angles and lighting were interesting or helpful. I chose a toaster where the lighting diffused across the front face and partially on the side, so finding both glossy and matte finishes helped me identify the differences between the two, as well as how light affects different coloured surfaces.
Did I speak clearly and articulately?
I never completely know how I go, presentations tend to be forgotten by my brain immediately after, but from as much as I remember, I tried to speak to the whole group, as well as the tutor, Max.
I feel I may have spoken a little too fast, and spaced my talk with a few too many “um’s” which is a habit I need to kick.
How was my body language?
I believe I kept an open stance and didn’t hunch over, and faced the whole circle at various points. I was nervous, so I was probably a little rigid, but with practice I think I’ll improve.
How did I feel before/after the presentation?
Beforehand I felt like I was underprepared because I didn’t have a research board with me, however I was well aware of what I had looked at in the process of choosing and rendering the product, so ultimately felt pretty okay throughout. Afterwards I felt pretty good, but I definitely need to be more to the point with what I say for the future.
What did I do well?
I think I did the aspects of the rendering well enough, from the selection and collation of ideas to the planning of layers and paths in photoshop.
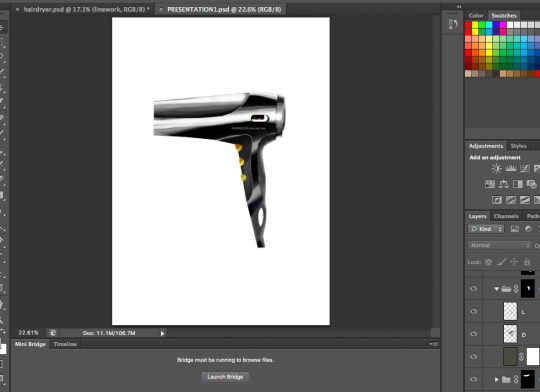
I was definitely better with layers this time, when compared to the hairdryer which was easier, still had some issues, but was able to resolve them faster.
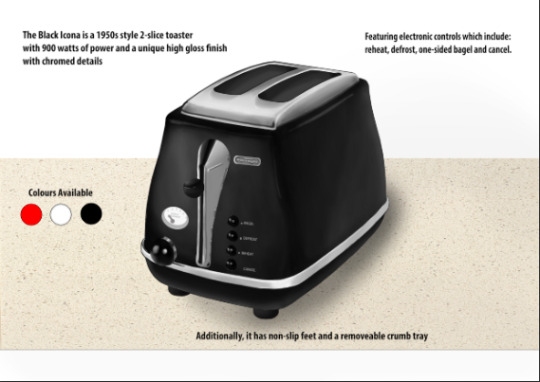
Final render with a subtle background, colour options, and product details.
And what would I do differently next time?
Next time, I will make sure I cover all bases in regard to communicating the product to the audience, including a research board for example, so that the audience is able to physically see what influenced my choices.
Max brought to my attention the text choice could probably be limited/ or size reduced, and also the font be more inclusive of the recognised industrial design labelling, which I will take on board next time.
*Also, I’ll use Pinterest to initially gather ideas, but image quality searching is better with Google.
4 notes
·
View notes
Text
Week 8 Photography
After mid sem break
I really enjoyed this weeks tutorial.
We were using camera raw and photoshop to help enhance and/or balance the photos we took during the tutorial.
I had never used photoshop to correct images before, but found that if you don’t drastically change the photo with all the available options, you can get them to a point where it looks like what you actually saw, rather than the version your phone/camera processes without shooting RAW.
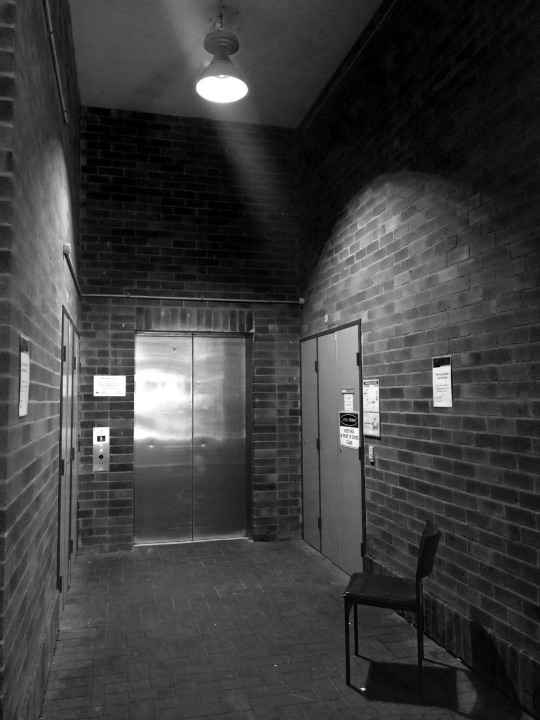
Spotted this seat in the corner next to the quadrangle, and thought it looked pretty cool, trie to accentuate the light with b&w
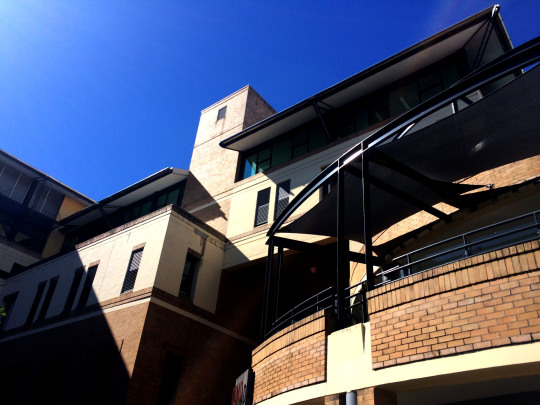
Thought this building looked neat with the curves and edges
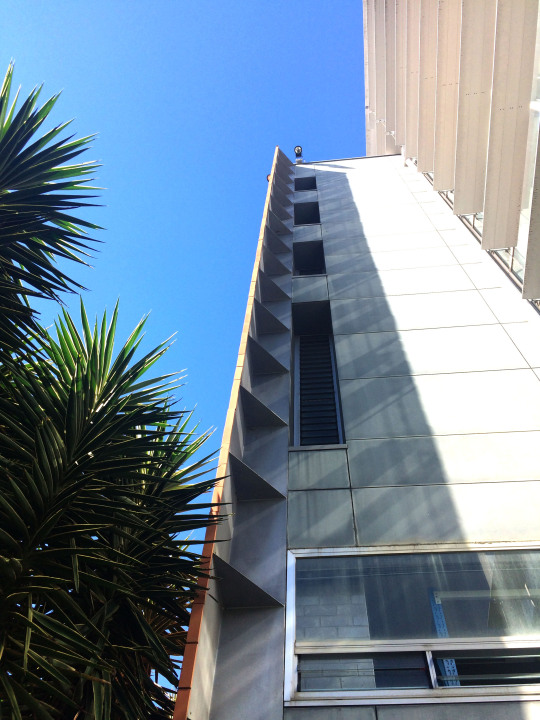
I liked the blue of the sky, with the greens of the plants contrasted with the grey of the building
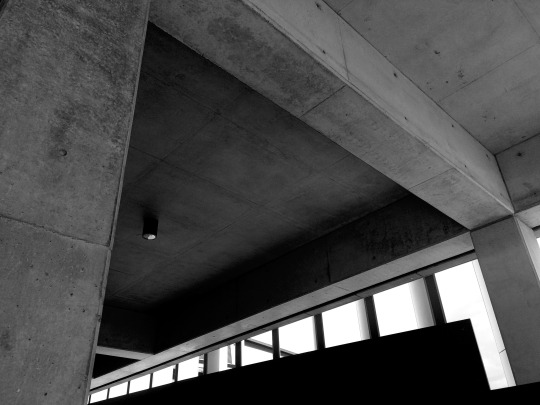
An interesting concrete walkway
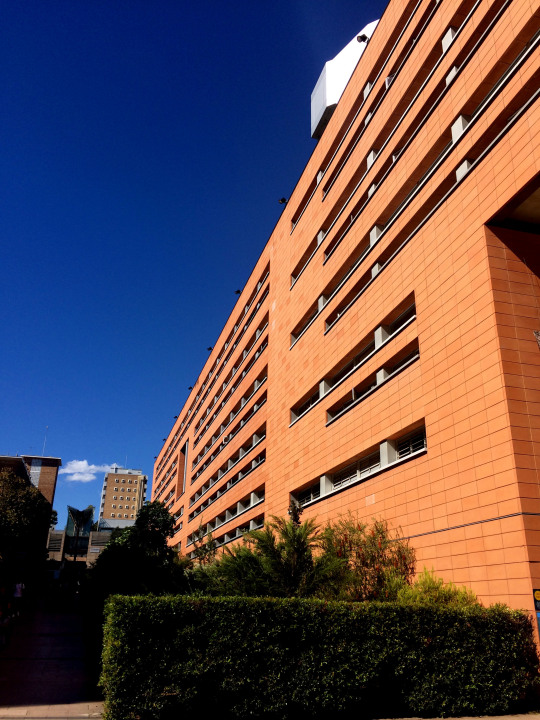
The red centre’s stark contrast with the sky

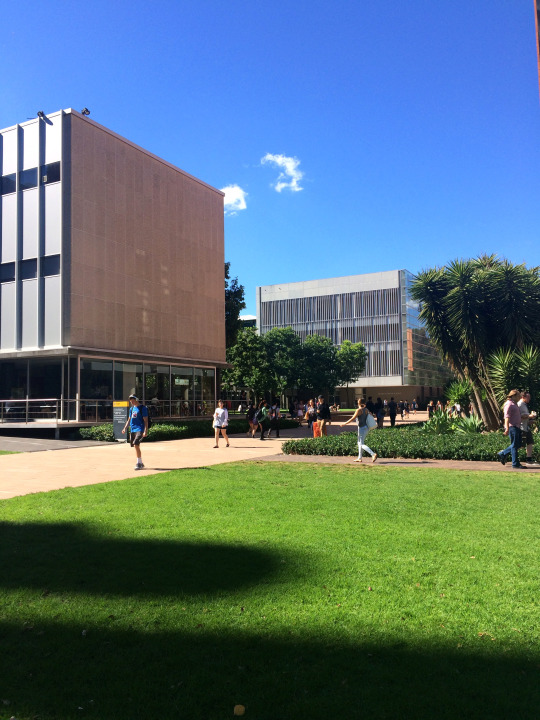
UNSW grounds
I think this is my favourite, It gives me a good vibe, but I have no idea why, possibly the clean colours.
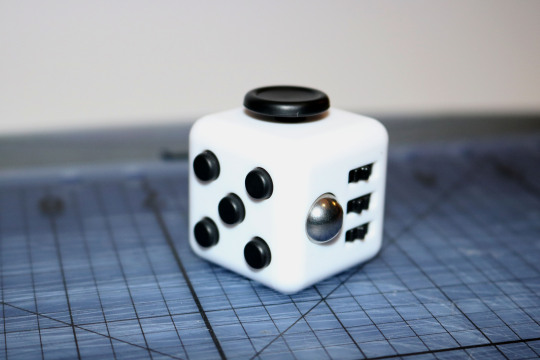
Product Shot
‘Fidget Fingers’
A product that aims to reduce stress and anxiety allowing the user to fiddle around with the multiple options (dials, buttons, toggle, switch) that distract and calm.
I took the photo on my cutting board as a little stress inducing aspect, having the product take up the focus, and used a white piece of paper to calm the background, so the product appears to trump the stresses of studying etc.
I only brought my iphone 5, so I wasn’t sure how good the photo quality would turn out, but it was surprising, normally the camera is pretty so so, but this week it lifted it’s game, and surprisingly the photos I thought were pretty okay, and I was pretty happy.
5 notes
·
View notes
Text
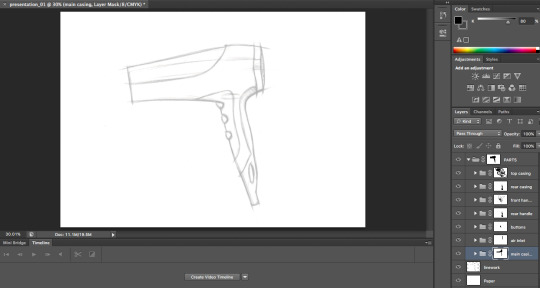
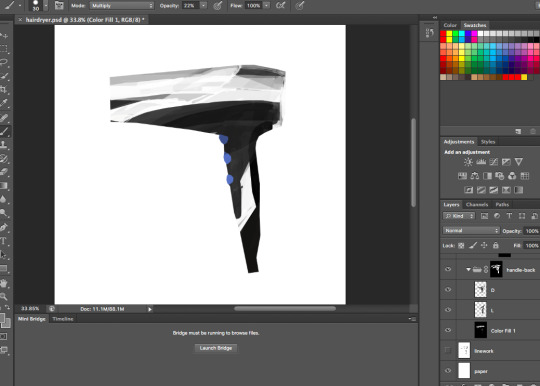
Week 6: PHOTOSHOP Hairdryer
I had quite a lot of difficulty with this weeks task.
Initially it was simple, and setting up seemed fine.
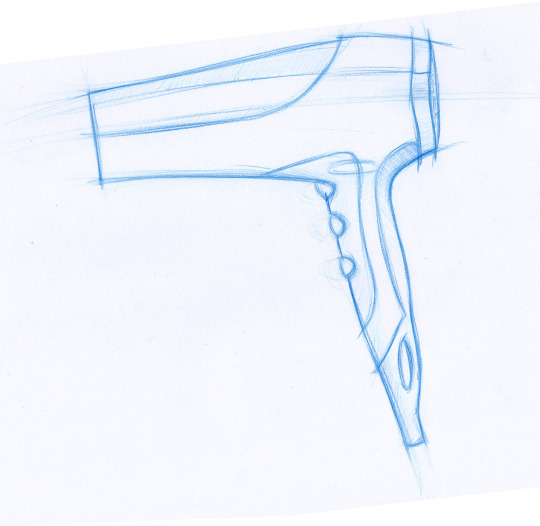
Changing the image to remove saturation was fine.
However, once I reached making paths and then removing the parts from the outline I couldn’t figure out how to get it to work as I was following the instructions. They helped me to sort it out, but it still didn’t seem to work properly, and the parts were partly separated, but also joined.
A couple of my friends also has some issues, I think it was when we were told to inverse our selection, we didn’t actually need to at that point, or the way we interpreted the instructions was slightly off, but off enough to have a huge delay.
So I ended up redoing it all like 3 times and finally removed the parts from the outline selection individually, rather than in one go, and then managed to get the part for the main casing.
After that colouring everything actually worked, and the fill layers individually coloured the sections, and it actually became enjoyable after way too many hours trying to figure it out.

FINAL
So for next time, I’ve had quite a lot of fiddling around practice that will hopefully help me out. And after it all, I couldn’t figure out how to get the background to go behind the hairdryer, despite reordering layers to hopefully send it behind.
I learnt that if you’re following instructions for something you’ve never really done before, one small error can really impact you further down the line, and that interpreting something the wrong way can lead for a lot of confusion.
2 notes
·
View notes
Text
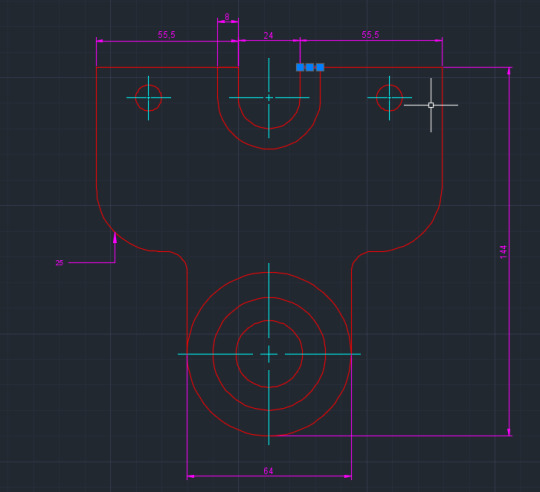
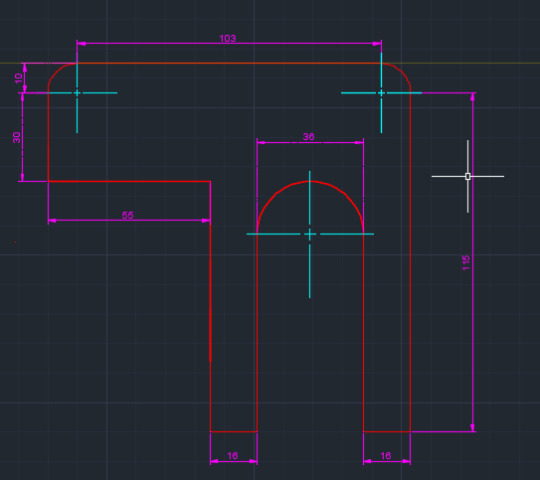
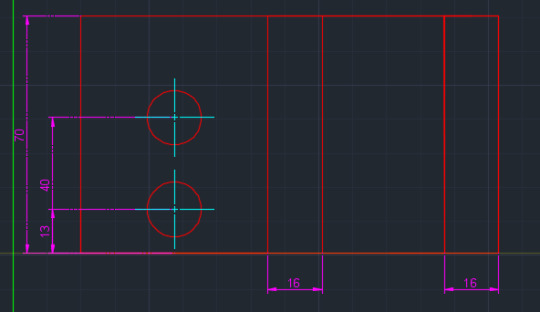
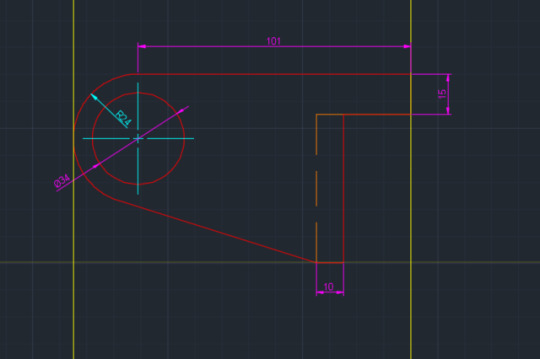
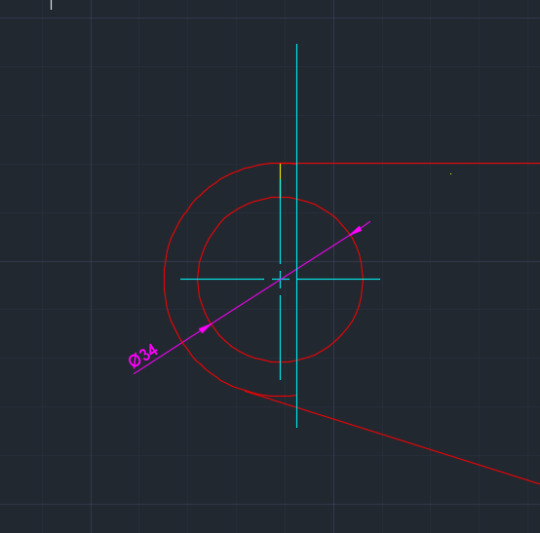
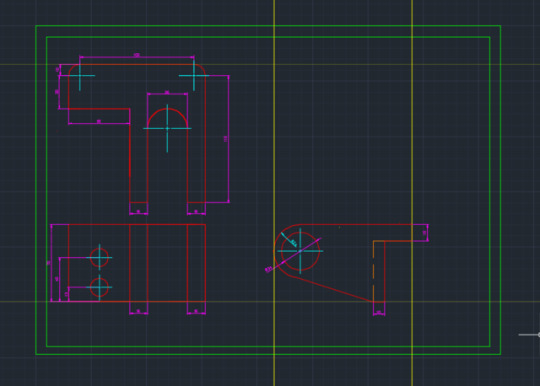
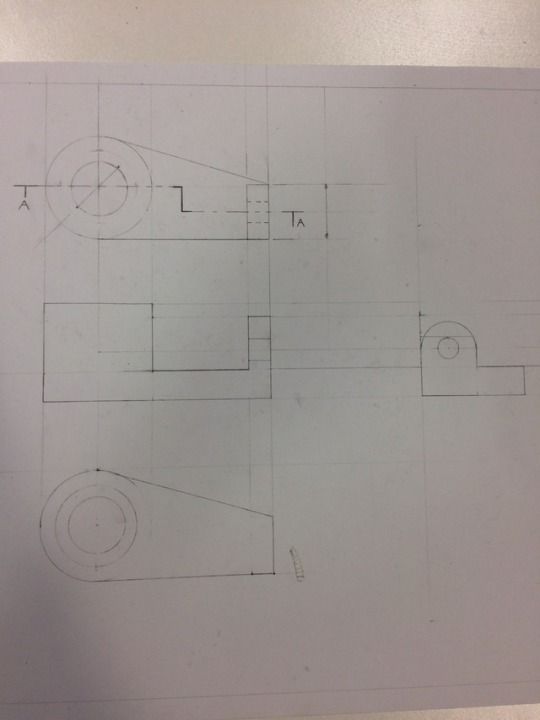
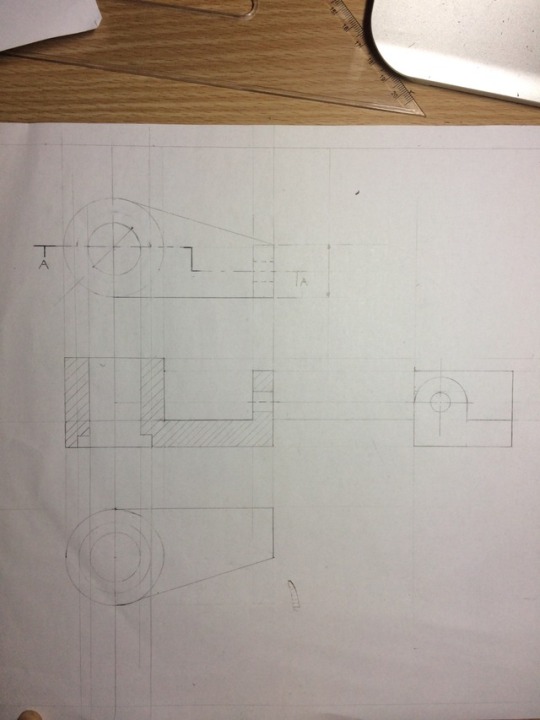
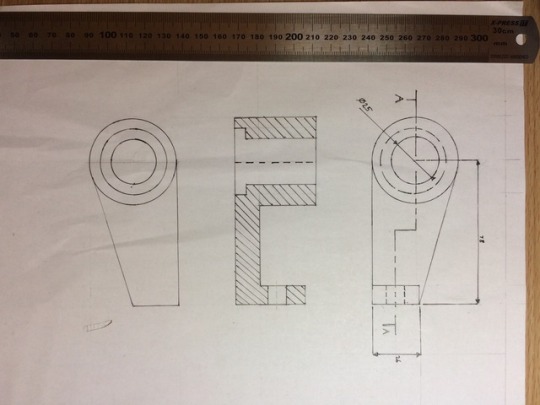
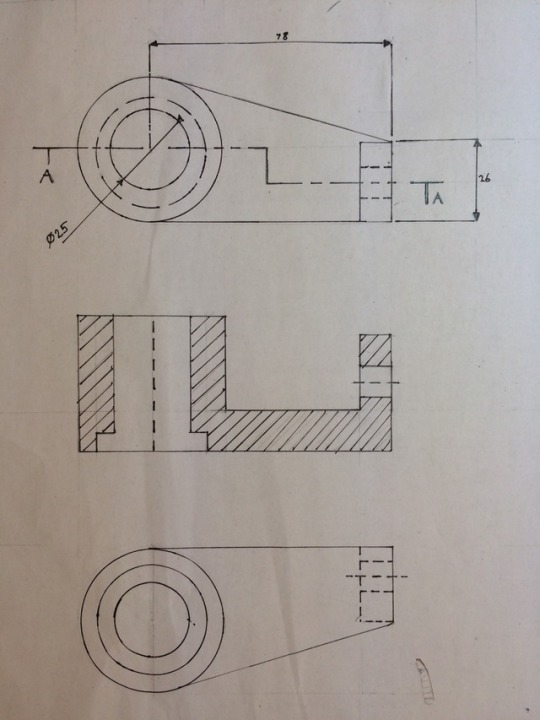
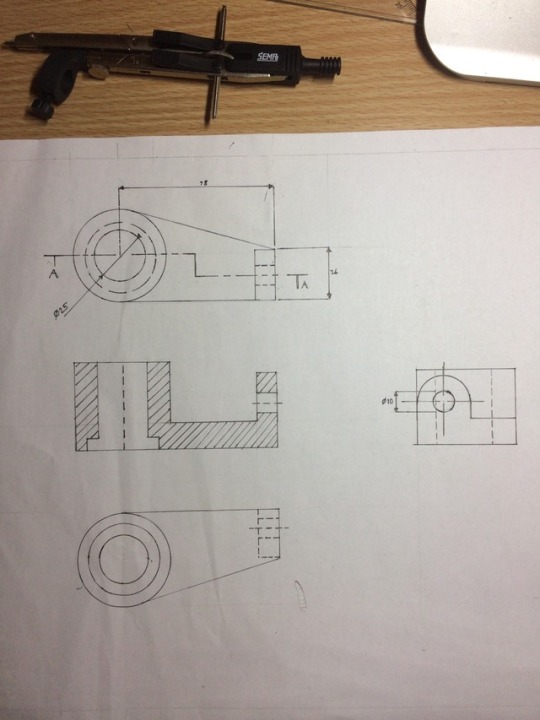
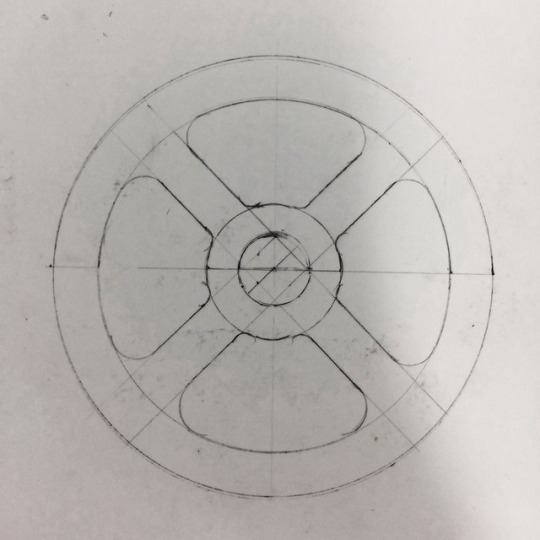
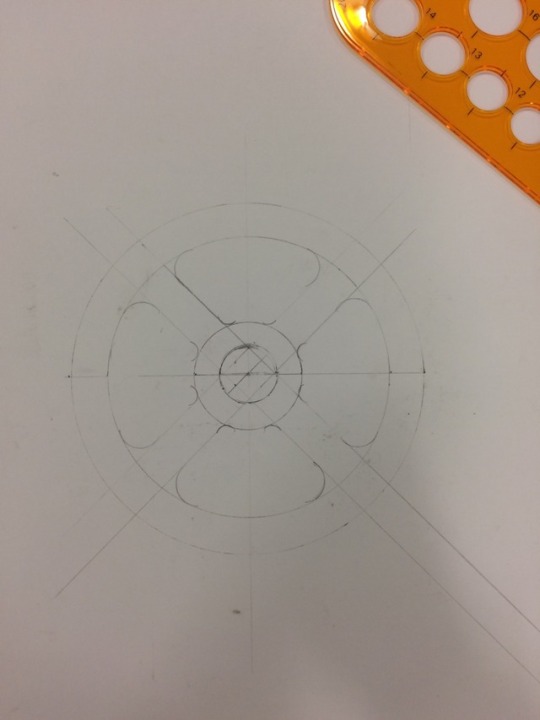
Blog Post Week 5 (PIVOT BEARING):
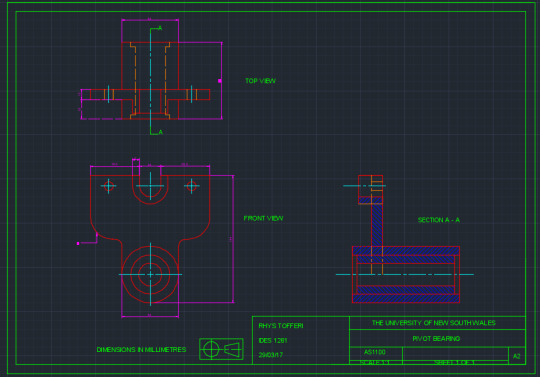
Overview (TOP, FRONT, SECTION): I used dashed construction lines with a transparency of 70% throughout this task, it helped me with having the reference lines, but without the headache of blocking the view of parts of lines.
Layout and front view:
I started by constructing a box that was the size of A2, and then continued by adding in a second border of 10mm width all around.
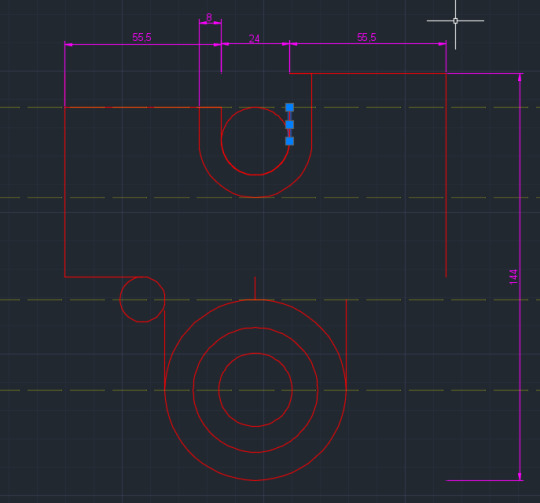
I then moved onto making the front of the bearing, and transferred the measurements on the page to Autocad (the width and length) and filled in the details.
Decrypting the measurements and placements from the worksheet was really challenging, and I talked to a few of my friends about how they found the distances, and confirmed where the measurement amendment had been.
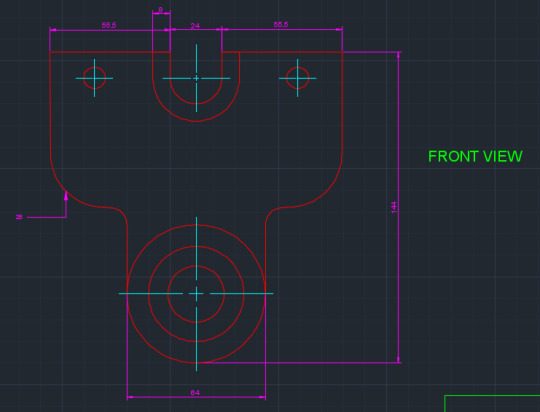
I had issues with finding the placement for the 25 radius curve, I couldn’t figure out how to make it work with the Fillet tool, so instead used a circle and trimmed, but the initial placement I got through many, many measurement, and I’m sure there was a more efficient way.
I then moved onto making the top view, and used construction lines to guide the placement
Top View:
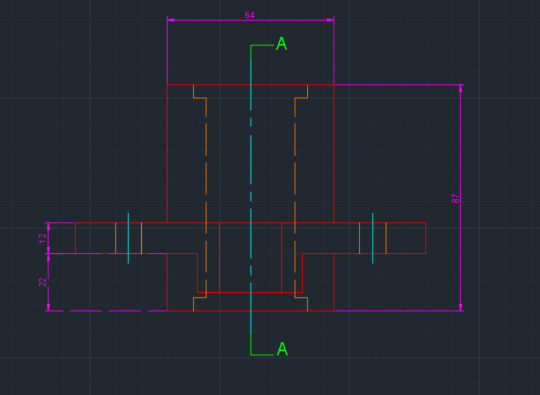
Added in where the section view will be, but wasn’t sure where to get an actual arrow line, so just went with normal lines.
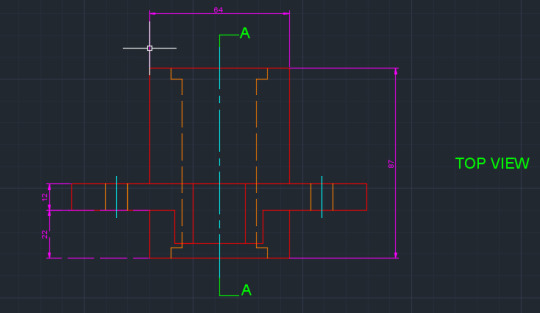
Once the top view was made, I looked at the sheet to find where the section view would be, and with a lot of back and forth, and trial and error, managed to figure out which parts of the section were relevant.
I then added in the title block, with reference to the textbook.
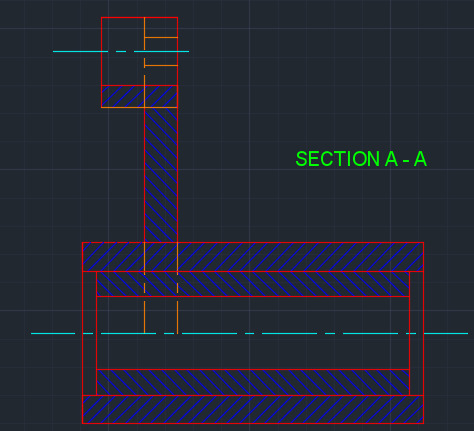
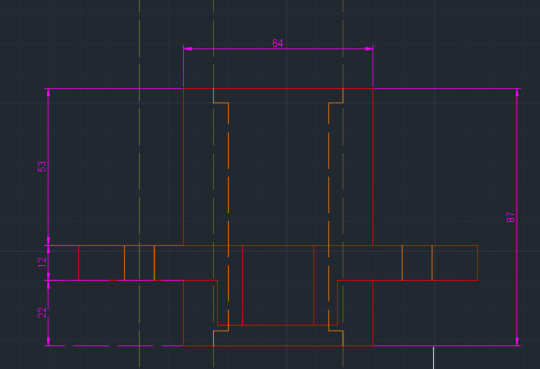
Section View:
Constructing the section view took a while, I kept making mistakes with the length, and after making the section, realised that parts were not working properly, and that the shape was different.
So then I fixed mistakes, added in hatching and hidden lines, not completely sure the hatching is correct.
Overall:
This was definitely the most challenging work for myself so far. It was really difficult to grasp the measurements, and how they tied into each other, especially if one length was off, or if something was missed.
Evaluation:
This work was great in regard to increasing my limited skills in Autocad. I found that the tools were becoming a bit easier to figure out and use, but I was slowed down by my bad interpretation of the measurements, and constant repair work.
I realised after printing that my lines were the same thicknesses. Also, I was supposed to change the hatching for different layers/sections of material in the section view, so I then went back and changed it in Autocad to what I think is correct.
I feel that even though this took a really long time for me to make up, I’m happy with how it turned out.
3 notes
·
View notes
Photo
Blog Post Week 4 (AutoCad Lt):
Working with Autocad this week was definitely challenging.
I’ve only used archicad in year 9, so using this program was pretty rough.
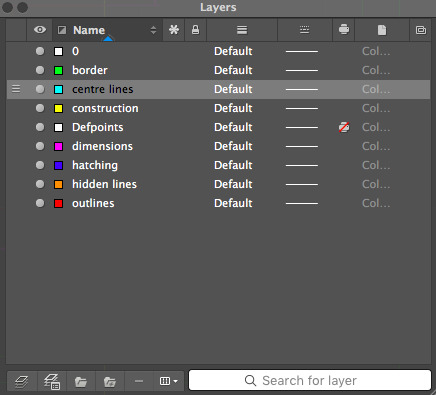
Layer organisation: We set up colour coded layers to help with the different components of the drawing.
Border: I then began by setting up an a3 box with another smaller rectangle inside, giving a 10mm border in green.
Drawing: Began following the dimensions given in the diagram, I had a few smaller issues with using the fillet tool, but my friend next to me helped me with the order of use with the tool.
Everything was a little trial and error from then, until I reached the 3rd perspective, the right side view.
Right side view: So I had a lot of trouble figuring out the tangent tool, and eventually when at home decided to just use the circle, enter in the radius I needed, measure down from the top line, and then used the trim tool to edit the circle into the curve I needed.
Evaluation: The drawings appear to have the correct dimensions, however I’m not quite sure the right side view is 100% as I used a different method for the curve. The work was way harder than I expected, I struggled with one perspective quite a lot, and I had troubles getting familiar with the buttons, and deselecting a bit.
Tip: I removed my construction lines as I went as they made it harder for me to find my lines, but towards the end, I found that you can reduce the opacity of the lines, making it easier to see where you’re working.
1 note
·
View note
Photo
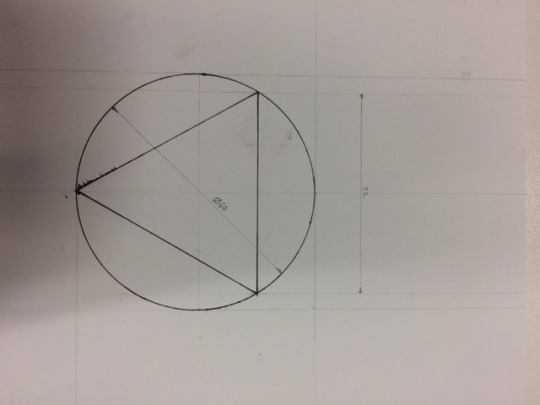
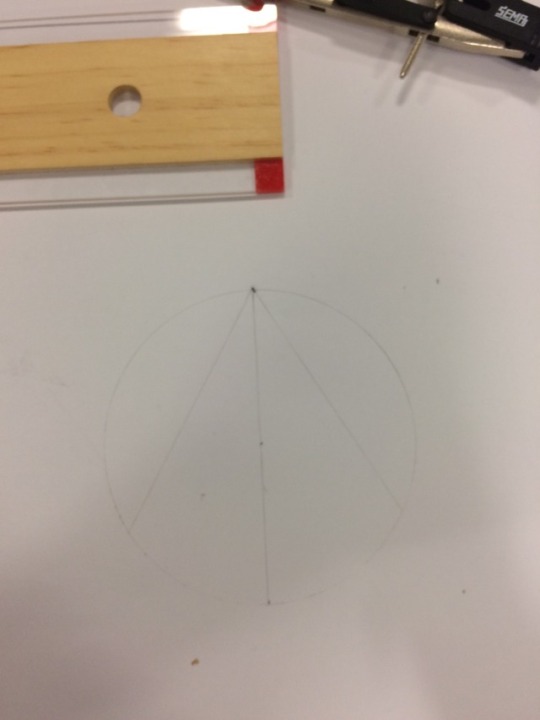
Blog Post Week 3:
These drawings I found quite hard to do. I had problems with lining up each view with the others.
Problems:
I've found that during the class I tend to either understand and work well, or I get stressed and work inefficiently.
I completed the drawing at home, and it was much easier. However when redoing the circles, I went over the final version with the compass incorrectly in the centre.
Helpful:
Sketching the rough layout and faces of the drawing helps with planning, and taking extra time whilst at home allowed me to focus better with better results than when I'm stressed in class.
+I realised that taking extra care, and a little more time can really benefit your work, making small mistakes can halt your progress multiple steps ahead, and make it tricky to fix.
Overall, this was a useful example as it taught me to take care, stay relaxed, and triple check before making a permanent line.
1 note
·
View note
Photo
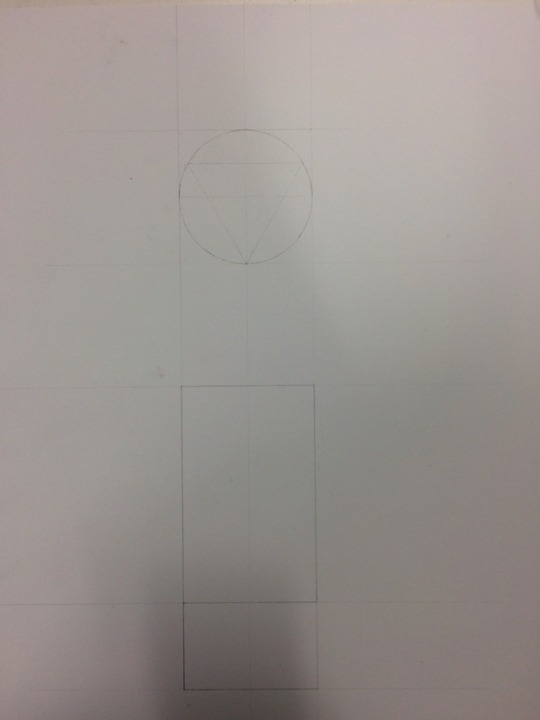
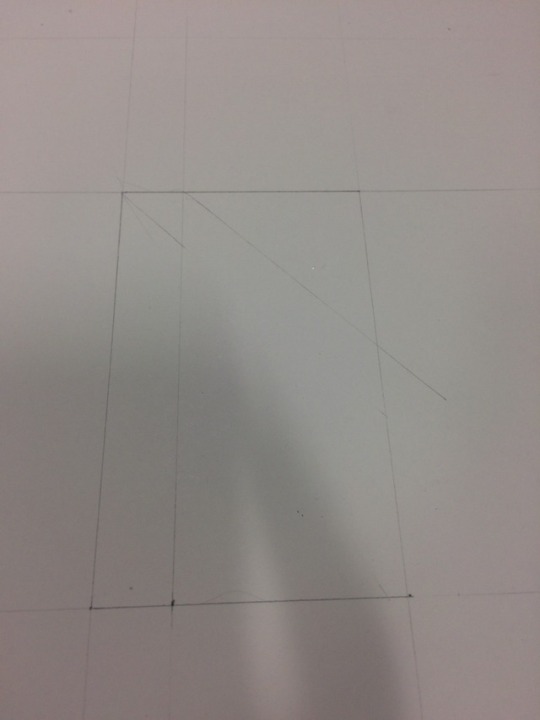
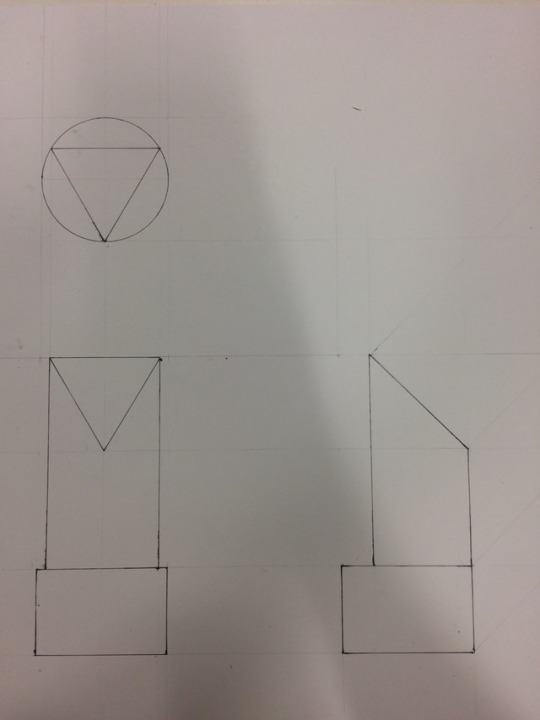
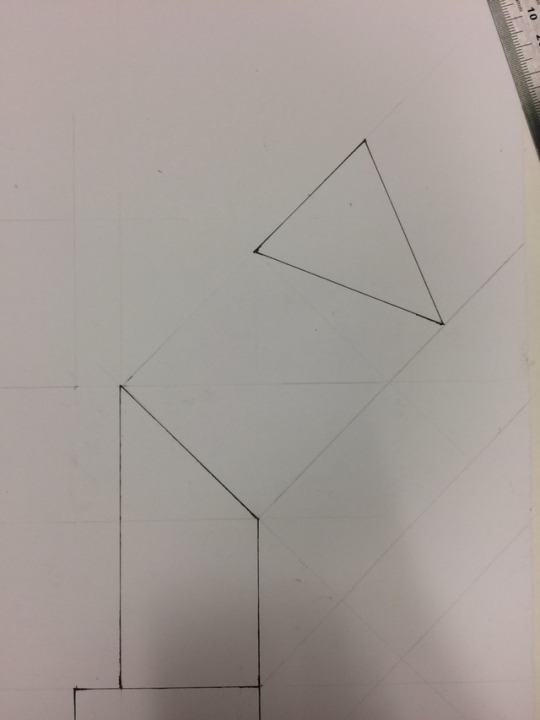
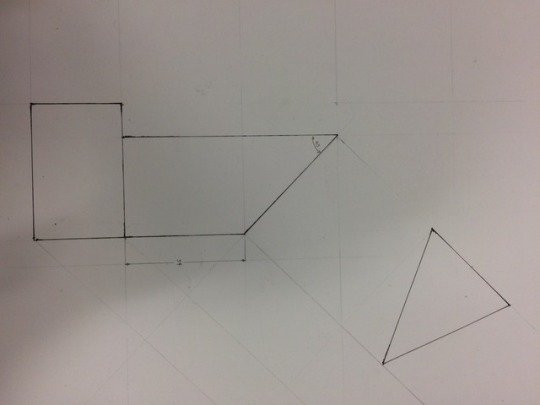
Blog Post Week 2:
Overall this was a more enjoyable experience than the previous class work. I found that the drawing up the trophy was smoother, with less complexity, and less use of the compass- which I struggle with in regard to neatness.
Couple Issues- Everything was going smoothly until my friend pointed out that I had drawn up the front view a bit wrong.
I hadn’t realised that the cylinder was exposed more on the sides as the triangular prism touched at the back, meaning the sides of the cylinder should be more extended.
Resolution: Rubbed out the errors, and re-drew them correctly and everything went well- once I reached the auxiliary view, progress stopped for a bit while everyone was figuring it out, and after some time reading the textbook, it was sorted.
At the end of the tutorial, I rushed out a simple drawing of the battery pack for my phone, and the class ended just when I finished.
2 notes
·
View notes
Photo
Blog Post Week 1:
Overall: Not too happy with the result… ran out of time in class to finish removing the working lines, and my 0.2 felt tip would smear even with care (shouldn’t blame the tools though I guess)
Evaluation: I definitely need to improve my technical drawing quite a lot, and I definitely need more practice using the compass as I haven't used one for a long time, and I’ve had difficulty with precision.
1 note
·
View note
Text
Introduction
Hey everyone, my names Rhys! I chose industrial design because I absolutely loved graphics in year 9/10, as well as design and technology in high school 11/12. I’m excited about where the course may take me, and about how much I'll learn throughout its duration.
0 notes