pikaisragingmad
pika is here
DeviantArt -> pika | Learning to become a better reblogger of stuffsies! What am I doing?! | #my art
1070 posts
Don't wanna be here? Send us removal request.
Last Seen Blogs

coldcowboydonkeyghost
Untitled

begumaisha
Untitled

juanovalleaudiovisual
Juan Ovalle

falsewings
I don't sleep

acepunks
@mobydyke now


Text
"if you ship this thing it's because you're too naïve to understand that it's toxic and that you wouldn't like a relationship like this" actually it's because I see one of them as a mentos drop and the other as a bottle of coke zero and I want to watch the mess they'll be together
20K notes
·
View notes
Text
✨ HTML for pretty colors tutorial ✨
Hello silly hamsters in my phone 🫶 I'm lowkey shocked to see blogs gatekeeping this knowledge but yeah. Make your blog pretty! Match your text to dividers or just have it as colorful as you'd like!
First of all, you can not do this on the mobile app! You need to either use a laptop or your phone / tablet's internet browser (in my case safari)
You start by logging into your account and either you make a post or you edit a post. I recommend making the post on the app first because editing is certainly faster & easier!
This is our starting point! For the fancy fonts you can use messletters


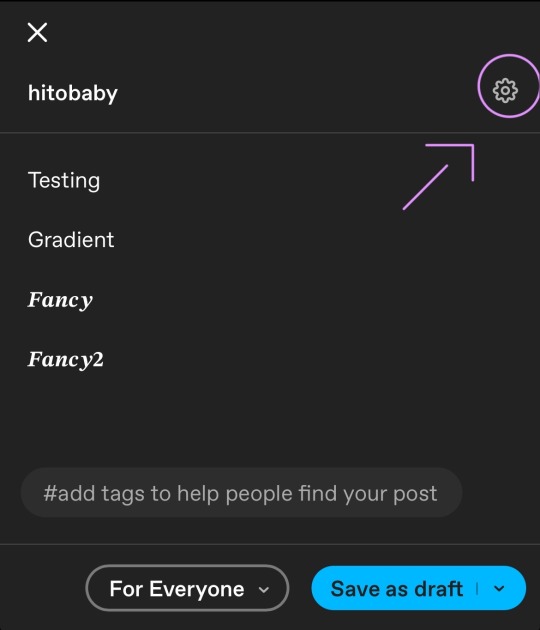
I will now log into tumblr on my web browser and click on edit this post.
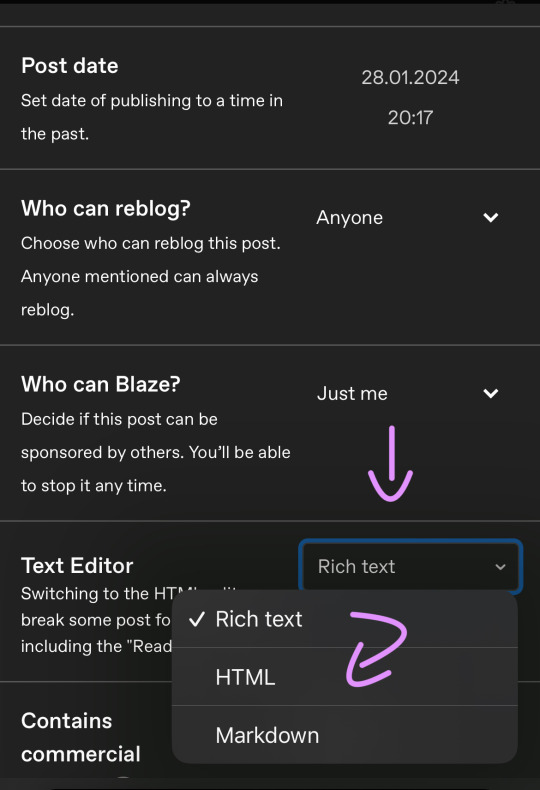
You then have to click on the little gear icon in the top right corner to change the settings on your post.
There you have to click on "rich text" to change it to "HTML"
Your post should now look like this:

A quick rundown on html.
You always start with a letter or code in brackets. to end what you're doing it's </>. The slash signals the end.
P= paragraph <p> and to end </p>
I= italics <i> and to end </i>
b= bold <b> and to end </b>
Now tumblr will automatically do this for you if you made a text bold/in italics on your mobile post but to keep this tutorial simple i left that out here. You can always edit your text in the app after! Just not the color.
And as you see, the fancy text is now in coding. But we get to that later!
To colorize your text it's easiest to just use this website as it gives you lots of options!


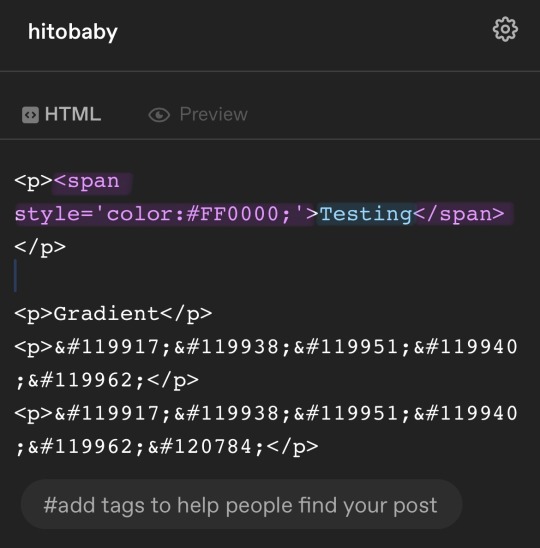
First i will be choosing the option of "solid color" and you can then put in the hex code of your desired color into the color box.
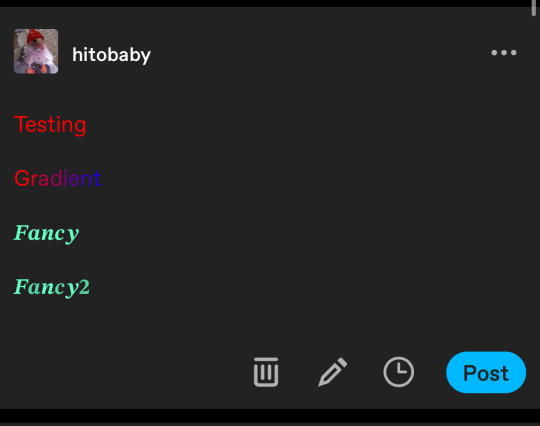
In the top box you will have to put the text you will color - for this tutorial it's "Testing"
Then you copy the box HTML code and paste it into tumblr where your word(s) are. Do not remove the in front and after your word/sentence !
For the sake of this tutorial marked the html code for colors in pink and the words in blue
Your code will now look like this!

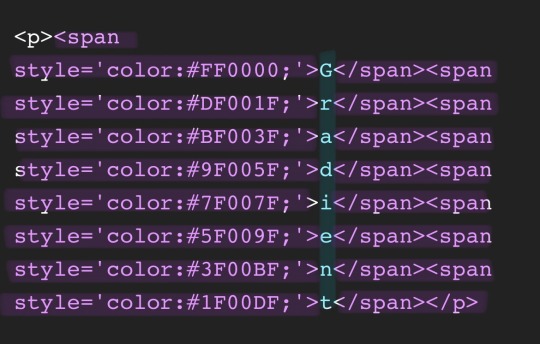
For the gradient you can simply choose horizontal gradient or three colored gradient on the website above and copy/paste the html text.
Mind you that every single letter will get its own color code now so the word gradient suddenly looks very long in html.
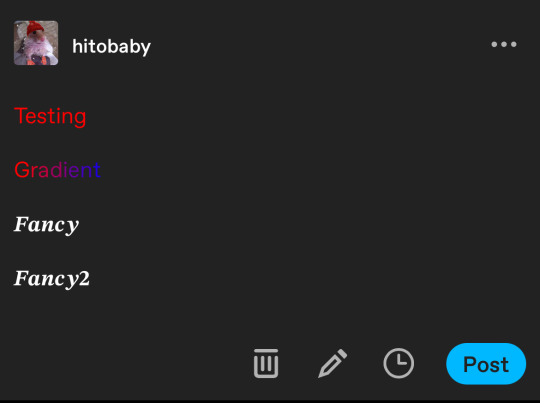
If you save the post it will now look like this!
Important to know is that you can color the fancy text only solid as the website can not color it as it is and putting the letter codes in the box above does not work either.
To color the fancy letters you simply copy the color code instead of the whole text - which looks like this:
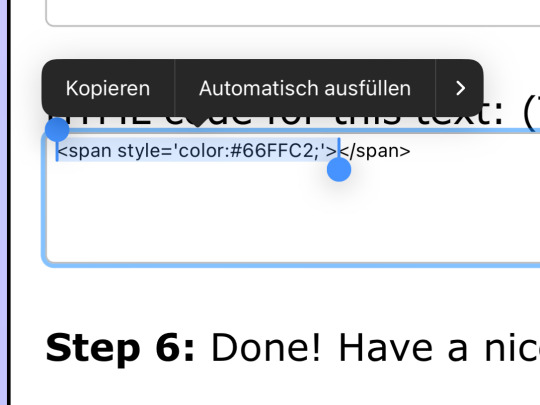
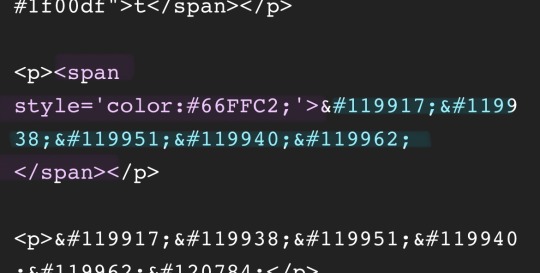
Don't forget to add </span> behind the word/the codes you're coloring to signal that this is where the color stops! If you forget to add it, nothing will be colored.
If you decide you still want to have the fancy lettering in multiple colors you have to color letter code by letter code manually like this:
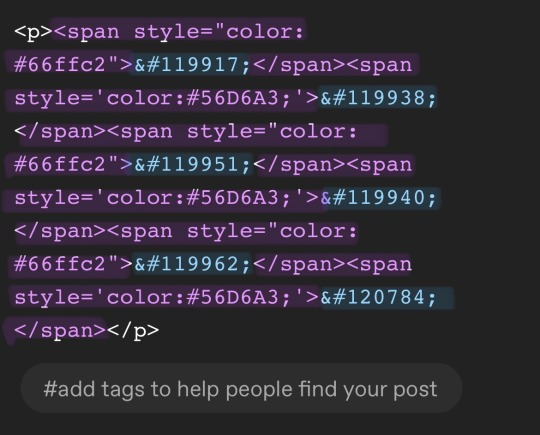
(I made a very poor choice on 2 different greens but oh well)
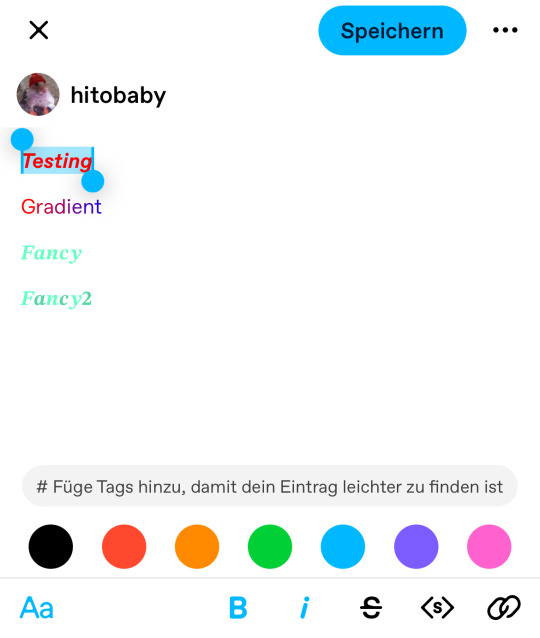
If you'd like to change your text, you can always do that on the mobile app like you usually would. You just can't change the color unless it's into a default color. But you can still change the size or make it bold for example.
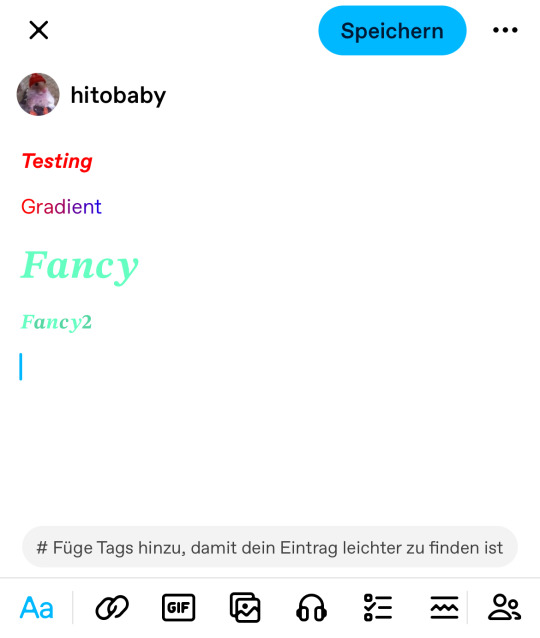
Anyhoot, this is the whole magic behind html. It's a lot and might be very complicated at first but you will eventually get the hang of it! Took me weeks and hours until someone sat me down and went through it step by step.
If you have any questions or something doesn't work as you thought it would please don't hesitate to reach out - I'm always happy to help!
128 notes
·
View notes

Text
Apologies for radio silence, but finally back to working on pics and being more active!
Gonna try to get these done asap, ty for those that waited;v;
245 notes
·
View notes
Text

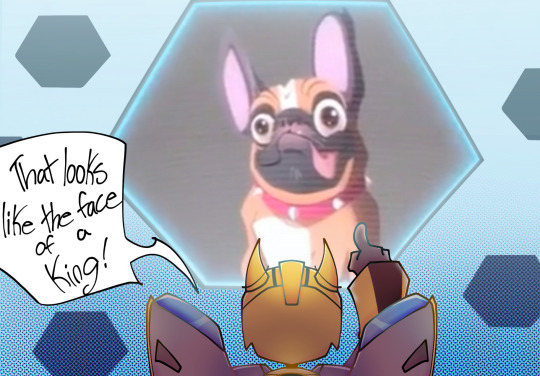
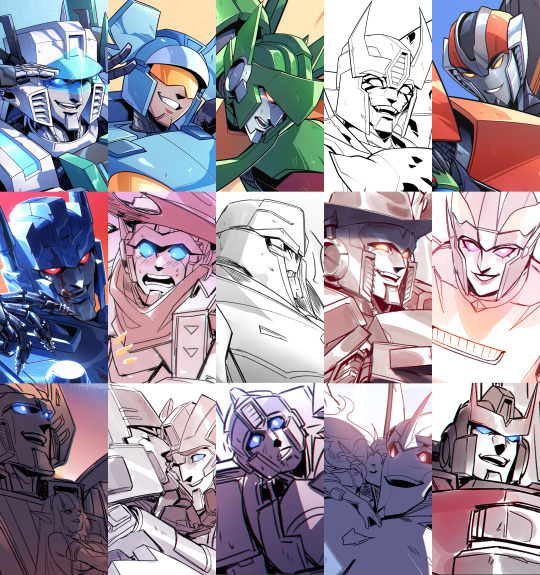
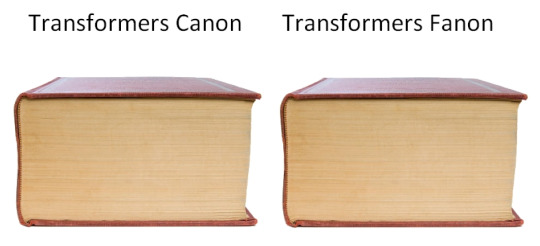
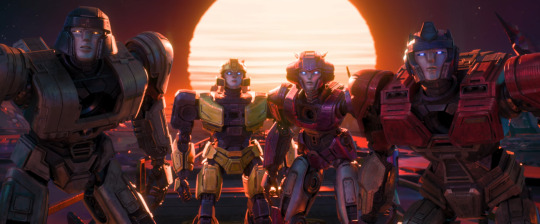
Transformers One isn't changing the established lore y'all because there is no established lore
4K notes
·
View notes
Text
Hc that any Cybertronian with a car, truck, or ship alt mode can voluntarily beep or honk in robot mode
And that some of them with really loud ones would sneak up on others from behind and HONK to spook em
Just thinking about what if Ratchet needs to get the attention of the entire room and goes WEEWOOWEEWOOWEEWOO
2K notes
·
View notes


Text
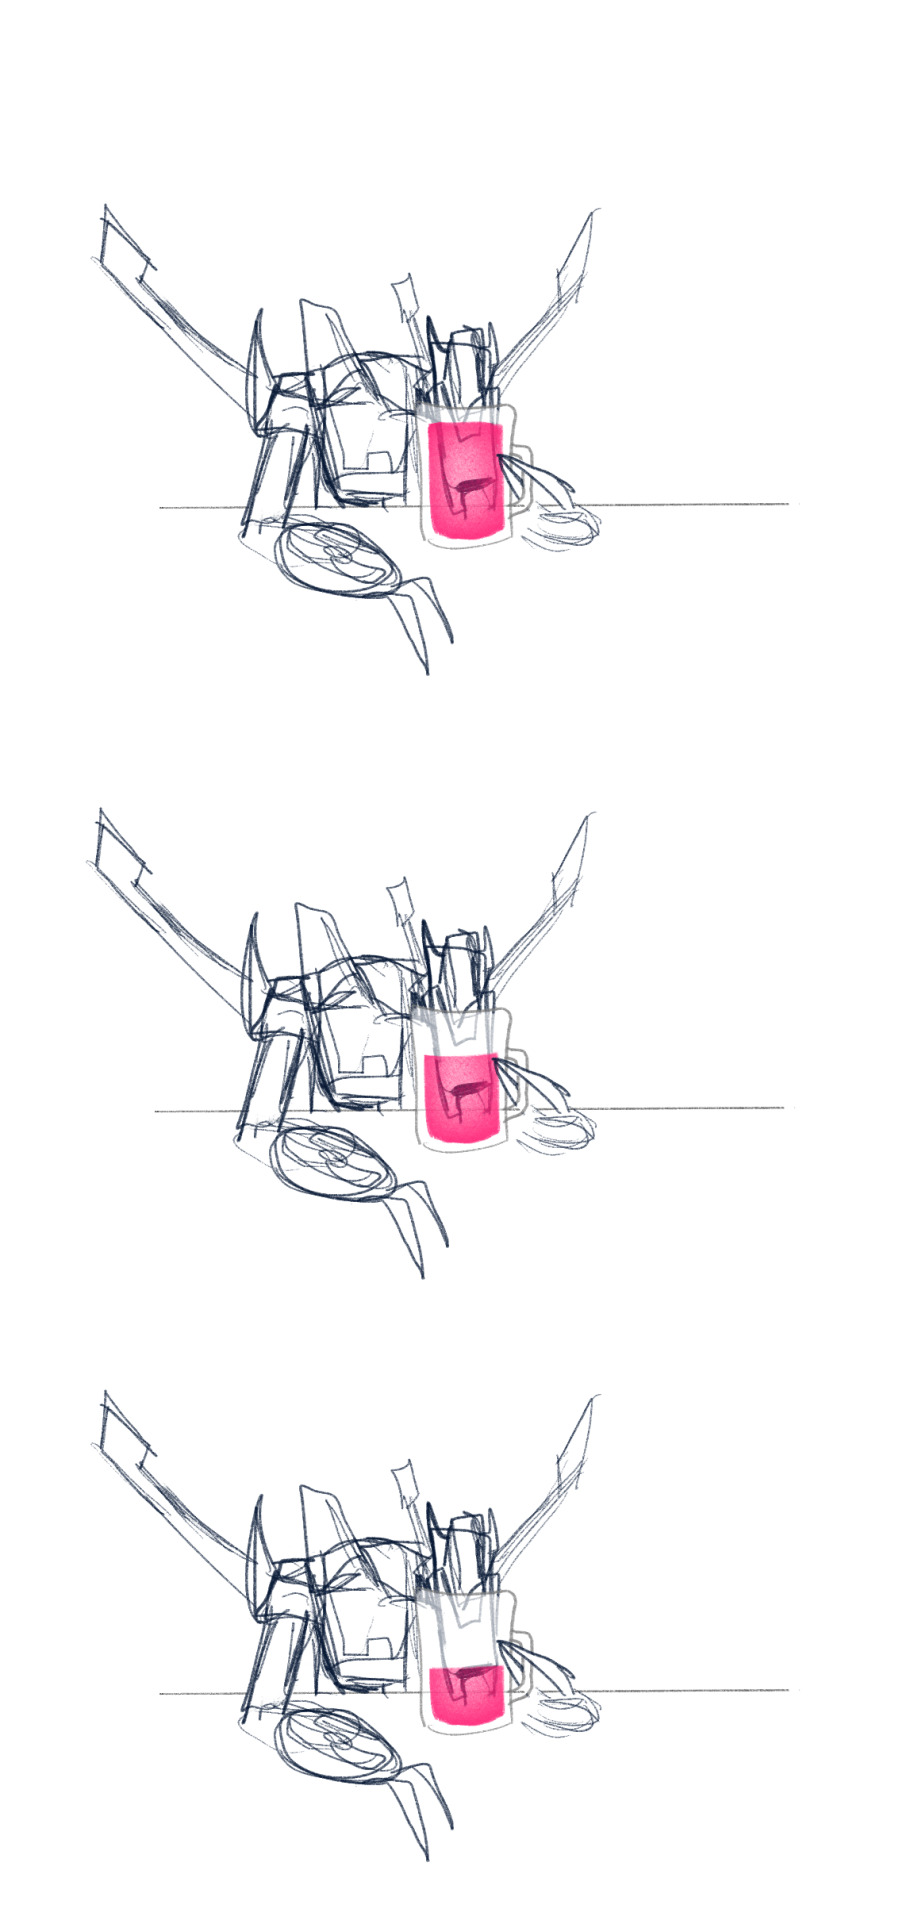
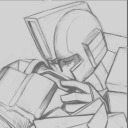
This is my answer to the how does Whirl drink with no face question
1K notes
·
View notes
Text
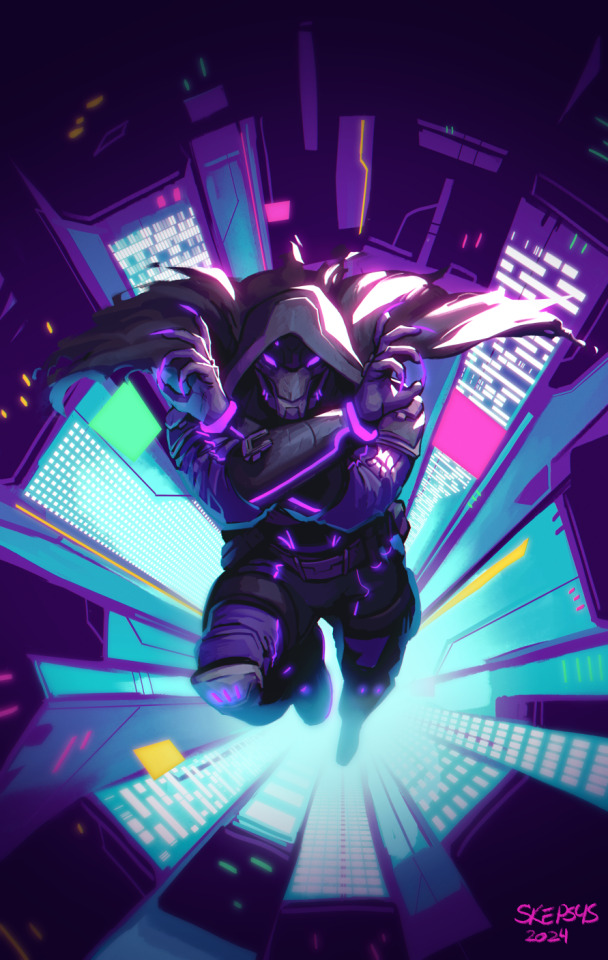

didnt intend to finish this quite so soon but its what i wound up doing today after getting sucked into it for a few hrs........ :D hi eleven
159 notes
·
View notes
Text

Why is insincere modesty and fake generosity polite? If you turn something down don't get upset when someone else takes it.
2K notes
·
View notes
Text

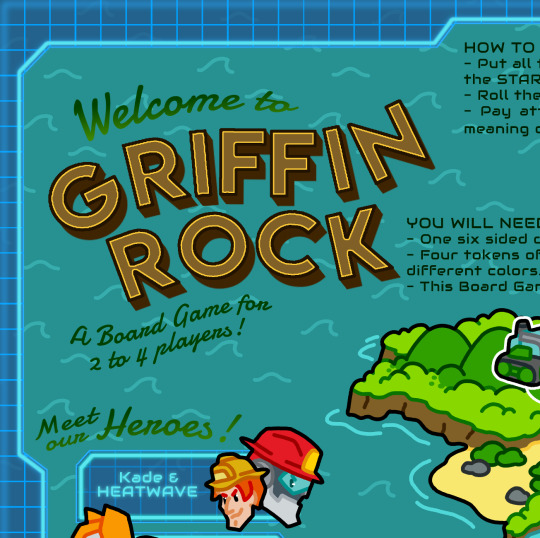
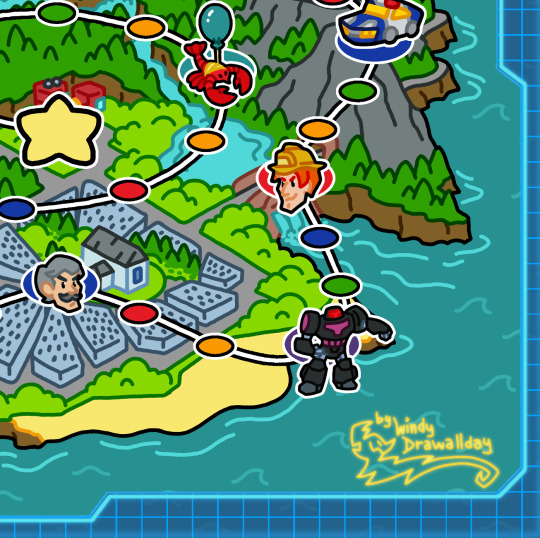
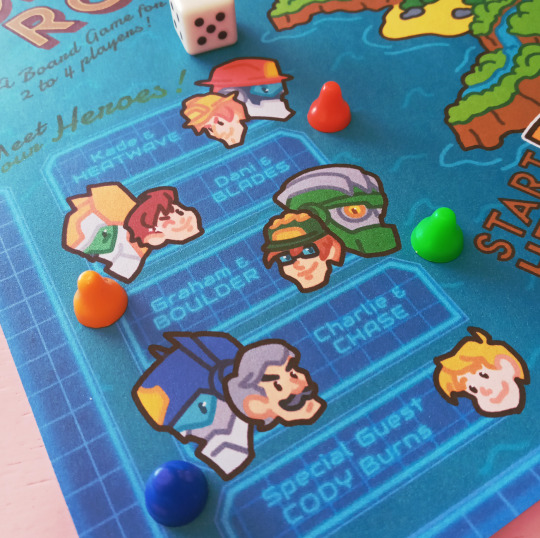
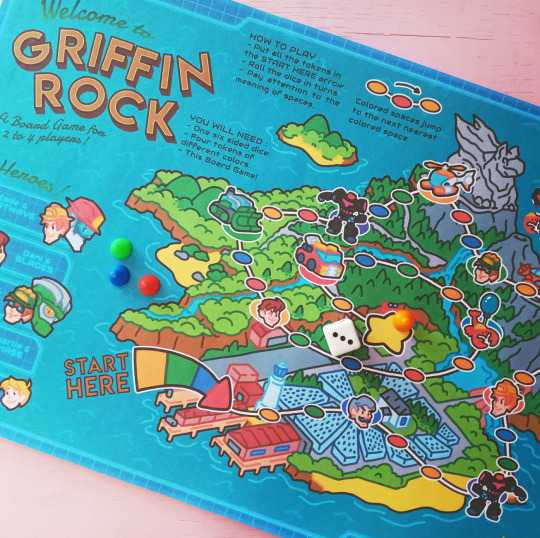
Roll a DICE to the RESCUE!
My (first) double-page contribution to @turbofox-zines 's TF Fanzine/Art Anthology: the RBA Zine, in all its glory!
Well, here is upscaled thrice so, I suggest everyone check the full monster of a piece by [Downloading it here] the whole booklet because there's so much precious art and writing (we even got a special guest story!) that deserves the support.
This illustration is extra special to me because it marks my first time working on a double page instead of my usual one-page piece. It's the first time I let my Graphic Designer knowledge take credit for the lettering, text, and graphic components to make this a full-functional board game (it works beautifully printed in an A3!).
The admins even let me contribute with the little character graphics to decorate the zine pages, something I was delighted about ♥
Now, as always I'll share my art process under the cut because a lot was going out during the journey to make this piece look as professional as you see it now. I hope everyone enjoys it as much as I did, thank you to all for the support ✨
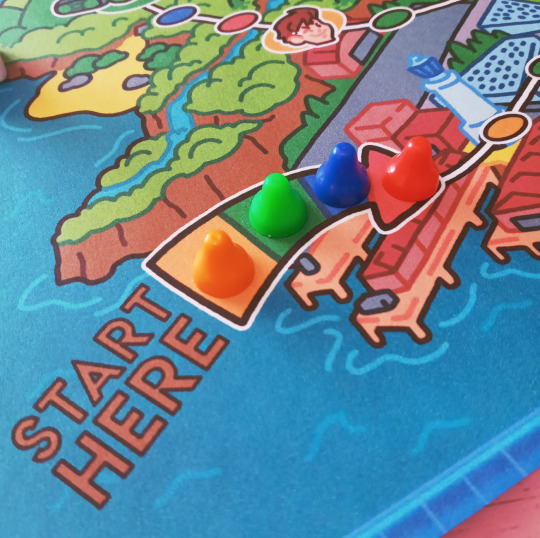
I confess: I never EVER before illustrated a whole map in this art style x'D So I was glad this show already had shots from different perspectives of its setting. Still, not every place was visually consistent so this map is more of an approximation than a loyal representation of the canon.

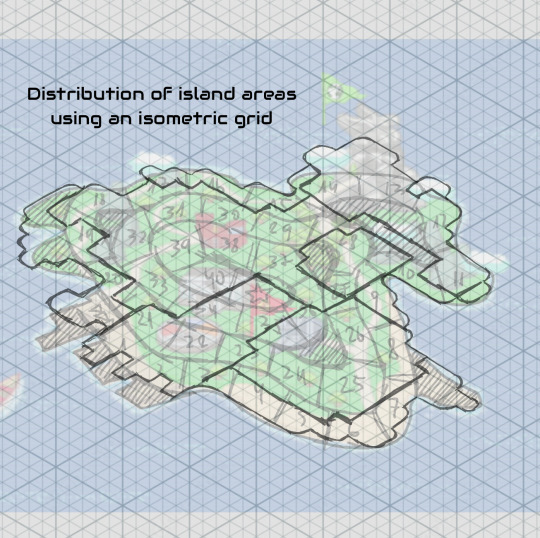

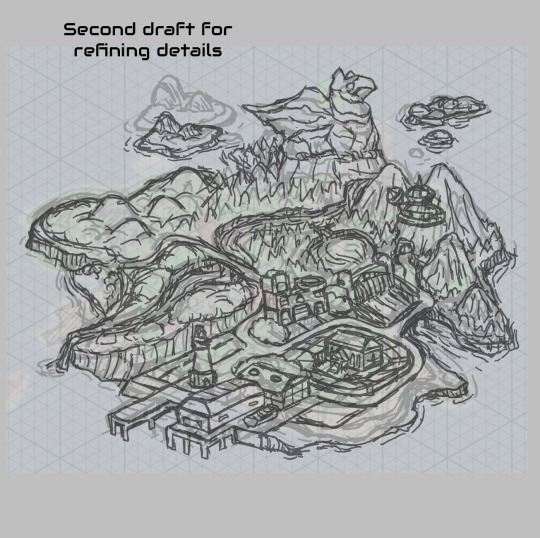
I think the hardest part is to make something that looks good both with an without the board game path.
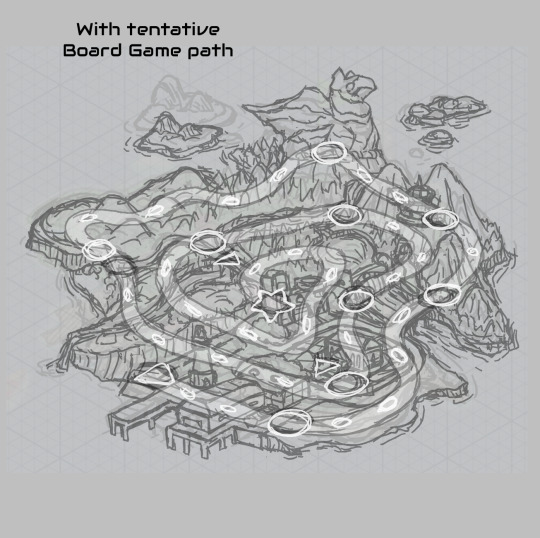
... I confess too that even if I'm obsessed to make things follow a certain logic, I struggled a ton with the perspective 💥
YEAH, IT MADE ME USE BLOCKS TO UNDERSTAND IT AAA
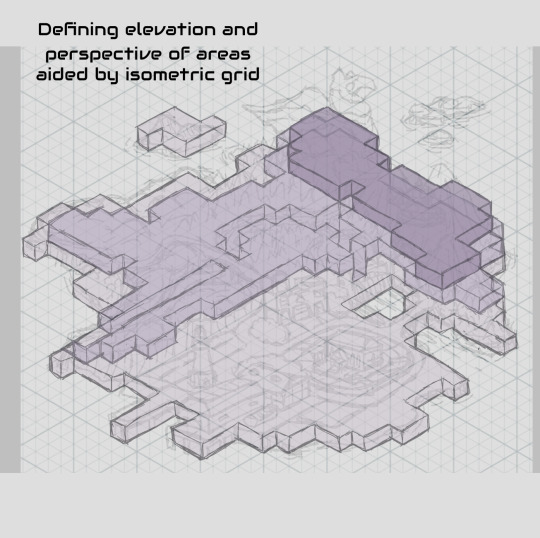
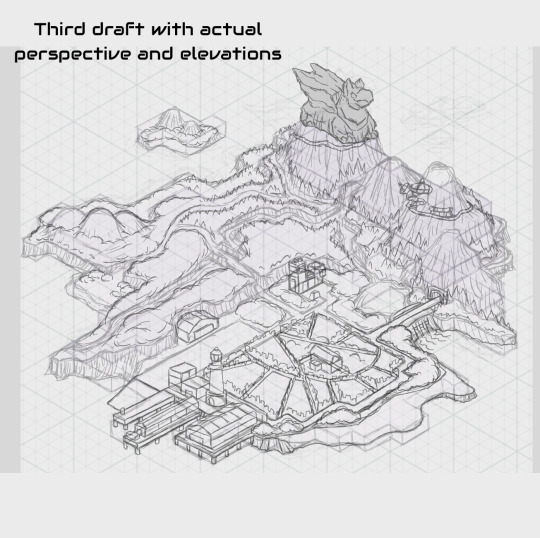

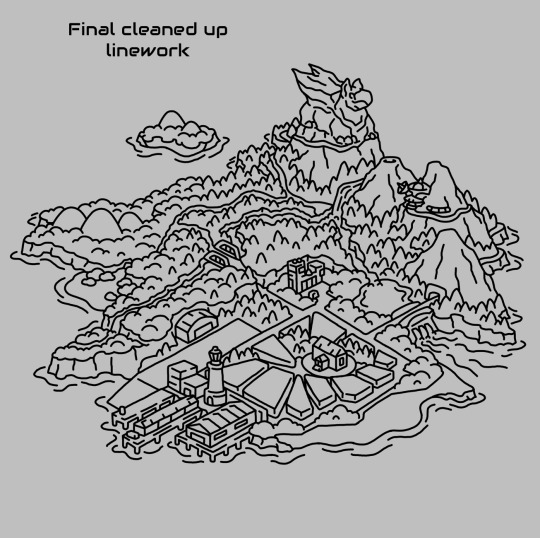

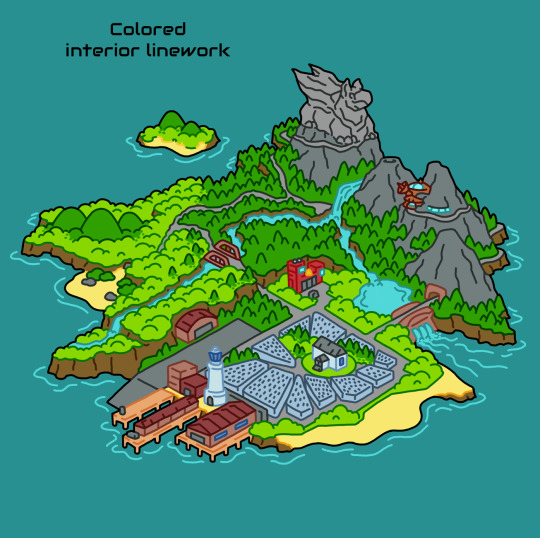
It was worth the effort: look at how it works printed! And this is without an illustration-suited paper.
OH! Before I go: this too marks my first time drawing the vehicle mode for TFs... THE TINNIEST VEHICLES EVER, you can download their respective files on the Merch Part of the Zine too!
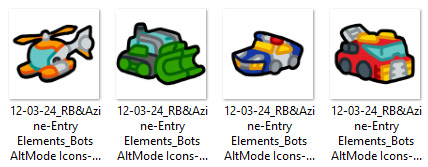
They are so bite-sized, luff them!!!
70 notes
·
View notes
Text

quick painting of elita-1 from the transformers one trailer
3K notes
·
View notes
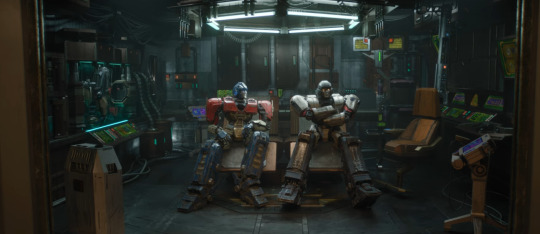
Text
HELP I JUST WATCHED TRANSFORMERS ONE TRAILER AND IT'S SO MUAH~~~~
181 notes
·
View notes