notworblacosplay
Not Worbla Cosplay
Dismantling the capitalistic hegemony of overpriced plastic sawdust paste. This blog updates very sporadically, and I have a bad habit of accidentally posting stuff here that was meant for my personal blog.
185 posts
Don't wanna be here? Send us removal request.
Last Seen Blogs

amusicaperfeita
A Música Perfeita

nacnde
hot damn

criesinmalex
criesinmalex

reality-exodus
#IAmJake

lifecoachleah
Leah The Life Coach
Text
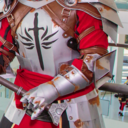
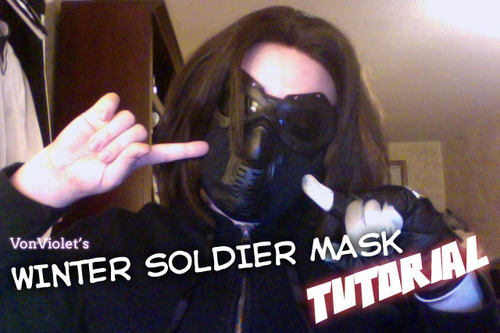
VonViolet's Winter Soldier Mask Tutorial
Materials:
2mm craft foam
Black PlastiDip
1ft Black Knit Fabric
1ft Black Pleather
1yd Black Pleather Band (could use left over pleather too)
Velcro (black Sticky Back recommended)
Wire/Pipe cleaners
White Acrylic ink
Liquid Stitch/Elmer’s Glue
Tools:
Scissors
X-acto Blade
Sewing Machine
Hot Glue Gun
Spray Bottle
Heat Gun/Hair Dyer
Pattern Download: https://www.mediafire.com/?7blhdp951ule4bb
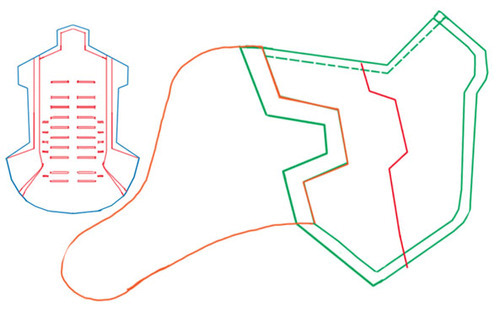
Print at 100%, do not “scale to fit” or else the proportions will be messed up. Pattern may need scaled to you, but it should fit most!
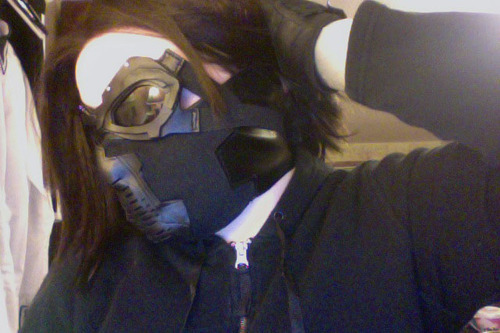
(Another view for the side. This is actually quite comfortable to wear.)
Step 1: Cut out all of your patterns. The sides are pleather, the main part is fabric and the mouth guard is craft foam.
Step 2: At this point you’ll want to tape off your fabric and spray it grey with a mixture of white liquid acrylic ink and water in spray bottle. Test it on some scrap first, it may need a 2-3 coats so you can see the difference between the black and painted fabric. (I was impatient and didn’t do this yet. You’ll need to tape everything off later if you wait.)
Step 3: Right sides together, sew down the front of your mask to the chin. This makes attaching the sides easier. If you want to avoid the bulk at the bridge of the nose, when cutting out the pattern, put the bridge of the nose on a fold so you don’t have a seam there. Step 4: Sew the pleather band around the top. I worked this much like bias tape.

Step 5: Hot glue a wire to the BACK along the rim where you just sewed the band. This will help the mask keep its shape. I used a pipe cleaner, but should have used slightly thicker wire. Step 6: Pull the loose edge of the band over to the wrong side of the fabric and hot glue it down. Cut a notch where the corners are so the band can flex. My sewing machine almost died trying to sew through hot glue. Don’t be me!
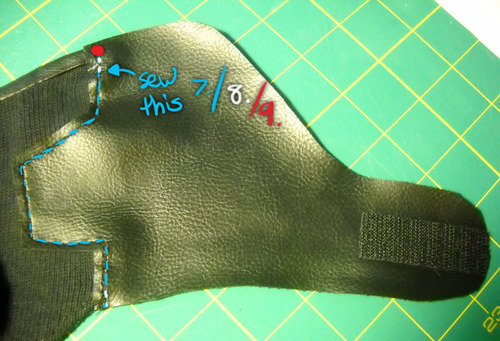
Step 7: Sew the pleather sides to the fabric part. Avoid the parts with the hot glue and wire. Step 8: Hand sew any loose parts at the top or bottom to secure them. Step 9: Hot glue the top corners of the sides to the pleather band. Trim the band so you don’t see any raw edges from the front.
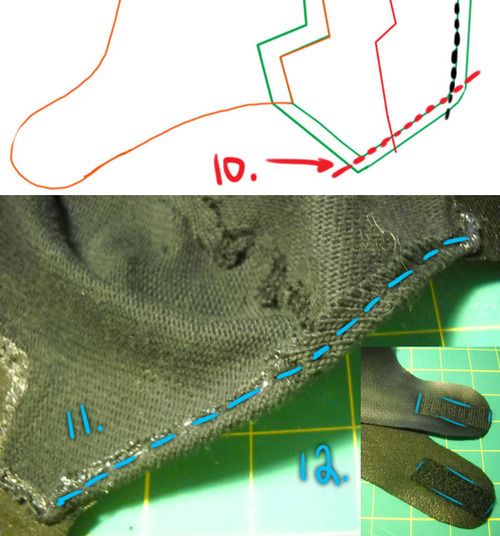
Step 10: Go back to your sewing machine, with right sides together, sew from the chin to under the jaw. Step 11: Hem the raw edge either by hand or machine. I did mine by hand. Step 12: Take the sticky back velcro and attach it to its respective sides, or how it feels most comfortable to take on and off. (EDIT: If it’s hot outside the sticky back is going to melt off; this happened to me. If you’re committed to the placement, use the sewing machine to make sure it says in place.)
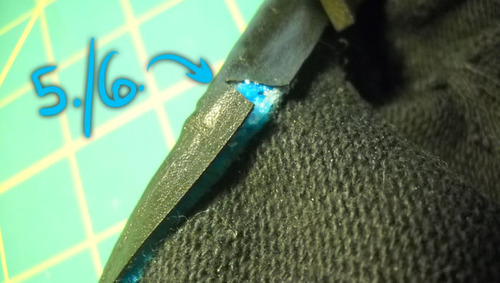
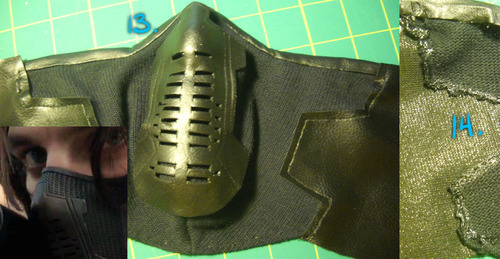
Step 13: Try it on and hot glue the COMPLETED mouth piece* (see more info below) to the mask as you are wearing it so it forms correctly. Make sure there is gap between the pleather band and the mouth piece (see image ref). This could be done without wearing the mask, but alignment of the mouth piece might be off. You may need to hot glue some wire, on the back, to the mouth piece sides, so it keeps its shape. Step 14: Seal the raw fabric edges with the liquid stitch/Elmer’s glue. If you don’t do this, the fabric will unravel! D:
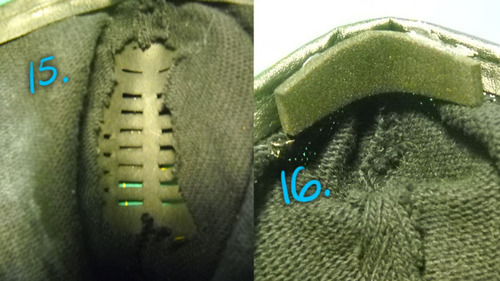
Step 15: Cut out the fabric behind the mouth piece to reduce bulk and to make it easier for you to breathe. Don’t forget to seal these raw edges too! Step 16: Take some of your craft foam and hot glue it to the bridge of the nose so this acts as padding. Trust me, you’ll need it!
*Mouth Piece:
(Basically the same steps as THIS and THIS. )
Step 1: Cut out your mouth piece from the craft foam.
Step 2: Tape your pattern to your piece and carefully with an X-acto blade, cut out the vent parts. You can make the grooves with a pencil.
Step 3: With your heat gun/hair dyer/open stove top, heat the foam and press it to your face. Be careful, the foam can get really hot! I started forming from the nose and worked my way down to the chin.
Step 4: Seal your mouth piece with PlastiDip or Mod Podge. I did 2 coats, but depending on your foam it might need 3-4 coats. PlastiDip royally stinks, do this outside!
I hope this tutorial helps anyone trying to make Bucky’s mask from scratch! If you have any questions feel free to drop me an ask! If you use my tutorial/write up thing I’d love to see what you make! :) EDIT: I also now have a goggle tutorial here!
#this looks SO NICE#and so much more comfortable than a full plastic one!!!!!!#masks#foam#fabric#accessories
1K notes
·
View notes
Text
Winter Soldier Goggle Tutorial
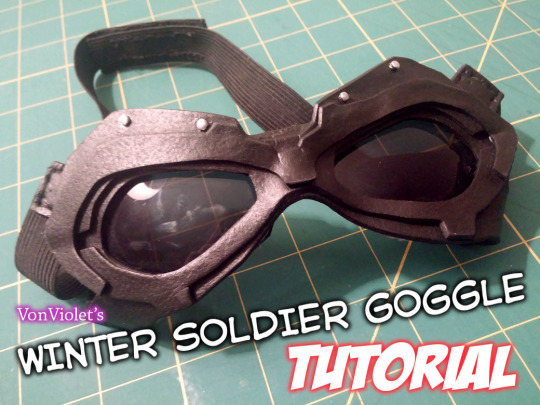
MANY of you have requested this, it has finally arrived! Instructions under cut.
Materials:
1 pair of $1 sunglasses from the dollar store (with a dark tint and the largest the lenses you can find)
2 sheets of 8.5”x11” 2mm black craft foam (an extra for mistakes)
Black PlastiDip – can buy at Hope Depot (alt. matte Mod Podge and black acrylic paint if your foam isn’t black)
Silver paint (or silver sharpie marker will work)
¾ in. sew-on Velcro
1 yard of ¾ in. black elastic
Black thread (All purpose will work, but if you’re feeling fancy, there’s heavy duty too, which I used)
Total cost: About $16-ish (not including tools), and an hour or two of your time.
Tools:
X-acto blade (can use scissors too)
Hand sewing needles
Sewing machine (optional if you’re okay with hand sewing Velcro to the elastic)
Hot glue gun + a glue sticks
Heat gun/hair dyer
Tape (scotch tape recommended)
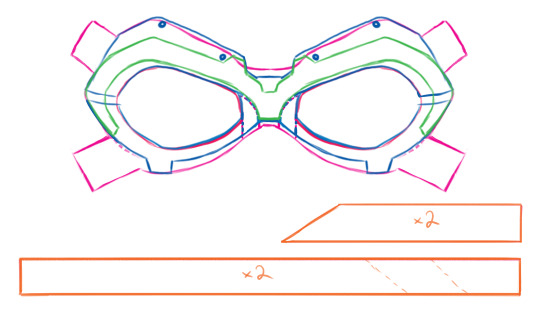
Pattern Download: [ MediaFire ] Print at 100%. Do NOT fit image to paper size.
Keep reading
#hey these are BEAUTIFUL#these look just as good if not better than most of the 3d printed versions available#anyway this blog has always been 90% for my persona reference so guess what I've been thinking about#...I forget what my tagging system used to be#foam#accessories#goggles
180 notes
·
View notes
Video
youtube
Feather Setting Tutorial
I added a whole bunch of feathers to my kenku costume. Here are instructions on how to do it, yourself!
Keep reading
1K notes
·
View notes
Photo
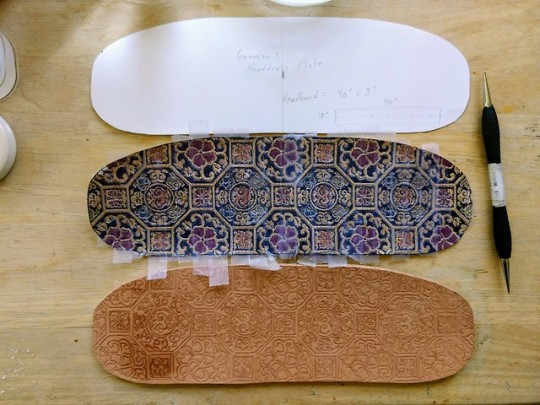
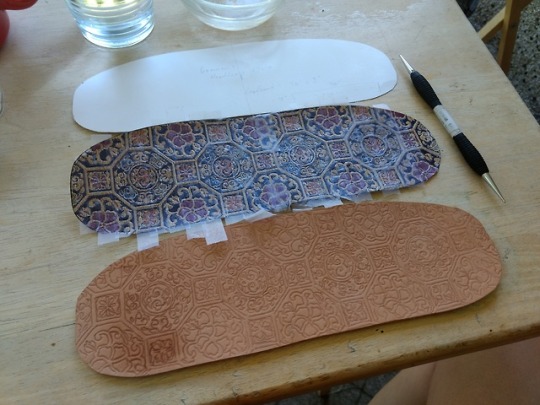
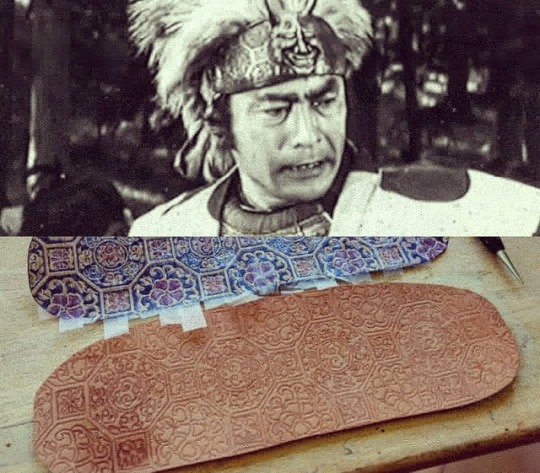
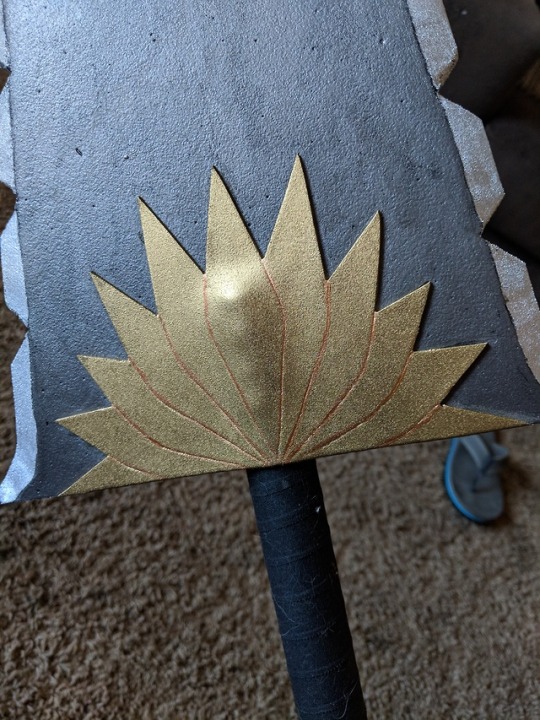
I took a couple of hours this morning to get the plate for Goemon’s headdress sorted out. I was initially thinking of ordering a fabric to use as a backing but I couldn’t find anything that really felt correct. Thankfully, I DID have a big bin of leather scraps, a print-out of a similar design, a good stylus, and a big cup of tea.
Protip: When tracing on to veg-tan with a paper stencil, cover the paper surface with tape first. This gives you a smoother surface to trace plus it prevents the paper from getting too damp from the wet leather underneath. 👌
94 notes
·
View notes
Photo
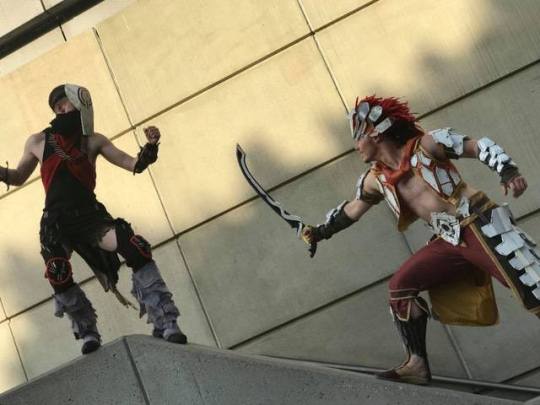

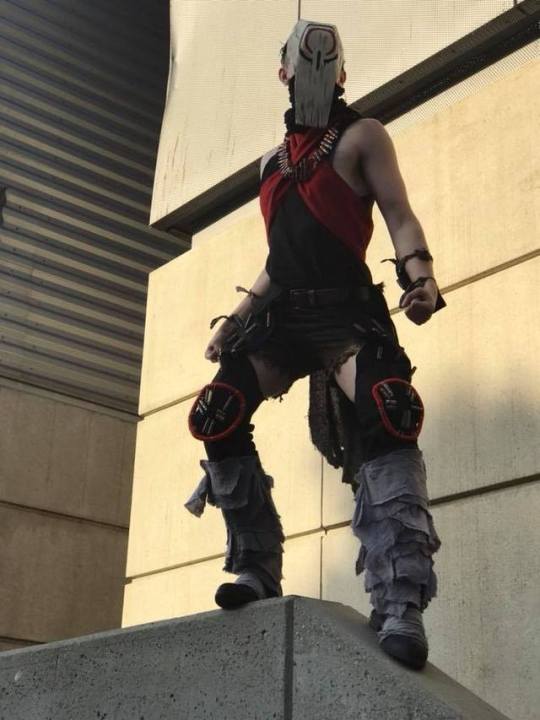
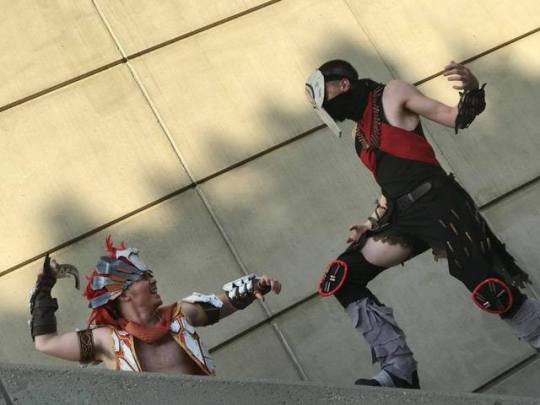
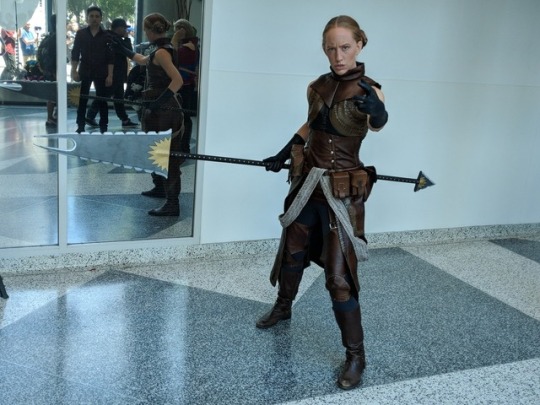
Horizon Zero Dawn is one of my favorite ever games and @moonbound-cosplay is one of my favorite ever people to cosplay with, 10/10 would recommend both
Also recommended is @renaissance-goth as an impromptu photographer, less only kind of recommended is this wall outside the LA convention center which made me look pretty cool but from which I also almost fell and died.
103 notes
·
View notes
Photo
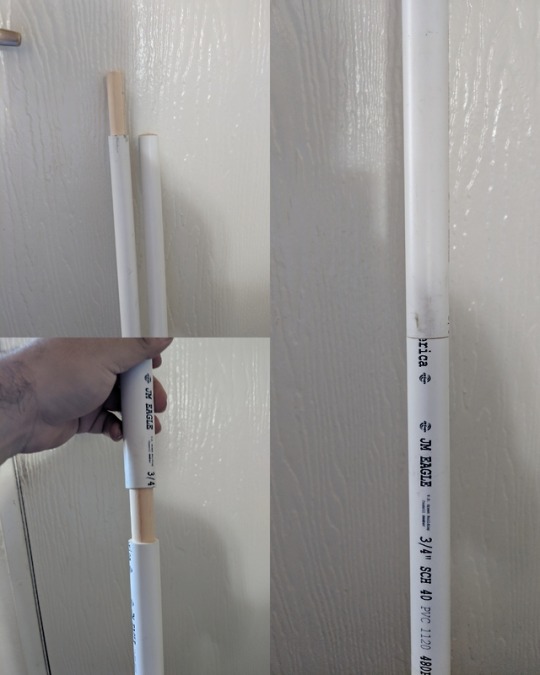

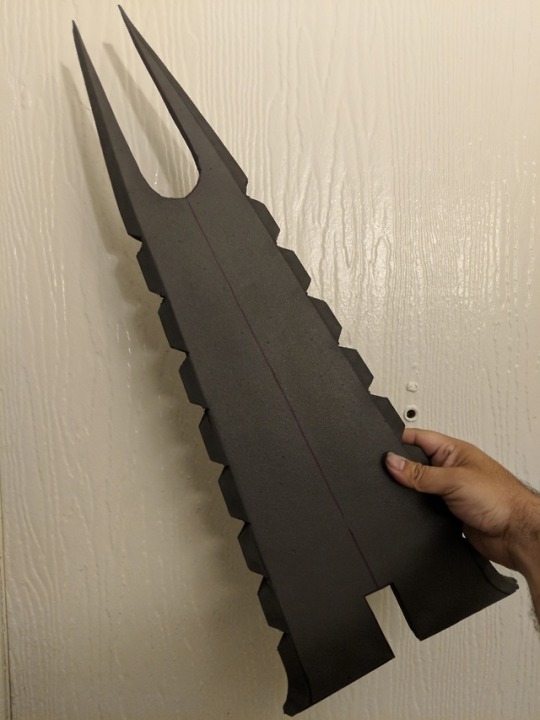
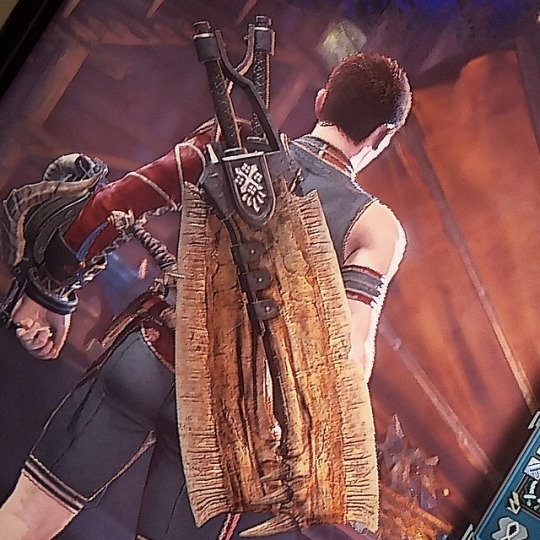
@lady-lucrezia asked me to make her Calpernias Spear from Dragon Age. I never made a prop this size so it was time to go on an adventure.
She wanted the prop to be light, have the ability to split for storage and travel and be con safe. I went with PVC since it’s both light and easy to work with. The challenge was to make the spear split but still look flush. I could’ve used a coupler and that would look bulky in the middle. I decided to use a 6" piece of dowel whose diameter was bigger than the inside of the PVC and sand it down till it would slide into the pipe and have a good snug fit. Once I got the dowel sanded down, I glued 2 inches to one end and left 4 inches as support for the other piece.
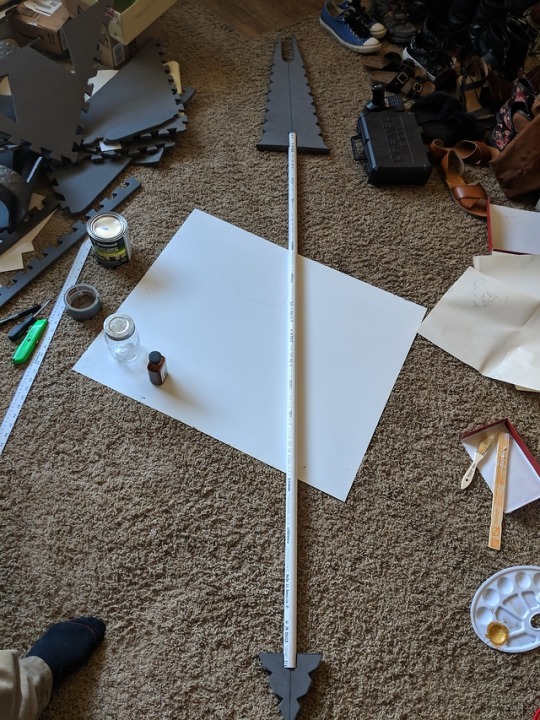
I then took some butcher paper and started sketching the shape of the spear with @lady-lucrezia approving the final shape. Unfortunately I had to scale the length of the spear tip since I only had the square foam mats to use. This made the spear shorter but also quite thick (It definitely kept the spear con safe)
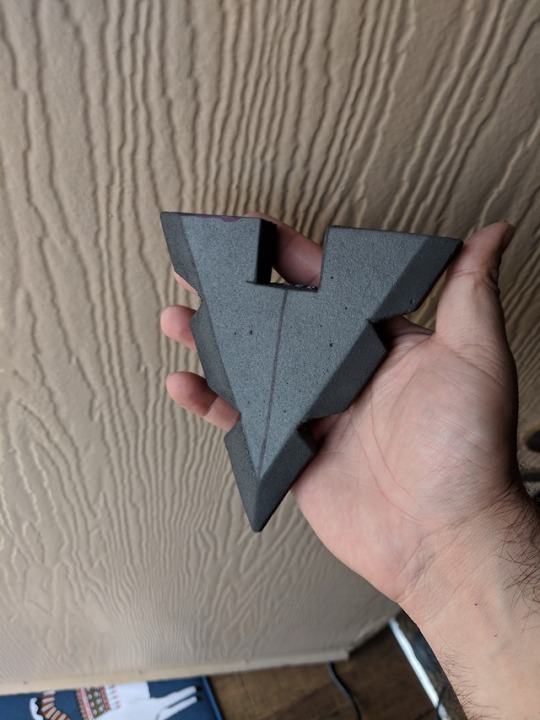
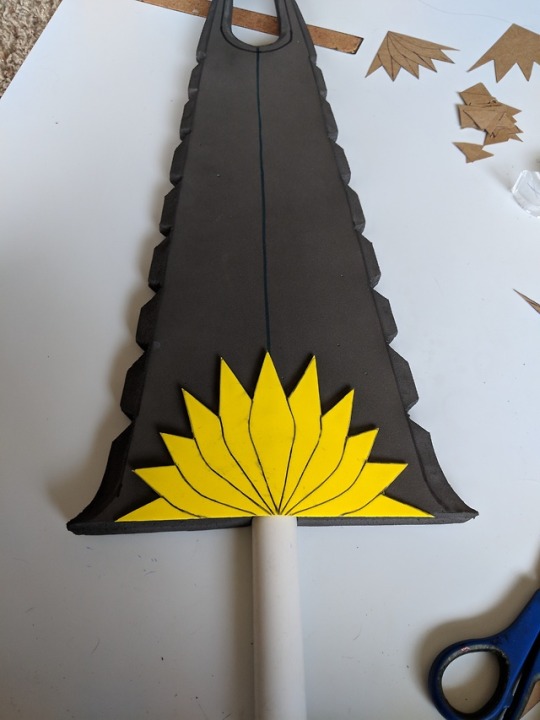
Once the spear tip and end were cut, I dremeled the bevels for the “edge” of the weapon. I then started working on the “fan” detail on 2mm craft foam that will help hide where the PVC pipe and foam meet. Once everything was shaped and cut, I did 3 coats of plasti dip.
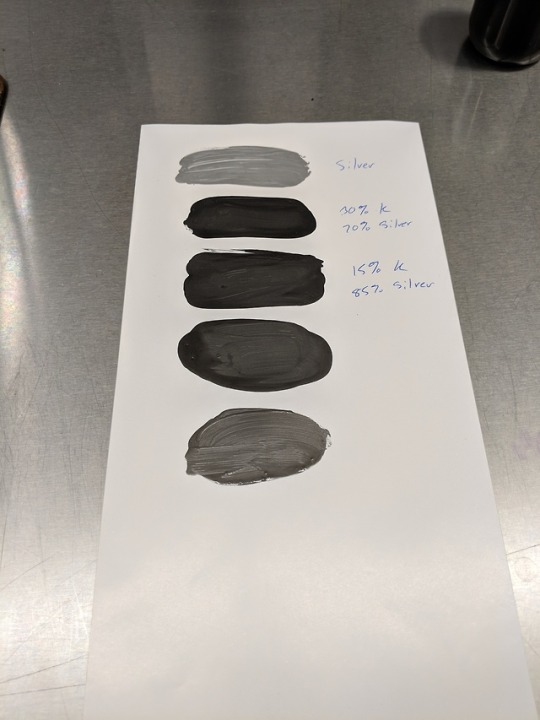
I started mixing black and metallic silver paints to get a shade of gun metal black that both Lady Lucrezia and I were happy with. I then painted the bevel silver and the rest the gun metal color I made. The fan details were painted gold.
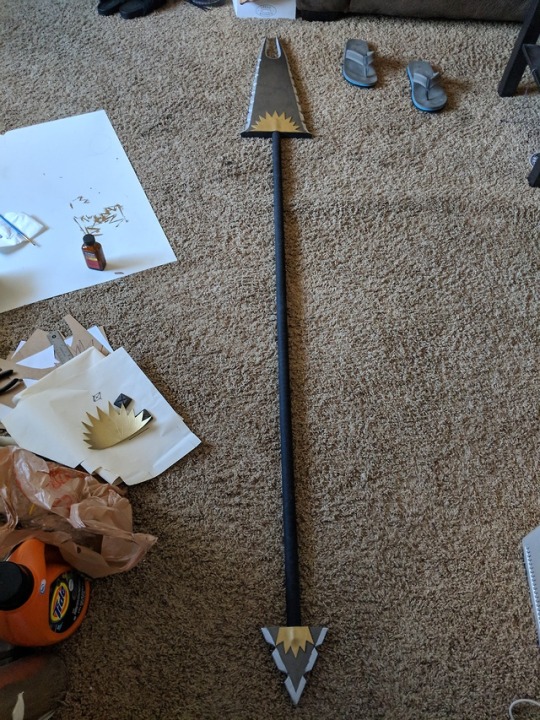
I used both contact cement and high temp hot glue to glue both the foam and pipe together. I first used the contact cement to glue the sides and once it set, I filled in any gaps between the foam and pipe with hot glue reinforcing it.
Once everything was finished, I used some metallic bronze to fill in some line work and then wrapped the staff in butcher paper so I could clear coat the spear ends.
The staff itself is not painted but wrapped in grip tape making it easier to hold and giving it more texture. In the end, Lady Lucrezia was extremely happy with it even though I think I can do a better job. I was able to make her a prop with materials I had on hand and only spent around 10 dollars on extra materials. Not bad for my second prop build
247 notes
·
View notes
Photo
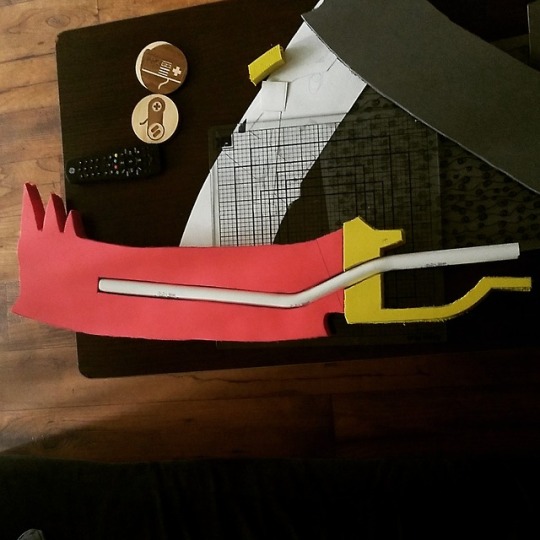
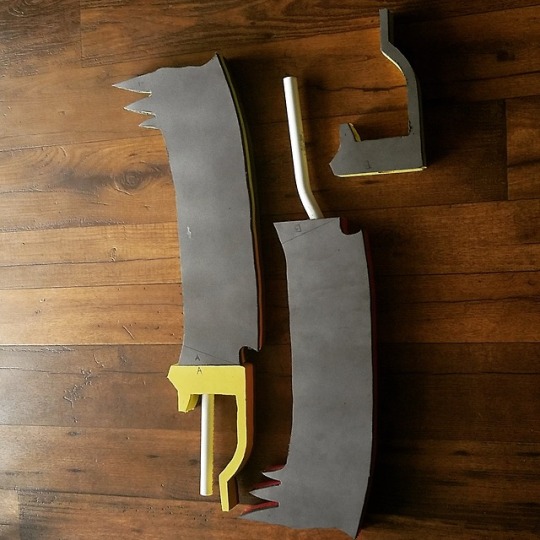
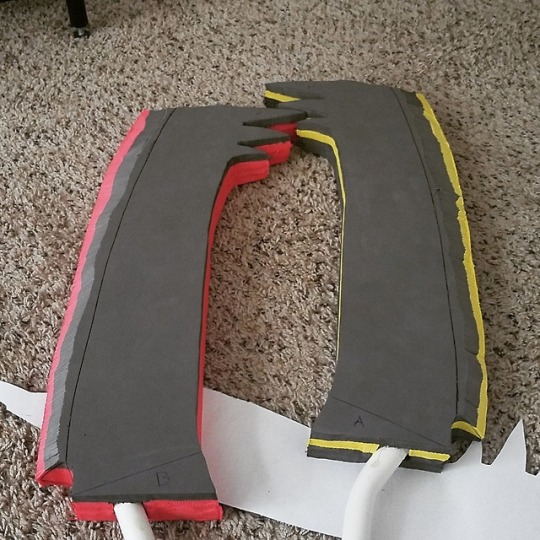
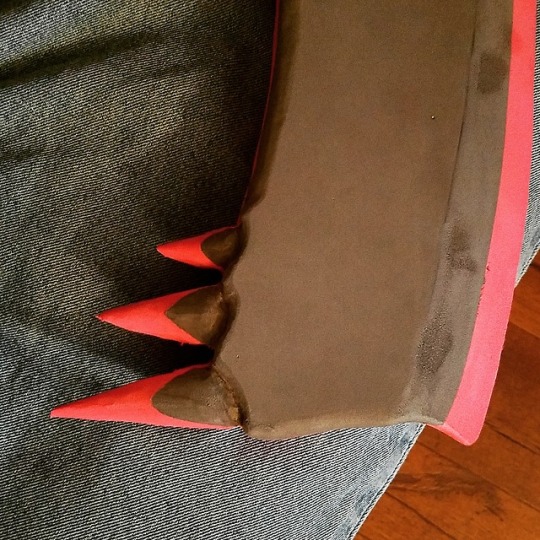
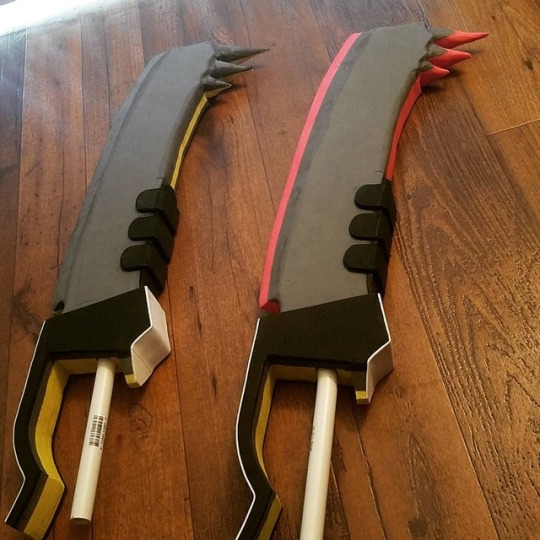
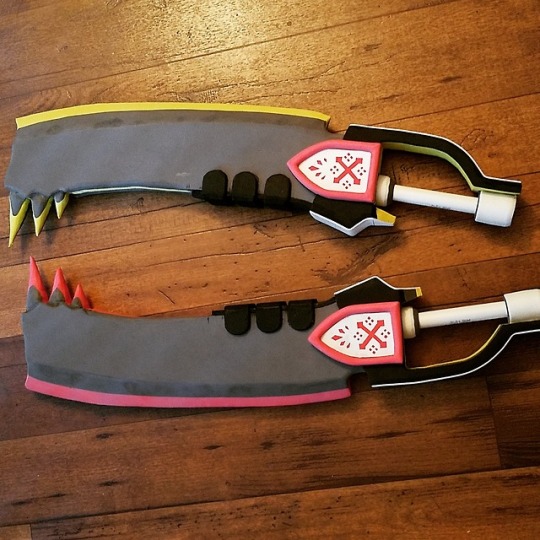
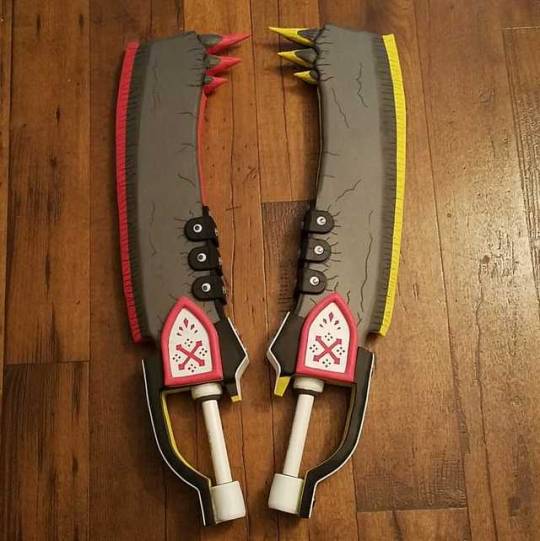
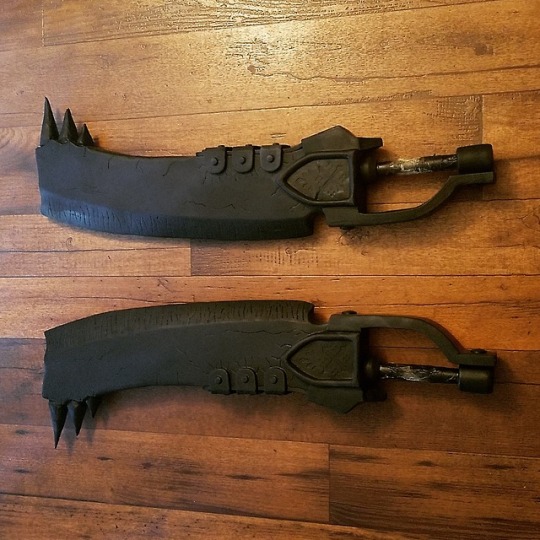
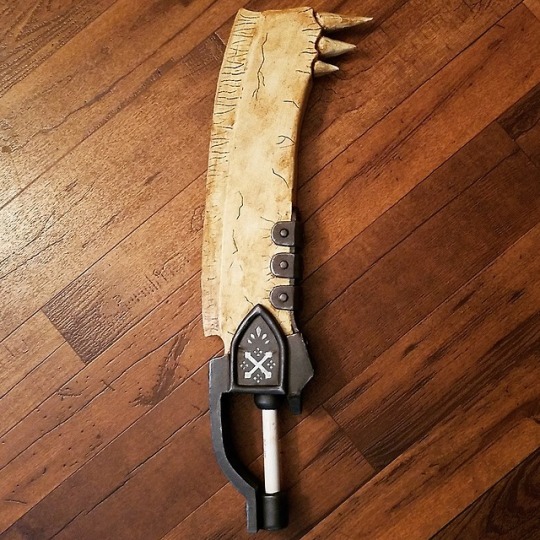
Been a while since I’ve posted but here’s an update on my most recent project. Been playing a lot of Monster Hunter World and I’m doing another colab with @blogofmaddog for an armor set. And of course there’s the weapons so we decided to do the bone dual blades. This is a rough step by step of how they’ve come together. I promise to post more frequently on here from now on!
523 notes
·
View notes
Note
Hi! Do you have any advice toward making a reusable beard prosthetic? I need to make one for a Merl Highchurch cosplay and if I could just do it like one time and reapply it that'd be better
I have...some advice. I’ve only done beards the tedious way, with crepe hair and spirit gum right on my face. Now, I haven’t tried to do this, because I didn’t want to deal with storing and transporting the thing, and also I had done a kind of shitty job, but you CAN technically reuse a beard made this way a few times if you are VERY careful.
This video shows how to do that (it’s linked to the relevant part, but the whole thing is very good, it’s how I learned to do beards). It’s definitely a tricky thing to get right, but this kind of beard is also the most realistic and comfortable, done well.
I’d keep asking around, though, if this isn’t what you’re looking for. You’ve definitely got options -- ventilating (EXTREMELY time-consuming), some kind of wefted wig-for-your-face contraption (I know it can be done, I just done know how), just buying one (there are some good options, given the number of professional Santa Claus cosplayers in the world) -- I just can’t give much specific advice on anything else.
21 notes
·
View notes
Photo
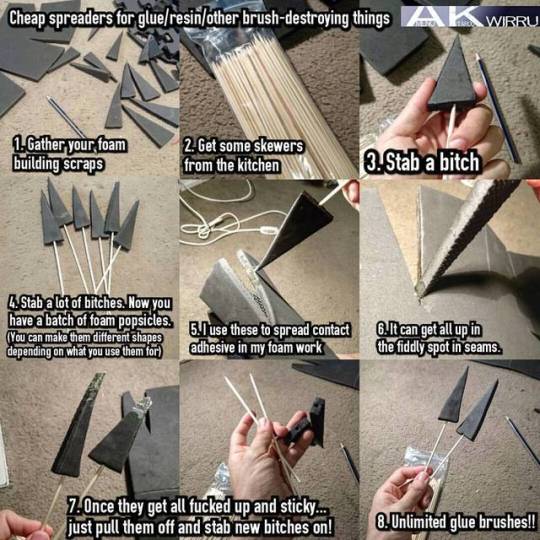
☀ Good morning #Tutorialtuesday! ☀
✨ Anyone who works with messy chemicals (contact glue/latex/resin etc) will have experienced the CONSTANT need to replace brushes OR having to get OTHER chemicals to keep those damn brushes alive! That shit hurts in the wallet. 😡
✨ So I started doing a thing I like to call… Foam Popsicles!
✨ Let’s all be less wasteful. Let’s all stab bitches instead!
Please support Tutorial Tuesdays on Patreon - AmenoKitarou ✨
#RepeatTilCry #FoamPopsicles #JustWirruThings
#I...usually just use whatever foam scraps I've got lying around#but this is a much more professional approach#foam#glue
526 notes
·
View notes
Text
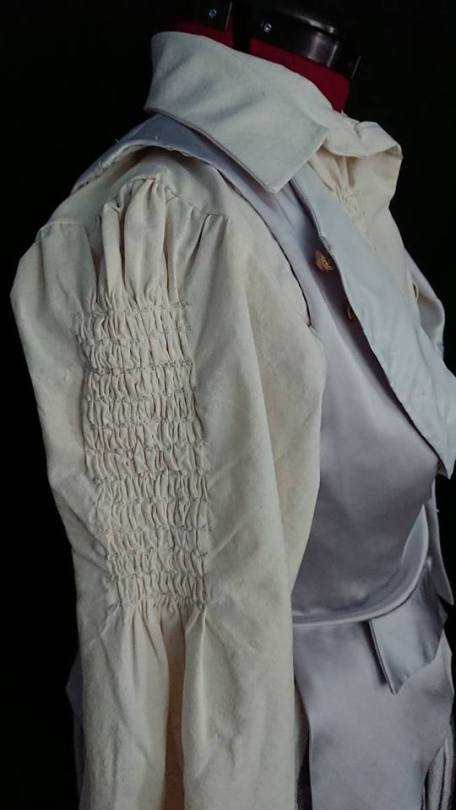
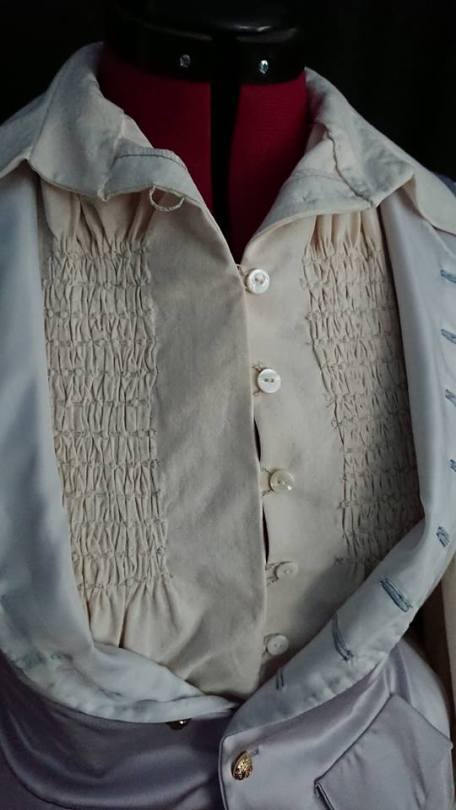
Machine smocking tutorial
While working on my Eleanor Guthrie cosplay, I researched how to do smocking with a sewing machine (rather than by hand) I’m quite pleased how it turned out, and I thought I’d share a little tutorial. If you have any questions, do not hesitate to reach out!
What you’ll need:
Sewing machine with decorative stitches
Embroidery thread (I used Gütermann Sulky Cotton Multicolor in grey/beige tones)
A ruler or measuring tape
Chalk or disappearing marker
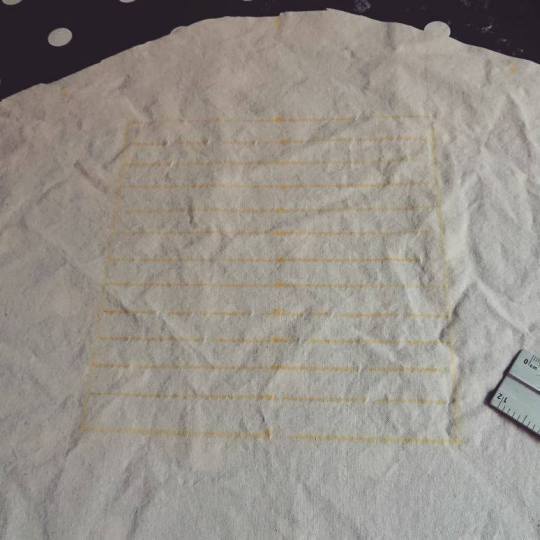
1. First, you must decide on your ratio (how much fabric you will gather), and mark your gathering stitches lines. I went for a 1:3 ratio and marked lines 18cm long. My desired final gathered length is 6cm. My lines are 1.5cm apart, but you can experiment with lines closer or wider apart for a different effect.
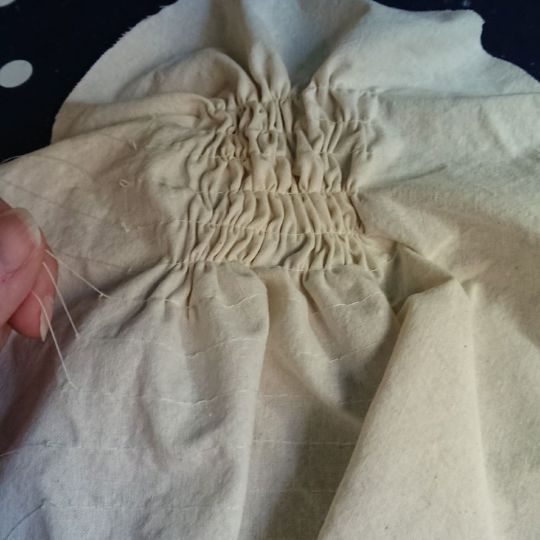
2. After sewing a long gathering stitch on each line that you marked in step 1, gather your fabric down to the length you decided in the first step (in my case, 6cm). Press your fabric to set the pleats.
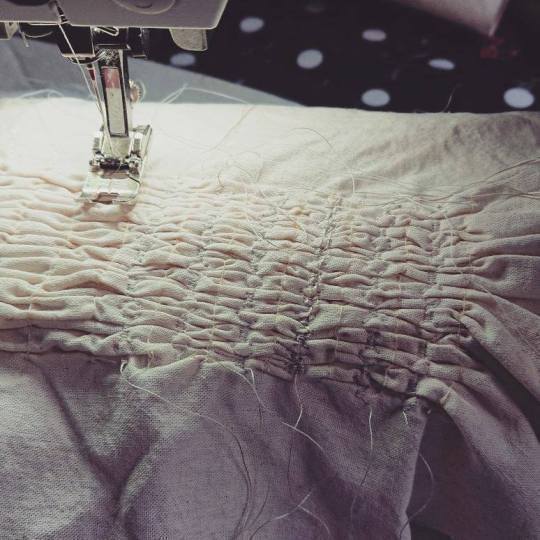
3. Go back to your sewing machine and sew decorative stitches _between _each gathering line. This will permanently set the pleats. Note: smocking isn’t elastic like shirring is, don’t confuse them! They kinda look the same and they both reduce the width of your garment by gathering fabric, but they have very different in behavior: shirring keeps its elasticity by using elastic thread as the bobbin thread, while smocking is permanent. I see smocking as something more decorative rather than functional, like shirring is.
4. Remove all your gathering stitches (the most tedious task of them all!), give your fabric another good press with steam, and there you go! Admire your beautiful smocked piece!
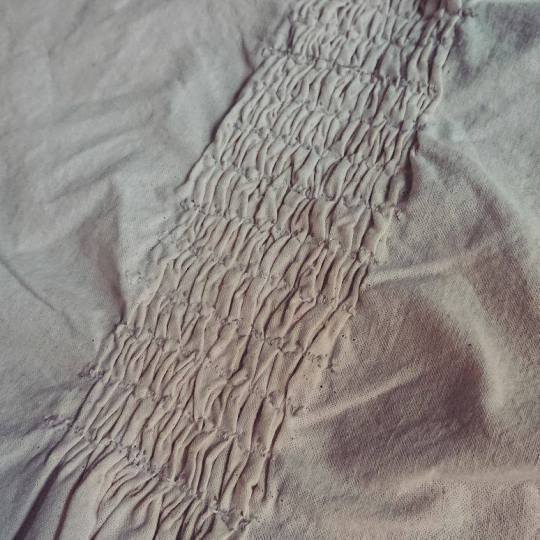
And done!
There are many other methods, including smocking by hand, but I hope this short tutorial will have inspired you to give it a try! Smocking is not difficult and the final result is sure to make a statement on your costume!
Liked this tutorial? Don’t hesitate to share it! Sharing is caring! ♥
#this is a great idea#hand smocking will look neater but it's VERY time consuming#And friends#for cosplay?#it ain't worth it#(says someone who would definitely try it)#sewing
434 notes
·
View notes
Text
Boot Basics Tutorial
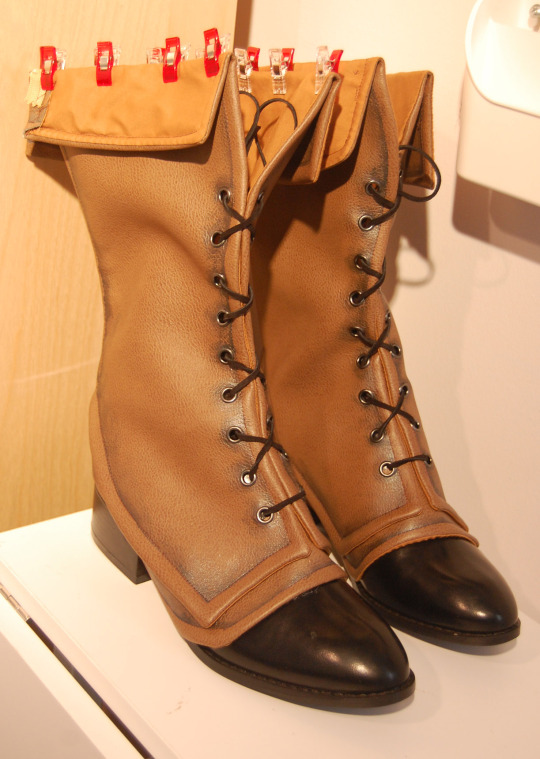
Recently, I wrapped up work on my boots for a cosplay (Lillet from Grim Grimoire) and I got a few questions about how I made them, after posting photos of the first of the pair. So, while making the second, I took pictures and notes along the way.
Keep reading
2K notes
·
View notes
Text
Flexible Paint Test
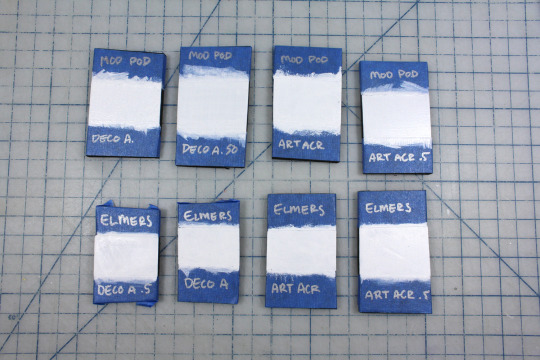
I need to do some detailing on S76′s boots, but boots are meant for walking go on feet. Feet bend, flex, run into stuff, and are generally rough on shoes. Hence whatever I use needs to be durable AND flexible. It’s not worth ordering another can of Plastidip, so I want to make my own flexible paint. A quick Google search reveals a couple strategies such as mixing acrylic paint with various substances. Since I have the materials on hand, I tried mixing paint with PVA glue to get a colorful substance capable of flexing without crazing or cracking. Read on to see the results!
Keep reading
241 notes
·
View notes
Photo
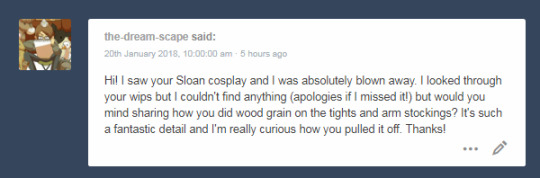
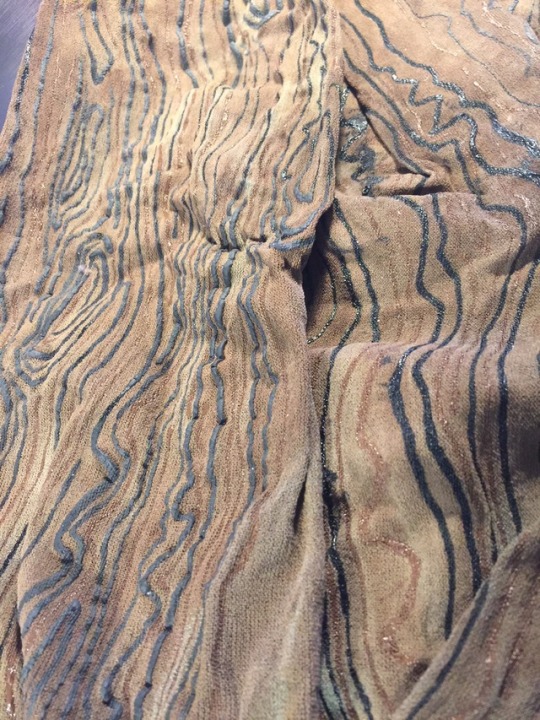
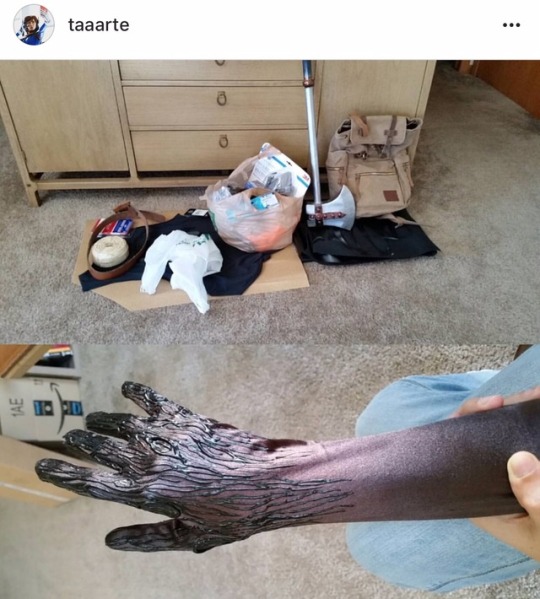
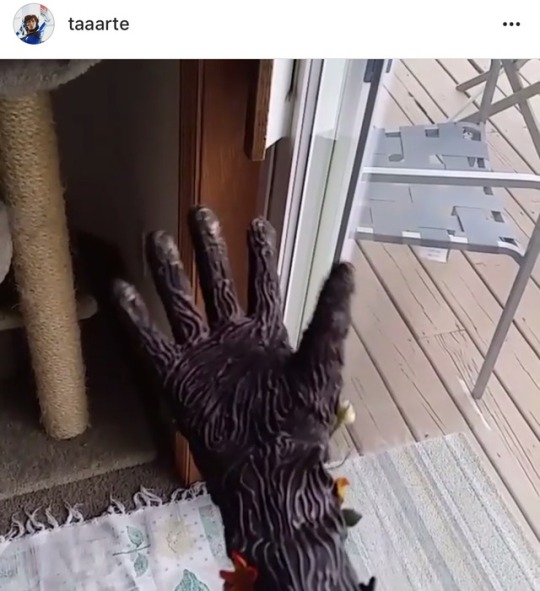
Thank you! (and thanks for checking the wip tag, as well!)
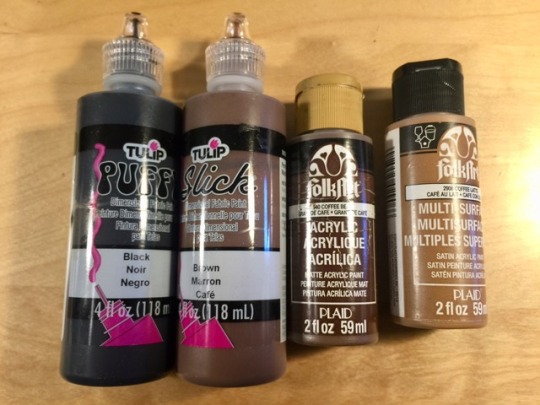
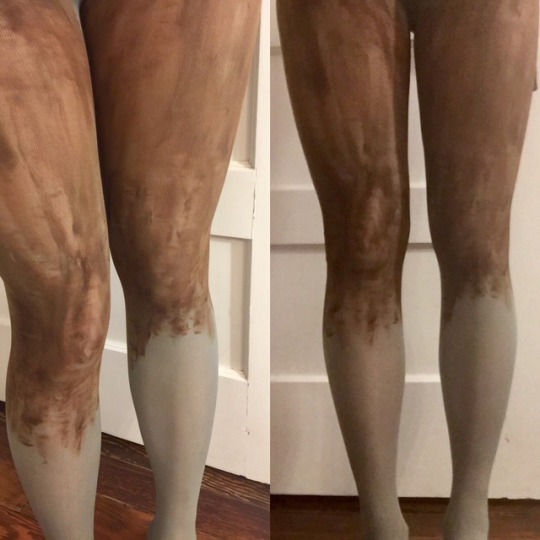
Materials:
- tights and armsock bases
- brown acrylic paints in various shades (two remaining bottles are shown, but there were four to start with)
- fabric-painting medium (obtainable at your local craft store - mix it into the acrylic paint to give it the flexibility of a fabric paint)
- black and brown puffy fabric paint
- sponge brushes
- a friend to help in doing the lines on your dominant arm (or: a very steady hand, or some newspaper to stuff into the arm for keeping its shape)
Keep reading
#this is how I did merle's arm too!#except I used dimensional paint instead of actual puff paint I think#I'd recommend puff#it'll take less time to dry#and the worst part of this is waiting for it to dry ON YOU#painting#sewing
546 notes
·
View notes
Note
I'm just wanting to say that I'm new to foam work and never quite bought into the worbla hype, so I already love this blog and its mission statement. If you can teach me things and make me laugh in the process, I'm gonna love ya forever.
I love you TOO
I’ll be doing grad school for...a while so posts will (continue to) be few and far between, but you can bet I’ll write up any Good Graduate Costuming Secrets I come across.
#the biggest secret I have learned is that industrial sewing machines are Garbage#most sewing machines are haunted#industrials are haunted by the souls of approximately 30 drunk weasels that hate each other and you#jacky-the-nerd
18 notes
·
View notes
Photo
CONTACT CEMENT, I'M TELLING YOU


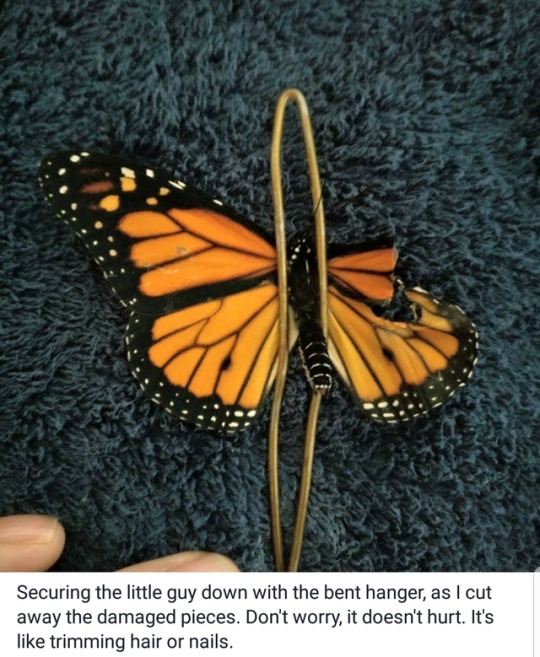
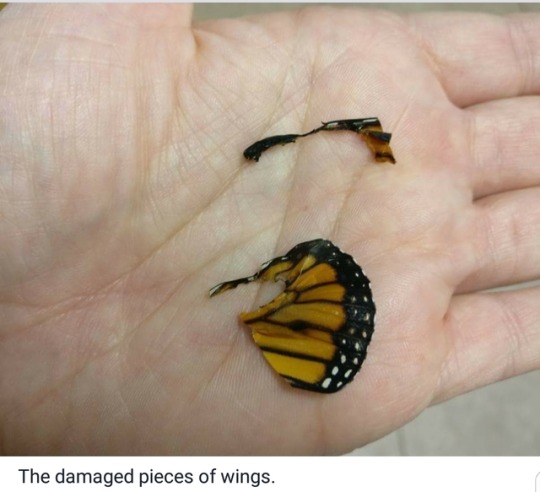


This person…. fixes butterflies….. 🦋
#not cosplay#insects#okay uuuuh this may only seem relevant to this blog to the six people I convinced to buy contact cement instead of hot glue#but those six people...this is for you
290K notes
·
View notes
Note
any tips for knowing which ebay sellers are legit/have better quality when it comes to wigs? I find a lot of sellers using the same photo of a wig so its kinda concerning that I'm probably not even seeing the real wig!
Sheila’s Tips for Wig Buying on Ebay!
-Most mass sellers on Ebay all use the same photos because they are all actually selling the same manufactured wig –MOST. Some do it because their lazy. When looking for sellers, look for one that has pictures of the wig ON A STAND. (A generic model is okay too, but NOT cosplayers) but the biggest key is that they have SEVERAL photos of the wig in different angles. If you scroll down and they have various pictures in the description, thats a good sign!
-Another great tip off is watermarks. If the ebay store has their logo on the photo, and I mean a logo and not like MSpaint type, haha, then its a good sign. -CHECK THE REVIEWS. I can’t stress that enough. Check the reviews, how many do they have? (You want four digit numbers). How many positive reviews (it should be a majority.) -Specifically check the bad reviews. Most have a detail of what went wrong and it gives you an idea of what you could be potentially dealing with. So if all their bad reviews are on the quality, or appearance – thats their main problem. If its all about the shipping time– thats the risk you may have to deal with. Make sure you are ready to deal with the issues others have reported if you are set on that seller. -Return policy!!! Make sure THEY HAVE ONE. Not having one is a BIG NO NO. Most sellers have one, READ IT. Because sometimes they offer exchanges but no refunds. :( And some won’t take it back if the tags are cut, etc etc. -What else do they sell? Do they only sell wigs (this is great!) Wigs and cosplay stuff (good sign!) Wigs and hardware products and house items (hmm… maybe not.) -There are some well known, verified stores with their own pictures, wig only stores with great prices. My favorites are CharissaKids, CosplayAnimeWigs, Cosmonde, WigFashion, and JCPunk-Talk to your seller!! You’d be surprised how quick and nice they can be. Several times I’ve contacted them asking for more pictures in different light or with questions about shipping time (usually they offer me expediated for a higher price, which is handy when your late). I’m always answered. Don’t be afraid to get to know the product before you buy. Especially if you are on a deadline.
753 notes
·
View notes
Note
hello! I was wondering how you would do a kinda... under boob belt? I'm planning on cosplaying Sigyn soon and I have one of her dresses have a "metal" belt under her breasts that tips up in the middle and I was wondering if you knew how to/knew of a tutorial on how to do that? Thanks! (sorry if I explained it oddly, it's a hard piece to explain XD)
Iiiiinteresting. I figure the shape of the thing isn’t too complicated (correct me if I’m wrong, since I don’t know the outfit), so what you probably need is advice on materials? I’m always happy to ramble about materials.
The obvious answer, as always, is craft foam. It’s the easiest solution, probably, and can be either glued directly to fabric or closed with velcro so it can be removed for storage or washing. But foam is delicate and tears or wrinkles easily, so for something tight to the body it’s not ideal. Here are some other options:
Thin HDPE sheet. I use this for basically everything. It curves easily in one direction at once, but it’s tough as nails, hard to crease or scratch unintentionally. I often layer craft foam on top of it, either to add substance or details. I wouldn’t try to glue it directly to a dress (it doesn’t hot glue well, you need contact cement), but I have sewn snaps to a scrap of fabric and glued THAT to the plastic, and used the snaps to attach it to something. Or you could have the belt overlap in back and close it with velcro.
If you’ve got the budget, veg tanned leather. There are some great metallic leather paints out there, it would look super legit.
If you find some scraps - linoleum. I throw this one in here partly because I’ve only seen it done once and think it’s great. Behaves a lot like leather, except you can’t shape it permanently. But it’s flexible and tough, which is what you need.
Fabric! Don’t underestimate metallic vinyl, either stretch or upholstery. You could sew upholstery vinyl it into the dress itself, or you could sew it onto something really stiff (canvas plus interfacing, or something similar) to make a sturdy belt as a separate layer. I like how topstitching looks on vinyl (this sort of thing), but that’s a personal preference. If you want it seamless, you can also “skin” craft foam or another material with stretch vinyl, like this. You can ALSO sort of quilt craft foam pieces into the dress itself - that integrates it nicely into the dress, but also adds some dimension. I did something like that a few years ago with armored boot thingies. Depends on the look you want.
...so no, I do not have a tutorial, but I can give you like twelve different partial answers. I hope they’re kind of helpful?
19 notes
·
View notes