
mi5018malgorzatawegrzycka
Compositing for Animation
31 posts
Don't wanna be here? Send us removal request.
Last Seen Blogs

reeeeeva
ree

stimkee-artist
Mostly Logince, Tbh

meiamey
WRITER

vairagiiofficial-blog
Untitled

office-cleaning-services-g-blog1
Golden Lion Cleaning Services Toronto
Video
Mix and Matchmove brief
Final video
Vimeo link in case the video does not play:
https://vimeo.com/710753548
Considering my procrastination habits, with this project I gave myself way too hard of an idea to work with. Five shots, most are not locked off, filmed outside in public, all have character animation and I was going to make all five characters from scratch, all in different styles and software. That is a lot. And I was blind to my mistake until the deadline was close and production was barely started.
I still managed to deliver most of what I was planning to create and feel proud about it. There are only four shots, but they are in the styles I wanted them to be and learned extremely a lot about compositing through working on them. I also realised how much software-hopping is usually required to make such scenes. Things can go wrong at any stage and there are simply so many stages to this process.
The final sequence has its wonky movements in a couple of places, colour matching could use a bit more polish. Details such as shadows and reflections my characters should cast are missing. There is a little too much camera movement, or my hands were too shaky and I should have used a stabiliser. But there is only so much time I was able to spend on the whole project.
As always, I probably should have started the production earlier. My ideas were quite ambitious, but not impossible. Not attending tutorials to get feedback at the late stages is not something I ought to have done, but I felt genuinely ashamed of how little I had to show from how much I was procrastinating. A hard lesson I thought I already had learned last year with a different module.
My final video has good sound design and I think the last scene - the petting scene - came out the best out of them all. I planned beforehand for this one the most, thinking it is going to be the most difficult to create. As I have found out, all of them were in fact very tough to make.
Upon being given more creative freedom for my projects, it feels like I go feral and start putting every neat but very hard to achieve idea I have into them. But at the same time, what is even the point to a project that is not a challenge for you?
Music source:
https://freemusicarchive.org/music/holiznacc0/orphaned-media/strangers
Sounds source:
https://freesound.org/
1 note
·
View note
Photo

Editing together and adding sound to the final sequence for the main brief
I have been rummaging through freesound.org and freemusicarchive.org every time I was waiting for my animations to render, so I was pretty prepared for this stage.
My general music and composition choices come from the fact I wanted my project to look and feel a bit like the “montage segments” in vlogs, especially travel vlogs. When the vlogger stops talking for a moment to show us all the great and interesting stuff they saw on their trip as the background music sets in. Except here instead of things such as concerts, monuments and sunsets, we are being shown giant creatures being themselves in their natural environment.
Since out of time constraints I have four and not the planned five scenes to work with, the final video will deviate from what I had in my storyboard.
1 note
·
View note
Photo
Working on the monument scene - animating, rendering
It is fun to have a stylus and not a mouse back in my hand. What is not fun is rotoscoped masks clipping and me having so little time before the deadline I had to give up smooth animation and settle on adding shake to my lines.
At least this scene was made from start to finish in a single piece of software, as Blender has compositing tools and I could render my animation already with the added footage.
1 note
·
View note
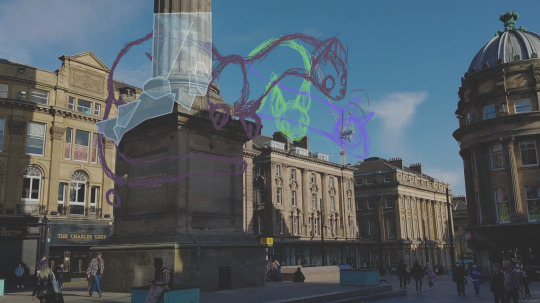
Photo
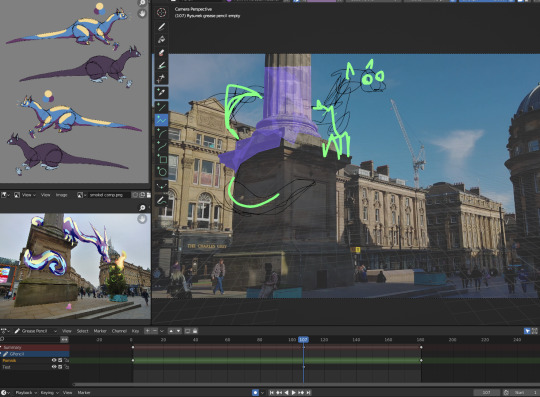
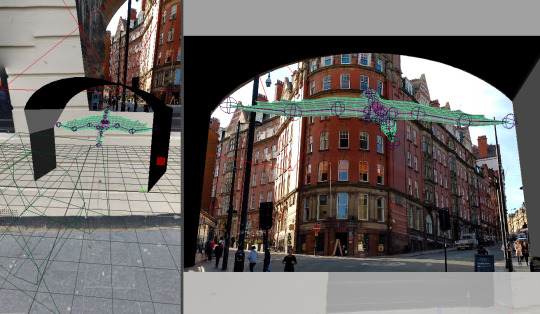
Working on the monument scene - tracking, setting up the workspace
I tried tracking the footage for this scene with Nuke, but I got a significant amount of complications with importing it to Blender. The scene and camera were flipped and at odd angles upon being exported. I was not able to fix it and decided to track my footage directly in Blender instead. More tutorials had to be referenced.
I have never used Blender’s 2D animation tools, and just setting up my workspace had a learning curve to itself. This software’s community is however extremely active and helpful, so I was able to find plenty of material I could use to understand the workflow better.
1 note
·
View note
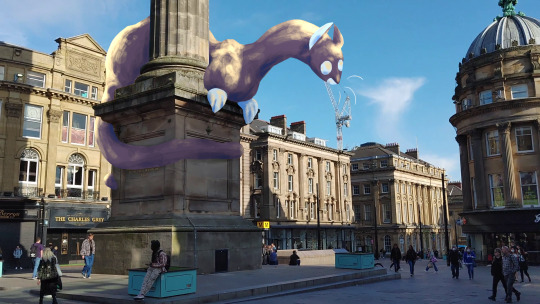
Photo
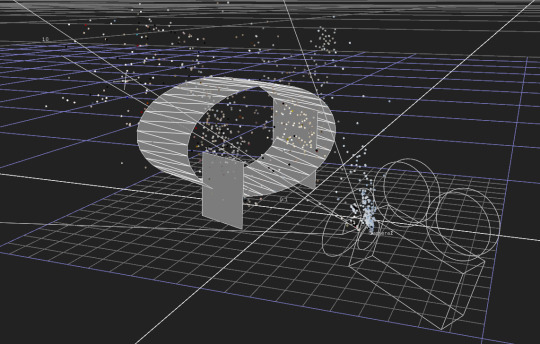
Working on the foggy scene - animating, compositing
Aside from being a slow process, animating this scene went rather well with the help of referencing many tutorials.
No rotoscoping masks this time either, the contrast between my foreground and background was strong enough to use a Luma Key.
1 note
·
View note
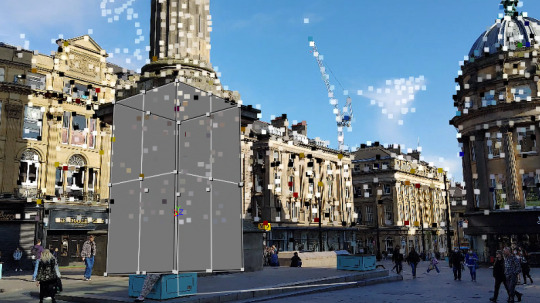
Photo

Working on the foggy scene - preparing the character assets, tracking the footage
In Photoshop and PaintTool SAI, I took a close look at my character design and painted over it until it matched the lighting of the scene I was about to put it in. Then separated it into rigable pieces and moved on to tracking my footage in After Effects.
A free plugin - DUIK Bassel was used to bring my character to life. Despite it being one of the best character animation tools in After Effects, I found it to be very laggy. Looking through tutorials on how to utilize the plugin, this behaviour is apparently expected.
1 note
·
View note
Photo
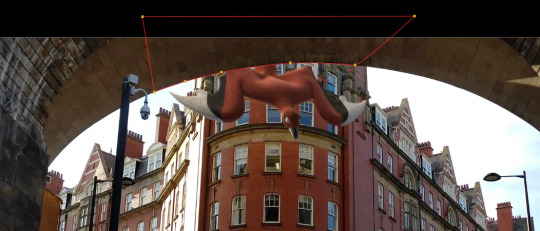

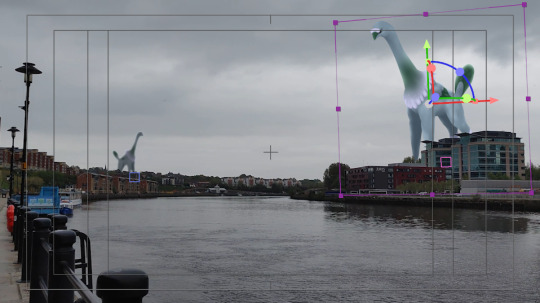
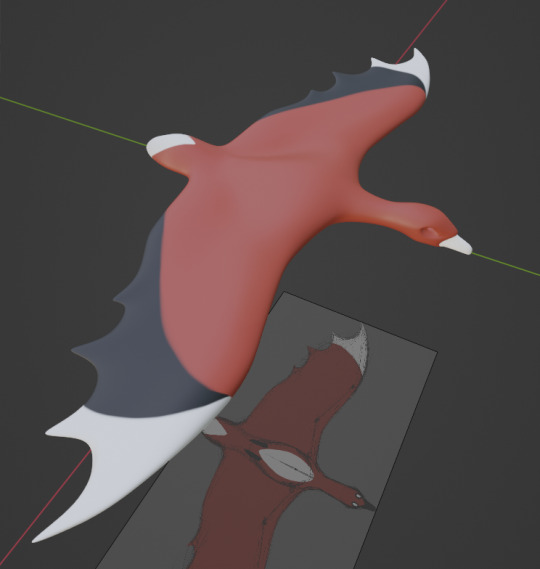
Working on the bridge scene - rendering, compositing
With the render of this scene, I finally figured out how do Maya render settings work. I needed less grainy images with motion blur.
Here a problem occurred to me: although faster and blurrier animation may look more realistic with the real-life footage I am working with, it also removes the whole point of me creating and giving movement to the character from scratch. I want them to be visible, so settled on a much more moderate amount of blur and speed.
In Nuke, rotoscoping the bridge, building, a lamp and doing colour correction were not particularly difficult. However, I noticed a problem with the scale of my character when it is flying directly above the viewer. It looked weird to have it magically behind the tall building on the left. A lot of tweaking later, I moved the animation to the right in the last seconds of its duration. It is not ideal, but still an improvement.
1 note
·
View note
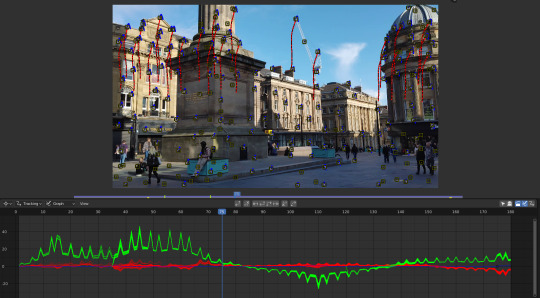
Photo
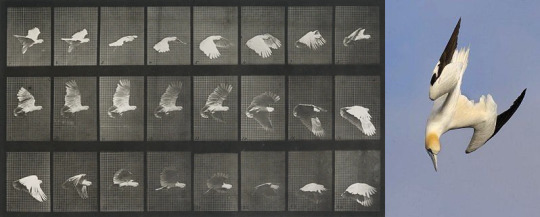
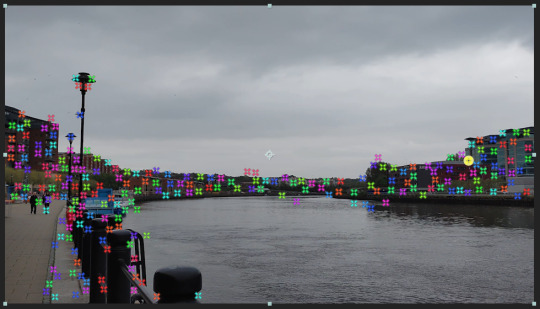
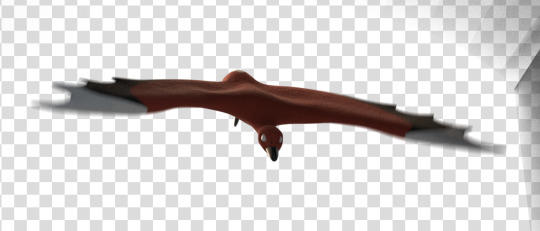
Working on the bridge scene - tracking, animating
I was warned by our lecturers that this scene might be hard to track. They were right, it took multiple tries, but I eventually managed to get something out of Nuke that I could work with.
Animating was difficult here. I referenced pictures of real birds in flight, but I still had to match the character’s pose and position with the strong, fast camera movement the best I could.
1 note
·
View note
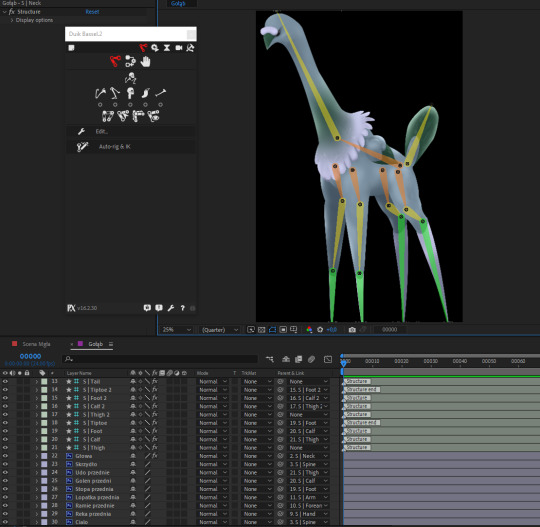
Photo
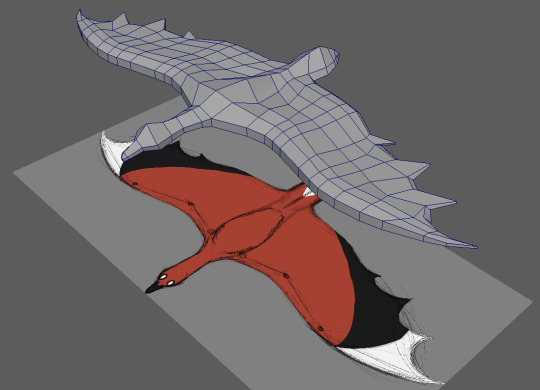
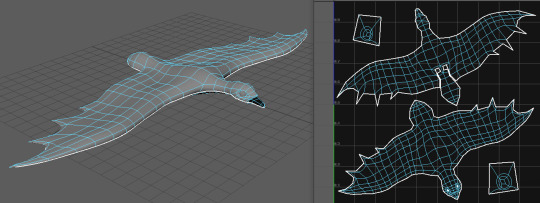
Working on the bridge scene - modelling, texturing, rigging
With the second scene came the second character to model. I have gone through pretty much the same process as with the first one, as this one too is in 3D.
The issue of non-manifold geometry appeared again as well, this time however, it was severe enough for even Maya to refuse to UV unwrap it. I looked more into the mesh cleanup features in this software and some tutorials on the subject. The mesh has successfully been fixed.
I still did not use Mudbox for texture painting though, I enjoyed doing it first time in Blender too much.
1 note
·
View note
Video
The petting scene for the main brief (no audio yet)
Aside from the odd neck movement in the very last second, I think this scene looks very good. The character does look like the hand is interacting with them, so the main concern I had for this scene has been conquered.
My only other complaint would be whether there should be a shadow under the hand. There was none on the object I was patting in the original footage because of the sun angle, but I am still unsure if it looks right.
I am happy with how much emotion the moving gills are adding to the performance, especially for such a small and simple addition. They are more akin to the ones that can be found on an axolotl rather than a fish. It is very nice.
1 note
·
View note
Photo


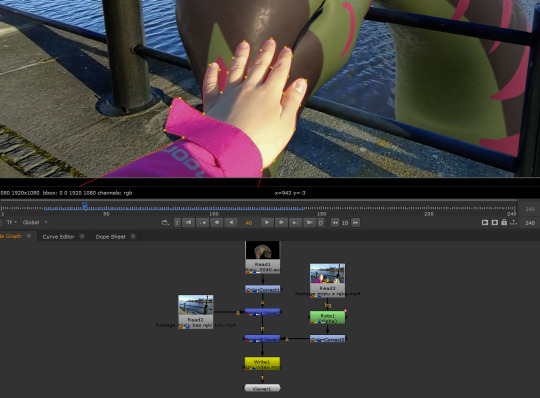
Working on the petting scene - rendering, compositing
Once I was done with character animation and matching my lights with the footage, I could render the sequence as EXRs and put everything together in Nuke. There came the pain of rotoscoping a moving human hand, as I did not have the foresight to record it on something bright green.
1 note
·
View note
Photo
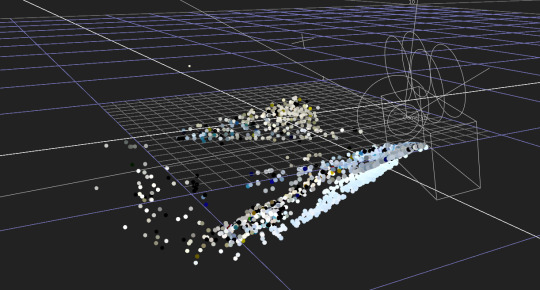


Working on the petting scene - tracking, animating
After cutting down my recorded footage for all scenes to only what I needed, changing its frame rate to varied-animation-style-friendly 24fps and 1920x1080 resolution in Premiere, I could finally move on to something else.
Such as: tracking the video for the petting scene. It gave a lot more problems than anticipated, as NukeX was getting confused by the flowing water and kept putting my foreground far in the background. Also, my scene got flipped upside down and was at an angle. I found out that you can rotate the entire scene in the tracker settings, so I made use of that feature, however the floor plane, was still in fact, not where the floor should be.
Despite multiple tracking attempts and aggressive googling for what I could do, no answers were found, so I worked with the tilted scene in Maya. In defeat.
There I carefully positioned my shadow matte objects made based on what I did in Nuke to avoid as much future rotoscoping as possible.
The animation process itself was not that bad. I had to match the movement of my character with the hand pats very well to make it look somewhat convincing. The lack of IK constraints on any snake-like creation makes posing in some situations more difficult, but I have had nothing but trouble with self-made inverse kinematics in the past, and this project is not the one to learn how to make them. There is not enough time, my focus should be on compositing.
1 note
·
View note
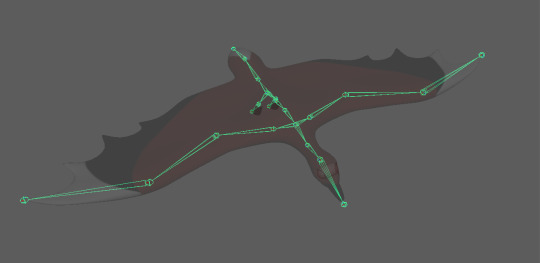
Photo

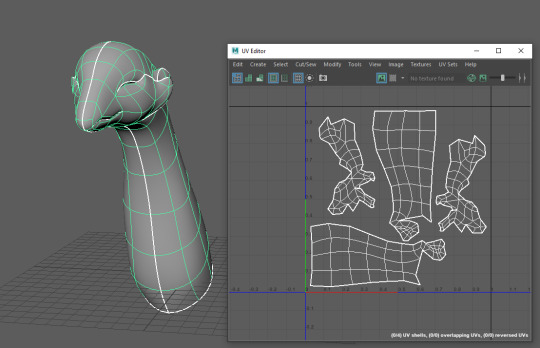
Working on the petting scene - modelling, texturing, rigging
I decided to tackle first the scene I think will be the hardest one to make, as it requires the character to interact with my real hand from the footage.
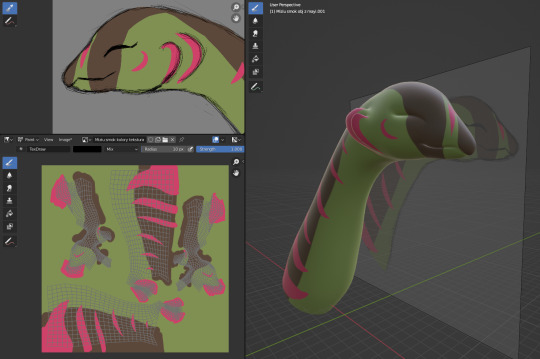
Most of my character creation at this stage was done in Maya, with the exception of texture painting, which I do not remember to even be possible in this software. For that I wanted to use Mudbox, just like for a model I made last semester for a different module, but my plans were disrupted with non-manifold geometry my character apparently had and Mudbox would not accept. Probably the mesh issues got there in the first place because of how quickly I was trying to work and therefore a bit sloppily.
Regardless, I was having a very hard time fixing this problem, so I looked for a workaround instead. In the end, I have done texture painting for my character in Blender, which had no concerns for non-manifold geometry.
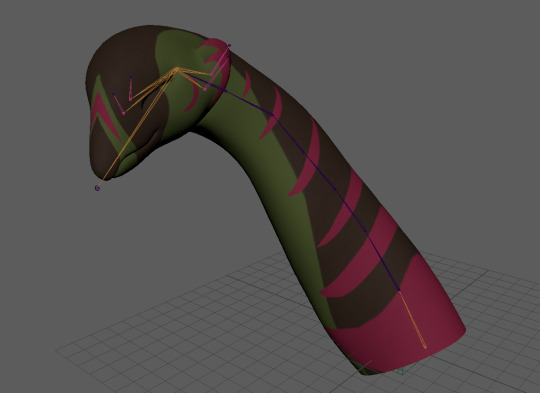
From there, I exported everything needed back to Maya, rigged the model, corrected the weight painting and added a roughness map made out of an edited noise texture to make the model look wet. It will be submerged in water after all, and because of that, there is also no need to model anything more than the head and neck.
I am glad I thought the design through and gave the character permanently closed eyes, with no plans to attempt complex facial movement, making my life as an animator significantly easier.
1 note
·
View note
Video
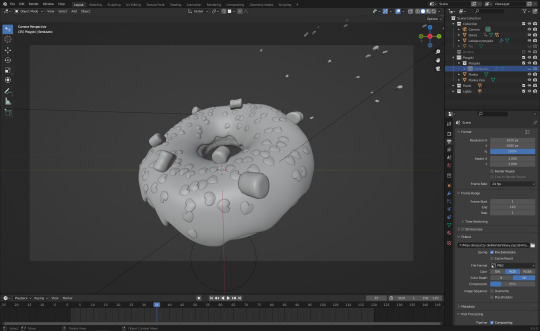
Learning Blender 3.0
Although I have used Blender in the past, the software has changes significantly since and I forgot many important details of its workflow. I do want to use it for this module, therefore I revisited the tutorials on all its basic controls and created the animation above.
Going through all of it again took awhile, but it was essentially relearning a whole piece of 3D software, so it’s understandable. The knowledge on it will be very useful.
youtube
0 notes
Photo
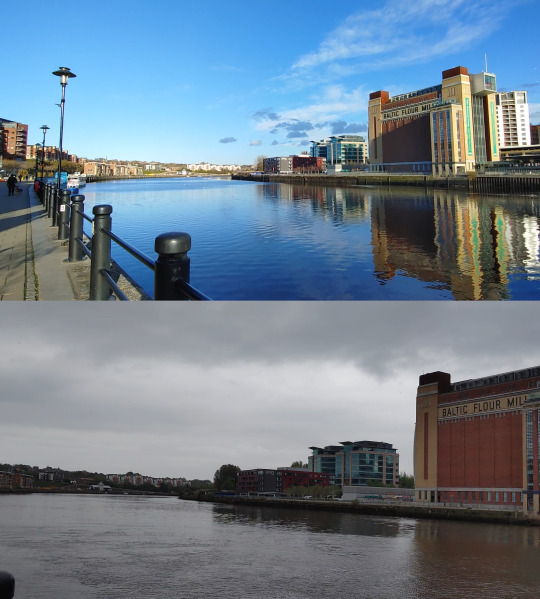
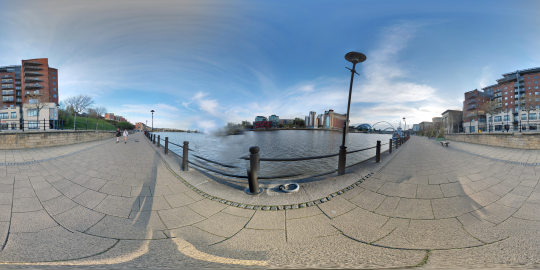

Filming vs weather
The struggles I had with getting footage for the single scene I wanted to be foggy made me reflect on the general issues that come with filming anything for creative work. Nature is not in our control and projects have deadlines. In the end, a cloudy day is a good enough substitute for a foggy one.
Shooting outside is something that has to be considered and planned carefully, as the outdoors change constantly. My bridge scene, for example, had to be re-recorded twice, if not thrice, because of roadwork, changing weather and finding free time in just the right hours for good lighting.
Above are some footage and HDRIs I got for the petting scene and the foggy scene. You can see the difference in what different weather might contribute to a shot.
1 note
·
View note
Photo
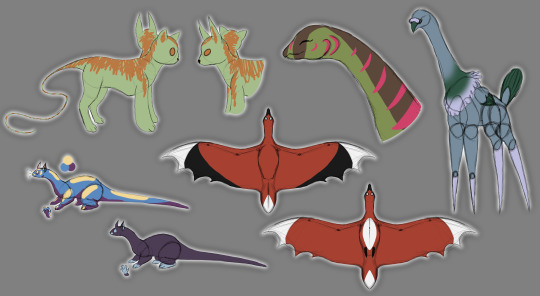
Final character designs
Using all of my ideas, research and planning I have gathered so far I drew final designs for five characters, for five shots in my project respectively. They differ a bit in style, as I will be using different techniques to create them, both 3D and 2D. I did my best to keep them within the same theme of city monsters, with some cuteness sprinkled on top. The shapes and colours are a bit minimalistic - friendly for animation work.
1 note
·
View note
Photo
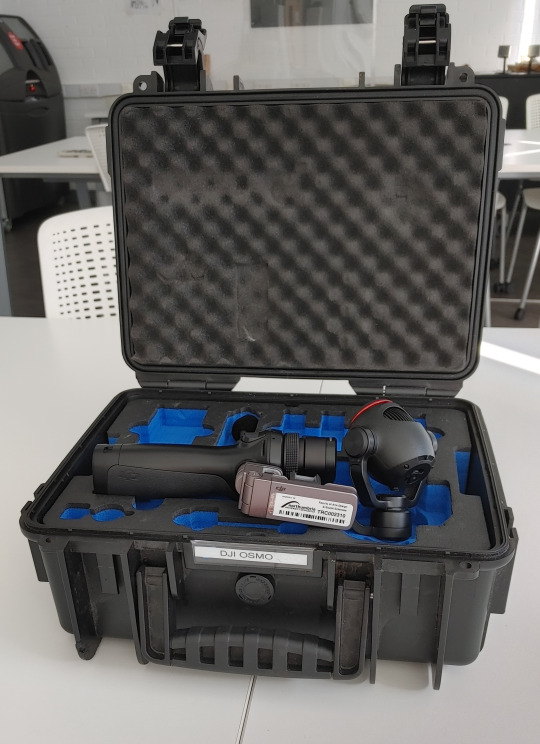
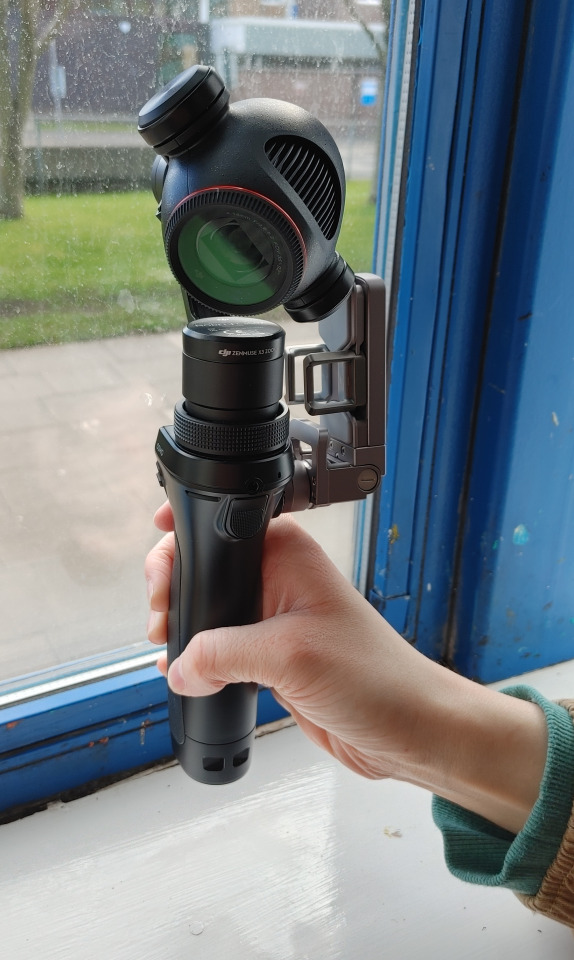
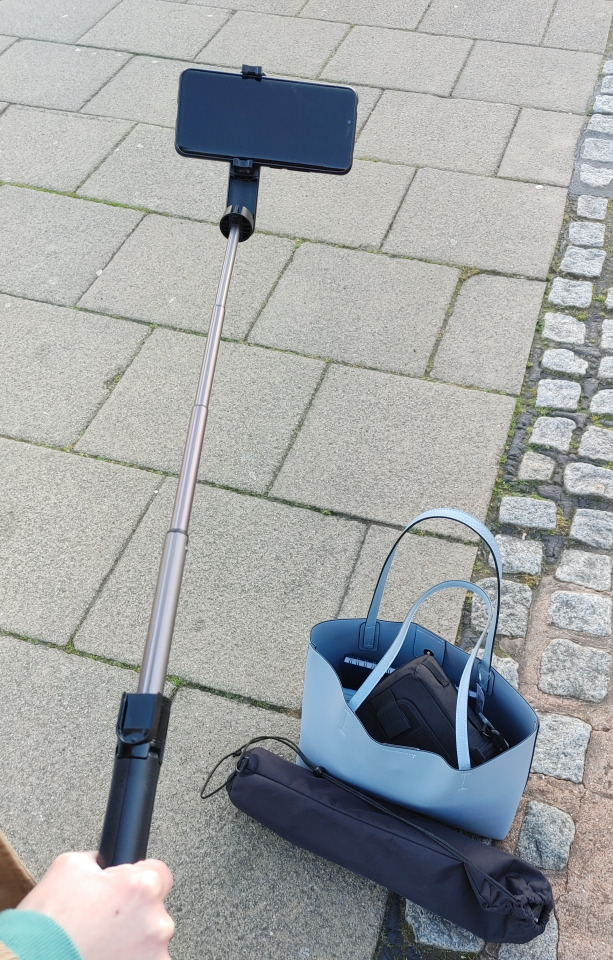
Shooting the footage
During the shooting of my footage, many things did not go quite as I wanted them to.
A friend and I booked out a DJI Osmo+ camera from the university’s TRC and went out into the city to the desired locations I had planned. We had to go much later than scheduled, as it turned out the camera’s batteries were dead. Hopefully, there was in fact still a good bit of sunlight outside, even in the afternoon.
However, the trip was cut short as the said batteries barely lasted two hours, if not less. Using the camera was not particularly pleasant either, we had a lot of trouble figuring out and once we did understand it better, the batteries run out.
Two hours was absolutely not enough to get the footage I needed, so after such amount of frustrations we decided to try using our phones instead. Much later, I found out my phone is capable of recording in 4K, meaning the quality will be completely satisfactory for this project.
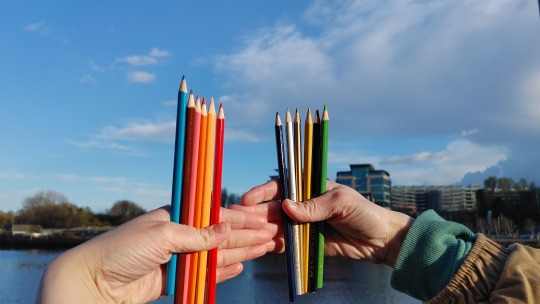
I had to rerecord some scenes on my own at a later date, as after watching what we got on the first day on a computer, I decided some of them needed it. Getting the HDRs and photos of coloured pencils (for colour reference in my animations) was also something I did on a different day. I just made sure the times of day during the recording and the weather were as similar as possible.
There is still one more shot I require and I will film it as soon as there will be a foggy day.
The videos will need editing, but if anything was learned from this whole experience is that modern phone cameras are capable of much more than you think. Also, if you are going to shoot in public, do bring a friend with you.
1 note
·
View note