Last Seen Blogs

nook-loveless-blog
NOOK-TH

petelavadigger
Wait, why are you here?

wonderfullyprovacative
Welcome to the Show
nook-loveless-blog
NOOK-TH

jadeoliveiraart
Jade Oliveira
Text
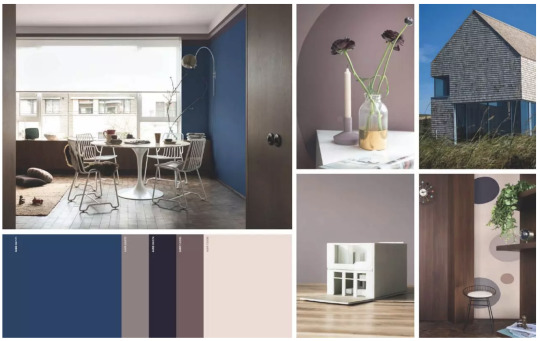
Interior design - warm brown
From the essence of design, interior design is a discipline that requires extremely high colour applications. In a sense, interior design masters can basically call it a colour master, an excellent designer, and its design style. It is also often very much related to its colour usage habits.
The colour matching of this case creates a natural and relaxing home environment with light and easy warm wood brown and pink grey, establishing a connection with nature and enjoying the comfort and peace of mind brought by natural colours. It has strong inclusiveness and extensibility, while at the same time embodying a spatial balance between freedom and deepness.
When warm wood brown is blended with deep purple and light pink, it presents a deep and quiet ambience, bringing warmth and comfort to the body and mind, reflecting the beautiful mood of the home of the healing system.


0 notes
Text
Commonly used fonts in graphic design

Inspired by Bauhaus, Futura inherits the Bauhaus minimalist design philosophy - sharp, concise, but also a bit cold. Designer Paul Renner first created Futura from 1924 to 1926.
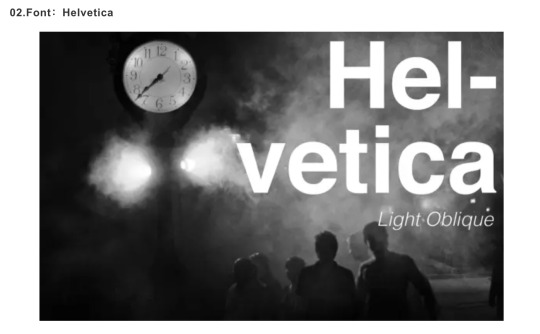
When you can't think of any fonts, it's ok to use Helvetica. Apple's royal fonts and even many famous logos are also made directly from Helvetica. There is also a book called Helvetica Font Legend, which introduces the history of this font and can be bought for a look.

Uni Sans is a futuristic font, whether it is a font or a stroke, and is suitable for use in designs with a strong sense of style.

I like to use Nexa as the title because it is very concise and has a strong sense of design, which is very suitable for use as a super-large title.
0 notes
Text
Tadanori Yokoo
Tadanori Yokoo is a famous Japanese graphic designer who has designed posters and covers for records and movies since the 1960s. His works are easy to identify, using a lot of Japanese symbols such as sunrise, cherry blossoms, and waves, as well as sexy dancers with gossip titles. Yokoo said that he couldn't forget the bomber that had been dyed in the sky and the silver shining in the sun. His childhood impression of World War II defined his aesthetic and reappeared in his work.
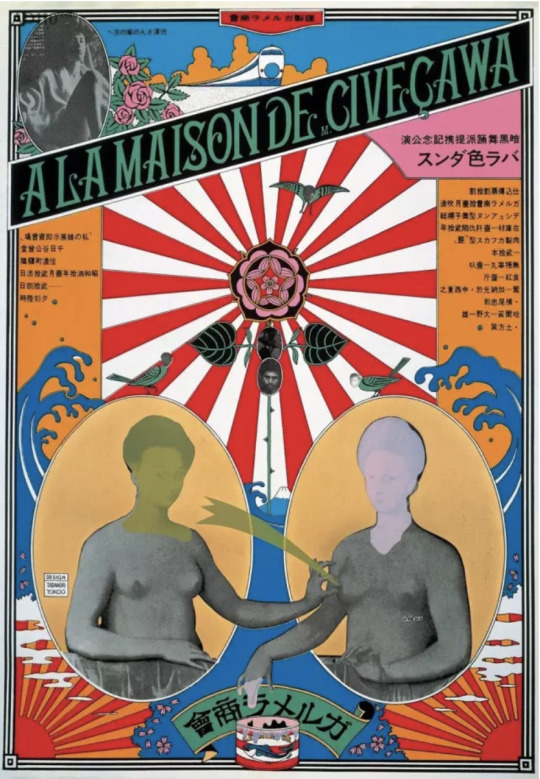
Yokoo said in an interview that Alexander M.Rodchenko had brought him the feeling of "like-mindedness," but if it had the greatest impact on him, it was also Pop style. Reused single image, flat colour, his posters are like a kaleidoscope of whimsical worlds, a clear expression of the popular culture of everyday life, and even a sense of decadence. He combines elegant art with secular life to create his own infectious symbols. Therefore, people call him "Japan Andy Warhol". As the Japanese scholars said: "Yokoo is the pioneer of the revival of the mass art in the 21st century. He changed the art trend of the 20th century from the masses."

Of course, he is not satisfied with the madness, so Yokoo is playing a thief in the film "Shinjuku Mud Stick Diary" filmed by Oshima and has designed a poster for the film. It can be said that his life is like a movie, crazy and capricious.

Yokoo is deeply influenced by Yukio Kazuo of Japan, and when Mishima sees Yokoo’s works, he also highly praised him: "His success lies in the Japanese-style folk mourning and the United States. The emptiness of Pop Art is directly connected, is the dark passage to the deepest part of the human mind, and is a telepathic communication."
0 notes
Text
Good logo design to share
people have a special preference for saving time and simple visual form. The logo is designed to deliver information quickly and efficiently and must be designed to make the graphics highly general, sharp and powerful, and at a glance.
Focus on the simplicity of the logo elements, the representation of the logo graphics, and the performance methods. The principle of modern logo design should be simple, innovative, concise, and adapt to the times to meet people's aesthetic requirements.


0 notes
Text
(3)How to make a funny poster?
Six, design editor poster text
Step 5
At this point, first, minimize the InDesign window and return to the Photoshop document. Select "Edit > Paste" to paste the text directly into the main canvas, and the copied text will automatically be converted to a vector smart object. Press Shift to resize proportionally. Try to match the position and size of InDesign. Press Enter to confirm.

Select the lasso tool, select the text portion beyond the chocolate bar, then adjust the edge as much as possible to control the selection over the entire selection, then click Delete. Here, the vector smart object needs to be rasterized first.

Step 6
Double-click the rasterized vector smart object layer. In the Layer Options window, check the shadow, set the mode to Multiply, lower the Opacity to 30%, set the distance to 6 pixels, expand 13%, and size 49 pixels. And click OK. Save it as a PSD file again and then minimize the Photoshop window.

Step 7
Go back to InDesign, select the letter C, O text frame of the defect location, and delete it. In the link panel, you can see a triangle exclamation point, double-click it, this will automatically update the latest status of the PSD file to the InDesign canvas.

Step 8
Use the mouse to select all the text frames and choose Object > Effects > Bevel and Emboss. In the settings panel, set the style to pillow-shaped relief, the method is smooth, the direction is upward. Set the size to 1 mm, soften 2 mm, and depth 100%. In the shadow option, set the angle to 120 degrees, the height to 30 degrees, the highlighted portion opacity to 11%, and the shadow portion opacity to 55%.

Step 9
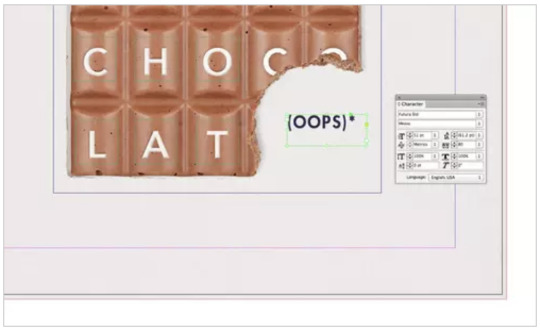
Select the text tool, create a text frame at the bitten chocolate position, enter text (OOPS)*, then set the font to Futura Std Heavy and the colour to dark blue.
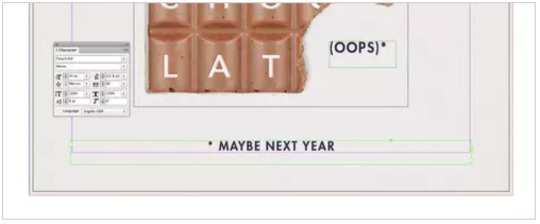
Copy and paste the text frame, place the copy text frame on the bottom of the chocolate bar, and then enter the text *MAYBE NEXT YEAR to adjust the centre alignment and reduce the size.
Seven, the final overall adjustment design
7. Final adjustment of the poster
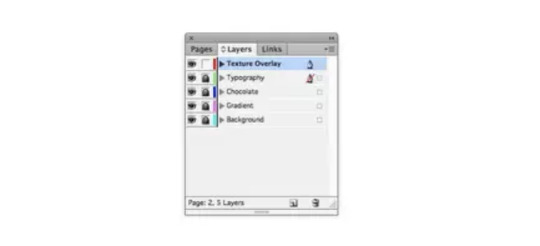
Step 1 Go back to the Layers panel, lock the version layer, and unlock the text overlay layer.
Select the Rectangle tool to create a frame that extends to the entire page. Select File > Place to open the paper material and fill the entire frame as a background.
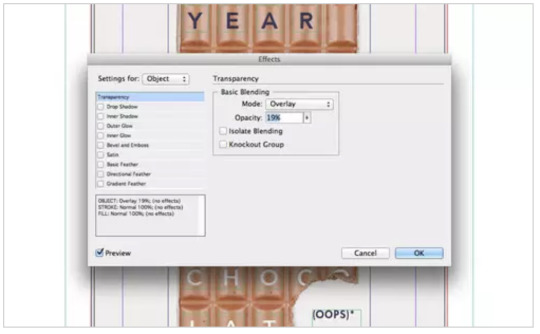
Choose Object > Effects > Transparency, set the mode to Overlay, and reduce the Opacity to 20%.
Step 2
Lock the text overlay layer to unlock the gradient layer.
Create a new swatch in the swatch panel, name it light blue, and set the gradation to C=57 M=12 Y=6 K=0.
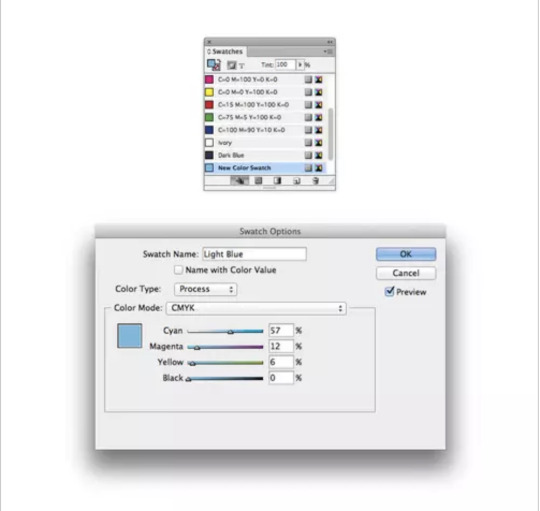
Step 3
Select the Rectangle tool, create a shape that covers the entire page, and then fill it with a new swatch light blue.
Choose Object > Effect > Gradient Feather, apply radial gradient mode, set the gradient colour scale as shown below, and click OK.

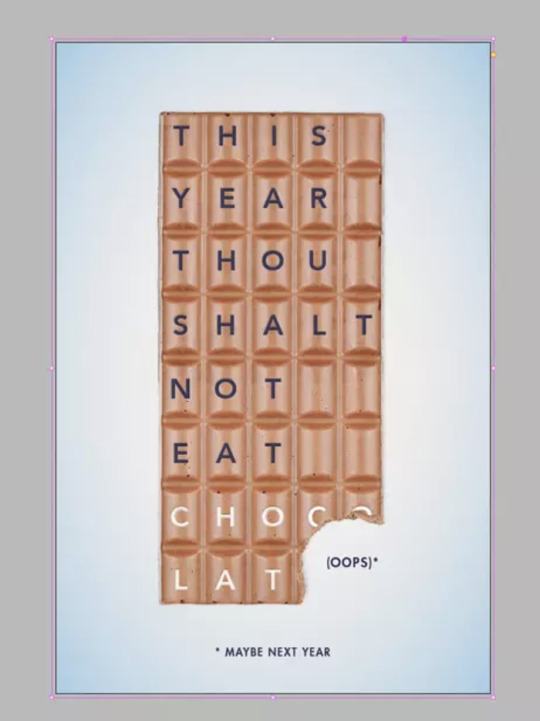
Finally, the poster is finished.
0 notes
Text
(2)How to make a funny poster?
Continue with the last poster
Fourth, PS extended chocolate bar
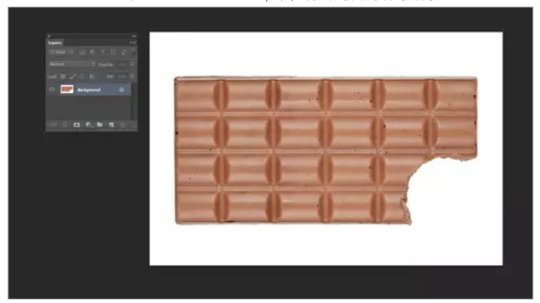
Step 4
Then select the rectangular marquee tool and select two chocolates as shown below. Then press Ctrl+C, Ctrl+V to copy and paste onto the new layer.
Press Ctrl+T (Windows) or Command+T (Mac) on the duplicate layer, move the copied part to the left of the chocolate bar and let the chocolate block on the right side of the duplicate layer cover the leftmost chocolate bar of the original layer, and then free transform. Make careful adjustments and know that they are completely coincident. This will add a block of chocolate to form five grids.
Press the background copy layer and the layer of the newly added chocolate block, press Shift to select it, then right-click the layer thumbnail and select Merge Layer from the pop-up menu.

Step 5
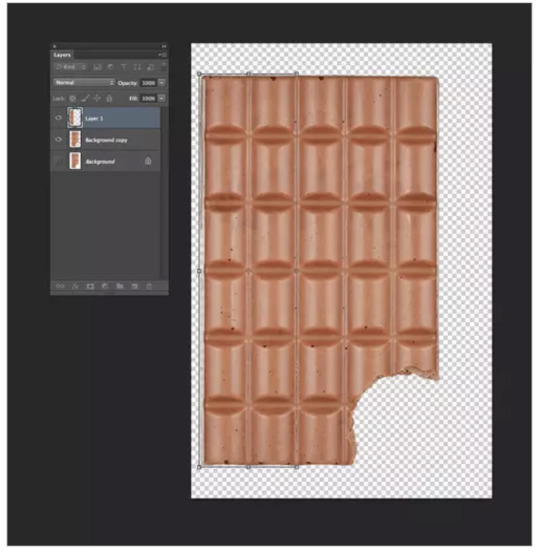
Select the crop tool and expand the canvas up to make the canvas 1/3 higher than the original. Select the Rectangular Marquee Tool and select the top two chocolates as before.

Copy and paste the two chocolates in the selection area on the new layer, then use Ctrl+T to freely adjust the edge of the chocolate block to cover the top layer of the original layer of chocolate, and add one more square.
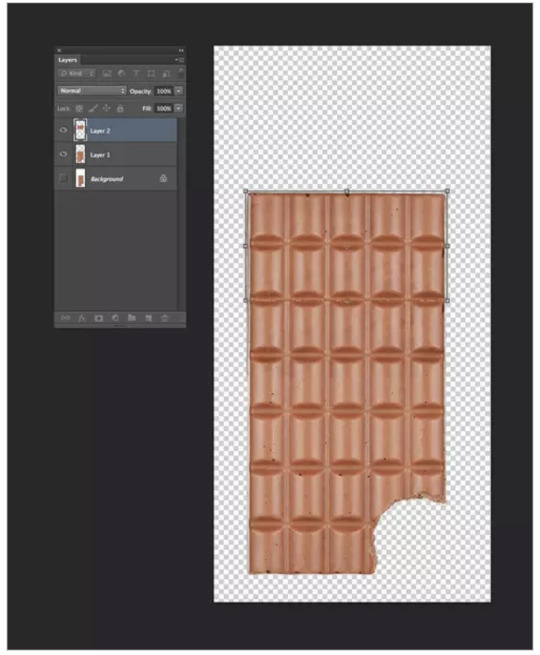
Copy the two chocolate layers and move them up, then add a chocolate.

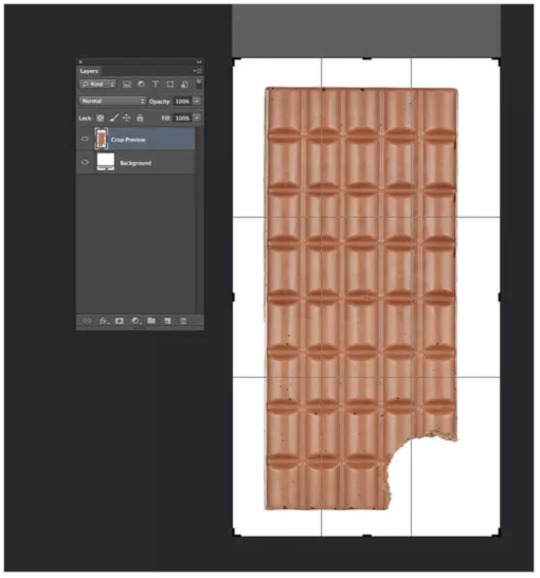
Select the crop tool and crop the canvas as shown below to fit the adjusted chocolate bar size.

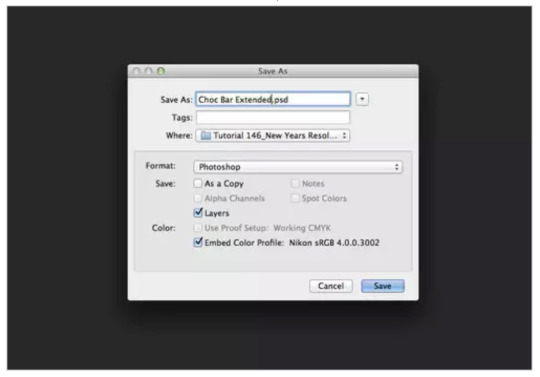
Step 6
In the menu bar, select "File > Save As" and save the image of the chocolate bar you just made as a PSD file for use. Then minimize the Photoshop window.
Five, chocolate bar placed poster
5. Put the chocolate in the poster
Step 1 Go back to In Design and select the Rectangle Frame tool to drag the image frame over the canvas. Then select "File > Place" in the menu bar, select the chocolate bar PSD file, and click Open. Press the Shift key to fill the image proportionally into the canvas.

Step 2
With the image frame selected, select Object > Effect > Projection. The setting mode is a multi-layer, with an opacity of 25%, a distance of 4 mm, and an angle of 15 degrees. In the options bar, set the size to 5 mm, expand 8%, and click OK.


0 notes
Text
(1)How to make a funny poster?
First, In design establishes poster layout
1.Preparation work
To make a New Year's resolution poster, you need to use some materials, click on the link to download: paper, chocolate bar, font Avenir, font Futura Std Heavy. If you have your favourite font, you can use it. Install the font. After the material is downloaded, open Adobe In Design and start designing the poster layout below.
2.In Design to create a poster layout
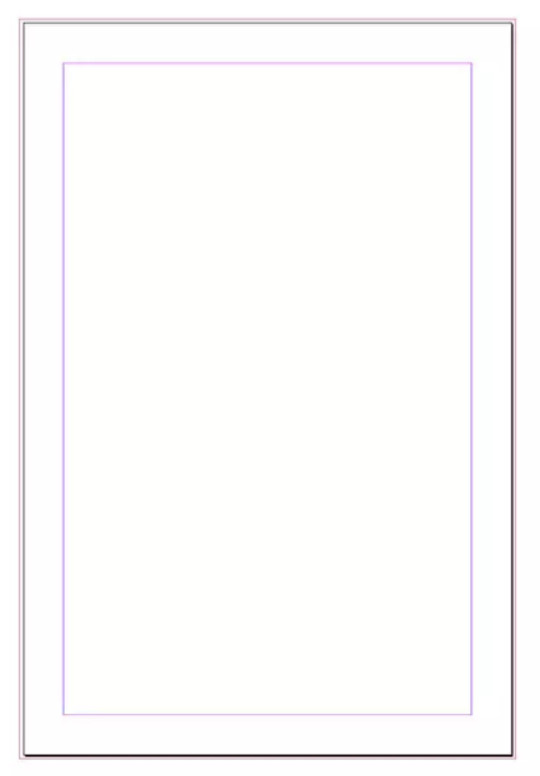
Step 1
In In Design, choose File > New > New Document. In the New Document Settings panel, set the purpose to print, the number of pages is 1, uncheck the page. The width is set to 609.6 mm and the height is 914.4 mm.

Set the margin 50 mm, add 5 mm of bleeding, 50 mm of the auxiliary information area, and click OK.

Click OK to create a new document.
Step 2
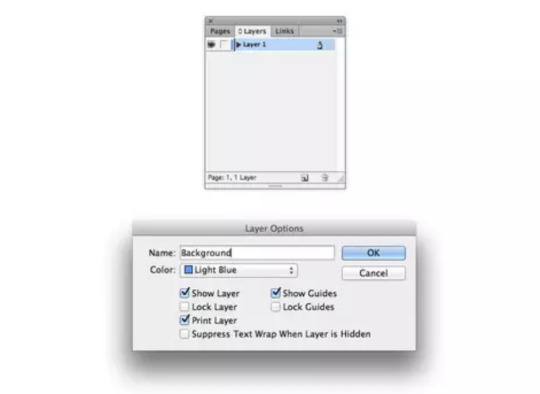
In the menu bar, choose Window > Layers, bring up the Layers panel, double-click Default Layer 1, open the Layer Settings window, name the layer as Background, and click OK.
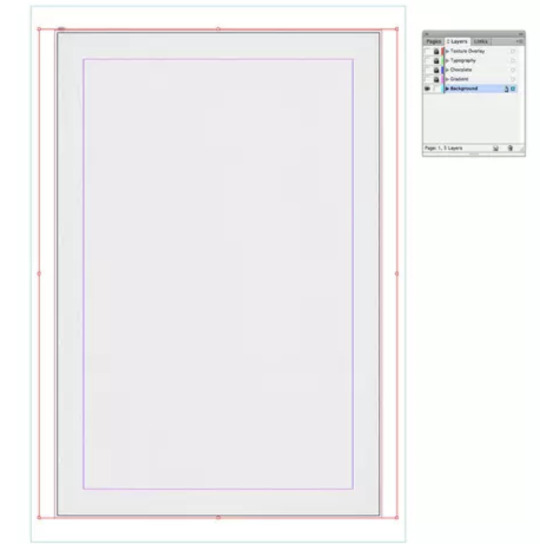
Click Add New Layer at the bottom of the Layers panel, double-click the new layer, and rename it to Gradient. Then continue to create a new layer from top to bottom in the Layers panel, which is “Chocolate, Typography, Text Overlay”.

Step 3
Setting other layers is not operational except for the background layer. Then select the background layer as the active object.

Second, ID create poster background
3. Create a poster background
Step 1
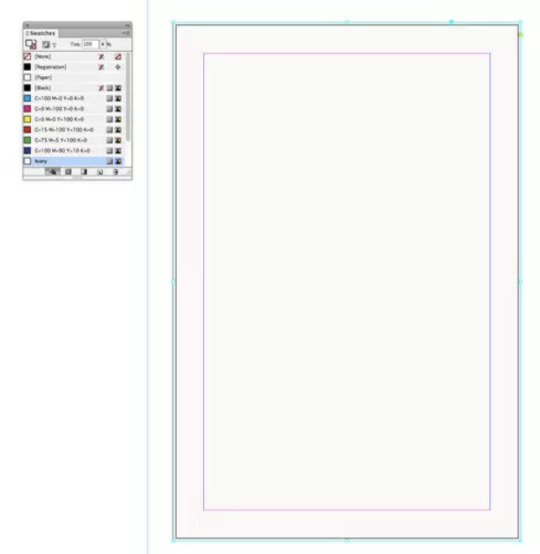
In the menu bar, choose "Window > Colour> Swatch", adjust the highlight setting panel, click the new swatch button underneath, then double-click the new swatch to edit, name it "milky", set the colour type to spot colour, colour The mode is CMYK, set C=2 M=1 Y=4 K=0, then click OK.

Set the fill colour to milky white on the swatch, and select the Rectangle tool to drag the rectangle over the canvas to the bleeding edge.
Step 2
Select the Rectangle Frame tool to create a frame that is the size of a creamy rectangle. Select "File > Place" in the menu bar, then select the paper texture and click Open.
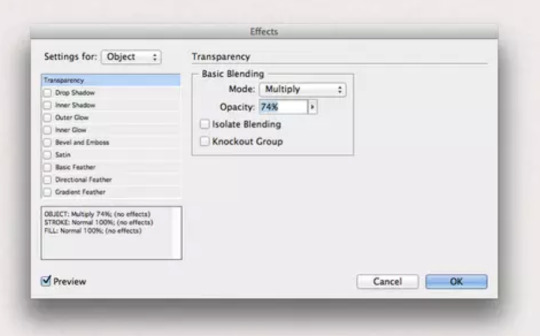
In the state selected by the image frame, select "Object > Effect > Transparency", set the mode to Multiply, and set the opacity to 74%.
Step 3
Go back to the Layers panel, lock the background layer, and unlock the chocolate layer.

Third, PS adjust the direction of the chocolate bar 4.Photoshop edit chocolate bar image
Step 1
In Design, choose File > Save As, save the poster you just designed, and then minimize the window in Design. In Adobe Photoshop, open the chocolate bar material.
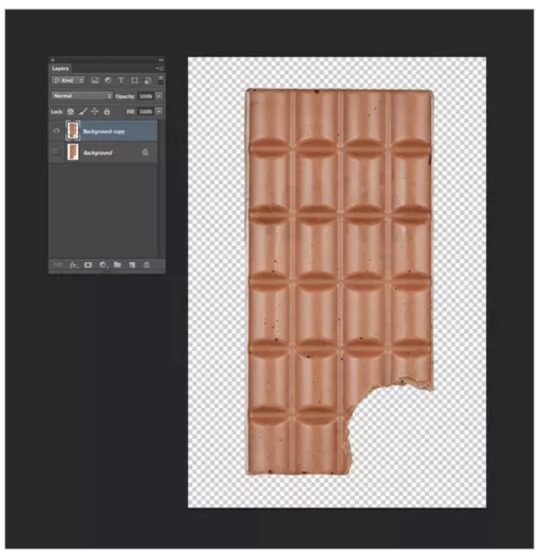
Bring up the layer panel, then drag the background layer to the button of the new layer, copy the chocolate bar material, and turn off the original chocolate bar layer.

Step 2
Next, you need to remove the white background around the chocolate bar. First, select "Select > Color Range" and then click on the white part of the clip.
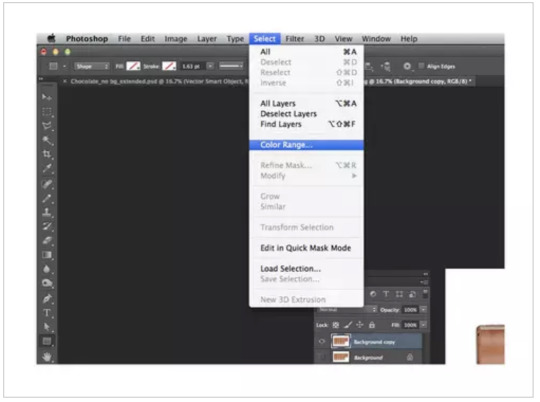
In the Color Range window, gradually adjust the colour tolerance until it can be recalled to accurately separate the chocolate bar from the white background, then click OK.
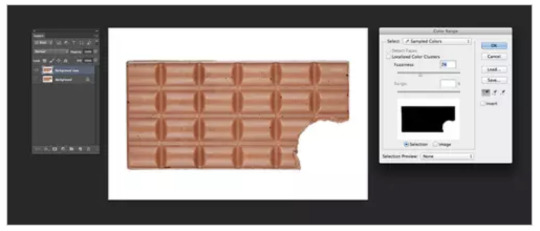
After using the colour range, the selection has been set on the chocolate bar image, and the selection range is adjusted below. Click the Adjust Edge button in the options bar. In the Adjust Edge panel, you can check the smart radius and adjust each setting until you can select all the white parts, and then press OK.

After adjusting the selected area, the white part is deleted, and the effect is as follows.

Step 3
In the menu bar, choose Image > Image Rotation > 90 degrees (clockwise).
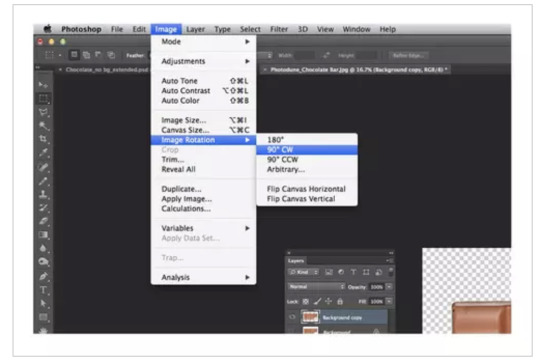
Then click on "Image > Image Rotation > Flip the canvas horizontally".


0 notes
Text
An example of font in the film poster
I think the core of poster design should be concept and story, which is storytelling. A good poster will make the reader create an imaginary space, even if there are only one word and one graphic on the poster, and if the word is consistent with the story or idea to be conveyed by the poster, then the designer and the reader ,They have already established a connection and the poster has completed its mission.

Big Fish is a fantasy film which is directed by Tim Burton in 2003. "BIG FISH", the title of the film in the poster has the primary position, and the tree of fonts that grow from the ground produces a strange branch. (people who know the Tim Burton puppet series must be familiar with this circle), fantasy, mystery and the stories in the film are taken care of each other.
0 notes
Text
A good poster to share

This poster is a book published by Swedish design theorist Linda Rampell, which explains the author's account of "shop modern mind": contemporary phenomena combine aesthetics with consumerism. The poster has a fascinating effect by using the full texture and black-and-white contrast of the delicate elements in the image. This model not only reminiscent of different objects in daily life but also proposes different ways of shopping.
0 notes

Text
Geometry of Design
The use of geometry in graphic design began in the 1930s and 1940s.
Geometry is a universally applicable modernist modification that is still widely used today.
At that time, traditional realist illustrations were considered obsolete, and stylized decorative art had a feeling of being "too picky."
So the general visual pattern - triangle, square, round (Bauhaus trinity), polyline and diamond - marks a fine method at the time, unlike the early style, it symbolizes the new trend.
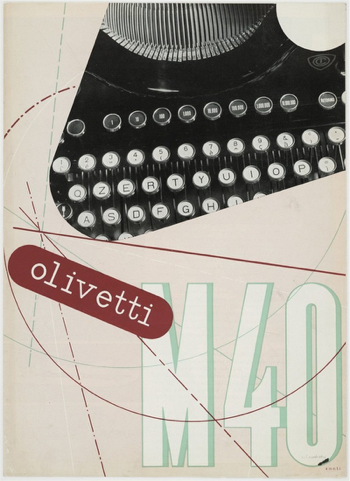
The 1934 poster of Olivetti was designed by Bauhaus teacher Xanti Schawinsky. Although the graphics are strictly based on the grid, they are smooth and vivid.
The casually placed "Olivit" diamond echoes the special curve of the cropped typewriter keyboard.
The angle formed by the intersecting random lines suppresses the flowing graphic elements, contrasting with the beige background, showing a futuristic style.
If you remove the old typewriter from the picture, it will be difficult for people to define the age of their creation.
Olivier's name is even placed in the typewriter's picture, and the fresh and simple effect is like the modern style of the digital age.
0 notes
Text
Share a good poster
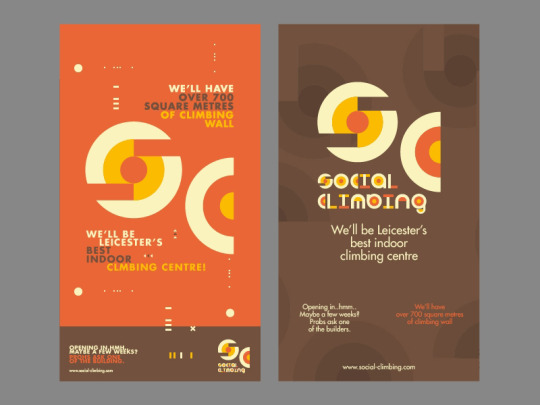
Last week we learned the basic design theory of points, lines and surfaces.
I think these two geometric posters use adjacent colors in color, which means that the colors are adjacent on the color circle. This combination of colors will make the picture look more harmonious.
In the use of geometry, it divides concentric circles and rectangles and combines them.
The font color selected on the poster is also adjacent color, which echoes the color of the picture itself, and adds a circle, triangle, rectangle and other decorations to the picture.
These decorations can make the picture more lively and detached, not so dull.
Finally, the poster adds a shadow effect so that the poster will be more spatial.
0 notes