
lisbeny
Lisbeny's Mastery Journal
Hello, I am a Full Sail University student pursuing my Masters degree in Instructional Design and Technology. If I had to pick a purpose statement, it would be "Inspiring Growth." I value education, in all its forms, and strive to better myself in all areas of my life. I try to live my life in such a way that people are happy to see me arrive, and sad to see me go. I hope to inspire others around me, both personally and professionally. You can follow me on Instagram, @capitana_beny, and also on LinkedIn at https://www.linkedin.com/in/lisbeny-duran-7b12218a.
24 posts
Don't wanna be here? Send us removal request.
Last Seen Blogs

jaymes8690
robsten soul

lynndegroot-blog
Untitled
sahope
Things i drew...

precisionadvantage
Precision Advantage

djangothehunter
Coffee Connoisseur Mercenary
Text
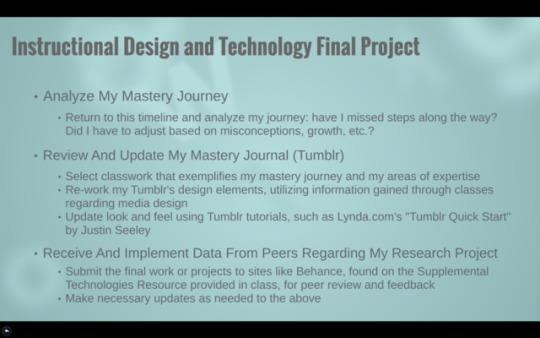
Final Instructional Design Course - Reflection
After over a year’s worth of full time study in this Masters degree program, I can proudly say that I’ve reached the end! This program has taught me a lot, not only by way of the actual course content, but because of the accelerated pace, and the overall format of online schooling. I was able to learn a lot about myself and what makes me thrive in an educational environment, I had to learn time management skills as I worked and studied full time, and quickly recognized the power of proper communication and deadline management, which is imperative when doing online schooling.
As far as the actual course content, this Masters degree taught me practical skills that I’ve already put to use in my current role as a Training Coordinator. Below is an assessment of each course.
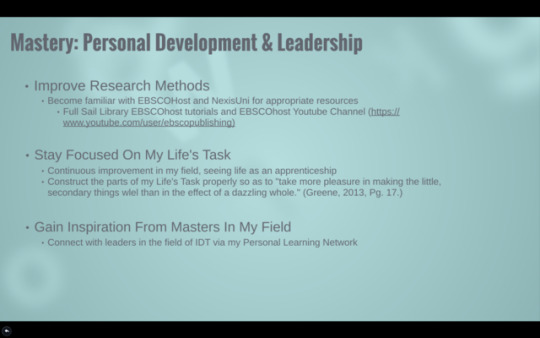
Mastery - Personal Development and Leadership
This was the first course in the program and it set the tone for all following classes. They eased us in, as there was not an actual project, but rather, a paper that we wrote, which helped us discover what we wanted to “Master,” as graduate students in this program.
Greatest Triumph: I got a 100 in this course, which was a very pleasant shock. I hadn’t been in school for just about four years and was unsure how I would do. This helped me gain a lot of confidence in myself and started me on the right foot.
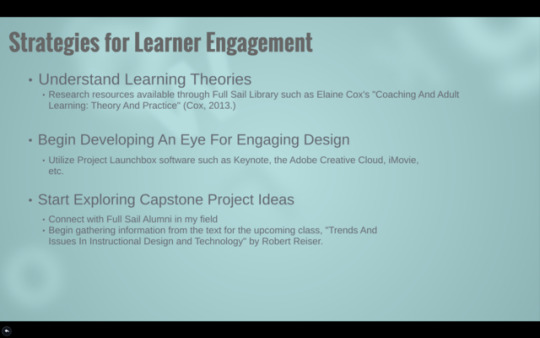
Strategies for Learner Engagement
This class was very entertaining for me. It was foundational in nature. The first assignment was to write a paper on various Instructional Design theories, including ADDIE, SAM, Gradual Release, Rapid Prototyping, and Schema Theory, among others. I found myself going back to this paper and the research materials quite often over the next few months, and even used some of them as resources in future assignments.
Greatest Triumph: I earned a Course Director’s Award for this class. He really liked my designs for my Models of ID posters, and again, that was a great confidence booster. I can write well, but design has never been anything I dabbled with. This course really helped me see that I have an eye for aesthetic design and taught me cursory knowledge of design software, using the free service Piktochart.
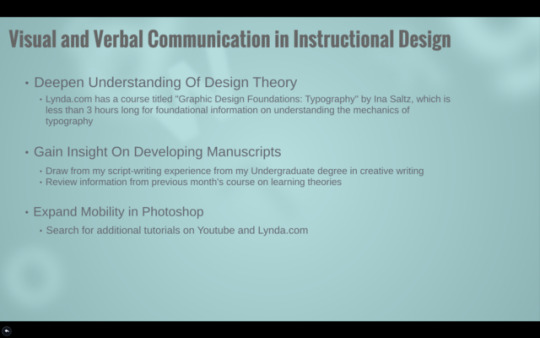
Visual and Verbal Communication in Instructional Design
This class took some of the elements of design in the previous course one step deeper. Here, we learned about typography and visual literacy, and used Adobe Illustrator. This software was brand new to me, and I made heavy use of Lynda.com, Google, and Youtube for how to customize my design. We also created an interactive infographic, which used Adobe Illustrator. I’ve been intrigued with the way many creatives can utilize simple vector shapes to create works of art, and I would love to be at that level some day. By practicing the infographic, I’ve gotten more familiar with using the graph tools, and it was slightly simpler than I imagined it to be. This will be helpful during training or curriculum-building, where I may want to depict information or statistics in an easily-digestible fashion.
Greatest Triumph: My travel posters were quite a hit! It also helped me get even more hands on experience with very relevant software that I’ve since used.
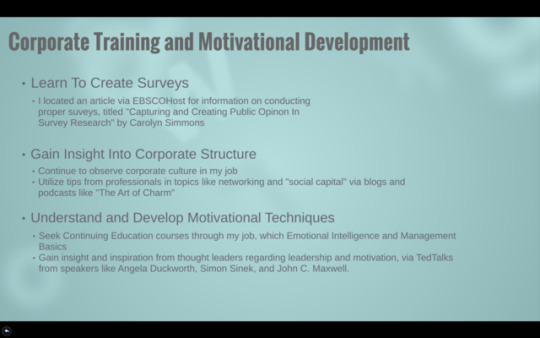
Corporate Training and Motivational Development
This class taught us about the Conscious Competency Theory, which include Unconscious Incompetence, Conscious Incompetence, Conscious Competence, and Unconscious Competence. This was useful even in my role as a trainer. Knowing that each stage of that theory can come with widely varying levels of self-confidence (for instance, Conscious Incompetence is when you’re very aware that you don't know something, and that is not a fun experience to have at a new job,) meant that I could more easily guide my new hires through this phase and into Conscious Competence, which is a major morale booster.
Greatest Triumph: I was actually traveling to Montreal, Canada during this class and still managed to get a high A. I was considering taking an interruption of training, as this trip had been planned for several months, but decided against it. I was able to have a great time in Montreal and submit my assignments on time as well!
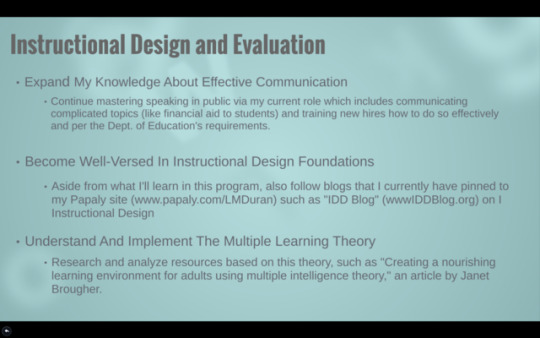
Instructional Design and Evaluation
This course was about learning how to create a Training Needs Analysis with a given project. We were given a previous student’s analysis which was about 4 pages, and our final version, after adding all required elements such as surveys and SME’s, ended up being about 15-20 pages long. I didn’t pass this course the first time around, due to some personal issues. However, when I retook the course, I came to the class mentally prepared for the amount of work that was required, and with a clearer understanding of the timeline and various goals of the analysis. This course taught me that there is so much research, planning, and iteration and reiteration that is required when developing a curriculum, more so than I expected!
Greatest Triumph: I did very well the 2nd time around, so much so that my instructor used my final analysis as an “exemplary example of a final document.” I was honored and again encouraged to continue to push harder through the rest of the program.
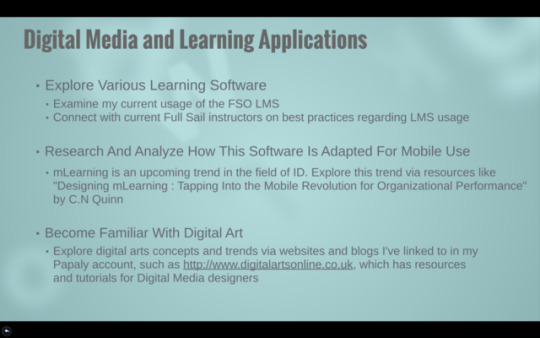
Digital Media and Learning Applications
This course taught us about the power of video as a medium for teaching. I was warned about this course by other peers who had taken it before, as it was the first course to implement coding, which I had no experience with whatsoever! First, we learned about the virtues of video as a learning tool. Then, we picked a topic and created an interactive quiz on a NASA video of our choosing. We used Illustrator to edit pictures, and Brackets for the coding. This assignment was very meticulous, as coding is extremely particular about any stray character you may add accidentally. However, this was one of my favorite projects as it was so hands-on and the final result was amazing, to think that I was able to do that! The quiz was fully customizable, which is always fun, and I learned a lot about my topic of choice, the 2017 Solar Eclipse, which was a huge event just a few months prior to the assignment. Finally, we created a video walkthrough of the quiz, and I added narration (not required but was fun to do) to explain my design choices.
Greatest Triumph: I didn't start this class too great. My paper was lacking, in my instructor’s opinion, and I didn't score nearly as high as I usually do on papers. I don’t know if I got over-confident, or didn't understand the assignment, but it took some work to bring my grade up. However, at the end of the course, my instructor really liked my final project. I scored a 100 on it. He said it was fun to go through my quiz, and that I went “above and beyond what was required.” I learned, through this program, that I have a good speaking and narration voice and really enjoy doing it.
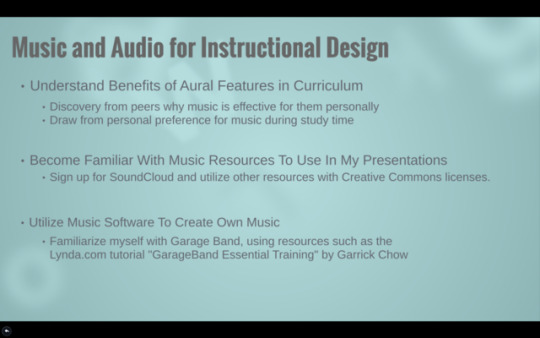
Music and Audio for Instructional Design
This course was one of my absolute favorites! Here, we delved into GarageBand as a tool to record and edit narration, foley, and audio for videos. We started with a narration project, where we summarized and recorded us reading a Gimm’s Fairy Tale. We also had to add sound effects and background noises on GarageBand, which I had never used before. The final project had us record narration over a provided silent video of the Pioneer Village in Osceola County, Florida. This was a unique experience as I live in the area and took a field trip there as a chid in middle school. We recorded a dramatic narration and again added foley such as music, animal sounds, and the like, and used tools in GarageBand like ducking and audio editing. As mentioned above, I really enjoy narrating, so though this class was quite tedious, it was very fun to do.
Greatest Triumph: I think my greatest triumph had to be simply learning how to use GarageBand properly. It came into play several more times throughout the program and this foundational class was super helpful for that. I’ve had GrarageBand for years on my Macs and never put it to use, and now I have good cursory knowledge for future personal projects, such as my podcast which is in development.
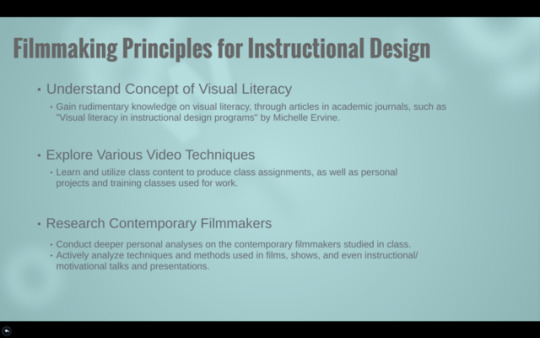
Filmmaking Principles for Instructional Design
This course built upon the previous audio course and added a video element. Here, we learned a lot about storyboarding, which is a very effective way of planning an instructional video. Though I've heard of them before, I never really saw the value of a storyboard until I had to submit one. I realized, after submitting it, that most of the work was done, Now, I just had to do the actual recording. I underestimated how much time it takes to plan something, and by the time it was time to record, I already could see the final product in my mind’s eye and was able to cut my recording time in half as a plan was already laid out.
Greatest Triumph: I learned a lot about the concept of good lighting, and have used it in other assignments since. Understanding how to light your subject against the background made my final video very crisp and clean, and this was perhaps the first class where I could see most element of what I learned in the past, come into play. From typography, to the power of video as a learning tool, to audio essentials, it was a great amalgamation of my knowledge up to that point, and one of the more fun projects I did.
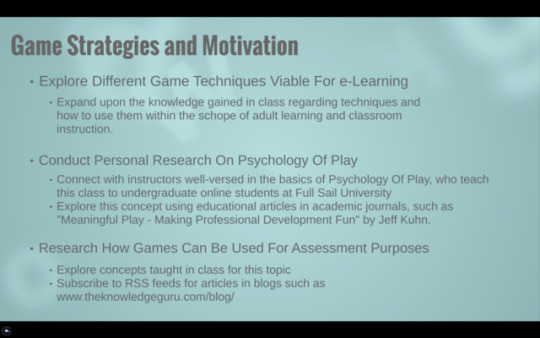
Game Strategies and Motivation
In this class, we learned about the power of gamification in learning. A lot of the concepts were difficult for me to grasp. I couldn’t initially differentiate between gamification and game based learning, as the terms initially seemed interchangeable to me. I did deeper research and was able to finally understand the difference between the two. We were also required to develop a plan for a game asset for a class of our choice, using Google maps. I designed a fun geography based game called Tripler, where my middle school students would team up and take a “trip” around the world, filling out a “Passport” for six separate continents and information on each, such as a famous landmark on each, and information about countries on each continent (Antarctica excluded.)
Greatest Triumph: I presented this game to my sister and when I was done explaining it to her and showing her the pitch I created, she actually wanted to play it! I don’t have the actual components created, but it was so much fun to plan and imagine an actual classroom of students playing this game, that I would love to develop it, even if it’s just for my friends and family to play one day. I never imagined myself to be a game master or anything, so developing this game really had me walk through all possible scenarios and work through loopholes or confusing bits in the rules, which was difficult but very fun.
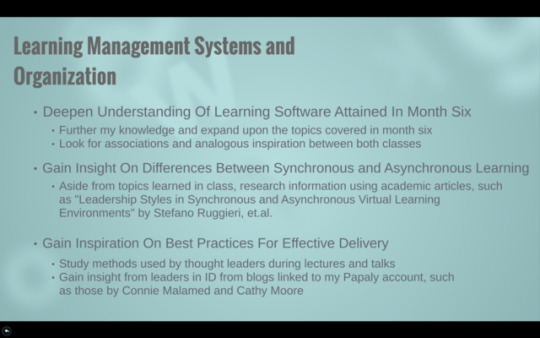
Learning Management Systems and Organization
In this class, we learned about various LMS’s that we can make use of when developing a course. This class’s content wasn’t particularly challenging, as we had to use a previously developed project as the basis of the course we were creating. However, I was going through a very rough time in my life, and I had to repeat this course several times. My instructor was very understanding but this was a huge disappointment to me. I knew I had it in me, and I had picked the silent video narration from the Audio class so I couldn’t pinpoint why it was such a hard class to get motivated for, other than the external factors of my dad’s illness getting in the way at the time. When I finally took the class (for a third time) I did very well. My instructor first recommended that I completely overhaul the project and change the topic, and that was a huge help for me. I couldn't imagine having to redo it a third time so taking on another topic really made it feel new to me.
Greatest Triumph: My greatest triumph in this class, and perhaps in this whole program, was finally passing this class. I passed with a high A after having failed it twice, and it helped remind me that I was so close to the finish line, and that I had it in me to finish on a strong note.
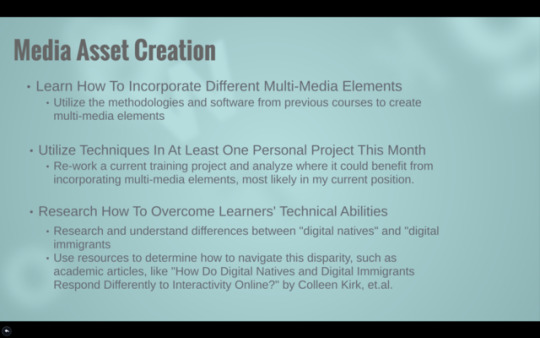
Media Asset Creation
This course was another one of those that took a little from many previous courses and made use of what we’ve learned thus far. Here, we took the previous course’s project and created the media assets that we had proposed for the topic. In my case, I created an instructional video that introduced the students to the course, which was intended for new hires in a financial aid office. When I had switched the topic of the previous course’s project, my instructor said that it’d be helpful to create something I can actually use later, which this project very much was. It’s exactly related to what I do in my role currently as a financial aid advisor and trainer for the department. I was able to take specific time to create a very detailed course that I’m implementing in my training, rather than an arbitrary topic that would “sit on a shelf” and not really serve my career goals.
Greatest Triumph: I love being able to use something that I did in class, in my current role. It affirms that I am in the career and degree that best suits me, and it didn't feel like wasted work. Being able to present this to my manager was a great experience, and I had much more passion behind this project, as it’s something that will take root and actually be fleshed out very soon.
For this final project, I was able to consider various instructional design theories. I really connected with the idea of Gradual Release, which is my favorite theory, because it slowly releases the responsibility of knowledge to the learner. I planned my curriculum around this idea, of teaching a concept, having the learners practice it together, and assessing them on their own. I was also able to use software like Illustrator, GarageBand, and iMovie, which really brought my entire education in this program full circle, and helped me see how all pieces interlock to creating an effective training curriculum.
Since I am already in this field, I have been able to use many of the concepts learned in this program already, and am excited to be able to implement more of them as I progress in my career. From developing more entertaining presentations using iMovie and Powerpoint, to adding and editing narration, audio, foley, and most importantly, creating a detailed, research-based, cohesive training needs analysis, this program has taught me more intricacies of corporate training than I could have hoped for.
0 notes
Text
Game Strategies and Motivation
A previous course’s final project required us to develop a game-based learning activity for an audience of our choosing, that would use Google Maps or Google Earth to complete the activity. We were asked to provide a walk-through demonstration of our plan and summarize the concepts of game-based learning, gamification, and game strategies that we learned throughout the course.
REFLECT: I learned a lot about gamification in this course. As a child, one doesn’t stop to think about what exactly makes games fun. One concept that stayed with me from this course was the idea of intrinsic and extrinsic motivators and how they add to game play. Taking an educational activity and adding elements of gaming to encourage participation and excitement helps the student retain information and increases cognition.
iNQUIRE: Prior to getting all of the instructions for this assignment, I wondered if we were required to eventually build out and test the game. Ultimately, it called for more of a project proposal format, but it made me wonder if building out the game could have helped enhance my plan. I tried to visualize the game, but was unsure if there were perhaps gaps or loopholes in the gameplay that couldn’t be uncovered until the game was actually played in person.
SUGGEST: If I would have had more time to do so, I would have built out the game, for the reasons listed above and also to be able to include footage of the actual game play and the fun environment that it would create. Using elements like timing the game and racing against other teams to finish would have added a level of friendly competition and excitement that would have been interesting to see in the pitch.
ELEVATE: Now that I’ve had a chance to rewatch the video (see below) with some distance from when I was creating it, I see where some of the rules of game play can be a little confusing. simplifying the Tripler rules, minimizing the number of categories, or creating a custom die for this game would be some of the things that could help simplify the game and avoid burn-out or confusion.
I welcome your feedback on this and other projects!
Thanks,
Lisbeny Duran
youtube
0 notes
Text
Filmmaking Principles in Instructional Design
For this month’s class, we were to create an instructional video based on one of four given how-to’s from WikiHow. The project was done in sections over a span of four weeks.
Reflect: This project was new for me. I had fiddled with iMovie, and used Garage Band in my previous class pretty extensively, which helped when it came to completing this instructional video. One particular attitude that changed through this process was what I learned through using storyboarding as a planning tool. I had never used it before, and found it to be tedious. I was initially concerned that it would mean being limited to what I thought I wanted back in week 1. However, I found that storyboarding helped organize me, and helped me see in my mind’s eye what would and wouldn’t work, as far as angles and lighting. Also, since I had to think about the narration from early on (seeing the end from the beginning), it felt like one less step to have to plan when it came time to narrate the video clips.
Inquire: I learned quite a bit, but can definitely use more experience with iMovie. Transitions and cut-aways add interest to the video, and I know that there are some resources online for how to use these appropriately. I also wonder if there’s a better way to include images and stills, and graphic elements like fonts, through iMovie. I used an app to design the opening screen for the video called Word Swag, where I used a still and added graphic text over it. I know that some videos I’ve seen and found engaging include text with animation.
Suggest: My peers and instructor suggested starting the music off at a lower video from the start. I used the ducking feature in Garage Band to duck the music down below the narration, but it was so fast that I might as well have started it low. I was also told I could benefit from a greater variety of angles.
Elevate: For future videos, I’d like to explore font animation or more interesting angles, for sure. I would also like to continue learning more about GarageBand and the elements of music and audio in videos. Future projects will include the things I did well in this video, and enhancements to areas of opportunity that were great learning lessons for me.
Below you can find some examples of the work I submitted week by week.
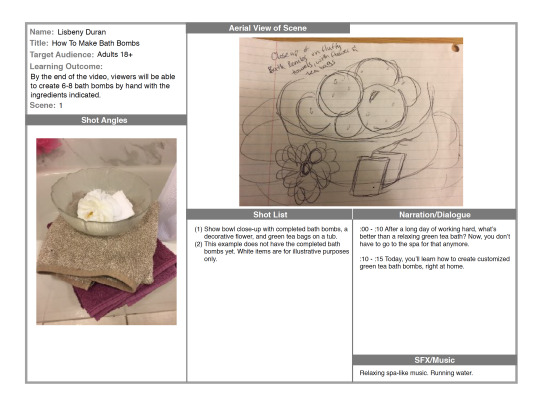
Here is an example of the storyboard that I used to plan my video. This layout was a free example sent as a project asset to us, that I will use in future projects, as it was simple and easy to use.
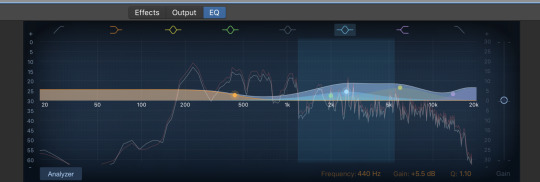
Here is some of the EQ that I did for the narration in the final video.
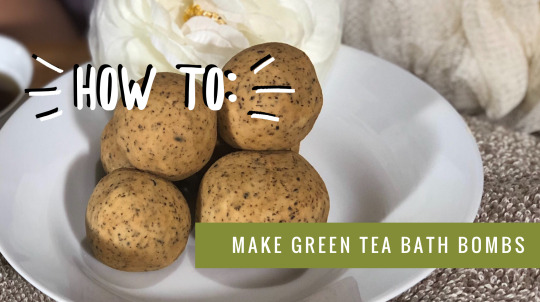
This was the still used at the start of the video as an introductory image.
Here is the final product. All video editing was done on iMovie, and all narration was recorded and edited on GarageBand.
youtube
0 notes
Text
Music and Audio for Instructional Design
Hello! Below you can see some of the major projects that I completed for this class, for the Masters program I’m in. See descriptions below:
The first project was an "audio story." We were instructed to pick a classic Grimm's fairy tale, and create a script based on that story. We were also required to select and/or develop music and foley. This was all accomplished on GarageBand. My intended (hypothetical) audience was a children's reading group. This caused me to simplify the original tale, and inspired me to use recognizable and easily identifiable animal sounds. Here, you can see my audio board on GarageBand. You can see how I used different racks for narration and foley, and the use of panning for different characters.
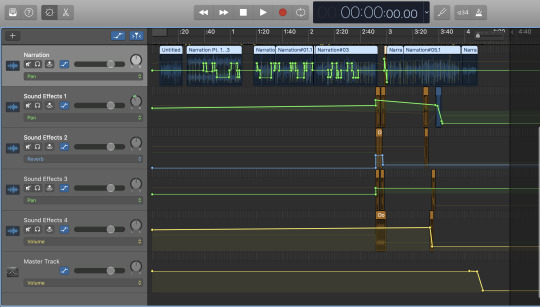
The second major project involved an audio story that was required to align with a provided silent video. This project was much more elaborate than the previous project, as timing was key. More sound elements were put to use, and our creativity had to fall within the bounds of this specific video.
One of my biggest learning areas was the EQ settings feature. Here, you can see how I made adjustments in the mid-range, since as a female, my voice tends to fall between 700-3,000Hz.

Using the RISE Model for Self-Evaluation, I’ve done an evaluation of last month’s class.
Reflect: I leaned on my personal experience when getting inspiration for these projects. For the pioneer video, I spoke as an actual resident of Osceola County, where the pioneer village is located. For the Grimm’s fairy tale, I went with a story I personally hadn’t heard, and recalled my own childhood reading group for inspiration.
Inquire: I asked my peers this question, and it made me wonder for myself: how different would these projects had been if the audience was younger, or older? How would that impact my tone of voice, the sound effects chosen, the music?
Suggest: I think I would have used better equipment. During this project, I learned how much difference a good mic and professional monitoring headphones make. I should have also looked into utilizing different talent for projects with multiple voices. I just adjusted my voice and used panning to give the impression of characters, but it would have been interesting to record various characters with different voices.
Elevate: For future iterations, I would use that better equipment and hope it’d further improve my projects. I would also hopefully have more experience with software that I used this time.
0 notes
Text
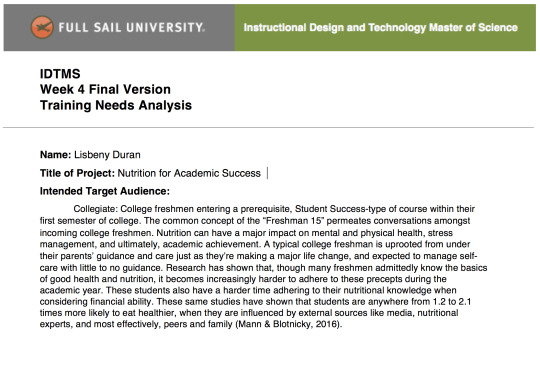
Class Five: Instructional Design and Evaluation
For my 5th month of class, we were required to complete a Training Needs Analysis. We added a new section to the analysis every week.
The analysis was based on creating a nutritional course, modified according to the audience we each selected. My course was a compulsory nutrition course at a college or university, that would be held during a student's freshman year. The audience would be freshmen students, 18 and up.
The audience that would have been reviewing the actual training needs analysis, however, would have been project sponsors, school administrators, the school's Education department, and SME's (Subject Matter Experts) involved with the development of the curriculum.
Below are some highlights of the analysis:
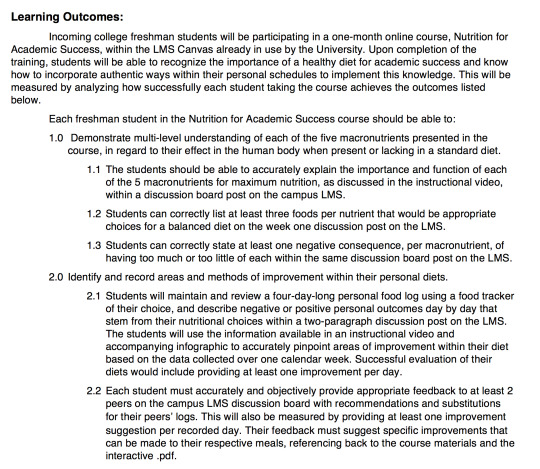
One of the first elements to determine would be the audience. This decision will impact the look and feel of the entire project. If it were designed for children, for instance, the health needs would be different. Deliverables would be simpler and likely involve parents. Being that my audience was college students, I had to make sure it was educative, and engaging to the busy mind of a new college freshman.
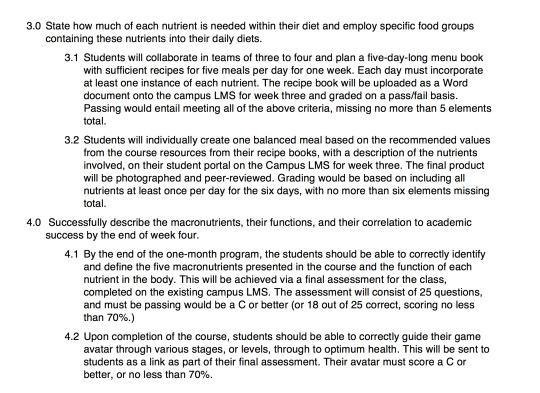
Learning outcomes and corresponding learning objectives were a major focus for this project. They helped anchor the effectiveness of the project, and were to be our reference points when creating deliverables and assessments. In referring back to these throughout the development of the analysis, I was able to consistently verify: is this deliverable truly measuring the learner’s ability to perform outcome x? Would this assessment give accurate feedback on the learner’s competence, based on outcome y? Etc.
These were formulated using Bloom's Taxonomy and the ABCD model (Audience, Behavior, Condition, Degree).
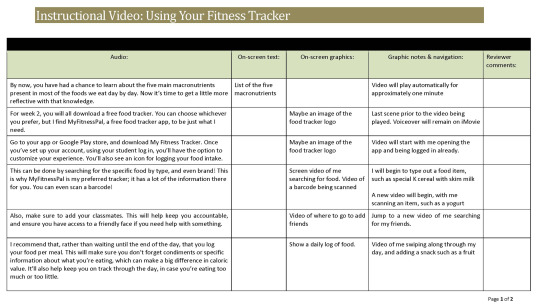
The text-based storyboard was for the SMEs (Subject Matter Experts) and sponsors to understand what our planning looked like for an instructional video. One of the deliverables for the course I designed required learners to download a free food tracker app, such as MyFitnessPal. In the video, I teach the learners how to navigate the app, and how to use helpful features within it.
This is the storyboard:
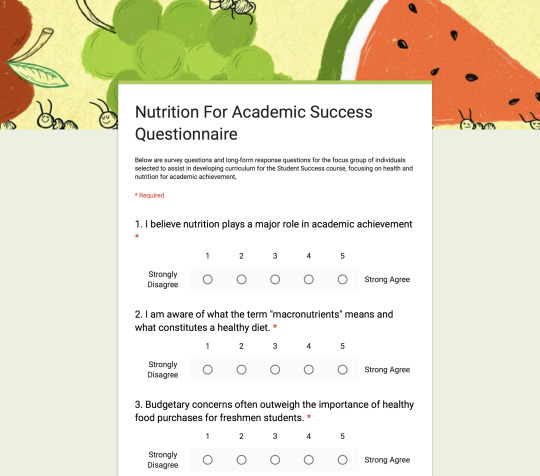
The project also consisted of developing various surveys and assessments. One of these surveys was for the SME, or subject matter experts, who would be acting as advisors for the development of the course. Here is an example of one of the Google doc surveys I created. To view the entire survey, please click here: https://goo.gl/forms/ZKpm8cH9buBwsr803
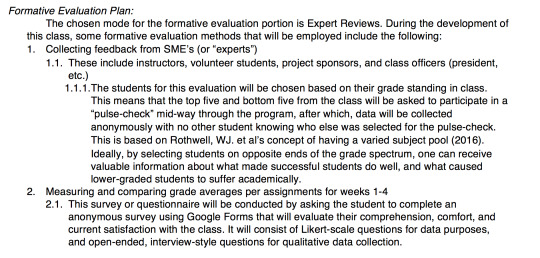
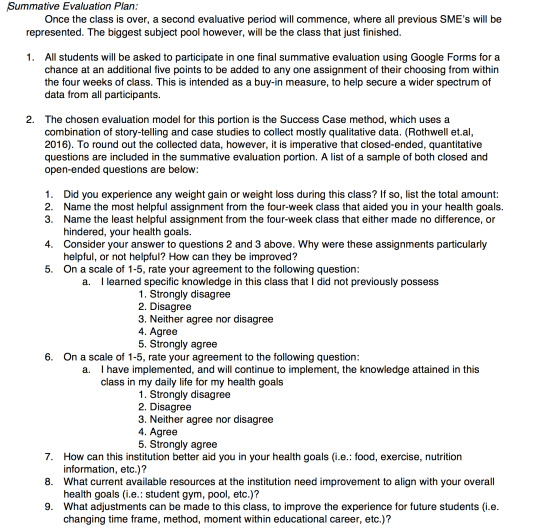
Finally, two of the last elements we were asked to add to the analysis were the formative and summative evaluation plans for the course. Formative evaluations would occur just before, and even during, the curriculum launch, in order to help develop the actual content. Summative evaluation would be after the class or curriculum has been delivered and the students have been assessed. This would measure the success of the curriculum, and identify areas of opportunity. See both of these below:
I learned a lot during this project. It was tedious, but was a great exercise in making sure all parts of a training plan are cohesive. It also really opened my eyes to the detail and planning that goes into launching a course like this: identifying the desires of the project sponsors, honing in on who the audience is, developing effective learning outcomes and objectives, deciding on deliverables, and determining collateral departments or secondary SME’s who would be involved in the dissemination and launch of the class.
0 notes
Text
Last month’s class was “Digital Media and Learning Applications.” Here, we learned about the effectiveness of video as a learning tool, and then had to apply that knowledge. We chose a video from NASA’s website, and updated a coded html interactive quiz using the Brackets software to edit the welcome page, questions, and other relevant aspects of the quiz.
Below, you can see three viable layouts, with a description of the one I chose.

This image was taken off of NASA’s webpage. Here, I edited the size and placing within the given frame using PhotoShop, and also used Illustrator for further edits. This was not my final Welcome Page choice, however.
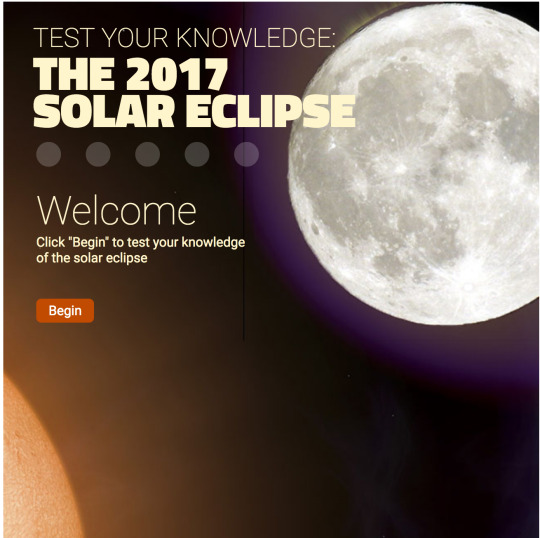
Here, I played around with Adobe’s “rasterize” feature. I was able to resize the image of the moon and place it there on the top right corner, since my chosen quiz topic was the 2017 Solar Eclipse. Though it was fun to experiment, I ultimately went with another final image for the Welcome Page.
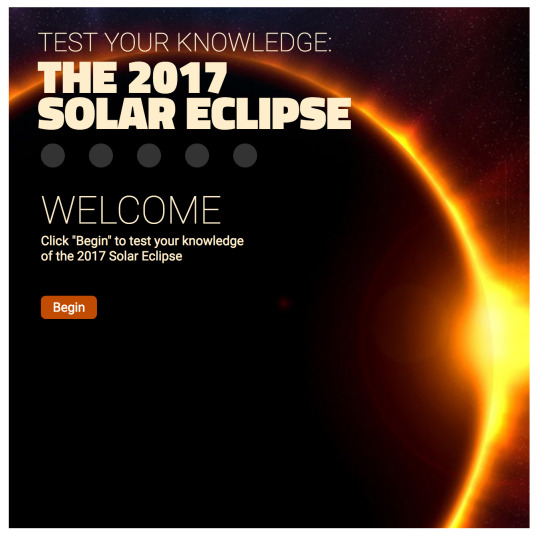
This image was taken off a creative commons site, and depicts an actual Solar Eclipse. I selected this image because of it’s accuracy, and the fact that it left me a great open space in the center which allowed me to not have to worry too much about the questions that would later go there in the center. I was able to resize and rotate the image of this Corona (the term for when the sun peeks out from behind the shadow of the moon) until it was still identifiable but left sufficient space in the center for me. I later added a slightly opaque black color layer to mute the brightness of the sun, and also changed the font color to be a bit more in line with the color scheme.
My instructor was very pleased with my final choice. His feedback included that I should have added a bit more of a description of what a Corona was, within the quiz itself.
If you’d like to watch the NASA video this was based on, click here: https://science.nasa.gov/science-news/sciencecasts/2017-total-solar-eclipse
I am also including a ScreenFlow of me narrating the interactive quiz, describing my process and design choices. Here’s the link: https://youtu.be/U52CmVAinEw.
0 notes
Text
Final Project: Developing an Interactive Quiz and Analyzing Effectiveness of Video as a Digital Learning Tool
My final project for my Digital Media and Learning Applications course consisted of creating an interactive quiz based on an instructional NASA video of our choosing. We were provided with the coding for the quiz, and were required to edit it to relate to the topic, and develop authentic assessment questions related to the video.
If you’d like to watch the NASA video click here: https://science.nasa.gov/science-news/sciencecasts/2017-total-solar-eclipse
I am also including a ScreenFlow of me narrating the interactive quiz, describing my process and design choices. Here’s the link: https://youtu.be/U52CmVAinEw.
Below are some reflection questions about the process of developing this quiz.
Explain your process in determining what questions to ask to assess the learners’ knowledge from watching the video.
Upon watching the video, I began by developing learning objectives that were quantifiable and therefore measurable. Could the student accurately name the parts of the eclipse? Could they identify details that made it differ from a lunar eclipse? Then I started thinking about which questions would genuinely gauge learning from the video. I wanted facts that were not completely unfamiliar to the learner, while also being foreign enough that the learner had to have watched the video to know them. I wanted to develop questions which would lend themselves to a variety of possible answers, and therefore had to develop the possible answers so that they were just believable enough to be a challenge without being too similar to the correct answer so as to be confusing. Quantifiable, objective questions with facts as details or answers work best for these types of quizzes.
Describe the relationship of your authentic assessment to the interactive quiz. In what ways is it an effective assessment?
My authentic assessment questions were aided by the requirement of them not being true or false questions. I also considered context clues and critical thinking. Since only one question was true or false, the chances of the student simply guessing correctly were much slimmer. For example, one of the questions required images. Three of the four images came directly from the video. The other image was a familiar picture of the moon. Since the images were screenshot from the video, the student could recognize them, but it would require a focused learner, or even simply one who was able to answer based on “context clues” (i.e, which of these images resemble “beads” more?) to get the right answer. Critical thinking also played a major role in developing the questions. For example, we know that the mass of a larger object in space has a stronger orbital pull. It stands to reason that the Moon, comparatively small to both the Earth and Sun, would eventually fall more towards the Sun’s orbit than the Earth’s, meaning the correct answer is that it “inches away from the Earth.” This kind of deep, critical thinking would not only test their knowledge based on the video, but conceivably, their knowledge of physics, since the audience I chose was a high school class.
Describe the benefits of digital media in learning and assessing the effectiveness of the learning object.
Dorian Peters states that “watching, and even just thinking about, physical things activates the same parts of the brain that are activated when we actually do those things (Peters, 2013).” This closely relates to the entire concept of authentic assessments, which is to check skill level and knowledge versus rote memorization. Video media aids in retention and therefore, application of the topics presented. It also engages various channels of information: audio, visual, and even kinetic learning can all be involved when it comes to video as a digital media tool. Furthermore, quizzes whose questions are thoughtfully developed, follow the content, and are able to fulfill all the requirements set forth by the learning objectives not only assess the student, but the effectiveness of the video presentation.
Peters, D. (2013.) Interface design for learning: Design strategies for learning experiences. United States: New Riders.
0 notes
Text
Evaluating My Previous Course Utilizing the RISE Model for Self-Evaluation
My previous course for my Instructional Design and Technology Masters program was titled Visual and Verbal Communication in Instructional Design. It wrapped on October 22nd. Reflecting on the projects I submitted for the course, I learned quite a bit about the software available to us as budding instructional designers, which of course was my purpose for joining this program. My three previous posts are the three major projects that we submitted for the class. All feedback is welcome!
Utilizing Emily Wray’s Rise Model for Self-Evaluation, below is an analysis of my work in the class.
REFLECT: Recall, ponder, and articulate. How did your attitude, logic, and behaviors influence your performance or contribution? What worked? What didn’t?
Much of what I learned during this class, and during the Lynda.com tutorials, were things that I feel we all know intrinsically. I’m not a graphic designer, but all of us can identify when something is visually appealing and when it’s not. Putting words to those ideas were helpful, and allowed me to justify or correct decisions I made, design-wise. I found that with these projects, what I thought would work (smaller, less-distracting fonts, etc.) would be more appealing, but much of my feedback (for the travel poster, see below) was that the font initially was too small. I had to keep in mind not only the principles of effective typography, but also things like marketing, appealing to target audience, and advertising principles.
INQUIRE: Seek information and/or provide ideas through questioning. What concepts/techniques do you need to revisit to master the material? What resources are available to you?
I continuously want to learn and grow more in my usage of the software available to me in this program. I find myself needing to seek external assistance, mostly through Google or YouTube, for certain tasks on programs like Illustrator and Photoshop. These have been great resources that “cut the fat” and let me learn how to perform a specific action to achieve my design goals. Revisiting these tutorials, and especially Ina Saltz’s presentation on typography, would definitely help hone my skill in this area,
SUGGEST: Introduce ideas for improvement of CURRENT iteration. What could you have done differently to improve your performance or contribution? What if you had more time?
I believe that the iterations of my final projects were acceptable. I want to seek to better understand what makes a font pleasing. I didn't want to utilize too many different fonts for the Keynote presentation. Some of the fonts were provided for us, and I wanted them to look similar. The font within the sideways tabs is not my favorite (too many serifs for my taste), and seeking additional fonts that don’t overload the slide yet match with what was provided already would have made this more visually appealing.
ELEVATE: Raise to a higher degree or purpose in FUTURE iterations. How will you approach similar situations in the future? How will this experience inform your personal and professional goals?
Approaching these projects in the future, I will already have had more hands-on experience with the software. Less time can be dedicated by then to learning the software, and more to honing my design vision. By exposing myself to different typography styles and resources, I know my future projects can be made more aesthetically pleasing and therefore, deliver information even more effective. it is my belief that clean, modern, well-thought-out design is pleasing to the eye and allows for less distraction, which permits learners to really grasp the information without being sidetracked by poor design choices.
0 notes
Photo
This photo was taken by Ina Saltz, and added to her Lynda.com tutorial for typography. This was the final version of my mock travel poster. The intention was to create a travel poster, utilizing Ina Saltz’s instructions for effective typography. We were asked to pick our preferred images, and create a mock travel poster. This was designed on Photoshop.
0 notes
Photo
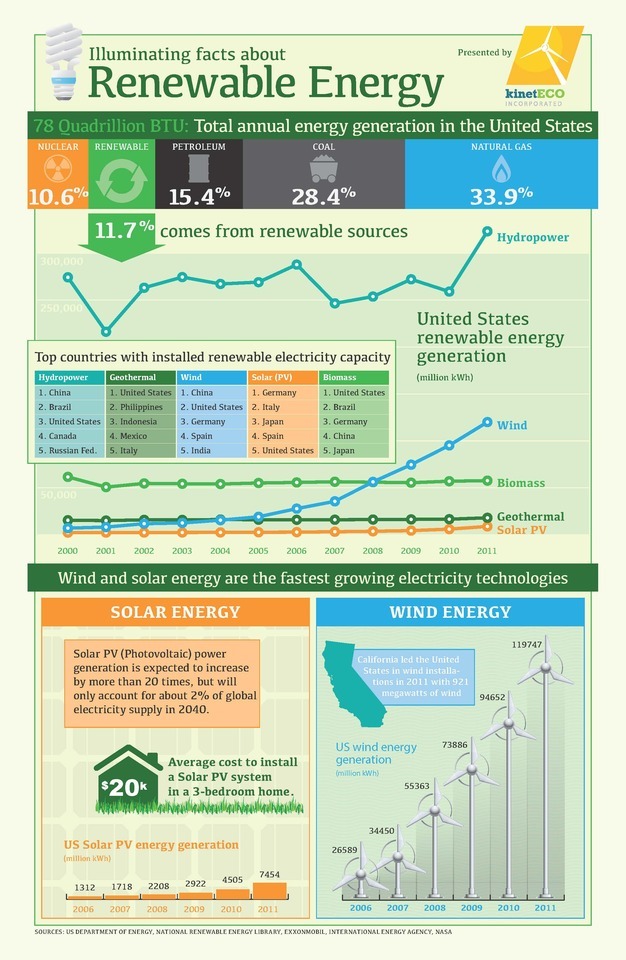
This infographic was created following a step-by-step Lynda.com tutorial, intended for students to learn to use Illustrator. Some of the assets were provided, but the majority of this was created on Adobe Illustrator as I followed along. It was my first time using Illustrator this in-depth, and though it was difficult, I learned quite a bit about the software! This infographic was were I pulled the graphics for the Keynote presentation I created (see below) for the mock e-learning module.
0 notes
Photo
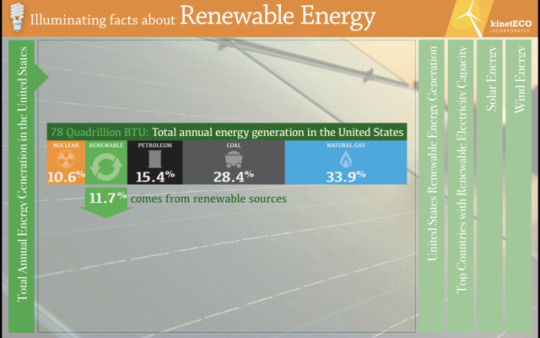
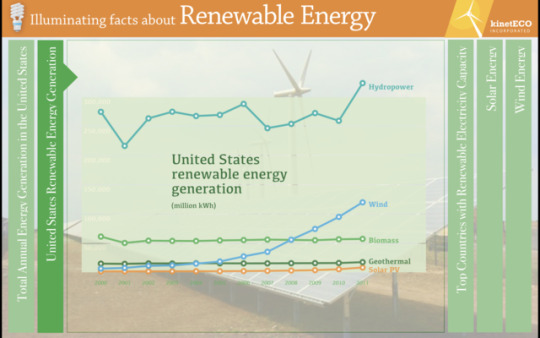
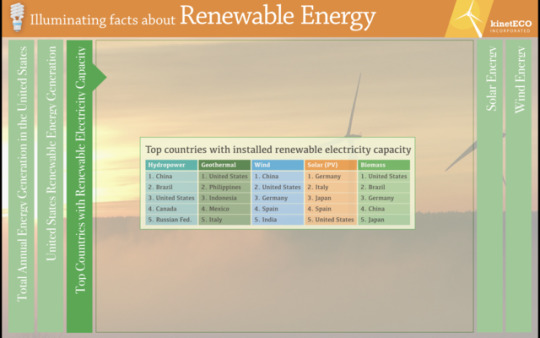
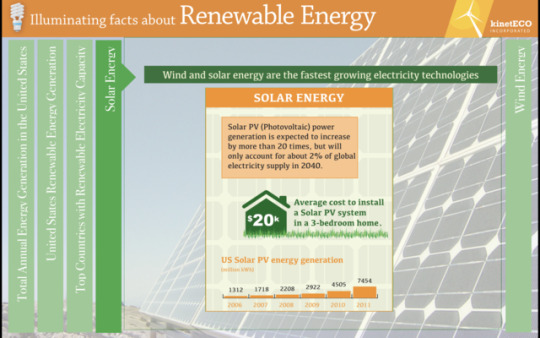
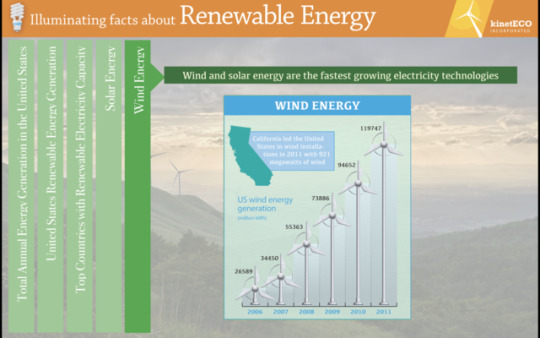
These are screenshots of the final project for my Visual and Verbal Communications course in the Instructional Design and Technology Masters program at Full Sail University. These are the slides for a Renewable Energy e-learning module I created. The Keynote had a voiceover that activated once the slide appeared. These graphics were pulled from the infographic we were required to create earlier in the month, and edited to fit this Keynote.
0 notes
Photo
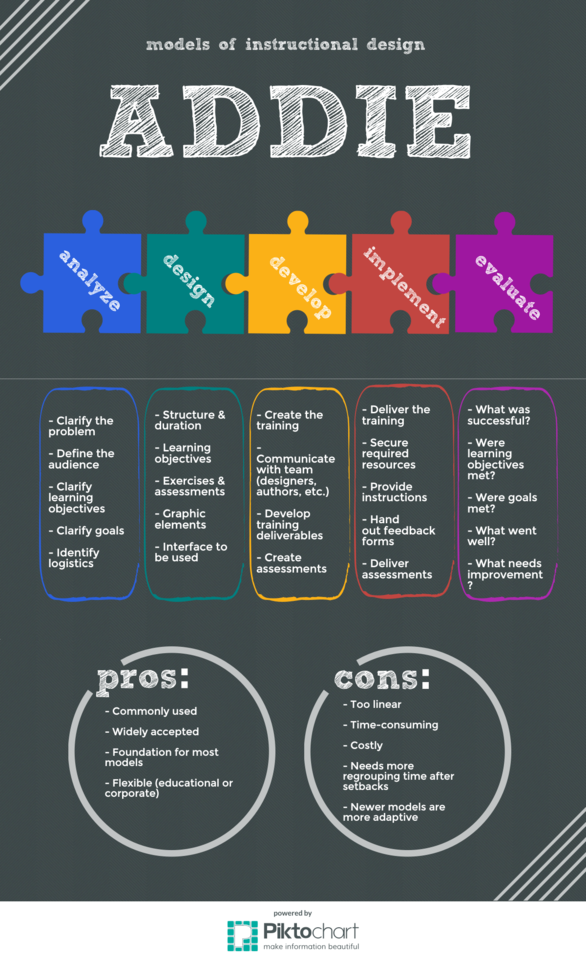
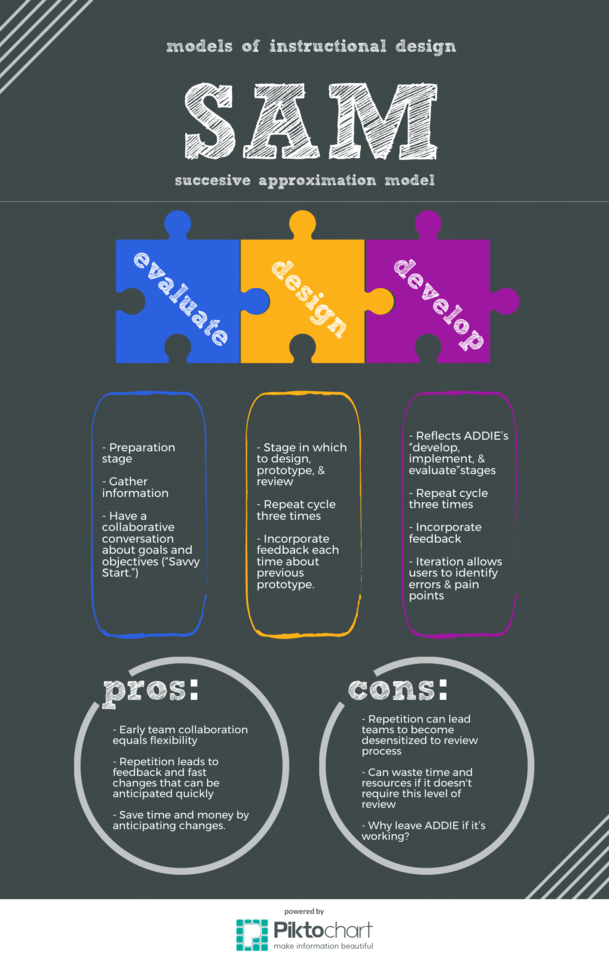
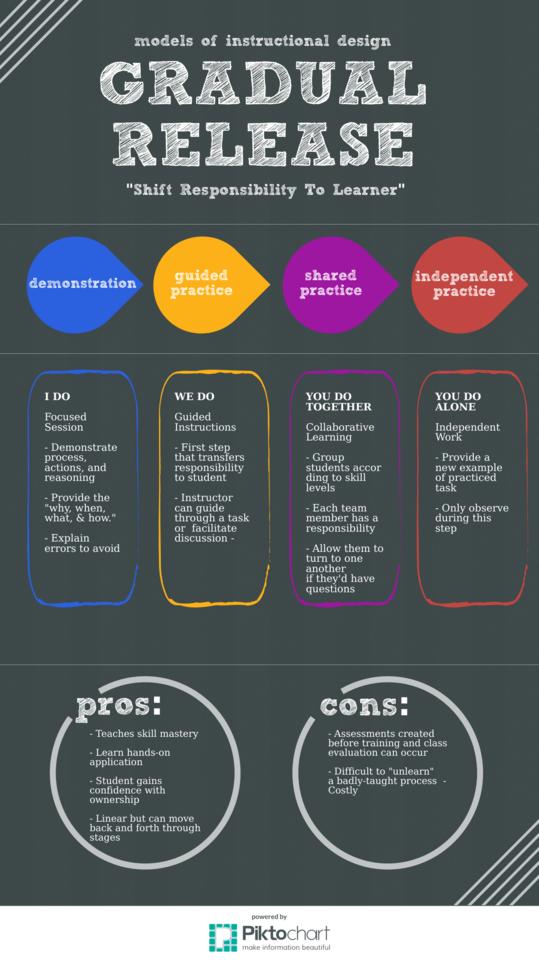
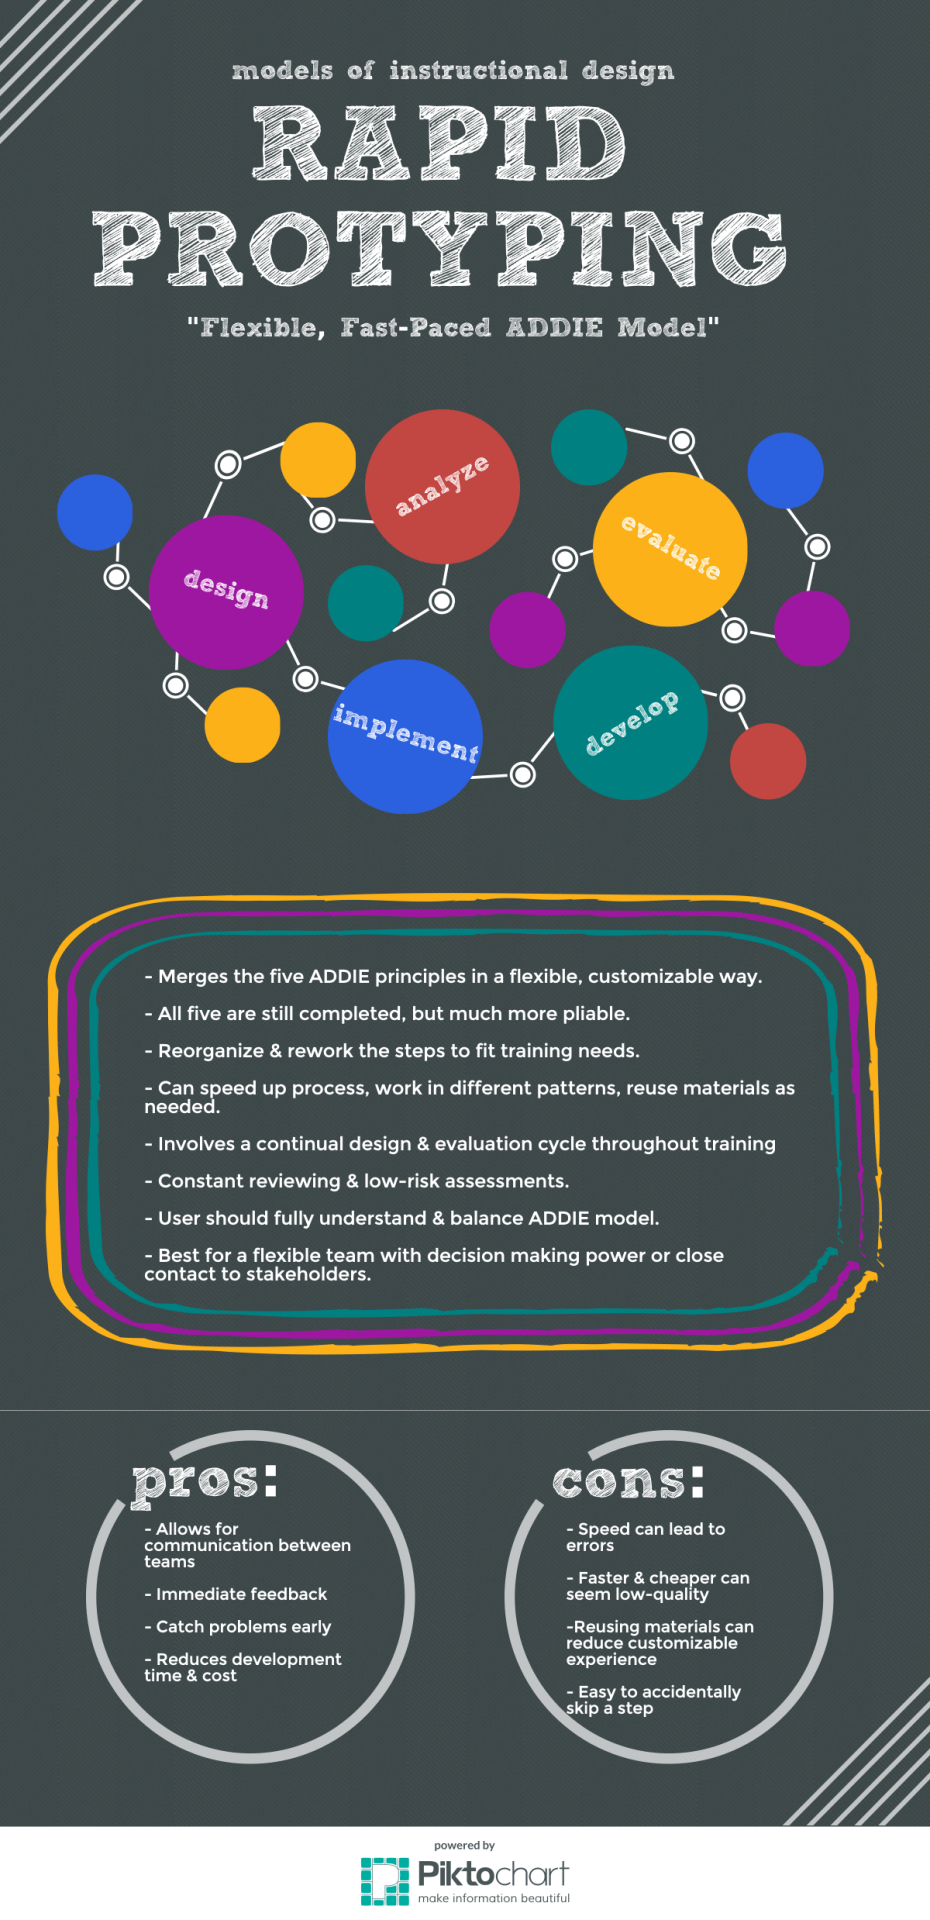
These posters depict four common Instructional Design Models: ADDIE, SAM, Gradual Release and Rapid Prototyping. We studied various key principles of graphic design, such as word weight, placement, colors and alignment. With ur instructor’s guidance, we learned what makes a poster engaging, clear and easy to read, and effective. I utilized the free version of Piktochart to create these posters. Since creating these, I’ve had a little experience with Photoshop and Illustrator.
Reflect: I really liked my theme of choice, which was to make it look like a school chalkboard. I went with all white text, and stuck to about two font choices total. I also aligned with the school theme by using vibrant colors for the graphics.
Inquire: In creating these projects, I wondered how much more pleasing they would look if I had had a chance to do these on Illustrator, which I didn't learn until the class after this one. I like the ease of use on Piktochart quite a bit, which helps snap images into place, comes with built-in guides, and have pre-designed graphics. But customization is a little more limited than if I were to have designed my own on illustrator.
Suggest: I would have liked for the puzzle sections to fit better with one another, and again using a different software would have allowed me to fit them better. I would probably work on that. I would also work on the font within the puzzle pieces. They look a little boring to me! I definitely preferred my fourth iteration, which was Rapid Prototyping. I was inspired by the rapidity and controlled chaos within that model, and designed the graphics to match that vibe.
Elevate: Running this one more time through different software, and potentially making these posters square instead of so vertical, would make these more appealing in my view.
0 notes
Photo

Here is one of the projects I submitted during my second class of my Masters in Instructional Design. These images show slides from a narrated Powerpoint presentation, on communicating the Instructional Design process.
The learning outcomes for this project were to collaborate with a team in the development of activities and learning outcomes for adult learners, and to establish the content and format for a presentation to stakeholders.
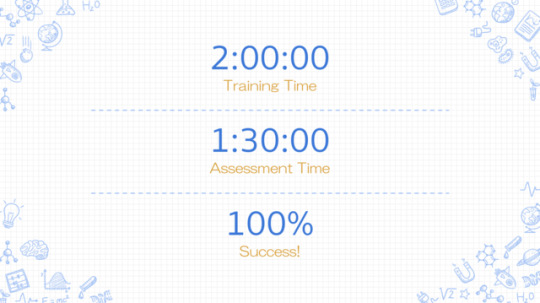
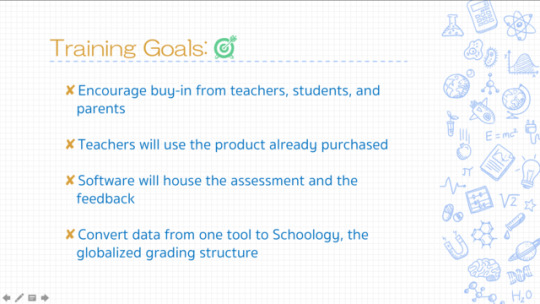
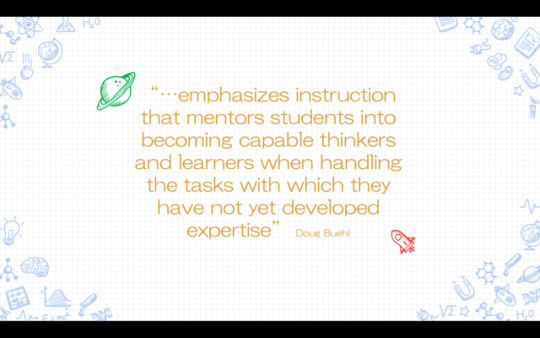
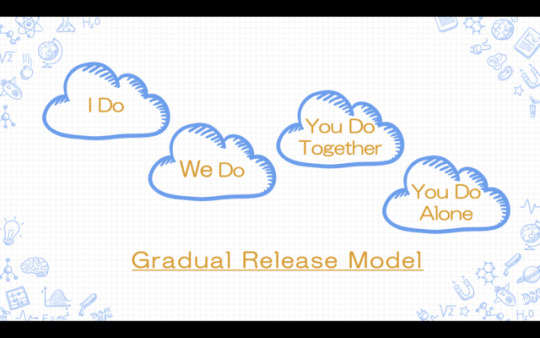
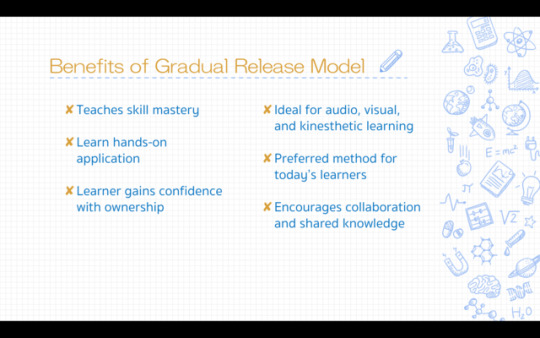
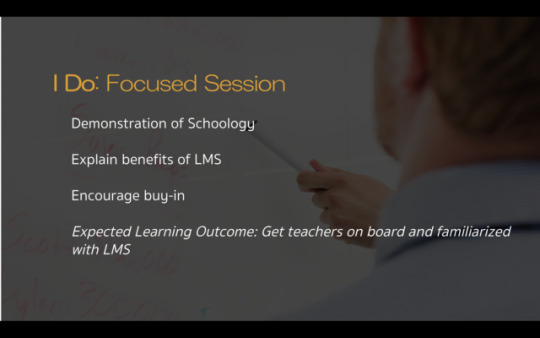
For this two part project, we were tasked with working as a group, acting as a sponsor team, requesting a training course to be developed by the other team in the class. We provided them with information as to our company, our requirements, and the training needs. Then, the roles were reversed, and our team acted as the Instructional Designers, developing a training program to fill the needs of the other team acting as sponsor. They provided us with the training needs of their project. We proposed the Gradual Release model for developing and implementing the training. We were tasked with determining the presentation content and its format, to create and post the presentation, and to evaluate our experience. According to the instructor’s feedback, myself and my team members’ work was done very well. We scored a 100%, of which we are very pleased and humbled.
Reflect: I liked this template quite a bit. I found it for free online, and it went with the school theme, since we were developing a mock training for a theoretical LMS geared towards grade school teachers.
Inquire: I think my biggest struggle, and why I joined this program, is a lack of knowledge about technology and their proper use. Google has been a huge help :-) but I could have better incorporated the background music to sound more crisp and clear. I wonder how much more engaging it would have been with a properly incorporated element of music.
Suggest: I ran this past some friends and family, and their recommendation was to slow down my speaking. During this final iteration (probably my 12th or 15th recording, honestly), my voice was strained and I over-corrected, by speaking slower than I would have in conversation. I did this to avoid making mistakes during the final read-through. Im sure there are ways to record audio for powerpoint and edit them, but due to time restraints, and wanting the audio to match my pacing for the slideshow perfectly, I just re-recorded it until it was as close to perfect as possible.
Elevate: Again, by finding more effective ways to edit small portions, I could have pronounced words like “articulated” properly, but I didn’t want to re-record the entire presentation again! I like the minimalist colors, and since it’s not geared towards grade-school students, but rather their teachers, the blue and white theme is calm and clear. I do however, think a chance to make this more lively would take it to another level.
0 notes
Quote
Learn to say 'no' to the good, so you can say 'yes' to the best.
John C. Maxwell
I love this quote! It reminds me that there will be certain sacrifices I’ll be making today, in search of a bigger and brighter future. When I feel bogged down or tired with assignments and all the things I have to juggle day by day, I stop and think about the investment it is making to my future, and it re-energizes me.
0 notes
Photo
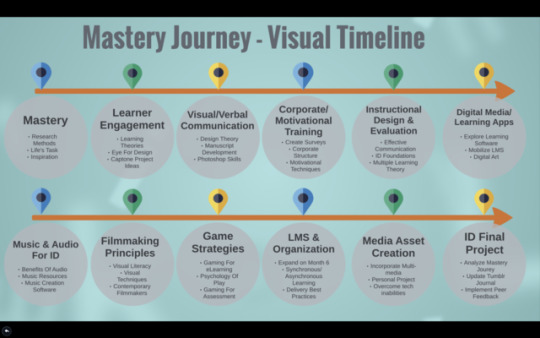
Part 2: Here are classes 11 and 12, as well as a visual, a summarized version of my literal timeline.
0 notes
Photo
Part 1: Here is a summary of each class (months 1-10, 11 and 12 are in the following post) that I’ll be taking in my Masters programs, as well as some goals, strategies, and resources for each to help me attain the goals I’ve listed.
0 notes