
levelrazearts
It's worse than night 7 from Freddy's
This is where the art that I either do or don't put up on DeviantArt ends up at. That or it sits in a folder.
308 posts
Don't wanna be here? Send us removal request.
Last Seen Blogs

t--d1
HEATHSÉCEO🥰🙏

dabitvocemaustria-blog
Dabit Vocem Austria

valentinesgreatestgift
Anointed+ Appointed

the-1-bigshot
Ate The Chalk Kinda Sussy

zeevoo
First compliant Big Puff Pod system on the market
Text
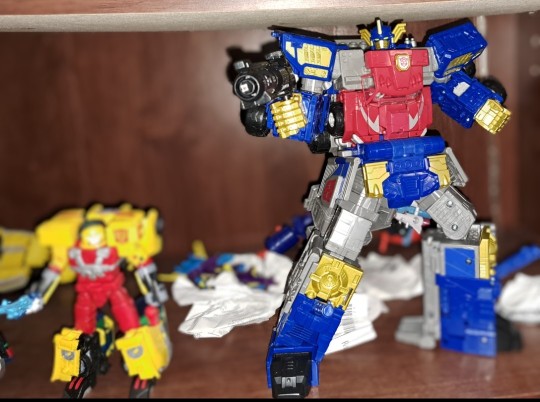
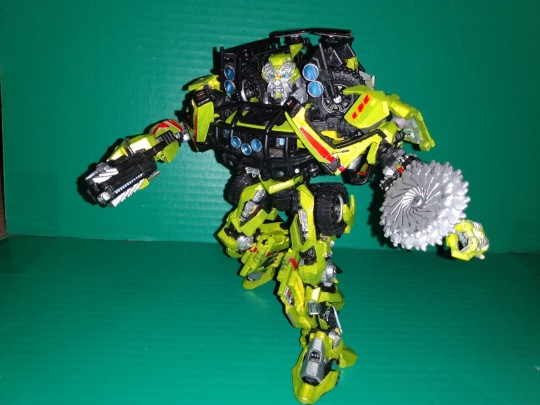
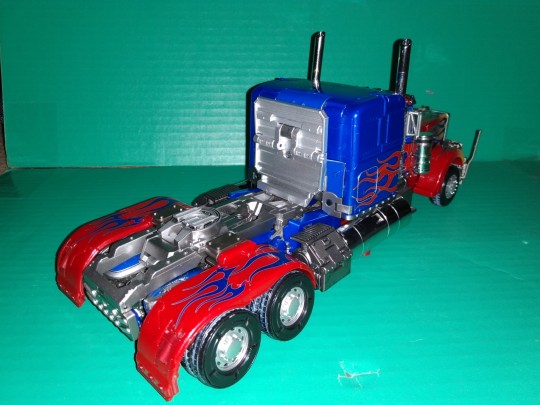
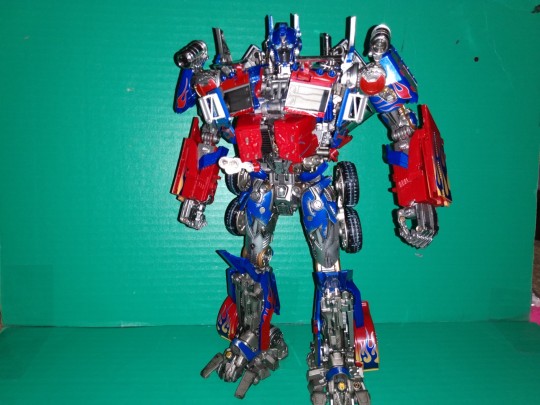
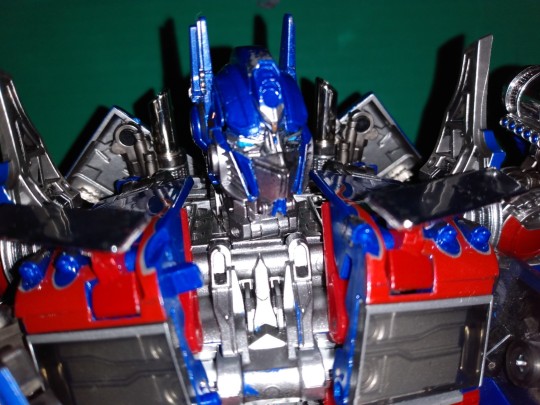
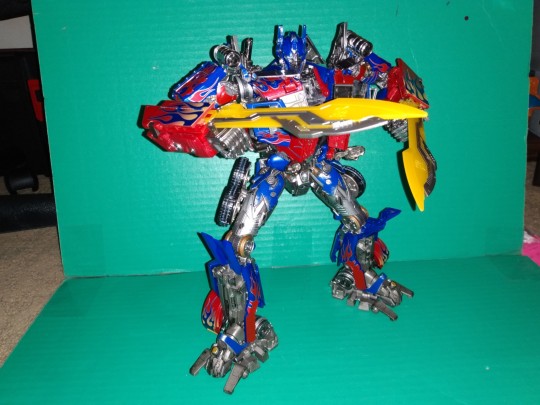
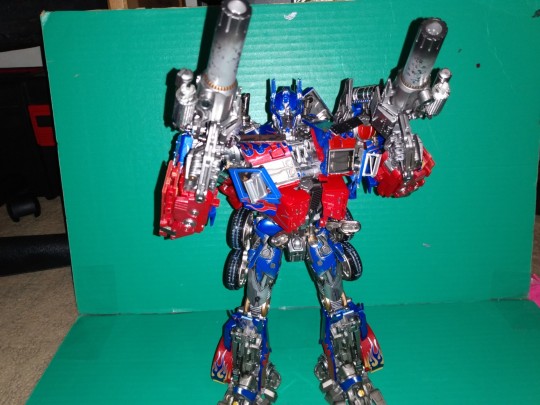
Forgot to post, but this guy came in, fantastic figure, truck mode is fun, core robot mode is hella fun and poseable, base mode is alright but makes me wonder of ways to add to it, and combined mode is fricking fun, and it has KNEES! 10/10 This is my figure of the year so far, it's literally my favorite childhood toy come back to life as a masterpiece. Go buy one.
#transformers#toy#autobot#optimus prime#transformers armada#armada#hasbro#unicron trilogy#legacy#transformers legacy
7 notes
·
View notes
Text
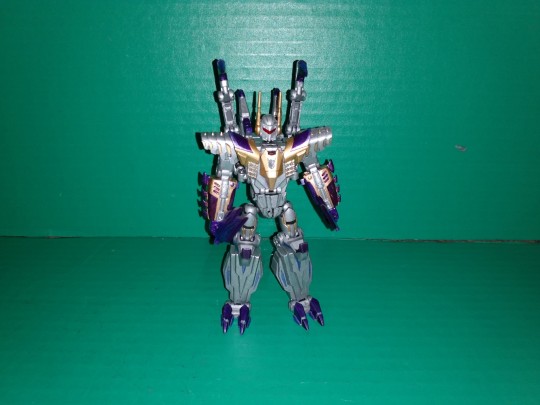
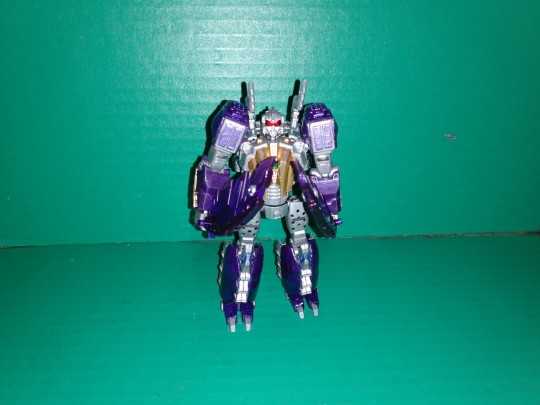
This figure is amazing, basically what I always imagined when playing with my original Armada Megatron when I was younger and dumber, highly recommend getting one, 10/10 he needs a knife and Leader-1.
4 notes
·
View notes
Text
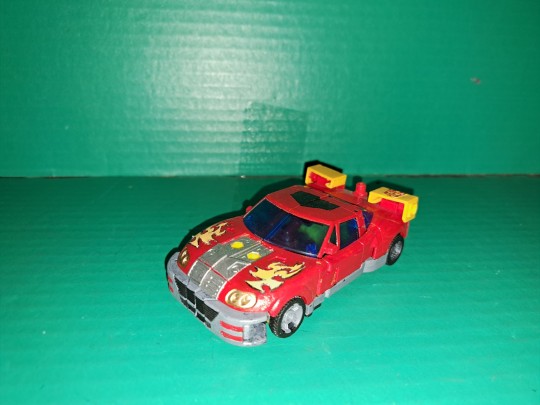


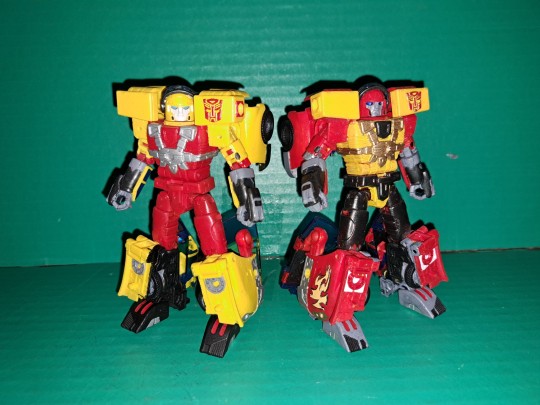

Hey look at that, another Armada custom, and hey look at that it's another Hot Shot custom, and hey look at that, it's red. Yeah I ended up caving and buying a second Legacy HS to turn into his Powerlinx form, which took longer to do mainly cause I procrastinated like heck on it, but it's done now and I'm very pleased with how he turned out. Basically a lot of gloss red, yellow, gold, blue, grey and a little bit of white and black on his shins and roof respectively. And flat black of course. Also used graphite again but in big amounts for the legs, the center piece on his chest, hands, and his waist belt. For the flames, I went ahead and made a sticker for that cause as soon I started to paint them I went "nope, to lazy to do that" and made a decal in paint tool sai, printed it on sticker paper, cut it out and bam, looked really good thank goodness. If I can figure out how to get them precut so they don't have to be manually cutted ever I'd be willing to sell them but otherwise I think I'll just upload the file image here on a seperate post so that anyone who wants to attempt this custom can have an easier time doing so. For the Autobot symbol, I did the same thing as last time where I took a ToyHax raised symbol, cut the edges off, glued it in place (just in case) and painted it up. Did chrome up the sideview mirrors again and also did something new with the eyes. After figuring out how to take the head apart, went ahead and chromed them up with a chrome pen/marker, than went over them with a blue sharpie to give them a really nice reflective look and I think it turned out very well. As far as engine gun goes it still works cause everythings the same, I just didn't print one out in time, but I am working on another set of weapons for this guy that'll hopefully work/look well so we'll see how that goes. But yeh, that's all for this guy, again very happy with how he turned out, and can't wait for the new Armada Megatron and Optimus to come in so I can paint those up as well, but next is Armada Starscream or MPM Ironhide cause they've been on the back burner for way to long now.
#transformers#toy#custom#autobot#armada#transformers armada#hot shot#powerlinx#unicron trilogy#legacy#hasbro#inspired by bumblebee#but now more hot rod in a lot of ways
0 notes
Text
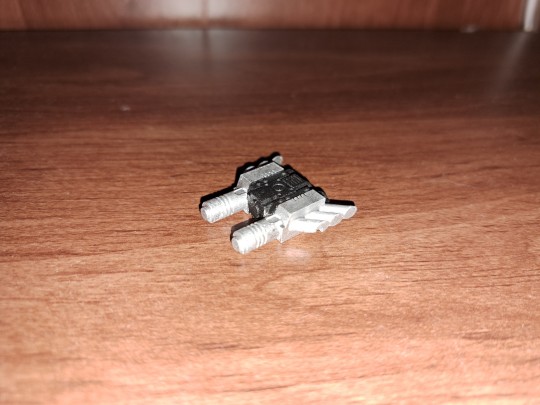


And it finally arrived, the item I was waiting on was a new gun for Hot Shot that I designed based on the one he came with that has 3 handles that can all fold away to allow for a centered handle in robot mode like a traditional gun, or the double handles to plug into vehicle mode. This item is now available for sale on the Shapeways website, link below, but does require and additional piece in the form of a 2mm by 21mm metal pin for assembly as this is printed in plastic (smoothest fine detail for this specific one) and I have provided a link to get the required pins as well. Painting also required. Will see about making the pin a buyable piece as well but it might be cheaper to buy them in bulk than an individual one if I'm being honest, will test it out though. But yeah, very happy with how this turned out.
The gun:
https://www.shapeways.com/product/EJ4NY5HS3/better-gun-for-legacy-hot-shot?optionId=299656426&li=shops
The pins:
uxcell 100Pcs 2mm x 22mm Dowel Pin 304 Stainless Steel Pegs Support Shelves Silver Tone https://a.co/d/2psxwpc
5 notes
·
View notes
Text


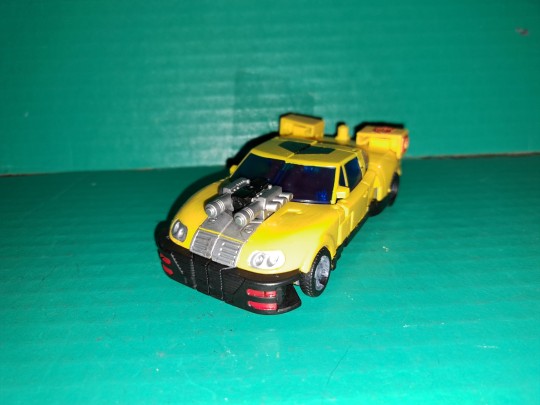

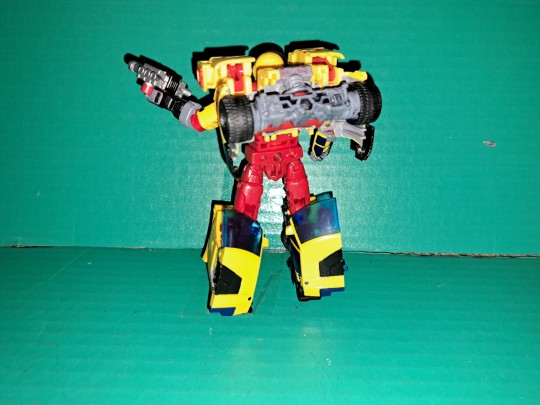

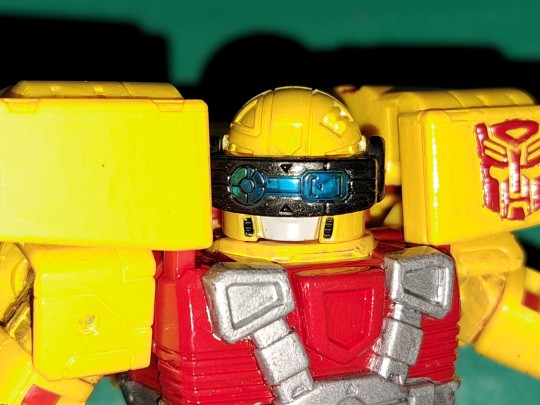
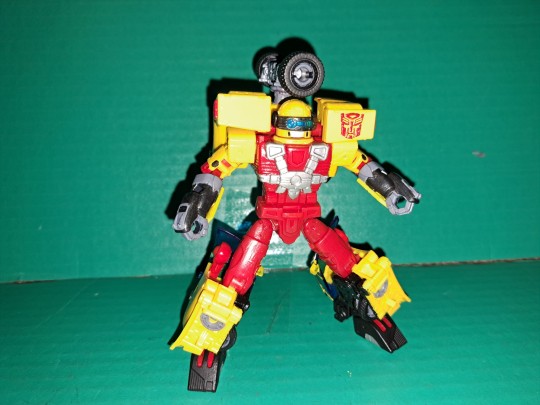

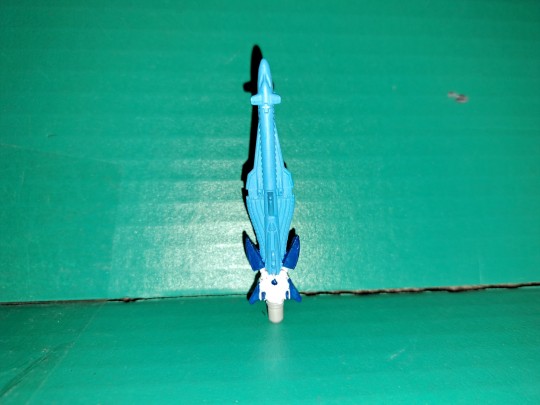
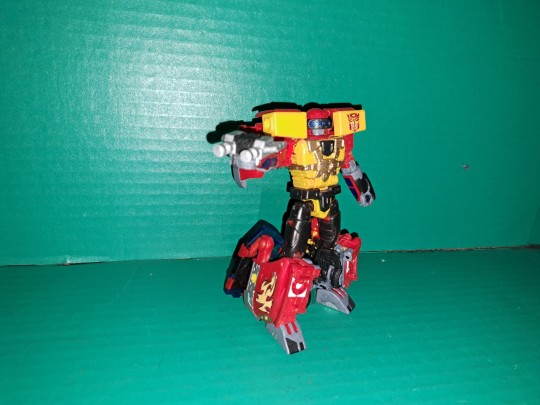
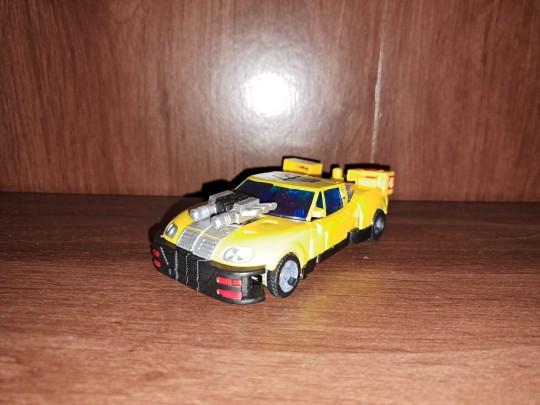
Had this guy done for a while now but was hoping to have something else ready to pair with him, but it's gonna be a while before said item is ready so here he is, custom Legacy Armada Hot Shot, already my favorite custom this year mainly cause Armada is both my favorite TF series and my first, and while I'm not 100% certain on this, the original Hot Shot figure is possibly my first Transformer figure ever, if not him than the Super Base Optimus, so having this figure made really is a dream come true and painting it was honestly an honor of sorts given how much this franchise means to me. But as far as the figure goes, used blue angel yellow as the base, gloss black, silver, red, and blue, graphite metallic, and flat grey. For the Autobot logo, I used a Toy Hax raised logo sticker as the original toy had a raised sigil and wanted to replicate it, cut out the edges of it to get it to fit and painted over it and it looks good I think. Used a gap filler set I got on ebay (link below) to help make this look better and it definetly helps, didn't use the guns or barrel cause didn't want to, and I also gave him the StarSaber that the Legacy Armada Starscream came with cause the first episode I have recorded of the series on vhs is Hot Shot with the StarSaber that introduces Scavenger so ye. For the StarSaber, I went and removed the 5mm post that was on the front of the hilt to make it look more streamline and as a result, also game me a pretty good premade minicon symbol dot to fill in with paint zo that worked out really well. Afterwards, I used flat white as a coat, than gloss white and blue, and flat sky blue for the blade. Also cut out the little fillers between the blade and the legs of what would be Sonar in the sword to help give it a better profile (which was nerve racking) and ye, they turned out well. Overall, very happy I with how this turned out, can't wait to do more Armada figures as they hopefully come out as Megs and Prime are on the roaster and as Starscream is already in my collectoon he'll definetly be on the list to paint.
Gap fillers - https://www.ebay.com/itm/304770203878?mkcid=16&mkevt=1&mkrid=711-127632-2357-0&ssspo=DtUb8VzESva&sssrc=2349624&ssuid=8tbfbcNxSdG&var=&widget_ver=artemis&media=COPY
#transformers#toy#custom#autobot#hot shot#armada#transformers armada#starsaber sword#unicron trilogy
3 notes
·
View notes
Text

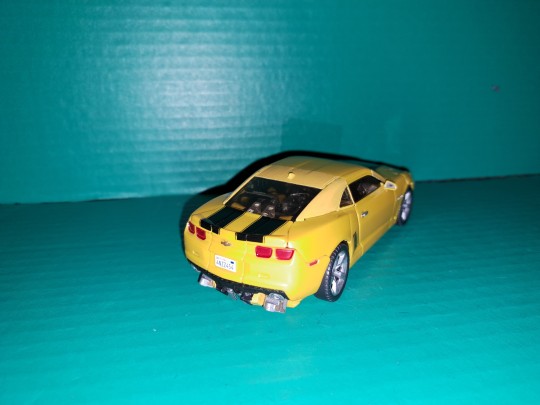


Been a while hasn't it. Here's custom mpm 03 Bumblebee, and I promise the yellow paint I used actually matches better in person, it's just on camera where it looks off cause I used the flash and don't want to retake the pictures under different lighting. But yeah, lotta gloss yellow, along with red, blue and orange, and a lot flat black and some red, with silver, gold, brass and stop light red. Also included is the removal of his extremely long heels so its more screen accurate and he falls over easily now. Also trimmed a lot off the the rear windows support so that they could rotate and also be more screen accurate. Overall happy with how he turned out and gonna be working on some more mpm's for sure.
#transformers#toy#custom#autobot#bumblebee#inspired by bumblebee#but better painted in every way#movie masterpiece#masterpiece#hasbro
1 note
·
View note
Text

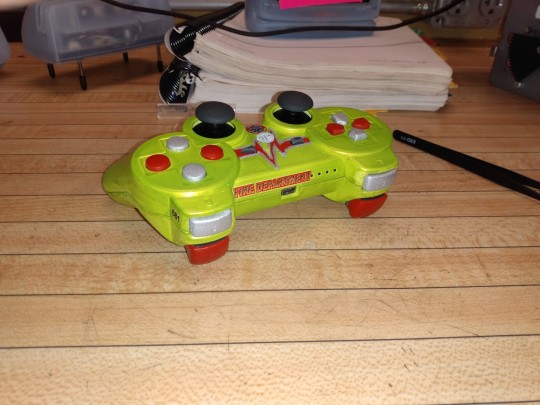
Not something I've done in a long time, but something that I did enjoy when I did it, custom controller for the PS3, done up in the style of Ratchet from the first live action Transformers film, to celebrate its 15th year anniversary. I will admit, had this done for a while now but just forgot to upload it so it is late to the party but oh well lol. Base color is the same flash green that I used for the MPM Ratchet that I did a while back as I loved it so much I and it looks good. Red and silver to also (poorly lol) replicate the stripes he has on both the center of the body and the buttons. Also used some leftover ToyHax stickers to give it some more pop and flair and ye, really happy with how this looks. Got plenty more I want to do including some really tough ones that'll also line up with an anniversary and yeah, that's it. :p
1 note
·
View note
Text


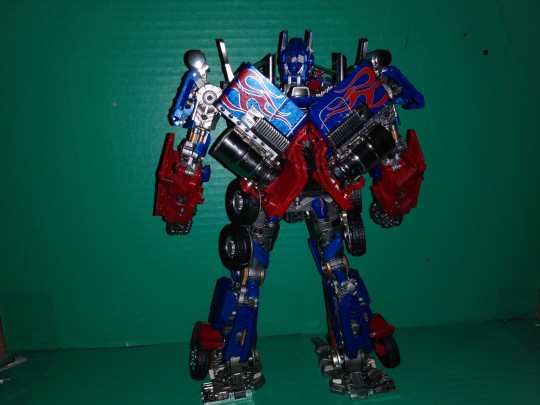
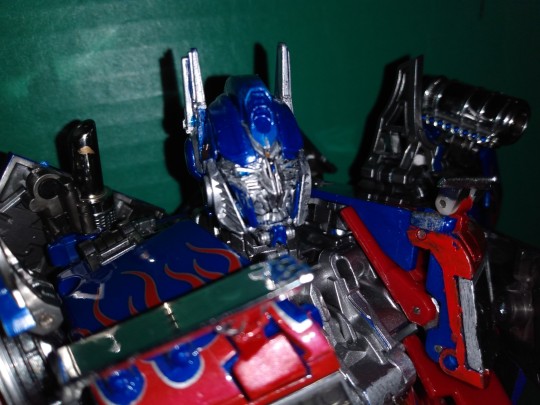
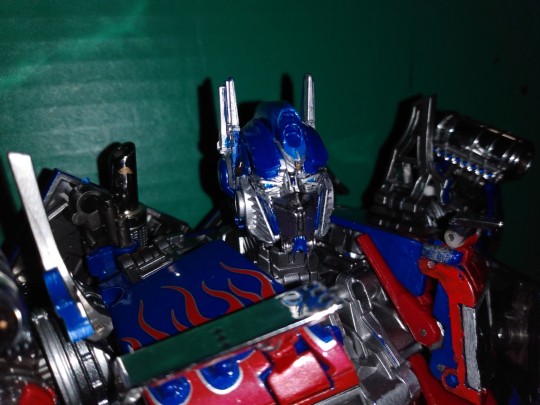
Custom MPM Optimus, really just a touch up of the figure more than a custom but one that I think helps make the figure pop a lot better than it did before, though I wish I color matched the blue better but I don't have a lot of time atm hence a touch up. But yeah, like how he came out, basically a lot of gloss dark blue, metallic flake blue, gloss red, ambur, gold, silver, flat black, and Molotow Chrome pen for the chrome bits (also saw in these pictures that a gold streak of paint somehow ended up on his smokestack so went over that after seeing them but am to lazy to redo the pictures). Also used the Toyhax sticker set for the ROTF Leader Optimus to get the Autobot logos on his grill and chest and they're practically perfect fits, only the chest one is a little to big for it but even then it's perfectly fine for me. All in all a simple touch up that I like, and I'll probably do another MPM next.
#transformers#toy#custom#optimus prime#knockoff#oversize#transformers 2007#movie masterpiece#thunder leader#weijiang#black mamba
2 notes
·
View notes
Text


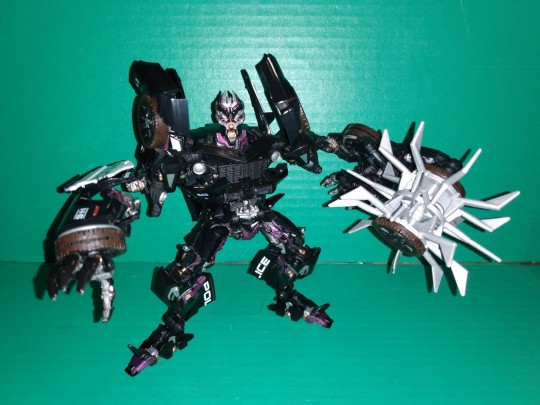
Custom MPM Barricade, a very extensive touch up basically cause Hasbro couldn't tell what purple was from blue and I was salty about >:3 But yeah, a other MPM painted and I don't regret it cause I really like how he came out, particularly with the contrast between his body and the wheels, which I painted in a flat rubber (actual color name lol) and was pleasantly surprised with how it looked and it helps them look like real tires almost. Probably coulda used it as a wash on flat black but next time perhaps. Basically this figure is a lot of flat and gloss black, gloss white, silver, gold, flat rubber, purple metallic flake, some flat red for the eyes, and Molotow chrome pen for the side mirrors. The windows I decided to cover them over in black sharpie for, as much as I woulda loved to keep them clear, it would help fill the arms out just a bit better, and one of his door windows had a pretty nasty scratch that I wasn't able to get rid of sadly and thus this was the next best option, and I do like how it turned out. For the wheel weapon, because it's spikes were made out of rubber, I did the same thing that I did with Ratchet in spray painting them just in silver and putting a clear coat on afterwards which definitely helped keep it on. After that it was just touching up on the plastic bits of it with gloss and flat black, rubber and some silver and it was good to go. Also used some Toyhax stickers (the 643 on his front and next to his doors as I needed them, unfortunately couldn't find a new Decepticon badge to replace the purple ones and I have to figure out why my printer doesn't want to work to print out my own as I did make some so I just lightly painted the blue on them in purple for now and I think they look okay for now. Reference for this was a bit hard to get but in the end I think I was able to get him as accurate as possible minus some liberties but I like how he came out and am glad to be done with him cause he took a bit to long to complete lol. Certainly gonna be doing more of these now as it's rather fun to match all the details up and have been learning new details while revisiting the scenes that these characters appear in so yeah, that's that
3 notes
·
View notes
Text
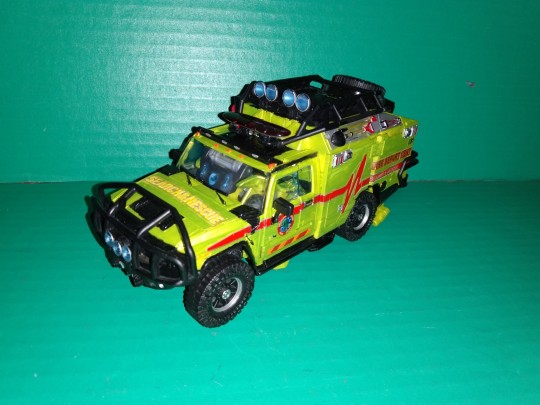

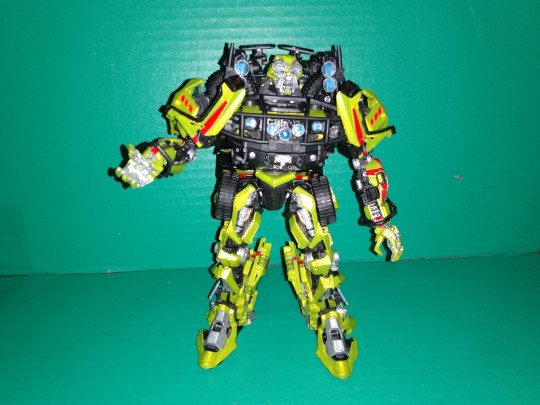


Oh my goodness this took forever cause I had to wait on stickers to come in but I finally got this guy all painted up. MPM Ratchet was perhaps my favorite figure from the Masterpiece line in general just cause of how nicely complex he was with his transformation and how accurate he looked in both modes. Until it came to the paint. Good God was he in sore need of paint, mainly in uh.....well everywhere. And paint him I did, but not before debating with myself for about a week as to paint him or not as I wanted to get one of the knockoffs and just work on that a bit mainly due to A. Not wanting to try and get or make the right yellow-green his primary color is. B. Didn't want to paint the rubber bits as painting rubber usually sucks ass and I didn't want to just sharpie it. C. As a MP figure he is rather expensive and if I wanted to ever sell him I would not be able to get full value for it. But what ultimately made me paint it was the fact that he was missing on of said rubber bits from his legs (that's like a pole sticking out) and that alone would probably keep this from being resold as highest a price as possible so yeh. Now he's worth probably $10 cause I butchered this figure :D
The primary color is a Color Shift Green Flash I found at Walmart whilst on my last leg on sanity after trying to mix a good color for him for a day and I instantly fell in love with it. Might be a bit more green than yellow but it works for me.
The life lines and more extravagant features I was able to pull off thanks to the Toyhax Voyager Ratchet stickers for the 2007 Voyager figure which work VERY well on this one, in that you can probably use all of the stickers on this figure and they'll pretty much match up aside from a few areas. The areas these stickers helped the most were the arms. And my goodness they look so much better with just them on. The legs also look better with black and silver breaking them up instead of just lime all throughout.
The missing pipe I had a difficult time figuring out, as I initially wanted to 3D print replacements for them and the black segments of his arms to get rid of all rubber pieces but was having some issues with my printer and I was able to find another method by taking an old wire coat hanger and cutting it down to size and shaving away at it to create two mostly similar pipes and glued them into place. For the arm grilles, I took a new approach and spray painted them black, and gave them a clear coat, which does seem to have worked for the most part but I will need to keep an eye on them as even though those have been done for about a month now, I'm still worried about them getting sticky or whatnot in the future. But they seem to be good for now so only time will tell.
The red lightbar, the simplest of things that should've been done with the mold originally was just create a little cut in the plastic between the bar and the light so that they rotate separately from each other and makes his physique look more slim. Also sanded and shaved parts of the hinges on the vehicle sides so that the paint and stickers don't rub off.
The accessories, where pretty easy lol. The gun was difficult in trying to get colors to line up correctly (though I might have the silver and black swapped but oh well), the missiles which I found out through looking at stills of him in the films he actually does have on his left arm, though he doesn't seem to use them interestingly enough, was just silver and black. And the saw was just black with rubbing a lot of it off and around so it's not as flat looking. Guess I should also mention with the ports in his arms that the gun and saw can tab into I spray painted as well and coated so they can last longer.
The "Search & Rescue" on his hood and back, along with the "Fire Department" on his back I took from pictures of the vehicle prop online and edited to be straight and sized as best I could and they work pretty well I think, with the hood one having to be painted over its letters with Color Shift Yellow Flash to give them a better pop. Will probably work on it a bit more than post a thing for it so anyone can use it themselves if they want to.
Overall, this is probably my favorite custom to date just cause of the shineyness of it, and that it makes a fantastic mold look so much better cause this is what we should've gotten from Hasbro (tooting my own horn here cause I'm proud of it) and Hasbro do better.
4 notes
·
View notes
Text


Been a while since I last posted anything, and I apologize for that as I was so busy with trying to balance work and social life that I kind of neglected all of my tf projects but I got some stuff in the works that'll hopefully come to fruition this year along with some stuff that I'm already working on. No promises on a Top 10 list of last years tf figures as I don't think I really bought enough to fill it out so we'll just jump straight into this year with the first tf that I've bought and it's one that I've been wanting since it was first announced, and that is the Weijiang Thunder Leader aka MPM Optimus Prime. And my gosh is this the best Optimus figure ever made. Looking as if he popped right off the screen and with every possible detail that exists from the cgi render this guy sports, which is more than what the original MPM Prime can say of which this is an oversize and knockoff of that figure but with so much changed that honestly I don't even count it as such, as it is a huge improvement to that figure that this is basically a third party entry. The biggest changes are as followed
Vehicle mode:
The orange gradient has been added to the front nose of the truck which was only present on the front wheels on the Hasbro release.
The antenna (I think) have been added to the front bumper which is a first for any Optimus figure that can transform and it is awesome.
The overall color is a lot more metallic and darker to match that of the film, and the flames look nicer too.
All four weapons store in the truck mode, with his blasters forming the insides of the gas tanks and a bit of the smokestacks and the swords just peg in underneath, something the original couldn't do.
He has 8 rear tires instead of 4 thanks to a very neat engineering trick that as far as origins go seem to go back as far as the ROTF Leader Class Optimus but was cut due to budget constraints, so it's awesome to see if come to life.
The CHROME, it looks soooooo goooooooood.
Transformation:
The legs, arms and chest are probably the only things that are similar if not the same from the original, after that, a lot is new. The rear wheel covers completely fold in on themselves to creat a more accurate appearance, the rear taillights also flip around to form his butt flaps, the lower parts of his smokestacks get removed due to being parts of his guns so a bit of partsforming but an acceptable amount and excuse for it. And the way the back compresses now is I think different but certainly better, especially with how the gas tanks fold on themselves. The biggest changes by far are the forearms and lower chest, where they are now hella more accurate and better proportioned in that instead of being lazy like the original they actually put effort into making the parts of the nose and front go to where they're supposed to be, namely the nose becomes the arms with the rear of the nose forming the chest along with the headlights, which is a bit hard to get positioned good but creates a very good look at the end of it all. But my favorite parts is with those rear wheels, where they compress into each other. It's just so good.
Robot mode:
As mentioned above, the arms are different and much better now, and even have a new tabbing method for the swords so the hands don't angle forward. They also go the shoulder pads to have their front panels so that's also an added goodness and bit of accuracy.
The legs are pretty much the same, with the addition of maybe the posts on the undersides of his knees thay can be folded out for more accuracy.
The chest is much better looking as previously mentioned, and still retains the Matrix of Leadership gimmick so that's nice. Same with the back as well.
The head is similar to the original in that you can flip the forehead upward to spin the mouth around to a faceplated look, but he does come with a swappable face that instead of spinning around for the other look can simply have the plate fold out from behind it to cover up the mouth, and that is the one I have installed in the pictures.
Articulation: Everything can move pretty much, and nothing feels like it's gonna break, nor feels loose.
Accessories: Coming with his two swords and guns, you can pretty much recreate any scene from the first two films pretty flawlessly, with the swords tabbing into the panels that form the outside of his forearms and the guns just tab into his hands. The way the guns transform into the inside of the gas tanks and parts of the smokestacks are also just brilliant and really emphasize just how screwed people were on that original release.
Scaling: Would've shown Bee with him but decided to use Jazz instead cause why not, but he's pretty much double the height of Bee and Jazz as they stand and much more in scale than the original was. Will try to post an image with the MPM's I have to show it off as I've already hit the image limit with this post sadly.
The paint: It's all there, the gradient, the flames, the silver, it's all perfect. Only the wheels on mine are a little faded but I can fix that easily with some flat black, but this thing is beautiful and can be considered a piece of art.
The verdict: 100/100, one of the most perfect figures out there. If you ever get the chance to pick this guy up, do it. He is a great figure and an even greater centerpiece for any collection, even if you don't collect the movie figures as he can stand in as just a piece of art. If you have that original MPM Optimus and are able to get this than throw that one away (by that I mean sell or donate, don't actually throw away try to get your money for that back somehow) and never look back on it. It really is a shame that after the gorgeous figure that was MPM Bumblebee, they failed to give Optimus the proper treatment or care they gave Bee or the latter figures for that matter, as the engineering is possible as clearly shown by this figure, and Hasbro is more than willing to shell out for great figures such as G1 MP-44 Optimus who is a whooping $400 compared to the $120 MPM 4 was, whereas this retails for around $200 at the lowest. This isn't the last time they've flaked on an MPM figure either sadly, as their MPM Ratchet is in a sore need of a painting to where knockoffs look more official than it. Basically do better Hasbro, stop being bad, give us better please. You do it with G1 and Beast Wars. Why not Movie?
#transformers#transformers 2007#optimus prime#Weijiang#thunder leader#knockoff#oversize#inspired by a bad figure#and absolutely better in every way possible#masterpiece#toy
4 notes
·
View notes
Text
I know I haven't posted much of anything recently but can I say how annoying this new "check this previous thing of yours" feature is cause it makes me think if I posted something that wasn't ready to be posted or I didn't want posted yet and I hate it. Also hate how it's showing me stuff from people I don't follow. Like if I wanted to see that I'd probably go look for it or follow that person but nope, here it is randomly without rhyme or reason. Am annoyed :/
4 notes
·
View notes
Text


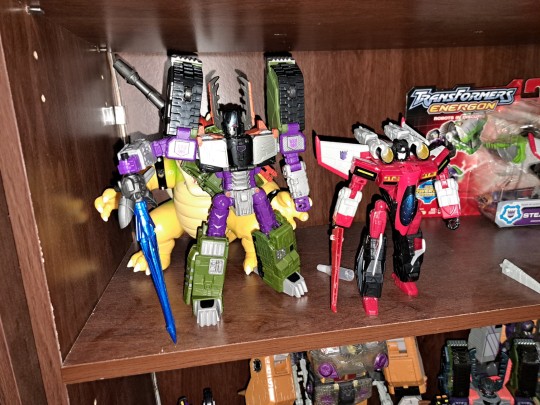
The last of the Insecticons, Planet X Phantasus aka Kickback was uh, well laid-back with bug accuracy lol. Honestly don't have much to say on this one as opposed to the others as due to the way they did him he's only really accurate in robot mode with bug mode being sacrificed. Surprisingly the Hasbro figure takes the cake for that with mainly how the legs convert and become longer which is how they look in-game so ye, definitely the weakest of the 3 figures overall but still came out decent I say. Currently got some projects in the world that'll hopefully be ready soon but work is starting to build up again so might not have as much time as I would like to work on them as frequently as this whole batch was but I am excited to show off what I'm doing.
18 notes
·
View notes
Text


Planet X Morpheus, aka Sharpshoot, aka bug. Not much to say on this other than finding good reference for him was harder than Hardshell :D unintentional pun is good. But yeah, this is what I was able to do and I like it. For the wings those things were purple I stead of mainly silver so that was fun to do as I had to coat it twice due to the purple being rather light and see through almost. But ye, chrome silver, gloss grape, gold, flat black and stop light red, and that pretty purple for the glowy bits. And that's it :P
1 note
·
View note
Text
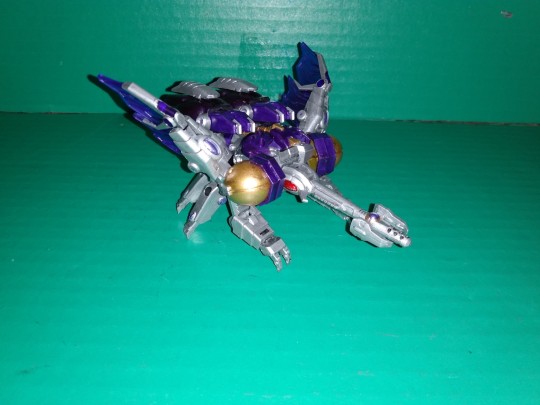


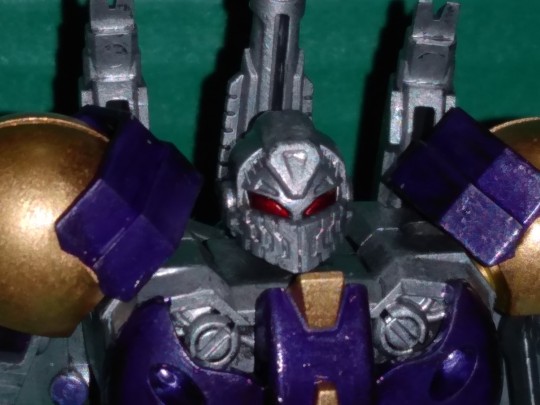
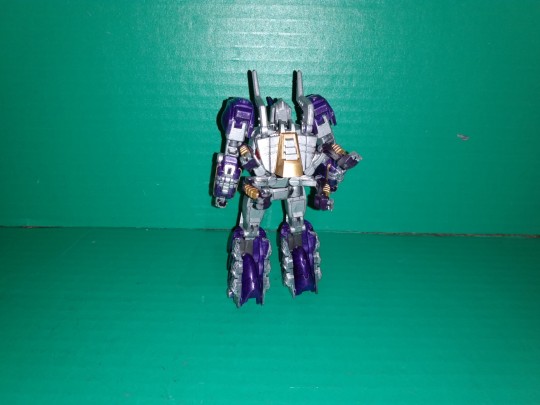
Planet X Phobetor, aka FoC Hardshell is a bug and I don't like bugs but he and the others were roboticy enough for me to not feel the creeps painting them. Also finding good reference was not easy, so I ended up playing through Fall to get some good shots which thanks to the Insecticon Lab in Starscream's Betrayal has some actually really good reference for both bot and bug mode for all three of them, so did my best to match that and it turned out pretty well. Used gloss grape, chrome silver, stop light red and gold. For the wings they don't exist in-game so I winged it with painting silver on the outside. :D I'll stop now.
2 notes
·
View notes
Text


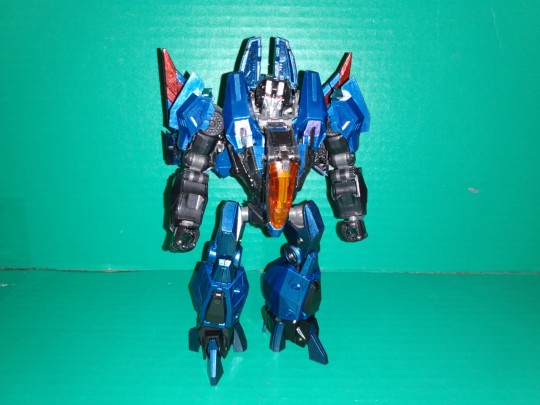
Here's another one, following the person who looks like him is Planet X Querella aka Skywarp from the Cybertron games, all painted up and ready to be stupid. And by painted I mean it's mainly just gloss black and some of the grape purple on him cause there wasn't that much to do thankfully. Until I accidentally dropped him and broke his wing off, that was not fun to figure out but I got it fixed and apart from that not to much with this figure. Happy with how he turned out and now onto another figure.
#transformers#toy#custom#decepticon#fall of cybertron#war for cybertron#planet x#planet x querella#skywarp
10 notes
·
View notes
Text


Woah another custom, I must be on a roll (cause I am >:3) Anyways here's Planet X Fatum aka Blue Skywarp in all of his shiney glory! This is by far my most favorite cause I got to use this really nice metallic blue that I got and I love it and was kind of a freestyle with how I did it cause I can't find to great of reference for him but I think for the most part he turned out really well. Was originally going to base him off his scheme in Rise of the Dark Spark but my god is that game hella inconsistent with his colors from jet to bot mode, so based it off what he looked like in War For Cybertron and did what I could. Overall very happy with how he turned out, love that for once the metallic red wasn't a pain in the butt, and now on to more figures >:3
#planet x fatum#toy#custom#transformers#decepticon#fall of cybertron#war for cybertron#planet x#thundercracker#blue skywarp
5 notes
·
View notes