leahsalmonunit27
Unit 27
Graphics Student - Photoshop and Photograhpy focused blog
16 posts
Don't wanna be here? Send us removal request.
Last Seen Blogs

ldxyoogeun
ℒittle ℬoy ℬlue

mariostars115-blog
Mario star

scottsfl69
South Florida
ravidhg
Untitled

menina-mulher123
Menina Mulher ♛
Text
Researching Stop Motion Animation
Stop motion animation, which can also be known as stop frame animation, is an animation that is captured one frame at a time with something moving in each frame. When you play back the animation, it gives the illusion that the object in it is actually moving. It is a similar process to 2d drawn animation except it is made with real objects.
To make a stop motion animation is simple but can prove time consuming. For one frame you move your object a little, snap a photo before moving it again just a little for the next frame, snapping a photo of that and so on. We see stop motion animation nearly all the time but because we are used to it, we don’t realise or notice it. Often people just associate stop motion animation with clay animation but that isn’t the case at all, it can be used in a wide range of film styles.
From the early stages of stop motion animation, cameras have been used in order to capture movement. Clay was used from the early days too since it is easy to mould and change into whatever you want. Animators couldn’t see the process of their animation however until film was processed. Only later were special video machines allowed the animator to view the last one or two frames. This allowed them to get a sense of how their animation was progressing.
Research ten different films that use stop motion animation, make sure you have the following information to support your findings:
Coraline
Coraline was released on 8th May 2009 and was directed by Henry Selick. More than 28 animators worked at a time shooting scenes, producing 90–100 seconds of finished animation each week. It took Henry 20 months to shoot this film.
youtube
The Nightmare Before Christmas
TNBC is a stop motion animated film released in 1993 on October 29th. This is another movie directed by Henry Selick. The production team started creating this movie in July 1991 so it took over 2 years to create with crew of 120 workers. In total, there were 109,440 frames in the entire film.
youtube
Chicken Run
Chicken Run is one of my favourites. Released in 2002 and directed by Peter Lord and Nick Park, Chicken Run is a family classic. 180 people worked together to create this movie, taking a week to complete just 1 minute of the movie calculating to roughly 84 weeks to finish the film.
youtube
Corpse Bride
Another movie I like is the Corpse Bride. Corpse Bride is a 2005 british-american movie directed by Mike Johnson and Tim Burton - who is also the author of the novel released on October 13th. The film began its production in 2003, taking two years to complete.
youtube
Kubo and the Two Strings
Kubo and the Two Strings is a movie I haven’t had the chance to watch myself, though I’d like to. It is a 2016 3D stop motion animation directed by Travis Knight released on August 13. This movie took roughly 5 years to make.
youtube
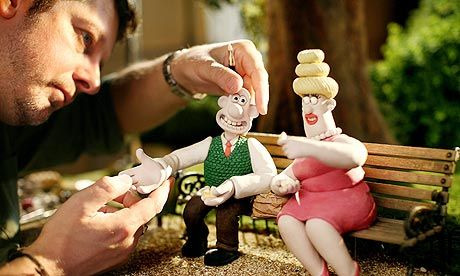
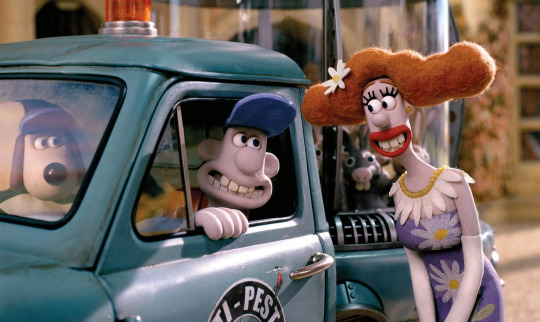
Wallace & Gromit: The Curse of the Were-Rabbit
Wallace & Gromit: The Curse of the Were-Rabbit was released on 7 October 2005 and was directed by Nick Park and Steve Box. The film was announced in 2000 and it took a few years to complete. Though it was announced earlier, production didn’t officially start until 2003.
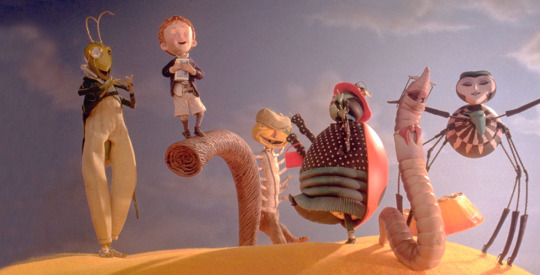
James and the Giant Peach
James and the Giant Peach is an (August 2nd) 1996 British-American musical fantasy film, again, directed by Henry Selick. This movie is a bit different to the others. The film begins with normal live-action for the first 20 minutes but becomes stop-motion animation after James enters the peach and then live-action again when James enters New York City.
Fantastic Mr Fox
Fantastic Mr. Fox is a 2009 American stop-motion animated comedy film
Paranorman
The Pirates! In An Adventure With Scientists
2 notes
·
View notes
Text
Peer Feedback
Today we left post-it notes at each other’s desks with feedback about their work on it. The feedback I received was:
‘Try to have less moving elements’
‘Good water motion. To improve try and get footage of birds swimming.’
‘The rain in the scene looks good. A nice little effect. Have the traffic/some people more in shot is still. A lot of movement.’
‘Subtle but effective. Try to make the loop smoother.’
‘The water effect is really nice and the little bit of snow. The loop is a little short and obvious when it repeats.’
I somewhat agree with half my feedback. I could add a little extra movement such as birds swimming in the water and I could possibly have waited until more traffic and people were in the still shot. I also agree that my loop could have been made smoother but I wasn’t entirely sure on how to achieve that. Next time I will work harder to try and create a smoother loop. The only one I don’t agree with is the one to have less moving elements. For me, I like a cinemagraph with an obvious moving element and in my cinemagraph you can straight away see its the water that is moving. I looked at my peers work and in some of them, it took me a while to figure out what was moving either because it was so small or so little of it was moving. I would not change my moving elements if I did this again.
0 notes
Text
My Cinemagraph + Evaluation

Above is the cinemagraph I created in photoshop. I later edited it a little on a website but I was unable to save it for some reason, I assume from the gif size. So I have left a link to my cinemagraph instead:
https://imgur.com/PCRQmRx
Here is a link to the video I took and used for my cinemagraph.
Evaluation
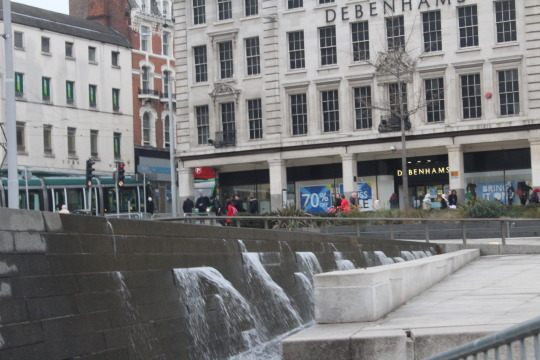
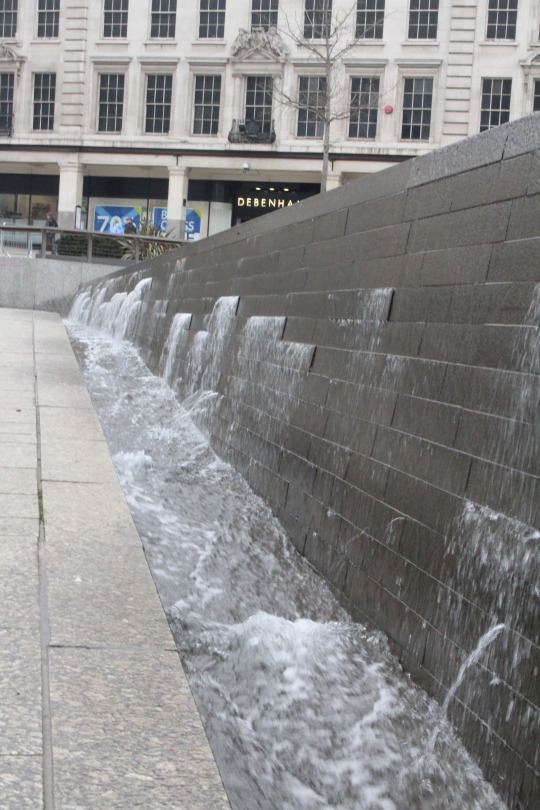
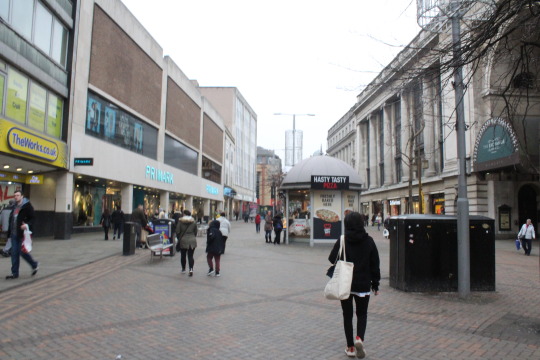
My final idea was to create a cinemagraph of the river trent which contained trent bridge with only the water moving.
I got to this idea simply and quickly. I considered the word ‘Nottingham’ and I decided to create a cinemagraph based around the first thing that comes to mind. Trent bridge was the first landmark that came to my mind.
I like to think personal experience inspired me. I have lived beside the river for a few years now so I am accustomed to seeing it nearly everyday. When people say Nottingham, I think of the river and the bridge.
The final production stage went ‘swimmingly’. Making my footage into a cinemagraph was easy and I finished it within one lesson. The difficulty I had was saving my footage as the file size was just so big. It took me nearly an hour to save the file and start editing it, I was worried I wouldn’t be able to finish it before the deadline that same day.
I used a website and for some reason, I was able to save that same file using that website when I couldn’t save it by simply right clicking and selecting save. It was odd but I was relieved I managed to save and obtain my file.
The obvious skill I have learnt is how to create a cinemagraph. I had always wondered how artists did it before and now I have that same knowledge. I have also learnt the valuable lesson of saving footage directly to your usb rather than/as well as saving it to online storage to edit on a different computer as this created a big problem for me.
If I could do this again, I would change the position of my camera. I dislike having the buildings at the left in the shot when I could have had more of the bridge and water.
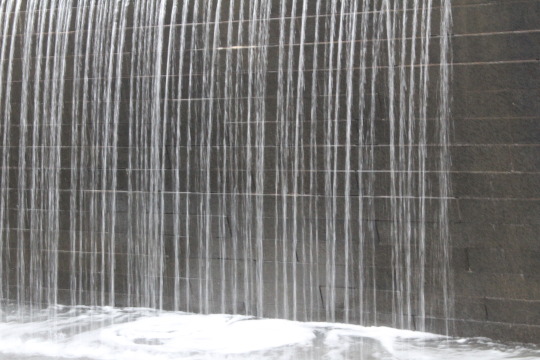
I was really happy when I woke up on my shooting day and saw the weather was minimal. I was counting on ‘bad�� weather as it would make the water currents more vigorous which works out better for my cinemagraph since you can see it move a bit better.
I dislike how my cinemagraph doesn’t ‘loop’ perfectly. There’s a jump between the end and start but I wasn’t sure if I could fix that or how to.
0 notes
Text
Researching Cinemagraphs
Over the recent weeks, we were introduced to cinemagraphs.
Cinemagraphs are still images which have a specific element/area of it which moves. It is usually shot as a video then stilled, however one area remains moving.
Usually you only need a camera that records footage, a tripod to keep the camera still and adobe photoshop to obviously do the editing part.

- What techniques are commonly practiced when making cinemagraphs?
One of the main problems in trying to create a cinemagraph is trying to make it loop perfectly. Some substances like water might be easier to loop as its fluid and takes shape easily. Other things such as people will be harder because people don’t look the same and don’t make the exact same movement twice. If you want to make a looping cinemagraph, choosing to shoot something that is fluid and, effectively, the same shape may work better. Making a cinemagraph may prove difficult if you don’t have knowledge and comfort using Photoshop. Shooting a video is one thing, editing it into a cinemagraph is another and both require skill and patience.

Evaluating some cinemagraphs
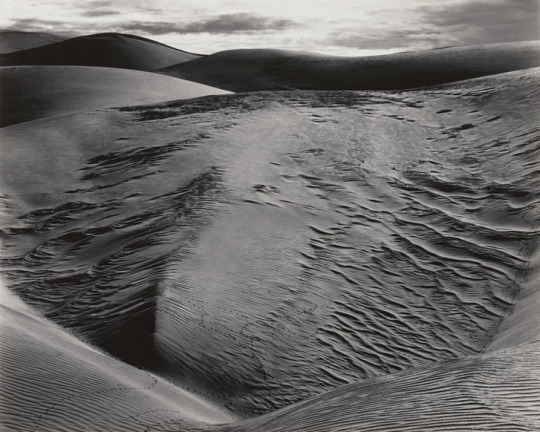
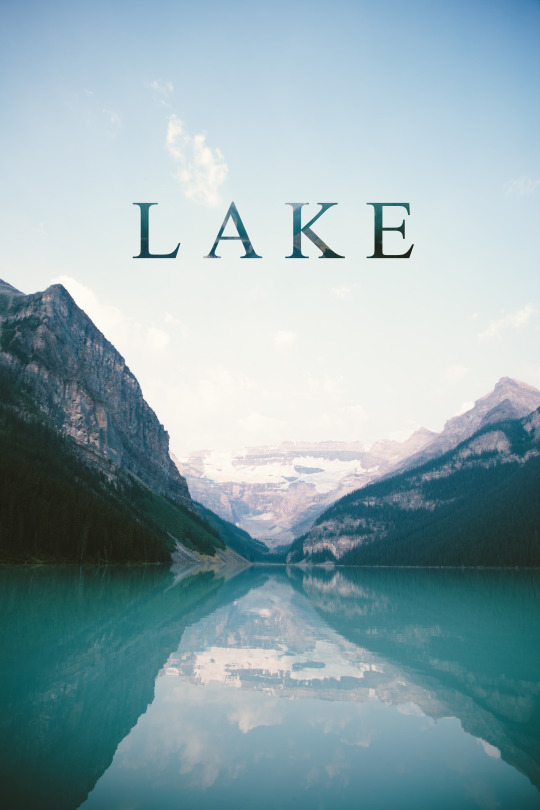
This cinemagraph was shot in a field, I believe probably at dusk. It looks as if it could be somewhere in america. For this particular shot, a tripod was most definitely used in order to keep the camera so still.
I don’t think this cinemagraph was created for a specific intent other to be aesthetically pleasing and maybe motivate people to travel the world. That’s how it feels to me.
I really like this cinemagraph. It’s really aesthetic and even soothing in a sense. It makes me wish I were there.
I am a fan of sunsets and dusk so that is the main reason why I liked this cinemagraph. I think the time of day really affects whether a cinemagraph is aesthetic or not. It affects the overall mood and atmosphere.
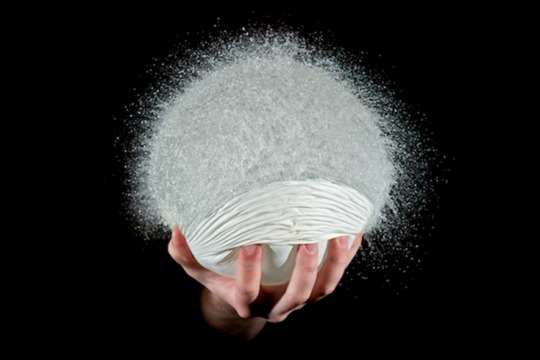
It would have been nice to have more of the cinemagraph moving such as the sweater or something. Just having the hair moving is a bit plain, the photographer could have asked her to untie her hair to give it more movement but maybe this was shot on the whim and not planned.

This cinemagraph is quite dark so I am struggling to figure out where it was shot but I think somewhere rural as I can’t see any streetlights or buildings. For this again, I think a tripod and camera was used. I also think the falling stuff (rain or snow?) was shot on another location and day or even computer generated. It is definitely not from the same scene.
I think this cinemagraph was made to be moody. I don’t think it is an advertisement of any sorts. It is probably from a movie scene.
It looks as though it was a cinemagraph created for some sort of assignment. I can’t figure out what anybody would make this for but I like it. It is aesthetic but makes me feel quite gloomy but spiritual.
One thing I dislike in this cinemagraph is the falling snow or rain. It is too bright and I think it should have been darkened to make a moodier effect.


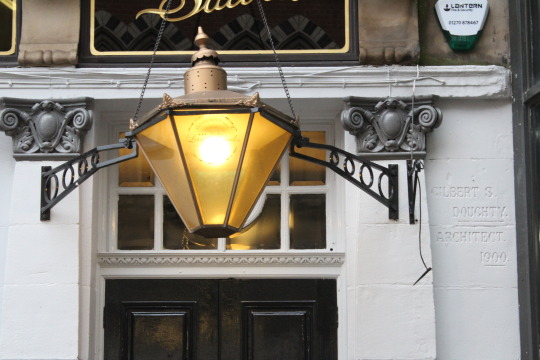
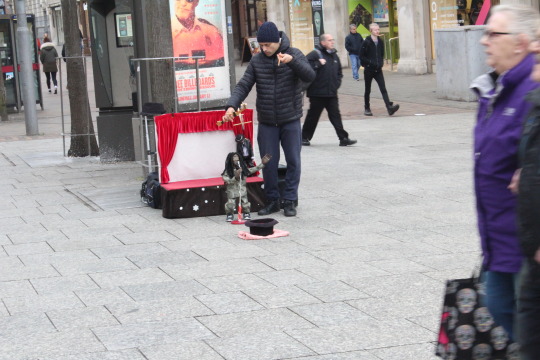
This cinemagraph is different to the others I have selected to analyse. For starters it was shot indoors, probably in an older home, somewhere cosy and warm. I’m not 100% certain but I think again this was shot using just a camera and tripod. But I am not sure how they shot the candle-
The cinemagraph appears spooky and mysterious so possibly it was created and used around October ready for Halloween. It reminds me of Harry Potter in a way due to the colours and objects used. They appear quite old, not modern, almost magical - especially with the candle moving on its own.
I like how mysterious the cinemagraph appears. It strangely soothes me and makes me almost believe that some form of magic is achievable.
I think the book is a little dated. It reminds me of hundreds of years ago. If I were remaking this cinemagraph, I’d like to use a book that is possibly more recent and of better quality.
0 notes
Text
Wk 2: DSLRs and video recording
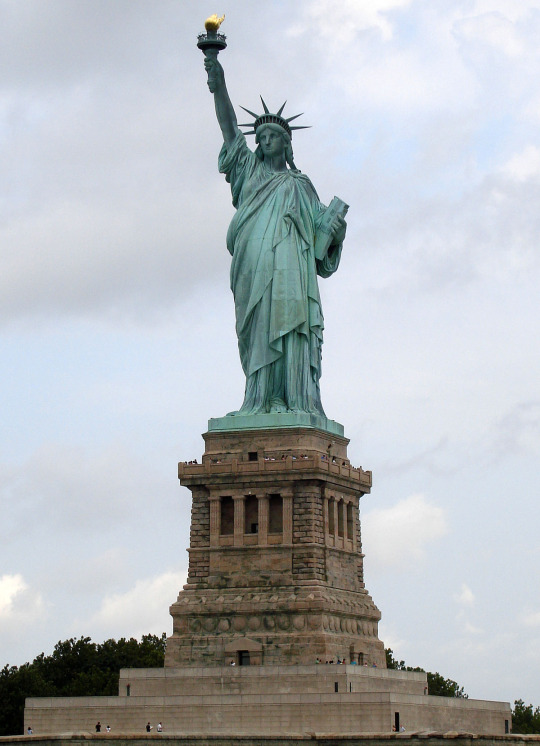
At the start of the lesson, we gathered around the whiteboard and watched two video footages showing the statue of liberty. We discussed both videos before heading back to our seats to answer a set of questions from interact.
What are the main differences between video footage captured on a smartphones compared to a digital SLR?
A visible big difference between recording footage on a phone and a dslr camera is the quality. A professional camera produces a higher image quality than a smartphone. The sound quality will also be clearer and of higher quality too.
Why is it important to use a tripod?
Using a tripod makes it not only easier for someone to record footage, it ensures the camera is still if on a moving vehicle like a boat for example. If someone was to hold the camera whilst on a moving boat, the picture quality would still be high but a video footage might be shaky depending on how sturdy their hand is.
How does a tripod allow you to be creative?
A tripod is not only used to keep a camera still. You can use it on natural ground too. A tripod has the tools to move the camera whilst sitting still, an example is panning. You can create neat shots using a tripod that probably wouldn’t be as neat and still if you did them handheld.
What other pieces of equipment are commonly used when filming with a digital SLR? Website Source
Zoom lens
Screen Loupe
Density Filter
Microphone
Memory cards with larger file space
0 notes
Text
Wk 1: DSLRs
The lesson begun at 9:30am. We looked at the cameras and discussed what DSLR stands for - digital single-lens reflex.
Aperture
This is the opening inside the lens that allows light through. The bigger the aperture, the smaller the aperture value. ‘f-stop’ is aperture number. Aperture allows you to change the depth of field, allows you to change the amount of focus you want in an image. The smaller values (f-stops) have a shallow depth of field whereas the larger values have a deep depth of field.
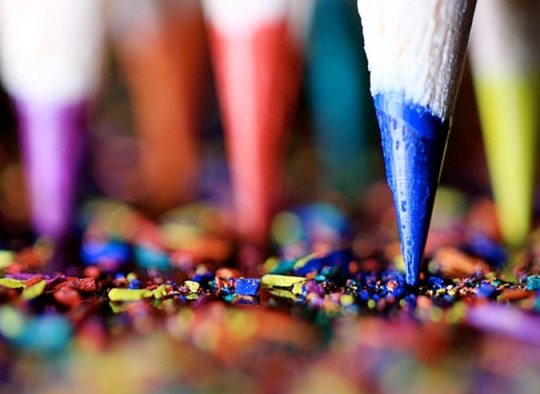
People will use a shallow depth of field when they want something to stand out within an image. There will be more blur in a shallow depth of field (bokeh).
A large depth of field will have less focus in the image. It is more ideal when taking a landscape photo.
Shutter Speed
This controls the amount of time the shutter is open for to allow light into it. You can choose very fast shutter speeds or slow shutter speeds.
A fast shutter speed is better when photographing something that is moving at a fast speed. It allows the photographer to capture the moment without a movement blur.
A slow shutter speed is used when photographing something that is moving slowly, something like the night sky.

ISO
This stands for international standards organisation and refers to the sensitivity of light in the camera’s sensor. ISO has an impact on the quality of your image. It allows you to take photographs in low light conditions. The higher this ISO, the more digital noise appears in your image. ISO 100 is the lowest ISO value you can get on a DSLR camera. ISO doubles each time you increase it. EG; 100 > 200 > 400 > 800 etc.
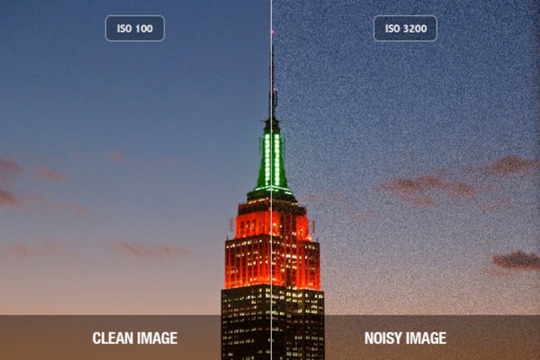
Exposure
ISO impacts the exposure most. A lower ISO means a lower exposure but good quality, a higher ISO means more exposure but also more noise and grain.
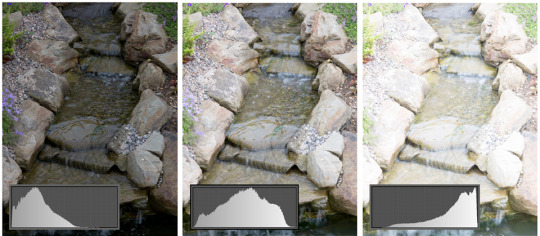
The best exposure is usually a subjective view.
The camera controls
Looking at the camera dial, we can understand that:
M = Manual. This allows you to take full control of all the camera settings.
Tv = shutter priority. This allows you to take control over the shutter speed and let the camera calculate the exposure.
Av = aperture priority. This allows you to take full control over the aperture and let the camera calculate the exposure.
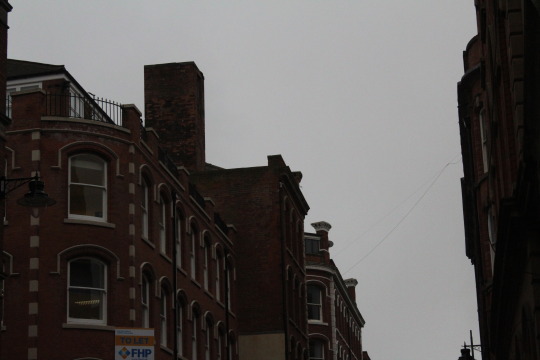
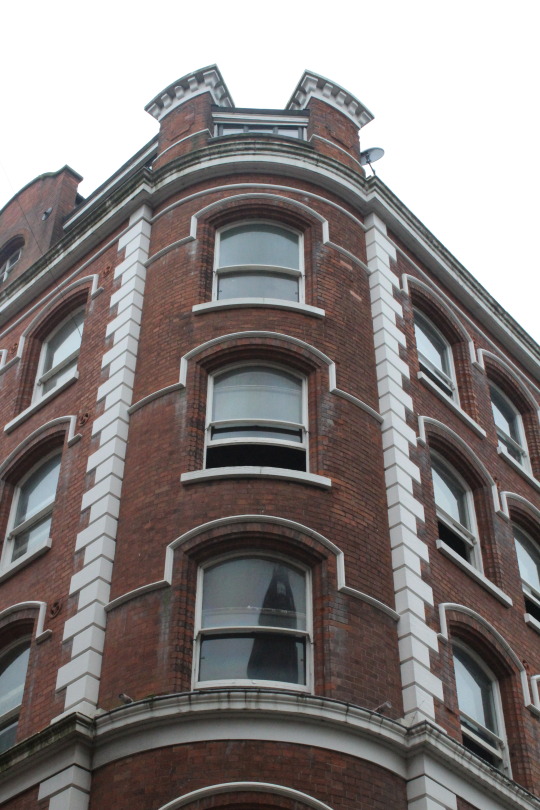
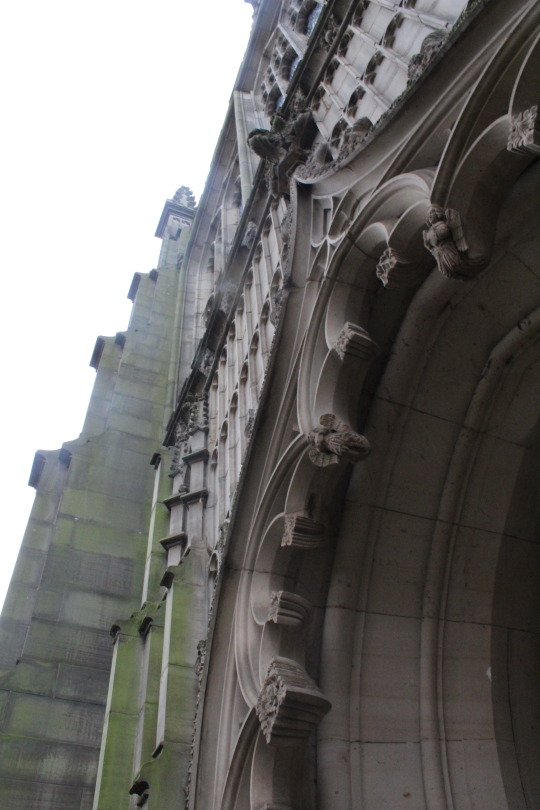
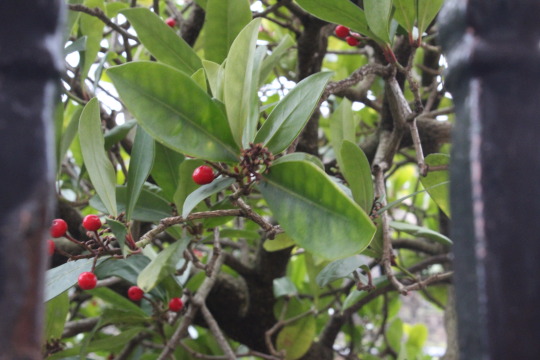
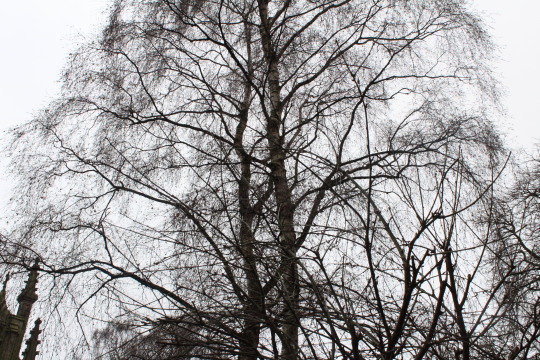
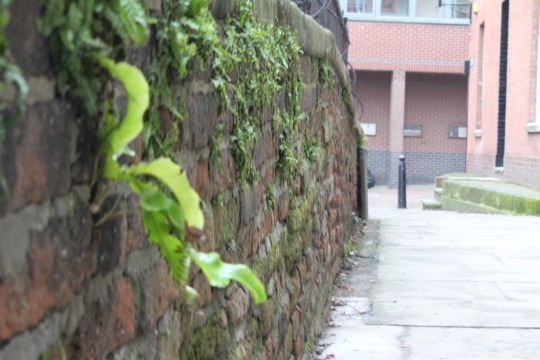
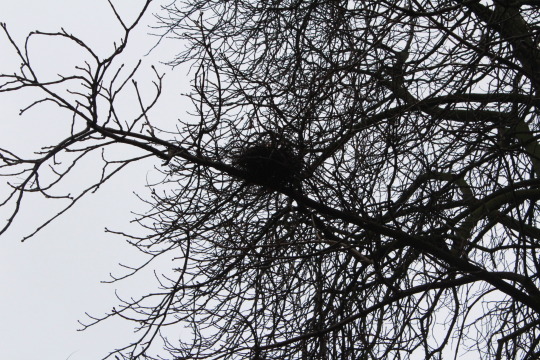
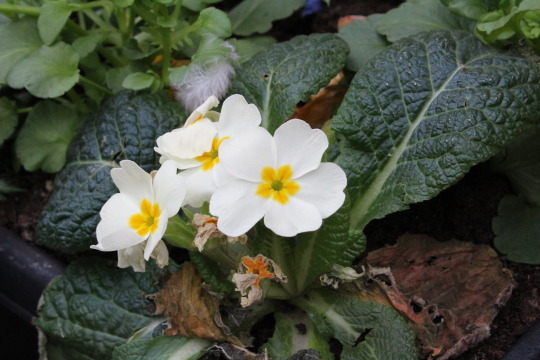
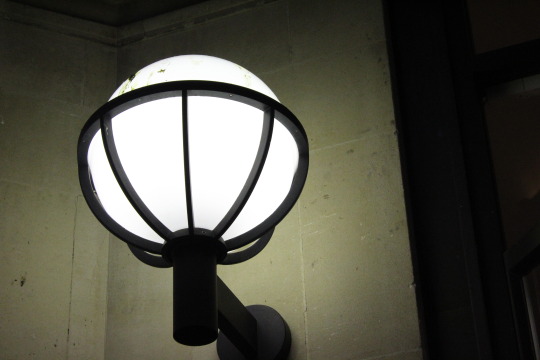
For the next part of the lesson, we went out and photographed the following: light, people, nature, buildings and liquid. These are the photographs I took in my group of 3.
Buildings:


Nature:
Lights:
Liquid:
People:
0 notes
Text
Wk 11: Putting my skills into practice
Step 1, 2 & 3
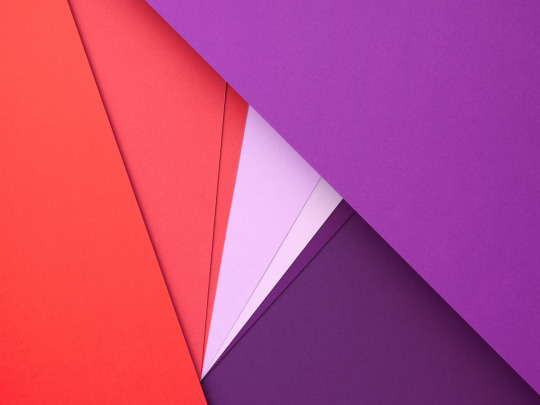
Like last term, we used all the skills we have gained so far to showcase them in a poster, book cover, advertisement or comic strip. We chose two themes from a handful of around 80 and I decided on the themes ‘Ethereal’ and ‘Astrology’. I also decided to create somewhat of a book cover using these two themes.
After deciding on my themes, I researched a colour scheme to use within my work. Typically, rich purples and navys are usually used in Astrology as it’s to do with celestial objects so I anticipate to use many purple shades.
Step 4
The most important part of our work is the research. We have to understand the themes we are using before we can use them otherwise we may create a piece of work that is irrelevant to our themes. I looked up the definitions of my chosen themes:
Ethereal
extremely delicate and light in a way that seems not to be of this world.
"her ethereal beauty"
synonyms: delicate, exquisite, dainty, elegant, graceful, beautiful, lovely; fragile, airy, gossamer, gossamery, light, fine, diaphanous, thin, tenuous, subtle, insubstantial, shadowy
Astrology
the study of the movements and relative positions of celestial bodies interpreted as having an influence on human affairs and the natural world.
synonyms: horoscopy, stargazing; horoscopes;
I know a bit about astrology already as its something I believe in and are passionate about. Its more or less study of the stars/constellations and how the position of them at our time, date and year of birth affects our personality and nature. Some people go much deeper into astrology and use it to predict how they behave in certain situations and environment. Its as controversial as science is to religion and religion to science - some people believe in astrology, and others do not. Its a personal preference. I chose the world ‘ethereal’ as my counter theme. I think it links really well with astrology as its almost celestial in itself. People use the word ethereal to describe something that is almost too precious and too fragile to be of this world - heavenly almost.
When I think of the word ethereal, I think of colours surrounding white; pastels, pales, golds and silvers. Astrology uses mostly rich colours like purples and navy. I think however as I will be using star like objects, they should blend in nicely with my ethereal theme as they’ll typically be in lighter shades.
Step 5
I sketched out my initial ideas. Instead of one whole sketch, I created 3 small ones. One was the background, the other the border and the last the figure of a model I hope to use. I wanted to have separate sketches so I can visualise the buildup of my piece.
[insert photo of work]
Creating my final piece in Photoshop
I decided to use photoshop to create my work in because I am more familiar and confident with photoshop and I will be doing more photo manipulation than drawing.
I chose a size of A4 with the orientation portrait in black - like a book cover.
I then followed this Youtube tutorial in order to create my celestial background.
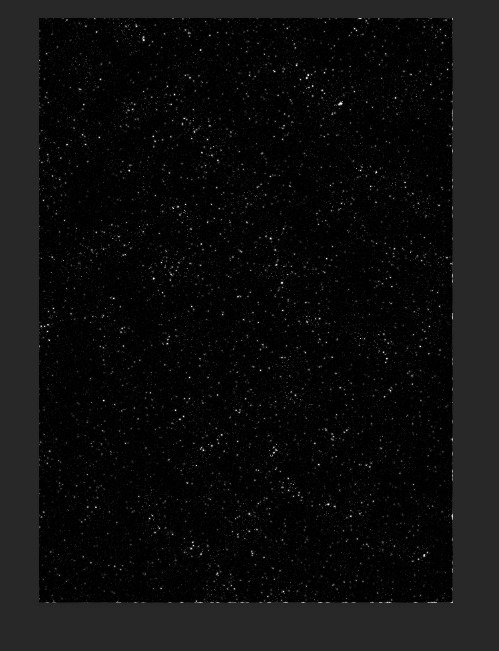
We first had to make stars. I made these using a lot of blur, editing the levels and adding ‘clouds’ from the filter menu. I also used the channels panel to create them too.
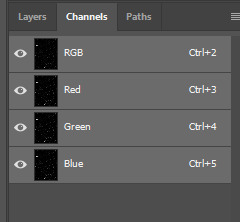
I had to duplicate the star layers to build them up, each with different sizes etc. I then filled one of the star layers with white. I moved onto my colour next.
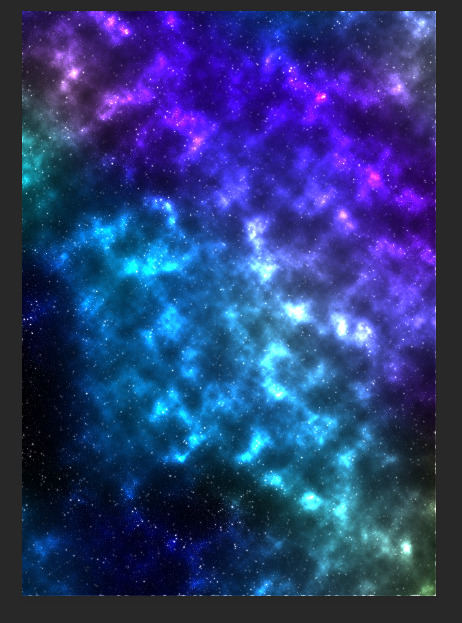
I used a rich blue, aqua, purple and a mustard yellow colour to create a space atmosphere as you can see above. It gives the cover an ethereal ‘out of this world’ feel to it.
I changed the colours though from those used in the youtube tutorial.
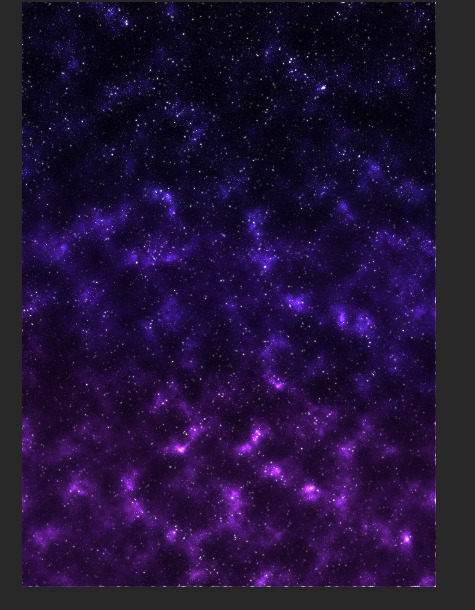
I then started work on my meteorite as I want there to be a meteor shower in the background of my work. I again used a Youtube tutorial by the same user as before.
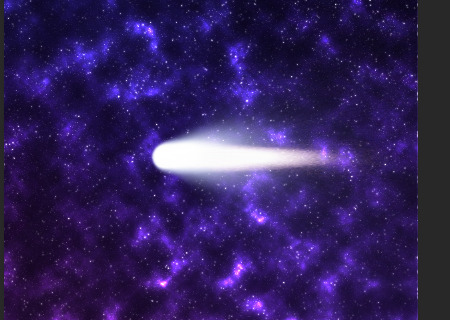
Above is the result of following the Youtube tutorial. It was much harder and complicated to make this meteor. I used many layers and effects to build it.:
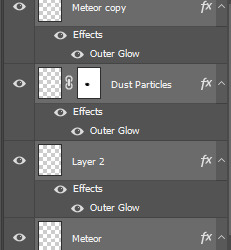
Next, I found a model for my book cover. I wanted to use an idol of mine from a popular boy group. I chose this image:
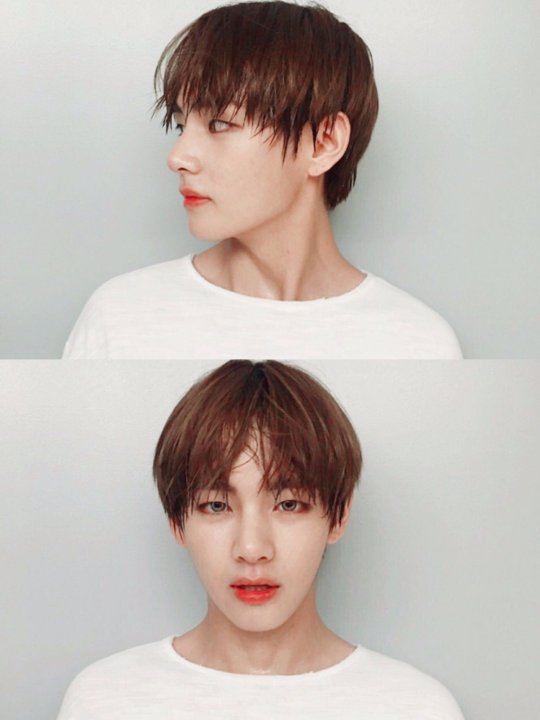
Unfinished
0 notes
Text
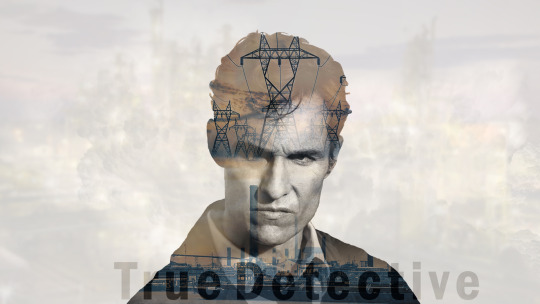
Wk 10: True Detective
In today’s lesson, we started off by watching the opening credits to HBO’s True Detective.

About the series:
It is a crime series, written by Nic Pizzolatto, which follows two homicide detectives called Martin Hart and Rustin Cohle in Louisiana who try to solve crimes over the span of 17 years. The first seasons depicts the pair investigating the murder of Dora Lange in 1995. Some scenes are set in the present and others in the past. 17 years later, they revisit the same case along with recent others. During this time, Martin Hart’s marriage is threatened by the infidelity he committed in the past years whilst Rustin struggles with his troubled past.
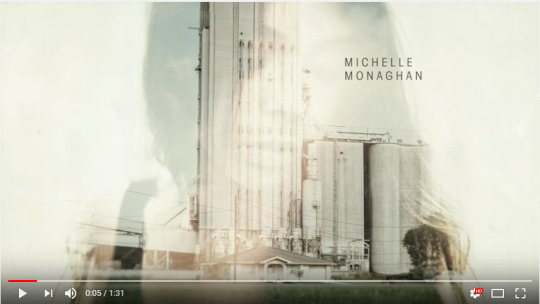
The opening scene & trailer:
The opening scene contains a lot of manipulation (multi-exposure). It contains some of the characters in the series with manipulated scenes inside their silhouettes. There was a little bit of satanic and church like imagery in the opening scene which could imply that the setting is based in a religious town. It looks as if its set somewhere in the countryside because there was also a lot of industrial buildings.
There was some sexual scenes in the opening too which could imply that lust is entwined into the series, whether this be a chaste romance or prostitution. With the images of maps and vehicles, there is a sense of journey and travel. Fire and smoke was also involved in the opening. It could represent actual fire and explosions or anger and frustration. The trailer contains even more than the opening scene. It contains violence, more sex and drugs. A typical crime series. It is raw.
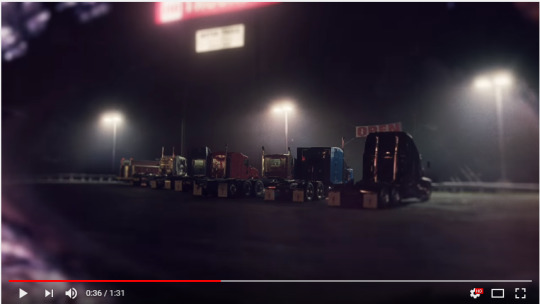
It’s a very dim and tedious looking opening scene, colours extremely saturated and monochrome in most parts. The town it is set in appears grey, old and almost desolate.
Now it was our task to create a True Detective poster using the images located in the folders on interact.
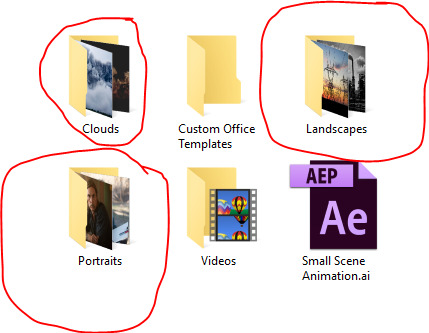
We created the first poster together. We used these highlighted settings:
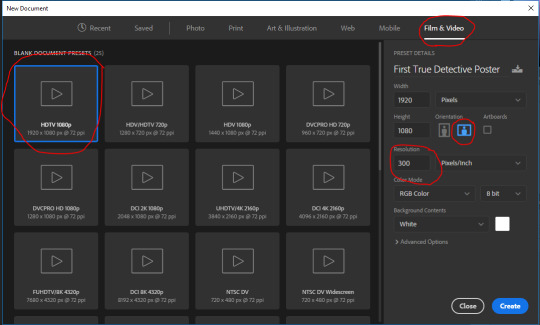
Ruler guides appeared when we created the new file. To remove them, we used the shortcut ctrl + ;.
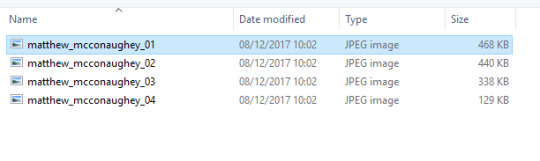
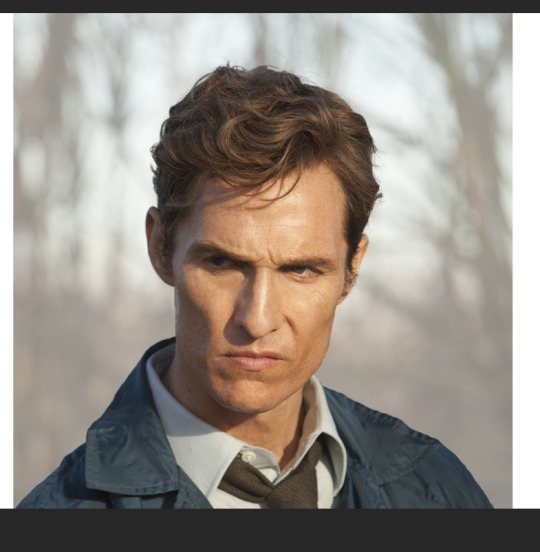
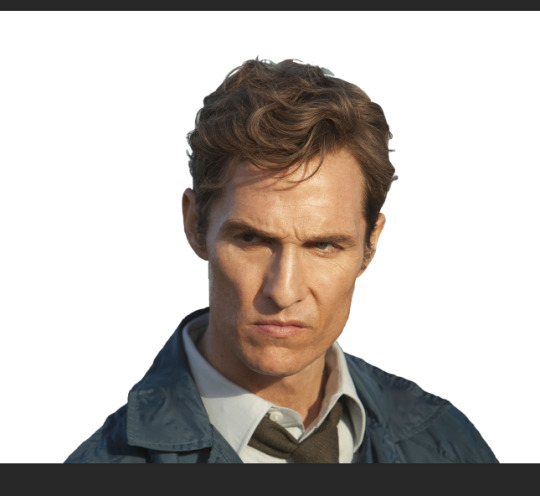
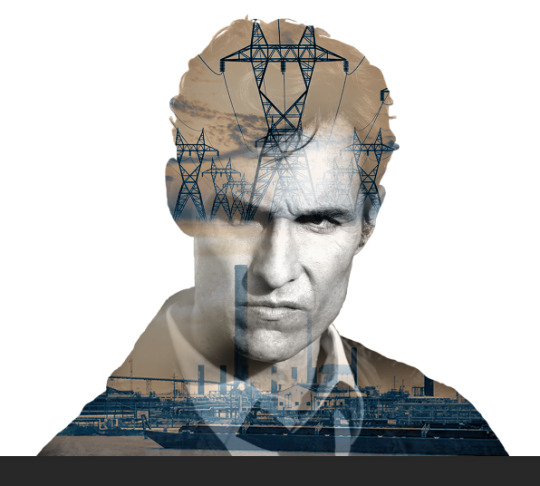
To insert an image, we went to file > place embedded and selected the top portrait.
We then position the actor as seen below. His shoulder curved off the page with some legroom above his head. We also rasturised the layer to make it more editable.
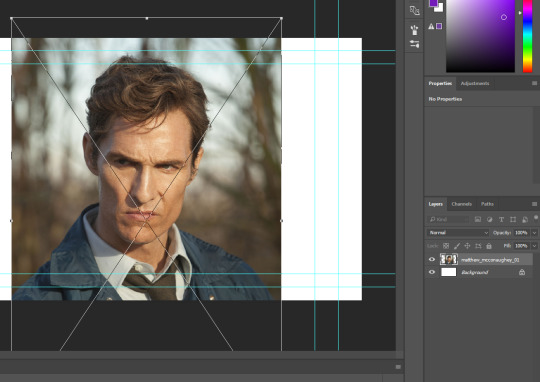
We used the pen tool to select the actor roughly. There was about a millimetre between the pen lines and the outline of the actor.
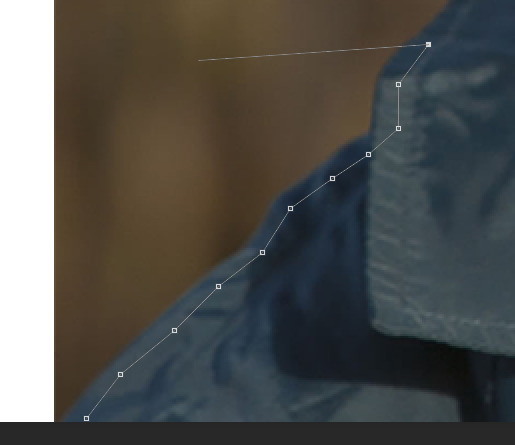
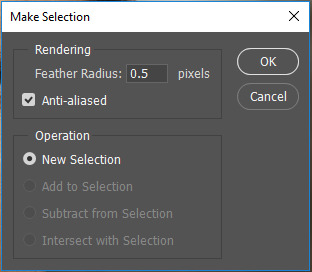
Right clicking, we selected make selection with a feather radius of 0.5.
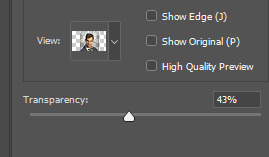
Select and Mask was our next direction after having our magic wand tool or selection tool selected. We changed the view setting to ‘Onion Skin’ and positioned the transparency somewhere between 50% - 70%.
We then used the brush tool to fill in the remaining details of his body. Holding alt allowed us to select the erasing brush tool. Our outcome was this. The select and mask method allows us to select a complex shape, with hair for example, in a quick and easy way.
In output settings, we ensured layer mask was selected from the drop down menu.
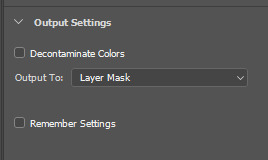
After selecting OK, we got this:
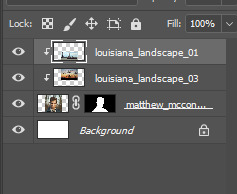
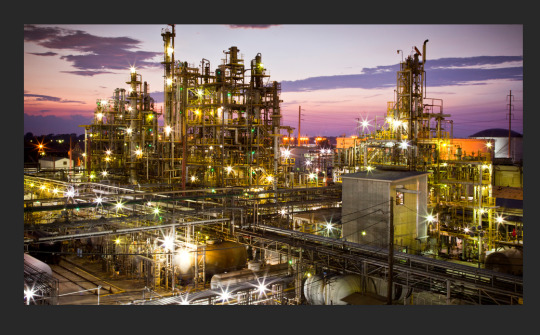
We next place embedded two images from the landscape folder. We piled them both like this after rasturising them both:
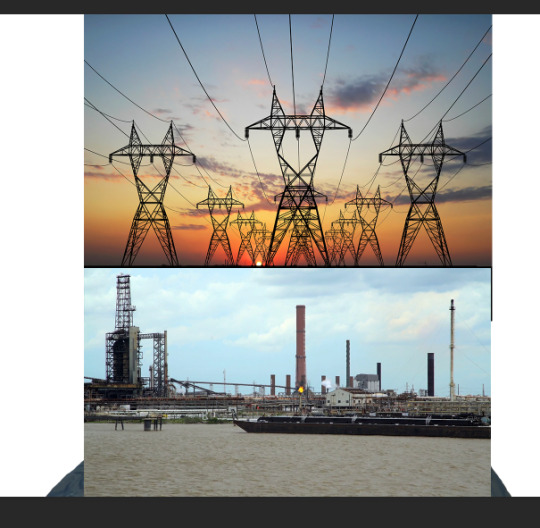
Over the layers tab, we held down alt until a box with an arrow appeared. Clicking masked the two images into the actor.
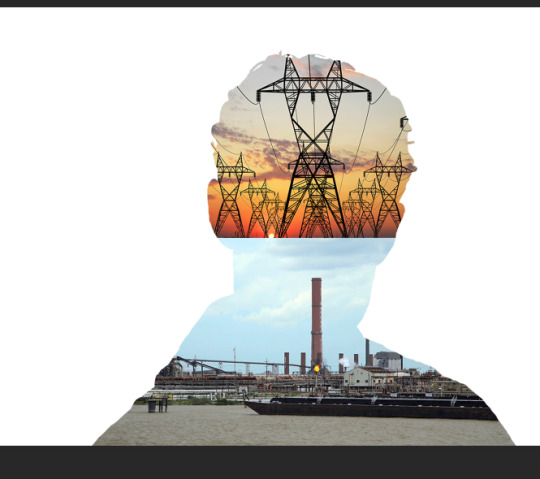
Inserting a layer mask onto the top layer, I can use the brush tool to erase some of the image which blends it with the bottom layer better.
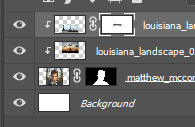
As you can see I increased the size of the bottom image using transform, and I then blended it with the top image’s horizon line.
In the adjustments menu, we selected gradient map and used the ‘cog’ menu to find photographic toning.
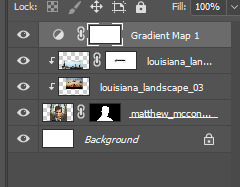
We applied the gradient map to the other layers using alt and clicking between the two top layers.
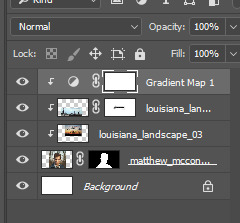
Next we duplicated our actor layer and moved it to the top, we attached our other layers to the bottom one so our work was not lost, as you can see below.
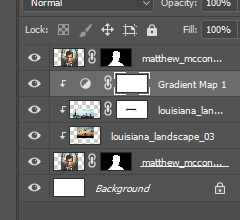
With the top layer however, it looks like the beginning again. This is because this top layer hides the others.
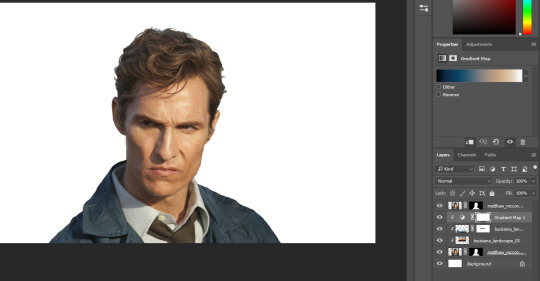
We used black and white and levels under the adjustment settings in the image tab. We used these to make the image of Matthew dark with shadows but increased the highlights. Then selecting the layer mask on the top layer and using the paint brush tool, we erased some of the top layer to enable the photo editing to show up beneath. As you can see, I kept his face quite prominent and erased most of his hair and suit.
We added another image, ensuring it covered the entirety of our canvas. We lowered the opacity to roughly 5%.
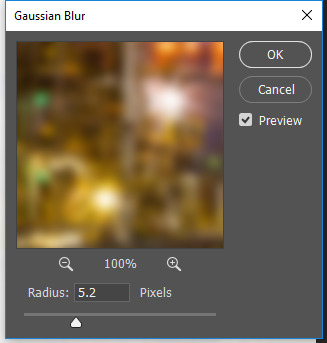
Going to filter and blur, we introduced Gaussian blur with a radius of 5.2.
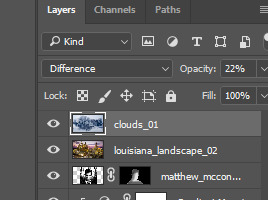
We added another image but it was from the cloud folder. Rasturising it, we changed the blend layer option and lowered the opacity so the clouds were just about seen but didn’t overpower our final image.
After this we were basically finished and we were able to add some text.
My final poster:
0 notes
Text
Wk 9: Geometry
Geometry has different meanings for different topics like math and art for example. In short, it’s the study of lines that make up shapes. It is very mathematical, regardless of the topic its used in. In art, artists use lines to create a shape and the artwork is usually of simple theme, nothing complex and busy. Lines, colour and shape are boldly used. Geometry art is often seen within Swiss and futuristic design.
- What art movements explored geometry?
Geometric Artists
We briefly googled up the artwork of the artists below, we then selected one we liked the most and built a mini case study around them.
Ilya Botowsky
Carl Kleiner
Edna Andrade
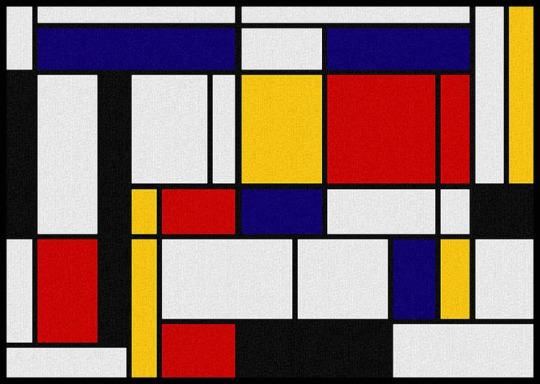
Piet Mondrian
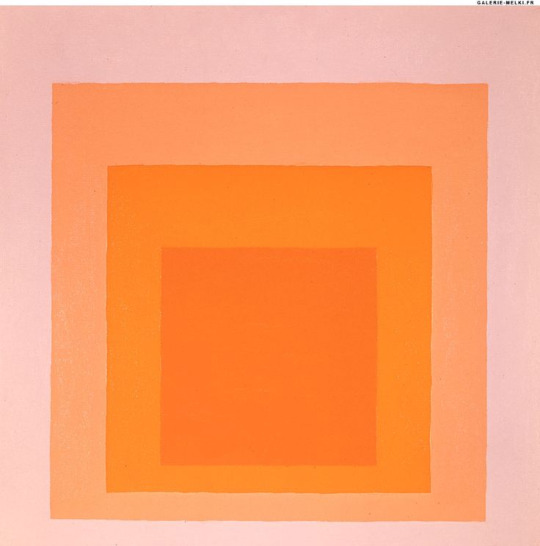
Josef Albers
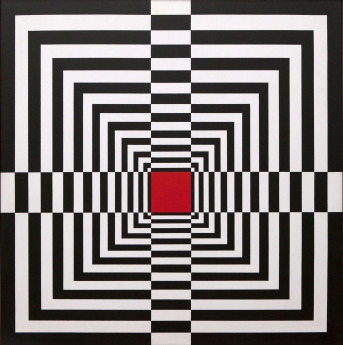
Bridget Riley

Bridget Riley’s artwork interested me the most so I decided to research into her a bit more. Bridget was both in Norwood, South London in 1931. Her father was a printer and moved his family business up to Lincolnshire. Prior to the war however, Bridget and the women of her family were sent to Cornwall where she spent the majority of her childhood. She attended the school Cheltenham Ladies College in 1946 before heading to the higher educational schooling of Goldsmiths College and later at the Royal College of Art. She is an artist who had been drawing and creating art from a young age. Whilst living in Cornwall, she frequently spent time playing by the ocean and the cliff edge, the patterns, colours and cloud formations impacted her way of viewing and creating art. She later stated that these childhood memories impact not only her art, but her awareness of life.
Riley was a key ringleader in the art movement of Op-Art. It became most prominent in the 60′s and Riley was an art celebrity when it became popular all over the globe. The movement was a form of geometric abstraction - the use of geometric shape to create abstract pieces. Other artists similar to Bridget who were involved in this art movement were Victor Vasarely, Richard Anuszkiewicz and many, many others. This movement came to life after artists grew ‘bored’ of creating simple, and what was ‘normal’ back then pieces. They grew hungry to create art that was seen as surreal, sometimes with a pop of colour. Not only did artists crave this, but the world. Businesses, people of the sixties all wanted something ‘out of the ordinary’ with pure expression which is how op-art became so beloved and welcomed. Op-art inspired more recent movements otherwise known as Postmodernism and Deconstructivism.
RA 2
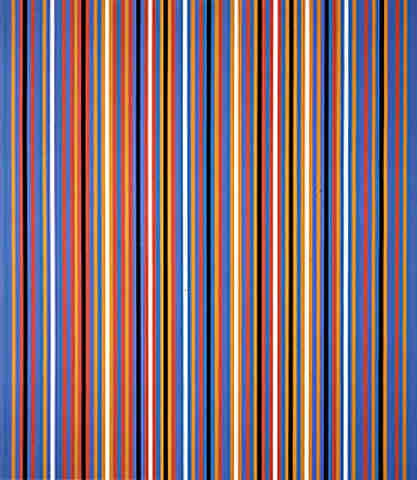
The first piece of Bridget Riley’s that I like is called RA 2 and was created in 1981 after she took a trip to Egypt, the Egyptian art inspiring her. This was made using silkscreen on paper. I think Riley took colours often used in Egypt and its culture and put them into her work. Although she used simple vertical lines, you can see in the colours that it has an Egyptian feel to it as a whole; black yellow, orange, red etc. Riley was inspired by the use of colour the Egyptians had used writing, “The colours are purer and more brilliant than any I had used before.” I like this artwork because it is kept simple in the terms of shape but she used colours to create a theme to the painting.
Nataraja
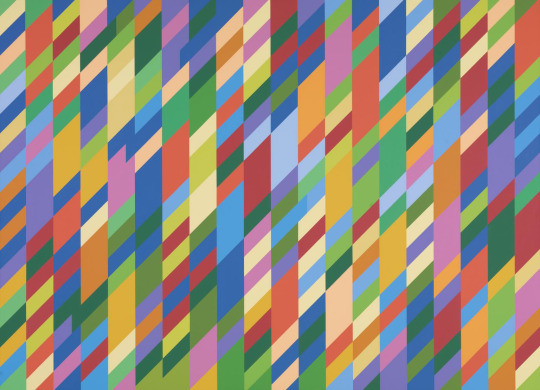
Nataraja is a part of a series of works within Lozenge Paintings and was created in 1994 using Oil on linen. This is my second favourite piece by Riley. I like it because, similar to the one prior, Riley used colour to present an emotion and sensation. However, this piece uses a more complex shape. This piece almost has a modern feel to it. It’s something you could quite possible see on a canvas painting in a modern house today.
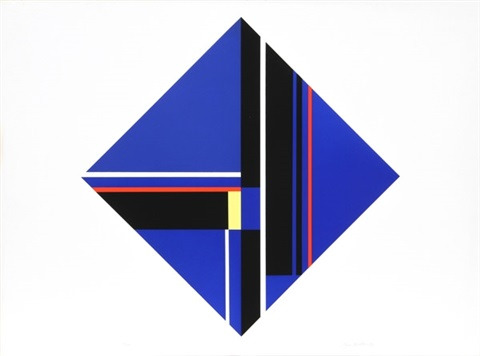
Two Blues
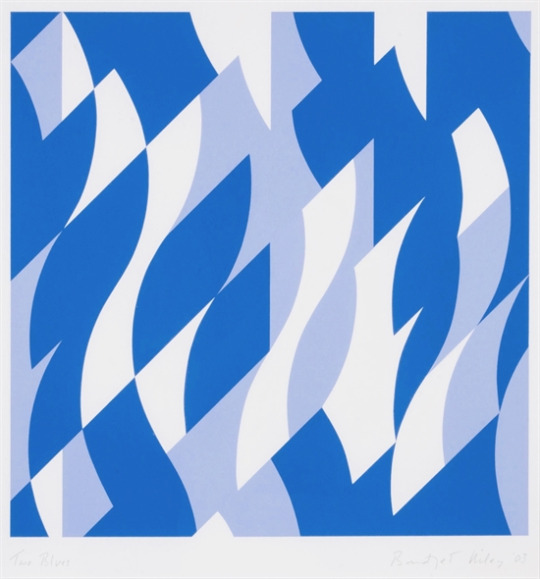
This is my favourite piece by Riley which is called Two Blues and was created in 2003 with oil on linen. This one takes a similar pattern to the others except Bridget has used softer, calmer colours. One could argue that this is because she’s at a much calmer, relaxed time in her life. It kind of looks like an ocean scene, the shapes looking like waves, or even rain seeing as the shapes lay vertically. I prefer this piece to the others as I prefer to look at more relaxing, ‘quieter’ pieces of art.
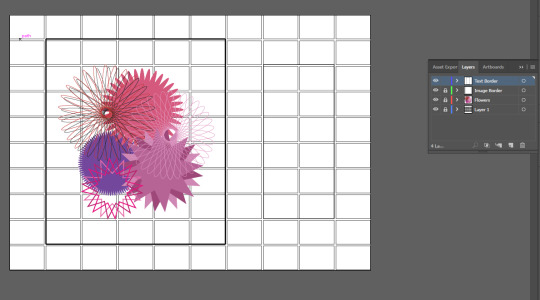
In the second part of the lesson, our task was to create a minimum of two designs that use the vector shapes already inside the Illustrator document, on interact, to experiment with different combinations of shapes and layout. We had to create two pieces in a similar format to those our selected artist uses in their own art.
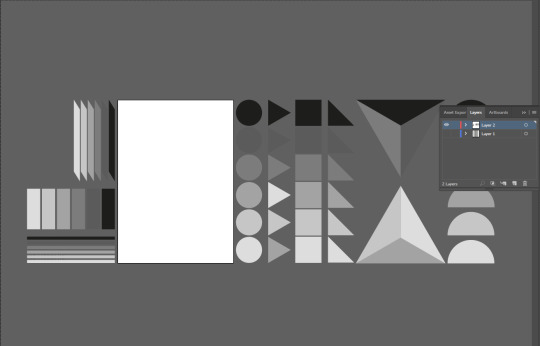
I decided on the theme ‘floral’ for my first piece and for this I used the semi circles already placed in the document. I manipulated their shape using the transform option.
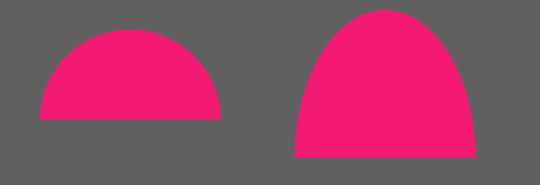
I manipulated the semi circles to look more like a petal of a flower. I then added 3 other shades as shown below using the same shape, I elongated one of the shapes.
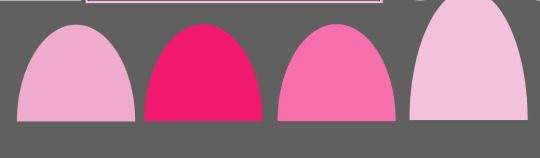
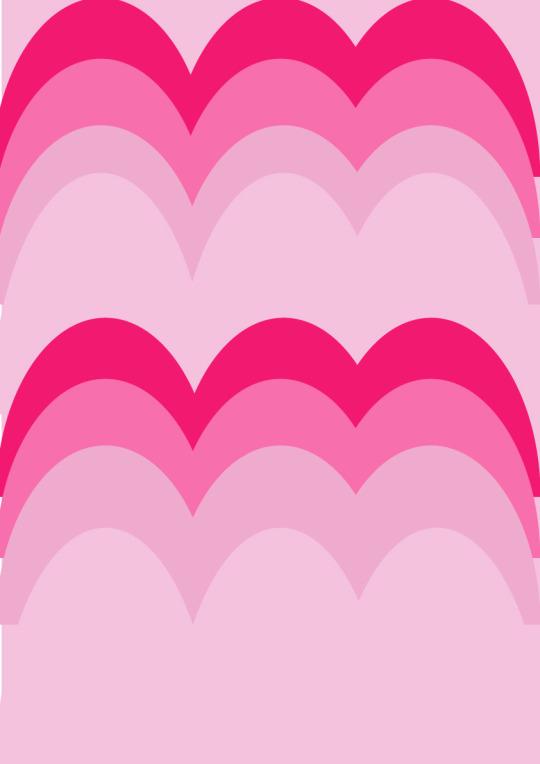
All I did was duplicate my shapes and placed the same colours next to each other like a row of hills.
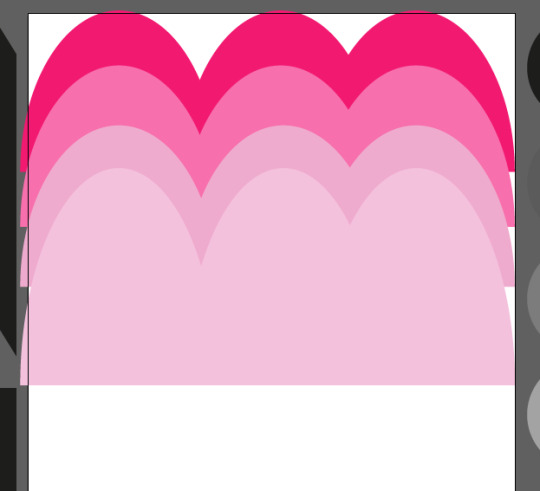
I repeated the rows as seen in below. In a piece by Bridget, she sometimes had shapes which didn’t follow the overall pattern of the artwork so I decided to take a similar method.
My next piece I decided to make was using irregular triangles. I wanted to repeat them, having a pair in two similar shapes, like below:
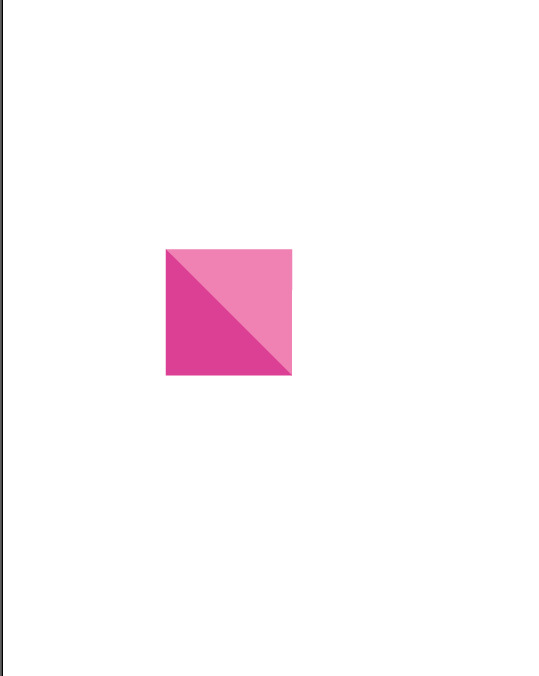
I filled the document with pinks, purples and blues.
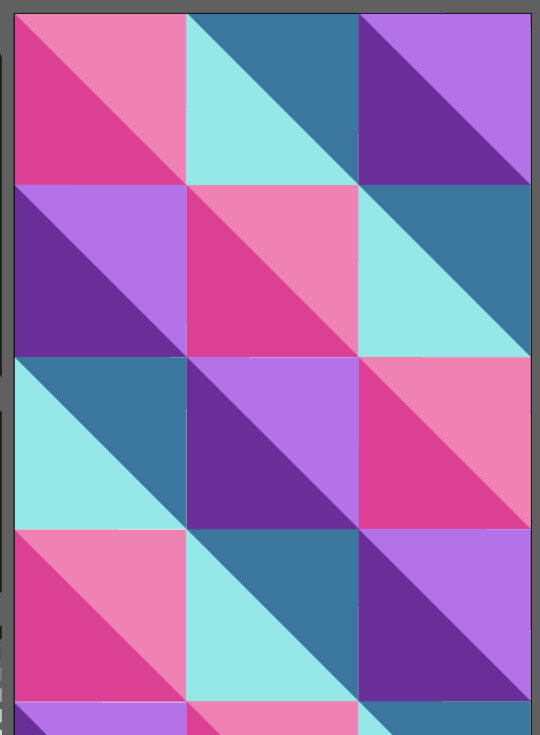
Again, like with Bridget Riley’s R2 piece, sometimes a colour is elongated to make a section of a piece unique and eye catching and likewise, I did that in the upper right hand corner of my work with the blue and purple.
I wanted to do a piece like this which focuses more on repetition and colour rather than the actual shapes, similar to what Bridget does in her work, hence why I chose a basic shape such as triangles.
With this piece I think the colours went well together. I chose three colours each with its own lighter shade, it kind of makes the blocks look 3D.
Next time if I did this piece again, I’d probably make the squares smaller. Riley uses smaller shapes in her artwork to make them more ‘patterny’, and I’d like to achieve this effect.
0 notes
Text
Wk 8: Grid Systems
For the first part of our lesson, we researched these 4 grid systems and how they aid Graphic Design:
manuscript grid?
column grid?
modular grid?
hierarchical grid?
I looked at this website.
What are grid systems in graphic design and how do they help?
In short, grid systems act as guidelines and are able to split the art-board into equal sized shapes. There are different grid systems which split an art-board using different shapes. They make layouts and composition much easier. Grid Systems help create balance and illuminate inconsistencies. Each grid has a different use and benefit and are used by different graphic designers for different purposes.
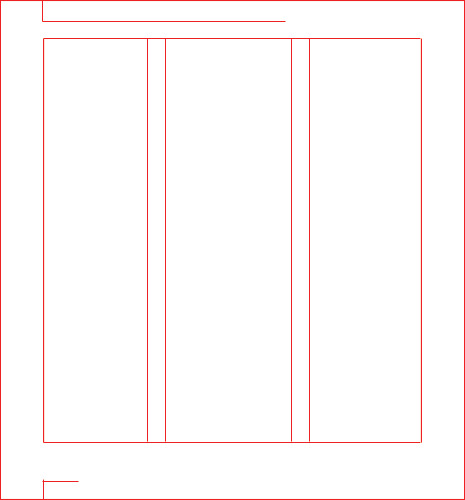
Manuscript grids
Manuscript grids are often called ‘block grid’ and are the simplest of all grids. It usually features a large rectangle which consumes most of the space in the middle of the artboard. These grids are most ideal for large bodies of continuous text and even for images which sit in the middle of a page. They’re used in books and long essays. In magazines and such, creators use different margins to create different effects. For example, a wider margin leads to narrower text blocks which helps focus the eye and creates a sense of calmness and stability.

Column Grids
Column grids are most often used online, particularly on online shopping sites and even here on Tumblr within specific themes and blogs. Column grids are best used where discontinuous information needs to be presented. You can separate blocks of information by placing them in different columns but still show the connection between them. One column will include text and the latter can include images instead.
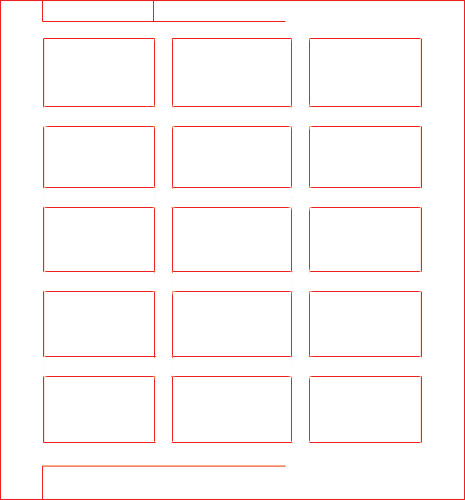
Modular Grids
Modular Grids are in a way similar to column grids however include horizontal divisions (lines) known as rows. These grids are better for use in complex projects that require more control than what a Column Grid has. The guidelines almost look like a timetable on a page.
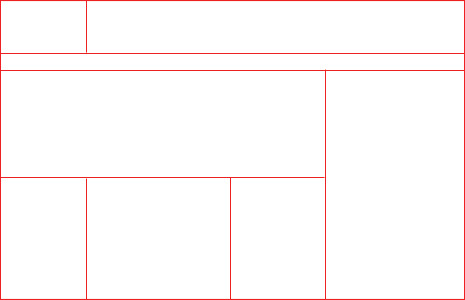
Hierarchical Grids
These grids are commonly found on the web and are most used when none of the above grids will work to solve a problem. They are probably the most chaotic grid system and you can sometimes see apps and websites following this format. You’ll sometimes find that smaller boxes fit into the larger ones an equal number of times.
Terminology:
Columns
Equidistant
Gutters
Rows
Margins
Our task was to create a piece, this can be a blog article, a magazine page or just some artwork using one of the grid systems.
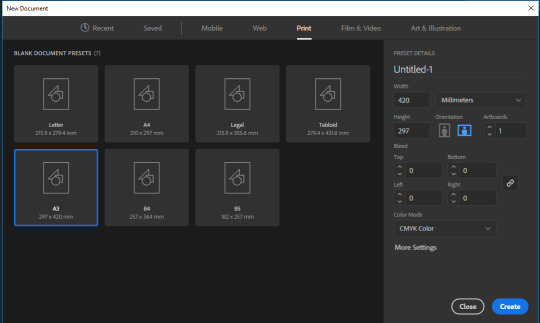
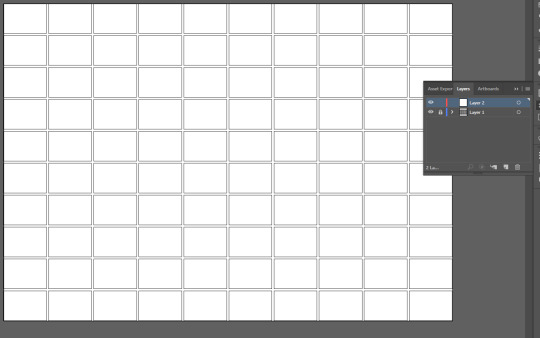
The first thing I did was create a new art-board using these settings shown below:
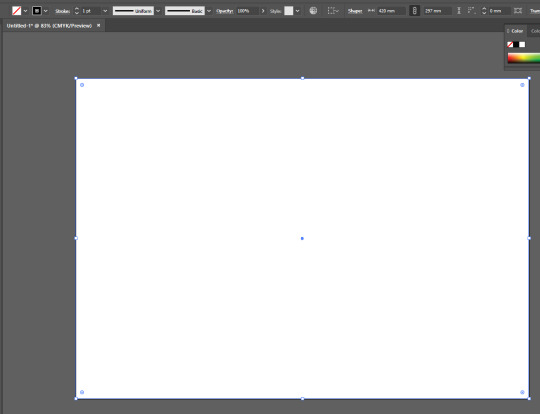
Next I drew a rectangle from one corner on the art-board to the opposite, like below, with no fill and a black stroke of 1pt.
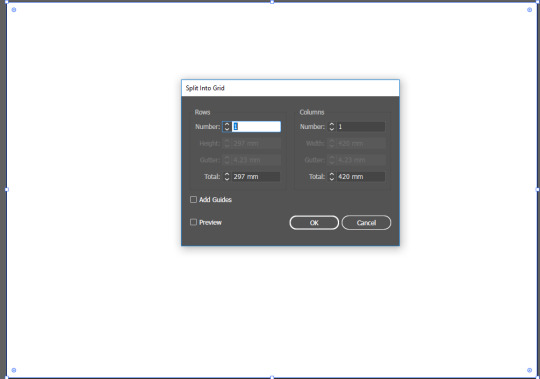
I then went to object > path > split into grid until we received this dialogue box. Turning preview on and increasing the rows and columns, we were able to create different grids.
Before:
After:
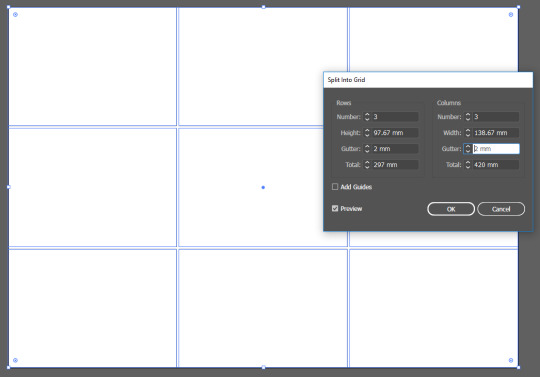
I added 10 columns and 10 rows, both with a gutter of 2mm. I locked this layer to ensure that I don’t accidentally move the guidelines.
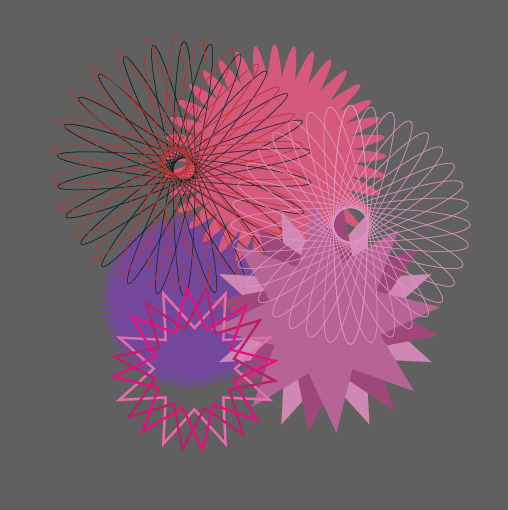
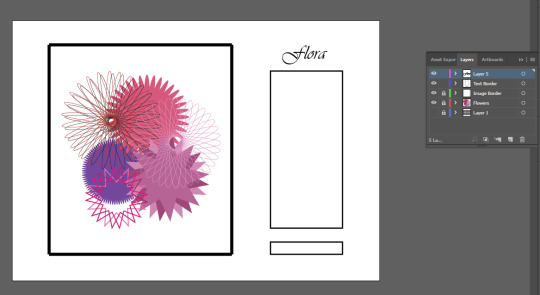
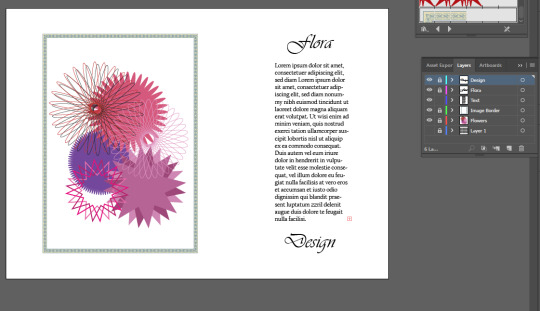
I wanted to design a page of a magazine mostly from imagination using the themes minimalism and flowers.
I will probably have to have a modular grid layout. To start with I created an ‘image’ of flowers on a new layer. I created these using the technique we learnt the same week but with Owain.
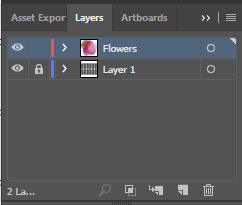
My flowers are the image to my magazine layout so I decided to create a border around it using the line tool. The guidelines were really helpful when creating the border as I was able to make the lines accurately straight. I did this on a new layer.
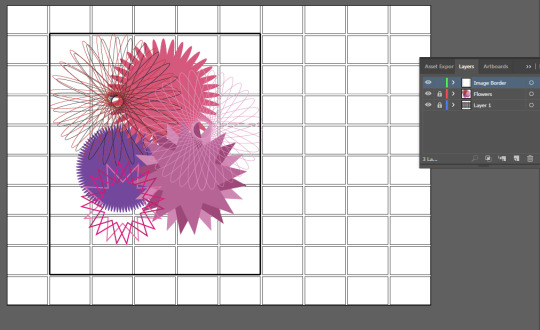
I drew a text box, using the rectangle tool like before with no fill and a stroke of 2pts. This was done on a new layer.
I then added two smaller text boxes, one above and one below the large text box.

Removing the top text box, I replaced it with some fancy text. At that point, I figured this magazine could be something to do with weddings.
I did the same with the bottom text.
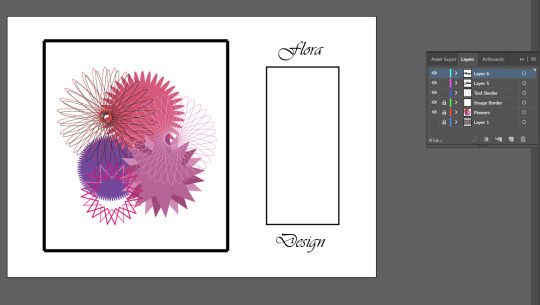
I decided to move around my image and I also added a ‘Decorative Border’. It gave more of a wedding feel to it.
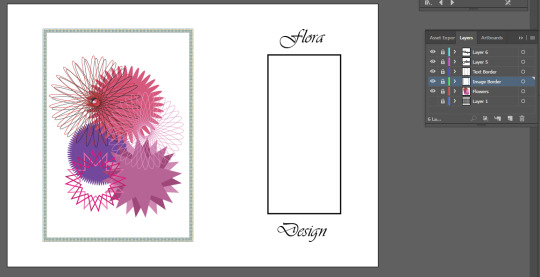
After, I filled in the large text box with some Placeholder Text. I’ve seen these plenty of times when searching for Tumblr themes but I never knew the name of it and where people got it from. I removed the border for a cleaner look.
On a new layer, I decided to create a line to separate the title texts from the main text. This line was 1pt.
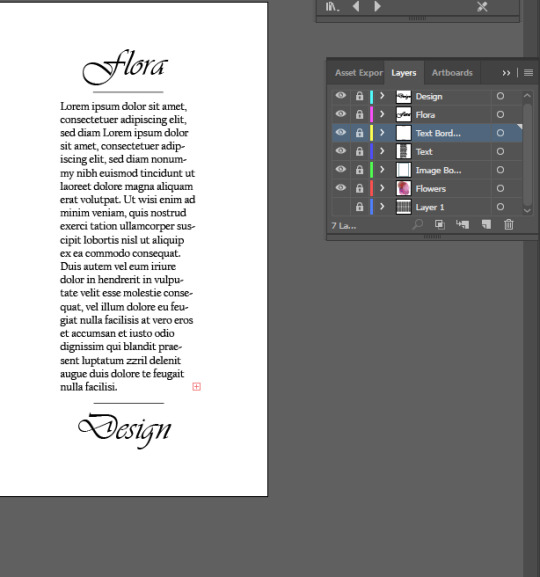
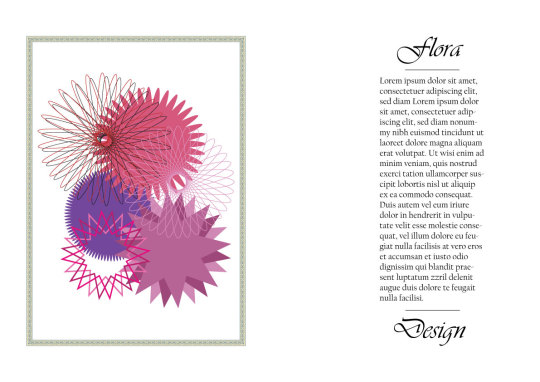
I used a modular grid guideline mostly so I kept my floral image vertically adjacent to the text on the right. Also because I had the idea ‘wedding magazine’, I wanted to keep my piece simple, elegant and clean as the majority of wedding magazines/extracts are clean and simple.
I don’t think I have used the modular grid system as well as I could have done. I still don’t understand them all individually and I did struggle in deciding which system to use.
I don’t think there were any problems building and using the grid system that I have used.
My final piece;
Created with the theme of wedding magazines in mind.
0 notes
Text
Wk 7: Icon Task
For the first part of the lesson, we went around the room and identified each icon and discussed what makes them recognisable.
After, we were given a theme with which we had to create our own icons for. With that theme however, we had to research and find 5 other icons that represent it.
- What does it look like?
- Is it a simple design? How?
- Is it modern?
- Does it accurately portray the theme?

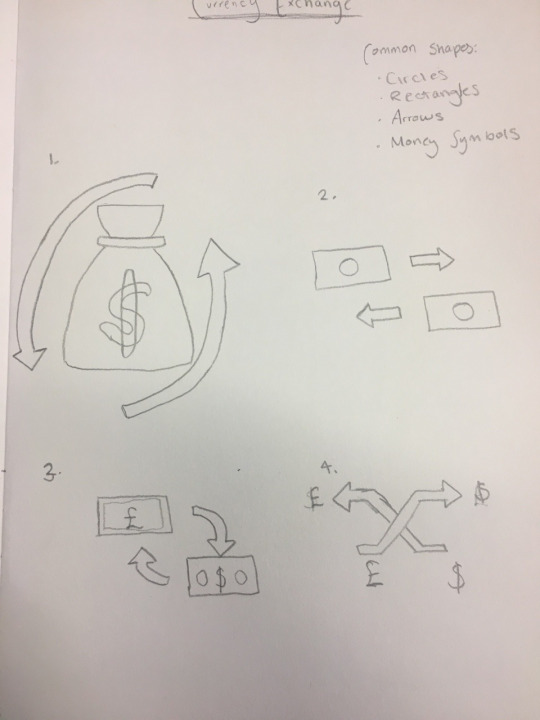
Above Icon: this icon is basically a flag like rectangle with a circle in the middle of it and arrows circling it. I’d class it as a simple design. There are no complicated shapes in it. I personally think it is a modern design but I don’t really think everybody would understand it universally.

Above Icon: this icon is more complicated than the previous one. I wouldn’t say it’s as simple as the previous icon either but I believe it to be most modern and probably recognisable as it includes actual different currencies.

Above Icon: this icon is a simpler than the prior icon however, I’m not too sure what the ‘fr’ stands for. It kind of just looks like a bank icon with the rectangle. Nothing represents the exchange aspect of it.

Above icon: likewise with the previous icon, nothing in this one symbolises currency exchange and rather just currency. Despite that it is a simple icon but probably too simple. Again like the previous icon, to me it just stands for currencies.
Frequently, the most used shapes in these icons seems to be circles and lines which can be turned into arrows.
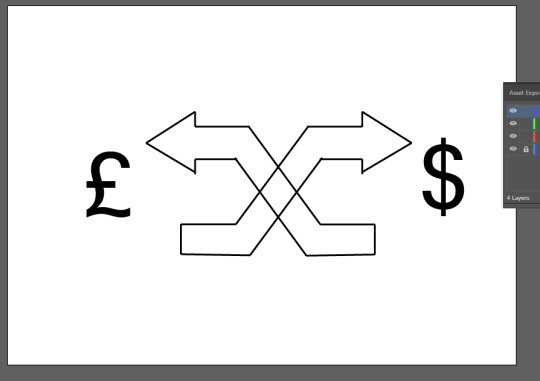
Keeping these icons in mind, I moved onto sketching my own icons that represent my theme Currency Exchange.
I decided on recreating the 4th and last one in illustrator. I started with a clean white canvas.
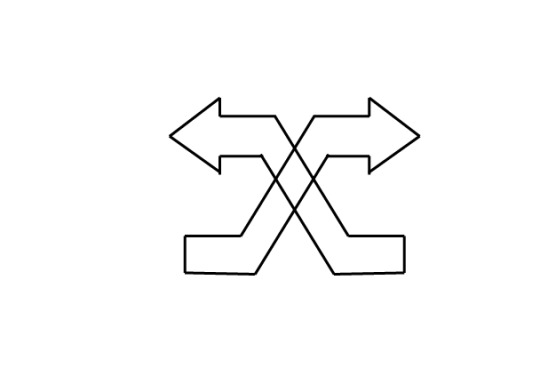
I wanted to create the arrows first and drew one using lines before grouping it together, duplicating and reflecting the duplicate. I then crossed them both over each other.
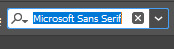
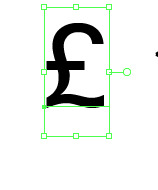
On a new layer, I used the text tool and added a British pound symbol.
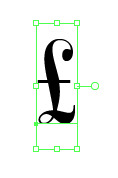
It was key that I chose a text that is easily readable for all ages so I chose this font:
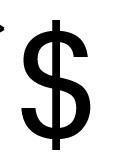
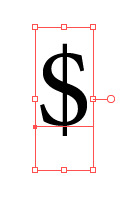
Next I worked on the dollar sign and used the same method as above.
According to my sketch plan, I initially wanted to have four symbols in total - two dollar signs and two pound signs on each side. I did try that layout but I found that it looked a little confusing and ‘busy’ so I kept one of each sign and enlarged them instead.
Our next task was to make this into a vector image. I copied it into Photoshop and went to File > Export As, this brought up a large dialogue box.
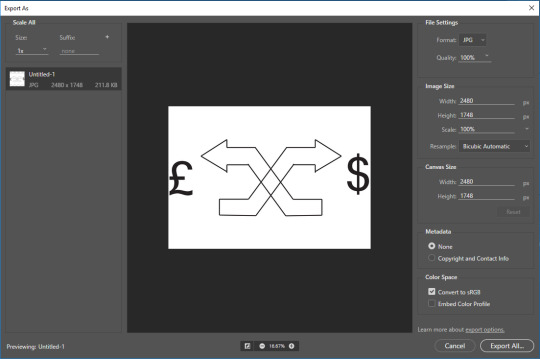
At the top right hand corner you can see it says Format: this is where I selected JPG. This is so it saves as an image to which i can upload onto Tumblr.
My final icon image is below:
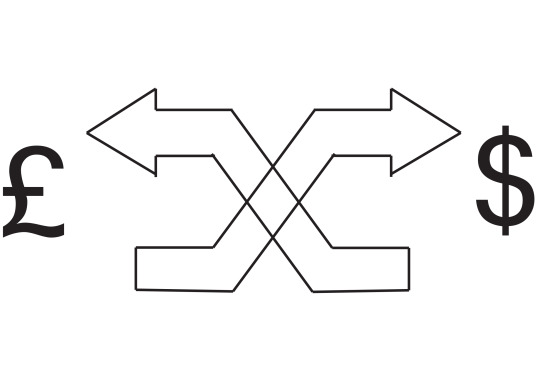
To make this more universal, I can change the currency symbols. These can change depending on the location of this icon.
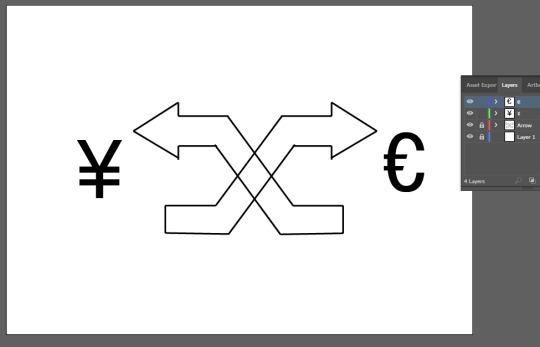
In Illustrator, all I had to change was the two symbols. I changed these to Yen and Euro.
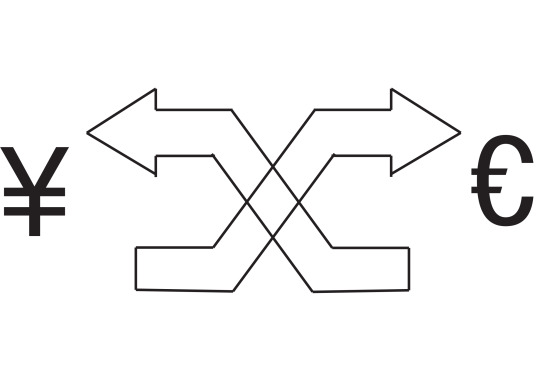
Final Evaluation for this design:
I chose to represent my theme this way as it is still simple yet doesn’t follow the other currency exchange signs which use circles and rectangles.
The arrows in my icon represent an exchange/trade because they cross over each other. I think the overall exchange message gets across clearly however it might be a problem that only two currencies are displayed at a time. Possibly adding more currencies to my icon could make it more universal however this could even make it appear more busy and complicated.
It could be made into a simpler design if I made the arrows run horizontally across instead of cross over each other. The design isn’t that bad but I feel like the arrows aren’t as neat and tidy as I anticipated. They were quite difficult to draw using the line tool.
Somehow, I’d like to make the arrows neater and straighter than they are here. I think it would make the icon more universally recognised too if somewhere I included other currencies.
I worked on my second icon which from my sketches is the first sketch. On a new canvas I created a semi circle and flipped it around as shown as below.
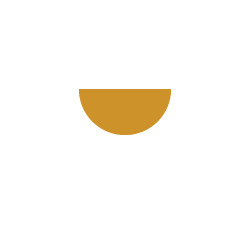
I then added a little string that ties the bag shut.

The bag shape was created via a rounded rectangle and curvature tool. All this was done on the same layer.

I then, using the text tool, added a dollar sign in white using the font:
This was done on a new layer.
This time for the arrows, I used the arc tool.
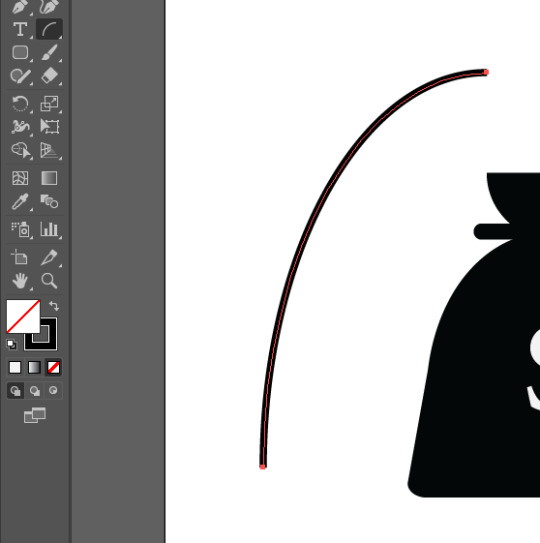
For the point of the arrow, I used a much simpler method and added a triangle at the ends of the arcs.
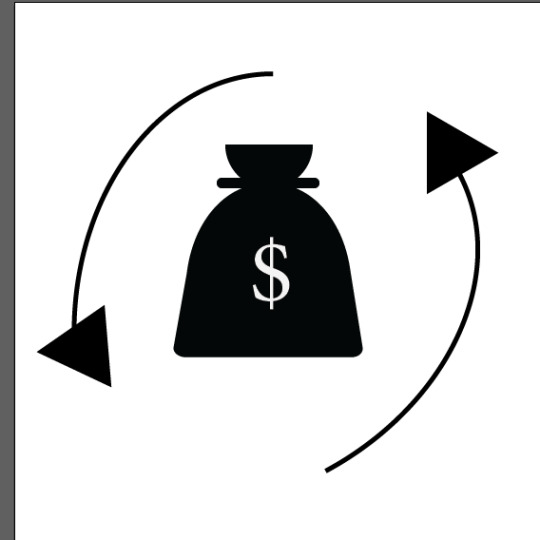
After I finished it, I copied it to Photoshop and saved it as a JPEG.
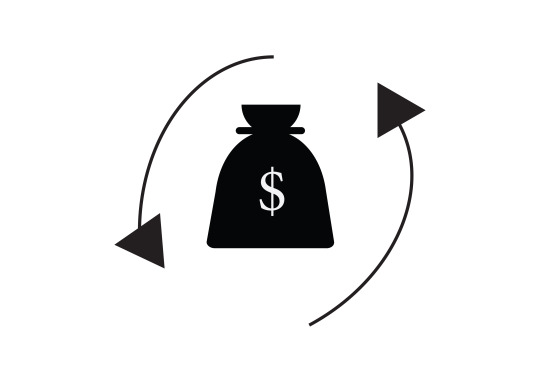
Final Evaluation:
I chose this as my second icon as I think it’s quite uncommon to see and can be perceived as ‘change’.
Again, like my first design, the arrows represent exchange or change. The dollar sign represents money and so does the shape it’s in - the money bag.
I think my icon definitely represents money but I think the arrows surrounding it could confuse people as arrows in a circle typically mean recycle instead. Maybe the bag could have included other currencies inside, but I am not so sure that the design could have been made any more simpler than it is now.
I actually am quite proud of the shape of the bag that I made. I made it using a semi circle, and two rounded rectangles. Before I started, I thought it would be tricky to create. Next time, I’d probably duplicate the money bag and change the symbol to that of another currency and position the arrows horizontally opposite each other so it looks more like an exchange.
0 notes
Text
Wk 5: Andy Warhol
In the first session of today, we completed a mini case study on Andy Warhol. I touched on Andy Warhol during photography last year so I felt confident in completing this task.
Andy Warhol was born on August 6th 1928 as Andrew Warhola and died later on February 27th 1987. He was an artist, director and producer whom was a prominent figure in the visual art movement known as pop-art. Warhol was born in Pittsburgh, Pennsylvania and was the fourth child to his parents who were working class emigrants from Mikova, in Slovakia (Eastern Europe). His father emigrated to america in 1914 and his mother later joined him in 1921 after the death of his grandparents. The Warhol family were Ruthenian Catholic and attended St. John Chrysostom Byzantine Catholic Church. He had two older brothers, one of whom became a successful children’s book illustrator - James Warhola.
In the third year of his schooling, Warhol was diagnosed with Sydenham's chorea (St. Vitus' Dance) which later created further complications with Scarlet Fever. This made Andy bedridden for most of his childhood and he later became a hypochondriac, developing a fear of hospitals and doctors. He became an outcast at school but grew a strong bond with his mother. He claims this period of his life was important as it shaped his personality and also his future. Sadly however, when Warhol was 13, his Father died in an accident.
As a teenager, he graduated Schenley High School in 1945 and even won the Scholastic Art and Writing Award. After graduating, his plans were to study Art Education at University of Pittsburgh and to become an art teacher but his plans were shortlived before he changed to study commercial art at Carnegie Mellon University.
His first ever art publications were during this time while he was the art director of the student art magazine. He illustrated a full page interior design and also a magazine cover. Warhol earned a bachelor’s degree in Fine Arts in pictorial design in 1949 and later got a career in New York doing magazine illustration and advertising.
Andy adopted silk screen printmaking, rubber stamping then developed the blotted line skill which is blotting the paper in ink while its still wet, this was similar to his printmaking process. His aesthetic was a blend of photography and fine art and a majority of his artwork was around a list celebrities at the time and well known household items. His most famous artworks were of Marilyn Monroe, Elvis Presley, Prince Michael Jackson and a controversial piece he did was of Jackie Kennedy, a political individual at the time. Warhol’s specialisms consisted of drawing, painting, photography and film. He completed a series of screen tests where he placed a camera for several minutes and kept it snapping while the celebrity was told to stand and pose. Within those several minutes, you saw sides to the celebrity that people never knew existed.
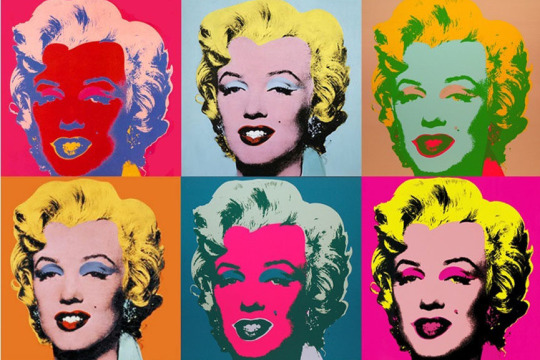
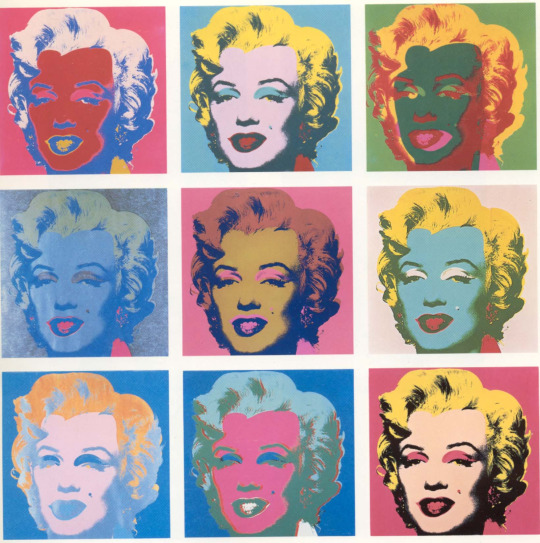
This first work I liked of Andy Warhol’s was the work called ‘Shot Marilyns’. It was made in 1964 and Warhol created the series of canvases using the technique silk-screening, each canvas using different colours. This was created in the same year Marilyn passed. He uses photo-stencils and photographic images for the screen prints. The screen is ‘prepared’ using a photographic process and then different coloured inks are printed using a rubber squeegee to press the paint onto the painting through the screen.
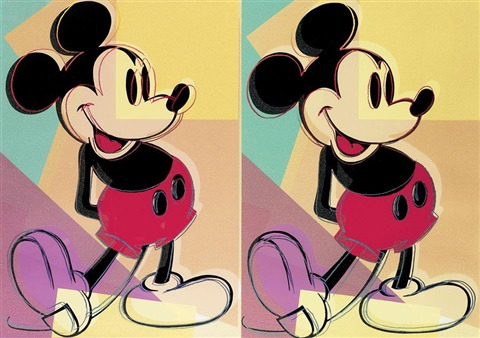
The second piece of Andy’s work I liked was the Mickey Mouse which was created in 1982. Like the Marilyn pieces, this was created using screenprinting onto paper. I liked this piece as it looks 3D in a way due to the way the colours sit just outside the lines drawn and possible down to the outline colours used. I feel like most of his work can be created on photoshop and illustrator, give or take using some filters to gain the same effect Andy mastered. As I think this piece takes more of a 3D effect, I think adding a 3D filter to the piece would make any work look similar to Andy Warhol’s Mickey Mouse.
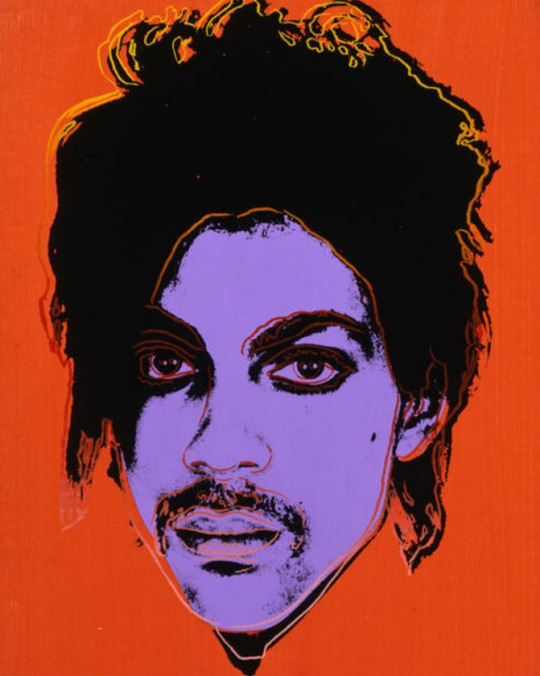
This portrait of Prince was by Andy Warhol too and was created in 1984. Again, it was created using silkscreen print and acrylic polymer paint on a canvas, a technique moreorless created by the few artists popular involved in the art movement. This image was used on the front cover of a magazine last year in 2016 to commemorate Prince’s death.
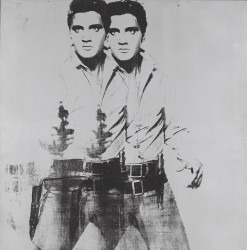
Double Elvis was created in 1963 using the same techniques as above; silkscreen ink on synthetic polymer paint on a canvas. Unlike the other pieces, this piece was created in black and white ink only. Warhol’s Double Elvis work looks the most simple and easy. You could take a photograph and in photoshop, duplicate a layer and then slightly manoeuvre it to the left or right. Changing the opacity of one or both may help. But creating a similar piece would be relatively easy as you’d only need to copy the image and move it.
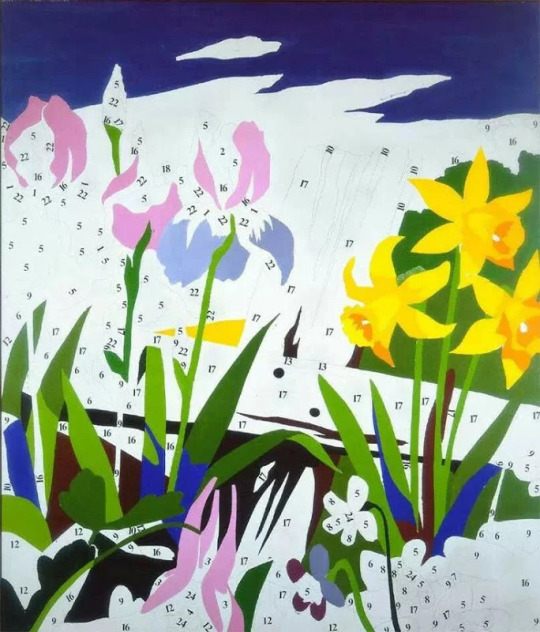
The last piece of Andy Warhol’s work I loved was the landscape version of ‘do it yourself’ created in 1962. As you can see by my selection, the pieces of work I enjoyed were all created within 20 years of each other. It was created using acrylic, pencil and Letraset (typeface) on linen. I liked it because it is different to his other works. It contains more block, bright colour and is a landscape/nature piece. Warhol was known for his portraits of famous people at the time so I find it quite refreshing to see a more subtle piece by him.
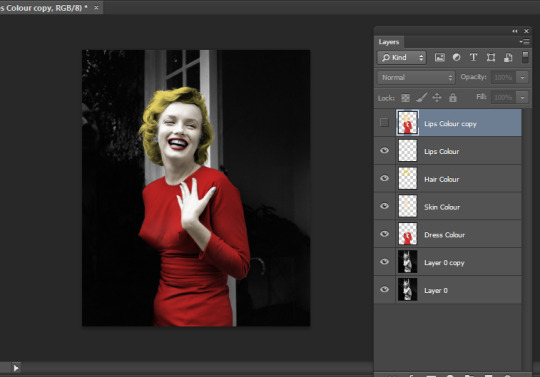
Pop-Art photoshop task
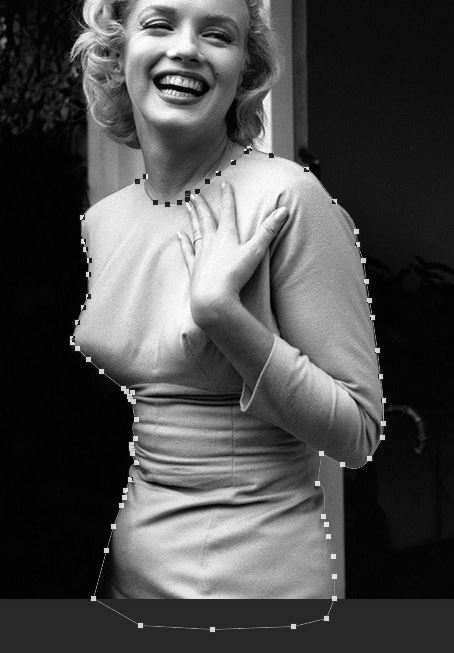
Our task was to non-destructibility edit this black and white photo of Marilyn Monroe.

I started off unlocking the background layer and duplicating it, using the shortcut ctrl + J.

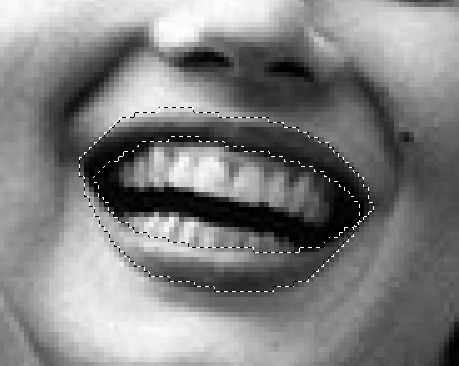
I used the pen tool to select the entirety of her dress. This enable precise selection in Photoshop whereas in illustrator, it allows you to create actual shapes. Zooming into the photo aids and increases accuracy. Up in the tool bar, I enabled ‘Rubber Band’ under the cog icon.

Clicking and holding allows you to drag and adjust the curve of an anchor point. This is most helpful when selecting shoulders and elbows etc.
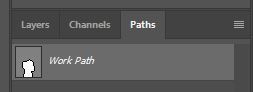
I then needed to make a selection within a selection and to do this I moved onto the paths tab by the layers.
Right clicking and selecting ‘Make Selection’, this dialogue box appears. From this I ensured Feather Radius was set to 0.5 pixels.
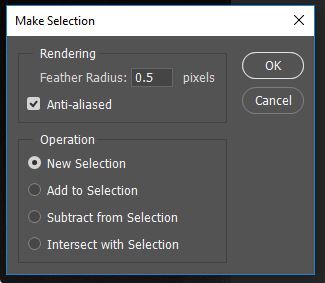
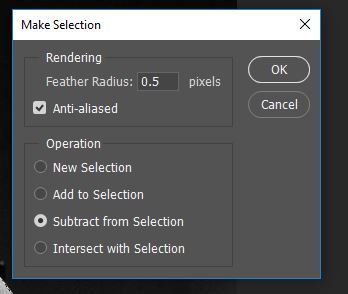
After clicking ‘ok’ I was then able to create another selection around her hand. This is so her dress is the only thing coloured and not her hand.

After making these selections, I made a new layer to add the colour non destructibility.

Using the paint brush tool, I was able to add colour to the image. I set my hardness down to 0% so the brush was really soft and delicate and I built up the colour gradually by increasing the opacity. My result was below.
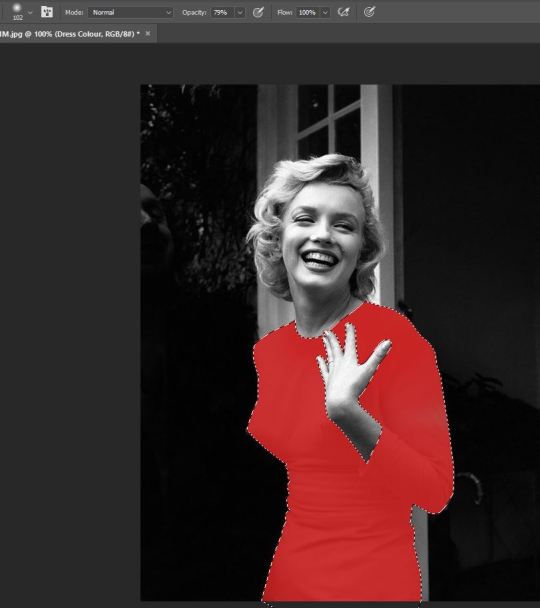
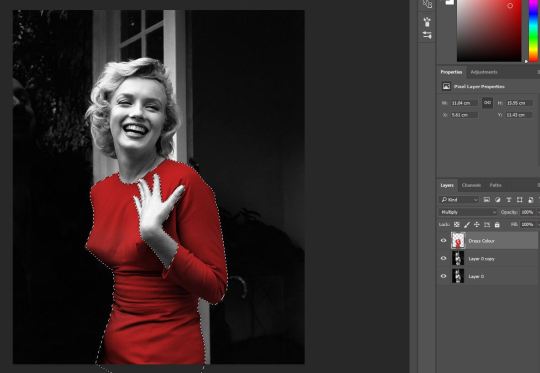
I needed to use blending modes so the colour blends in with the shape of her dress (the shadows and highlights etc) to make it look more realistic. I picked the blending mode ‘Muliply’.
I then worked on her lip colour and I wanted it to match the colour of her dress. Using similar methods as above, I selected her lips and then made colour on a new layer.
For the lips blending mode, I selected Overlay instead of Multiply. I found that this mode created more highlights and shine on her lips which I deemed more realistic.

For the skin, I looked up skin colour codes and found this website, I chose the first skin code #ffe0bd. For the blend mode however, I chose Soft Light.
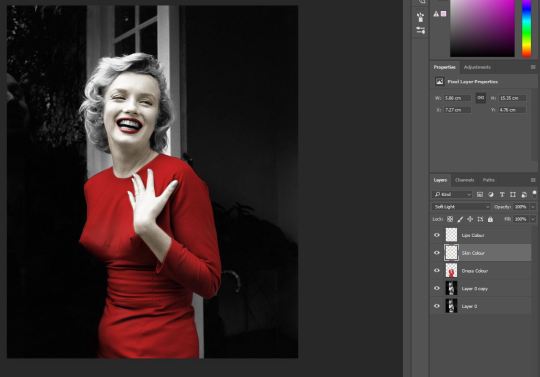
And finally for her hair, I chose a vibrant blonde colour and set the layer blend to Multiply.
This is my final realistic recolour of Marilyn.
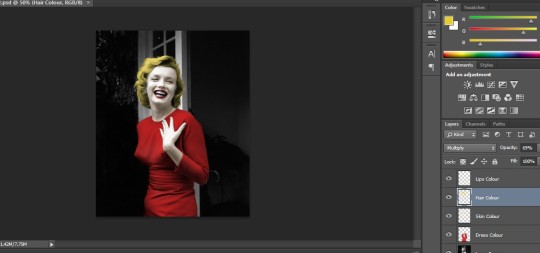
The second objective we had to complete was to create a new whole layer using the colour layers and then edit that layer so the colours became pop-arty. I copied my colour layers before merging them onto a new layer. Hiding this new layer still enables the realistic colours to be seen.
With that layer, I selected Hue/Saturation and dragged it onto the ‘Pop-Art’ layer. Dragging the Hue dialogue changes the colours drastically as you can see below. Hiding the pop-art layer will allow the realistic layers and colours to be seen again. This is non-destructibility editing the image.
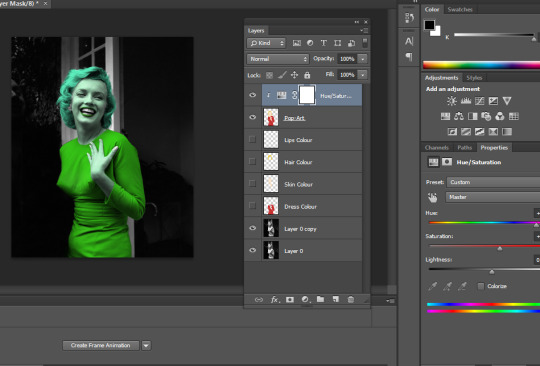
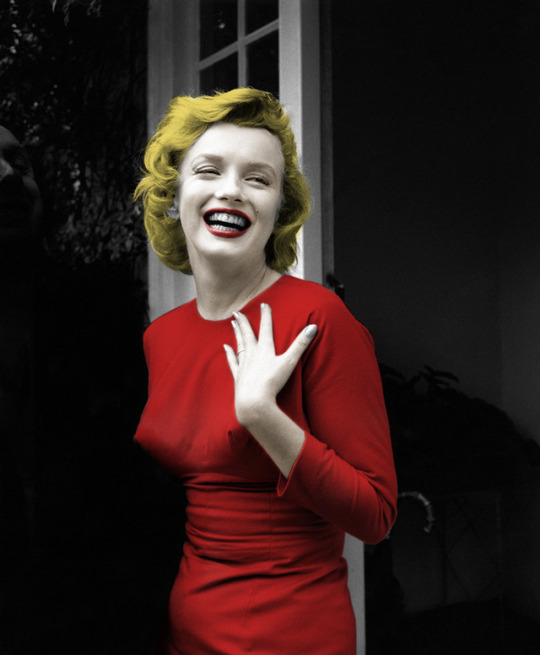
This is my final image with the pop-art effect on.

I think I have successfully recreated these Marilyn Monroe images. One is of realistic colour and the latter, following pop-art effect.
I found the last part most difficult. Copying the layers onto a new layer and dragging the hue/saturation layer down.
Using the pen tool and colouring each part was the easiest. I found these tasks both easy as I have experience doing them both out of college.
I didn’t encounter any issues. Using the pen tool and colouring were the parts that I found went most well. However, that being said, choosing a hair colour that didn’t look just like ‘yellow’ was a challenge. If I were to do this task again, I’d take greater time and patience using the pen tool to select as I did unfortunately ruse to edit her hair and skin.
0 notes
Text
Wk 3: Victoria Siemer
For the first part of the session, we learnt about a visual artist called Victoria Siemer - also known as Witchoria. She’s an artist based in New York and most of her artwork is surreal.
Her behance
Victoria was born in the 90′s in New York and she graduated from the University of Buffalo in 2007. She studied Communication Design. She has won a People’s Award - Best Visual Design in 2015 and started selling her works online.
I am a big fan of landscape photography so looking at her Behance profile was a treat. What she does is rare and I’ve never seen a similar artist. If you think about it logically, it wouldn’t be difficult to create a similar piece yet her work makes you think that a lot of skills has gone into it. It gives the illusion that the art is impossible to do.
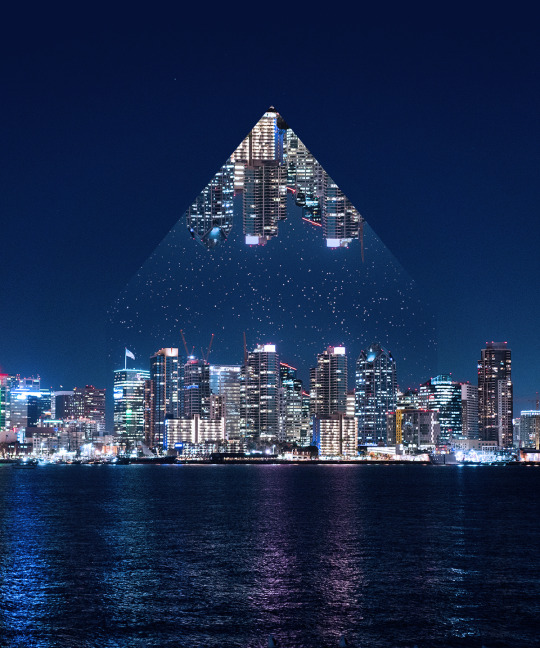
We were to create a similar piece to Victoria’s work and we started off by searching for a landscape image on Unsplash. I chose this image:
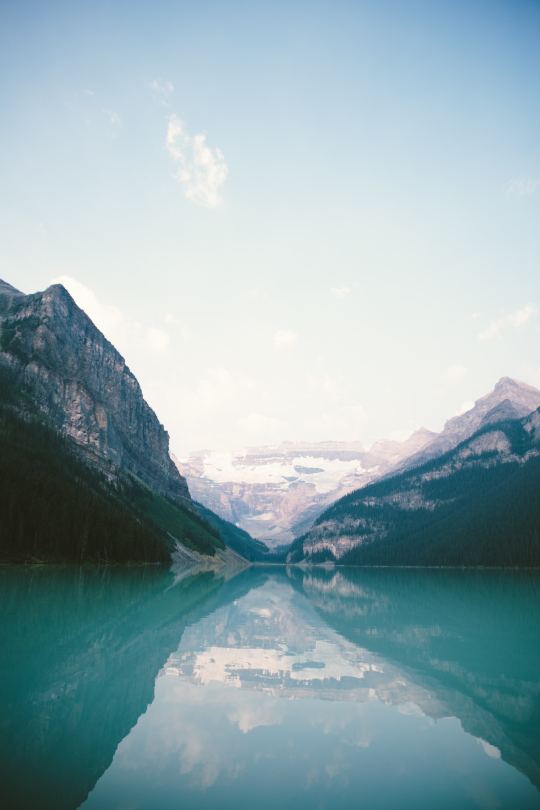
Credit:
I opened the image up in photoshop and copied the layer.
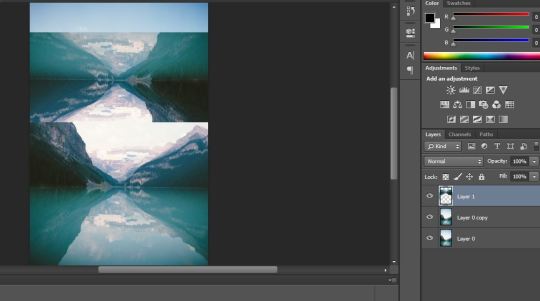
I then used the Marquee tool to select the part of the image I want to reflect in the sky and copied and pasted it onto a new layer; reflecting it after.
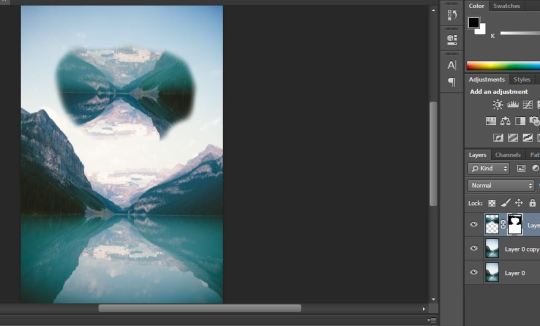
Next we blended the cut out into the image by using the layer mask option.
This however mimicked Victoria’s work too much so we decided to add something different while using the same method. We decided to add text. After I added some simple text in the size and style I wanted, we held down Ctrl and selected the text layer; this makes ‘marching ants’ appear around the text.
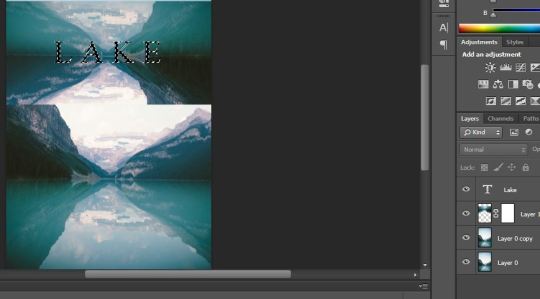
We lowered the opacity so only the marching ants are visible. With the reflected image layer on top of the text layer, I used the layer mask to paint the reflected image through the text/marching ants. Below were my layers in order to do this.
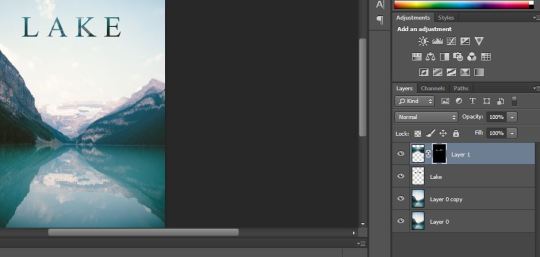
I think my work is somewhat similar to the work of Victoria Siemer. It’s important though not to copy someone else’s work completely as that is a form of plagarism and then your work wouldn’t be personal if you just copied from another person. I found it difficult to complete this task as I was absent from the lesson and I had to catch up at home and I feel if I were in the lesson at the time, the outcome would have turned out even better. After some practice with the layer mask, I feel pretty confident with it now so I think using the layer mask went well the most. If I could do this again, I’d like to experiment with a nighttime photography.
0 notes
Text
Wk 4: Putting skills into practice
For the start of the lesson, we looked at 4 example images and what tools and skills were needed to build them whilst noting it down on a spider diagram.
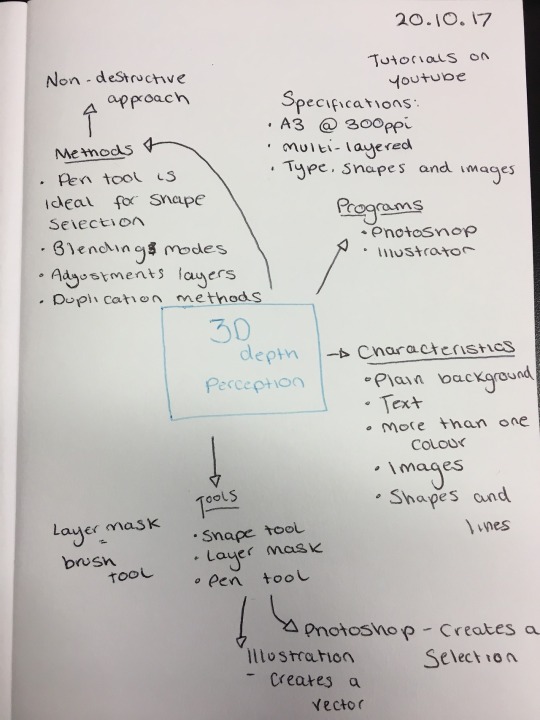
Our task for the rest of the hour was to create an image similar to those we looked at using a selection of images already handpicked. Our edited image had to remain non-destructive, be A3 in size with 300ppi, multi-layered and consist of shapes, text and images.
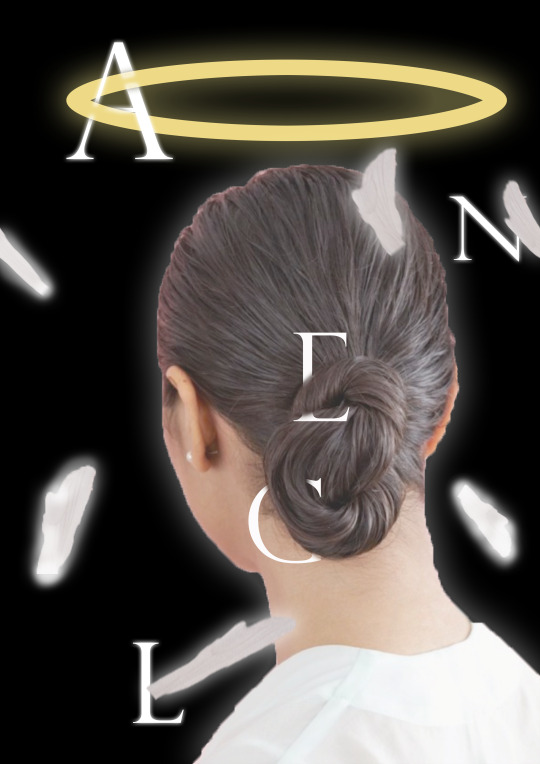
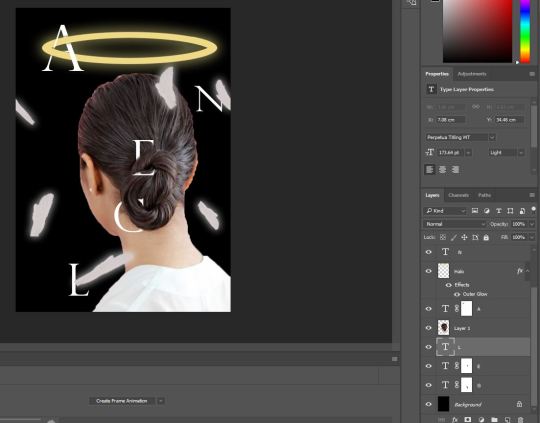
This is my final piece:
I started off with my background set to the specifications requested:
I then copied and pasted the selected image onto my photoshop file.
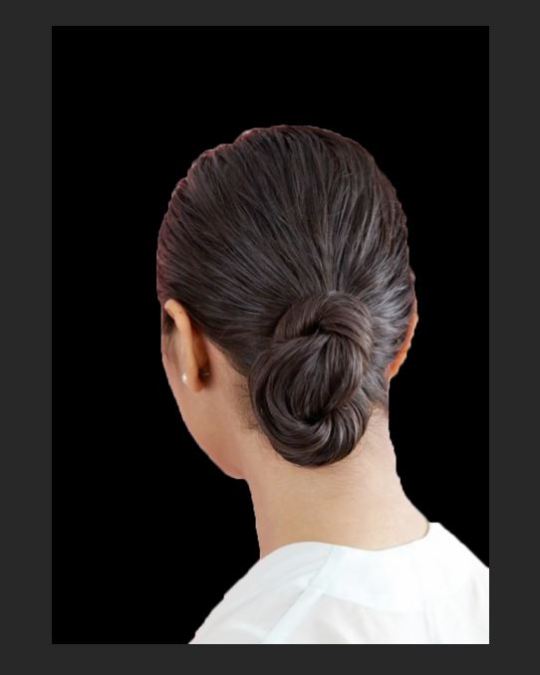
To create the halo, I followed this photoshop tutorial.
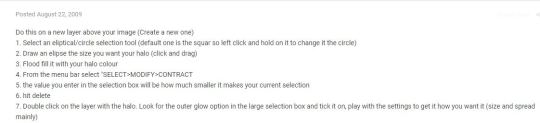
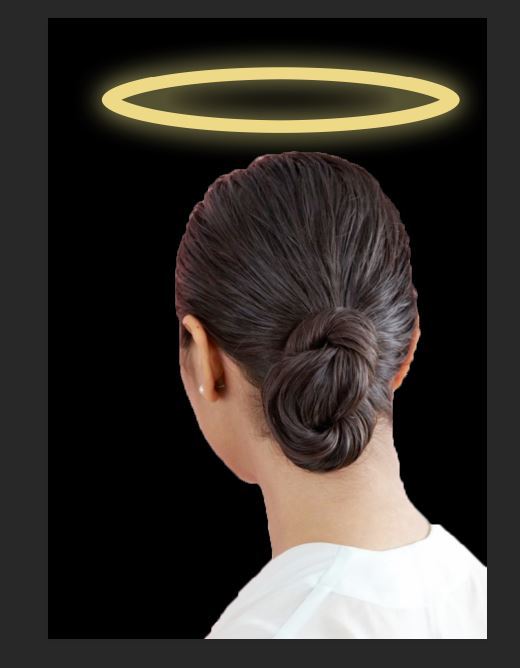
I found drawing feathers quite difficult so I decided to take the shape of a feather from a bird image using the magic brush tool and the copy > paste option.
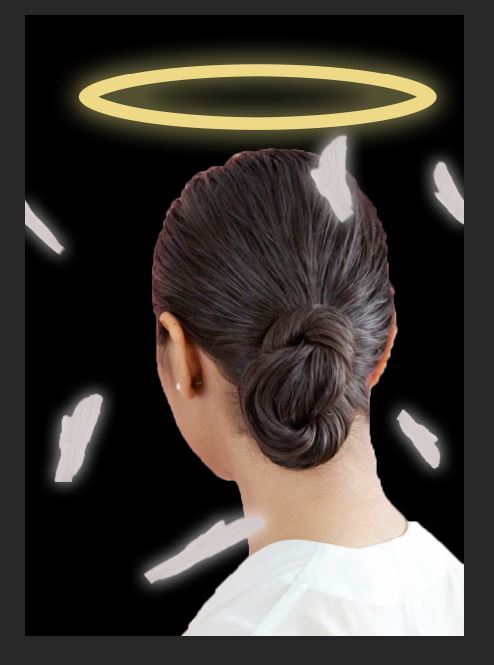
I used the blending options ‘outer glow’ and ‘colour overlay’ to give them the effect that they’re glowing.
Next, I worked on the text. I used the font ‘Perpetua Titling MT’, in the colour white and enlarged them. I used the layer mask to make them look intertwined with the halo and also the woman’s hair bun. I followed this tutorial on layer masking. You have to mask using the paint brush tool; black to erase and white to fill back in.
0 notes
Text
Creating a Secondary Colour Wheel using Nature images
What are primary, secondary and tertiary colours?
Primary colours are the three colours that can be mixed together to make every other colour. These colours are red, blue and yellow.
Secondary colours are the primary colours + the colours that are made after mixing the primary colours with each other. For example, a secondary colour is purple because it is made up of the two primary colours blue and red.
Tertiary colours works in the same way. Tertiary colours are the primary colours + secondary colours + the colours that are made after mixing the secondary colours together. The number of colours and shades doubles each time.
What are complimentary colours?
Complimentary colours are the two colours that go well together, look appealing to the naked eye and are aesthetic. An example can be Christmas. Red and green are two colours associated with Christmas and these are both complimentary colours which could explain why Christmas colours look appealing.
What connotations are associated with the following colours?
red – yellow – green – blue
Red: Red is one of the two favourite colours in the world. Like green, red is universally associated with the word stop but red has also many different meanings in other cultures. Red is the colour of good luck in Asia and most often, countries like China draw the sun in red. In Japan, red kimonos symbolise happiness and good luck. (stop, anger, danger)
Yellow: Yellow is psychologically the happiest colour on the colour spectrum. It can mean warmth, happiness, sunshine but also caution and warning. (warning, caution, happiness, warmth)
Green: Green is universally associated with nature but it can have different meanings for different cultures. For example in Israel green symbolises bad luck whereas in China it can mean infidelity. It is also used for traffic lights indicating ‘GO’. (envy, illness, environmentally friendly)
Blue: Blue is a popular favourite for many people and is typically the opposite to red. It is the natural colour for most things such as the ocean, sky and birds but is rarely a natural colour of fruit and vegetables. Because it is such a popular colour, different shades of blue have different meanings for example light blue is associated with peace, ethereal, serenity and spirituality. But most blues convey trust, cleanliness and loyalty. (sadness)
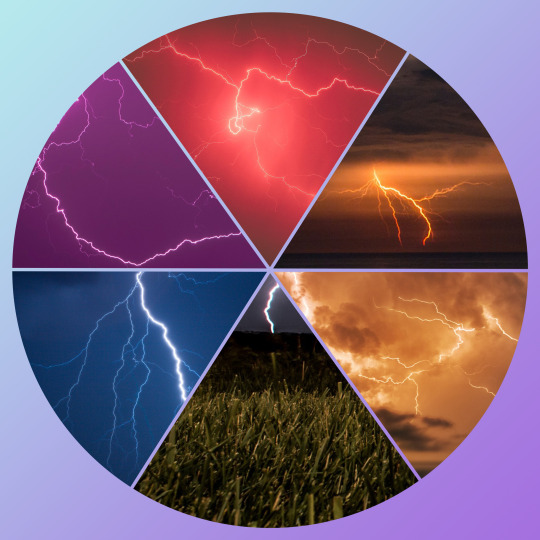
We were set the task to create our own colour wheel using free source images. I went onto Unsplash and I used these 6 images, each displaying a specific colour from the secondary colour wheel (Photographer’s name underneath each photo):
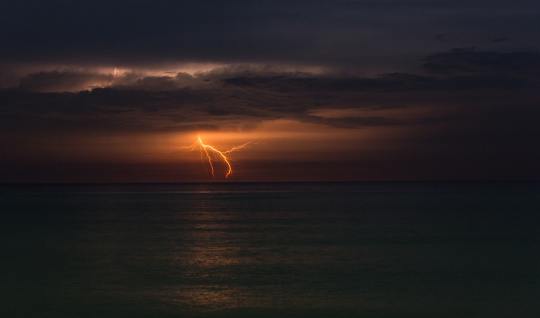
Image Credit: Marcus Neto
Image Credit: Derek Thompson
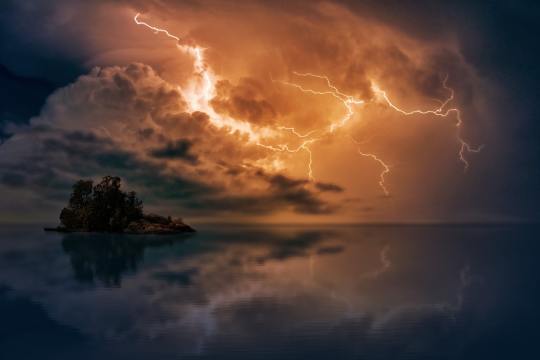
Image Credit: Johannas Plenio
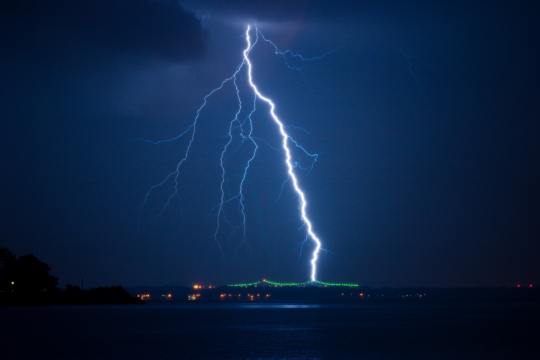
Image Credit: Sean McAuliffe
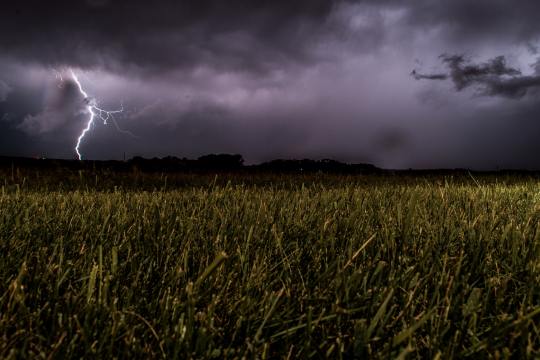
Image Credit: Eugene Triguba
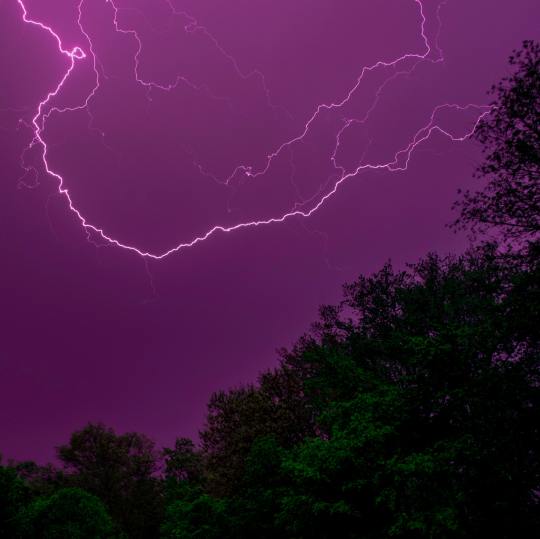
Image Credit: Peter Forster
The creation
We started off by creating a ‘pie’ in Illustrator. I created a perfect circle using the ellipse tool and the shift button and then segregated it using the line tool. I then copied and pasted the selected shape into Photoshop with the settings set to 20cm x 20cm (and 300 resolution) before resizing it to fit the square - shift + alt.
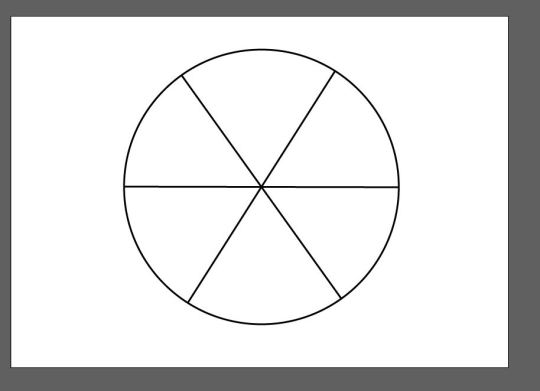
Going to File > Place Embedded, we inserted each of our images over a segment of the circle. The order was red, orange, yellow, green, blue and purple from the top segment clockwise.

Then selecting the layers using shift, we clicked Rasterise Layers.
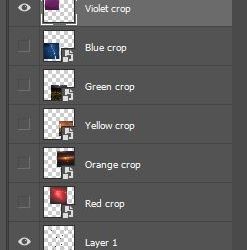
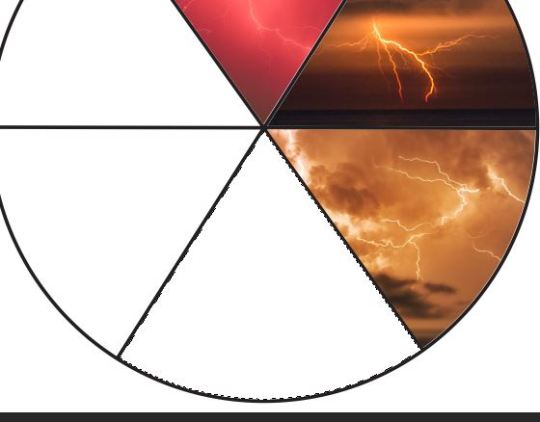
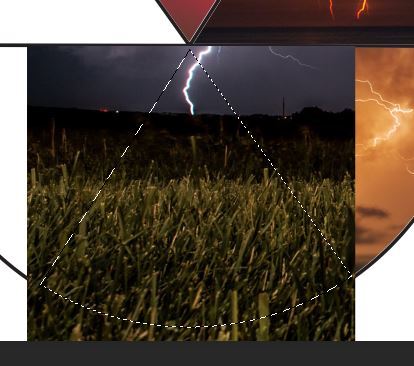
To start bringing the images in, I go back onto my circle layer and using the magic wand tool, I select the segment I want to bring through. I then click on the (crop) layer I’m bringing through, and add the layer mask
Before clicking to add the layer mask:
After clicking to add the layer mask:
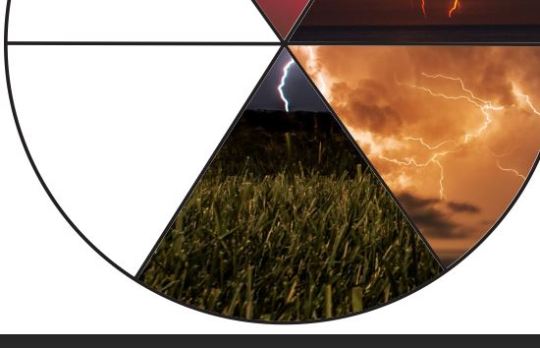
I repeated this process for all segments. I hid the circle layer and added a pastel gradient on the background. Here is my final product:
1 note
·
View note
Text
Non-Destructive Editing
Today we were introduced to Photoshop and its tools. We were to create an aesthetic album cover exploring these tools and processes:
Opening images in Photoshop
Using selection tools
Getting to know your layers
Blending modes
Duplication methods
Cropping
Curve adjustments
Saving / exporting
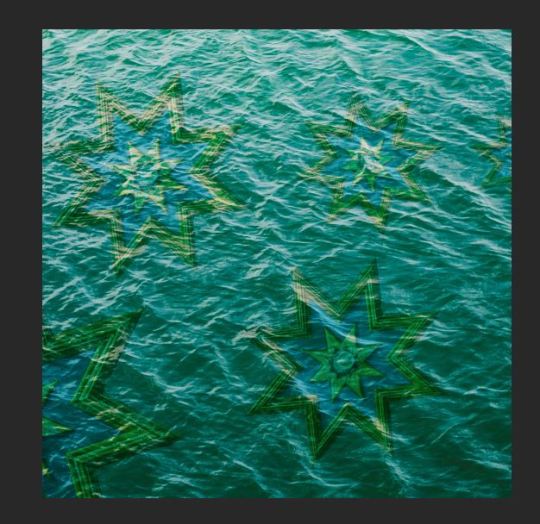
This is my final design:
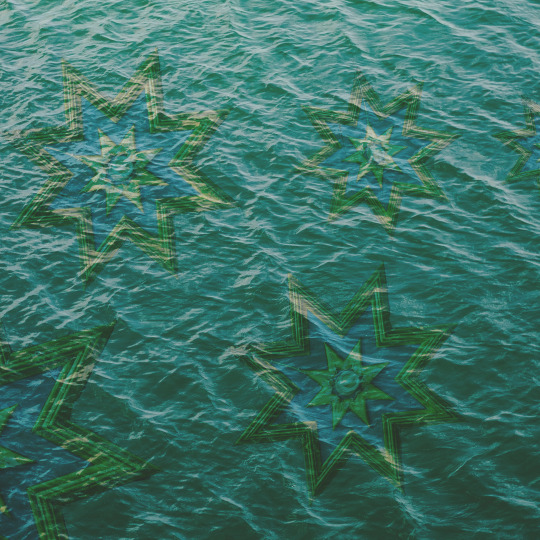
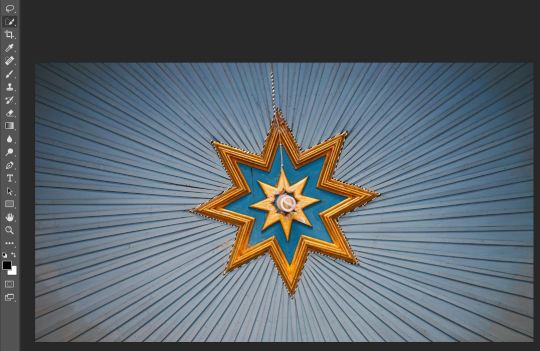
We used Unsplash to find our two images to use on our album cover. I chose these two photos:
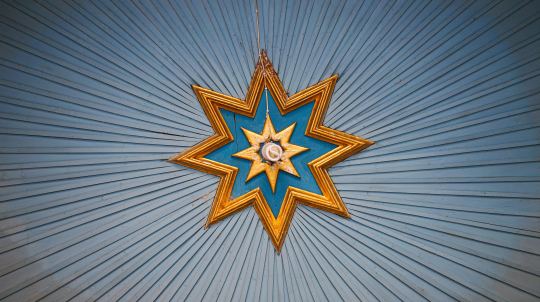
Image by Dan Gold
One was focused on the geometric shape and the latter was focused on the texture.
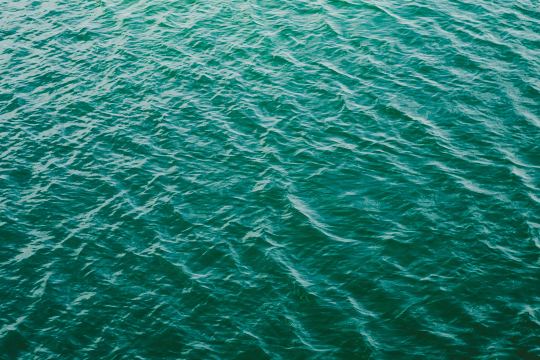
Image by Rodion Kutsaev
Unlocking the layer:
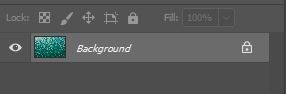
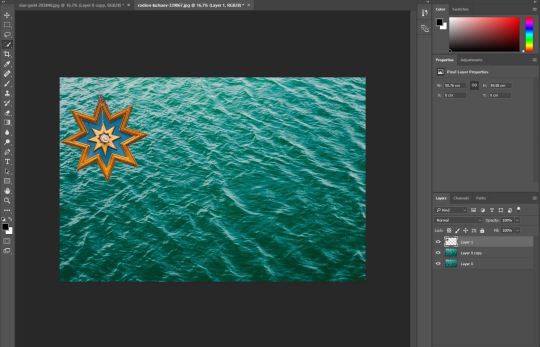
After saving the images we liked most from Unsplash, we opened two of them in Photoshop - both were under separate tabs. We clicked the lock icon on both layers as this allows us to work on the photo layer.
Duplicating the layer and using selection methods:
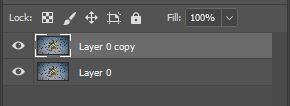
Using ctrl + J, we duplicated the layer. You can also right click and select duplicate layer.
I needed to select my shape and to do that, I used the quick selection tool as it was easier to select the entire star-like shape with it. You can also use the Marquee Tools and Lasso tools, depending on the shape.
Transform:
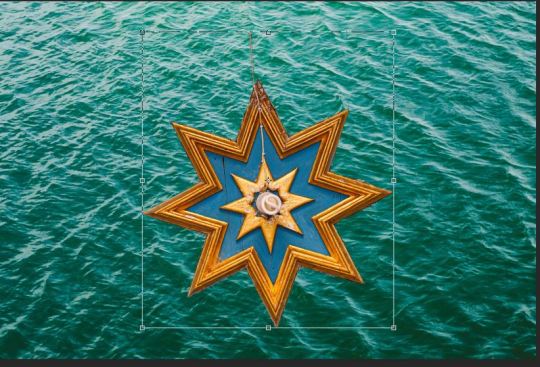
After copying (Ctrl + C) the shape and pasting (Ctrl + V) it onto the texture photo, you can use the transform option to change the position and scale of the shape. Ctrl + T is to select transform.
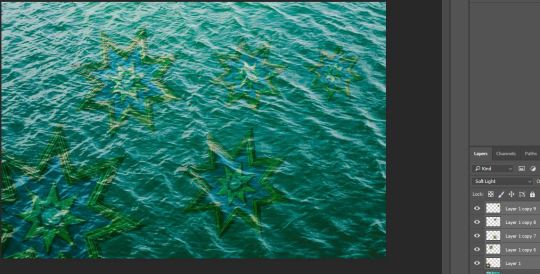
I also duplicated my shapes 4 times and the shortcut to do this is to click and drag whilst holding down Alt but you could also go to Edit and select Copy > Paste.
Editing the layer/blending mode:
Selecting all my shape layers using shift, I changed the layer mode to Soft Light. I chose this blending mode as I liked how you could see the texture through the shapes. They almost look as if they’re starfish in the ocean.
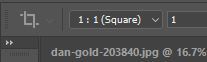
I decided to crop my work into a square to look more like an album cover and to reduce the negative space.
While crop was selected I changed Ratio to Square:
Adding Adjustments:
I edited the levels, brightness/contrast and hue/saturation of my image. I attempted editing the curves but I wasn’t keen on the way it came out so I hid that layer as you can see in the screenshot below.
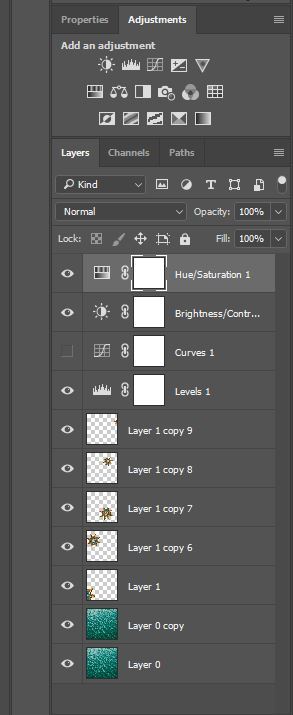
Before the adjustments:

After the adjustments:

Adding the final adjustments was went mostly well. I managed the get my image to look the way I wanted it to. I particularly like the faded effect it has, almost like a washed out feel which goes well with the ocean theme.
I don’t think the image is as interesting as what my peers produced. I don’t like how prominent the shapes look through the waves and I’d have liked them to be less view able.
Next time, I definitely would look for another shape photo that emphasises the shape more and I would also lay my shapes out differently as I don’t like the amount of negative space.
0 notes