
kisanbazar
KisanBazar
Introducing KisanBazar - the online platform connecting farmers directly with consumers! Shop a range of fresh and organic produce while supporting local farmers and promoting sustainable agriculture.
29 posts
Don't wanna be here? Send us removal request.
Last Seen Blogs

cloudpbxforsmallbusiness
Cloud PBX for Small Business

amynesskingsley
Amy Ness Kingsley

rosepinkspecks
if you love, the best timing is now.

dungeonsofrap-blog
Huh?

fuck-you-i-am-spiderman
Fling King Beast Into The Sun 2k22
Text
How to Care for Philodendron Plants
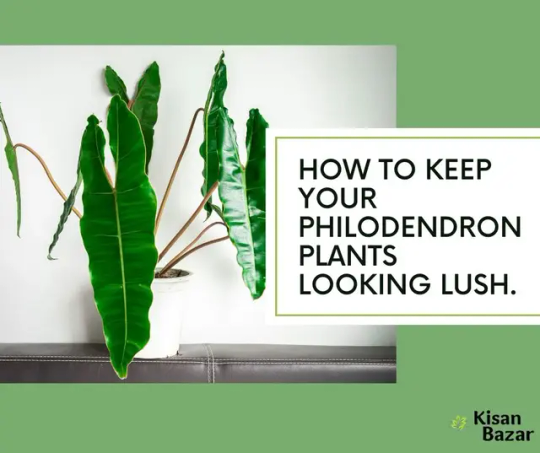
Are You Searching for Low Maintenance Houseplants to Add Greenery to Your Home? Philodendron plants make for excellent additions that require little care - from their ease of care, beautiful appearance and overall ease. In this blog post I provide all of the essential information and tips necessary to ensure the longevity of philodendron plants in the home environment.
Light and Temperature Requirements for Effective Operation
Light is essential when caring for Philodendron plants. Make sure your Philodendron gets bright indirect sunlight without direct exposure; direct sun can scorch its leaves. Philodendrons thrive best between 65-75degF temperatures so it is important to protect it from drafty spots or sudden temperature shifts.
Humidity plays an integral part of Philodendron care. Philodendrons thrive in humid conditions; therefore if your humidity level dips too low you should take steps to increase it by grouping plants together or misting their leaves regularly or investing in a humidifier.
Before watering your Philodendron, wait until its top layer of soil has completely dried before watering again. Be sure to allow all excess liquid to drain out completely from its container; this will prevent root rot from being trapped underneath wet soil, helping protect its health and prevent root diseases that arise due to overly moist environments.
Hydrating and Humidifying Philodendron plants require little attention in terms of maintenance. With proper watering and humidity levels, however, you will enjoy years of lush green foliage from these lovely flowers. Philodendron plants prefer moderately moist yet well-drained soil. In order to get optimal growth conditions for these beauties, water when the top 1-2 inches feel dry - otherwise their root systems might suffer and the plants could die quickly!
Keep humidity levels high to promote plant health; mist regularly or use a humidifier if necessary; avoid direct sunlight which will scorch its leaves and prevent photosynthesis from taking place. Place philodendron plants in indirect lighting such as north or east-facing windows for optimal results. Fertilize once every month throughout its growing season (spring-summer) using an all-purpose liquid fertilizer; with proper care and attention these beautiful perennials will continue to provide lush foliage for years.
Soil and Fertilizing
Caring for a Philodendron plant can be relatively straightforward; just keep a few key points in mind to keep yours happy and healthy. Soil should have good drainage with an ideal pH range between 5.5 to 6.5 and be fertilized every two weeks during growing season using balanced 10-10-10 fertilizer;
water the top two inches when dry; prune when too large/leggy or excessive sunlight becomes present, while optimal temperatures range between 65deg- 80deg Fahrenheit as well as temperatures between 65- 80deg Fahrenheit for optimal conditions -- in that way ensure yours keeps its healthy roots happy while remaining happy in its surroundings! Using these tips will ensure its overall well being.
Pruning and Propagation
Pruning is an integral component of maintaining any Philodendron plant. Once every month, use clean and sharp scissors to cut away dead or discolored leaves to stimulate new growth and make your Philodendron look its best.
Propagating Philodendrons from cuttings is straightforward. Cut off an actively growing stem to yield 4-6 inch cuttings; remove lower leaves before placing into a glass of water with leaves above its surface; change this every few days for several weeks or so and when roots have begun forming you can transfer this cutting into soil-filled pots for propagation.
Pests and Diseases
Care of Philodendron plants is essential to their overall wellbeing and vibrancy, so regular inspection for pests and diseases is of utmost importance in successful treatments. If any signs are discovered, an appropriate insecticide or fungicide must be applied immediately;
alternatively bringing samples of your plant in for diagnosis at your local nursery/garden center can often offer guidance as to its causes; trimming away infected leaves/stems is helpful as can following package directions when applying any insecticide/fungicide product.
As well as treating pests and diseases, taking measures to keep your philodendron healthy can also make a big difference in its wellbeing. Wiping its leaves regularly with damp cloth may help deter pests; providing your plant with plenty of sunlight and humidity may also contribute. Wilting or yellowed leaves could indicate insufficient light or water; make adjustments as soon as necessary so your philodendron thrives for years.
Repotting and Transplanting
Repotting philodendron plants is important for their health and growth, and should be done every 1-2 years.
When selecting a potting mix, it is important to choose one that is well-draining and slightly acidic. To start, carefully remove the plant from its pot and inspect the root system. Prune away any roots that are unhealthy or damaged, and then repot it in a container that is 1-2 inches larger than the current pot.
For best results, transplanting should be done in the spring or early summer when the weather is warm and dry. When selecting a location for your philodendron, it is important to choose a shaded area that has plenty of indirect sunlight.
To begin the transplanting process, dig a hole that is twice as wide and twice as deep as the root ball. After carefully removing the plant from its pot, place it in the hole and backfill with soil, making sure to tamp it down firmly. Finally, water the plant thoroughly after transplanting.
Training and Supporting
Caring for a Philodendron plant can be extremely rewarding; with proper care and attention it will prosper over the years to come. One key aspect of taking care in tending your Philodendron is monitoring soil moisture.
Make sure to inspect and water the plant when its soil becomes dry to the touch, especially Philodendron plants which prefer bright indirect light rather than direct sun as direct sun can scorch its leaves, as this should be avoided for maximum results.
As soon as spring and summer arrive, fertilize the Philodendron every two weeks with a balanced liquid fertilizer to maintain optimal conditions for it's health and blooming potential. Pruning periodically can help control its size by cutting away dead, yellow or wilted leaves; using damp cloth cleanings on its leaves remove dust and debris build-up; periodically check for spider mites mealybugs or aphids and treat with an insecticidal soap treatment as necessary if present; with proper care your Philodendron could flourish for years ahead!
Care and Toxicity for Philodendron Plants
Caring for Philodendron plants can be rewarding experience; to make sure yours stay healthy and blossom well, here are a few important pointers you should keep in mind when caring for one.
First, locate an area with bright, indirect sunlight - this will enable your plant to flourish by providing it with essential lighting needs for its development.
Second, use caution when watering philodendron plants. Allow their topsoil to become dry before watering again - using a potting mix with excellent drainage can also help avoid overwatering issues.
Make sure that when handling plants, gloves are worn when handling sap as this could irritate skin and it could potentially become toxic if inhaled - therefore keep out of reach of children and animals alike!
Fertilize your Philodendron every two to four weeks during its growing season using an all-purpose fertilizer, while pruning leaves and stems of your plant to promote its healthy development.
Finally, be sure to regularly inspect your Philodendron for signs of pests or disease and treat immediately if any appear. With proper care and maintenance, this plant should thrive for many years ahead.
Care of Philodendron Varieties
Maintaining your Philodendron plant doesn't require too much work; here are a few helpful hints on how you can properly care for it.
Provide sufficient light: Philodendron plants thrive when given bright indirect lighting from windows; placing it close by would ensure optimal conditions. Direct sunlight should also be avoided for best results.
Keep the soil moist: Water your Philodendron when its top few inches of soil become dry; but avoid overwatering as that could lead to root rot and overly saturated roots.
Feed regularly: To maintain optimal growth in spring and summer conditions for your Philodendron plant, feed it monthly with liquid fertilizer.
Pruning: For optimal plant appearance, remove dead or yellowing leaves by regularly pruning off any dead or yellowed foliage from your plant. This will keep it looking its best!
Repot when necessary: Repotting your Philodendron every couple of years will allow it to continue growing with plenty of room to expand.
Avoid Extreme Temperatures: For best results, place your Philodendron away from drafts or air conditioning vents so it does not become either too cold or hot.
Stay on the Lookout: To protect your Philodendron from pests and treat accordingly, regularly inspect it for signs of spider mites, mealybugs and scale.
Philodendron Plants Can Add Charm To Any Decor Scheme
Philodendron plants add life and vibrancy to any room in your home, thanks to their easy care requirements and adaptability to various indoor environments - an ideal option for those without green thumbs! When decorating with Philodendron plants, ensure their location receives ample indirect sunlight, with enough room for growth in its container.
To keep your Philodendron looking its best, it is vital that it receives water when its top inch of soil dries out, as well as regular fertilization every two or three months. Dust its leaves regularly so as to rid yourself of pests - this will ensure it remains healthy and vibrant over the course of many years!
How often should I water my Philodendron plant?
Care of Philodendron plants does not pose too many problems, though some knowledge may be required. One key point is not overwatering; when the top layer of soil feels dry when touched lightly it's time for some Philodendron care! As cold water can shock roots, use room temperature water instead. Water deeply until all parts of your pot have received sufficient hydration -
aim to do this every 7-10 days during warmer weather months and less frequently in wintertime. Make sure that you do not overwater the plant by periodically monitoring its soil moisture level by sticking your finger into it or purchasing a moisture meter which provides accurate readings on soil moisture content.
In order to protect its leaves and prevent their potential rot, try not to allow water into their area of potted growth as too much wet can damage or destroy their health; with proper care a Philodendron plant can make a beautiful addition to any home!
What type of soil works well with Philodendron plants?
Philodendron plants require special soil conditions in order to thrive; their ideal pH level lies between 5.5 and 6.5 for ideal results. Furthermore, light and airy soil allows adequate drainage and air circulation around these delicate flowers.
Philodendron plants require high quality potting soil that contains equal parts peat moss, perlite and vermiculite or you may mix your own from equal portions coco peat, garden soil and sand or perlite. Philodendron plants require not only soil but also pots with drainage holes for adequate drainage to avoid root waterlogging and access the right amounts of oxygen and moisture for growth. If they become waterlogged they won't survive as efficiently. This way they get optimal growth.
Philodendron plants may survive under low light, providing adequate levels for their development.
Philodendrons are widely-favored houseplants due to their minimal upkeep requirements and ability to thrive even under low light conditions. Although philodendrons can do well under low lighting conditions, proper care must still be provided to maintain healthy growth - here are a few tips to care for philodendrons in such low lighting environments.
First and foremost, it is key that you ensure the soil remains moist but not soggy. For best results, choose a pot with drainage holes, and water your plant when its top layer feels dry to touch. In addition, make sure you fertilize every two weeks to promote healthy plant development and growth.
When choosing the location for your philodendron plant, choose an area which receives indirect sunlight; this will keep its color vibrant and lush. Misting with water two to three times every week should keep moisture levels balanced for proper plant development. Also remember to rotate its location every few weeks for even growth and bloom.
By following these tips, you can help your philodendron thrive under low light conditions and enjoy its beauty for many years to come.
How can I propagate a Philodendron plant?
Care of Philodendron plants is relatively straightforward provided you follow some general guidelines. Philodendrons need regular watering; ensure soil remains damp but not saturated, and make sure not to overwater when propagating through stem or leaf cuttings.
Place stem or leaf cuttings in moist soil in an environment with warm temperatures and sunlight, misting periodically so the soil stays damp. As soon as they have begun growing actively, transfer them to another container. Regular fertilizer applications with balanced solutions will aid the Philodendron's health and growth, while pruning helps it remain attractive and maintain a good shape. With some basic care steps and regular pruning sessions, your Philodendron should soon be flourishing!
What are some common pests affecting Philodendron plants?
Proper care of philodendron plants is crucial to their health and growth. Here are some guidelines on identifying and treating common pests or diseases that could threaten to undermine its wellbeing.
Spider mites can be an issue for philodendron plants and can be identified by yellow spots and stippling on the underside of leaves. To rid yourself of them, dip a cotton swab in rubbing alcohol before gently rubbing over affected areas with your hand or cotton swaps.
Mealybugs are another prevalent problem and are easily identified by their white, fuzzy wax covering stems, leaf axils, and buds. To control them effectively use cotton swabs dipped in rubbing alcohol on affected areas or opt for natural insect control sprays as effective remedies.
Aphids, or Aphidophorus insidiosus, are tiny insects easily distinguished from one another by their green, black or white coloring. Aphids feed off of plant sap while leaving behind sticky honeydew-like honeydew residue; to get rid of them use cotton swabs dipped in rubbing alcohol to gently rub over affected areas and gently wipe the affected spots clean with them.
Scale insects are small pests that feed off of plant sap by attaching themselves to stems and leaves and feeding on its sap. Scale insects are easily identified by their hard and scaly outer shell, often covered in scale-like structures.
Read the full article
0 notes
Text
How to Grow Cherry Trees in Pots
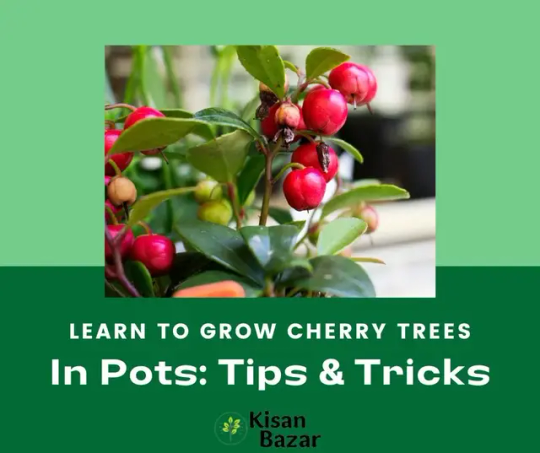
If you don't have a big yard but still want to enjoy the beauty and taste of cherry trees in your garden, consider growing them in containers. If you give your cherry tree a little TLC, it will reward you with a bountiful crop just outside your door. In this article, we'll go over several techniques for successfully growing a cherry tree in a container. We'll also provide you tips on how to take care of your tree so that it yields the most fruit. If you want to know how to cultivate cherry trees in containers and collect their delicious fruit, keep reading!
Choosing the right pot
Selecting the right cherry tree variety
Soil preparation and fertilizer
Watering and drainage
Pruning and training
Pest and disease management
Sunlight and temperature requirements
Harvesting and fruit preservation
Winter care and protection
Common mistakes to avoidCan cherry trees grow in pots?
What size pot should I use for cherry trees?
How often should I water my cherry tree in a pot?
When should I prune my cherry tree in a pot?
Can I keep my cherry tree in a pot indoors?
Choosing the right pot
If you want to reap the benefits of cherry trees but don't have much room, growing them in containers is a great option. Choosing the appropriate container is crucial for a successful harvest. The ideal container has a diameter of between 15 and 20 inches, has plenty of drainage holes, and is large enough to avoid waterlogging and root rot. Furthermore, make sure you're using potting soil made for fruit plants. For optimal outcomes, this will provide enough nourishment and hydration.
A container with good drainage will encourage strong root development; one with a broad base will prevent the plant from toppling over. Now that you have the proper container, put it somewhere that gets at least six hours of sunshine every day. This will provide the ideal levels of heat and light for development.
If you follow these guidelines, your container garden will produce luscious, flavorful cherries. You can grow a plentiful harvest of this tasty delight in your own garden with only a little bit of planning and attention.
Selecting the right cherry tree variety
Raising cherry trees in containers may be gratifying, but it's important to think about the local environment and the kind of cherry tree you want to plant. If you want to grow a cherry tree in a container, choose a small type that can thrive in confinement. Find cherry trees that can pollinate themselves to guarantee successful fruiting.
Choose which cherry tree is ideal for container planting by doing research on the numerous varieties available and making sure that the variety you settle on is resistant to common illnesses and pests. When choosing a cherry tree kind, think about how much sun the pot will get, how much wind and rain it can tolerate, and how much space you have in the yard. If you follow these guidelines, you should have a successful cherry harvest.
Soil preparation and fertilizer
If you follow some simple guidelines, cultivating cherry trees in containers may be a very satisfying experience. Use a premium potting soil formulated for trees when preparing soil for a cherry tree in a container. The container must be big enough for the tree to flourish, and it must drain well. It is also essential to fertilize the cherry tree in a container.
Follow the directions on the packaging of a fertilizer made for fruit plants. Keep the soil around the cherry tree wet, but not drenched, with consistent watering. Maintaining healthy growth requires periodic pruning of the cherry tree.
Make sure the tree receives lots of light by putting the container somewhere bright. Lastly, be on the lookout for pests and do everything you can to get rid of them if you find any. If you follow these easy instructions, you may count on having a fruitful cherry crop every year.
Watering and drainage
You can grow your own fresh, delicious cherries right in your own house by planting a cherry tree in a pot. There are a number of things you can do to make sure your harvest turns out well.
Water your cherry tree often enough so that the soil always stays wet. If you want your plant to thrive, choose a container with drainage holes and set it up on some blocks or feet. Position the container where it will get at least eight hours of sunlight a day for optimal growth. Always observe the soil's moisture levels to avoid over- or under-watering the tree. Furthermore, ensure sure the openings for drainage aren't plugged up at any point.
Soil and compost may be used to improve a pot's nutrient content if the pot is large enough and has good drainage. The humidity around the tree may be increased by routinely spraying the leaves.
If you follow these instructions, you'll have a flourishing cherry tree in no time.
Pruning and training
If you want to reap the benefits of your effort but are limited by space, consider growing cherry trees in containers. A healthy, productive cherry tree may be yours with just a little bit of care and attention.
Choosing a suitable container for your cherry tree's needs is the first step in container gardening. Choose a container that's big enough to hold the tree's roots, plus some extra room in case you need to add soil or water. It's also crucial that the container has holes on the bottom for water to escape.
After settling on an appropriate container, you must ensure the cherry tree receives enough sunshine. Be sure to put your cherry tree in a spot where it will receive at least six hours of sunshine a day.
The next step is to consistently water your cherry tree. Water it once a week minimum, and more frequently if it's scorching outside. Cherry trees benefit from fertilizer applications every few weeks throughout the growing season.
Lastly, your cherry tree needs weekly pruning to be healthy. By doing so, you may eliminate damaged or dead branches and promote healthy new growth. Also, the branches may be directed in growth.
Pest and disease management
The splendor of cherry trees may be brought inside or out by growing them in containers. When given the attention they need, cherry trees may provide an abundant crop. If you want a productive cherry tree in a pot, consider these suggestions.
Pests and illnesses may cause wilting, discoloration, and holes in the leaves, so it's important to keep an eye out for these things on a frequent basis. Remove and discard any infected or otherwise unusable branches. Maintain the tree's health and vitality by feeding it a well-balanced fertilizer. As soon as a pest or illness is discovered, the proper treatment should be applied.
Root rot may be avoided by planting in potting soil with good drainage. Reduce the likelihood of pests and illnesses by giving the tree plenty of room to breathe. Don't let the soil become too wet or dry out completely. Your cherry tree has to be in a spot where it will get enough sunlight.
If you give your cherry tree the attention it needs, it will flourish and provide a plentiful crop. In order to keep your tree healthy, you need to monitor it for symptoms of pests and illnesses. Make sure your tree has a conducive environment for developing fruit.
Sunlight and temperature requirements
Potted cherry trees demand some more Care, but they're worth the effort. If you want a bountiful harvest, follow these instructions.
If you want to plant a cherry tree in a pot, the first thing you need to do is make sure the container has good drainage. This will guarantee that the roots are not resting in water, which may inhibit the development of harmful microorganisms. It's also crucial that the container be exposed to direct sunlight for a minimum of 6-8 hours daily. To flourish, cherry trees need warm temperatures, preferably in the 65–75 degree Fahrenheit range.
It's best to keep the soil moist, but not drenched, while watering plants. Water the soil anytime you feel it becoming dry. In addition, a balanced fertilizer like 10-10-10 should be applied to your cherry tree every two weeks. The nutrients in this will help your tree develop and flourish.
Last but not least, spring pruning of your cherry tree is essential for its continued health and a bountiful yield. You may shape your tree and promote new development by pruning it. If you follow these guidelines, you should have a successful cherry harvest.
Harvesting and fruit preservation
Planting cherry trees in containers allows you to bring the sweet, juicy fruit straight into your house. You can get the most out of your cherry tree by following a few easy guidelines.
Choose a container with a minimum diameter of 18 inches and a depth of 18 inches as the first stage. This will guarantee the tree has room to grow and flourish in the greatest possible setting. To ensure proper drainage and air circulation, use a potting mix developed for fruit trees.
After you have your container and potting mix set up, be sure to give your tree enough of water and fertilizer to help it thrive. Size and form may also be managed with regular pruning. In addition, be vigilant in the detection and management of any pests or illnesses.
Cherries should be picked when they are at their greatest ripeness. Once gathered, they may be used immediately or stored for later consumption. Think about drying, freezing, or canning the cherries to keep them around longer. The shelf life of the preserved fruit may then be extended by keeping it in a cool, dry area.
If you follow these guidelines, you should be able to get a bountiful crop of cherries in your own garden.
Winter care and protection
If you want to reap the benefits of cherry trees but are limited by space, planting them in containers is a terrific option. There are a few things to remember while planting and caring for your cherry tree to make sure it thrives.
First and foremost, while planting your cherry tree, be sure you select a container with drainage holes. This will aid in keeping the soil healthy and preventing root rot. Maintain a consistent watering schedule for your cherry trees all winter long, but don't let them dry up. In cold weather, a blanket or sheet may be used to shield the pot from frost. Maintain a steady, moderate moisture level in the soil.
If you want a bountiful crop from your cherry tree, fertilize it in the spring and summer. To keep the soil wet and the tree roots healthy, remove any diseased or dead branches and cover them with mulch. During stormy weather, you should take the plant inside or to a protected spot.
With these guidelines, you may ensure a bountiful harvest of cherries from your container-grown cherry tree.
Common mistakes to avoid
The rewards of nurturing a cherry tree in a container are worth the extra effort. Avoiding these blunders will increase your chances of having a successful crop.
One of the most typical oversights is buying a pot that is too small for the root ball of the cherry tree. If the container is too tiny, the tree's roots will be unable to flourish. The tree will not be able to absorb enough water and nutrients to develop normally.
It's also crucial to amend the soil with compost and fertilizer before planting. The cherry tree will benefit from these nutrients as it develops. In addition, make sure the container is placed somewhere that receives a lot of sunshine. In this way, the cherry tree will get enough sunlight for fruit production.
The cherry tree has to be watered often. The tree won't dry up and die from lack of water if you do this. You should also trim the tree so that it has a healthy, balanced form that lets air and light reach the branches and the fruit.
Keeping pests and diseases at bay is crucial for a cherry tree growing in a container.
Can cherry trees grow in pots?
Planting cherry trees in containers is a terrific method to get instant gratification from your gardening efforts. There are a few essential measures to take to guarantee a bountiful crop of juicy cherry. Before anything else, choose a pot that can hold the tree's eventual size and has good drainage.
Position the container where it will get full sunlight for at least six to eight hours a day. Add compost to the soil to improve water retention and drainage. Maintain an equal moisture level in the soil by watering the tree on a regular basis. The tree should be pruned as required to ensure its continued good health and manageable size.
Feed the tree a balanced fertilizer twice yearly to keep it healthy. Insulate the tree more if required to keep it safe from the cold. Lastly, be sure to keep an eye out for any signs of pests or illnesses so you can take the necessary precautions. If you follow these instructions, you'll get a rich cherry harvest from a potted cherry tree.
What size pot should I use for cherry trees?
Planting cherry trees in containers allows you to reap the benefits of your hard work while adding aesthetic value to your yard. Growing cherry trees in containers requires a pot with drainage holes on the bottom and a minimum diameter of 18 inches. The tree won't be able to reach its full potential in a too-small container, and it may drown in a too-large one.
If you want to experiment with different locations to see where your tree does best, consider getting a pot on wheels. In addition, ensure that the lid fits snugly over the pot to stop any leakage of water.
After you've decided on a container, set it where it will receive plenty of sunshine throughout the day to ensure the best possible growth of your cherry tree. Keep an eye on the soil's moisture levels and water as required, but avoid soaking the roots.
Make sure the tree is receiving all the nutrients it needs by fertilizing it once or twice a year. You may reap the delicious delights of growing a cherry tree in a container by following these steps.
How often should I water my cherry tree in a pot?
You may have your own fresh cherries right in your own house by growing cherry trees in pots. The following are some suggestions for maintaining a healthy and productive cherry tree.
Cherry trees in containers need constant watering. Water your tree every two to three days, just enough to keep the soil wet but not drenched. You may use your finger or a soil moisture meter to determine how wet the ground is.
Temperature dictates whether you should increase or decrease the quantity of water you feed your tree each day. Watering frequency will also increase with decreasing pot size. Keep the leaves dry by watering the trunk instead of the branches.
By adhering to these guidelines, you may guarantee a fruitful harvest from your cherry tree in a container. In your own backyard, with just a little TLC, you can grow a bumper crop of sweet cherries.
When should I prune my cherry tree in a pot?
Cherry trees are easy to grow in containers and may produce a large amount of fruit. Pruning your cherry tree correctly each year will assure its continued health and the production of a bountiful yield. If you want a healthy, flourishing cherry tree, it's best to do any necessary pruning in the late winter or early spring, when the temperature is still chilly and the tree is dormant.
Pruning a cherry tree involves removing any branches that are dead, diseased, or otherwise in poor condition. If you want more air and light to reach the tree's core, you should trim down the branches that are crowding it. Trim back the excessive stems that are preventing the development of new branches, and remove any branches that are growing too near to the trunk or crossing each other.
Next, prune the tree so that it has a pleasing form, such as a vase or a rounded tree, by removing any branches that are too far from the trunk. If you want to cultivate a healthy cherry tree in a pot and maximize your yield, follow these instructions.
Can I keep my cherry tree in a pot indoors?
The delightful flavor of fresh fruit may be enjoyed without taking up too much room if cherry trees are grown in containers. Make sure the cherry tree pot has a capacity of at least 20 gallons to accommodate the tree's eventual size.
Too much water might cause root rot, so make sure your container has sufficient drainage. Choose a potting mix that drains well and is rich in nutrients, and think about adding compost to the soil for even more nutrients, for the greatest results.
Plant your tree in a location where it will get at least six hours of sunshine each day. Fertilize your tree in the spring and summer to promote a bountiful yield, and water it frequently throughout the year. You can assist your cherry tree produce more fruit and better development by pruning it annually. Keep an eye out for pests and diseases and treat your tree accordingly.
If you follow these guidelines, your container cherry tree should produce a bounty of sweet cherries.
Read the full article
0 notes
Text
Commodity and States wise Market Rate in India (Updated Daily - [date])
Commodity and States wise Market Rate in India (Updated Daily)
Read the full article
0 notes
Link
0 notes
Link
0 notes
Link
0 notes
Link
0 notes
Link
0 notes
Link
0 notes
Link
0 notes
Link
0 notes
Link
0 notes
Text
Cut Flower Growing : Commercial Chrysanthemums
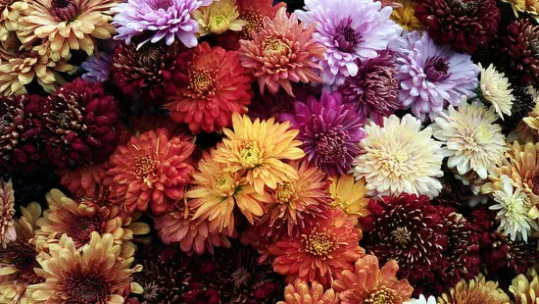
Beautiful chrysanthemums are a favorite for floral arrangements since they are available in a wide range of hues. We'll explore the steps involved in growing these flowers on a farm for profit in this article. We'll explore the growing process from the peat mixture to the final product and everything in between.
Peat Mixture
The first step in growing chrysanthemums is creating the peat mixture. Peat is a type of soil that is formed from partially decayed vegetation. It is an excellent medium for growing plants because it is rich in nutrients and holds water well. At the farm, the peat is stored under cover and kept constantly wet. Regular sprayings are very important because peat can't be re-wet once it dries out.
Automated machines are filled with the peat which gets pressed into cubes with pre-made holes in the center. These blocks have a texture very similar to cooked brownies. The cubes are loaded into trays before moving on to the next step.
Chrysanthemum Cuttings
Chrysanthemum cuttings are kept in cold rooms before they are stuck in the blocks. These cuttings are often grown in tissue culture and imported for cut flower purposes. The bunches of cuttings are dipped into powdered routine hormones and then stuck into pre-made holes. By having these holes pre-punched, the damage caused to the stem during the sticking process will be reduced.
Greenhouse Growth
The trays full of cuttings are wrapped in a thick plastic covering and kept in a greenhouse. This helps create a humid micro-environment around the cuttings, preventing wilting and promoting root growth. In just a couple of days, the first roots start to appear. As the cuttings grow, new sets of leaves develop.
At this stage, the plastic covering is removed to help the cuttings acclimatize before they are transferred to the growing greenhouse. In the growing greenhouse, the cuttings and the peat blocks are simply laid on top of the floor. The nutrient and water supply is so perfectly controlled the cuttings do not need to be planted in the soil at all. As they grow, wired support is continually moved up along the stem to prevent bending.
Read the full article
0 notes
Link
0 notes
Text
What Is Coco Peat : An Overview of This Sustainable Growing Medium

Coconut husks, or "coco peat," are a sustainable and natural by-product. Gardeners and farmers all around the globe are discovering its benefits as an eco-friendly growth medium for plants. Coco peat is an all-natural alternative to synthetic fertilizers and soil that has many positive applications. In this article, we'll discuss why and how to utilize coco peat in your garden.
What is Coco Peat?
More and more eco-conscious gardeners are switching to coco peat. Coconut husk compost is an organic and sustainable growth medium that may be used as a soil supplement, hydroponic potting mix, or in containers. Because of its low weight and portability, coco peat is often used by commercial producers.
An environmentally preferable substitute for peat moss, coco peat is used to enhance soil structure, water retention, and nutrient availability. It's also a resource that may be utilized repeatedly without depleting its supply. Because of this, it's a fantastic option for eco-conscious gardeners.
The use of coco peat in both commercial and private gardens is on the rise. It's a terrific option for individuals trying to lessen their ecological footprint since it's cheap, abundant, and simple to use. Whether you're a professional grower or a hobbyist, coco peat will do wonders for your soil and plants.
Types of Coco Peat for Plants
In place of more conventional peat moss, coco peat makes for a fantastic soil supplement. The coconut husks that are discarded after production provide this sustainable resource. Several types of coco peat, including blocks, loose, and dry, each have their own set of benefits and drawbacks.
Coco peat blocks are versatile; they may be used alone or in combination with other additions to the soil. Soil structure, aeration, and water retention are all aided by this. Coco peat, when it is loose and dry, may be used as mulch or in potting soil to enhance the soil's structure. Similarly to the soil, coco peat may be used to create a nutrient-rich growth medium that is ideal for hydroponics.
To sum up, coco peat is an excellent option for those who want to enhance the quality of their soil. It is versatile, renewable, and simple to implement. Whether you need potting mix, hydroponics media, or soil for your garden, coco peat is a fantastic option.
Read the full article
0 notes
Link
0 notes
Link
0 notes