
jeggis
Robots, Puppies & Sewing Machines
#bitchRose
1544 posts
Don't wanna be here? Send us removal request.
Last Seen Blogs

xlt-green
Love Is The Answer

luckibunbun
Lemonade

buy-axes-in-central-london
rob ‘save horse, ride a cowgirl’ the guy

willicewc
Willice's Cats Blog

Photo

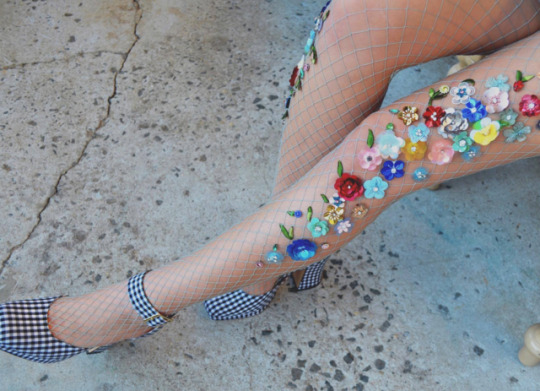
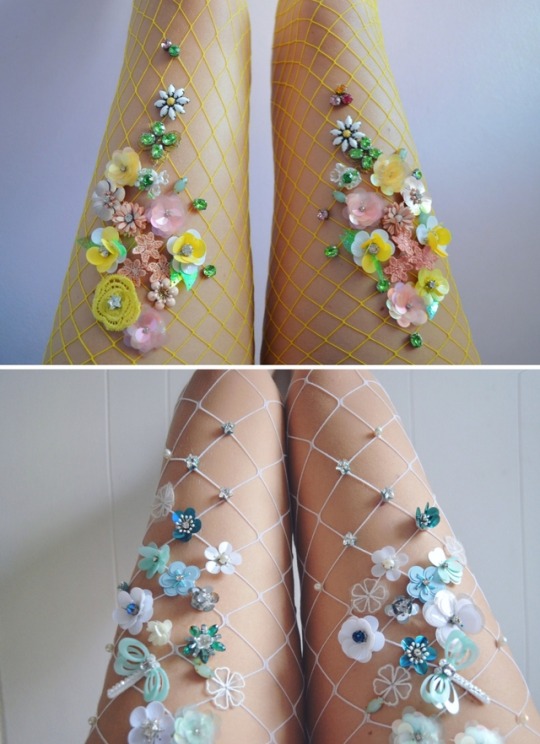
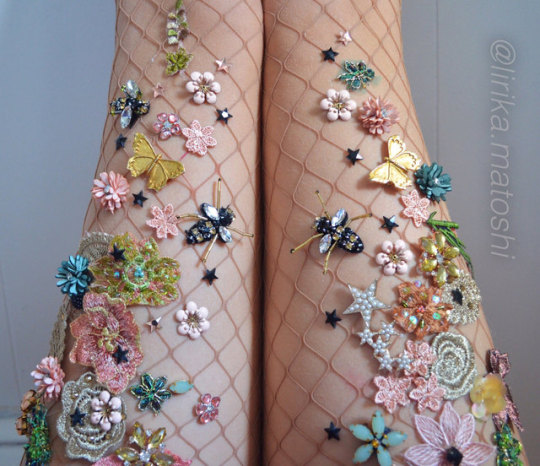

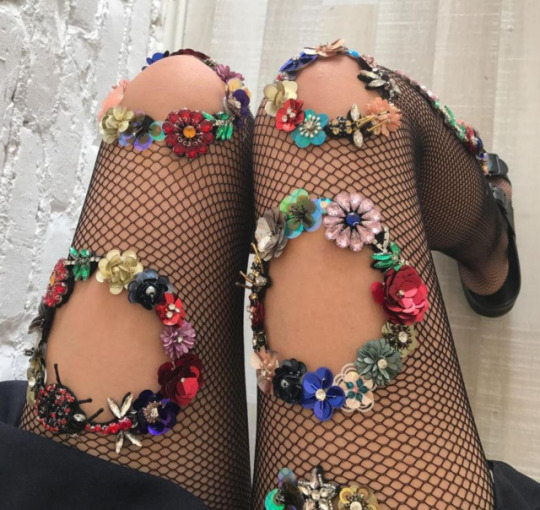
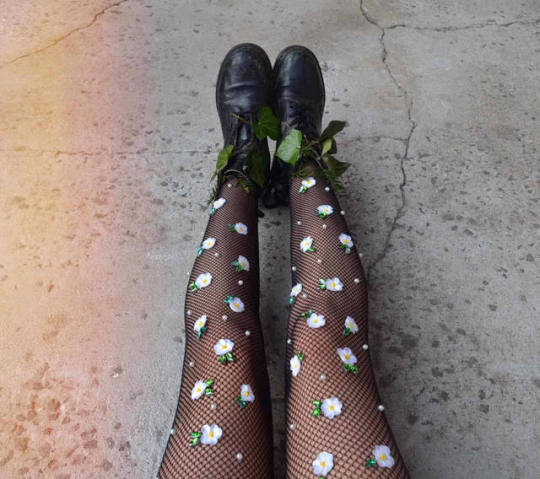
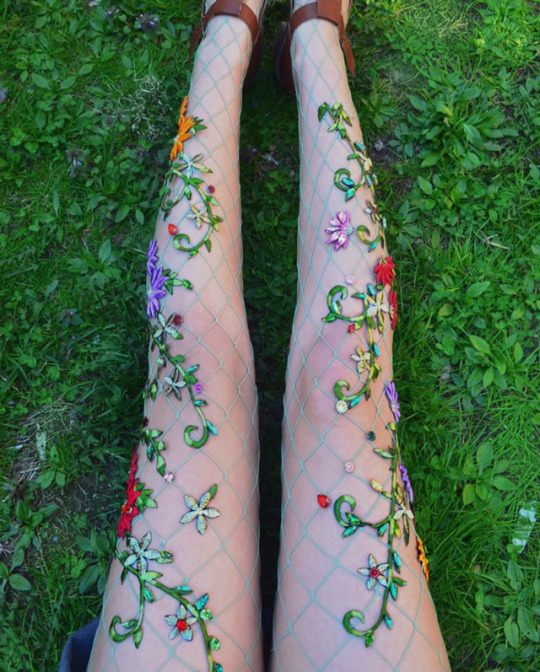
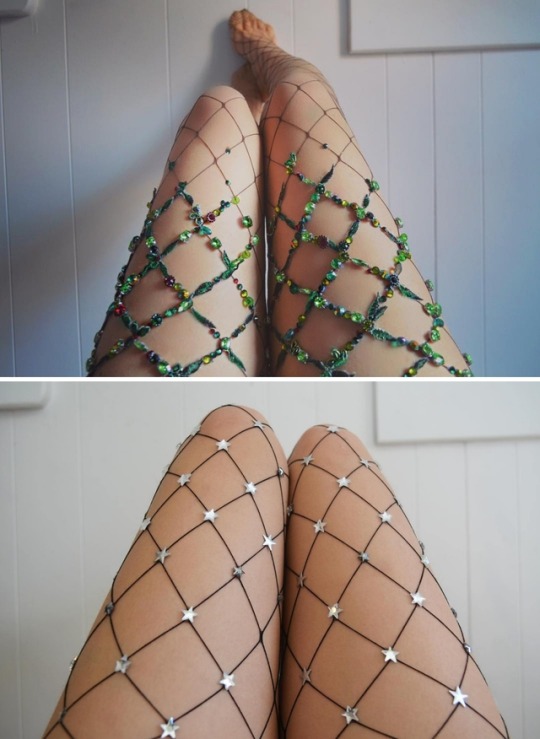
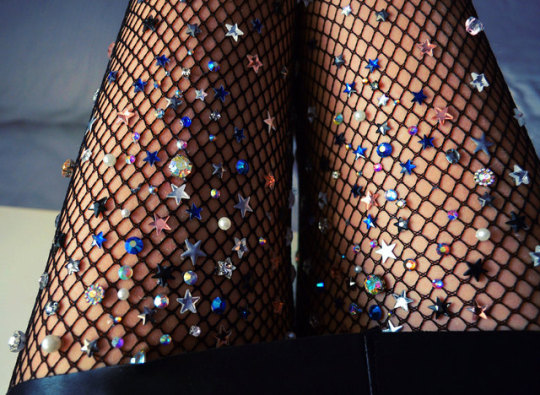
Handmade Fishnet Tights by Lirika Matoshi on Etsy
See our ‘festival fashion’ tag
Follow So Super Awesome: Blog • Instagram • Facebook • Pinterest
22K notes
·
View notes
Text
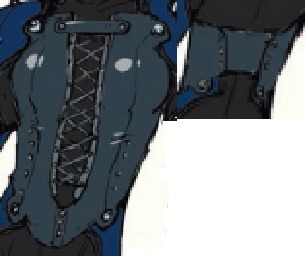
Makoto Sew-Along 2: The Breastplate/Vest/Corset
Edit: Thought I had a read more, sorry!
The next piece that I finished was Makoto’s chestplate thing (hereby referred to as the vest for simplicity). By and large, it’s craft foam covered with faux leather and lined with black jersey. The reason that I chose to make it with fabric rather than plain craft foam/worbla is because of a) the wrinkles under the bust in the reference image make me think it’s supposed to be leather, and b) wearing a significant piece made from worbla feels like I’m being gently crushed by legos all day, and the odds of me ever getting it nice and smooth are nil.
Fair warning: this is a very long post, and I take horrible pictures.
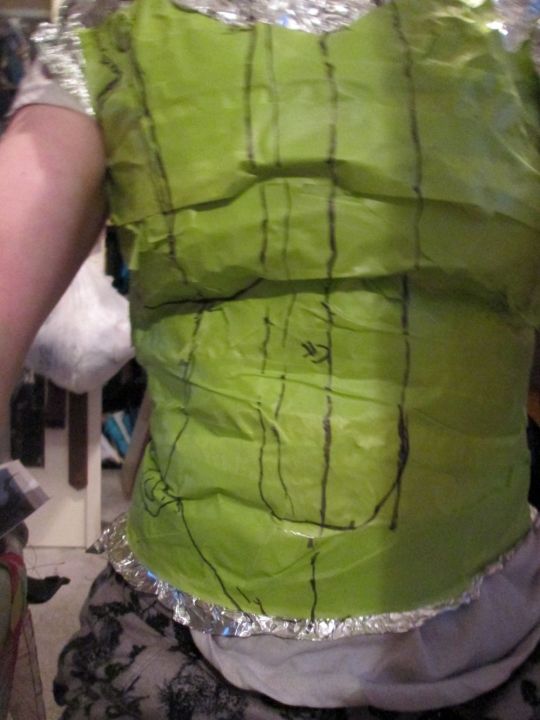
I started out by wrapping myself in tin foil and duct tape to create a form-fitting pattern. Important parts were loosely drawn on, including the centre front, side seams, the tabs, under the bust, and the U-shaped cut out.
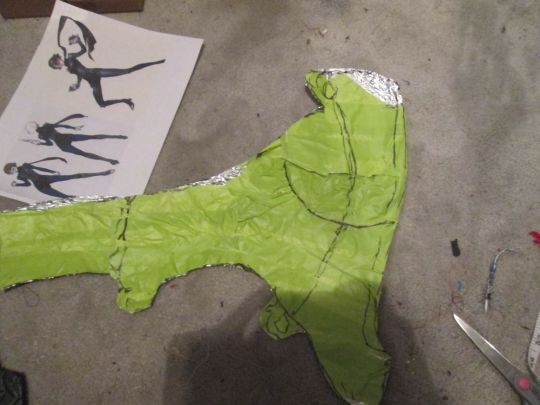
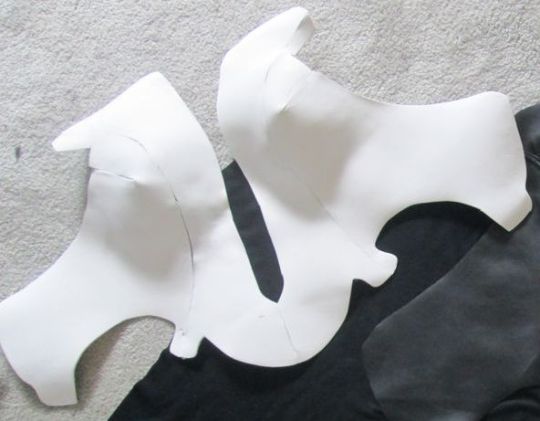
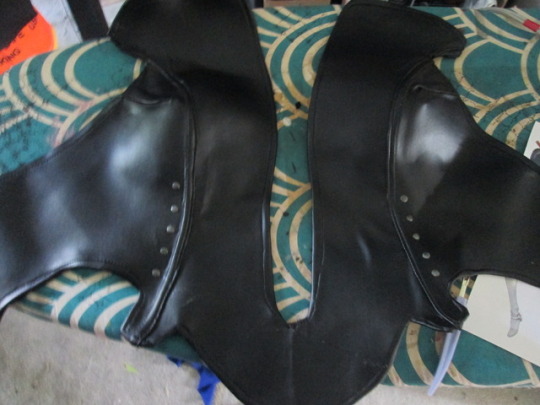
The pattern was carefully cut off of me, cut out, and flattened. My hope was to use the princess seams in the vest to incorporate all the shaping, but I ended up needing a small dart near the armpit. The entire thing is two pieces: the main piece, and the “modesty panel” at the back (I’m calling it that because it resembles a modesty panel on a corset, but it doesn’t technically qualify since, as far as I can tell, there’s no lacing.)
Next, I cut the pattern out of craft foam and taped it to my dress form (I padded the bust with an old bra, since dress forms are notoriously flat). You can see it crying for armpit darts, but first, I used the heat gun to give it a bit of shape. It certainly helps, but I’d estimate that 80% of the shape is from the princess seams and darts.
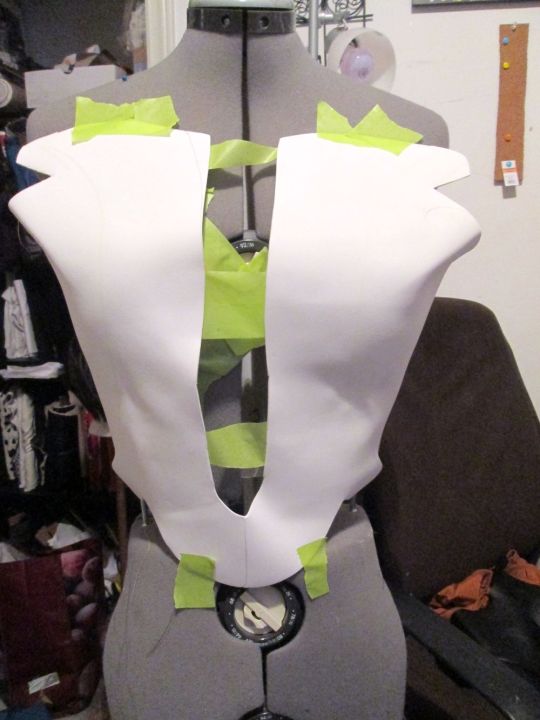
To make the darts and seams, the craft foam was cut, a dart was removed, and the foam was pushed back together with no overlap and held with tape. On the back side, I attempted to use superglue to reconstruct the foam, but it wasn’t gripping, so I ended up with good ol’ hot glue. The tape was then removed, leaving the front smooth. Here it is after shaping:
I then cut out the pleather and jersey, both of which were cut with a healthy seam allowance compared to craft foam. I wanted the princess seams to really stand out and make the vest look tough and industrial, so I did them as flat-felled seams rather than proper straight princess seams. This is something I did consistently for the rest of the costume.
Spray adhesive (I used Aleene’s Tacky Spray, which is much stronger and more permanent than most spray glues I’ve tried) was applied to the craft foam layer and the pleather was pressed on top, working towards the armpit in order to shape the armpit dart. Once everything was lined up and the dart stitched, the edges were stitched around the craft foam.
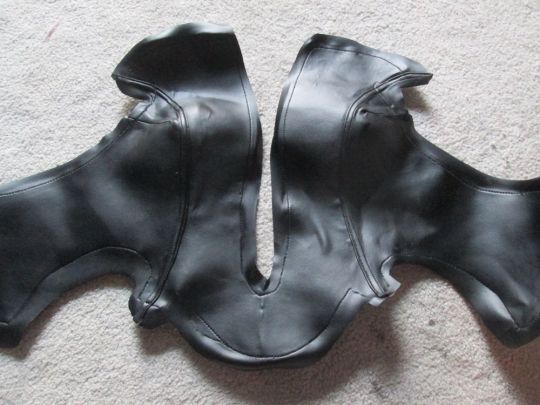
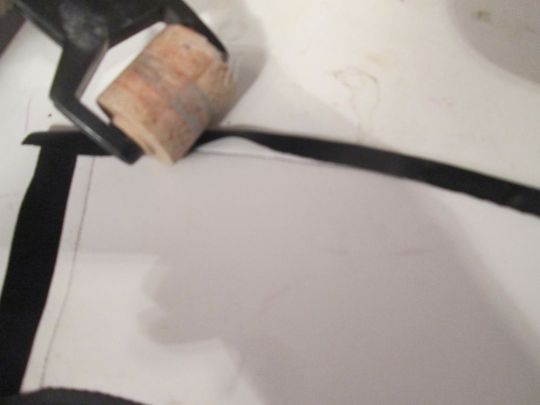
Wrapping the edges of the pleather around the craft foam was a very laborious and fiddly process. Basically, I used spray adhesive on the wrong side and pressed the seam allowance down- sounds simple, but because of all of the curves and corners, it ended up being very difficult. Here’s the process on the rectangular modesty panel, which was very simple by comparison.
(That’s a latex seam roller that I am using- helpful, but not necessary by any means!)
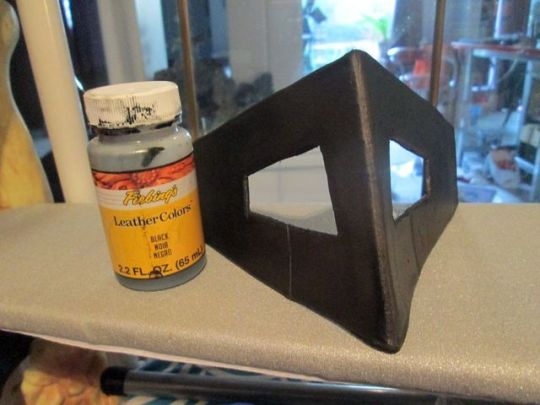
There’s a silver piece with eyelets comprising the middle U. I wanted to use a silver vinyl, but settled for a grey twill instead. It was interfaced and decorated with some stitching, just for fun. The black tab at the top was also made and decorated with a bunch of stitching. Again, not really accurate, but I think it gives it a moto feel. (The grey strip is angled the wrong way here. I fixed it before putting it in.)

I added eyelets, then basted the grey strips into place. I also made the small strip with 3 studs and stitched that into place. The lining was then basted into place, turning the hem to the inside as I went, keeping it close to the edge. The edge was stitched again to keep the lining and the hem of the pleather in place.
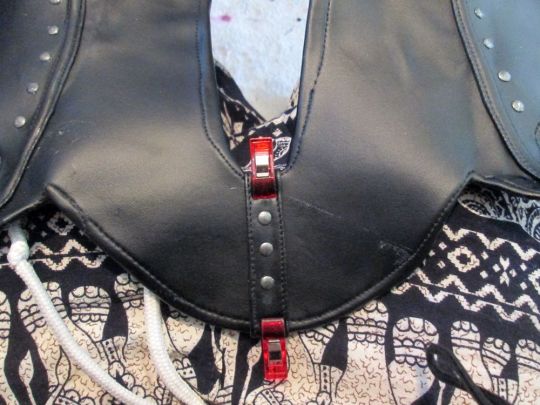
The studs were fixed on with Fabri-tac. It was my first time using it, and I didn’t realize how stringy it was, resulting in the big gross string you can see above. I managed to get 80% of it out, but ugh ugh ugh glue strings.

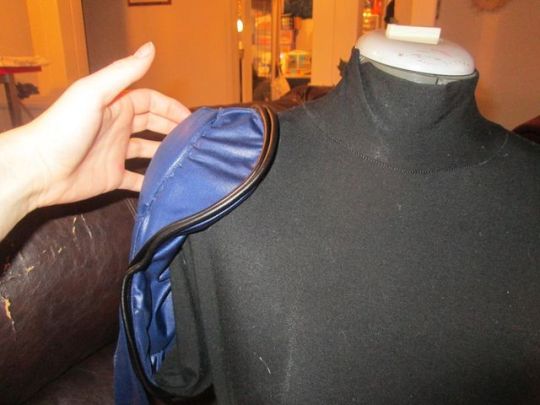
The back fastens with 3 snap fasteners on each side. They are very sturdy and run no risk of coming undone, and are easy to do up and remove. Since I have to take everything off to use the bathroom, being able to fasten and remove pieces easily was a must.
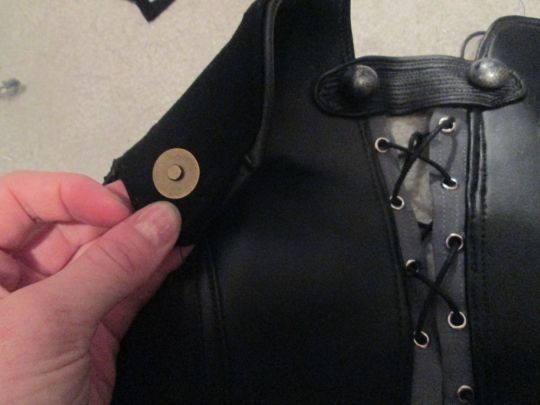
The lacing, buttons and centre tab were all added. The brass plate you see in the picture above is a magnet, intended for use in closing purses and such. It has two prongs that are stuck through the lining layer, and a partner that is stuck through the bodysuit. This keeps the vest exactly where I want it and flat against my body. Another pair is on the front bottom tabs, but I ended up not using them. I plan on adding another pair to the centre front beside the lacing, because it tended to curl away from me when I wore it.
A few more odds and ends were added to clean it up, including sewing the lace down, adding a stitch to the bottom of the U where it was pulling, and handsewing some parts of the lining.
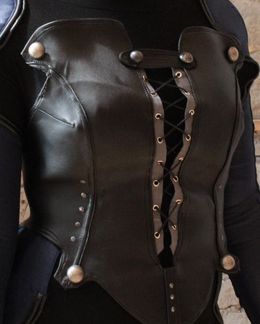
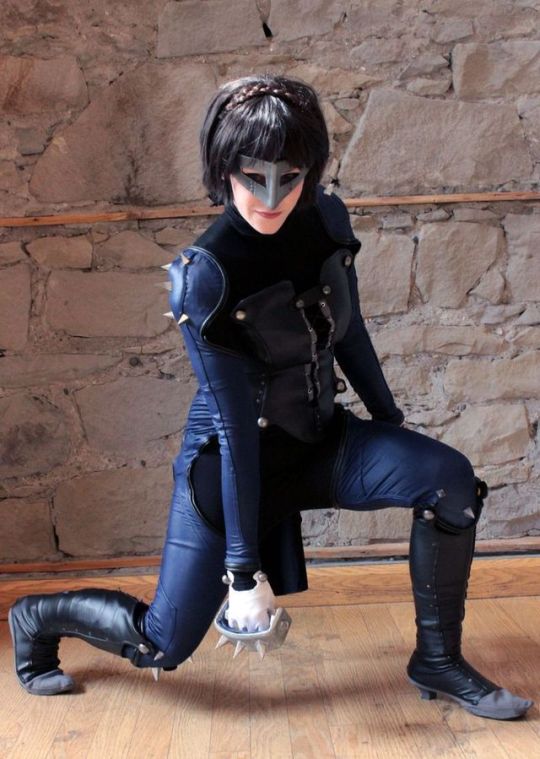
Overall, the vest is very comfortable and non restricting to wear. It’s easy to take on and off by myself, and all of the adhesives that I used held up over 2 long days of convention wear. And, as a bonus, my choice of materials made it relatively cheap. There are a couple of things that I’d like to fix for its next wear (add more magnets, make the grey bit go to the top of the vest like I later discovered it does), but overall, I’m very happy with the result.
The final product (again):

The Finished Costume
Part 1: The Gauntlets
Next up is the mask, which I’ll link when I’m finished.
Happy Sewing!
22 notes
·
View notes
Photo
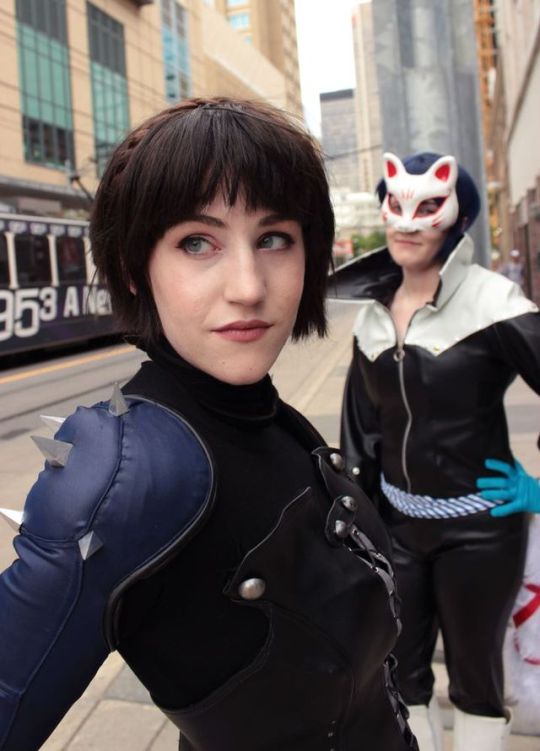
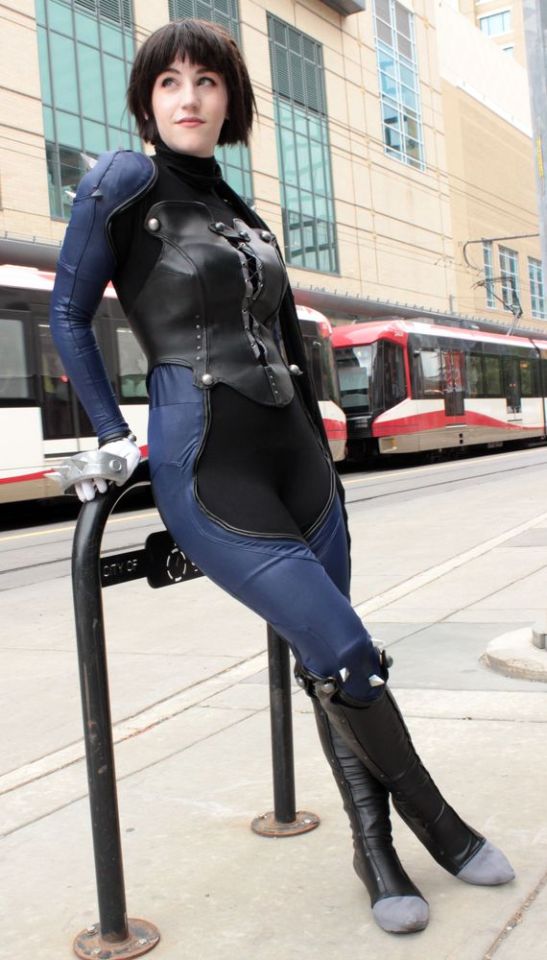

Finished Makoto! These pics were taken at Otafest 2017 (took home runner up intermediate in the craftsmanship contest, which was really exciting since it was my first cosplay award). I’m currently writing out a sewalong for this costume. The gauntlet post can be found here: x
Photo credit: x
Yusuke cosplayer : x
#persona 5 cosplay#persona 5#makoto nijima#otafest 2017#makoto nijima cosplay#my cosplays and wips#finished cosplays
6 notes
·
View notes
Text
Makoto Sew-Along 1: The Gauntlets
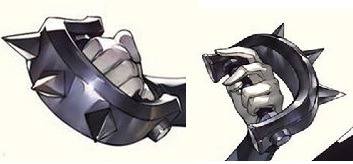
I decided to tackle Makoto’s spiky fist punchies (hereby referred to as gauntlets) first. Overall, they cost me about $10, since I had most of the materials already.
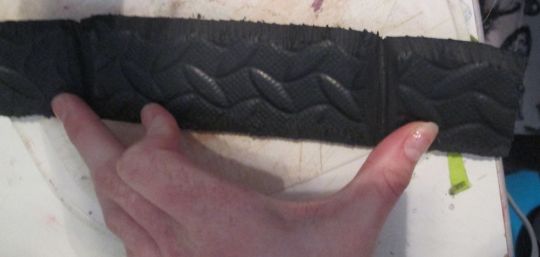
I used EVA foam floor mats (4 for $14 from Superstore), a wooden dowel (around $3 from Home Depot), and furniture tacks that stop chair legs from scuffing the floor (I believe they were around $4 for a pack of 12).
They’re not as clean as I would have liked, but I’m satisfied with the results. Since my floor mats were heavily textured on the wrong side, I decided to make a quilted pad out of the same blue fabric I used for her bodysuit. Not canon at all, but I like it.
I started off by cutting out a 2 rectangles from the EVA foam. I eyeballed the dimensions to match my hand. Where I wanted the foam to bend, I cut out a long triangle. The edges were bevelled very roughly with a box cutter. (Warning: I take horrible pictures.)
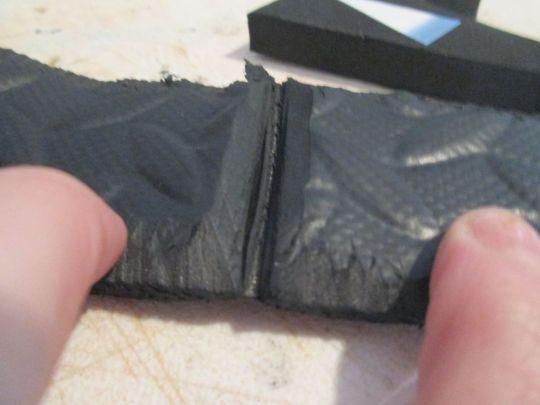
I then heat formed them with the heat gun until they curved roughly symmetrically and accurately. Once they were curved to my liking, I squirted some superglue into the scored portion to cement it and prevent it from overbending. I also measured and marked where I wanted the spikes to go.
The spikes were made using this method by Evil Ted Smith on YouTube. In a nutshell, several pieces of foam are glued together (two, in my case) and a cut into a triangle, then flipped to the side and cut again to create a four sided pyramid spike. Ridiculously simple, but I can honestly say I would have never thought of it myself!
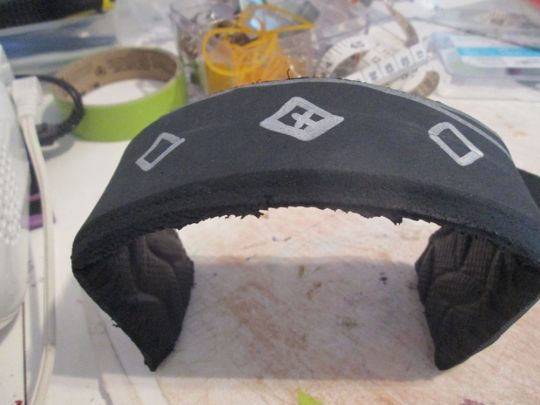
Everything was cleaned up with some sandpaper, and my spikes turned out, er, really ugly and with a big crease, so they were glazed with some Bondo Spot Putty in hopes that it would fill in the major flaws. To put in the spikes, I cut out diamonds in the main base of the gauntlet and pushed the spikes in to fit, then removed them and coated the hole in superglue to make sure they don’t budge.

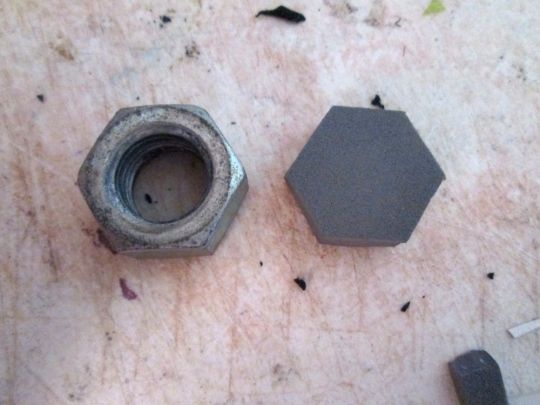
For the hex nuts, I happened to find one in my garage that slipped over the chunk of wooden dowel that I had cut very nicely. It was far too heavy in relation to the foam, and I debated moulding it and casting it, but I decided against it. Instead, I used it to trace nuts out of foam.
Next up, everything was given a few coats of sealant (I used Flexbond, which is essentially slightly thicker, more expensive Mod Podge. Some people swear by it, but I’ve really never found it to be any different than Mod Podge or school glue. But I digress.)
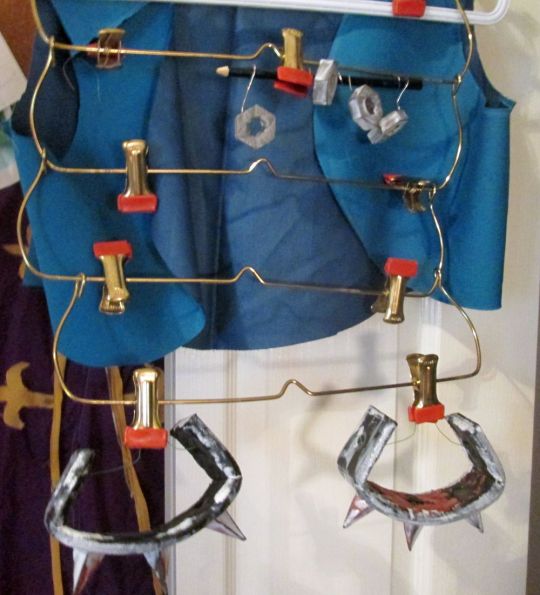
(As an aside- the really hideous purple thing in the background is, in fact, one of my first and most horrific costumes. It’s made of unhemmed broadcloth with fraying, hot glued appliques.)
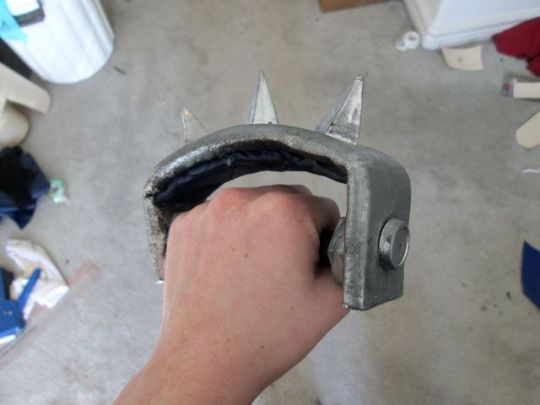
Everything was sanded in between coats of sealant, then primed, sanded, sealed, etc to get rid of the foam fuzzies and keep the spikes sharp. Then it was primed and painted gloss black with some chrome stippled on top to give it gunmetal appearance. Some steel wool was buffed over it to take down the shine in some parts.
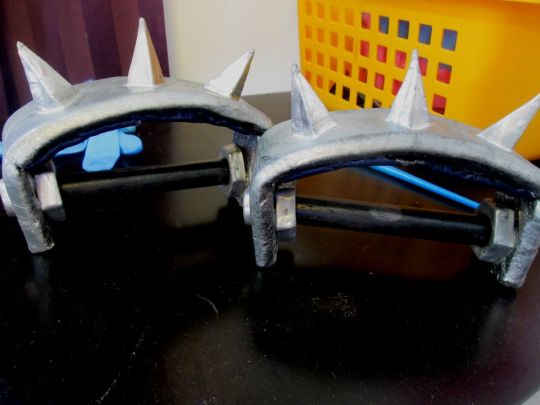
As I said earlier, I made a quilted pad to cover up the texture of the foam and the cuts where the spikes go. This was glued in place with E6000. The furniture tacks were pushed in place and secured with some superglue, and the wooden dowel and hex nuts were glued in with Gorilla glue.
The final product:

I’m not much of a prop maker, so I’m pretty happy. I hope this helped in some way! Next up will be the vest/breastplate/corset/whatever, which I'll link once that write-up is done.
Good luck and happy crafting!
8 notes
·
View notes
Photo
just a handful of Makoto progress pictures. I’m hoping to do full write-ups for each piece as I finish them, so that I might be able to help anybody stuck on their own Makoto cosplays! I’m on track to have it done by Otafest at the end of the month, so long as I bust my ass and don’t have any, ahem, major screw ups
5 notes
·
View notes

Photo


My Halloween Town Aqua cosplay :)
Photos by Inspired by Analog Photography
1K notes
·
View notes
Photo


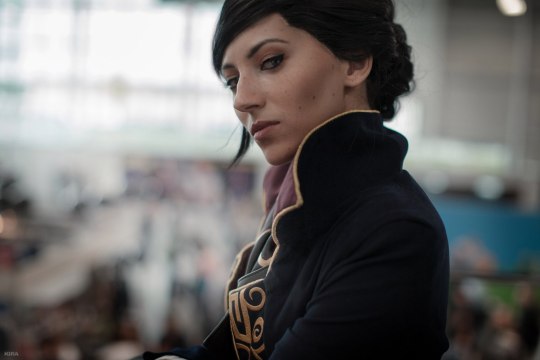


I’ve put too much effort and time into Emily Kaldwin to not post something.
I have numerous photo shoots planned for Dishonored in the future, but for now - first pics of my latest cosplay from ComicCon Russia 2016.
photo by kmitenkova
20K notes
·
View notes
Photo
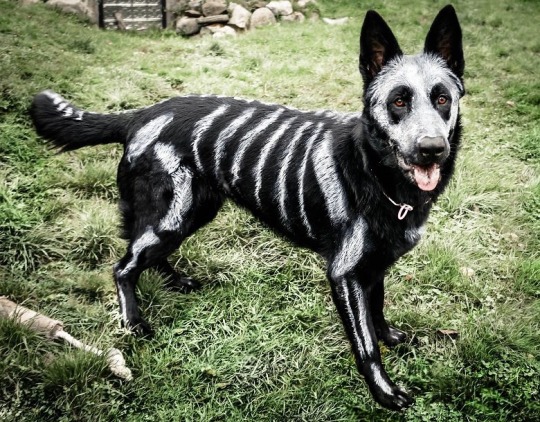
A skeleton Puppy out trick-or-treating this October! (x/post /r/petbehavior) (Source: http://ift.tt/2dfiEQZ)
3K notes
·
View notes
Photo

Old dogs can be just as cute as puppies. (Source: http://ift.tt/1FzG1cv)
1K notes
·
View notes

Photo


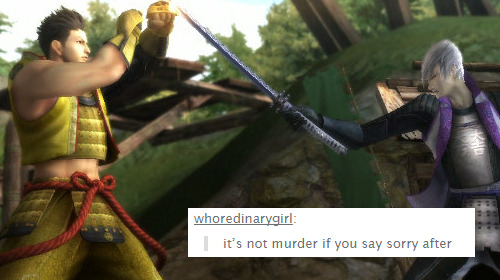


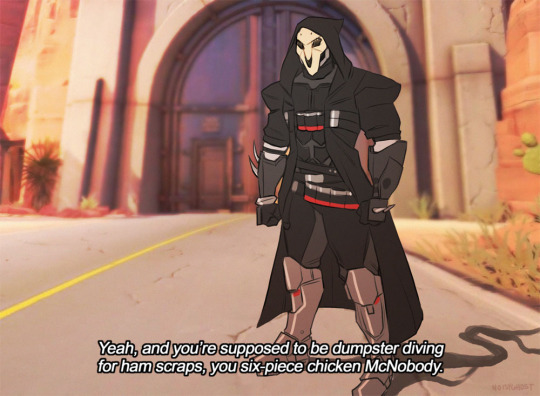
Sengoku BASARA + text post meme (part 1)
Has this been done yet?
506 notes
·
View notes
Photo

rare cosplay post from me - super proud of these arm plates 😊
2K notes
·
View notes
Link
For those of you who don’t follow me on twitter you missed out on an amazing doritos saga, but i made it all into a storify for you!
Preview of this story:

636 notes
·
View notes
Text
i did math on the ladder in metal gear solid 3 snake eater
naked snake climbs 3 bars in a single second
the entire climb takes 1 minute and 47 seconds
this means he climbed a total of 321 bars
if naked snake is 6′5″ then that means he is roughly the height of 5 bars on the ladder
with the knowledge that there are 321 bars, and each 5 bars are roughly 77 inches tall, we can say snake climbed 411.95 feet worth of ladder
that’s 2 ½ original godzillas
47K notes
·
View notes