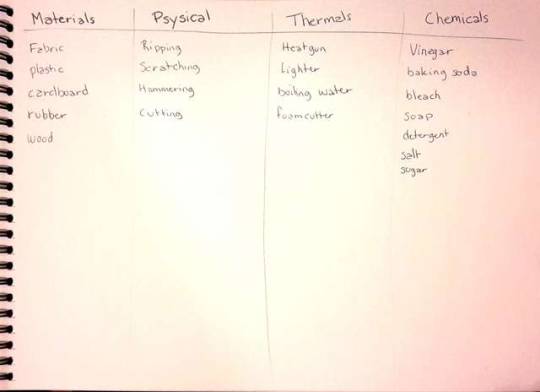
Last Seen Blogs

kikidamanik
rosegold

datsuzokuw
now

redhairfeels
hannah.17.uk
zargsnake
Bride of Vader and Other Stories

hrdfbv
Untitled
Photo


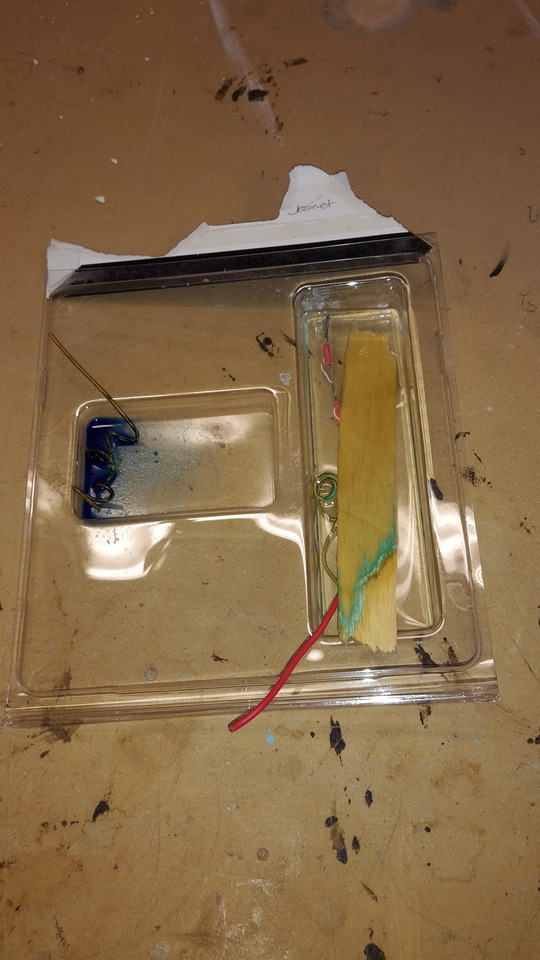
Going for the emotional qualities of joy, happines and childish, I made a model with a spinning object. I made my cast out of candlewax mixed with wax crayons, to get the bright colour. My handcrafted element, I made out of wire which I by hand twisted and bend into the shape of a spiral. I then 3d printed small baskets, which I attached to the spiral with the use of strings.
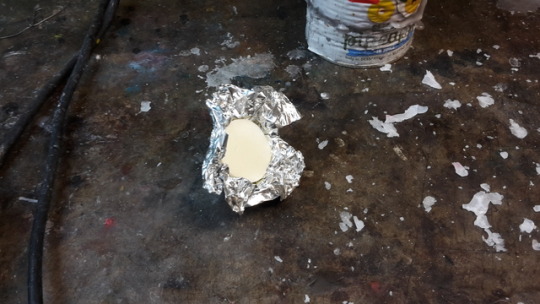
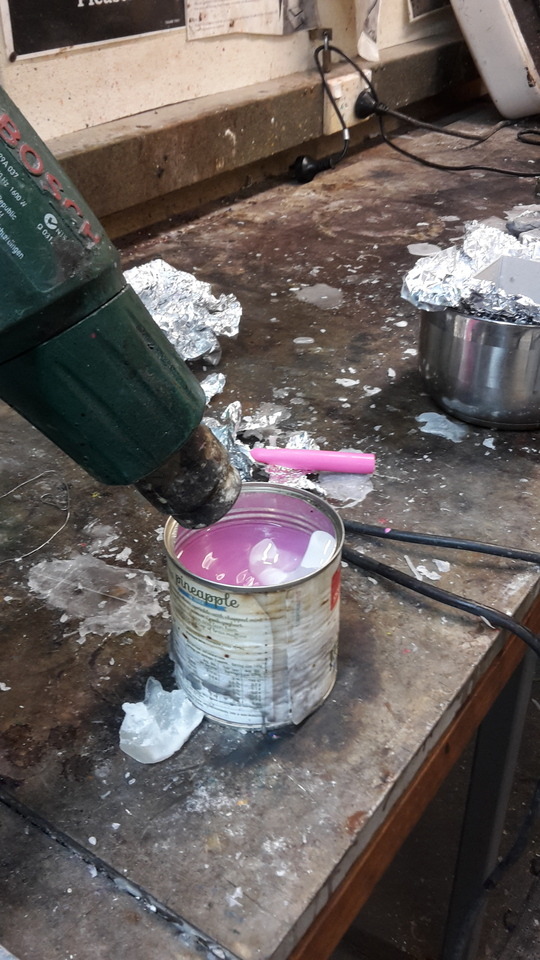
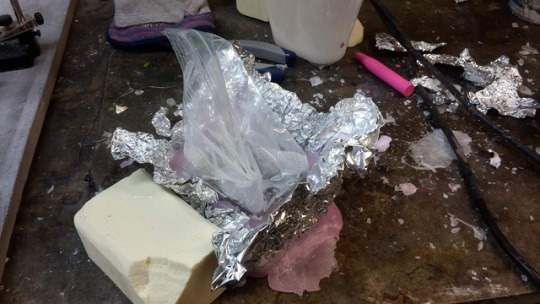
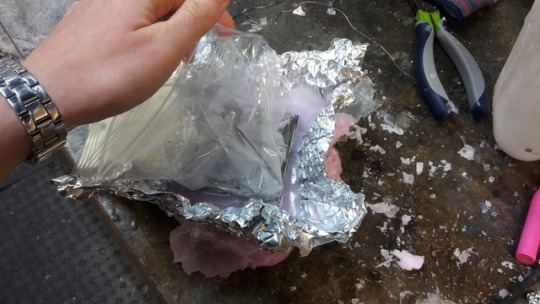
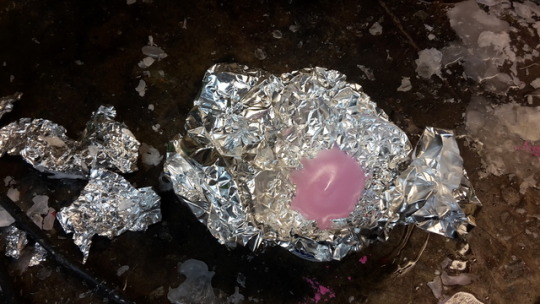
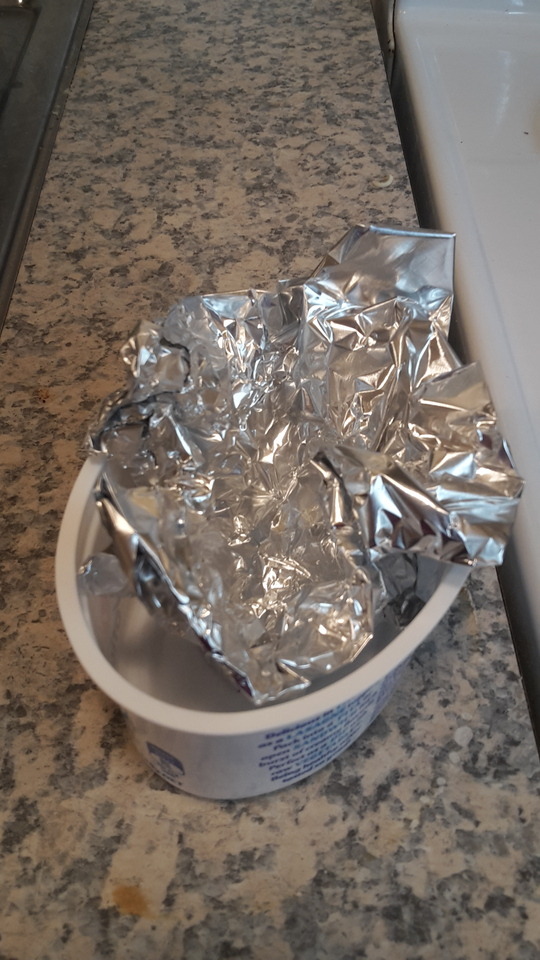
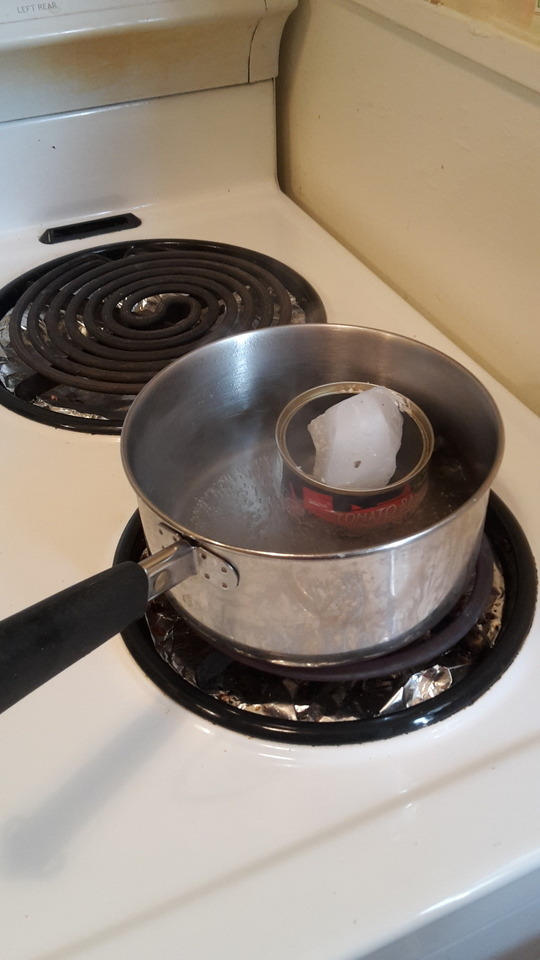
When making my model I started out by making my casted part. I the first try I placed my electronics (motor and switch) inside a plastic bag, which I then casted into my candleway, using tinfoil as a mold. As I removed the tinfoil and tested out my motor, I realised that the plasticbag had not been competely sealed, which ment that the motor had now filled up with wax. Having broken my motor, I had to start over.
For the 2nd try I made a small box for the electrical componants which I made my cast around. When my cast was dry I was able to place my componants inside, and from the opposite side attach the handcrafted spiral to the motor.
0 notes
Photo
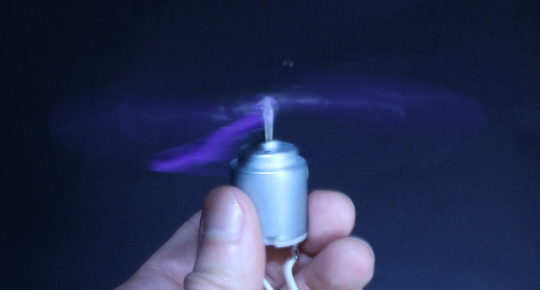
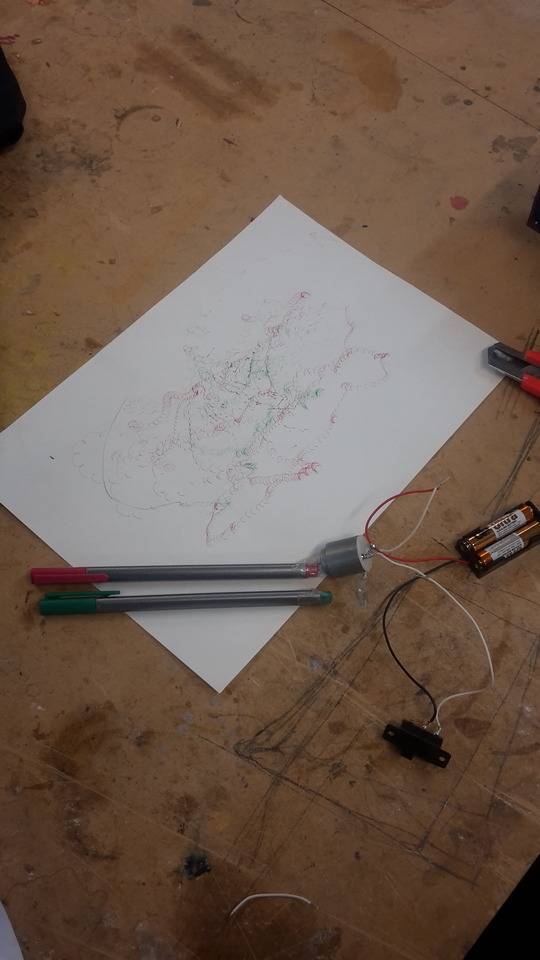
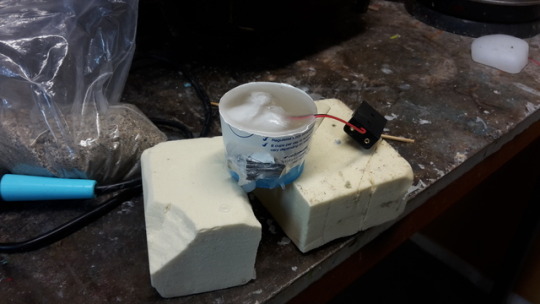
This week I experimented with the motion made by a motor. For the first experiment I attached a straw to the motor, to see the motion the accured. Adterwards I attached pens in different colours to the motor, to make a drawing based on the motion.
During this experiment I realized the difficulty of attaching an object to the motor, which would stay on as the motor would start to spin.
0 notes
Photo
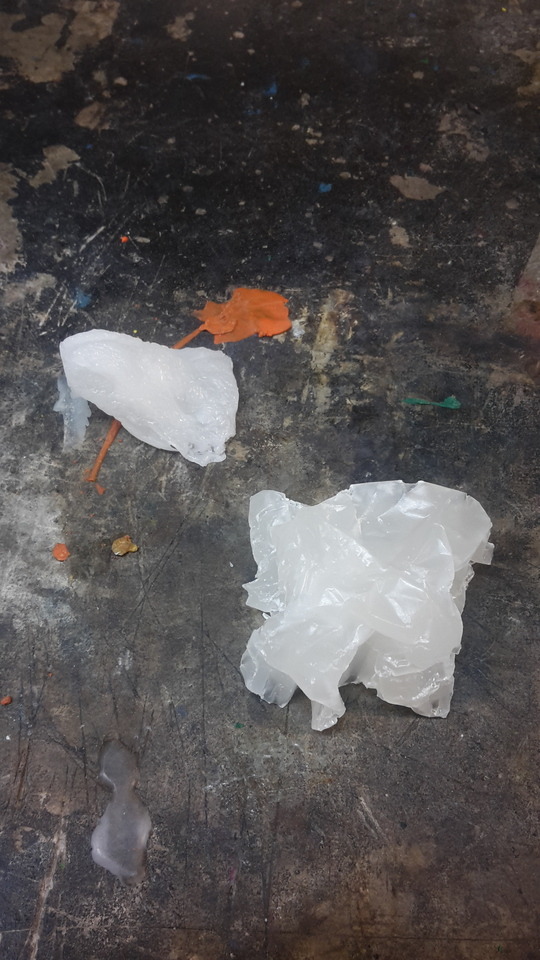
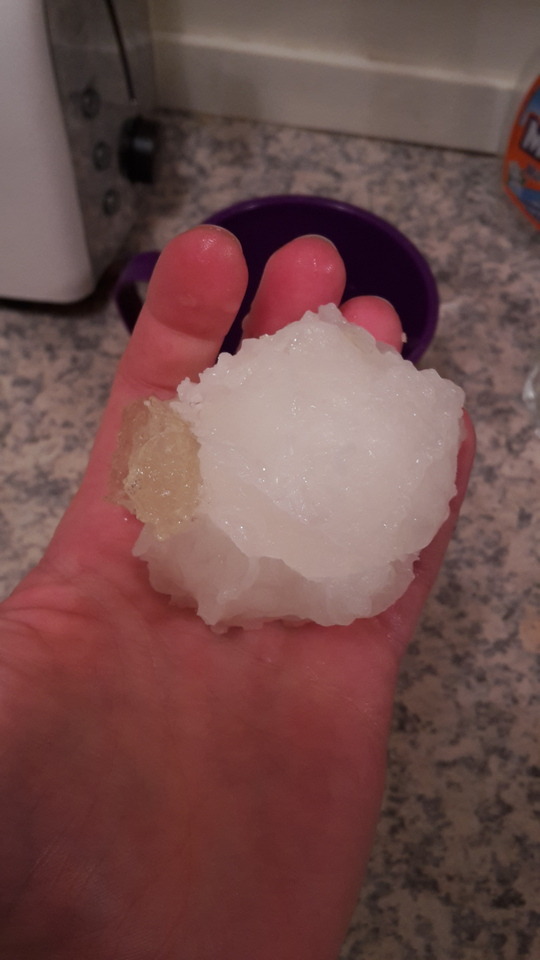
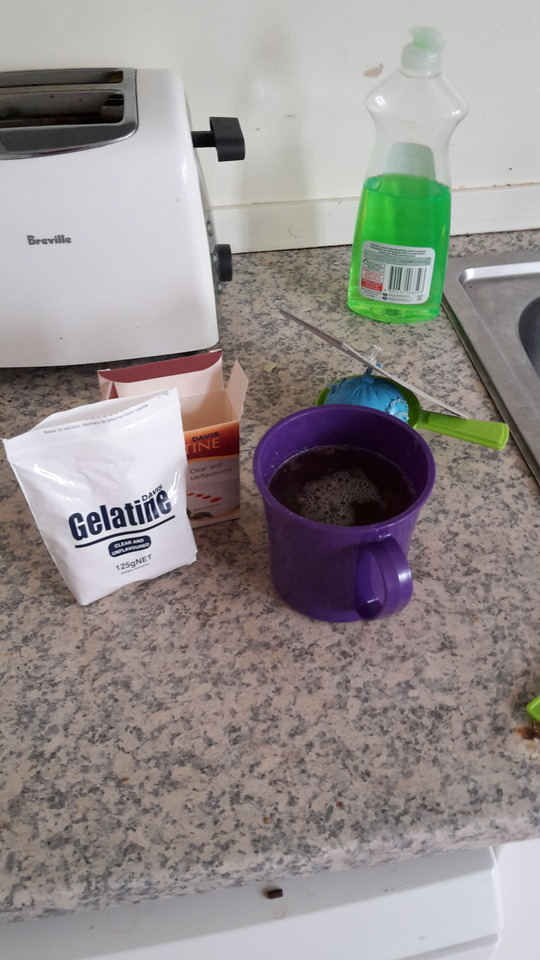
To make my mold I used my knowledge from earlier experiments, and made a soft mold out of geletine. When hardend, I carefully removed my shape, and filled the mold with candlewax. To try something different I also made a mold out of foil, which I first curled up a bit, and then folded into a shape. I then placed it in a container, to hold the mold still and in shape before pooring the melted candlewax in to dry. When both casts were dry, I removed the mold and was left with two very different shapes.
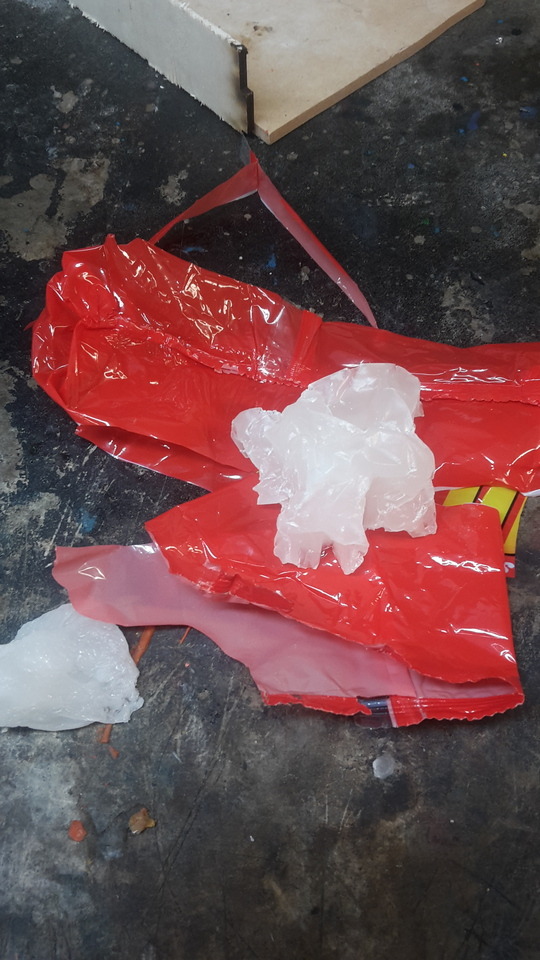
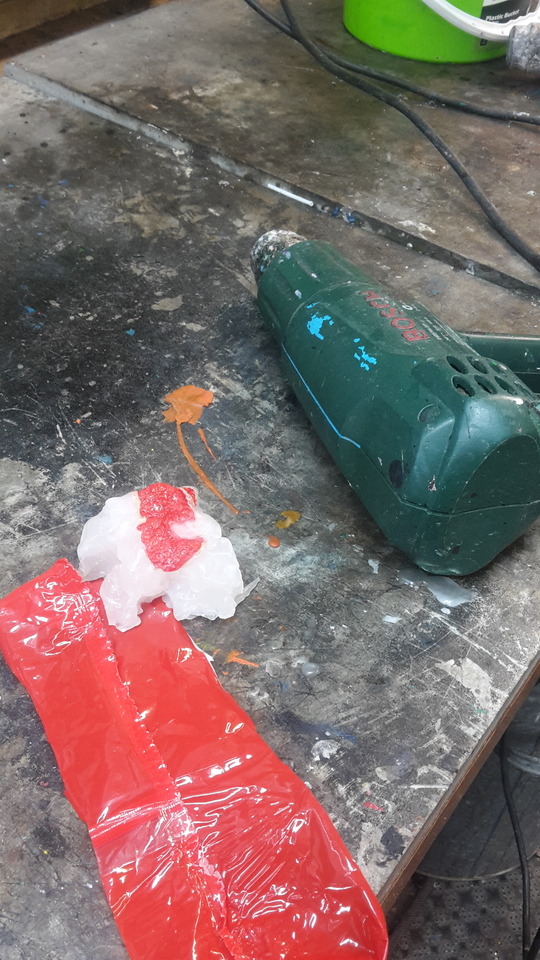
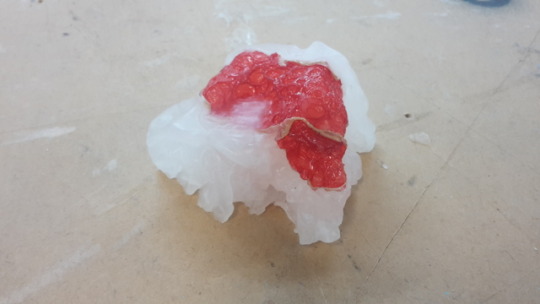
For this project I wanted to make a parasitic shape. Having my cast, I wanted to add an element of plastic. I cut up a red plastic bag and held it onto my cast, and used a heating gun to melt the plastic and wax. The heat made the plastic shrink and curl. At the same time the wax started to melt, so I had to work quickly. To make the expression I wanted, I - while heating - gently pressed the plastic into the melting wax, which made the plastic stick to the surface of the wax. The red plastic with a circular texture, now made an interesting context to the white wax with “sharp” edges.
0 notes
Photo
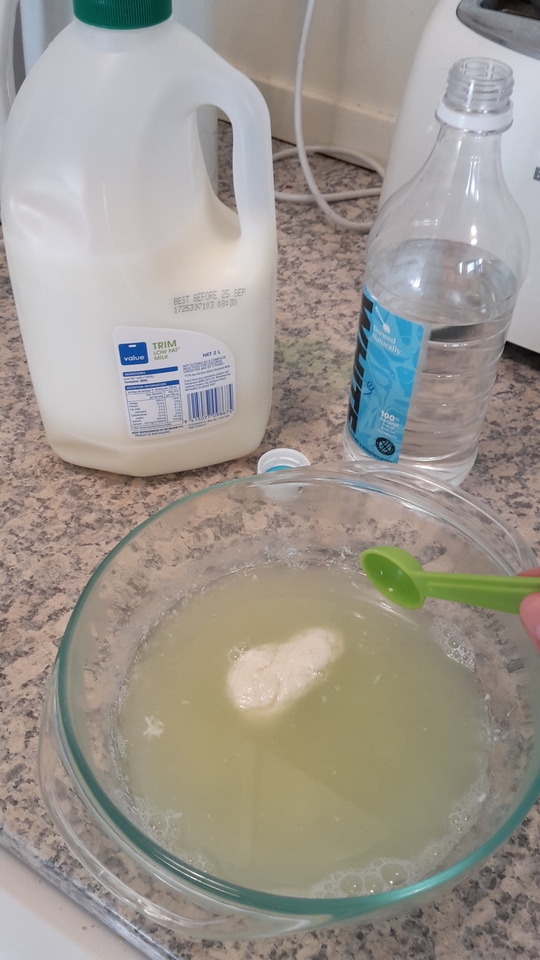
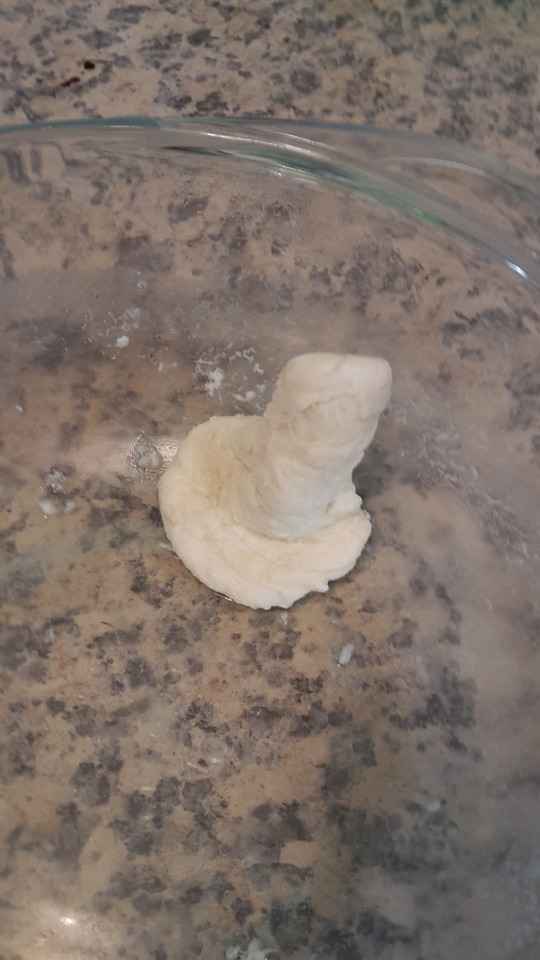

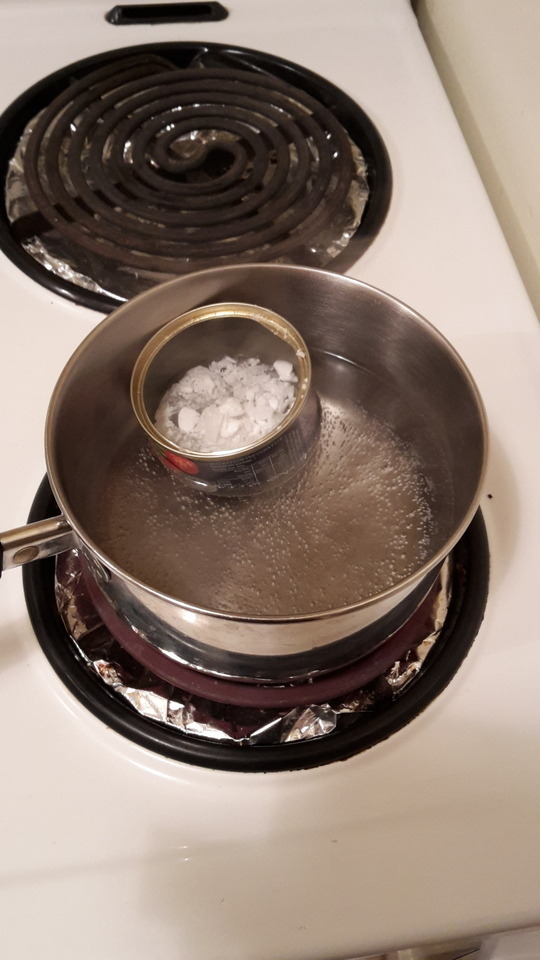
This week I wanted to experiment with making “plastic” out of milk and vinegar. With the help of an online guide, I boiled the milk, added the vinegar, stirred, and drained the fluid. What I had left was my “plastic”. I tried playing around with it, but it didn’t take long for it so, start drying and getting harder to shape. I therefore, quickly made it into a shape, and put it aside to dry.
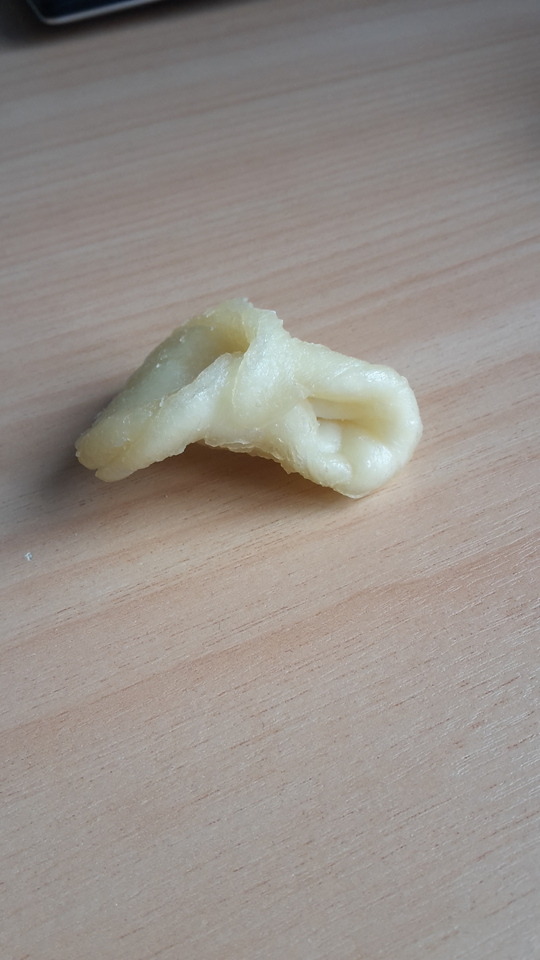
After drying for about a day, the outer layer started to turn clear, while the inside was still white. I wanted to use the shape to make my mold, but realised that some parts of the shape would be hard to get back out of the mold when dry. I therefore decited to wrap a piece of foil around the shape, to close the gaps. By curling up the foil before applying it to the shape, it added a new texture to the shape.
0 notes
Photo
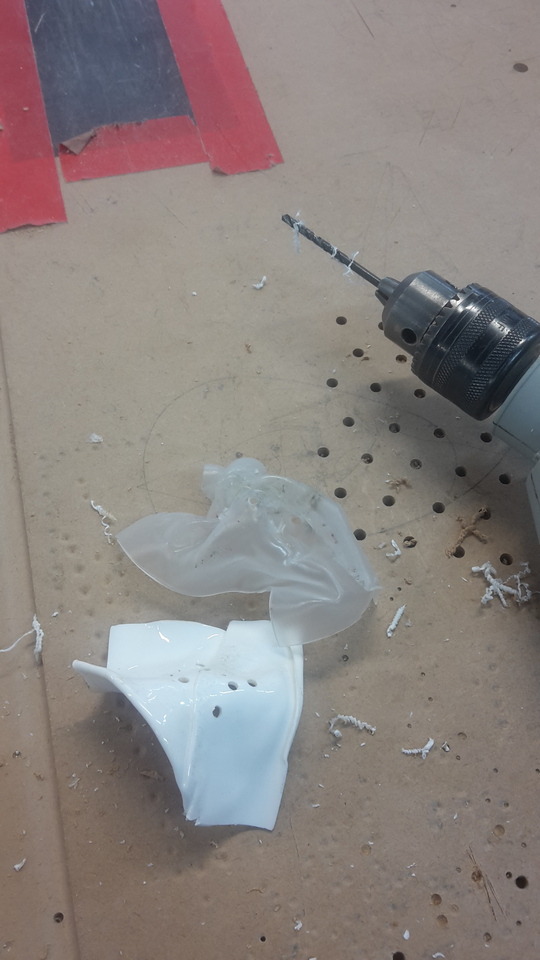
This week we had to experiment with soldering, which was a lot harder than anticipated. I started out by heating two different pieces of plastic with a heat gun, to make them melt and curl together. The one piece I pushed together, to make bigger curls. The other I folded when soft, and used a piece of wood to make folds. By using the wood to apply pressure to the soft plastic I expected to see the wood structure in the plastic after, but was left disappointed.
For another effect I now made holes, in the plastic instead with a small drill. I placed my piece of plastic in the surface of a bucket of water, and started melting solder through the hole. This didn’t work as intended either, as the solder tended to turn into small pearls on the plastic, and if it got through the holes, it just went right through, not sticking to the plastic.
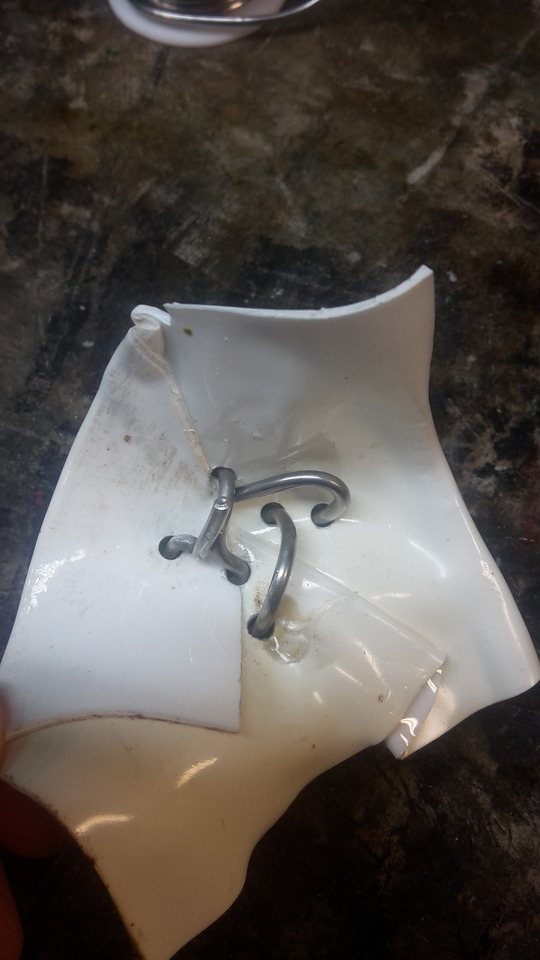
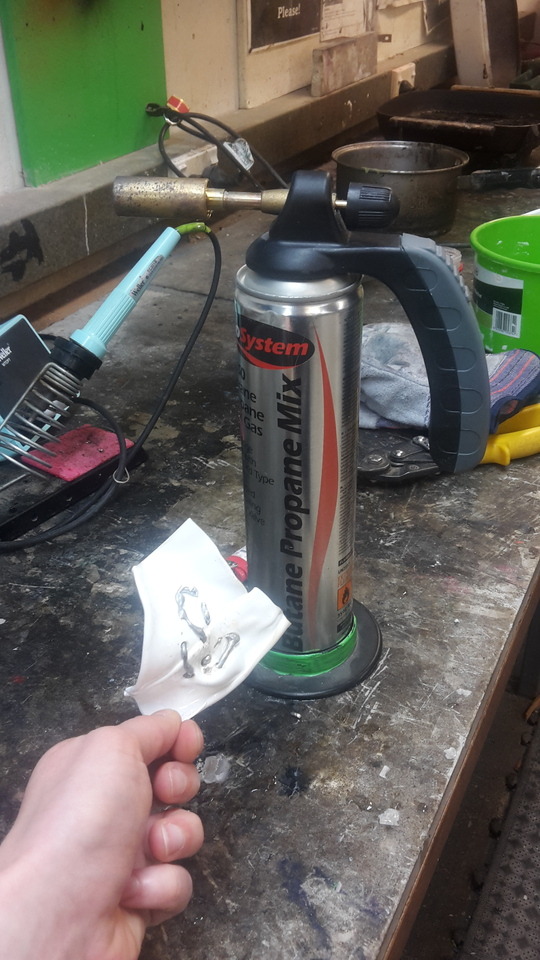
I then decided to chance my strategy. I took the soldering wire and put it through the holes in the plastic, making it bend around. I then used a gas torch, to melt the solder. I was very careful, since the plastic tended to start melting at approximetly the same time as the soldering wire. By using this method I got a patteren on the plastic, going in and out through the holes.
0 notes
Photo
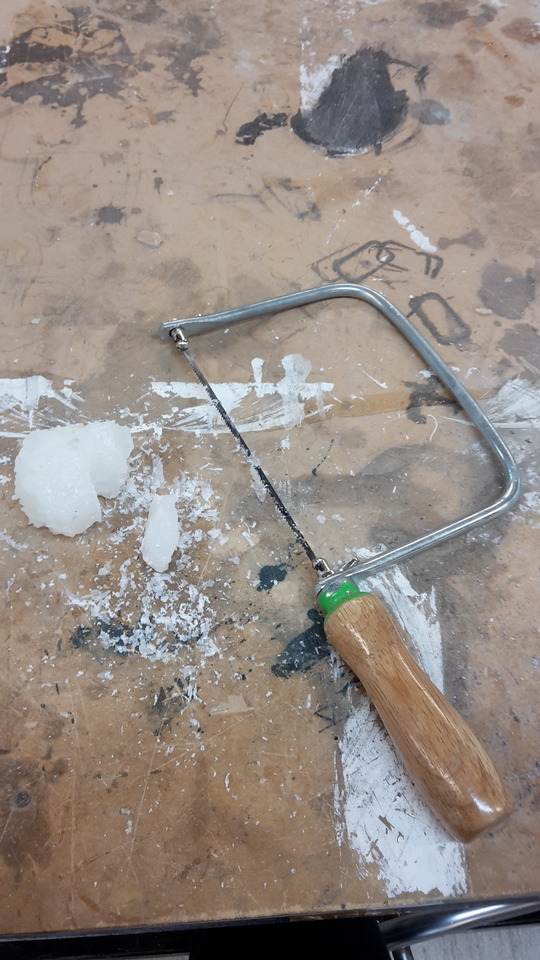
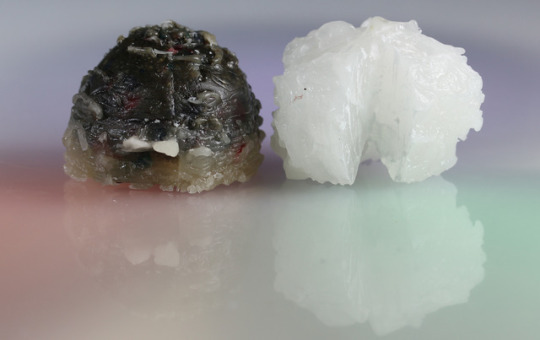
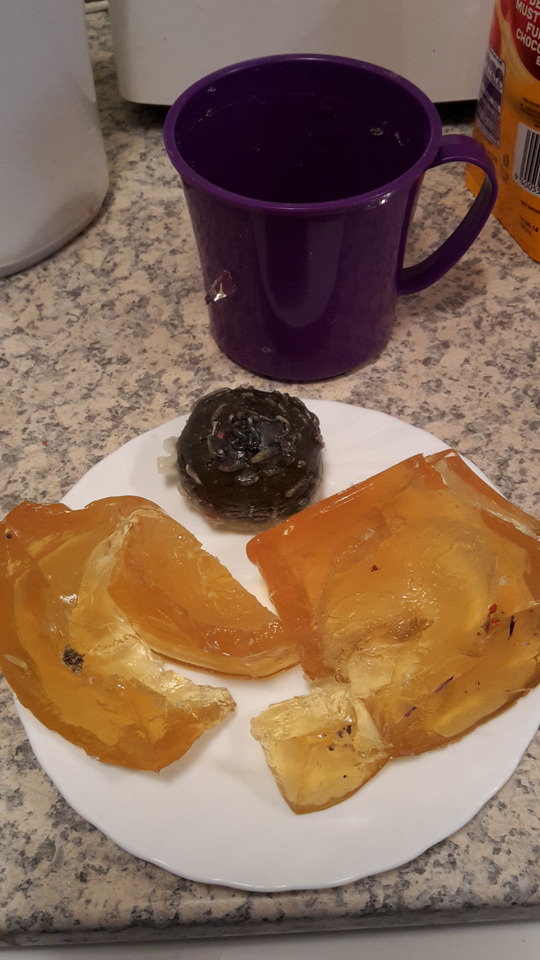
When I had may two twin models, I used a saw to cut a piece out of the one model. This may I was able to see part of the inside. I choose to cut into the cast made of clean candlewax, because this one had internal cracks, from cooling down to quickly, so I would it interesting to we how it looked on the inside.
0 notes
Photo
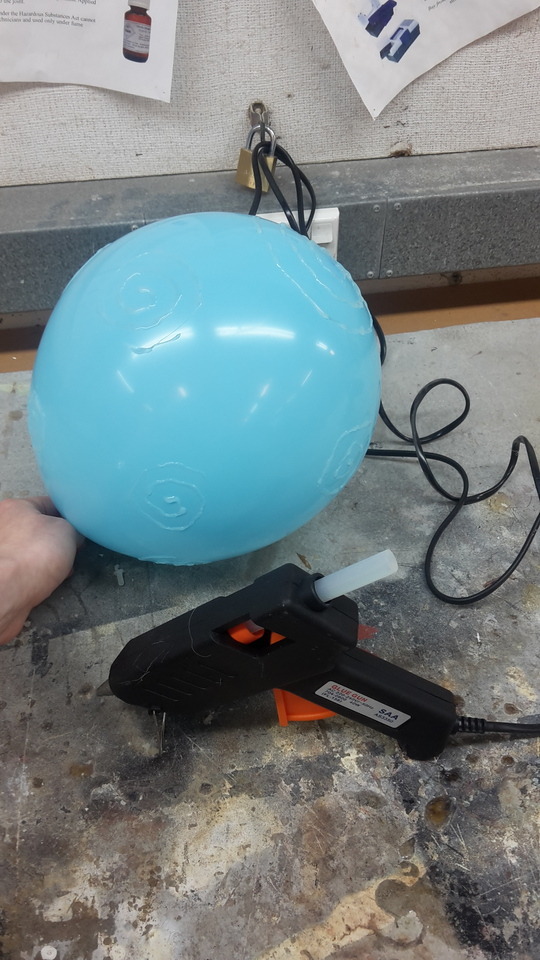
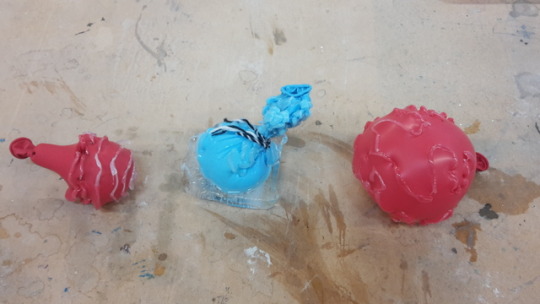
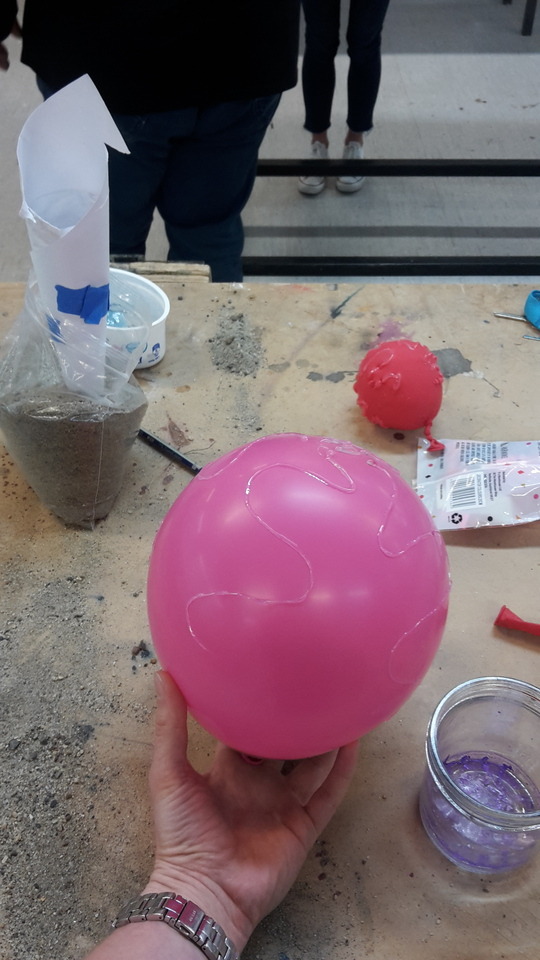
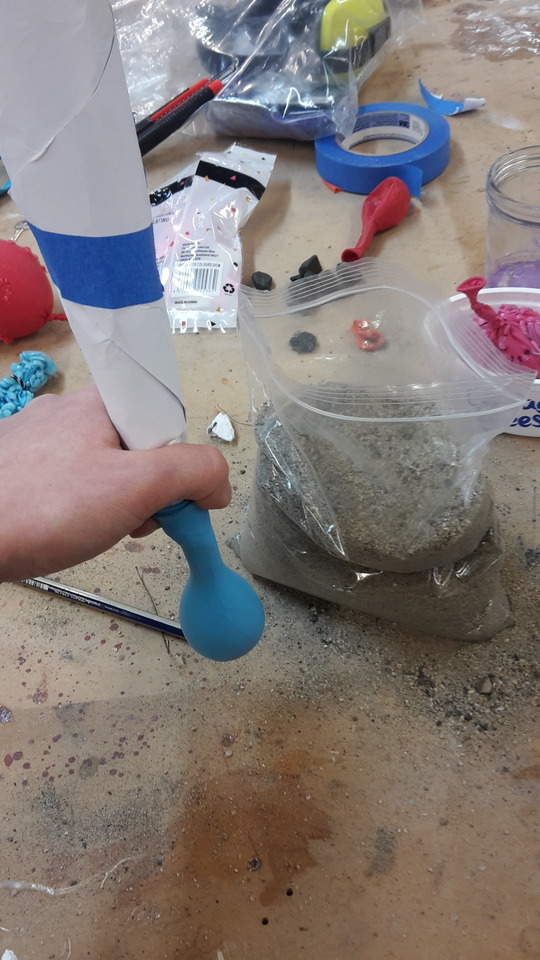


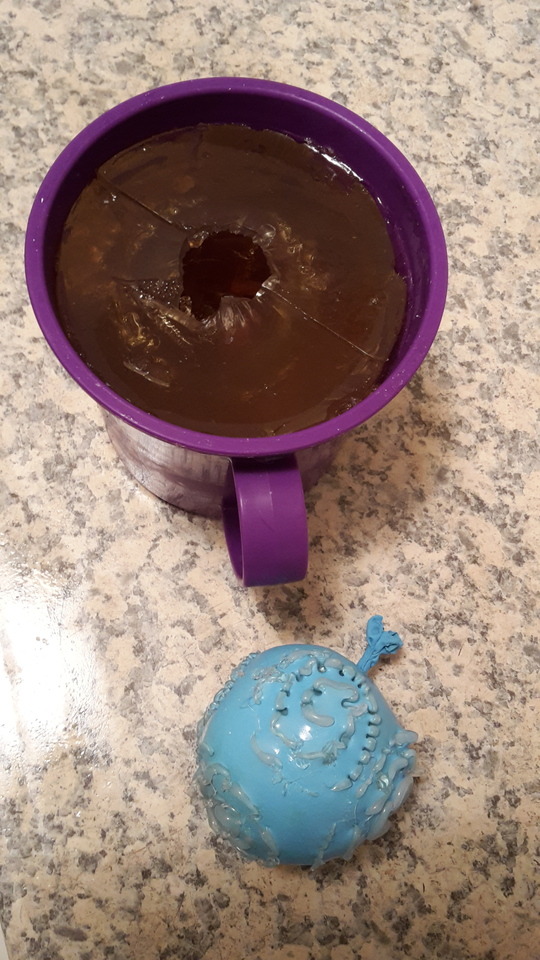
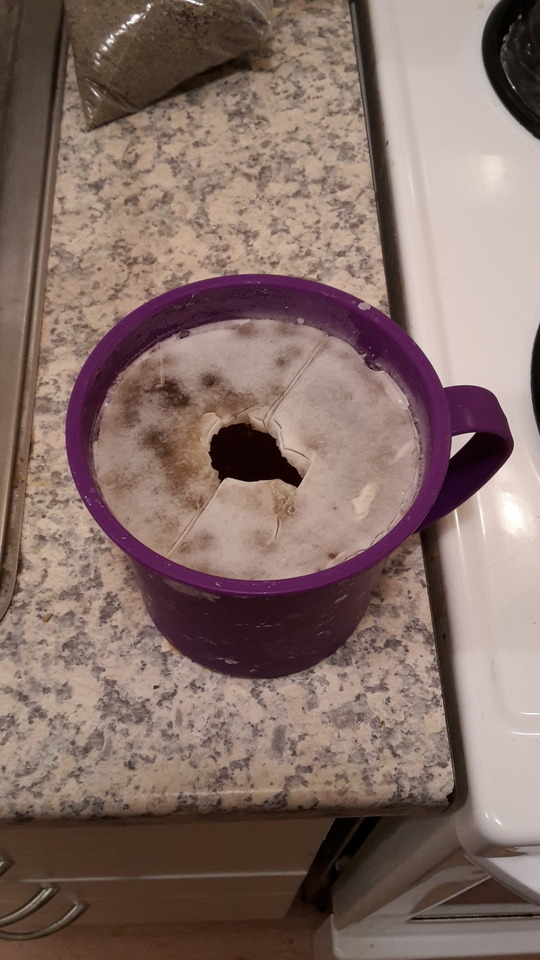
For this experiment, I have worked with mold/castmaking. I wanted to work with ballons. I first experimented with different ways of make a mould for my cast. I started out with blowing up a ballons. Then I used hot glue to draw pattens on the ballons. When the glue had cooled down, I carefully deflated it. In my first experiment I then filled the deflated ballon with water, until I had the size I wanted. I then put the filled ballon in the freezer overnight. The next morning when I took the frozen ballon out of the freezer, I saw that the rubber had leeked due to the hot glue and freezing. This ment that most of the water was frozen outside of the ballon, insted of staying inside it.
The first experiment having failed, I tried again. This time I used sand to fill the ballons, insted of water. For my mold I used gelatine, because I wanted a soft mould, so I would be able to get my cast out. I mixed the gelatine as told on the box. While still fluid, I filled to cups with gelatine and then added a ballon in each. In one cup I added a ballon with glue on the outside, and in the other I added a ballon what had an extra ballon pulled over, to make the surface more smooth. After placing the ballon the in gelatine, I placed the cups in the fridge to make it cool down and become solid. When solid, I removed the moulds from the cups. When out of the cups, I cut the mold in squares, to get the ballon out. I here say that the mould from the ballon with the glue on the outside, had made more of a patten, so I decided to go with that solution.
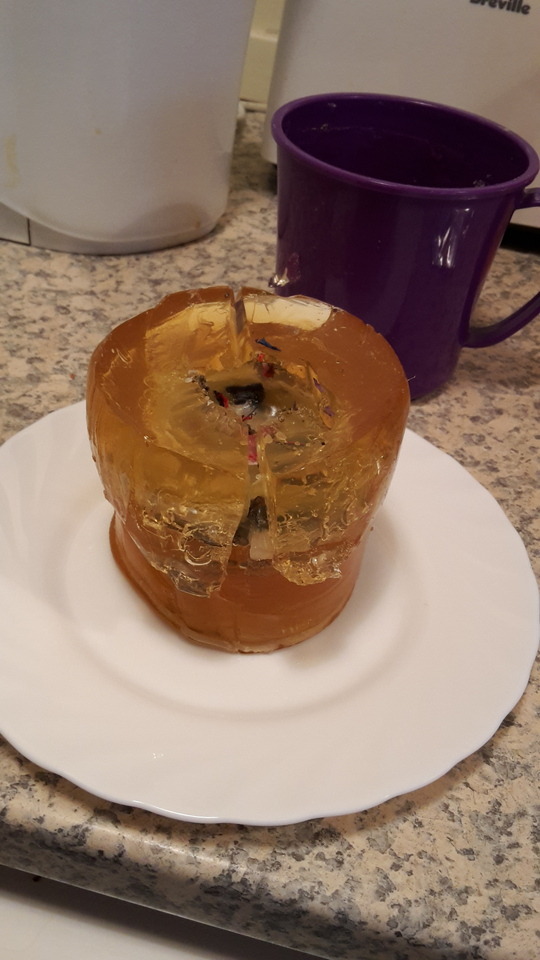
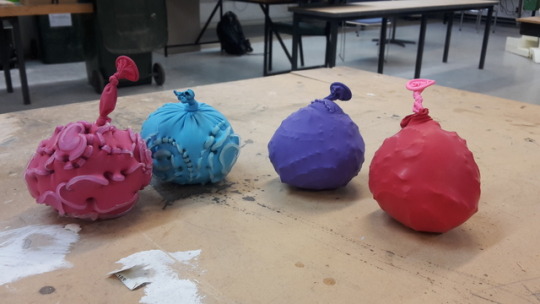
Having my first mould, I put it back into the cup and placed it in the freezer for a few hours. When frozen and hard, I melded candlewax in a pot, and poored it into the mould. I placed it in the fridge to make i harden quicker. I left it overnight. The wax was now solid, and I could remove it from the mould. I saw that the fast drying, by putting it in the fridge, had made small cracks inside the cast.
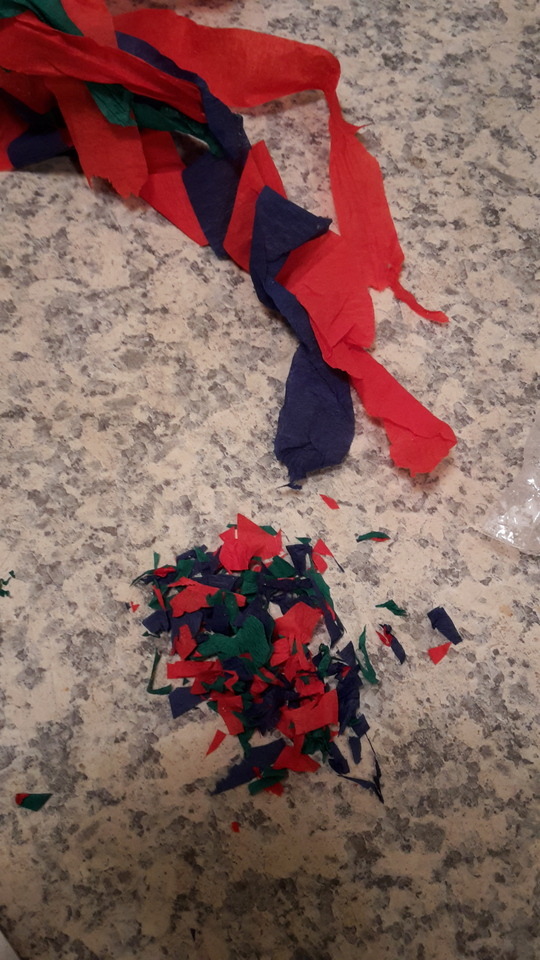
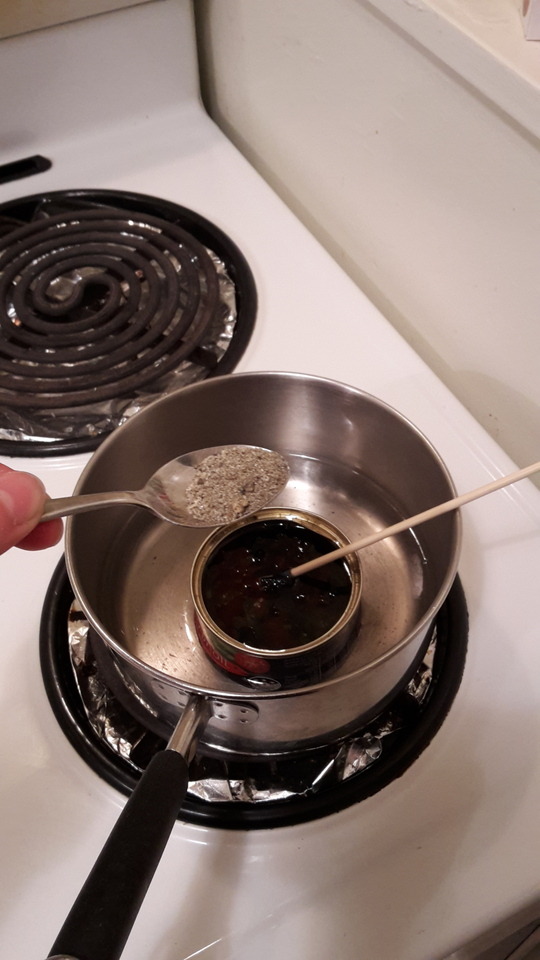
The process did destroy the mold, so in order to make a twin, I had to make a new mould. I went through the same process, this time making a bit thicker solution of gelatine, to make the mold a bit more solid. This time I only cut the mold in two pieces. I removed the ballon, put the mould back in the cup and froze it. When hard, I melted candlewax. This time I added small pieces of coloured paper, and sand. I then poored the solution into my mould. This time I did not put the mould/cast into the fridge, but instead let it harden at room temperature. I left it overnight, and the next morning I removed the cast from the mould. I now had my two casts!
0 notes
Photo
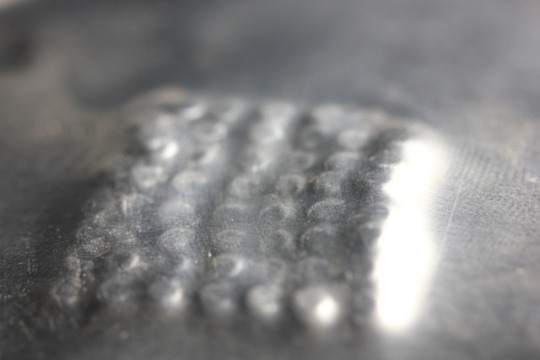
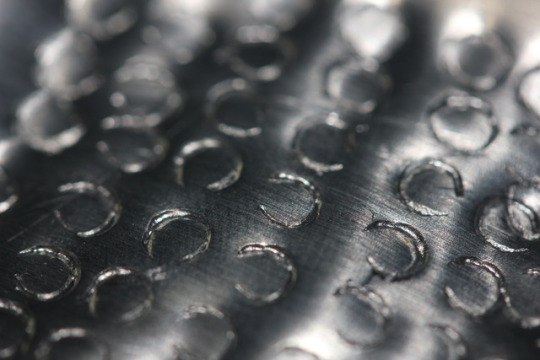
My last material of the week, was a piece of sheetmetal. I here used a brad to make small bumps in the materials. On the one side of the metal, small bumps accured, while on the other side small horseshoe shaped scraches were made. What I experienced during the experiment, was that the metalsheet tended to curl a bit on the side of the patteren as I made the new texture of the surface. This made it a bit hard to line up the patteren.
0 notes
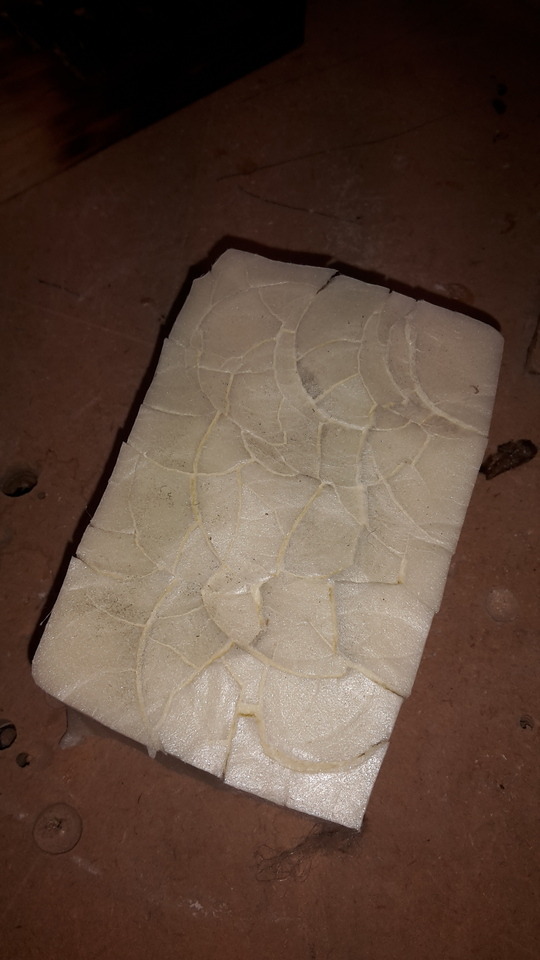
Photo
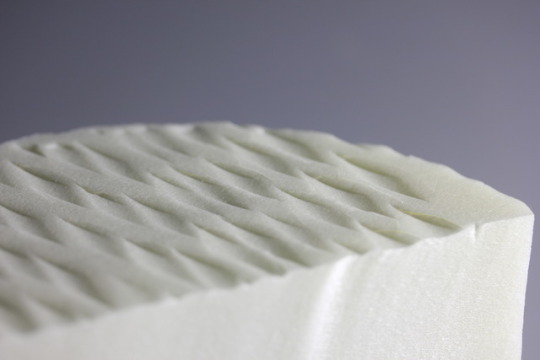
This weeks our task was to experiment with making different surfaces. One of my materials was foam. To make the surface as shows on the picture, I used the side of a drill. I pressed the drill down, into the surface of the foam, which them deformed. After each time pressing the drill against the foam, I twisted the drill, and moved it to line up with the previous mark. I did this to change the pattern made in the foam, to be more lively.
0 notes
Photo
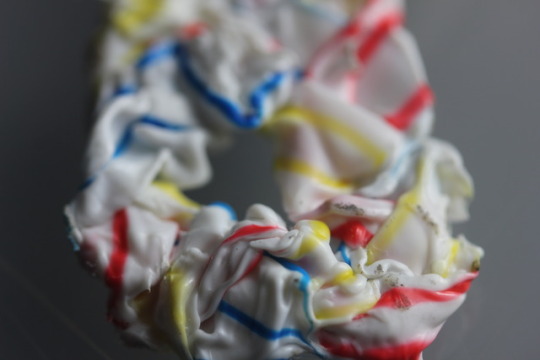
For this experiment I used plastic straws. I used straws with different coloures lines; red, blue and yellow. To mix the colours, and get a more interesting texture, I first braided the three straws. I then used a heatgun to melt the plastic, which made the material melt and curl into a circular shape. The initial braiding of the material, helped make an interesting new surface.
0 notes
Photo
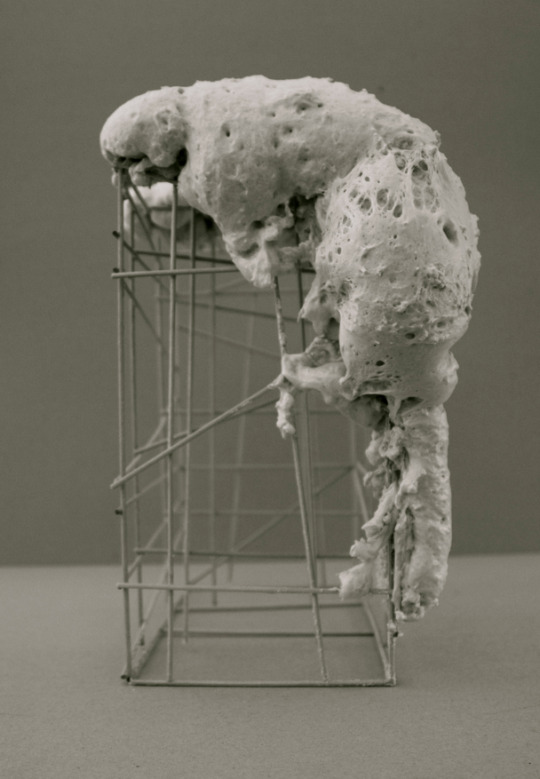
Example of Parasitic design. You see the foam “eating” the grid structure.
*Concept Model: The Parasite. Made of construction foam.
Found on Pinterst: https://www.pinterest.dk/pin/319826011013607099/
0 notes
Photo
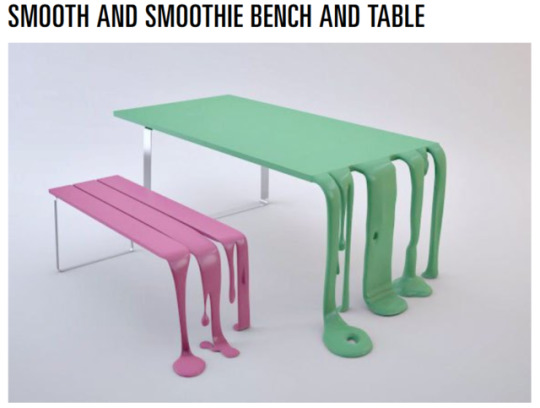
Bench and table created by French designer Florent Degourc. Example of symbiosis design.
*Picture from http://thefoxisblack.com/2009/10/12/smooth-and-smoothie-bench-and-table/
0 notes
Photo
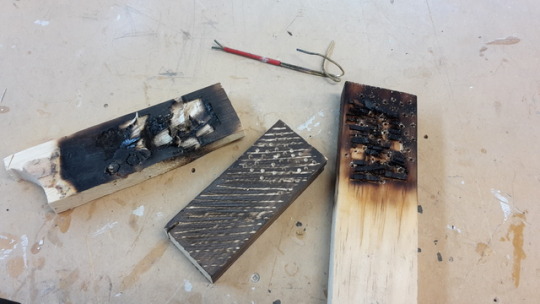

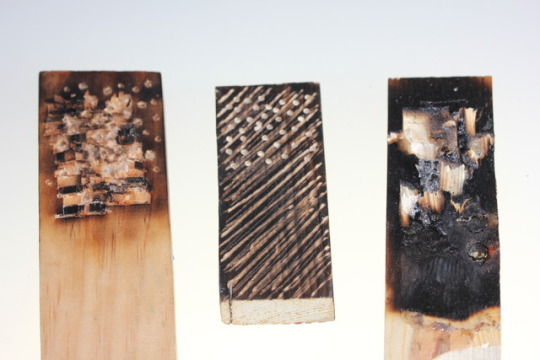
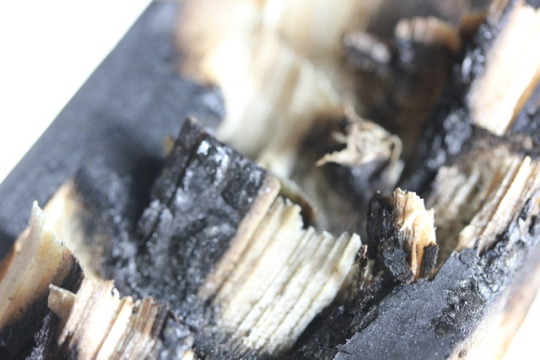
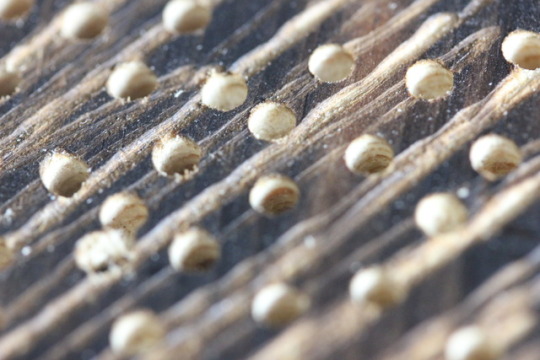
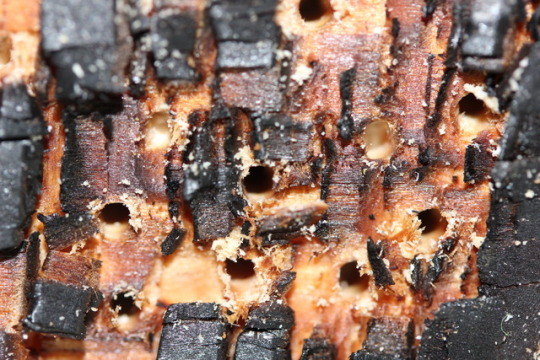
For the first project I decided to experiment with wood. I started out by cracking up the surface with a chisle. I then used a heatgun to burn and chance the colour of the surface, noticing that the splints sticking out after using the chisle, got much darker than the solid part of the wood. To get a unusual look, I placed my piece of wood, together with some brass wire, in a cup of vinegar. In earlier experiments this combination had given wood some interesting green stains.
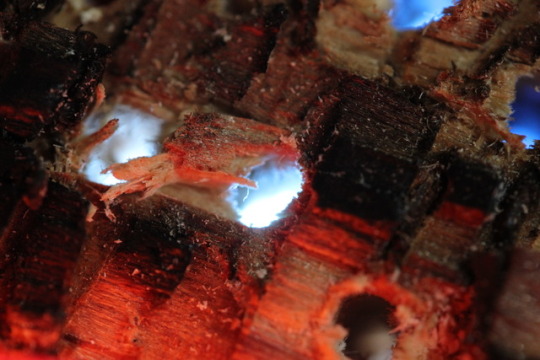
For this experiment I left the wood in the vinegar for three days, but this time nothing happend. The wood only got a bit darker from being wet. Not having enough time to do another experiment with another chemical, I decided to drill holes in my piece of wood instead. This made an interesting texture, with light shining through the holes.
0 notes
Photo
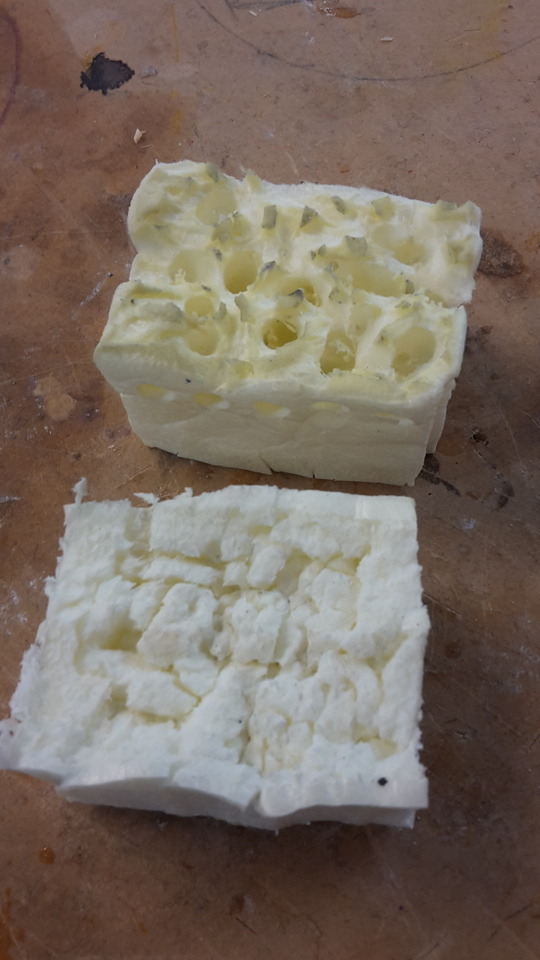
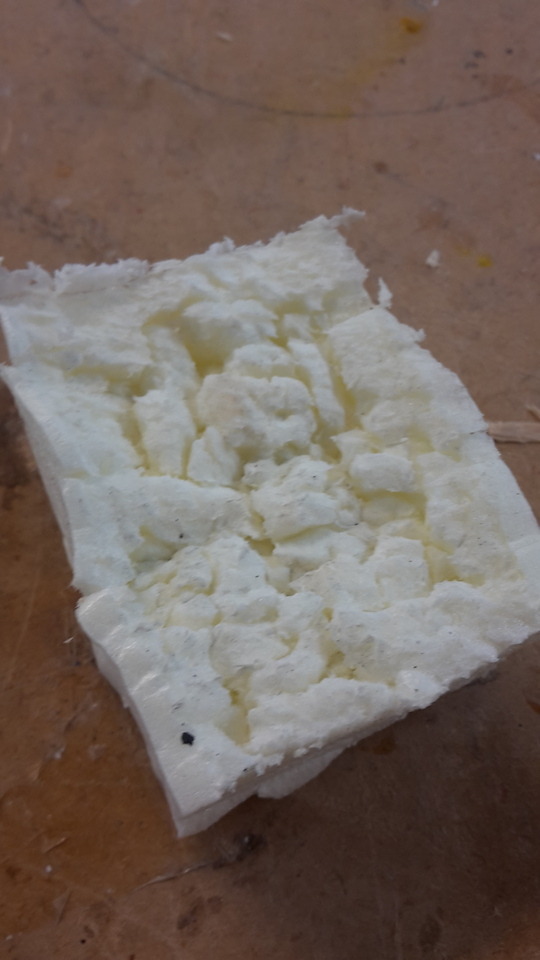
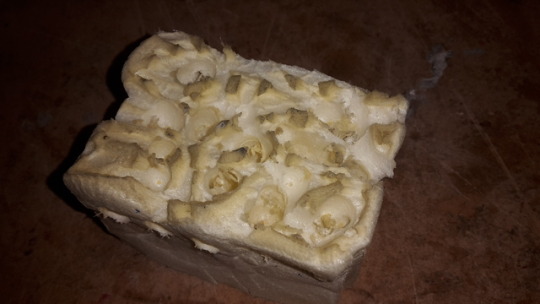
Starting out this weeks project, I experimented with different techniques on foam. First I used a hammer to crack the surface. Afterwards I used a heatgun to melt the surface. Here I saw that the cracks got bigger, melting the surface into small “islands”. I later used a drill to make the cracks deeper.
0 notes