
Last Seen Blogs

ikemengoessbrrrrr
Random blog cause why not

toaster-fire-art
can i get uuuuuhhhh

somuchfuckingsalt
Whatever I’m Currently Hyperfocusing On

dei-light
art wall

Text
The reasons for water leaks around a boiler
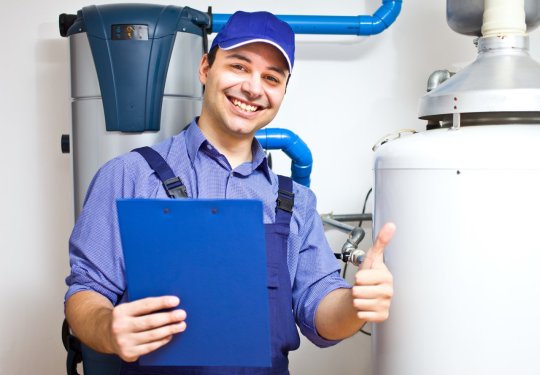
Pressure problems
All boilers are equipped with a special pressure relief tube. This is a small connection point on the side of the boiler, without fittings, which drips water from time to time. This allows the pressure inside the boiler to escape.
Damaged seals
Another cause of water leakage around the boiler can be damaged boiler seals. This may allow water to escape during normal use, or the boiler pump may even push water out through the broken seals.
Cracks in the body
As the boiler ages, the metal can suffer stress damage. These will be evident if they are the source of the water leakage.
Loose joints
If you have a big leak around your boiler, the situation could be much worse than loose joints. In this case, the solution is quick. Loose joints can often cause a leak around the boiler during hot and cold contraction and expansion, so you need to check all the boiler fittings and all the pipes going in and out of the boiler.
0 notes
Text
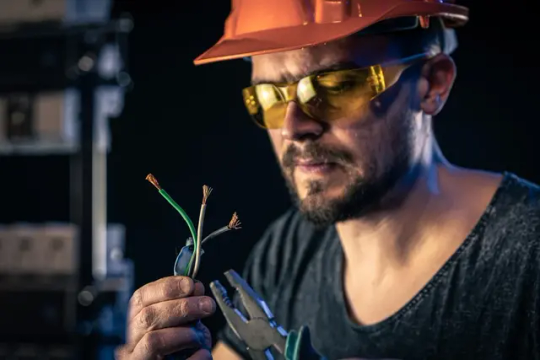
Common Electrical Problems at Home
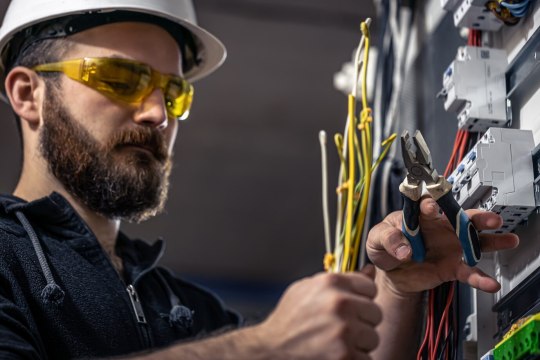
The safety of your home depends largely on the integrity of its electrical system. Just as the heart pumps life into the human body, electricity powers your home, with the power to provide you with comfort but also the risk of serious danger if not handled with care.
#24h service#electrician near me#professional electricians#reliable electricians#find me an electrician
0 notes
Text
Unclogging Blocked Drains

Blocked drains are one of the most common household plumbing problems that can cause significant inconvenience and even damage to your property. If not addressed promptly, blocked drains can cause a range of problems, from bad odors and slow-draining water to overflowing sinks and toilets. Fortunately, with the help of an expert plumber, unclogging blocked drains can be done quickly and efficiently.
#need a plumber#24h service#local plumbers#plumbers near me#plumber near me#24h plumbing#plumber Cambridge#find me a plumber
0 notes
Text
Hiring a Professional Electrician Nearby
Professional electricians are accountable for their work and will provide guarantees and warranties for the jobs they handle. This guarantees that the electrical work is done correctly and that you are getting a quality service from the professional electricians.
Are you searching for Electrician Near Me? Emergency Electrician in Liverpool is there available 24 hours for you. Don’t worry about the schedule because we provide service around the clock; middle of the day, middle of the night or early in the morning.
#24h service#electrician near me#local electricians#electricians in Liverpool#electrical wires#electrical rewiring#find me an electrician#professional electricians
0 notes
Text
Trusting Professionals for Boiler Repairs
As winter approaches and temperatures start to drop, we turn to our trusty boilers to keep our homes and offices warm and cozy. But what happens when our reliable heating system breaks down? We rely on our boilers and heating systems to keep us comfortable, so it’s important to address any repairs or maintenance issues promptly.
#24h service#local plumbers#plumber near me#plumbers near me#need a plumber#24h plumbing#local plumber#boiler repair London#plumber near me London#London Plumbers
0 notes
Text
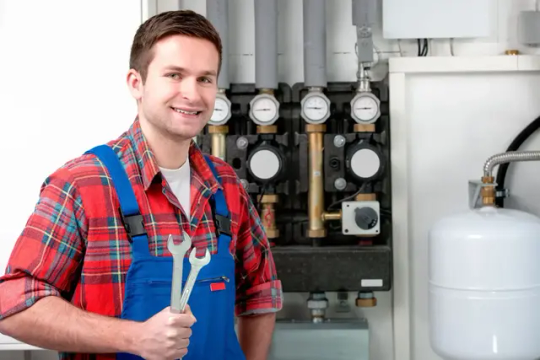
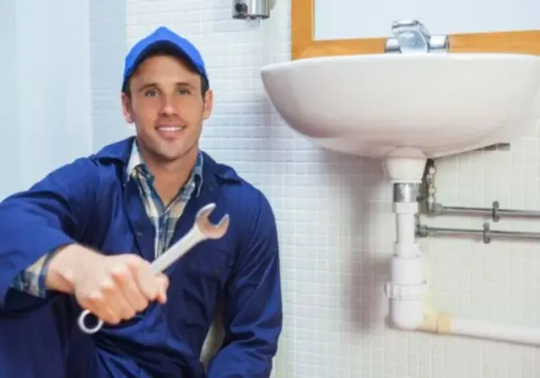
Hiring Licensed Plumbers

When you employ a licensed plumber, you can rest assured that they have the necessary qualifications and expertise to resolve your plumbing issue promptly, effectively, and safely. They can also handle complex scenarios that may be hazardous to you and your family’s well-being. Licensed plumbers undergo extensive training to ensure that they understand the risks involved in plumbing work and how to handle them safely.
#plumber sheffield#plumbers near me#24 hour service#emergency plumbing#find me a plumber#plumbing repair#boiler repair#unblocking drains in sheffield
0 notes
Text
Emergency Electrician Near Me
Having an emergency electrician near you means they can respond quickly to your call and be on the scene as soon as possible. A local electrician will be familiar with the area, making it easier for them to find your location. Quick response time can be the difference between a minor problem and a costly one. Moreover, having a local electrician will ensure that you get a quick response in case of an electrical emergency.
#emergency service#electrician#electrical wires#electrical outlet#electrician near me#find me an electrician#local electricians
0 notes
Text
Benefits of Having a Plumber Near You
Quick Response Time
One of the biggest benefits of having a plumber nearby is the quick response time. The longer you leave the issue, the more damage it can cause. Having a plumber who is just a phone call away means that you can get help quickly and avoid further damage to your home.
Experienced Professionals
Another advantage of hiring a local plumber is that they have the necessary experience to assess the problem and provide the best solution. Trying to fix a plumbing issue yourself can often lead to making things worse. However, professional plumbers have the expertise and knowledge to diagnose the issue and provide the right solution.
Cost-effective
Some homeowners may shy away from hiring a professional due to the cost. However, fixing a plumbing issue yourself can be much more costly in the long run. One small mistake can lead to a big problem and end up costing you a lot more than hiring a plumber. Additionally, local plumbers often offer competitive pricing.
#plumbers near me#local plumbers#24h service#local plumber#need a plumber#plumber near me#leaking pipes#leak detection#clogged pipes#blocked drains
0 notes
Text
The Ultimate Guide to Finding Reliable Plumbers Near You
When it comes to plumbing issues, you need a professional who is not only skilled but also trustworthy. This guide will show you how to identify reputable plumbers in your area and ensure that they are licensed and insured.
Emergency Plumber in London is here for you!
#24h service#local plumbers#need a plumber#plumbers near me#plumber near me#24h plumbing#plumber London#emergency plumbing london#leaking pipes#leak detection#leak repair#clogged pipe
0 notes
Text
How to replace a cistern valve

If you know how to replace a cistern valve, you can save time and money by not having to hire an expensive plumber. If you follow the necessary steps, you'll find that preventing your toilet from running is a simple task.
Remove the lid
The first step is to remove the lid of the tank. This will give you access to the inner mechanism of the cistern, including the cistern valve. If you have a cistern with the flush button at the top, you will need to unscrew it before you can lift off the lid. A normal cistern lid can simply be lifted out. Place it on a flat surface to prevent it from tipping over or being stepped on.
Examine it
When you set the lid aside, you can see the entire inside of the cistern, which should be submerged in the fresh water that flows through the bowl when you flush the toilet. You may even be able to see the source of the problem, as there is a pipe in the centre of the tank that should not be leaking water. Regardless of whether your toilet runs constantly or only flushes sporadically, the problem is probably with the cistern valve.
The valve is the point from which the tank refills after flushing the toilet and is usually located at the bottom of the cistern. Flush the toilet to remove the water from the tank and close the water supply. The stopcock should be located either on the wall or on the floor next to the toilet.
Remove the cistern valve
To inspect the cistern valve more closely and determine the defect, you will need to remove the cap holding it in place. Depending on the type of cistern, you can probably simply unscrew the cap by hand by pressing it down firmly. Alternatively, you can use a screwdriver to loosen the screws holding the cap in place.
Examine the parts
After removing the cap, you can examine the valve closely to determine where the fault lies. If it was properly tightened, it is likely due to a broken or worn washer that fits into the valve.
Carefully remove the washer with a screwdriver by prising it open at the edge before pressing in a new washer. Put the valve back in its original position and screw it tight.
Test
Remove the lid and allow the tank to fill with water before operating the flush. By observing the process, you can determine whether the valve is working properly and where the fault lies if it is not working. If it is working properly, carefully replace the lid.
Call the Emergency Plumber in Sheffield. We are available around the clock. Call us now, 01144630216.
#plumber near me#24h service#need a plumber#24h plumbing#plumber sheffield#toilet repair#leak detection
0 notes
Text
How to install a backflow preventer

A backflow preventer is designed for use in irrigation systems and water lines and prevents water from flowing back into the line, as you might suspect. Most backflow preventers are mechanical devices that create a physical barrier to achieve this.
If you want to install your own backflow preventer, you need to make sure that the mechanism is compatible with the water source you are using and that you are confident in installing this complicated device yourself without help. If you are fairly confident that you can replace the system, you should follow the simple rules below to get on with the installation.
Step 1 - Prepare yourself
Before you start, the most important thing you should do is find out about the building regulations in your area. If in doubt, the local building authority or your water supplier can tell you how deep you need to lay your pipe, what dimensions the backflow preventer box may have and what limits apply to the installation. You should always check what is allowed in your area before you start the installation, so you don't waste money on a project that won't last. Conditions such as low winter temperatures, for example, can affect how deep you need to dig.
Step 2 - Locating the pipe
Once you are sure that your machine does not violate building codes, you can proceed. Dig down at the main water line connected below your curb. There you will find a 2.5-cm copper pipe that can be split into smaller pipes at the meter box. Anything on the side of the meter at your house is yours. There is a valve near the meter that can be used to shut off the water in case of repairs to the house. There may also be a pressure reducing valve nearby, as well as small indentations near the valves called meter nipples. You may need to dig 90 to 120cm away from the meter before you can clear all of this.
Step 3 - Install the backflow preventer
There are two different types of backflow preventer that you can use. The first involves inserting a threaded T-piece into the pipe and connecting it to the pressure valve adapter. Occasionally this variant requires extra length in the pipe, so a small section needs to be removed so that a connection can be added.
The other variation uses a compression fitting that is sealed around the outside of the supply line with a pressure washer. Cut off a small section of the pipe and then install a compression fitting around the interface. This will seal the line and prevent the water from flowing backwards. Find a metal compression fitting with a rubber gasket and make sure it is tightened properly without cracking the pipe or damaging the compression valve.
This will successfully secure your backflow preventer in place, and it can be used immediately.
Call the Emergency Plumber in Ipswich. We are 24 hours available. Call us now, 01473792015.
0 notes
Text
How to repair a leaking shower head
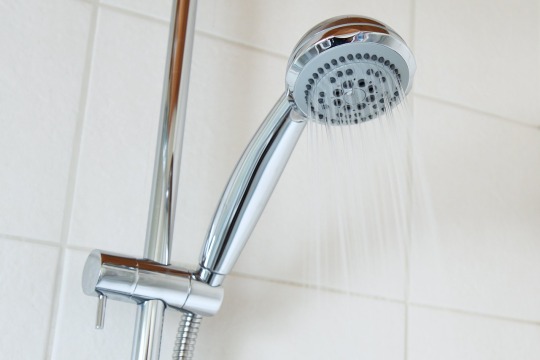
A leaking, dripping shower head is not only annoying, it also wastes water. Before you call in a professional, you can fix this fairly common household problem yourself relatively easily (depending on the cause of the problem).
Step 1: Switch off the water
Switch off the main water supply throughout the house. Have a towel handy - the main water line may be turned off, but there could still be water in the line that is leaking out.
Step 2: Removal and inspection
Remove the shower head by unscrewing it from the pipe with your hands. If the head is stuck (which is often the case if it hasn't been removed for a while), use pliers or a spanner to unscrew it. Look for a small plastic disc or rubber O-ring on the thread inside the shower head. It is often the age-related wear and tear of this component that causes a shower head to leak and start dripping. Over time, it dries out and becomes brittle, affecting its ability to hold water.
Step 3: Clean the shower head
Since you've removed the shower head, now is a good time to clean the shower head, especially if you've noticed reduced flow. Often there are mineral deposits or build-up caused by hard water inside the shower head or on the pipe spigot (where the pipe connects to the shower head). This can significantly affect the water pressure and flow and contribute to a leaking shower head.
In a small saucepan or pan, mix water and three cups of vinegar and bring to a boil. Place the shower head (without removable rubber parts) in the solution and leave it to soak for about 20 to 30 minutes. Then take it out, rinse it off and scrub the inner and outer nozzles with an old toothbrush until there are no more deposits.
Step 4: Masking
If the washer or O-ring is OK or you have replaced it, the next step is to wrap Teflon tape around the thread on the pipe shaft. However, do not overdo it with the tape. Only wrap a thin strip around the thread at the top of the pipe stem.
Step 5: Reattach the shower head
Screw the shower head back on by tightening it by hand until it can no longer be turned. Then use pliers to turn it one last time. Remember not to over-tighten, otherwise the shower head or pipe could break.
Step 6: Turn on the water
Turn the water back on and let the shower run for a few seconds. Switch it off. Wait a few minutes and then check to see if it is still dripping or leaking.
Call the Emergency Plumber in Cambridge. We are 24 hours available. Call us now, 01223931383.
#need a plumber#local plumbers#plumber near me#24h service#plumber cambridge#find me a plumber#emergency plumbing#leak detection#blocked drains
0 notes
Text
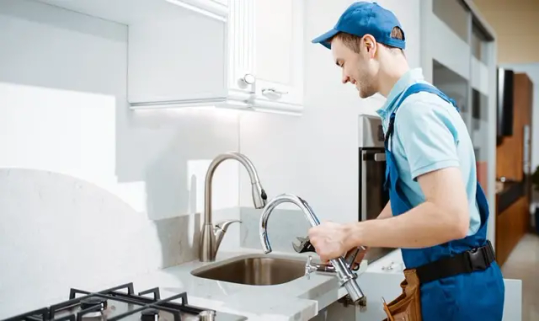
6 common problems with pull-out kitchen taps
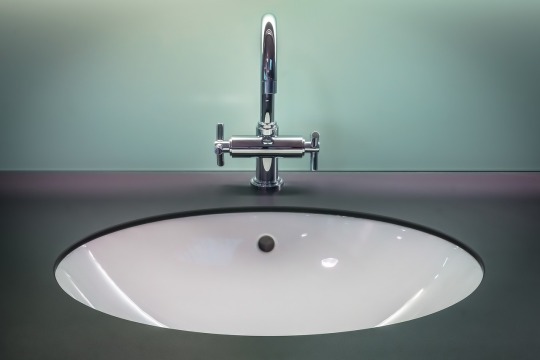
A pull-out kitchen tap is very popular with many modern homeowners today. These great looking kitchen taps can be used to do many things that are not possible with a normal tap handle, such as washing large pots, which is much easier with a pull-out kitchen tap.
Whilst the pull-out kitchen tap is a great addition to a kitchen sink, it is not immune to problems. These problems do not necessarily mean that the tap is a bad investment. However, some problems can occur under normal use. Below is a brief list of the most common problems.
The hose cannot be retracted
When the retractable hose is brand new, it can be easily pushed back into position without causing many problems. The older the appliance gets and the more it wears out, the more the hose sticks to the sides of the holder and can no longer be retracted as easily. This can mean that you need both hands to push the tap back into the correct position. Many manufacturers have solved this problem by adding a weight to the hose which pulls the hose back into the correct position.
The tap is not positioned correctly
Another common problem with pull-out kitchen taps is that the tap no longer sits correctly in the holder after repeated use. This is usually due to wear and tear. Some newer models have a magnetic system that allows the tap handle to stay in the holder for much longer.
Sticking of the tap handle
Another problem that often occurs with pull-out kitchen taps that are used a lot concerns the water handle. Most pull-out taps have a small lever on the handle that you press to release the water, similar to a spray bottle. After frequent use, this handle starts to stick. Sometimes this is due to a build-up of dirt and grime along the lever. Once it is clean, the problem can no longer be solved.
Tangling with temperature handles
Another common problem with this type of tap is that the hose gets tangled with the temperature handles when it is pulled out. Although it takes a little more time to release the hose from the handle, the tap is not damaged as a result.
Leaking tap nozzle
You may notice small drops of water around the aerator of the pull-out kitchen tap during use. This occurs with many taps and can be easily rectified with a new aerator filter. It is often sufficient to clean the aerator and ensure that it is firmly seated on the tap again.
Call the Emergency Plumber in Durham. We are your right contact partner. Call us now, 01913039678.
#plumber durham#emergency plumber#24 hour service#need a plumber#plumber near me#kitchen sink#leak detection#blocked drain
0 notes
Text
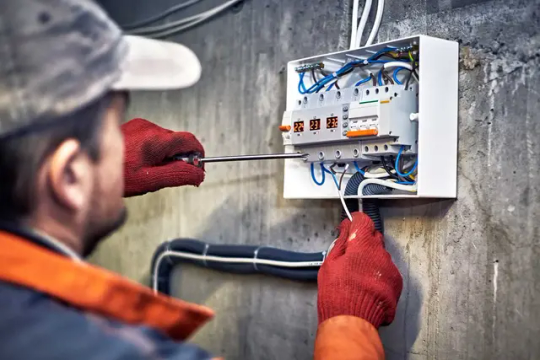
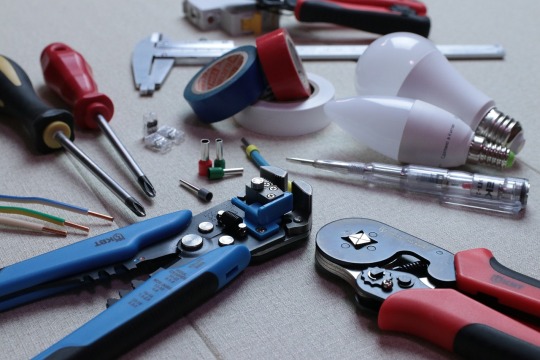
Understanding electrical wiring in residential buildings

Electricity is an essential part of any property, including your home. Electricity is needed to power appliances, maintain a comfortable temperature and get things done. Therefore, everyone needs to have at least a basic understanding of what a domestic electrical installation is and how the system works. This is the only way to avoid problems and control the system in an emergency.
The basic components of the wiring
Although every residential building has its own electrical wiring structure, certain components are essentially the same everywhere.
These basic components include:
Electrical house connection
The house connection cable is used to feed electricity from the power grid into the house. The system mainly consists of three wires, two hot wires and a neutral conductor. These wires can hang overhead (a service drop) or be earthed (a service lateral). The two hot wires carry 120 volts each, meaning they carry a total of 240 volts to power the house.
The electricity meter
The wires from the service lateral all run through the meter. The electricity meter is located at the top of the outside wall of the house or in the breaker box and registers the electricity consumption in the house. Electricity consumption is measured in kilowatt hours (kWh). The electricity meter can be analogue or digital, although most new meters are usually analogue.
Switchboard
As soon as the electricity arrives in the house, it must be distributed so that it can be used at different, easily accessible sockets. The switchboard - also known as the breaker box - supplies electricity to the various circuits in the house. The electricity therefore comes from the entrance to the house, runs through the electricity meter and is then distributed via the switchboard. All circuits in the switchboard have breakers that can be used to interrupt the electricity in the house.
The main switch, which interrupts the power supply to the house, is also located in the switchboard. However, some residential buildings have a circuit breaker specifically designed for emergencies.
Sockets, switches and appliances
The rest of the power distribution is done using sockets strategically placed throughout the house. The power in the sockets is controlled by switches, which are used to switch the power on or off as required. Finally, the appliances are all electrical devices that are connected to the electricity, such as lamps, microwaves, dishwashers, irons, etc.
Wiring in residential buildings is fairly simple. The main components are almost identical in all cases, and there are several safety precautions to avoid accidents related to electricity.
Apart from the breakers, the connecting wires consist of two hot wires that carry the current from the panelboard to the rest of the house, while the neutral wire carries the current back to the panelboard; this prevents an overload if additional current is fed back. Knowledge of the basic wiring system is necessary to safely perform minor repair work in the home.
Call the Emergency Electrician in Somerset. We are available around the clock. Call us now, 01934807996.
#electrician Somerset#electrician near me#need an electrician#emergency electrician#professional electrician
0 notes
Text
Repair or replace the tap when an old tap is worn out

A single leaky tap can waste as little as 0.79 m³ of water per year if it delivers 5 drops per minute. That may not seem like much, but for the 1.2 billion people who don't have access to drinking water, it's like an oasis. What's more, all this waste - which can actually amount to around 45 cubic metres per house per year - is a waste of money. The question now is whether repairing the tap is better than replacing it. Is it cheaper, or would it make more sense to install new taps?
Leaky tap
A leaking tap can still be repaired if the problem is just a worn seal or a loose part such as a nut or bolt.
Old O-rings (which act as a seal) are often the cause of leaks in pressurised taps. In this case, you only need to replace the seal, although you will need to disassemble the tap first.
Ball, cartridge and ceramic disc taps have more parts, so they can be more difficult to repair. Fixing a ball tap, for example, often requires a new cam assembly for the tap. Ceramic discs, on the other hand, are fragile and can break if mishandled.
However, leaks can also be a sign that an internal part of the tap is broken. In this case, you may also hear clicking or clinking noises when you run water from this tap. A piece of metal may have broken off and is hitting other parts.
Take these noises (and leaks) as a sign that you need to install a new tap. The sooner you get a replacement, the sooner you can stop wasting water.
Low water pressure
Faucets with aerators or atomisers are prone to low water pressure issues due to debris build-up. When you first encounter the problem, you may only need to clean the nozzle.
Scrub the holes with an old toothbrush to remove any dirt or debris. For more stubborn blockages, soak the nozzle in some baking soda or vinegar mixed with water for half an hour. Then try running the tap again to see if this improves the water pressure.
If this doesn't help, there is probably a blockage somewhere else in the tap that is blocking the water flow. But it could be worse, as low water pressure could also be a sign of blocked water pipes.
At this point, it's time to call a plumber to take a look at your tap. He will also help you determine if you have a clogged, damaged or leaking water supply line.
Visible and extensive tap damage
If the outside is already in poor condition, then it's even more likely that the inside will be in the same state.
Don't let your faulty taps continue to waste water
If your tap is too old, or if it always seems to work backwards, it's time for a change. It's important that these problems are resolved soon, especially all those leaky taps.
Does a faulty tap need to be inspected and possibly replaced? Maybe you're not sure if it's just the tap or if it's a bigger problem with your plumbing system.
Call the Emergency Plumber in Stockport. We are 24 hours in our service. Call us now, 01613941214.
0 notes
Text
Low water pressure at homes in Basingstoke

Problems with low water pressure
Common plumbing problems in older homes often revolve around low water pressure, but the problem can also occur in new homes. Depending on the cause, low water pressure can occur suddenly or slowly worsen over time. Whatever the reason, low water pressure makes flushing and showering difficult, so resolving the problem is a priority in order to return to normal water usage.
What is the cause of the problem?
Low water pressure has several possible causes. A water main break can reduce the pressure to your tap - this could be the problem if your neighbours also suddenly have low water pressure. The same loss of pressure occurs if a pipe in your house is leaking. Close all taps, check your water meter and wait a few hours without using water to check for leaks. If the water meter changes, you probably have a leak. Another possible cause is the build-up of deposits in the pipes. These deposits slow down the flow of water, resulting in low pressure.
How to fix low water pressure?
If you think the build-up is the problem, start with the aerators or showerheads where you have water pressure issues. Unscrew the end of the tap to clean it. Soak the aerator in vinegar overnight to loosen the build-up. If you are unable to remove the aerator or shower head, place vinegar in a plastic bag. Tie the bag around the tap so that the aerator or shower head sits in the solution. For other problems, the help of a plumber is often required to restore the water pressure.
How to avoid low water pressure?
Install a filtration system to keep minerals out of your pipes to prevent future build-up.
When should you call a plumber?
Call a plumber if the water pressure suddenly drops, or you can't pinpoint the cause of the problem. This could mean that you have a leak in a pipe. If you notice a gradual drop, but the problem is not in your aerators, it could be a build-up or corrosion problem in your pipes. This will also require a plumber to replace or repair the affected sections.
Call the Emergency Plumber in Basingstoke. We are 24 hours available. Call us now, 01256594007.
#plumber near me#24h service#local plumbers#24h plumbing#local plumber#plumber in Basingstoke#need a plumber#emergency plumber
0 notes
Text
THINGS YOU SHOULD CHECK BEFORE CALLING AN ELECTRICIAN
CHECK THAT YOUR APPLIANCE OR SYSTEM IS PLUGGED IN
This may seem obvious, but over the years we have come across many 'electrical problems' where all that was needed was a plug inserted into a socket!
This type of problem is most common when the sockets are difficult to access, such as in entertainment centres or home office set-ups with overloaded power strips.
MAKE SURE YOUR OUTLET IS NOT CONTROLLED BY A SWITCH
Another surprisingly common cause of electrical problems that don't actually require electrical work is switch-controlled outlets.
Sometimes only one outlet in a power strip is controlled by a switch, leading to requests for electrical services.
If a socket suddenly stops working, it's worth checking all the mystery switches in the room to see if they can actually control the non-functioning socket.
CHECK AND RESET GFCI SOCKETS
Sockets in the kitchen, bathroom, laundry room or near water sources are often protected by residual current circuit breakers (RCCBs). These are safety devices that protect against electric shocks by interrupting the power to the socket if unsafe conditions are detected.
However, the outlet remains inoperable until the GFCI is manually reset. GFCI protection can be installed on the outlet itself or integrated into the electrical panel.
CHECK THAT YOUR APPLIANCE IS IN GOOD CONDITION
Electrical appliances do occasionally fail, although this is rare. If a socket suddenly seems to stop working, it is advisable to test the appliance on another socket that is known to work.
Similarly, you can try plugging in an appliance that you know is working to see if the problem is in the socket.
A short circuit in an appliance can actually cause the circuit breaker to trip. In this way, a faulty appliance can make it appear that you have a problem with your home's electrical system!
CHECK YOUR BREAKER PANEL AND RESET TRIPPED APPLIANCES
Ok, you've come this far and the outlet still isn't working! Now it's time to check your circuit breaker and look for tripped breakers.
All breaker switches should be aligned with the centre of the breaker box. In most cases, the breakers themselves are labelled "On" and "Off" to show you how they should be positioned.
When a breaker is tripped, the switch moves to the off position. Sometimes this is a relatively subtle change where the breaker ends up in the centre, so you need to look carefully.
To reset the breaker, slide the switch fully to the off position and then back to the on position.
Residual current circuit breakers and arc fault circuit interrupters (AFCIs) can be installed on the breaker panel - in this case, there is a white or yellow button next to the breaker. These types of interrupters are simply reset by pressing the button.
Call the Emergency Electrician in Leicester. We are your right contact partner. Call us now, 01163930353.
#electrician Leicester#24 hour service#electrician near me#need an electrician#professional electrician#emergency electrician
0 notes