
Last Seen Blogs

emfan25
Emilly Fan

louaylort91
kat?!

remixinc
kiddynomiteinc

tuttoquellochericordo
Tutto quello che ricordo

amtrak-official
The official tumblr of amtrak
Text
How to clean Bodum electric milk frother?

As the whole of our processor and coffee maker reviews includes cleaning and upkeep information, the Bodum frother study will have it in addition. Sympathetically note, that if there isn't adequate milk in the frother, it will turn OFF normally. Accordingly, reliably check to assume that there is adequate milk in the thing. Switching the device OFF thus might shorten its life expectancy. Yet again in like manner, grant the machine to chill off before garnishing it off.
Whisk Cleaning
Switch off it from the power base. Let the frother cool down before cleaning.
Clean within the compartment with a sensitive spongy texture, or with a wipe.
The whisk can be taken on a mission to wash with water.
Full Inside Cleaning
Put on the whisk association onto its head. Fill it with clean water to the MAX mark. As of now, add 2 drops of delicate liquid chemical. Turn on the frother. The frothy water will clean the holder.
Once, the milk frother turns itself off, throw out the cleaning agent water. Void new water into the holder again and discard it. Go over until the chemical development is gone completely. Finally, get out with a fragile soggy texture.
General Upkeeps
Keep all of the electrical connectors and connections dry.
Consistently store in its case. Then again inside a cool and dry spot.
Never store the machine while it's related to the mains.
Wash the top and subsequently rush in clean water and permitted them to dry.
Never use any harsh cleaning trained professionals or solvents, hard brushes, and metal or sharp articles for cleaning.
Never wrap the line immovably around the machine. Put no weight at risk as it would make the rope battle and break.
Solvents are risky to your prosperity. It furthermore harms the thing's plastic parts. Unpleasant cleaning subject matter experts and embellishments make scratch flaws on the machine.
0 notes
Text
Since the idea of coffee begins to decrease directly following cooking, various coffee purchasers ponder stewing their coffee at home. Usually, when you sear coffee yourself, you know when it is new. Moreover, you control the level of stewing and can achieve the best cup close to the end. While coffee is green, its quality won't drop for up to one year counting from the appearance date. Regardless, to sear coffee at home, you need an explanation-built cooking machine. With everything taken into account, what is the best coffee roaster for home?
Fascinating focuses While Picking a Roaster
Overall, you can't say that a particular machine is the best coffee roaster. There are various decisions that you should consider and make a decision considering your tendencies. Exactly when you pick a roaster, ponder your monetary arrangement, your optimal dinner, and how much coffee you customarily drink.
In any case, accepting you like dull feasts, pick Quality Bistro or air roaster since they work better with faint dishes. Second, dependent upon the machine, you will be working with 4-12 oz. packs. Typically, 4 oz. of green coffee will achieve 26-42 oz. of arranged coffee (dependent upon how strong you make your coffee). A Quality Bistro or a HotTop will make twice more coffee, while a Behmor 1600 will make up to a full pound of a quick bite. In this way, if you drink a lot of coffee, you should consider a greater drum roaster as opposed to an air roaster. At last, drum roasters are extensively more exorbitant stood out from air roasters so plan as necessities are.
Air Roaster or Drum Roaster?
Air roasters use hot air for moving and cooking coffee. Cases of those are Nesco and New Dish. By and large, air sear expects around 8-12 minutes. Expecting that the dish stays less, the flavor likely will not develop completely. If the feast remains too extensive, the flavor could dull. Drum roasters are greater and they move the beans using a turning drum. Occasions of those machines are Behmor 1600, Quality Bistro, and HotTop. It requires greater investment to cook the coffee using those, around 14-20 minutes. While air roasters make coffee more splendid, drum roasters will commonly cultivate the flavor better.
How Long Does a Roaster Endure?
The life expectancy of the roaster depends upon the commonness of direction and upkeep. Little roasters normally last something like two years. They could persevere longer if you use them now and again, clean them regularly and make lighter dinners. Nevertheless, accepting you use the roaster a ton, don't immaculate it, and make dull dishes, the machine can have a more restricted future. If you pick a drum cook, you have the decision to displace parts rather than replace the whole unit. This saves you money over an extended time.
Roasters for Amateurs
More unassuming machines like Nesco or New Meal buckle down to cooking coffee beans. New Dish is perfect for youngsters, sensible and little, which makes it ideal for individuals who don't drink a lot of coffee. Nesco is more prominent and has a component for the smoke decline, which is wonderful if you don't have incredible ventilation. It is shaky if you buy a tremendous machine without knowing how to use it, yet buying a machine that will not make adequate espresso is moreover problematic.
On the off chance that you genuinely drink a lot of coffee then again expecting that you understand a couple of things about searing, going with a greater drum machine is a respectable choice. Such roasters as HotTop, Quality Bistro, and Behmor grant you to control time and temperature. A lot of these machines as of now consolidate programming features that help you with fitting the feast to the coffee beans. Considering everything, pick a roaster depending on your prerequisites. Consider your monetary arrangement, how much coffee you drink, and the best dinner.
0 notes
Text
How to clean Baratza virtuoso plus?
With respect to keeping your Baratza virtuoso in addition to Processor in top condition, there are tablets that you can purchase and go through the machine every 4/5 weeks which help to clear out any bothersome excess in the machine.
Nevertheless, there are moreover places in which these tablets can't reach, and thus, cleaning within your Baratza virtuoso in addition to the Processor a couple of times during the year is recommended. While the times you finish up to do this will depend intensely on how habitually it is used, the join framework is all around shrewd as expected.
Here is the direct and least complex strategy for cleaning a Baratza virtuoso in addition to the Processor:
1. Twist and dispose of the holder
From the outset, bend the compartment on top of the processor, you should see that it might be wiped out when the nubbins are changed. Clean off any development from the nubbin and spot this close by the compartment to the side.
2. Take out the top gasket and spot it to the side
At the point when the holder is disposed of, you will have an explanation above viewpoint inside your processor. At the astoundingly top, you should see that the top gasket is easy to kill with your fingers and this can in like manner be set to the side until you are finished cleaning.
3. Kill burr and clean with a brush
Under the top gasket and in the uncommonly center, the burr and holder is the primary piece of the arrangement that ought to be cleaned. You can take this out and a while later use a fragile brush to dispose of the excess of drudgeries or development. Yet again while wrapping up cleaning this part, say no thanks to it to the side.
4. Clean inside the machine (but don't flip around)
Additionally, you should install this comparable brush into the machine and brush away whatever amount you can from the inside. It is vital to note during this cycle that flipping around the machine is a particularly unreasonable idea as this is known to upset the places of parts inside the machine. Moreover, you will similarly see a couple of master accounts online which recommend that you do this yet mercifully note that these accounts are overwhelmingly censured by the creators of the thing.
5. Brush away all excess and put the top back on
Having brushed away all overflow on the machine, ensure that the parts are impaired inside in the particular banter demand they were taken out. Having placed the holder back on top of the processor, assuming no one cares either way, also twofold check that you have not missed any parts and the machine is fit to be used.
Cleaning your Baratza virtuoso in addition to the Processor is a gainful cycle yet for collecting the processor back in this way, benevolently make sure to investigate how the processor is destroyed. That being said, this is a by and large fundamental cycle and you are presumably not going with disdain any of the abovementioned so comply with the above bearings, and you should do okay. If you do run into issues send us a message and we'd be anxious to help.
0 notes
Text
Are coffee beans different than Espresso beans?

You're wandering the coffee walkway at your general store or scrutinizing the Eldorado site, and you see a couple of sacks named "espresso." In opposition to pervasive reasoning, that espresso mark doesn't suggest the beans. The qualification between espresso and "standard" coffee isn't the real bean yet how you dinner and blend the bean.
What is the difference between espresso and coffee beans?
Are our espresso beans and coffee beans something almost identical?
That is right! Most coffee beans are either Robusta or Arabica beans. This turns out true to form for a coffee drink you produce — including espresso. The espresso bean is only a coffee bean that is stewed more, ground better, and matured in an espresso machine or Aeropress. What is espresso?
Espresso is an infusion of concentrated coffee, made by convincing very warmed water at a high strain through finely-ground coffee beans. The importance of espresso shows two huge differentiations between espresso and coffee: the getting ready framework and the work.
Espresso can't avoid being coffee. It's made extraordinarily rather than "typical" American-style coffee.
The differentiations between espresso and coffee
Cook
Espresso beans are cooked longer and darkly than the beans used for spilled coffee.
Light, medium, and medium-faint dinners are ordinarily used for stream coffee. That is your point of view when you consider ordinary "American" coffee.
Espresso is stewed for a more broadened period, when in doubt, past the resulting break, so it has a toasted and more significant flavor. The beans are similarly seared for longer, so it takes out a lot of the sharpness while conveying more smoothness. This makes a heavier, all the more full tendency in the mouth.
Overall, expecting you to see a pack of whole coffee beans that says "espresso" on it, the roaster is communicating that they cooked the beans to the dull/espresso sear point.
Grind
An espresso grind is routinely significantly better compared to various types of coffee grinds. This is because the technique engaged with making espresso requires warm water being pushed through solidly stuffed grounds. The espresso beans ought to be especially fine, like the outer layer of the sand because the water comes into contact with them for a more restricted period.
If you see a sack of ground coffee beans that says "espresso," it normally suggests that the beans are stewed to the espresso point and they're ground to a fine espresso grind.
Steady tip: Coffee grounds are our main decision for Do-It-Yourself coffee skincare since it's fine and suspicious to hurt skin stood out from coarser drudgeries.
Mixing
For your typical cup of coffee, you can use a French press, spill, percolator, and various systems. Be that as it may, espresso requires a specific kind of maturing process. This requires either an espresso machine or Aeropress, and it achieves a shot or two (1-2oz) of a concentrated espresso.
Genuine espresso can't be made in a conventional coffee pot. It needs high strain for the extraction cycle to accomplish something astounding genuinely.
Espresso takes a specialist to make. It moreover requires the right contraptions. Anyway, that doesn't mean you can't progress at home! At the point when you've figured it out, you can have bistro excellent espresso every day, unequivocally in your own home. Start sorting out some ways to make espresso at home with this article by the Wirecutter.
Taste
Since espresso is cooked, ground, and mixed out of the blue, it tastes novel and diverged from spilled coffee. It, generally speaking, has a bolder, less acidic taste, with a decent and full-bodied finish. It tastes "really convincing," suggesting that it has a rich coffee flavor. The stewing framework especially gets out extra oils from the beans, so it regularly has heavier energy.
Does espresso have more caffeine?
It's a legend that espresso has more caffeine than stream coffee. The backward is legitimate! The run-of-the-mill cup of spill coffee has to some degree more caffeine than espresso. That is because espresso beans are cooked for longer than light or medium dish beans, so a lot of the caffeine is consumed with outrageous intensity during this cooperation.
Regardless, espresso has a high gathering of caffeine per ounce. A solitary shot of espresso (1 ounce) has a similar caffeine content as one cup of stream coffee (8-10 ounces). In any case, assuming you some way or another ended up drinking 8 ounces of espresso, you'd be far over-trouble on your regular piece of caffeine!
What is the difference between espresso and Americano?
An Americano contains espresso. Believe it or not, Caffè Americano (moreover called a "long dull") is generally debilitated espresso (espresso and water). When debilitated, it has practically identical fortitude to stream coffee, but with a smoother and less acidic taste.
An Americano, generally speaking, has the espresso poured into the cup first, polished off with water. A long dull usually put water in the cup first, polished off with espresso.
0 notes
Text
Can you use espresso ground coffee for the Moka pot?
It's better not to. We propose that you don't frame a very direct clarification: assuming you use the best ground coffee for espresso, for instance, the Super Mix in the Moka pot, you'll in all likelihood end up tasting espresso with a pointlessly cruel and to some degree consumed taste, turning the delight of your everyday cup of coffee into a genuinely bothersome experience.
Why does this happen? The essential clarification is associated with the coffee grind: could we look even more cautiously at what this is and which kind is the most sense given how given is prepared, so you can continually make a point to see the value in a bewildering espresso?
Coffee grind
What is a coffee grind? Pulverizing is the technique by which the cooked beans are crushed into a powder structure, a crucial cycle in describing the organoleptic properties of the blend.
Smashing can convey coffee on three unmistakable surfaces or pulverizes fine, medium, or coarse. ,,,, Each type concludes the speed at which the coffee is removed, got together with the level of resistance that the coffee presents when the water goes through it.
Coffee grind for espresso machines
In-home coffee machines used to make espresso coffee, the extraction cycle is constrained by an electric motor that creates a high strain, for the most part, in some places near 7.5 and 9 environments, if not higher.
A type of this sort needs to encounter a negligible surface of coffee with higher resistance: thus, the blends g, roundmixedicularly for espresso machines have a bettehasudgery.
Coffee grind for Moka
On the other hand, the commendable Italian coffee pot works with a light strain delivered by the water range and by the expansion of the air in the lower part of the pot.
Hence, ground coffee for espresso can't be used thereof the psyche: for the Moka pot, a coarser work of the blend is required. A blend that is too fine will suggest that the water goes through it even more comfortably and with inconvenience and it will leave a couple of extras at the lower part of the cup.
On the other hand, a blend in with too coarse a drudgery would permit the water to go through unreasonably quickly, provoking an exorbitantly watery coffee, given the way that holding all of the substances can't. To taste a nice coffee, find the blends for Moka, ground faultlessly by Caffè Aiello: superb coffee that merits its remaining as certifiable Italian espresso.
0 notes
Text
What are the best coffee beans for cold brew?

The virus mix is one of the most direct coffee refreshments to make at home and the least complex to change.
This versatile reward is great for summer, and in this article, I'll discuss the best coffee beans for making at home.
Even though various bistros offer infectious brew, seeking after it at home offers more choices and the decision of using fresher, better beans.
What's the differentiation between crisp mix and chilled coffee?
The articulations "cold blend" and "chilled coffee" are often used alternately, but they're not the same thing.
Chilled coffee is simply pouring hot coffee over ice. You can add milk and sugar to chilled coffee, yet the mixing framework is at this point unclear from hot coffee.
While you can allow your hot coffee to cool a piece before pouring it over the ice, this will regardless convey a debilitated refreshment.
The virus mix is coffee arranged without heat for a couple of hours (ordinarily present moment). This makes less acidic coffee, has a more good, bolder taste, and is more squeezed than espresso.
What coffee cook is best for the virus blend?
For a cold blend, you'll have to use a medium-dull dish. You don't need to use the dark feast you can find, but usually, the more excessive, bolder, chocolatey flavor profile of faint dishes makes a predominant infection blend.
The central thing is to use coarse-ground coffee. This is because the infection water you will use to make your infection mix expects to course for the coffee flavor to be isolated.
What do I need to make the virus blend at home?
There are heaps of approaches to making cold blends at home. The easiest way is to assimilate coarse ground coffee in an impervious holder with cold water for something like 12 hours. Right when it's done sprinkle, strain, and appreciate.
For this method, you'll have to use an extent one part of the whole coffee beans to four segments of water. That infers expecting you to grind one cup (82 g) of coffee beans coarse, and assimilate the drudgeries four cups (950 ml) of cold water.
You can moreover use a French press to make the cold mix. You could have used a French press before to make flavorful hot coffee, in any case, this procedure is much the same way practical for cold mixes.
The extent is hardly special while using a French press, so attempt to use two cups (470 ml) of water for every four oz (110 g) of coarsely ground coffee.
Add your coffee beans to a French press and cover with water.
In the wake of permitting it to splash for 14 to 18 hours, press the unclogger cover down until your grounds are out and out brought down and strain the liquid.
By and by you have an infection blend concentrate that can be taken care of in the fridge for up to seven days. To serve, add identical measures of concentrate and equilibrium of water or milk.
You can similarly use an AeroPress to make cold blend coffee, which I cover thoroughly here.
Might you anytime make a virus mix with any coffee beans?
You can include any beans for making the cold mix, for whatever length of time they're ground coarse. Regardless, one of the most marvelous inspirations to drink a virus mix is that the lessened causticity will allow you to taste the full sort of your feast.
On the off chance that you want to profit from your infection blend, a hazier dish is the best methodology. These dishes overall have a more solid flavor and make your infection mix brilliant without adding sugar or milk.
The 4 best coffee beans for a cold blend
The best coffee beans for the cold mix will be the ones that hold serious solid areas in the wake of maturing. To know if a particular feast will be perfect as a cold blend, look on the sack for the flavor profile, starting, and dish type.
I'll isolate my vitally six beans for making a virus blend.
1. Nicaraguan coffee beans
Nicaraguan coffee is great for cold brew. It's normally on the better side, and numerous feasts give notes of citrus, caramel, and chocolate.
Most Nicaraguan coffee is "cover created" and normal and has a wide collection of flavors depending upon how long it's seared.
Little Impression Espresso's Nicaraguan Natural Dull Dish from Amazon.com is chocolatey, nutty, and wonderful. The meanings of fig and zing in like manner come out enjoyably while maturing a virus blend.
2. Colombian Supremo coffee beans
Colombian coffee is sensational for a couple of exceptional rewards, and a virus mix is no exclusion.
Colombian Supremo, explicitly, is the greatest coffee bean filled in Colombia. With its striking and changed flavor, there are parts to revere with these beans.
3. Arabica Colombian coffee
Arabica coffee essentially suggests this coffee comes from the Arabica plant, and this kind of coffee can be filled in various regions across the world.
Colombian Arabica coffee, regardless, is especially tasty. Most coffees conveyed in Colombia are from this plant, so most Colombian coffees have the light, sweet sort of ordinary Arabica sears.
Like Colombian Supremo cooks (countless which are moreover Arabica), these beans are ideally suited for a virus blend because of their solid, toasted flavor and notes of chocolate.
For an ideal Columbian infection blend, endeavor Stone Road's 100% Arabica Dull Meal from Amazon.com. Recently cooked in Brooklyn, New York, this blend is unequivocally expected for an infection mix and is great for a very cool summer coffee.
4. Indonesian coffee beans
Indonesia is similarly a gigantic producer of Arabica, especially Sumatra. Sumatran coffees knew for their low sharpness, making them ideal for cold blends.
Indonesian and Sumatran dinners are great for coffee dears looking for an earthier, to some degree less sweet flavor.
Most Sumatran coffee is moreover wet-hulled, which is a washing technique that incorporates cleaning the coffee beans and allowing them to mature.
1 note
·
View note
Text
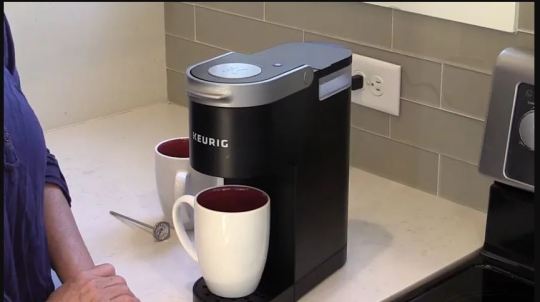
How to Install a water filter kit on Kuring K155?
In just 30 minutes you will see the value in fresh tasting, filtered water in each drink you blend! Not simply might you at any point kill chlorine and other harmful parts that ruin the kind of your coffee, nonetheless, the channel enjoys the extra benefit of descaling your brewer as it disposes of poisons, helping with hauling out the life expectancy of your coffee maker reliably.
NOTE: This guide acknowledges you at this point have presented the Keurig Direct Water Line Plumb Kit on your brewer. In the event that you don't know whether your brewer went with a Plumb Kit, then again assuming you really want to sort out some way to present one, see this article I formed on presenting a Keurig Plumb Kit.
Guarantee You Have All the Parts Handy
Before you start the foundation association, you'll need to purchase this Keurig Direct Water Line Filter Kit, which integrates the going with required parts:
PureWater Filters Purification and Scale Control Filter, Mounting Head with Screws and Bracket, the Keurig Direct Water Line Connector and Elbow, (2) Lengths of NSF Certified Food-Grade Water Line, and a Shutoff Valve, Angle Stop Valve, and a One-Way Check Valve.
Join the HEAD UNIT to the BRACKET with the (4) SCREWS
Assuming no one minds, note the sides put aside "IN" and "OUT" on the head. You'll need to guarantee the "IN" side is focusing on one side as shown in the under picture.
Dispose of the YELLOW cap from the most elevated place of the WATER FILTER
This is simply here to keep the channel new while not being utilized. You'll need to dispose of this prior to presenting it. On the off chance that your channel doesn't have this, that is completely fine. Proceed to the accompanying stage.
Join the WATER FILTER in the lower part of the HEAD UNIT
You'll do this simply by turning the channel until it totally and securely screws into the head unit.
Install one completion of the WATER LINE into the ONE WAY CHECK VALVE
Note that the One Way Check Valve is at this point connected with the Gray Ball Valve. You'll insert one completion of the water line into the other free completion of the Way Check Valve. Embed the Gray BALL VALVE into the HEAD UNIT along the edge and put aside "IN"
Note: DO NOT kill the dull, plastic rings as tracked down in the picture under.
Partner the open completion of the WATER LINE to your water source
You'll do this by either using the included 1/4″ Adapter or the Angle-Stop Valve. Guarantee you TURN OFF your water source prior to doing this, on the off chance that not you could be in for a wet shock.
Prior to proceeding to the resulting stage, you'll have to FLUSH the water channel to set it up for partition. Hold the water channel over a sink or enormous can, so the side put aside "OUT" on the Filter Head is investigating the sink/compartment. Then, at that point, turn on your water supply (assuming nothing arises, you could need to wind the green change on the Gray Ball-Valve to the "OPEN" position).
You MIGHT see a great deal of BLACK stuff rise out of the channel. This is ordinary. Try to flush the channel with something like 5 gallons of water (or until the water runs clear) going before use.
Yet again finally, switch off your water supply or turn the green change on the Gray Ball-Valve to the "OFF" position.
Affix the COFFEE MACHINE CONNECTOR to your machine
It will simply screw onto your brewer. Then, implant the little 10-inch water line into the side of the Head Unit stepped "OUT".Attach the BRACKET to the back of your brewer
You'll use the 2 existing screws that should at present be joined to your brewer. Assuming you did everything precisely, the back of your Keurig should appear to be the picture under.
1 note
·
View note
Text
How to remove coffee stains from a calphalon coffee maker?
Hardened steel is an ideal material for an espresso pot since it's challenging to break, sturdy, and simple to clean. Be that as it may, if you don't spotless your calphalon espresso pot after each utilization, espresso stains can develop on the metal, and these can be hard to eliminate. Fortunately, those espresso stains will emerge. All you want is quality cleaner and the right strategy.
Section 1
Getting the Stain Out
1
Add a cleaner to the espresso pot. There are different items you can use to eliminate stains from your coffee beans. For anything that you pick, simply empty the puree into the lower part of the container. Try not to utilize fade, as it can harm the metal. [1] Good cleaning items to include:
½ glass (118 ml) wine and ⅛ cup (38 g) hard salt
½ glass (118 ml) wine and ¼ glass (55 g) soft drink water
½ glass (118 ml) hydrogen peroxide and ¼ cup (55 g) soft drink water
½ glass (110 g) soft drink water
Four toothpicks (these are intended to separate food particles and stains)
2 tablespoons (30 ml) of dishwashing fluid or powder
2
Fill the pot with bubbling water. Fill the pot with regular water. Switch off the pot and heat the water. At the point when the water bubbles, put sufficient water into the pot to fill it. Fragrant water ought to be joined with a cleaning arrangement and assist with eliminating debasements from the metal.
3
Treat the stain outside the container. Espresso stains inside an espresso creator are normal, yet can likewise have spots outwardly of the coffee beans. To wash them, put one tablespoon (14 g) of pop in a little bowl. Add bubbling water and a couple of drops all at once until the glue is viable. Sprinkle the nail clean outwardly of the pot with the tip of the spread.
Let the cleaning arrangement stand by. Place the espresso producer close to a protected spot where there is no gamble of anybody blowing it or pouring water inside. Furthermore, the sink is a decent spot. Give the cleanser splash access to baking soft drinks for 30 minutes.
Permitting the answer for dry and glue will allow them to go after the stain, making it simpler to eliminate.
5
Clean the container. Following 30 minutes, the time has come to tidy up the wreck. Put in broiler gloves to shield your hands from heated water. Utilize a non-grating fabric, brush, or scrubber to eliminate espresso smudges inside and outside the pot.
Parts 2
Clean the container
1
Clean the pot. Pour the messy water from the espresso producer. Flush within and outside with new water to eliminate contaminations. After the pot is cleaned, actually look at it within and outside to ensure all stains are no more.
If there is an imperfection, attempt another cleaning arrangement. Put your picked cleaning agent in the pot, fill it with fragrant water, and allow it to sit for an additional 30 minutes before endlessly washing.
2
Clean the pot with a cleanser and water. Pour one teaspoon (5 ml) of dish cleanser into an espresso processor. Fill the pot with boiling water. Clean within and beyond the pot with a soggy material or clean fabric.
This is a significant stage in the cleaning system as it will eliminate any buildup from the first cleaning arrangement, which can give your espresso a flavorful taste.
3
Wash once more and dry the pot. At the point when the soil has settled and cleaned the espresso producer, wash it completely under high temp water. When everything cleanser is gone, utilize a perfect, dry fabric to dry the espresso creator.
Wash your container with deionized water rather than standard depleting it to forestall water stains from showing up on the tempered steel.
Parts 3
Forestall stains
1
Try not to leave espresso in the espresso ground for a long time. Espresso contains oils, and these oils can harm your pot, particularly if you leave espresso in the pot for a long time. To stay away from injury, don't leave espresso in the espresso ground for over 30 minutes.
This is particularly significant on the off chance that there is just a modest quantity of espresso left over from the coffee beans because the burner can dial back the progression of espresso, which will leave the cooking region and ground coffee beans.
To try not to have extra espresso and espresso beans, make sufficient espresso to give everybody each or two glasses in turn.
2
Clean the pot after you finish. The coffee beans left on the lower part of the pot can bite the dust and cook, which will leave the disturbing and hard spots clean at the lower part of the pot. When the espresso creator is vacant, flush it with warm water to eliminate any leftover espresso.
Clean within and beyond the pot so the lost water doesn't sully beyond the pot.
3
Erase things right away. While pouring espresso, there is typically a modest quantity of water dribbling from the sides of the spout and outside and the lower part of the espresso creator. Over the long run, these can cause imperfections on the off chance that not treated right away. To keep soil from outside and behind the lower part of the pot, utilize a comfortable material to clear the water off beyond the pot after pouring each glass.
Clean the container every day. Cleaning the espresso creator day to day with cleanser and water will assist with forestalling obstinate flaws that might foster over the long haul. Every morning, after you have completed your last mug of espresso during the day, wipe the espresso outside with warm, clean water and fabric or straw.
At the point when the pot is perfect, wash it with clean water and clean it with a towel to keep away from water and minerals.
On the off chance that you lack the opportunity and willpower to clean the pot in the first part of the day, clean and disinfect it when you return home from work or school in the early evening or night.
0 notes
Text
K•Supreme Plus Coffee Maker User Guide
Content
1 Connect to the Keurig® application
2 Connect your Coffee machine
2.1 Put it on
2.2 Bayne
2.3 Design
3 Before Bree
3.1 Rinse and fill
3.2 Pure Infusion
4 Prepare your most memorable glass
4.1 Add glass and supplement a case
4.2 Create and have a great time!
5 Get to know your winemaker
5.1 Part of a brewer
6 Supporting your winemaker
6.1 Brewer out
6.2 A piece of paper
6.3 Water supply
6.4 Regular upkeep
6.5 K-Cup® Pod utilized
6.6 Prevention
6.7 Remove the needle
6.8 Inserting the needle
7 Remove your espresso producer
8 Troubleshooting
9 Warranty
10K • Supreme Plus®
10.1 SMART COFFEE Maker
11 Books/Materials
11.1 References
11.2 Manual/related materials
Associate with the Keurig® application
You will require it to coordinate and deal with your engineer.
Interface your brewer
Introduce
Eliminate the tape from the blender and spot it in the lower part of the compartment. The injecter will turn on consequently, and you can press any button on the injecter to turn it on. Ensure you have your home Wi-Fi® secret phrase physically.
Open the Keurig® application and select Connect, then make a record. At the point when done, right-click on the brewer to associate.
Establishment
Adhere to the application directions to interface the brewer to your cell phone, and associate with your home Wi-Fi®. You will see a message that says achievement! Click OK. You will likewise find data that the brewer says Wi-Fi® associated, click Finally
Before fermenting
Flush and fill
Fill the tank with new water and fill it to the edge.
If you have a Keurig® water channel, apply it now. Unadulterated mixture
Press any button to turn it on. Put an enormous glass (at least 10 oz) on a channel plate. Adhere to the guidelines on the screen brewer to complete the cleaning region.
The one-time preparing process is finished and you are prepared to mix!
Set up your most memorable glass
Place the glass and put the case
Lift your hand and addition the K-Cup® case into the K-Cup® holder. Tenderly lower the handle to close the cover. The foil cover and K-Cup® cases have not been eliminated.
NOTE: Remove the spilling plate to get a 7-nm long travel glass.
Make a brew and have some good times!
Utilize the suggested base for preparing or modifying your lager. Select the size, and afterward click the BREW Bright button. When the brew is finished, dispose of the pre-owned K-Cup® unit. Completed when the delight screen shows up.
Alert: During the shower, there is an extremely high temp water holder in the K-Cup® holder. To stay away from injury, don't lift the arm during the technique.
Brewer properties
Make top choices: Favorites can be added while modifying the lager, press and hold the heart button above temperature and power settings, you can set aside 10 top picks and snap-on settings, then, at that point, select Favorites to rename. Top picks can be altered utilizing the Keurig® application. In the application, tap the settings, then the top choices, then, at that point, the ↑ Akara symbol, and drag the top picks to the ideal configuration. Top choices can be erased by the winemaker or the Keurig® application. To erase from the brewer, select the top choices you need to erase
Heated water: On the home screen without the K-Cup® case embedded into the bar, press K to get high temp water. Select the size and press the splendid K to change the heated water. Switch Off Automatically: To turn on your winemaker, press any button or increase current standards. Your espresso producers will switch off the following five minutes. You can likewise press and hold the K key to switch off the bar.
Settings When the installer is turned on, double tap the two keys simultaneously to open the Settings menu. Utilize the right snap to look at different menu highlights, including:
Wi-Fi®: Connect to your Wi-Fi® organization, change your secret key, and change your Wi-Fi® settings. Surface: Make sure your producer is working appropriately at high elevations (5,000 feet).
Language: select your #1 language
Water channel updates: Set up water channel suggestions to guarantee you have the perfect proportion of water for your espresso consistently.
Brewer Message: Provides the most recent kind of programming introduced in the espresso distillery
Support: Provides contact data for getting help when you want it
Industrial facility reset: Reset to state manufacturing plant reset state
Voice orders (Alexa and Google Home): Open the Keurig® application, tap Settings, tap My Account, and tap Voice orders. Adhere to the directions in the application. Alexa and all connected brand names are brand names of Amazon.com, Inc. or on the other hand its subsidiaries. Google Home and all connected brand names are the brand names of Google LLC.
Brew: First spot the case in the bar and lower the handle. Then, at that point, put a glass of standard size on a plate of holes. This should be possible any time before the imbuement is segregated. At the point when you are prepared to accomplish something from a distance, open the Keurig® application, ensure you are on the Brewing tab, select the blend settings, and afterward click the brew button on the application. To drop the distant activity, you can drop through the application or mood killer the designer.
Here and there: In the Keurig® application on the Brewing tab, press to turn the gadget on and off.
Booking a mixture of time permits you to plan an imbuement later on. To
make larger and application, and tap the schedule symbol in the upper right corner. Then select the date and time you need to plan the implantation. Ensure you have sufficient water in the water, put the case in the injecter and bring down the handle, and put a glass of standard size on the trickle plate. You will get an update before making one more suggested drink.
Shrewd Auto-Delivery monitors the number of glasses you that utilization and sends you arranges quickly while your leftover item is down for ten days, so the units won't run out of you.
My Brew Style monitors your wine making in the application and offers tips for top choices we figure you will appreciate contingent upon what you have made.
Caution!
This espresso creator is viable with the new Keurig® My K-Cup® Universal Reusable Coffee Filter. Try not to endeavor to utilize some other changed channel or unique form of the Keurig® My K-Cup® Universal Reusable Coffee Filter; can hurt the heavy drinker.
Deal with your winemaker
Standard cleaning makes your wine machine more effective. Make certain to switch off and eliminate the coffee beans before cleaning.
Outer Brewer
Keep the Keurig® winemaker at its best by at times cleaning the outside. Just perfect the metal surface with a paper towel and non-alcoholic paper towel, as well as the plastic with water, cleanser, non-grating, non-rough material. Try not to drench the injector in water or different fluids.
Recuperation box
Scratches can hold up to 8 ounces of abundance and should be taken out and cleaned incidentally. To eliminate it, slide it toward you, keeping it level so you don't conceal it. Utilize a perfect, foamy, and non-rough fabric.
Water capacity
The fluid ought to be washed periodically by cleaning the items in the tank and secret with a clean, non-rough, build-up-free fabric. Try not to dry eggs in water tanks since buildup can persevere. Allow the tank to dry totally.
K-Cup® holder
To eliminate the K-Cup® Pod Holder from the bar, lift your hand and hold it over the K-Cup® Pod Holder with one hand as you lift the K-Cup® with the other hand. Case Holder underneath. . until it breaks. After cleaning, fix the K-Cup® cinch in the opening utilizing the twofold rib confine as an aide and take it to a high spot.
Eliminate your espresso creator
You want to dismantle your espresso creator at regular intervals or so when the harm level comes up. Follow the obliteration cycle cautiously to switch off the level. Contingent upon your water content, lime drops or amounts might begin in your coffee beans. Numbers are not poisonous, and whenever left untreated, they can influence the exhibition of the brewer. Eliminating your espresso creator routinely at regular intervals helps keep the hot fixings and other inside parts hydrated. Limescale stores can be developed rapidly, making them considerably more significant.
Disposal process
Before you start, you will require a huge earthenware cup, clean water, a Keurig® descaling arrangement, and a sink. Try not to utilize paper cups. Ensure there are no liquor units and K-Cup® holders. If it's not too much trouble, leave around 15-20 minutes for the end cycle.
0 notes
Text
Compare Ninja CE251 vs CE201 Model
What portion of the espresso machine do you believe is generally vital to plan for making the best espresso? Numerous barista clients say that the flavor of espresso relies upon the recipe. Ninja CE251 is for a period without a maker that could do likewise. Its hot brewery innovation gives you high intensity for extremely hot espresso. He is given 15 seconds to put it on. This Ninja ce251 programmable brewer is completely chosen for espresso eaters as it permits you to mix hot espresso for as long as 24 hours. It permits you to require activity in front of investment presented by a couple of winemakers. How about we continue toward its definition.
Espresso creator Ninja CE251 can blend so you can get lovely or rich.
Its adaptable warming curls keep the espresso hot for as long as four hours.
This sort of Ninja Coffee includes a straightforward 60oz water repellent. The 24-hour brew plan gives you something hot early.
This bottling work incorporates a mid-mix breaker that permits you to snatch a glass of mid-brew.
The Ninja CE215 Programmable Brewer accompanies an adaptable stove that gives you extremely hot espresso for as long as 4 hours. The Ninja Ce201 espresso creator accompanies a short warming plate to keep its warm intensity for 4 hours without heat.
Espresso as well as tea has an astounding taste. Its flavor gives the espresso a scrumptiously sexy, sensitive, blossom fruity fragrance. This superb espresso program has a straw processor to convey the espresso to guarantee you have a warm, scrumptious espresso.
The hot innovation of this sort of Ninja doesn't allow you to ponder hot espresso. Its hot blazes have an adaptable temperature blend for ideal hot espresso at the right temperature.
It has a 60oz water stockpiling tank that can hold up to 12 cups of carafe milk. It has a very much depleted water tank that permits you to fill the tank without the mess.
A foamy icing framework gives you a lot of milk making for a delectable cappuccino.
This kind of Ninja accompanies different frills like a long-lasting channel, a ninja scoop introduced, and a 12-glass screen.
What clients say regarding the Ninja CE215 Programmable Coffee Maker
Ninja CE215 Programmable Coffee Maker enjoys a significant upper hand over its clients. Ninja has thought of many models. In any case, this kind of espresso of the Ninja party celebrates all that of its ancestor. He utilizes a great deal of rapture with this brewer. For amateurs, they share a few hints so they can play out the unrewarding brewery and get it.
The most ridiculously contacting portion of this is all there is to it carafe. Any year clients can utilize it since it is not difficult to introduce. It permits you to drink espresso the entire day without complaint. Mobile water tanks are an extraordinary expansion to moment cleaning. As indicated by them, this is an espresso creator with remarkable quality. The pot of the espresso producer doesn't bubble as fast as the supposed espresso pot. Be that as it may, barely any clients have grumbled about its frying pan. They said his hot plate couldn't keep the espresso warm. In any case, this producer is faultless. They support it without a doubt. Likewise, you can find the best Keurig espresso model to consider. A significant piece of the Ninja CE215 Programmable Brewer
The capacity to brew
The Ninja CE215 Programmable Brewer accompanies a hot and cold shower framework so you can blend new espresso and tea quickly.
Ninja clients can make foamy specialty wine by adhering to their guidelines and directions. No other espresso producer conveys espresso and tea as rich and exemplary as Ninja Coffee Maker. You don't need to stress over brew size. It gives you the legitimate temperature for a brief time frame and doesn't give you harsh or hot espresso. To make the fermenting system simpler, it offers bottling works.
An implicit pinner permits you to quantify how much espresso, milk, and different fixings make a solid espresso.
Cleaning and support
This programmable espresso machine gives you great espresso while you clean it routinely. To clean it, you want to wash the portafilter, super durable channels, and carafe. If you have any desire to keep your machine exceptionally spotless, you can clean it. On the off chance that you think it generally looks great, you can utilize a cleanser and clean water. In the wake of completing the espresso, wipe the machine with a spotless fabric.
If you have any desire to clean it appropriately, you can dismantle the machine. Complete directions you can find from Ninja espresso producers or their client support organizations.
Life span
Typically, the Ninja CE215 allows you one year guarantee. However, here and there this machine has a great deal of discussion about making a round brew and water tank. You can expand the life expectancy by accomplishing cleaning work or supplanting the parts. As per client numbers, this maker labored for quite some time. Be that as it may, it relies upon your utilization rate. Then again, countless clients say it just labors for a half year. Assuming that it is a half year old, you can contact client support and they will fix it. You might be intrigued to know the Ninja Coffee Bar CF091 Carafe System Review
or on the other hand, think about the Delonghi America BCO430 Review - Is it the equivalent?
Ninja CE215 Coffee Maker FAQs
Is it hardened steel?
No. It is plastic. In any case, a few sections are metal. In any event, when it is made of plastic, it doesn't separate rapidly. Is it treated steel? No. It is plastic. Be that as it may, a few sections are metal. In any event, when it is made of plastic, it doesn't separate rapidly.
Is the dish light?
Indeed. The hot compressed air firearm has a fire. At the point when it illuminates, the buttons light up.
Last Thoughts
Ninja CE215 is more than an unrivaled program engineer. To provide you with some espresso in the first part of the day, there is no foe. Getting it for not exactly $ 100 would be a savvy choice. So put away your cash accurately.
1 note
·
View note
Text
Does a French Press Make Coffee Stronger?

Indeed, French papers will generally taste more grounded and full body than moment espresso since it takes more time to separate doesn't utilize paper channels and is fermented with espresso and high water. Yet, espresso breaks might contain more caffeine because of consuming meat. Peruse on to figure out more about why the French Press areas of strength for produces.
French Press espresso has areas of strength a because of its long extraction time
The French Press espresso plant has a long extraction time since they collaborate with the water for quite a while. This implies that espresso beans have additional opportunity to deliver a fat, acids, and other fragrant mixtures giving the espresso its sweet taste. The acquaintance alludes to the cycle by which coffee beans soften in water. Many variables influence how much extraction is done, including the level of espresso beans, water temperature, handling time, and gear utilized.
Thusly, it is conceivable to make espresso fermenting more grounded tin han French papers. Erring on that in a moment. In any case, we can securely expect that one cup of French paper prompts a long extraction period. What amount of time does the development of French papers require?
The most generally suggested time for French Press espresso is 4 minutes, which is no longer than conventional espresso. Some prepared espresso has a more extended fermenting time contingent upon the heaviness of the ground espresso.
Notwithstanding, French Press espresso is made utilizing a metal screen rather than a piece of paper. The directing wheel permits the best espresso beans to go through and fill the last wine where they keep on creating flavor. Thus, the typical additional time for some French Press espresso is generally longer than that of cracked espresso. Thus, the joined flavor created in French papers is additionally high.
The French press makes the surface stick out
The French cylinder screen doesn't add fluid or oil. They unequivocally forestall emptying espresso beans into cups. These oils found in French Press espresso, which are filled in coffee beans, add to areas of strength for the surface. The paper channels utilized for espresso spills assimilate the greater part of these oils during creation, making the espresso less actually sound. Hard espresso has a mouth-watering feel and a distinct appearance and is seen to have serious areas of strength for an ideal taste.
Other espresso beans are utilized?
French Press espresso is generally presented with 1:15 espresso and water while fermenting espresso is utilized at 1:17. The high measure of espresso in the French paper permits it to additional concentrate the flavor and caffeine from beans.
The outcome is a more delectable French espresso. Just honestly, these cutoff points are not stoned. Streaming espresso can be made by utilizing great espresso with a lot of water if necessary. All things considered, in any case, top-notch espresso is utilized in French papers.
The main proviso to this is that the French Press espresso requires a bean-hued bean. This implies that the ground bean particles are bigger and have a higher surface region than the fine bean glue utilized for trickling espresso.
It is significant because a little region implies that the French letter set will create flavor and a delicate surface. In any case, the long extraction from a French paper sabotages this. French Press has a more grounded caffeine content than espresso spills
French espresso creators are one of the sans caffeine espresso producers on account of their life span. Long-haul blending permits it to take out caffeine and beans, making it more grounded than fermenting coffee. Click here to look into why French Press espresso is so profoundly juiced.
How to make espresso trickling more earnestly than a French press?
All things considered, is produced using refined water utilizing adaptable boiling water, thickness, and handling time. Be that as it may, you can decide to make your espresso some way you like. So there are a couple of fundamental things you can do to make major areas of strength for a.
Utilize more refined beans
The best footstool will expand the extraction rate and produce a heavenly espresso. This is because ground espresso beans have a higher surface region and communicate with water, making them dissolve more quickly.
The risk of utilizing bean sprouts is that they take excessively and add an astringent, unpleasant taste to your espresso.
Utilize heated water
Heated water will expand the pace of espresso dissolving in your drink. This will make espresso tastier as long as you make it for a similar measure of time as in the past.
0 notes
Text
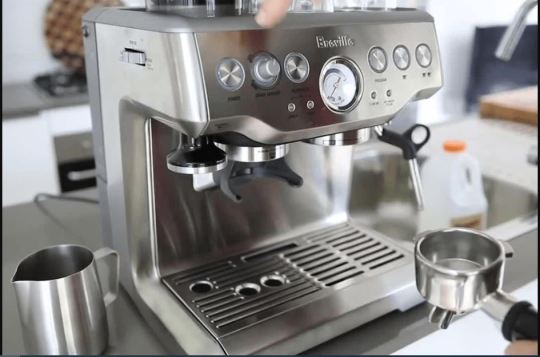
Nespresso Creatista Plus Espresso Machine by Breville

Outline
Because of a coordinated effort between espresso specialists at Nespresso and engineers in Breville, Creatista Plus is taking the coffee group serving at a basic and elevated degree of control. The high roofs permit you to make great quality espresso bistros however you would prefer, without the preparation of the barista. You control the volume, temperature, and foam level for lattes, cappuccinos, and the full beverage menu.
• Viable with Nespresso OriginalLine and other generally utilized espresso containers.
• Suggested drinks incorporate coffee, level white, cappuccino, bistro latte, latte macchiato, ristretto, lungo, and hot milk. Warm-up and all set in only 3 seconds.
• The underlying milk washing framework produces milk with miniature froth which is great for latte preparation.
• Different air vents take into account redid milk conveyance: select latte or cappuccino with programmed foam rate control, while the sensor distinguishes when the milk is excessively hot for your beverage.
• Adaptable coffee machine, milk temperature, and milk level.
• A keen tone/menu show makes the assignment simpler. Utilized espresso cases fit in a cabinet that can hold up to ten utilized containers.
• The topped-off glass keeps the coffee glass as it makes the wine.
USE AND CARE
Eliminate the plate of holes in the case pack every day. Eliminate the glass holder by first eliminating the glass case, then unscrewing the glass holder, pulling the holder forward, and lifting it to eliminate it from the machine. Clean the glass holder and wipe it within the machine, and collect again with perfect, clean material. Eliminate the water tank and top, clean both of the fragrances and flush with cold water. Fill the water tank with crisp drinking water.
Wash the milk container and dry it after each utilization.
If essential, wash the pet with a gentle cleanser.
Container the milk and hydrate among min and max. Select the MILK administration and afterward click Start. When gotten done, dispose of the high temp water, then, at that point, wipe the liner with a spotless material.
Try not to utilize hard solvents or abrasives, wipes, or clean creams. Try not to put it on a plate. Try not to involve the container or any piece of it in water or different fluids. Utilize a delicate moving pin to clean every one of the parts and collect the parts. Utilize a perfect material to clean the coffee beans and machine routinely.
Elements and more data
• 16 "x 6 3/4" x 12 1/4 "length.
• 60fl oz. water capacity. 11 lbs 9 oz.
• 1600W.
More data
• Type # BNE800.
• Incorporates 16 ounces of fluid. hardened steel frother milk.
• Fiery milk to make rich, splendid hot cocoa.
• Menu animates cleaning and destroying machines.
• Framework holes of versatility.
• Plate spills have an ideal perspective on the water. The kind of energy stockpiling when not being used.
• Treated steel sack.
• This item is fabricated in the United States and Canada and is made with US electrical norms.
• Endlessly made in Australia, made in China.
0 notes
Text
How to clean Gaggia Classic pro?

Gaggia Classic Disassembly and Cleaning
I purchased a used Gaggia Classic machine on Amazon. After understanding that it was not as "delicately used" as the shipper connoted, I destroyed the entire machine to clean it up. I've made this helper as a teardown guide, yet feel free to peruse it from base up to get a sensible cognizance of how to gather this machine. Feel free to drop a comment expecting you have any requests or information to add.
Instruments
Before you start, I would recommend purchasing several instruments (by and large open at your close by home improvement shop):
• Metal brush
• Metric Allen wrench set
• Citrus concentrate or espresso machine cleaner
• Phillips screwdrivers
• Forceps or a sickle wrench
Kill the Boiler
Begin by killing the two association screws on the most noteworthy mark of the machine by the water meander aimlessly. The top plastic water meander aimlessly/sheet metal social event should pull off towards the back of the machine.
Then, at that point, pull the steam wand handle off (it could require a dash of effort). Note that the valve in the photo above is a digit adjusted, this is because my machine is being hurt. Yours should (in a perfect world) be centered around obligation. You'll similarly have to eliminate the push-on connectors from the power connector on the rear of the machine and eliminate all of the connections from the front switch. I recommend numbering all of these connectors before pulling them off so you can without a doubt reconnect them.
Flip the machine over and use Allen wrenches to take out the four bolts interfacing the social event to the suspension.
Following taking out these screws, your pot should be free. Wipe out the radiator from the body and spot it in an ideal work area. Note that things could get messy or possibly wet very soon.
Using a standard or bow wrench, dispense with the chromed steam wand from the copper steam pipe. This will allow you to put the social event down on a level surface without hurting the copper pipe.
Then, at that point, separate the contraptions and directs them from the machine. You ought to detach the siphon hose from the OPV and mood killer all push-on connectors. Accepting that you leave your wire get-together as-is after you switch off everything connectors (don't bend or pound the wires!) you should have the choice to helpfully see where every one of the wires is related for reassembly.
To make life clear, take out all hoses from the machine. You should simply need to wipe out the 3-way solenoid hose and the OPV hose now.
By and by flip the warmer on its side. You'll see a Phillips screw head in the shower screen.
Kill the Phillips screw from the shower screen, and a short time later draw off the shower screen itself. Expecting it is stuck due to calcification or coagulated coffee compounds, use a little flathead screwdriver to pry it off.
As of now grab an Allen wrench and eliminate the metal square that lives under the shower head. You should now have the choice to see the most elevated mark of the social event.
Using a plastic spudger, flathead screwdriver, or even your fingernails, carefully pry up the flexible gasket from inside the get-together.
As of now flip your evaporator and get together back up on the end.
Using a wrench, wipe out the steel nut from the most elevated place of the solenoid valve. The dim solenoid twist should slide off straightforwardly. Then, unscrew both of the warm transforms from the top and the side of the pot. The high-temperature switch goes on top, and the low-temperature (blend) warm switch goes on the right 50% of the pot.
And by killing the solenoid valve and getting together from the evaporator using an Allen wrench. You ought to take out the flexible o-rings for cleaning assuming they are genuinely calcified.
Presently you can unscrew the hose fitting on the most noteworthy place of the OPV. This is most easily done while the social event is at this point joined to the evaporator.
And by unscrewing the entire OPV gathering from the pot. Once more you ought to dispense with the versatile o-rings for cleaning expecting they are looking shoddy.
This is the best open door to dispose of the steam valve. This movement can be a cycle fascinating, especially expecting that your machine is more prepared. I recommend dispensing with the two bolts and winding the valve all over. After some winding, use a flathead screwdriver to carefully pry each side of the valve until it comes free. Make an effort not to be exorbitantly powerful, as metal is a sensitive metal. You'll probably have to dispose of the flexible gasket as well, mine was very calcified.
Then, dispose of the four bolts affixing your radiator to your social occasion, and your machine should be destroyed! You'll have to wipe out the flexible gasket from its space in the social event, expecting you have a more prepared machine this gasket and its initial will require some cleaning.
Cleaning
Your warmer looks something like the photo above and it could look white with calcification. Horrible. Expecting you have a lot of white calcification, a metal brush (open all things considered home improvement shops) will manage it. Expecting that you have a lot of oxidation and dim development as I had, a Dremel contraption with a tempered steel brush association will get it done.
Above is my evaporator after enormous dremeling and metal brushing. It's not unimaginable, yet it's adequate for me. Yet the aluminum around the seal is particularly emptied, I haven't experienced any deliveries whatsoever.
To clean your different parts, I recommend retaining them with a response of citrus concentrate or one of a kind explanation of an espresso machine cleaning plan (open at various online retailers). This will kill the basic proportions of calcification.
If your machine is overall around as old as possible mine, you could need to do some more raised cleaning. Have a go at using a metal brush with your citrus concentrate or espresso machine cleaner game plan. Use the brush to clean up metal fittings (especially the steam valve fitting), the social event, and other metal parts. This should eliminate any holding up calcification or other gunk.
Now that you've cleaned everything up, this present time is the ideal open door to gather things back! Accepting that you need additional help, just read this aide in converse to figure out how to reassemble the machine.
0 notes
Text
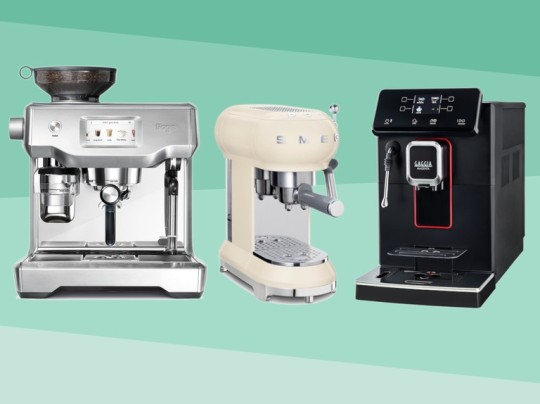
How to choose an espresso machine for home?
For espresso dears, there is nothing better compared to that first taste of the strong, dull arrangement that hails that the opportunity has arrived to start your day.
For others, it is the jolt expected promptly in the day to revive the energy for a significant social event or to get creative energy siphoning.
Usually, espresso is served strong and thick with a layer of crema on the top created utilizing coffee beans and water. The sort of bean used is regularly established on the tendency of the barista or individual to mix the espresso.
The standard espresso served in Italy isn't number one in the US today. Some grade toward a lighter, better dish while others will not meander from the dull and full-bodied beans that we will frequently consider while imagining a steaming cup of
The Ultimate Home Espresso Machine Guide
A flawlessly aged cup genuinely has no assessment. Additionally, what could be ideal over participating in this enjoy your own home? Before going out and overdoing it on another espresso machine, it is vital for understanding what you are looking for.
Machines change in cost, limit, and openness. The goal of this guide is to help you with sorting out which machine is great for you by emptying the complex subtleties of popular models.
What are home espresso machines?
The convenience of having the choice to participate in a delicious cup of espresso from the comfort of your own home sounds like a dream to various coffee fans. The underlying step is to guarantee you understand what definitively an espresso machine does.
Expecting you have never worked as a barista, the espresso machine could give off an impression of being to some degree unnerving. Gaining some information about the collaboration can help you with setting up an unrivaled cup of coffee and even add to your pleasure.
The most compelling thing to know about before you make your home espresso machine purchase is that there are three sorts. You can investigate a manual, self-loader espresso machine, totally modified, and, shockingly, super-customized. The most compelling thing to note here is that the more customized the espresso machine, the less the means ready to be finished by the individual using it.
For example, expecting you are someone that inclines towards the solace of having the choice to squeeze that blend button and occur with your day, the super-customized might be the best espresso machine for you.
Of course, maybe you like to have fairly more control over your blend and select express decisions depending upon the day. For this present circumstance, you might be more blissful with one of the manuals or self-loader espresso machines.
Knowing your tendencies and what you want to secure from your decision will help you in your dynamic communication. Knowing the key subtleties, features, and benefits of different kinds of machines will moreover go with the choice easier. Think about the going with before picking your machine:
Manual Espresso Machines
A manual machine gives more control to the client anyway on occasion needs consistency. The head can deal with the variables going into the connection, which can be satisfying for specific people. These machines are now and again more humble than customized and consume less counter room.
Customized Espresso Machines
The imprint "customized" consolidates a self-loader, totally modified espresso machines, and super-modified moreover. These machines are redone to change the strain applied normally to the volume of water being used. This eliminates a huge piece of the inconsistency from the circumstance and overall conveys a quicker cup of espresso.
What sum genuinely home espresso machines cost?
Particularly like another hypothesis, the final result will relate to the cost of espresso machines. There is a couple of staggering game plans to be found during explicit seasons (Black Friday and Cyber Monday) and, shockingly, some exceptional markdown codes to endeavor.
The expense for a home espresso machine ranges considering the sort and the included features. It is a large part of the time an incredibly confidential decision ward on tendencies. Various espresso fans will finish huge costs to get the best cup in the comfort of their own home.
Costs for a manual espresso machine range from the sensible expense of around $150 (like the Flair Espresso Maker) to the pricy $1,600+ (like the Elektra S1C Microcasa Lever) with all of the lavish embellishments.
Expecting a customized machine is what you need, a spending plan model like the De'Longhi 15 Bar Espresso and Cappuccino Machine will weaken you more than $100. At the furthest edge of the coast range, the La Marzocco will set you back more than $4,000!
There are ceaselessly going to be unbelievable decisions that are humbly assessed someplace near the spending plan and get carried away classes. Acknowledging what sort of machine you want and which features will satisfy you is fundamental to going with an informed decision.
What to Consider Before Buying a Home Espresso Machine
Cost is a huge idea when purchasing a home espresso machine, in any case, isn't the fundamental variable to recollect. You are certainly buying this to additionally foster your home coffee drinking experience. A couple of components will conclude whether it is the right partner for yourself as well as your lifestyle.
Manual or Automatic
As referred to over, the sort of machine you will peruse will either be a functioning, manual model or program.
On the off chance that you are a novice, the program might be your most memorable propensity since it will generally be straightforward.
Regardless, expecting you don't mess around about learning the specialty of espresso making and need to have more control, the manual can be overwhelmed via train.
Volume and Frequency of Use
There is support for why cafés put assets into expensive, inflexible espresso machines. Mileage due to progressive use can adversely influence coffee aging stuff.
It is truly savvy to recollect how habitually your machine will be used and the volume ready to be conveyed.
You could pick differently on the off chance that you have a couple of clients maturing different cups a day that stood out from a lone client making one cup a day. This is an important thought while pondering the right machine for you.
Processor Requirements
Recently ground coffee beans are one of the major bits of the espresso-making process. Various experts agree that the taste, flavor, and coffee-drinking experience are dependent upon this variable.
Regardless, only one out of every odd individual loves the time it takes to physically smash beans.
There are a couple of mind-boggling decisions open for either tendency so it is basic to know before buying, which machines accessible have a fundamental coffee processor and which don't.
Size/Space Available
Expecting that you have examined pictures of home espresso machines, you have probably seen a couple of wonderful pieces of the contraption. A piece of the top models looks like works of art and seems to take up a huge piece of the ordinary kitchen. That decision won't work for everyone.
Concluding the space you have open (or that you will give up) is critical as well as knowing the conclusions of your enjoyed model. These are not commonly the most un-requesting to hide away in a storage room, so it is urged that size and space be contemplated warily before purchasing.
Cleaning and Maintenance
Dependent upon the kind of water you are using in your machine, standard cleaning and descaling will be significant for your day-to-day timetable to keep on valuing brilliant coffee.
Hard water is scandalous for causing improvement and can unfavorably impact the taste and quality if a proactive cleaning isn't done regularly. Luckily, there are basic techniques for keeping your machine freed from advancement.
Certain people slant toward a trademark method like a vinegar plan. There are similarly financially made things that can be gone through the machine to kill any unwanted development.
The Best Home Espresso Machines Available Now
With all of the espresso machine decisions open, it can have all the earmarks of being overwhelming to have to seek after a choice.
Whether or not every one of them as of late referred information helped you with diminishing your choices, there are of course various components to consider that could make one machine a favored fit for you over another.
Fortunately for you, we have picked the very best espresso machines accessible today and showed the top features of each.
FAQs
1. What is a 'twofold pot' coffee machine?
A twofold radiator suggests that you can mix and steam drinks at the same time.
As well as the solace of being able to do more than every drink, perhaps more basically, it suggests that you'll have water at the best temperature for both setting up your coffee and frothing your milk.
While huge twofold radiator machines could seem like they would be the better decision, guarantee you check various features you could require too.
2. How long should an espresso machine last?
Numerous components will conclude how long your espresso machine will last including brand, a repeat of direction, type, and parts.
The ordinary program perseveres between five to fifteen years, while a manual could get through a bit longer with genuine thought.
Like with most things, the more you deal with it the more it's presumably going to persevere, so picking a machine that is easy to clean/stay aware of as well as buying new parts will help your coffee maker with this happening for quite a while.
3. What is pre-imbuement and why does it matter?
The course of pre-combination is an extra stage habitually taken to ensure that the ground coffee used is similarly submerged before pressure is applied.
Not all things machines do this, and as numerous people accept the
1 note
·
View note