
elizabethchristenia
Elizabeth Christenia
40-Something Maximalist Costumer and Bog Witch in Training 🦓
1 posts
Don't wanna be here? Send us removal request.
Last Seen Blogs

mauvecityextra
MauveCityExtra

dink-art
Dink-art Illustrations

starboywille
starlight
lesedilo-fi-blog
Artist

santa9722
☺ Hello,there! ☺
Photo
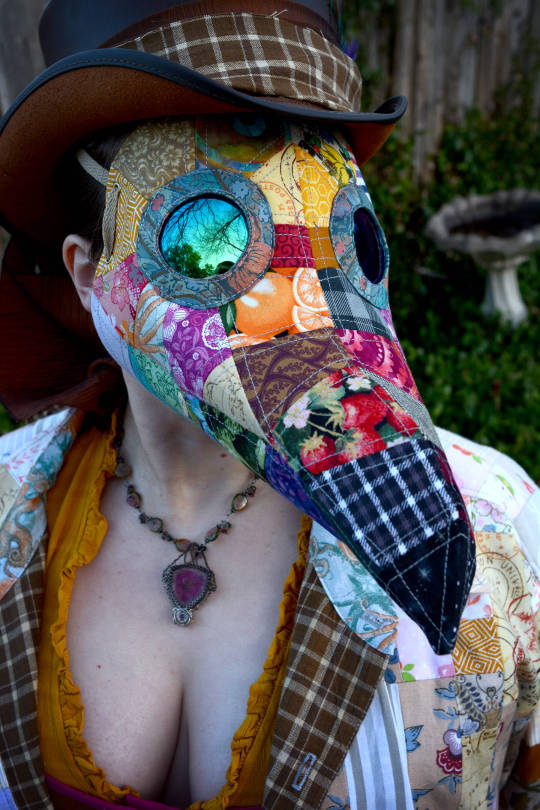

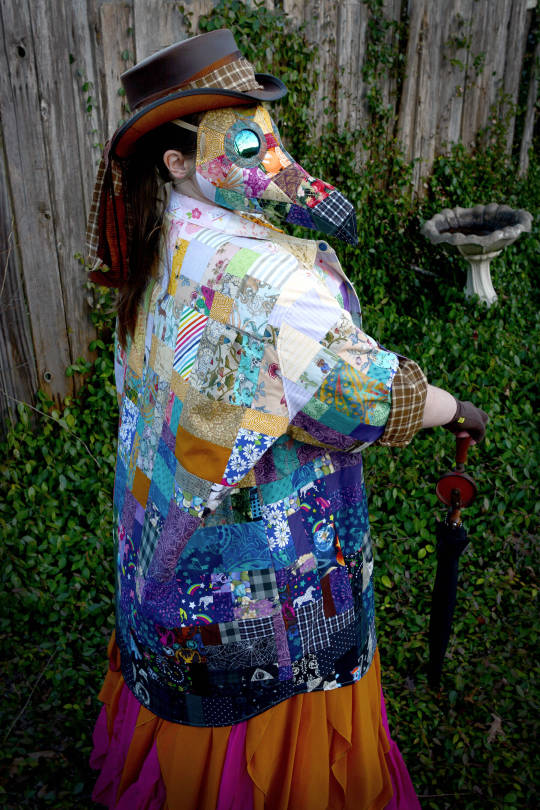

‘Mask’
I just finished my entry for the 2021 Foundations Revealed costume competition and got it entered a few hours before the deadline. Whew. It’s been... a long week.
I came across a poem, ‘Mask’ by Beth Bachmann and had the sudden idea... “Hey, that costume competition was for a literature character this year, wasn’t it? I wonder when that ends...” 11 days. It ended in 11 days. And with the business still shut down and me in isolation, I decided... why not? What else am I REALLY going to DO with the next 11 days anyhow? Could a mask count as a character? Here’s to hoping it does!
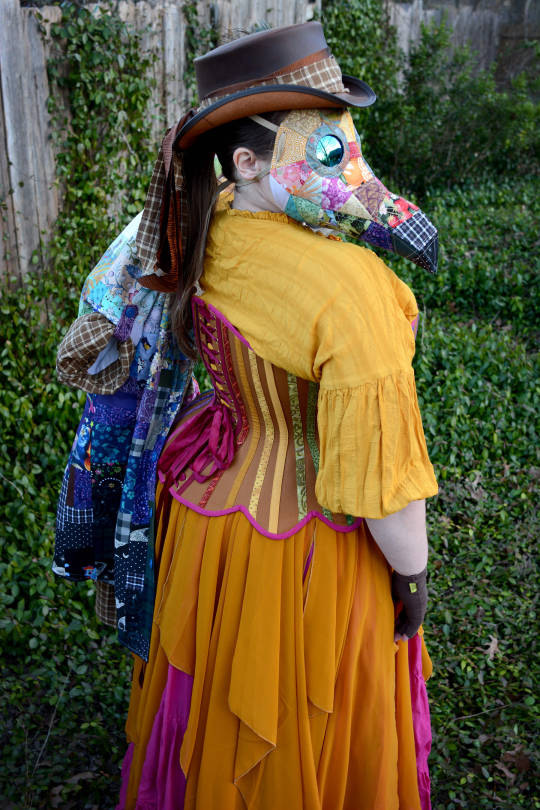
I made a mask from the pattern by @mctreeleth and also a jacket pieced from the giant pile of cabbage left after making over a thousand face masks while in quarantine.
I started by pulling a pattern off my husband’s old patched 4XLT work shirt that has become my favorite house coat during the pandemic, so I had a fairly simple pattern to make out of the fabric I was going to piece.
My original plan was to have an ombre effect on the jacket, light at the shoulders to dark at the hem. When I started laying out the pieces, it ended up also having a rainbowy effect from reds on the left to blues and purples on the right. It took about two days to sort and cut all the pieces of fabric from the mask scraps - the largest is 4″x 5″, and I drew the line at the smallest being 2″x 2″. When I wasn’t sure in what order to put the brighter colors in terms of going from light to dark, I pulled out my phone and used it as a tool to look at them in greyscale mode, and went with what order they looked like they should go when the color wasn’t involved.
I pieced each panel over top of the pattern piece it was going to be on, and added a little extra for wiggle room, then thread traced each piece onto the panel, stay-stitched just under 1/4″ from the edge, and cut. I bagged out the bottom hem as I flat-lined each piece to stash fabric that had been too loosely woven for masks, but was perfect for lining fabric. I then joined everything together with french seams and boom - quilted patchwork jacket.
Making the mask took longer than I expected. Based on the amount of Bridgerton and Fate: The Winx Saga that played in the background while I was working, it took about 14 hours from start to finish.
Printing the mask pattern onto interfacing was brilliant - although trying the DIY scotch tape/interfacing trick didn’t go so well. The time it took me to unjam the printer isn’t part of the 14 hours. I did manage to print it onto a 8-1/2 x 11 commercial poplin meant for printing your own photos onto fabric to put into craft projects - then I added Heat ‘N’ Bond onto the backs before cutting out the pieces. That went wonderfully and made the mask pretty sturdy once it was finished.
For the most part, I followed the instructions that were with the pattern - but I did end up making a few changes:
I didn’t bother to top-stitch the bottom center seam. There’s no way to go all the way to the tip of the beak by machine, and nobody’s going to be looking at the bottom of the mask much anyhow. I just pressed the seam open very well on a sleeve board.
I didn’t add a fabric face strap - instead, I put two eyelets at the top and bottom of piece #10 after I was done and ran a lanyard through them with a cord lock, which worked very well.
On the round eye pieces, I edge stitched a line on the inside after flipping the lining around to the back side to keep everything smooth and in place.
Rather than folding the edge of the large circle down and pinning a ton of tiny pleats in place, I ran a line of small gathering stitches around the edge of the larger piece and used it like a drawstring to pull the large circle to the back side of the eye pieces and hold it in place. I ironed it well, and ran the gathering strings through the eyehole to the inside of the mask. I didn’t cut them off until after I had the eye pieces stitched down onto the mask. (I wish I’d taken a picture of this step, because it’s a lot quicker than the pinning - alas, it was 2 am and I didn’t think to.)
I didn’t slip stitch the eye pieces down onto the front of the mask. I pinned them in place, with pins situated kind of like spokes on a wheel. I edge stitched the eye pieces onto the mask by machine, walking the machine over each pin by hand. (Note - I was using an industrial sewing machine that handles thick fabric just fine and has a much heavier foot pressure than most home machines, so that probably helped this turn out well.)
If I were making this again, I would attach the bias for the eye holes from the front and fold it around to the back instead of the other way around - just for an aesthetic factor. It was a lot easier to make the final line on the bias look clean - which, sadly, will never be seen inside the eyepiece. The line around the bias inside the mask is the one part of mine that looks a bit messy.
Over-sized round “John Lennon” Sunglasses worked perfectly for lenses on this. After a while, they do fog up - I’m betting that wipes meant to keep the inside of goggles from fogging up will probably fix this.
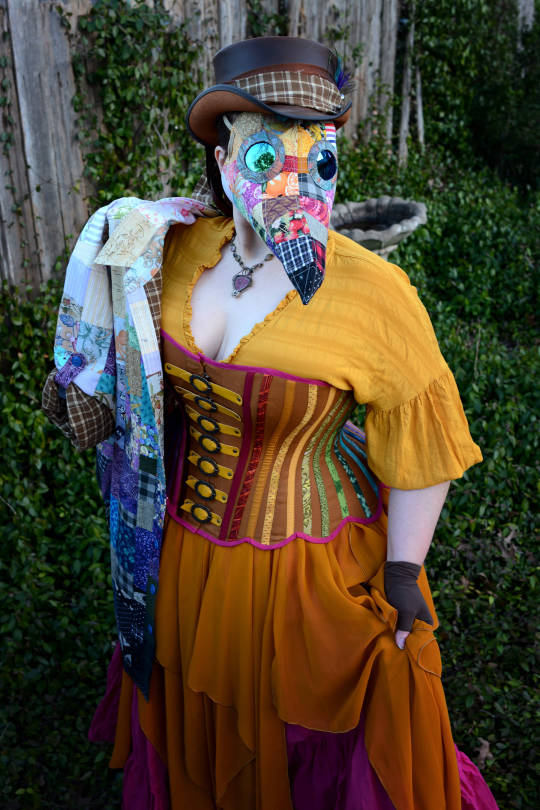
I paired the jacket and mask with my pre-quarantine garb skirts and leather hat (shaped much like the quintessential illustration of a plague doctor), a shirt from my closet, and a cotton duck corset I had already finished as an experiment in color (Each external faux bone casing is in a different color radiating around half of the corset.) and also as an experiment in edge shaping - I made the corset extra-long, and then hand drew scallops around the bottom of the corset - not quite deep enough to count as tabs. I wanted to see if the bones were enough to keep these down and flat on the corset, or were they long enough they would flip up when worn? (Spoiler: They actually sit flat - yeay!)
Also learned on this project - when your husband is taking the photographs, and he is much taller than you, every picture that isn’t of your back will end up being a boob shot. XD
1K notes
·
View notes