
ebiznation-blog
Welcome to ebiz Nation
eBizNation.com, Free resource for entrepreneurs, startups & small business seeking information about starting, managing and growing an online business.
11 posts
Don't wanna be here? Send us removal request.
Last Seen Blogs


mywombatreview-blog
شراء الأثاث المستعمل

calissarowan
Calissa Rowan

civilwarcpt
wanda

osmindias9
Untitled
Text
The Three Secrets of Choosing a Profitable Affiliate Offer

The one thing super affiliate marketers do differently than everyone else is, they know how to pick a good product to sell. They usually know the vendor's reputation, whether or not the product is good or not before promoting it. If it's software... does it actually work?
You see, choosing the wrong affiliate offer can ruin your entire business by destroying your reputation. Do you think your subscribers will still trust you if you recommend a crappy product or a product from a scamming vendor? Not a chance. That’s why you’ll want to protect your reputation and your business by only promoting high-quality products put out by reputable vendors.
Here’s how to do it…
Review the Product
It doesn’t matter if every other affiliate in the niche is raving about the product. It doesn’t matter if you have to buy the product yourself (hey, it’s tax deductible in most places). It doesn’t matter if the sales page is as slick as a whistle and the commissions are eye-popping…
Simply put, don’t recommend it if you haven’t first reviewed and used the product.
See, here’s the thing…
All those other affiliates raving about the product may not have used the product either. They’re all just looking for something profitable to promote. So if you simply follow the herd, they may just lead you off a cliff.
Imagine if the product actually turns out to be complete junk. What do you think that will do to your reputation if you recommend the product to your readers? That’s right, they may never trust you again if you hype up a pile of junk.
It’s not worth it to promote a big-commission product if it turns out to be junk. You may get a pile of cash today, but you’ll be hard pressed to ever sell anything to your list again. So the only products you should be recommending are those you’d recommend to your mother or your best friend.
Next up…
Check Out the Sales Page
The large majority of product vendors want to do everything they can to make sure their affiliates are happy. But then there is this minority of vendors who’re sneaky as hell. These guys are so shady they’d steal commissions from their own mother. And that’s why you need to watch your back. After all, if they’d steal from you, just imagine how they’ll treat your customers.
So what you want to do is check out the sales page and order form. Go through every link. Go through the entire process. Watch for these things:
• Unnecessary sales page leaks, such as links leading off the page. In particular, look for ads to other products.
• Alternative payment methods on the order form that don’t give you affiliate credit. This could be another payment processor, or even a number for telephone orders.
• Hijacked commissions. The most nefarious vendors will actually overwrite your affiliate link with their own. Go through the ordering process to ensure you get credit for sales.
In short, look for anything that could stifle sales or hijack your commissions.
Finally…
Research the Vendor
The product looks great, the sales page looks good. Time to promote?
Not quite.
Now you need to research the vendor to be sure he’s not going to treat your customers (or you) poorly. So drop his name into your favorite search engine and do some research. Look for a pattern of complaints such as:
• Slow or otherwise poor customer service.
• Not honoring a guarantee/refund policy.
• Doesn’t pay business partners (or pays them slowly).
Just look for anything that might suggest your vendor may try to rip off you or your customers – and if you see even one tiny red flag, move on.
Bottom Line…
When you’re an affiliate, you’re linking your reputation to the reputation of the product and vendor. That’s why you want to be sure your hitch your business to good, honest people and products.
Now the three secrets of choosing a profitable affiliate offer may all seem like common sense, but plenty of people overlook these steps. In fact, there are a whole lot of steps aspiring affiliates overlook when they’re setting up their business – and then they wonder why they can’t seem to sell more than one or two products a month.
Don’t let this happen to you. Be sure your business is set up the right way – the profitable way – by discovering the secrets of the super affiliates at www.affiliateprofitsclub.com. Check it out now to get in on a very special offer – you’ll be glad you did.
Read the full article
0 notes
Text
Commission Gorilla Affiliate Marketing Software Bonuses
Commission Gorilla Affiliate Software by Promote Labs is a web based, affiliate promotion page (bridge page) builder.
The affiliate marketing software hosts conversion boosting bells and whistles.
Combined with a bonus management system and an in-depth reporting and analytics engine developed exclusively for affiliate marketers.
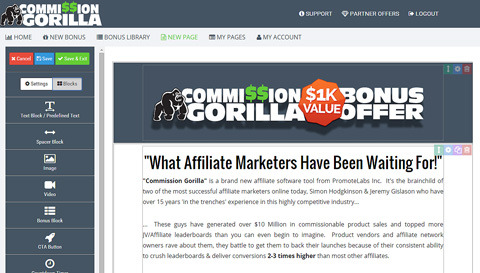
The software reduces the time and effort typically needed to create a promotional pages.
It also incorporates/automates many of Promote Labs own winning affiliate marketing strategies that have generated $10M+ in sales commissions and prizes for them over the last five years...
You could say Commission Gorilla is the software for affiliates made by affiliates, but it goes deeper than that...
Commission Gorilla took their team over a year to develop and then it lived for six months in private beta (generating over a million dollars in affiliate sales before it's public roll out)
"Frankly, there's NOTHING else on the market like it or that even comes close."
Click here to see our bonuses when you purchase Commission Gorilla!
Read the full article
0 notes
Text
How Long Does It Take to Boost Google SEO Rankings?

You've put in the hard work to try and boost your SEO rankings, but you're not sure how long it'll take for Google to notice. In this SEO tutorial video "How Long Does It Take to Boost Google SEO Rankings?" Neil Patel is going to share with you how long it takes to see results from SEO.
Neil has been in SEO for a long time, well over ten years. But he keeps this SEO tutorial simple, this is about SEO for beginners, not pros.
Hope you found this SEO Tutorial How Long Does It Take to Boost Google SEO Rankings helpful.
Hey! Don't Forget to Leave a Comment and Share this Post. :)
Read the full article
0 notes
Text
Top 10 Killer Blogging Mistakes

Do you make these Top 10 Killer Blogging Mistakes?
Blogging is one of the most lucrative moneymaking methods today, but it’s also really easy to screw up. The fact is, the vast majority of bloggers make little to no money, because they’re making these mistakes that could be easily avoided if only they knew what they were.
In this article, you’re going to learn about these top 10 killer blogging mistakes that could absolutely destroy your chances of making money with your blog.
You’re also going to learn some great tips you can use to increase traffic, increase conversions, and increase profits.
Keep in mind that these tips can be applied to any blog, but if your blog is in a “bad” niche, your results aren’t going to be as good as you probably hope. We’ll talk more about choosing the right niche later.
Please don’t just skim through this guide and not take action on it. These mistakes could really destroy your chances of making money. It’s really that serious!
So let’s get started.
Blogging Mistake #1
Choosing the Wrong Niche
When it comes to blogging, it’s critical to choose the right niche right from the start. It will be a complete waste of time and money if you set out to make money blogging and you choose a niche that isn’t going to be profitable.
While there’s no way to be 100% certain, there are a number of ways to figure out which niches are most likely to be profitable.
Competition – Believe it or not, competition is good. It means the niche has some interest. Too much competition could be a bad thing, but you shouldn’t worry about a significant amount of it.
Monetization – You should find out if there are a lot of products available to promote. If you can’t find any, it probably means the niche is not profitable. (Trust me, if a niche could even remotely make a profit, someone is already trying.) And please don’t think you can monetize any niche with something like AdSense, because you’d need massive traffic to make that possible.
Commercial Intent – This is a fancy term to refer to whether or not people in this niche will buy anything. If it’s something like “funny videos”, good luck making money with it. It would be possible with a very large amount of traffic, but difficult all around. You don’t have to be in a “product”-centric niche like “women’s shoes”, but you do need to be in a niche where people are known to buy stuff, like golf or weight loss.
If your blog doesn’t conform to this checklist, it’s probably not going to make you as much money as you hope. It’s certainly possible, but your chances of making money will definitely be reduced.
When choosing a niche, be very careful to choose a niche where you can get significant traffic (decent traffic, decent competition) and one that also has the potential to be profitable. After all, you’ll need something to promote as an affiliate.
Mistake #2
Giving Up Too Soon
Perhaps the most common mistake aside from choosing the wrong niche is simply giving up too soon. Almost any blog could eventually become very profitable if given enough time, but the majority of people will give up long before that time.
The average business offline takes between one and three years to become profitable, but the average person seems to give up on a blog after a month or two if it doesn’t start making money immediately. Why is this?
For one thing, some people seem to think blogging is a “get rich quick” method. It’s not. It takes time, hard work, and dedication. It’s not easy. It’s not fast. and it’s not a miracle maker.
Blogging may take anywhere between three months and three years to really take off. It takes a while to start getting good traffic from the search engines, and it takes a while to build a fan base and an email list.
If you reach the one-year mark and you’re not seeing any significant income, it may be time to re-analyze your data to see if maybe you chose the wrong niche or you’re doing something else wrong. But don’t stop too soon or you’ll never know what could have been.
Mistake #3
Not Promoting Your Blog
Years ago, as long as you did some keyword research and wrote some keyword-rich content, you could pretty much count on sitting back and making some money with a blog.
Unfortunately, changes in Google’s algorithms meant to combat spammers who flooded the internet with low-quality content meant to get people to click AdSense ads have made it a lot harder to gain traction. It takes a lot longer to start getting traffic, because the spammers ruined it for everyone.
(This is a major reason I don’t advocate spammy moneymaking methods. They may work for a while, but they end up screwing over legitimate marketers and will eventually stop working for the spammers, too.)
These days, it’s absolutely vital to get out there and start promoting your blog. You’re not going to get traffic to a blog these days without some promotion, at least not for many long months.
Get off your butt and start promoting! Don’t spam, but get your link out there in front of the people who will be interested in it.
Mistake #4
Autoblogging with No Added Value
Okay, so autoblogging used to be a great way of making money. You could outrank the original owner of the content for his own keywords just by getting a larger number of better quality backlinks to your site than he had to his.
well those days are long gone.
Sure, autoblogging might still be possible for some, but the odds are greatly diminished. Google slaps the crap out of duplicate content these days, especially if you’re not adding any value to it.
You can add value to your autoblog content by adding your own commentary to the post. Every day, find the new posts pulled in by your autoblog and edit them, adding some new information.
Just be sure to distinguish your content from the original author’s by using a different font, a different color, italics, block quote, or something similar. You don’t want to make people think the original author wrote your comments, because (a) you want them to think you know what you’re talking about and (b) you don’t want the original author upset if he disagrees with something you wrote and people think he wrote it.
Mistake #5
Not Building a List
This has been said over and over for as long as the internet has been in existence, but some people still don’t get it.
The money is in the list!
Repeat that. Make it your personal mantra. If you truly want to succeed online, you really, really need to build an email list!
An email list is a valuable property that cannot (barring extreme circumstances) be taken away from you. Google algorithm changes won’t affect it. Changes at various social sites won’t affect it. It will continue making you money every time you send out an email for a very, very long time to come.
They say that, on average, each subscriber is worth $1 per month. Different niches will have different numbers, as will different individual lists. But this is a good overall estimate.
So think about that. 100 subscribers equals about $100 per month. 1,000 subscribers means another $1,000 per month in your pocket. 100,000… wow! You get the idea.
Build a list. NOW!
Mistake #6
Counting on AdSense
Okay, AdSense can still be a nice little moneymaker if it’s used to supplement the money you make from other sources like selling your own products or affiliate products. But the days of earning a cushy living off AdSense alone are all but over.
Is it possible? Probably. Is it likely? Not a chance!
Remember this: The reason people advertise via AdWords (thus creating the ads that pay you through AdSense) is because they are making money with their products. Why would you settle for a few cents when you can make the big bucks like they are?
Even if you don’t have your own products, you can promote other people’s products with affiliate links and make a heck of a lot more money than counting on a few cents here and there from AdSense.
If anything, just use AdSense as a sideline income.
DO NOT count on it for your primary income source!
Mistake #7
Creating Bad Content
Even if you get everything else right, creating bad content will destroy your chances of getting considerable traffic and making decent money.
Here are some reasons why good content is a must:
Your content won’t be shared virally if it isn’t really great.
Your bounce rate (the number of people who quickly leave your site without reading your content) will be high, which will keep you from ranking well in Google.
People won’t trust your authority in your niche.
People won’t click your ads, because they won’t be there long enough to and they won’t trust you enough to.
And people won’t come back to your site.
A long time ago, some webmasters wanted poor content, because they wanted people to click and AdSense add and nothing more. Poor content accomplished that sometimes… when it didn’t just make the user hit the back button. These days, earning money is much more complex, and having great content is absolutely essential.
Mistake #8
Failing to Connect
Blogging is much more than just posting content. It’s about connecting with your audience on a personal level, too. If you fail to do this, you’re going to find that your content isn’t shared as much and your visitors don’t come back.
A lot of times you may look at a particular blog and wonder, “What’s so great about this blog?” Maybe it gets a ton of traffic and you just can’t figure out why.
The answer is usually engagement.
The most successful bloggers aren’t those that simply toss up a few 500-word articles and a picture here and there. They’re the ones who respond to comments, encourage people to leave comments, and reach out to their fans. They’re the ones who interact with their audience, and allow their audience to connect with them on a personal level.
To really make the most of this, let your personality shine on your blog. Post a picture of yourself and make your “About” page sparkle with your unique personality. Infuse yourself into every blog post!
Mistake #9
Keyword Stuffing
Are you still trying to stuff your target keywords into your articles as often as possible in order to reach a specific keyword density?
Hellooooo? 1999 called, and they want their internet-marketing tactic back!
Pardon the silly cliché expression, but it’s the truth. Keyword stuffing hasn’t worked in a very long time, and worse case scenario, it could get you penalized by the Big G.
It’s not necessary anymore, anyway. Google has gotten a lot more advanced, and you don’t even need to target specific keywords the same way. They can actually figure out synonyms with pretty good accuracy, so if you write an article titled “How to Build a Rowboat”, they can figure out that a search for “How to Make a Rowboat” probably means the same thing. So you don’t have to stuff both keywords into your content.
As long as you’re using the standard lingo you’d need to use to create a great article on a particular topic, you’ll be all good. Honestly, keyword research really isn’t as important as it used to be. Google focuses on other areas a lot more now.
Mistake #10
Backlink Spamming
Ok, 1999 is seriously ringing my phone off the hook.
This is another very old, outdated tactic that is just as likely to get you penalized as it is to help you.
Yes, you do need backlinks. They can still help you. But they need to be organic links from quality sites. Google can spot link spamming a mile away now, and they will slap the crap out of you for it.
Here’s what you should NOT do:
Creating a bunch of low-quality pages on Blogger, HubPages, etc. just to link back to your site
Buying links to your site (no, no, no!)
Submitting your site to spammy link directories
Here’s what you should do:
Create content people will want to link to.
Encourage people to share your content by using social share plugins and mentioning sharing in your articles
Guest post on popular blogs and link back to your content
Conclusion
Now you know not to make these Top 10 Killer Blogging Mistakes.
Also Remember, it’s never too late (or too early) to start building an email list. The best time to start, if you haven’t already, is now!
Not tomorrow.
Not next week.
And Not “someday.”
Now!
Every day you wait is potentially several subscribers you lose forever. Those people may never cross your path online again. Isn’t it better to get those people on your list while you have the chance?
Be careful with your email marketing efforts, because once you alienate a subscriber, they’re gone for good. They’ll hit that “unsubscribe” link, and you’ll probably never hear from them again.
As long as you avoid the mistakes outlined in this guide, you’ll probably find a lot of success with email marketing. Ultimately, if you treat your list like gold, they’ll bring you lots of gold!
Good luck!
Read the full article
0 notes
Text
How to Go From Beginner to a Super Affiliate Marketer

If you want to learn How to Go From Beginner to a Super Affiliate Marketer and stand out in the affiliate marketplace, maximize your income quickly while building a list of ultra-targeted, insanely loyal customers, then you will want to read every word on this page.
You see, many new affiliate marketers get it all wrong. They complicate the process of turning prospects into customers by failing to connect, entice, and funnel their traffic in a way that converts.
And that’s what it’s all about, right? As an affiliate marketer, your main objective is to warm up a customer base and turn those prospects into buyers. And not just buyers who will purchase products through your affiliate links, but customers who will turn to you time and time again, when making the decision to purchase.
The great news is that it’s easier to do than you may think!
Read the full article
0 notes
Text
How to Go From Beginner to a Super Affiliate Marketer

If you want to learn How to Go From Beginner to a Super Affiliate Marketer and stand out in the affiliate marketplace, maximize your income quickly while building a list of ultra-targeted, insanely loyal customers, then you will want to read every word on this page.
Read the full article
0 notes
Text
How to Backup Your WordPress Site Using a Free Plugin

In this video you are going to learn How to Backup Your WordPress Site Using a Free Plugin. The most important thing you can do right now with your WordPress blog or website is to MAKE sure you have a viable backup solution in place.
In this video Adam from WP Crafter will show you how to install and configure Updraft backup WordPress plugin.

Its free, painless, and it takes about 5 minutes to set it up.
Don't depend that your web host to have a backup to your site either even if you have the best web host and you can't count on your we developer no matter how much you pay them.
You need to make sure for your own sake that you have offsite backups that you have access to in case you website gets hacked or your host has a hardware failure or you do something like install a plugin and it breaks your site.
Read the full article
0 notes
Text
How to Improve Page Speed Using W3 Total Cache WordPress Plugin

In this tutorial you're going to learn How to Improve Page Speed Using W3 Total Cache WordPress Plugin.
As you may or may not know, page speed is a consideration in the Google ranking algorithm. So, your SEO (search engine optimization) will benefit from faster loading pages.
The first thing you'll need to do is install the plugin, so let's do that. To install this plugin please log into your WordPress dashboard, hover over Plugins and then click on Add New.
On the next page type "W3 Total Cache" into the search bar. The plugin we want should be the first one in the top left.
Click on the Install Now button and then click Activate after it's installed.
This is a new menu item in the left hand menu called "Performance". Hover over that menu item and then click on General Settings. This is where we access the majority of the page caching options to improve page speed.
The sections listed on this page include:
1. General
2. Page Cache
3. Minify
4. Database Cache
5. Object Cache
6. Browser Cache
7. CDN
8. Varnish
9. Monitoring
10. Miscellaneous
11. Debug
12. Import / Export Settings
In the General section you can mass-activate the caching options.
In the Page Cache section you will be able to enable caching of individual pages. This means that when a page is accessed, the website will query the database and then save a hardcopy of that page on the server. The next time that page is access the hardcopy will be loaded rather than querying the database again. This improves page speed.
In the Minify section you enable the shrinking of CSS and Javascript files. This removes excess white space in the files, which can lead to substantial saves in file weight and consequently page load times.
In the Database Cache section you enable the caching of database queries.
In the Object Cache section you enable to caching of database information for quick retrieval.
In the Browser Cache section you allow further caching on the visitor's browser.
In the CDN section you configure a Content Delivery Network which stores media files on super fasters servers. This can lead to substantial load time improvements.
In the Monitoring section you can activate your New Relic subscription to monitor your website's performance.
All of these options add up to faster page speed, which is what everyone wants, including Google.
Read the full article
0 notes
Text
How to Setup Yoast SEO WordPress Plugin - Step-by-Step

In this video tutorial Bjorn Allpas of WP Learning Labs shows you How to Setup Yoast SEP WordPress Plugin - Step-by-Step.
Bjorn's tutorial is broken into two parts. First, he'll show you how to install and configure the Yoast SEO plugin using the on-boarding wizard. Then he’ll show you how to optimize a blog post using the on-page SEO optimization checklist.
For many years the Yoast SEO plugin almost always been the number one ‘go-to’ plugin for WordPress SEO. There is a free version and a premium version as well as some nice add-ons like their video SEO plugin.
You can compare the Premium and the free version here: https://yoast.com/wordpress/plugins/seo/
Some of the great features of the free version have been moved into the paid version, but the free version is still powerful.
To install the free version of the plugin, log into your WordPress dashboard, hover over Plugins and then click on Add New.
On the next page type “SEO Yoast” or "Yoast SEO' into the search bar. The plugin should be the first one in the top left.
Click on the Install Now button and then click Activate after it’s installed.
A new menu item called SEO has been added to the bottom of the left-hand menu in your WordPress admin. There’s also a new link in the admin header bar called SEO.
If it’s your first time installing the plugin you’ll be taken right to the on-boarding wizard where you set some common settings.
These are:
1. Welcome Page
You can decide to work through the on-boarding yourself or pay SEO Yoast to do it for you. Since your watching this tutorial you probably don’t need to pay for it. When you’re done here click on Next.
2. Your Environment
Here you specify if your site is under construction or already active.
Choose under construction if you want to keep the site out of the index of search engines. Don’t forget to activate it once you’re ready to publish your site. The options are:
Option A: My site is live and ready to be indexed
Option B: My site is under construction and should not be indexed
Click next when you’ve chosen the appropriate one.
3. Your Site Type
Next you choose the site type, also self-explanatory:
– blog
– online shop (ecommerce)
– news channel
– small offline business
– corporation
– portfolio
– Something else
Click next when you’ve chosen the appropriate one.
4. Company or Person
Next, you choose whether the site is for a company or an individual. When you choose company you are given a name field to fill out and you can choose a logo image.
This information is important for Google indexing.
Click next when you’ve chosen the appropriate one.
5. Social Profiles
In this step you can add URLs to all the social profiles that you or your business has. Click next when you’re done.
6. Search Engine Visibility
This is where we choose which types of content on the site should be hidden from Google. If you want your content to rank then you’ll want to have as much content visible as a possible.
The exceptions are “Media”. I would also hide that category. And some of the custom post types on your site may also need to be hidden if they don’t add any value for your visitors.
Click next when you’re done.
7. Multiple Authors
Here you simply say whether your site will have multiple authors or not.
Click next when you’ve chosen.
8. Google Search Console
Here you authenticate your site with GSC, which you should always do so Google can tell you about any issues they find.
Click next when you’re done.
9. Title Settings
This is where you set the format of your titles.
Click next when you’re done.
10. Newsletter
SEO Yoast offers you a chance to subscribe to their newsletter at this stage. If you don’t want to then simply click on Next.
11. Upsell Page
Here SEO Yoast offers you the ability to upgrade to the premium version of the plugin or to purchase additional training from the company.
If you don’t want any of those offers then click Next.
12. Success!
Now you’re done.
Click Close.
Now that the Yoast SEO plugin installation and configuration is complete we can SEO optimize a post or page.
Now you know How to Setup Yoast SEP WordPress Plugin.
Read the full article
0 notes
Text
How to Build a Profitable Business with High-Demand Digital Products

If you’ve been looking for a fast and easy way to build a profitable online business, look no further than digital products. In this article I'm going to show you How to Build a Profitable Business with High-Demand Digital Products.
When it comes to selling physical products, you’ll spend a lot of time and energy dealing with the complexities associated with shipping, fulfillment, inventory, and management.
With digital products, you’ll never have to worry about any of that!
Not to mention ever-changing industries that can shift in favor of digital virtually overnight. Just think about the rise of digital music for example, versus those who still purchase CD’s. The same for the growing number of people who pay for streaming access to movies versus those who still purchase DVD’s.
Here’s a fun fact: digital sales surpass physical sales in many other industries as well!
Digital products are not only easy to create, but they can be easily replicated and turned into multiple product lines that fuel an unlimited number of sales funnels.
They’re also consistently in demand, easy to deliver, and if you never want to write a line of content yourself, you can affordably outsource everything!
So, the question is: what kind of digital products are the most profitable?
The answer is surprisingly a rather simple one: any digital product that caters to a consistent demand within an evergreen niche market.
An evergreen market is one that consumers are interested in for years to come. They aren’t based on a fad or current trend, but rather on fulfilling an ongoing demand from a loyal audience.
These markets are filled with die-hard fans, or people who have a strong passion and interest in products and services related to the niche.
So, it makes sense that when you’re considering what digital products to create, you should focus specifically on these types of markets!
In the first part of this artcle, we’ll dive into the different digital product formats that are not only easiest to create and sell, but that people are actively looking for (and already buying!).
I’ll then take you down the digital product rabbit hole where I’ll show you exactly how to gauge overall interest, demand and profitability of a niche before you even begin to create your products.
This one step will maximize your chances of success because you’ll base your digital products on proven winners.
Later, I’ll show you how you can easily use existing content to create outstanding digital products that will sell like wildfire.
Are you ready to enter the insanely profitable world of digital product creation so you can set yourself on the path to success?
Then let’s begin!
How to Uncover Digital Goldmines
When it comes to creating profitable digital products, you’ll want to begin by analyzing what is already selling.
This sounds like common sense, right? Yet you may be surprised at how many people overlook this step and go on to create digital products in formats that no one cares about.
For example, if you were interested in creating a course that catered to new self-published authors who were looking to build their social following, you’d quickly discover that most of those entrepreneurs are interested in eBooks, courses, reports and step-by-step video instruction.
They want to read about the steps they need to take to grow their audience and connect with their readers’ base.
They want to watch how they can find relevant keywords for their books, or build an author platform using WordPress.
Most of them won’t be interested in software, audio, music, stock photos, or most web-based applications. That’s not to say that none of those people would prefer those formats, but the majority are interested in the other types of content and training tools.
So, you need to know your audience, and the easiest way to find out what they’re most interested in is by analyzing the types of digital products they’re already buying.
You can find your audience many ways, including:
Facebook Groups
http://Facebook.com/groups
This is a fantastic way to gauge overall demand of a niche. By looking for groups that consist of active members who are avidly discussing the niche, you’ll be able to quickly find an unlimited number of hot niches and then qualify them.
Start by searching Facebook using relevant keywords under the “Find Groups” tab. If I were looking for groups pertaining to low carb recipes, I’d type in something like: “Low Carb Diet”, or “Low Carb Recipes”.
Look for groups that are active and include at least 1,000 members. While smaller, more segmented groups can also include profitable niches, when you’re just starting out it’s wise to focus on creating digital products that appeal to a wider audience.
Don’t spam the groups you join! You’re there to gauge interest and to spy on conversations to determine what people are most interested in. So, pay attention to recurring questions and threads that include common, ongoing discussion.
Facebook groups are a goldmine of helpful information that you can use to form the outline for your digital product.
Pinterest
http://www.Pinterest.com
Pinterest is a great resource for those who are looking for digital product ideas that sell, or trend-influenced product categories.
With this social media giant, catering to over 180 million active monthly users, you’re able to follow popular boards that are focused on niches you’re evaluating to see what people are sharing and what they are saying about it.
You can begin by browsing Pinterest’s most popular topics here: https://www.pinterest.com/categories/popular
You can also use Pinterest’s general search to discover new niches, quickly gauging popularity based on the number of followers an account has or the number of re-pins (shares) on any given board.
It’s an easy way to generate a quick snapshot of a potential niche’s overall demand.
Etsy
http://www.Etsy.com
When it comes to uncovering hot digital products, you may not think about Etsy. After all, it’s best known for handmade goodies, one-of-a-kind products, and handcrafted creatives.
But with more and more Etsy users creating digital products, it’s become a hidden reserve filled with potential ideas for your next digital product.
For example, thousands of Etsy sellers are making money by offering various printables in countless niche markets. These are simple downloadable products like journal inserts, planners, calendars, sewing patterns and even birthday and wedding invitations.
Talk about set and forget, passive income! These sellers create their digital downloads once, add them to their Etsy shop, and then move onto another project while they continue to sell day after day.
Spend some time browsing Etsy, paying attention to the shops that offer downloadable content. Begin by searching the marketplace using keywords like: printable, planner, download, journal, prints, etc.
Amazon
http://www.Amazon.com
It should come as no surprise that Amazon is one of the best places to find hot niche markets. After all, it’s synonymous with ecommerce. When it comes to finding in-demand digital products, there’s no better place to go.
You’ll want to focus on researching digital products found on the Kindle store.
Begin by entering keywords relating to your niche market. This is where you’ll begin researching and validating your digital product ideas.
Tip: Begin by entering in a broad term into Amazon’s search bar and then pay attention to Amazon’s auto-suggest feature. These are popular keyword phrases used by consumers. This will also make it easier to uncover a wider range of potential ideas than if you enter a specific keyword phrase.
Examples:
How to…
Learn to…
Make money…
Lose…
By entering in just a couple of seed keywords rather than complete phrases, Amazon will suggest dozens of popular search terms based on common searches.
Once you’ve found a niche you’re interested in, or if you already know what niche you’re evaluating, then complete your search query, and look at the following components:
Active demand for your digital product idea.
Are there a lot of existing eBooks in this niche? A healthy amount of competition is important as it indicates the niche is a popular one.
Reviews Matter.
Not only can the number of reviews indicate the popularity of a topic, but you can gleam a ton of useful information by reading 2 and 3 star reviews.
These are comments left by consumers who have found weaknesses in the books, or components they didn’t like.
You’ll be able to come up with tons of ideas by reading this feedback, including what direction to take with your own digital product, what subject matter is most important to consumers, what is lacking in existing products, and how you can create a competitive brand that will stand out to this audience.
You can also take things a step further and enter in the search terms provided by Amazon into: https://kwfinder.com/ to double-check the overall demand for specific topics.
Next, I’ll show you how to use 2 popular marketplaces to determine the profitability of different types of digital products.
With these 2 resources alone, not only will you be able to immediately determine the popularity of a niche, but you’ll be able to take a close look at how successful digital entrepreneurs have set up their sales funnels to maximize profits.
Dressed for Success
After applying the digital product research strategies in the previous chapter, you should have a great idea as to what your digital product will be about.
You should have also decided on the different formats you’re going to offer (video, eBooks, reports, lesson plans, course, etc.)
Next, we’re going to take one final step to verify profitability of the niche you’re interested in.
Note that this step may not be required, but it’s a great way to verify demand and to effectively determine a fairly accurate estimation of the overall profitability of your digital product.
Most people will look at the two resources I’m about to introduce you to as a way of finding affiliate products to promote. After all, that’s what the markets were designed for: to connect vendors with affiliates who want to promote their digital products.
But when it comes to finding what type of digital products are selling and what niche markets are in demand, these websites are filled to the brim with incredible information.
In fact, I rarely create a digital product without verifying that others are actively selling the same type of content in one form or another within one of the following marketplaces.
I’m talking about:
JVZoo: http://www.JVZoo.com
And
Warrior Plus: http://www.WarriorPlus.com
Both marketplaces are focused on selling digital products, so regardless of your niche market, chances are you’ll be able to use these resources to verify demand.
Start by creating a free account on both of these marketplaces. If you already have an account, you’ll begin by entering in a keyword that describes the type of digital product you are considering.
Let’s start with Warrior Plus.
Click on the “Affiliate” link in the top navigation bar as shown below. Then, enter in a seed keyword. It can be anything relating to your niche.

In my example, I’m searching for profitable PLR (private label rights) product ideas. So, I enter “Private Label Rights” into the search bar.
You can also search by category.

Next, you’ll want to click on “Launch Date”. That way you can be sure you’re only searching for current products and recent launches.
You can also organize based on “Sales” but just be sure that you’re only paying attention to recent launches in the last 6 months or less.
Obviously, the higher the number of sales, the more successful the launch was.
Scan through the products that have sold at least 200 copies. Sales volume is what you’ll want to pay most attention to because this is a clear way to evaluate overall demand for your digital products. So, the more sales, the better.
Obviously lower priced digital products will equate to a higher number of sales so keep this in mind when considering your own price point.
If you’re interested in selling higher-ticket items, you’ll want to focus your research on digital products that are in a similar price bracket.
Scan the sales pages for each digital product that you find within your niche that has sold more than 200 copies.
Take as many notes as possible, including sales copy ideas, bonuses offered, the digital formats available, etc.
All this information will help you come up with a successful launch strategy for your own digital product, as well as help you determine what your product should be focused on, how much coverage to provide, as well as the type of formats your customers will expect.
If you want to dive deeper into a vendor’s sales funnel to figure out what kind of bonuses, upsells, down-sells and one-time-offers are more likely to sell, you can find all this information easily just by clicking on the “Request” tab next to every product on WarriorPlus.

On this page, you’ll be able to see how many products are in the sales funnel, how each one is priced, and quite often, you’ll be able to visit their JV/affiliate page where you’ll see the funnel in action, including links to internal sales pages.
Like I said, these two marketplaces are a wealth of information, especially when it comes to figuring out what digital products are in demand and what is being offered.
Next, we’ll run the same search through JVZoo. Start by clicking on “Affiliates” and then choosing “Find Products” from the drop-down menu.

Run the same search, paying attention to product sales volume, pricing, and exploring the backend of each product launch.
Remember to take notes of everything you find! By the end of your quick and easy research you should have a solid idea as to the type of product you’re going to create, as well as what pricing strategy will give you the best chance of success.
In the next chapter, I’ll show you how to quickly create in-demand digital products just by using existing content.
This will not only save you time and money, but you’ll be able to create an unlimited number of profitable digital products in record time!
Instant Bestsellers
When it comes to creating your digital products, typically people choose one of two different routes:
Create the products themselves.
Outsource them to professionals.
These are both great options, but they can be rather limiting.
For example, you can choose to create your products yourself if you’re personally invested and experienced with the topics at hand. Or, if you have the money to invest in outsourcing the content to qualified writers you can easily find what you need at places like https://www.Upwork.com
But what if you don’t want to invest a lot of money in creating digital products?
And what if you lack knowledge or experience with the topics and are unable to create them yourself?
That’s when this secret weapon comes into play. Just by using this one resource, you’ll be able to create as many digital products as you wish in as many markets as you choose, even if you know absolutely nothing about the topics!
I’m talking about white label (otherwise known as private label) content. This is content that has been created by others who sell licenses to people just like you.
With a private label license, you’ll be able to:
Edit the content to suit your needs and to better represent your brand.
Combine content from different providers to create a full training package, a compilation of material that extends the coverage of your product.
Create bonuses, upsells, downfalls and even one-time-offers or upgrades just by repurposing private label content from qualified sources.
And much more.
Chances are you’ve heard about private label content before, but you may have overlooked just how useful (and profitable!) it can be.
The key is to find a source of high quality content. You want to be careful with this because not only will the content you sell form the basis of your brand, but you want to make sure that you’re buying private label content from the source so that you’re confident with your licensing terms and you aren’t buying content that’s been widely distributed by multiple vendors.
And finally, you want to make sure the private label content you purchase doesn’t include unrestricted rights.
Unrestricted licensing allows anyone who purchases the content to do anything they choose and while this might sound good to you because it gives you unlimited freedom and flexibility with what you can do with the material, it also means others can do the same thing.
Unrestricted PLR content tends to become saturated rather quickly, not to mention distributed for free. Imagine how difficult it would be to use this type of content in digital products you plan to sell if others are giving away the same content.
Instead, purchase high-quality private label content from trustworthy sources and whenever possible, directly from the original creator.
Here are a couple that I highly recommend:
1) Promote Labs
While best known for their own line of high-quality digital products and outstanding software, Promote Labs also offers a series of high-quality private label content packages that include comprehensive training modules, videos and more.
You can see just a few of them in action here:
Traffic Rampage:
https://promotelabs.com/trafficplr/
Entrepreneur Series:
https://promotelabs.com/entrepreneurplr/
Affiliate Samurai:
https://promotelabs.com/affiliateplr/
Kate Anderson:
https://www.subscribepage.com/resellerscontent
Kate’s private label content is not only known for being high-quality, but you’re getting the content from the developer herself. She also limits the number of licenses sold, ensuring that her content is never saturated.
Tip: Her business in a box packages are great products to repurpose into your own line of digital releases, especially because they often include a complete backend, sales page and bonus content.
You can see one of her business in a box packages here: http://www.EbookEmpires.com
In the final chapter, I’ll show you how to protect your digital products so that only authorized buyers can access them.
I’ll also leave you with a few final tips to help you get on the path towards making consistent money with your new product line!
Final Tips
It’s important to ensure that your digital products are well protected so that only those who have paid for access can download them.
While there are many ways to protect your files, including going through the learning curve necessary to install your own authentication gateway or protection tools, a far better and easier way is to simply use a product like Product Dyno, available at: http://www.ProductDyno.com
Product Dyno is a robust, feature-laden utility that not only makes it easy to sell digital protects that are securely protected, but they also allow digital marketers to sell membership access, one-time purchases or a combination of both.
What we love most about Product Dyno, aside from the ease of use and intuitive admin panel is that they host the software themselves, meaning that you never have to deal with script installation, configuring files or messing around with complicated permission settings.
You just sign up for a Product Dyno account and follow a simple set of guided instructions and you’ll have your digital product set up and ready to sell within minutes.
You can create your account at http://www.ProductDyno.com
I wish you the very best in your digital product adventures.
Resources
Here are links to some of the resources found in this guide.
Private Label Providers:
>> Promote Labs:
http://www.PromoteLabs.com
>> Resellers Content:
https://www.subscribepage.com/resellerscontent
Done-For-You Content Packs (PLR):
>> Traffic Rampage:
https://promotelabs.com/trafficplr/
>> Entrepreneur Series:
https://promotelabs.com/entrepreneurplr/
>> Affiliate Samurai:
https://promotelabs.com/affiliateplr/
Protecting Digital Products:
Product Dyno:
> http://www.ProductDyno.com
Creating Digital Products Easily:
Sqribble:
>> https://sqribble.com/amazing/
Designrr:
>> https://go.designrr.io/home234
Digital Product Research & Sales:
>> JVZoo: http://www.JVZoo.com
>> Warrior Plus: http://www.WarriorPlus.com
Niche Research Tools:
>> https://kwfinder.com
>> http://www.Amazon.com
>> http://www.Etsy.com
>> http://www.Pinterest.com
> http://www.Facebook.com/groups
Read the full article
0 notes