
deepinmummymatters
Mummy Matters
Blogging my way through blended-family life, sometimes with a tantrum (me and them), often with a photograph and generally with a smile . . .
5073 posts
Don't wanna be here? Send us removal request.
Last Seen Blogs

cosmicinkstudios
★COSMIC INK★

adriellej
He who hesitates... disintegrates

nobodytbh26
Idk Im Here

mixeduphabits
Fabulously British

Text
A Beginner's Guide to Hanging Wallpaper

Hanging wallpaper can transform a room, adding color, texture, and personality. While it may seem daunting at first, with the right tools and techniques, even beginners can achieve professional-looking results. In this beginner's guide to hanging wallpaper, we will walk you through the process step by step so you can tackle your next home decorating project with confidence.
Gather Your Supplies
Before you begin, gather all the necessary supplies:
- Wallpaper
- Wallpaper paste / Adhesive
- Tape Measure
- Utility knife / Wallpaper scissors
- Wallpaper seam roller tool / Clean brush
- Clean Sponge / Soft Cloth
- Drop cloth / Plastic sheeting
- Plumb Line - Laser Level
- Pencil
- Step ladder
Prepare Your Walls
The key to success lies in thorough preparation, so before diving into this creative venture, ensure that your walls are clean and smooth. Use a mild solution to wash away any dirt or residue that may interfere with the adhesion of the wallpaper. Additionally, smoothing out any imperfections with a filler or sandpaper will guarantee a great end result and flawless finish. Don't underestimate the power of primer. Applying a high-quality primer not only enhances adhesion but also prevents the wallpaper from peeling or bubbling over time. These are very helpful tips.
Measure and Cut the Wallpaper
When it comes to the wallpaper installation process, measuring and cutting the first panel of paper are crucial steps that can make or break the final result. It is important to take accurate measurements of the walls before cutting the new wallpaper to ensure a seamless application. One helpful guide is to add a few extra inches to your measurements for the first piece to account for any unforeseen obstacles like corners or uneven walls. This extra margin not only helps in achieving a perfect fit but also provides some room for error or adjustments.
Cutting the wallpaper requires precision and patience. It is essential to use a sharp utility knife or razor blade together with a straight edge ruler to ensure clean, even cuts. Taking your time during this step can save you from headaches later on when trying to match up patterns or seams. Remember, practice makes perfect, so don't be afraid to make small mistakes as you learn the art of measuring and cutting wallpaper—it's all part of the process for every beginner.
Apply Wallpaper Paste
Applying wallpaper paste with the right technique can be a satisfying and rewarding experience. One important tip is to carefully read the instructions on the wallpaper paste packaging to ensure you are mixing it correctly. It's crucial to achieve the right consistency – too thick and you'll struggle to smooth out air bubbles, too thin and it won't hold the paper in place.
Another aspect to consider is choosing the appropriate adhesive for your specific type of wallpaper. Vinyl wallpapers require a different type of paste compared to traditional paper ones. Using a paint roller or brush, apply a thin, even coat of paste to the back of the wallpaper, working from the center outwards to prevent air bubbles. Ensure the paste is applied close to the edges of the wallpaper on each application to ensure a strong bond to the wall and seams.
Hang the Wallpaper
Carefully position the first strip of wallpaper against the top of the wall as a starting point, leaving a few inches of excess at both the top and bottom. Attach a plumb line or use a laser level to ensure the strips of wallpaper are pasted in a straight line, then smooth it out with a dry wallpaper brush or smoothing tool, working from the center of the paper to the edges to remove any air bubbles or wrinkles.
Hanging wallpaper can seem like a daunting task for beginners, but with the right tips and tricks, it can be a rewarding DIY project. Don't be afraid of patterns or bold colors when choosing your wallpaper. Embracing unique designs can add personality and flair to any room. Remember that practice makes perfect, so don't get discouraged if you encounter challenges along the way - each attempt will only make you more skilled at hanging wallpaper!
Self Adhesive Wallpaper
Self-adhesive wallpaper has revolutionized the world of interior design, making it easier than ever for beginners to achieve professional-looking results. Unlike traditional wallpaper, self-adhesive options eliminate the messy and time-consuming process of applying paste. With a wide range of designer wallpapers and textures available, this type of wallpaper allows for easy experimentation and creativity without the fear of permanent commitment.
You can easily peel off and reposition pre-pasted wallpaper, providing great flexibility in trying out different patterns and styles without damaging walls. Additionally, its removable nature makes it an excellent choice for renters looking to personalize their living space without risking their security deposit. Furthermore, unlike traditional wallpapers that require precision cutting and lining up patterns carefully, self-adhesive versions offer forgiving properties for mistakes, simplifying the installation process even more.
Trim Excess Wallpaper
Once the first strip is in place, use a sharp utility knife or wallpaper scissors to trim the excess paper at the top and bottom of the wall. Use a straight edge, such as a ruler or the dull blade of a putty knife, as a guide to ensure clean, straight cuts. Repeat the process and continue to apply wallpaper strips to the length of the wall, matching the pattern as you go, until the entire wall is covered. Be sure to overlap the wallpaper seams very slightly to ensure a professional and smooth finish.
Light Switch
When it comes to wallpaper hanging for beginners, placing wallpaper around light switches or socket covers can often feel like a daunting task. With the right approach, it can be both manageable and visually appealing. One effective technique involves measuring the distance from the edge of the switch plate to ensure precise cutting and placement of the wallpaper. This way, you can create a seamless and professional look that enhances your space.
Another valuable tip is to use a sharp utility knife or scissors to initially score the wallpaper placed across the switch in a large X at the centre spot then carefully ease and adhere the wallpaper to the wall surrounding the switch and trim off the excess paper. Taking your time and patience during this process ensures accuracy and minimizes the risk of tearing or overlapping wallpaper. Consider using a primer on the wall before applying the wallpaper will not only result in better adhesion but also make it easier to work around intricate areas such as light switches.
Clean Up
Once the wallpaper hanging project is complete, it's time to shift our focus to the clean-up process. This crucial step ensures that the room is left spotless and that your hard work in hanging the wallpaper isn't undermined by a messy environment. Start by carefully removing any little bit of excess glue or adhesive residue from the walls using a damp sponge or cloth. Be gentle to avoid damaging the wallpaper.
Thoroughly vacuum or sweep the floor and baseboards to pick up any scraps or debris created during the wallpaper project. Take pride in meticulously wiping down each small space and surfaces with a clean cloth, and checking for any overlooked spots where glue or dust may have settled. Pay special attention to light switches, outlets, and other fixtures that may have been splattered with adhesive during the installation process. By devoting proper attention to this final clean-up phase, you can truly elevate the overall look and feel of your newly transformed space.
Conclusion
Completing a wallpaper installation project involves more than just putting up beautiful designs it's about completing every aspect of the job including clean-up with care and dedication.
- Take your time and work carefully, especially when matching patterns and trimming excess paper.
- If you're working with patterned wallpaper, be sure to purchase extra rolls to account for pattern matching and any mistakes
By devoting proper attention to all phases of the process, you can truly elevate the overall look and feel of your newly transformed space.
Read the full article
0 notes
Text
Prep and Paint Like a Professional: Tips to Improve

Whether your a novice looking to tackle your first prep and paint project or a seasoned DIY enthusiast, initial planning can make all the difference to the outcome of your work. Painting is one of the most cost-effective ways to transform the appearance of a room or the exterior of your house. Here are some expert tips to help you achieve the best results for your paint project and a flawless finish.
Plan and Prepare
When preparing for a painting job, one often overlooked aspect is thorough surface preparation. A smooth, clean canvas is vital for achieving that professional finish. This means sanding down rough patches, removing any old flaking paint or wallpaper residue, filling in cracks or holes and ensuring that the condition of your walls are free from dust and debris before applying any paint. Additionally, don't forget the power of primer – it's the key foundation for successful paint adhesion and an even finish.
Another critical element in proper prep is attention to detail. Taking care of small imperfections such as nail holes or cracks can seem tedious but will ultimately pay off in creating a polished final result. Don't rush through this process; embrace it as part of the process involved in achieving truly professional-looking interior or exterior paintwork.
Choose the Right Tools and Materials
Investing in high-quality tools and materials is essential and best way to achieving quality results. Purchase paint brushes, roller and roller cover, plus a paint tray suitable for the type of paint you'll be using and the proposed wall surface. Quality brushes and rollers will help you apply paint more evenly for a smoother finish and efficiently, saving you time and effort in the long run. Investing in durable drop cloths or plastic sheeting helps protect surfaces from drip or splatter, minimizing clean-up time and potential damage.
Utilizing sandpaper of various grits is crucial for properly preparing surfaces for the next step of new coats of paint. Coarse-grit sandpaper helps smooth rough patches, while fine grit sandpaper creates a suitable surface for paint adhesion. Equally important is selecting the appropriate primer for different surfaces; using a bonding primer on slick or glossier paints to ensure better paint cover, while stain-blocking primers help prevent bleed-through on porous surfaces. By choosing the right tools and materials for prep and painting projects, individuals elevate their work to professional standards with ease and confidence.
The Ultimate Tool Kit
The Basic:
9-inch Rollers and Tray
Synthetic-bristle brushes
The Prep Set:
Dust Sheet
Filling Knife
Fine grit and Coarse Sandpaper plus Sanding Blocks
Clean Cloth for spills
The Paint Picks:
Paint
Stirring Stick
Stepladder
Extension Pole
Good Lighting
Good lighting is essential for achieving a first coat flawless paint job and results. Insufficient light can make it difficult to spot imperfections when painting interior walls and inconsistencies on the surface, leading to subpar outcomes. Adequate illumination or natural light can also help in accurately detecting paint colors matching and blending issues for a flawless result.
In essence, investing in proper light fixtures and lighting solutions not only elevates the overall quality of work but also streamlines the painting process, making it more efficient and rewarding for all DIY enthusiasts involved. By paying attention to this often overlooked aspect of painting, individuals can enhance their work, achieving remarkable results with every stroke of the brush.
Select the Perfect Paint
It is essential to consider both the walls of a room and type of surface you'll be working with to achieve the desired finish. When looking for the right new paint, don't just focus on color; pay attention to durability and ease of application as well. Investing in high-quality paint may cost more upfront, but it will save you time and money in the long run by lasting longer and requiring fewer coats.
Take some time to familiarize yourself with different types of paints, such as latex or oil-based options, as well as their best applications. Consider factors such as humidity levels in your area when choosing your paint type – this can affect drying times and overall finish quality. In addition to understanding different paints' characteristics, mastering painting techniques can make a significant difference in achieving professional-looking results. By honing your preparation process and choosing the right materials for each specific project, you'll elevate your interior painting to new heights.
Prime for Success
Before diving into the exciting first step of applying the paint, taking the time to prepare and prime the surface in the correct order will set you up for success. Whether you're tackling an accent wall, furniture piece, or exterior surface, investing in proper priming techniques can make all the difference in the final outcome.
One vital aspect of successful priming is by selecting the right product for your specific project. Choosing a primer that matches the type of surface you're working with and addresses any existing issues such as stains or odours is crucial for ensuring optimal cover. Additionally, thorough cleaning and sanding of the surface prior to priming will help create a smooth foundation for your paint application, resulting in a flawless finish.
Another essential factor in achieving quality results is understanding the importance of patience during the priming process. The best practices of allowing each coat of primer to fully dry before moving on to subsequent layers or applying paint is fundamental for preventing peeling, cracking, or poor adhesion down the line.
Practice Proper Painting Techniques
Mastering proper painting techniques is key to achieving professional results. Start by cutting in the entire wall—using a brush to create clean, straight lines along the edges of walls, ceilings, and trim. Then, use a stroke of your roller to fill in the larger areas, working in small sections and applying paint in a smooth, even coat. Avoid overloading the paint roller with paint, as this can lead to drips and uneven coverage.
Learning how to properly load and apply paint to a roller or clean brushes can greatly impact the final result. Taking the time to practice these techniques will not only improve the appearance of your work, waste of paint and also reduce wasted time and resources due to mistakes or rework.
Work Smart, Not Hard
Painting can be physically demanding, but working smart can help you avoid fatigue and achieve better results. Take breaks as needed, stay hydrated, and pace yourself to maintain focus and precision throughout the project. A final tip is to use hand and drop cloths to protect floors and furniture from spills and splatters, and use painter's tape to mask off areas you want to keep paint-free.
Finish Strong
Once you've applied the final second coat of paint, step back and admire your handiwork. Allow the existing paint to dry completely before removing any tape or reassembling the room. Take the time to inspect your work for any missed spots or imperfections, and touch up as needed to ensure a flawless professional finish.
Conclusion
By following these best painting tips and techniques, you can prep and paint like a professional, transforming your space with confidence and skill. With careful planning, attention to detail, and a little hard work, you can achieve beautiful results that will enhance your home improvement and visual appeal for years to come.
Read the full article
0 notes
Text
From Spoils to Soil to Create Wealth for Our Planet

In our modern age of consumption, there lies an opportunity for transformation – the shift from spoils to soil, waste has become an ever-growing problem. From disposable plastics to food scraps, our throwaway culture has burdened the planet with mountains of garbage, polluting our oceans, degrading our landscapes, and harming wildlife.
The journey from waste to soil represents a fundamental change in how we perceive and manage our resources. It's a journey that requires innovation, collaboration, and a commitment to sustainability. Here, we explore the significance of this transition and the promising initiatives driving it forward.
Rethinking Waste: A Concept Shift
For too long, waste has been viewed as a problem to be disposed of rather than a resource to be utilized. Our linear model of consumption, where products are made, used, and discarded, is inherently unsustainable. It perpetuates a cycle of waste generation and environmental degradation, putting immense pressure on ecosystems and contributing to climate change.
However, the concept of a circular economy offers a compelling alternative. Rooted in the principles of reduce, reuse, recycle, and regenerate, a circular economy aims to close the loop of resource consumption by designing out waste and pollution, keeping products and materials in use, and regenerating natural systems.
The Rise of Sustainable Practices
Across the globe, initiatives are emerging to tackle the zero waste crisis and promote a more sustainable future. From innovative recycling technologies to community-driven composting process programmes, these efforts are reshaping our relationship with waste and demonstrating the potential of turning spoils into soil.
Recycling Innovations: Advances in recycling technologies are enabling us to extract value from waste streams that were once considered non-recyclable. From plastic waste, cardboard and paper to electronic components, new processes are recovering materials for reuse in manufacturing, reducing the demand for virgin resources and mitigating environmental impact.
Organic Waste Management: Leftover food waste disposal, organic matter and vegetable scraps in particular, represent a significant challenge accounting for a substantial portion of global landfill volume and greenhouse methane emissions. Composting bin initiatives, both at the household and industrial level, are diverting the fate of organic waste materials from landfills and transforming it into nutrient-rich healthy soil amendments for agriculture and landscaping.
Upcycling and Repurposing: The concept of upcycling emphasizes creative reuse, transforming discarded materials and garbage disposal into new products of higher value. From reclaimed wood furniture, heavy metals to upcycled fashion, entrepreneurs and artisans are demonstrating the potential to breathe new life into old materials while reducing the demand for virgin resources.
Creating a Home Compost Bin
Creating a home composting bin is one of the most fulfilling and sustainable activities you can undertake. It allows you to transform kitchen scraps and yard waste from spoils to soil, enriching your garden while reducing your carbon footprint. To start, choose a suitable location in your backyard or balcony for your compost pile or bin. Consider the balance of sunlight, moisture, and air circulation required for effective microbial decomposition. Keep it accessible for easy addition of organic wastes and monitoring the important process.
When setting up your compost bin, layer green materials like fruit and banana peels, egg shells, and grass clippings with brown materials such as tea bags, dry leaves or paper to create an optimal mix of nitrogen-rich materials and carbon. This promotes decomposition while minimizing odors and pests. Regularly turning the soil structure pile will aerate it, accelerating decomposition without causing greenhouse gas emissions and foul odors caused from the temperature of the pile. Additionally, use high-quality household waste and organic material for a healthier end of the 44-day incubation period product that nourishes plants effectively.
Cultivating a Culture of Sustainability
While technological innovations play a crucial role in the transition, true change requires a cultural shift in how we perceive and interact with the rapid increase of waste. Education and awareness campaigns are essential for fostering a sense of responsibility and in a good way inspiring individuals and communities to adopt sustainable best practices in their daily lives.
Government policies and corporate initiatives play a pivotal role in shaping the landscape of waste management and a great way to promoting organic compounds and sustainable alternatives. By incentivizing recycling, investing in infrastructure, and enforcing regulations to minimize waste generation and global warming, policymakers can create an enabling environment for sustainable development.
Embracing the Journey Ahead
The journey from waste food service, spoils to soil is not without its challenges, but it is a journey worth embarking on. As stewards of the planet, we have a responsibility to safeguard its resources for future generations. By embracing innovation, collaboration, environmental issues and a commitment to sustainability, we can transform waste into wealth and create a more resilient and thriving world for all.
Conclusion
The transition from spoils to soil represents a fundamental shift in how we approach waste management and resource utilization. It's a journey that requires collective action and a shared vision for a sustainable future. By harnessing the power of innovation and embracing a circular economy mindset, we can turn the tide to zero waste and pave the way for a healthier planet and prosperous society.
Read the full article
0 notes
Text
Dealing with a Blocked Outside Drain: A DIY Guide

Dealing with a blocked outside drain is a not-so-pleasant topic but one that many of us encounter. Whether it's due to dead leaves, excess weather conditions, tree roots or debris, or just wear and tear, a blocked drain can be a headache. With a bit of know-how and some elbow grease, you can eliminate this problem.
Identifying the Blockage
Identifying a blocked outside drain system can be a frustrating experience, especially when the signs of trouble start to manifest. Slow drainage, gurgling sounds, and foul smell are all common indicators of a potential blockage. However, one often overlooked sign is the presence of fruit flies or other insects around your drains. These pests are attracted to rotting organic matter trapped in clogged pipes and can serve as an early warning sign that a blockage may be developing.
Another method for identifying a drain problem is to use a designated camera inspection or CCTV Drain surveys, which provides real-time visual feedback from inside the waste pipes. This technology allows you to see exactly where and what the drain blockages are, enabling more targeted and effective solutions. Paying attention to changes in water pressure throughout your plumbing system and outdoor drainage can also help pinpoint the areas of potential blockage. By being vigilant and proactive in identifying these issues, you can address them before they escalate into larger problems that require significant time and resources to resolve.
Tools of the Trade
Before you start, gather your tools:
- Rubber Gloves / Protective Clothing: Protect your hands and clothing from dirt and grime and drain cleaning fluids.
- Plunger: A trusty plunger can work wonders in dislodging a minor clogged drain.
- Plumber Snake or Drainage Rod: For more stubborn blockages, you may need a drain snake or drainage rod to clear the pipe.
- Bucket and Old Towels: These are handy for catching water and keeping your work area clean.
- Baking Soda and Vinegar: A natural alternative to caustic soda or chemical drain cleaners, these can help break down organic matter causing the blockage.
Clearing the Blockage
To clear the outside blocked drain, start by removing any visible debris from the surface of the drain opening with a pressure hose. The next step is to use a gloved hand or a small tool to gently scoop out food particles, outdoor debris such as leaves and twigs, or other obstructions such as sanitary products. Next, try using a plunger to create suction and dislodge the blockage. Place the plunger over the drain, ensuring a tight seal, and push and pull vigorously several times. With any luck, this might be all it takes to get the outside blocked drain flowing again.
If the plunger doesn't clear the outside blocked drain in the first place, it's time to bring out the plumbing snake or drain rod. Feed the snake or rod into the drain and rotate it clockwise to help break up the blockage. Keep pushing and turning until you feel some free movement through the pipe. Should this process not eliminate the problem, it's time to call in a professional plumber.
Prevention is Key
Hopefully, now, with your external drains clear and water flowing freely once again, it's time to think about prevention. Regular maintenance is key to keeping your drains clog-free; for best results, consider installing outdoor drain covers to catch debris before it has a chance to cause drainage problems. Make a habit of clearing debris from your gutters and drains regularly, especially during the fall months when leaves are abundant and one of the main causes of drainage issues.
Conclusion
Dealing with a blocked outside drain may not be the most glamorous task, but with a bit of patience and the right tools, you can tackle any issue. Just remember, prevention is always better than cure, so make sure to keep up with regular maintenance to avoid future blockages.
Read the full article
0 notes
Text
How to Tile a Splashback - Tips for DIY Beginner
How to tile a splashback - tips so you can instantly elevate the look of your kitchen or bathroom, adding a finished look, style, and functionality to the space. Whether you are a seasoned DIY enthusiast or a novice looking to take on a new project, tiling a splashback is a great DIY project and a manageable task with the right guidance. In this step-by-step guide, we will walk you through the process of tiling a splashback, helping you achieve great results and a stunning finish.
Gather Your Materials
As a first step, it is essential to gather all the necessary materials and tools listed below:
- Tile Choice
- Tile Adhesive
- Tile Spacers
- Tile Grout / Sealer
- Notched Trowel
- Tile Nippers / Cutter or Tile Saw
- Spirit Level
- Tape Measure
- Damp Cloth / Sponge
- Bucket
- Grout Float
- Protective Gear (Gloves / Goggles)
- Dust Sheets
- Soft Cloth
Prepare the Surface
Start by laying protective covers over your kitchen surfaces. Make sure that the surface where you propose to tile is clean, dry, and smooth, with no uneven or bumpy surfaces. Remove existing ceramic tiles or debris if necessary, and repair any cracks or uneven spots.
If you're tiling over drywall, for the best results, apply a coat of primer to ensure better adhesion. If tiling behind a cooker or range, attach a Wooden Batten so that it appears level with the worktop, providing a definite line for tiling. This batten can be removed at a later date.
Measure and Plan
Carefully measure the area you will be tiling to determine the number of tiles you will need. It is essential to plan the layout, considering factors such as the size of the tiles and the pattern you want to achieve and any cut tiles required to fit around corners of the wall space or electrical outlets, obstacles, and light switches.
Apply the Adhesive
Using a notched trowel, spread the tile adhesive evenly on the splashback wall surface. Work in small sections to prevent the adhesive from drying out before you can lay the first row of tiles. Follow the manufacturer's instructions for mixing and applying the adhesive or use a ready-made mix..
Lay the Tiles
Apply adhesive to the back of each tile in small amounts before laying the tiles; press gently on the wall adhesive starting from the bottom and working your way up. Use tile spacers between each tile to ensure even spacing and uniform grout lines. Use a spirit level to ensure that the tiles are straight and aligned correctly.
Cut Tiles as Needed
If you encounter areas where full tiles will not fit, you will need to cut tiles to size. Measure the space carefully and use a tile cutter or saw to make precise, straight cuts. Necessary tools such as Tile Nippers are a good idea for non-straight areas or corners. Remember to wear safety goggles and gloves when cutting tiles to protect your eyes and yourself from flying debris.
Allow the Adhesive to Cure
Once all tiles are in place, allow the adhesive to cure according to the manufacturer's instructions. This typically takes 24-48 hours, depending on the type of adhesive used.
Apply Grout
After the adhesive has cured for the recommended time suggested, it's time to grout the tile surface. Mix the grout according to the manufacturer's instructions and apply it evenly using a grout float, pressing it into the spaces between the whole tiles.
Clean and Seal
After applying the grout, use a damp sponge to remove and clean excess grout from the face of the tiles. Once the grout has dried, apply a grout sealer to additionally protect the grout from stains and moisture.
Enjoy Your New Splashback
As a final step, once the grout sealer has dried, stand back and admire your tile splashback. Your new splashback adds a touch of elegance and functionality to your kitchen or bathroom, and with proper maintenance, it will continue to look beautiful for years to come.
Conclusion
Tiling a splashback may seem like a daunting task, but with the right tools, materials, and know-how, it's a project that you can tackle with confidence. By following the above step-by-step instructions, you can achieve professional-looking results and transform the look of your space.
Read the full article
0 notes
Text
Create a Chic - Black and White living Room

A Black and White living room color scheme in interior design exudes timeless elegance and sophistication. The interplay between these contrasting shades can transform any living space and home decor into a realm of chic refinement. A black and white living room is not just a design choice; it's a statement of style that transcends trends and stands the test of time.
The Power of Contrast
The power of contrast lies at the heart of the Black and White decor living room design. These colors are at opposite ends of the spectrum, yet when brought together, they create a dynamic visual impact that is both striking and captivating.
Incorporating contrasting elements such as black furniture against white theme walls or vice versa can instantly elevate the ambiance of the room. Consider a sleek black couch in leather set against a backdrop of pristine white paint walls adorned with minimalist artwork. The clarity of the white interior together with modern black creates a sense of balance and drama that is a unique style and undeniably dynamic.
Embracing Minimalism
This color combination lends itself beautifully to the principles of minimalism. By paring down clutter and embracing clean lines, your living room can exude a sense of calm and tranquility. Opt for furnishings with sleek silhouettes and understated detailing to maintain the minimalist design for the entire room.
Choose statement pieces such as a monochromatic area rug or a bold geometric coffee table to add visual interest without overwhelming the space. Remember, less is often more when it comes to a monochrome living room.
Playing with Texture
While additional shades may be limited in a Black and White living room, texture serves as a key element in adding depth and dimension to the space. Experiment with a variety of textures, from plush velvet cushions to smooth marble surfaces, to create visual intrigue and tactile appeal.
Incorporate tactile elements such as faux fur throws or woven baskets to infuse warmth into the modern living room scheme. Texture not only enhances the sensory experience of the room but also adds layers of visual interest that keep the space from feeling flat or monotonous.
Harnessing the Power of Patterns
Patterns offer another avenue for introducing visual intrigue in the living room with this enduring color combination. Whether it's classic stripes, bold chevron prints, or intricate geometric designs, patterns can inject personality and charm into the space.
Experiment with patterned throw pillows, area rugs, or accent walls is a great way to add visual contrast and depth. Just be mindful of striking a balance between bold patterns and the overall harmony of the living area. A well-curated mix of patterns can elevate an interior designer coherent look without overwhelming the senses.
Complimentary Art
Wall art has the power to transform a Black and White living room into a dynamic, visually stimulating space. By strategically selecting artwork that complements the monochromatic scheme or by creating a gallery wall display, you can create an atmosphere that is both sophisticated and invigorating.
Mixed media pieces or artworks with tactile elements such as impasto painting or three-dimensional sculptures as a focal point of the room create a sensory experience in which viewers can not only see but also feel the art in their surroundings.
Lighting as a Design Element
Lighting plays a crucial role in enhancing the ambiance of a Black and White living room. Add statement lighting fixtures such as sleek pendant lights, table lamps or sculptural floor lamps as a statement piece to illuminate the white ceiling and entire space to accentuate its architectural features.
Consider incorporating reflective surfaces such as mirrored accent pieces or glossy finishes to bounce light around the room and create a sense of openness and illusion of more space, warmth, and airiness. Strategic lighting design can amplify the drama of the Black and White palette while infusing the space with warmth and luminosity.
Conclusion
A black and white living room is the epitome of timeless elegance and sophistication. Whether you're drawn to the classic allure of black and white or seeking a versatile canvas for personal expression, the possibilities are endless. With its understated beauty and enduring appeal, a Black and White living room is sure to captivate the senses and stand the test of time.
Read the full article
0 notes
Text
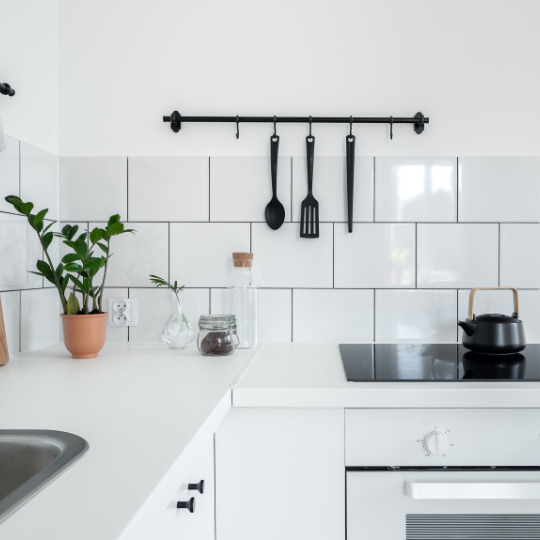
4 Must-Haves For Your Yearly Cleaning Checklist
Keeping your home in top condition means regular cleaning. You wipe down the counters or hoover the floors. You dust the bookcases when you remember. However, while this can keep your home looking good week-to-week, you need to do a deeper clean sometimes. While this isn’t an every-week sort of thing (because who has the time?) Your yearly deep clean should focus on these four areas.
Decluttering
You probably hate the word declutter by now, but it’s a vital part of any yearly deep clean. Without it, you end up having more and more stuff, which can make it impossible to get your home just right. Knowing the right way to clear your clutter can be more beneficial than you assume, especially if you’re able to donate old clothes, books, and games or even sell them because there’s always someone willing to pay for something you consider junk.
Your Kitchen
Your kitchen is one of the most used areas of the home, but this also means that it often requires the most cleaning, especially when you consider food waste, splashed sauces, and crumbs all over the place if you look closely. You can find a range of excellent kitchen cleaning ideas, from natural oven cleaning hacks to focusing on refreshing your fridge and freezer by cleaning them out. Focusing on your kitchen doesn't just make it look and smell better; it can also encourage your appliances to work more efficiently, extending their lifespan.
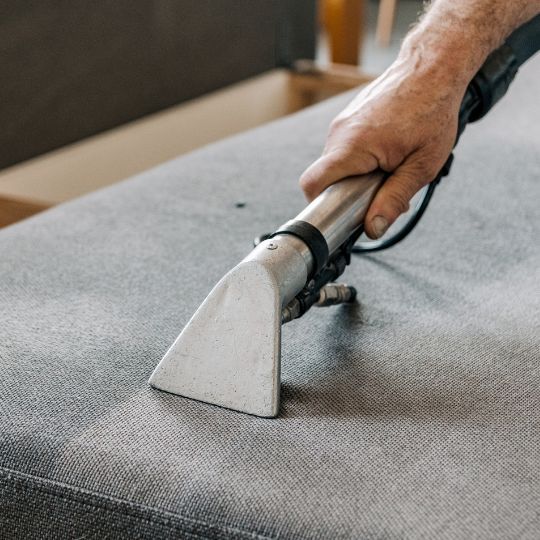
Deep Cleaning
The deep clean is perhaps the most daunting aspect of a yearly cleaning job, especially if you plan to deep clean every room from top to bottom. However, like decluttering, it’s a great opportunity to make your home into what you’ve always wanted.
Deep cleaning can help you find those lost shirts when you finally move the washing machine out of the way to clean behind it. It can help you breathe easier as you finally get to the dust collected on top of the cabinets or bookshelf since you moved in. You can make your house feel more comfortable, and you could even discover possible problems that you can finally solve, such as wonky doors or a little too much mould for your liking.
The Exterior
Many people don’t spend as much time outside as they’d like. This is usually because of the weather, but it also means that you could miss a lot of potential problems with your home since everything is out of sight and out of mind. It’s always worth arranging for gutter cleaning and even roof inspection when planning your yearly deep clean, as this can help your home get back on track and ensure it's safe, efficient, and functional.
Once A Year
You may only be deep cleaning once a year (or twice, at a stretch), but the scope of this activity can make a huge difference to your home. You’ll find more space, refresh your property, and feel safer and more secure inside, so you can sleep soundly knowing your home ticks all the right boxes.
Read the full article
0 notes
Text
Boost Your Productivity - Choose the Perfect Crystals for Your Office Desk

One simple yet powerful way to enhance your office desk is by incorporating the perfect crystals. In the modern workplace, creating a harmonious and productive environment is key to career success. Beyond ergonomic furniture and efficient organization, the energy and atmosphere of your work space can significantly impact your productivity, creativity new ideas, and overall well-being.
Crystals have been used for centuries for their purported healing properties and ability to influence energy fields. Whether you're a believer or not, there's no denying the appeal of each beautiful stone natural formations. Choosing the perfect crystal for your office desk can help promote positive energy levels, focus, and creativity while reducing stress and negative emotions. Here are some popular options to consider:
Clear Quartz
Known as the "Master Healer," Clear Quartz is one of the most versatile and widely used crystals. It is believed to amplify energy and intention, making it an excellent choice for any workspace. Clear Quartz can help clear the mind, enhance focus, and promote clarity of thought, making it easier to tackle complex tasks and solve problems. Placing this crystal on your desk is a great way to create a sense of balance and harmony in your work life and environment.
Amethyst
If you want to reduce work stress and promote a sense of calm in your office, consider adding Amethyst crystals to your desk. This beautiful purple stone is associated with peace, tranquility, and spiritual awareness. Amethyst is said to have a soothing effect on the mind and body, helping to alleviate anxiety, insomnia, and negative thoughts. By keeping an Amethyst crystal nearby in the work place, you can create a serene and relaxing atmosphere conducive to productivity and creativity.
Citrine
For those seeking success, abundance, and prosperity in their professional career, Citrine is one of the ideal crystals to have on your desk. Often referred to as the "Merchant's Stone," it is associated with wealth, success, and positive energy. It is believed to promote creativity, motivation, and a positive attitude, making it easier to achieve your goals and overcome obstacles in the workplace. Placing this crystal on your desk can help attract prosperity, new opportunities, and abundance into your life while energizing and revitalizing your workspace.
Black Tourmaline
In today's fast-paced work environment, it's not uncommon to encounter negativity, stress, and electromagnetic radiation from electronic devices. Black Tourmaline crystals are a powerful stone of protection that can help shield you from negative energies and harmful electromagnetic frequencies (EMFs). It is believed to be a great crystal that absorbs and transmutes negative energy, creating a barrier of protection around your workspace. By placing a Black Tourmaline crystal on your desk, you can create a safe and secure environment that promotes productivity, focus, and well-being.
Rose Quartz
In a world driven by deadlines and competition, it's important not to lose sight of the human element in the workplace. Rose Quartz, the stone of love and compassion, can help foster empathy and understanding and is a great help for harmony among colleagues. It is believed to open the heart chakra, promoting forgiveness, acceptance, and emotional healing.
By incorporating Rose Quartz crystals into your home office decor, you can cultivate a culture of kindness, cooperation, and mutual respect, enhancing both productivity, clear communication and morale.
Placement Tips
When placing crystals in the office environment on your desk, there are a few key considerations to keep in mind. Firstly, the proximity to your computer is important as certain crystals can help absorb electromagnetic radiation emitted by electronic devices. This makes them a great addition for placing near your computer or other electronic equipment to help create a harmonious energy field.
A popular placement option of the right crystals is on top of paperwork or files. Crystals can infuse these documents with their energy, helping to promote focus, clarity, and productivity. Keeping crystals close to important work materials can serve as a physical reminder of the intentions you set for your workday.
Lastly, an out-of-the-box option could be incorporating plants into the mix by placing small crystals within the soil or around planters on your desk. This not only adds visual appeal but is also the best way to harness the grounding energy of both plants and crystals for a balanced and serene workspace environment. Ultimately, whether you choose to place crystals near your computer, on paperwork, or within a plant on your desk - the benefits they offer can positively impact your overall work-life balance
Maintenance and Cleansing
These natural gems do so much more than just add a touch of elegance to your workspace - they can also help you ward off negative energy blockages in the right place and enhance your clarity and focus throughout the day. It Is also important to remember that these crystals need to be cleansed regularly to keep their energies pure and potent with one of the variety of cleansing methods available and listed below:
Smudging: The art of smudging can be an effective and gentle method. Using sacred herbs such as Sage or Palo Santo to clear the energy around your crystals can help remove any accumulated negativity and create a fresh, positive atmosphere in your workspace. This ancient practice not only cleanses the crystals but also purifies the surrounding environment, promoting a sense of clarity and focus that can enhance productivity.
Sunlight / Moonlight: Placing your crystals in direct sunlight or moonlight can also recharge their energies. The natural light has a powerful cleansing effect that can revitalize your crystal collection, keeping them vibrant and resonating with positive vibrations in your office space. By incorporating these simple maintenance practices into your routine, you can ensure that your crystals continue to support you in achieving success and well-being at work.
Salt Water: One often overlooked aspect of crystal maintenance is the use of salt. Salt has been used for centuries as a purifying agent, and it can be effectively utilized to cleanse and recharge crystals in your workspace. Placing your crystals on a bed of salt, such as Himalayan salt, can help absorb any negative energies they may have absorbed from the environment or prolonged use. This simple practice can revitalize your crystals, allowing them to continue emanating their beneficial energies and enhancing the ambiance of your office desk.
Sound Healing with Singing Bowls: Cleansing crystals is a powerful practice that can greatly enhance their energetic properties. Utilizing the healing power of sound through singing bowls is an effective method for purifying and re-energizing crystals. The vibrations produced by singing bowls can clear and balance the energy held within the crystals, allowing them to resonate at their optimal frequency.
When using singing bowls for crystal cleansing, it's important to select a bowl with a tone that complements the specific properties of the crystals being cleansed. This intentional pairing of sound and crystal energy can create a harmonious environment for deeper healing and transformation. As the soothing tones of the singing bowl wash over the crystals, they release any accumulated negative energy, leaving them energetically refreshed and ready to amplify positive intentions.
Earth Burial: Cleansing crystals through the method of Earth Burial is an ancient practice that draws on the purifying energy of the earth itself. By burying your crystals in the ground, you allow them to connect with the grounding forces of nature, releasing any accumulated negative energy and restoring their vibrational purity. This process can be especially beneficial for crystals that have been used for intense healing work or have absorbed a lot of dense energy.
As you engage in this maintenance routine, take time to set clear intentions for what energies you want your crystals to amplify in your workspace. By doing so, you'll not only refresh their energies but also realign them with your goals and aspirations. Next time you feel like the energy at your desk needs a little pick-me-up, don't underestimate the power of giving those crystals some TLC – they'll thank you by enhancing the positive vibes in your work area!
Conclusion
Whether you're a believer in the metaphysical properties of crystals or simply appreciate their natural beauty, there's no denying the positive impact they can have on your workspace. By carefully selecting the best crystals for your office desk, you can create a supportive and inspiring environment that promotes focus, mental clarity, creativity, and well-being. Experiment with different crystals to see which ones resonate with you and your professional goals. With a little intention and mindfulness, you can transform your work desk into a sanctuary of productivity and positivity.
Read the full article
0 notes
Text
How to Hang a Mirror Like a Pro

Have you ever struggled to hang a mirror straight and securely? Perhaps your attempts have resulted in wonky angles or, worse yet, shattered glass. Fear not! We will unlock the secrets of hanging a mirror like a professional. Whether you’re looking to add an elegant touch to your living room or create the illusion of space in a small area, mastering the art of mirror hanging is essential. From choosing the right hardware to ensuring perfect alignment, we’ve got you covered with expert tips and tricks that will elevate your home decoration game.
Choose the Right Location
Choosing the right location for hanging a mirror can significantly enhance the appeal of your space. Reflect on the size and style of the room and the Mirror to determine where to place it. A small room benefits from strategically positioned mirrors that create an illusion of depth, while a large room can accommodate oversized mirrors to add grandeur. Additionally, consider natural light sources when selecting a location for your mirror, as it can amplify and brighten the space. It's also paramount to pay attention to what will be reflected in the mirror - ideally, do not position opposite a visually cluttered area, or the mirror will amplify this area.
Measure Twice, Hang Once
Thinking outside the box when choosing where to hang your mirror can yield unique and refreshing results. Instead of defaulting to traditional locations such as above mantelpieces or dressers, explore unconventional spots like stairwells or kitchen backsplashes for an unexpected touch of elegance or to elongate a room. Embracing asymmetry by placing multiple mirrors at varying heights and angles in one area can create a visually dynamic setting, adding layers of interest and intrigue.
The saying measure twice, hang once is a valuable reminder of the importance of precision and foresight in any DIY project. This will help you ensure that the top of the mirror is level and centred; use a tape measure and pencil to mark the spot for best placement and the mirror's hanging position.
When hanging a mirror, this adage takes on added significance as it can significantly impact the visual appeal of a room. It's not just about the best solutions to getting it up on the wall but ensuring that it enhances the space in a way that feels deliberate and considered. One fresh perspective to consider is exploring alternative hanging methods beyond traditional wall mounting points. Utilizing chains, ropes, or decorative brackets can be a great option to add dimension and visual interest to the mirror while also making a design statement.
Gather Your Tools
Before you start hanging that new mirror, take a moment to gather your tools. Investing in a proper set of tools will save time and effort in the long run. Start with a good quality stud finder to ensure your mirror is securely anchored in the safest way possible. Precision is key for a first time fix and if you want to avoid multiple attempts at getting it just right.
Once you have assembled the right tools for the job, don’t rush into it. Like any project, hanging a mirror is only as strong as its foundation; by gathering your tools intentionally and thoughtfully preparing for the task at hand, you set yourself up for success from the very beginning.
To hang a mirror, you may need the following tools:
- Mirror
- Stud Finder
- Hammer
- Picture Wire or D-rings
- Wall anchors / Wall Plugs (if necessary)
- Screws or hooks
- Screwdriver or drill
- Level
- Measuring tape
- Pencil
- Masking Tape
Attach Hanging Hardware to the Mirror
Attaching hanging hardware to a mirror may seem like a simple task, but getting it right can make all the difference in how your mirror is displayed. When considering the type of hanging hardware to use, think about both style and functionality. For heavy or large mirrors, consider using sturdy D-rings or keyhole brackets that can support the weight securely. Be sure to measure accurately and mark the spot where you will install the hardware to ensure that your mirror hangs level and securely.
Depending on the type of mirror you have, you'll need to attach hanging hardware to the back. Most mirrors come with pre-installed D-rings or wire for hanging. If not, you can purchase these from a hardware store and attach them securely to the back of the mirror, following the manufacturer's instructions. It is worth remembering that different types of mirrors may require different methods for securing the hardware - for example, frameless mirrors may need special clips or adhesive pads instead of traditional brackets.
Find the Studs or Use Wall Anchors
An important consideration when attaching the different types of anchors and hanging hardware to the back of your mirror is the type of wall material you are working with. For plaster walls or drywall, use appropriate anchors or screws to ensure that your mirror stays safely in place. For heavy items and mirrors, it's important to anchor them securely to wall studs to prevent accidents. Use a stud finder to locate the studs in the wall. If you can't find a stud in the desired location, the best way is to use wall anchors to provide adequate support.
Mark the Hanging Points on the Wall
Marking the hanging points on the wall is a crucial step when it comes to hanging a mirror or heavy object. The placement of these points can make or break the stability and symmetry of the final display. It's essential to use a level, measuring tape, and pencil to precisely mark the spots where you'll place your screws or hooks. Taking into account factors such as wall material and the weight of the object is a great way to ensure that your mirror hangs securely and remains in place for years to come.
Install the Hanging Hardware
When installing the hanging hardware, it is also important to pay attention to the integrity of the wall you are working with. There are many different wall types. For example, if you have a plaster or drywall surface, be sure to use anchors or a wall screw specifically designed for these materials to ensure a secure attachment. If you're using screws or hooks, as a general rule, drill a pilot hole at the marked hanging points to make it easier to insert the screws. Then, attach the screws or hooks securely to the wall using a screwdriver or drill.
Hang the Mirror
With the hanging hardware securely attached to the mirror and the wall, it's time to hang the mirror. If you're using picture wire, loop it over the hooks or screws on the wall, making sure it's securely fastened. For D-rings, simply hang them directly onto the screws or hooks.
Consider the visual impact a well-placed mirror can have on a room; don't just think about the practicality of checking your appearance. Don't limit yourself to traditional hanging methods; get creative with how you display your mirrors. Experiment with different shapes and sizes, or group them together for an eye-catching collage effect. Remember that mirrors aren't just functional items—they're also powerful decor elements that can add texture, style, and personality to any space. Hang your mirror with intention and let it transform your home into something truly special.
Check for Level
When it comes to hanging a mirror, the check for level step is absolutely crucial. Ensuring that your mirror is perfectly level also prevents potential accidents. Once the mirror is hanging, use a level to ensure that it's perfectly straight, and then make any necessary adjustments to the positioning of the mirror.
Conclusion
Step back and admire your newly hung mirror! Not only does it add visual interest to the room, but it also reflects light and is an easy way to create the illusion of more space. Hanging a mirror may seem like a simple task, but doing it correctly can make a big difference in the overall look of your home and the feel of your space. By following these steps and taking your time, you can hang a mirror like a pro and elevate the style of any room in your home.
Read the full article
0 notes
Text
4 Signs You Need to Change Your Windows

Keeping your home in pristine condition is something that every homeowner should aspire to. There are many things around your home that you will need to make sure you are taking care of so that your home can look its best inside and from the outside as well.
Your windows are one of the major things you need to pay attention to as a homeowner.
If windows go bad, they will give you signs that replacements are needed. However, you may not know that it's time for you to replace your windows if you're not aware of all the signs that you need to do so.
Take a look at some of the major signals that you need to get your windows replaced.
Drafts
Photo by Leah Kelley
Among the first signs that you need to have your windows replaced are those drafts you will begin to feel. This will be especially prominent during the colder months of the year.
A chill In your home is an indication that the seals around your windows are starting to fail. This will compromise energy efficiency in a big way, and it can lead to higher heating costs.
Once it gets extremely drafty, it's time to look into whether or not you can replace the seals. However, if you have older windows, it might be more prudent for you to replace the windows altogether.
If you are looking to replace windows in Wolverhampton there are several to choose from.
Opening and Closing Issues
If you're experiencing opening and closing issues with your windows, then this is problematic. If your windows cannot stay closed or they refuse to open and you have to forcefully pry them open, there is something wrong with the overall frame and hardware on the windows.
Not only is this a serious problem for your safety, but it is also a potential ventilation hazard.
If this is the case, you might become wary of having your windows replaced because you're afraid it might break the bank. However, remember that you don't have to replace all your windows at once. You can do so in stages and save your pennies.
Visible Damage
If there is glaringly obvious damage, other than making your windows look unsightly, it may also destroy your curb appeal as well.
Visible damage, such as decaying window frames and rotting, is an indicator that the windows are not structurally sound. The last thing you want is for them to fall out of the wall. It might become dangerous, especially when they are made of glass.
Fading Furniture and Flooring
You may think that declining windows do not have much to do with your furniture and flooring, nothing could be further from the truth. Damaged windows will allow a lot of UV rays into your home, and this can cause your furniture and flooring to fade. This can cause you to have to reach deep into your pockets for more than window replacements.
This is not an ideal situation, so it's better to have the windows fixed as soon as you can.
Read the full article
0 notes
Text
Upgrade Your Home With These Key Renovation Areas

Have you ever thought about improving your home? You're definitely not alone! Upgrading your living space greatly enhances the value, looks, and comfort of your house. In this guide, we'll delve into aspects where thoughtful renovations can truly make a difference in transforming your home. Whether it's upgrades or style enhancements, each step can contribute to creating a pleasant and valuable living environment.
Roofing Remodelling: Prioritising Safety and Aesthetic Appeal
Image by: Tima Miroshnichenko/Pexels
The roof serves as the guardian of every home. It plays a role in shielding you from the elements while also contributing to the management of your home’s efficient energy. Upgrading your roof with the latest materials can be an investment offering both enhanced protection and an attractive appearance. Here are some options to consider for your roofing renovation:
- Solar tiles for energy efficiency.
- Metal roofing for sturdiness.
- Green roofs for added insulation.
- Slate tiles are fire-resistant.
- Asphalt shingles are known to be affordable.
Choosing the right roofing material can significantly enhance not only the look of your home but also its functionality and eco-friendliness.
Improving Your Home’s Comfort and Efficiency with an HVAC System
The HVAC system is like the heart of a home, a component in ensuring your home remains comfortable all year round. Beyond providing heating and cooling having an efficient HVAC system is a way to save money and promote a more eco-friendly lifestyle. When contemplating upgrading or maintaining your HVAC system consider these factors:
- Looking for energy efficiency ratings to minimise energy consumption.
- Having regular maintenance keeps filters and schedules servicing for optimal performance.
- Investing in smart thermostats can manage heating and cooling schedules for efficiency.
- Ensuring proper sizing in the system aligns appropriately with your home's requirements.
- Opting for air quality features with built-in air purifiers or humidifiers to enhance the air quality.
Upgrading your HVAC system enhances the comfort of your home.
Strengthening the Base of Your Home: A Focus on Home Foundation
Parents must be tough in order to raise their children to be strong, just like how a house must be built on a solid foundation for it to last. One effective way to enhance its durability and strength is by incorporating deck blocks into the foundation. Here's why these blocks can be an addition to your home foundation:
- Enhanced Stability: They provide a stable base for various structures, evenly distributing weight and reducing strain on the foundation.
- Easy Installation: Compared to footings, these blocks are relatively simpler to install, saving both time and effort.
- Versatile Application: Suitable for a wide range of projects such as decks, sheds and outbuildings.
- Cost-Solution: They tend to be more affordable than pouring footings.
- Resistance Against Decay: Many of these blocks are specifically designed to resist moisture and decay thereby extending the lifespan of your foundation.
Incorporating decking blocks into your home's foundation ensures its integrity and also makes a long-term investment in its resilience.
Plumbing: Essential for a Well-Functioning Home
Now, let’s shift our attention to plumbing, an element for the functioning of any home. Taking care of your plumbing system, whether it involves updating pipes or addressing leaks, is vital to ensure the health of your home. Regular inspections and maintenance play a role in preventing issues down the line. Here are some key plumbing systems and components that necessitate regular checks:
- Pipes: Be sure to look out for any signs of corrosion or leaks in homes.
- Water Heater: It's important to routinely inspect for sediment build-up or any potential malfunctions.
- Faucets and Showerheads: Keep an eye out for drips or leaks that might indicate wear and tear.
- Toilets: Ensure they flush properly and check around the base for any signs of leakage.
- Drains: Watch out for drainage, as it could indicate a blockage.
Maintaining these areas can save you from problems and costly repairs. Also, it keeps your home plumbing system in excellent condition.
That ends our exploration of the fundamentals of home remodelling. So go ahead. Dive in with mapping out your endeavour to improve your home. I assure you your future self will appreciate these considered enhancements!
Read the full article
0 notes
Text
3 Sustainable Home Upgrades That Will Stand The Test Of Time

According to studies, homeowners spend an average of nearly £600 yearly on various home upgrades. Not everyone can afford to upgrade their home every few weeks. Plus, with that much going into improving your home, you don’t want to have to do it over again in a short period, as that will cost you more money. You want each upgrade to last as long as possible. In other words, longevity should be your goal to help make each home upgrade more sustainable - both in terms of being long-lasting and being better for the environment. The following tips will help you make sustainable home upgrades that will stand the test of time.
1. Replace your carpets with stone or wooden floors
Image credit
If your interior floors are covered with carpets, you might want to strip everything and return to your original stone or wooden floor. If your floors are not made with hardwood or stone, it’s time to start investing in that upgrade. If properly cared for, a natural stone floor is guaranteed to last the entire lifespan of your home, meaning you wouldn’t need any flooring upgrade for a long time. Similarly, a high-quality wooden floor (like oak, for example) can last for about 25 years with proper care and professional installation. Both options are made with natural materials and are far more sustainable and long-lasting than carpets. Compared to stone and wood, a floor carpet can last between 5 and 15 years. The fibres used for these carpets go through a lot of processes to be fit for homes, including washing and dyeing. Even worse, they can emit toxic gas after disposal, showing their adverse impact on the environment.
2. Focus on lasting upgrades for your windows
Today, replacing your doors and windows is relatively easy with several companies available that are capable of doing it within minutes. But a window replacement can cost you anywhere between £550 and £3600 per window. Needing to repair or change your windows a few months after your upgrade can be frustrating and expensive. Sometimes, issues with glazing, deterioration, and insulation could be some of the reasons why you might need a relatively new window replaced or repaired. That’s why it’s important to focus on upgrades that will last, especially the ones that tackle the common problems associated with faulty windows. For example, you can invest in UPVC windows as they’re highly durable and offer better resistance to deterioration caused by the weather. They also provide excellent thermal insulation while being sustainable. You can also get similar benefits by upgrading to doors made from glazed UPVC or composite.
3. Turn to energy-efficient roofing solutions
Effective insulation is the cornerstone of an energy-efficient roof, helping to keep your home warm and cosy while lowering your energy bills. But you want to choose sustainable roofing materials that are capable of improving insulation while lasting a lifetime. Metal, slate tiles, and roof shingles are considered three of the most sustainable roofing options with better longevity. So, if you’re thinking about upgrading your roof, consider picking from any of these three. Plus, they absorb heat better, keeping your interiors warm for longer. Even if you can’t afford to replace your entire roof, consider changing or upgrading some portions in the meantime.
Read the full article
0 notes
Text
Calming Your Home And Creating More Peace

Do you wish your home was more peaceful? It doesn’t matter if you live alone or your children don’t cause much fuss; your space might not be as calming as you hoped.
If so, don’t worry; you’ve come to the right place for advice.
This guide lets you discover the best advice for making your home more peaceful and calming.
Fix things as soon as they go wrong
Photo by Taryn Elliott: https://www.pexels.com/photo/cozy-light-interior-of-comfy-bed-and-bedside-table-4440214/
It is good for you to fix issues at home as soon as they happen (or as soon as possible). For instance, your lights might stop working. You shouldn’t try to fix electrical faults yourself as this is dangerous.
Using a Commercial electrician will help you get the right person for the task. With the right experience in commercial properties, you can rest assured your electrical issue will be fixed and you can return to life as soon as possible. Living without appliances or lights can be frustrating. So getting them fixed by the right person as soon as they can will help you get your life back and live in peace.
Declutter and make your space minimal
You can achieve a calm and organized space at home if you declutter. Nobody wants to live amongst things that aren’t used. Hence, it is best to get rid of things every few months. Living in a minimal space has mental health benefits and will guarantee that you will feel calmer in your home.
Setup calming spaces
Another simple way to create a calm home is by creating calming spaces. Define spaces in your home as places of peace and serenity. Identify spots in your house that will be dedicated to comforting. Spend money on really nice beanbags, bedspreads, squishy cushions, and other soft furnishings to make the perfect little nests to curl up and snooze in.
Bring the outdoors inside
Adding elements of nature into your home gives it a serene, relaxing, and natural atmosphere. Use the following suggestions:
- Add plants and fresh flowers: Add plants and fresh flowers all over your home. Not only do they add beauty and life to a room, but indoor house plants improve the air quality by adding moisture and oxygen and removing harmful chemicals emitted by home appliances.
- Bring in natural materials: Adding natural materials throughout your home creates a natural vibe. Materials include wood or stone flooring or even countertop materials.
Let there be light
One of the major elements of the decor of your home is lighting. Changing the lighting lets you give your home a completely different look. Choose soft light options like lamps, candles, and string lights to give your home a warm and cosy feeling. At the same time, embrace natural light. Keep your windows without obstruction and with sheer curtains to let the natural light filter into your home.
Using soothing color palettes
Use soothing color palettes that promote tranquility and harmony in your home. Soft neutrals, calm blues, unsaturated greens, and barely-there pastels create a sense of serenity in every room.
Read the full article
0 notes
Text
Choosing the Best Air Fryer for Your Family of 5

The Air Fryer has become a popular kitchen appliance, offering a healthier alternative to traditional frying methods. If you're in search of the best air fryer for your large family, this guide will walk you through key considerations and recommend top choices to make an informed decision.
Factors to Consider
Capacity
Large-capacity air fryers are often a crucial factor when it comes to kitchen appliances, especially for a larger family of 5. Choosing the right capacity can make or break your cooking experience. A larger air fryer allows you to cook more food at once, saving time and energy. However, a smaller compact size unit may be more suitable for those with limited counter space.
Power and Wattage
Navigating the world of power and wattage in new models of air fryers involves finding harmony between speed, efficiency, and cost-effectiveness. Looking for an air fryer with sufficient power and wattage is a good idea to handle the cooking needs of a larger family. Aim for a model with at least 1500 watts to ensure fast and efficient cooking.
The power consumption of an air fryer is directly related to its wattage, which determines how quickly and efficiently it can cook food. Higher wattage models can produce more intense heat, leading to faster cooking times and crispier results. But while a high-wattage air fryer may seem appealing for larger families that want meals prepared in a flash, it's important to consider the impact on electricity bills and energy usage.
Lower wattage models may take longer to cook but can be more energy-efficient in the long run. Understanding your family's cooking habits and lifestyle will inform the best choice for your household. Considering factors such as temperature range, preheating time and overall energy efficiency will help make a well-informed decision when selecting the best large air fryers for a family of 5.
Multi-functionality
The different models of air fryers have become indispensable kitchen gadgets, especially for families with busy schedules. Its multi-functionality goes beyond just air frying; it can also bake, grill, and roast, making it a versatile tool for meal preparation. For a family of 5, investing in an air fryer means having a single appliance that can cater to various cooking needs without taking up too much space in the kitchen.
The convenience offered by the multi-functionality of an air fryer cannot be overlooked. With different cook times and settings plus pre-set programs, users can easily switch between functions to accommodate different recipes and ingredients. This not only saves time but also allows for experimenting with new dishes and culinary techniques. Many modern air fryers come equipped with additional features such as dehydration and rotisserie functions. These expanded capabilities further enhance the value of the appliance against cooking food in the traditional oven, offering endless possibilities for creating delicious and healthy meals for the entire family.
Ease of Clean
Keeping the kitchen clean is a top priority for many large families, especially those with busy schedules and hungry mouths to feed. The convenience of an air fryer is a great option that can't be overstated when it comes to cleaning up after meals. Unlike traditional frying methods that leave behind greasy messes, air fryers require minimal maintenance. With removable, dishwasher-safe components, tidying up after a family of five's meal is quick and hassle-free. From the sleek exterior to the non-stick cooking basket style, every part of the air fryer is designed with easy cleaning in mind.
The time-saving nature of cleaning an air fryer extends beyond just wiping down surfaces. With simple instructions and intuitive components, anyone can easily keep their appliance spotless without feeling overwhelmed by complicated maintenance routines. Many users find that the easy upkeep of their great air fryer encourages more frequent use, as there are no concerns about the laborious clean-up of cooking trays after the cooking process.
Control Options
For a busy household with a family of 5, the convenience and ease of use are essential factors to take into account. An air fryer with user-friendly, digital touchscreen control options can make meal preparation a breeze allowing you to create healthy and delicious dishes without the hassle.
One key consideration is the versatility of the control panel settings offered by different air fryer models. Look for an air fryer that provides customizable different temperatures and cooking time options, giving you the flexibility to adjust settings based on different recipes and preferences. Additionally, advanced control features such as preset modes for specific dishes can save you time while ensuring consistent results.
Another important aspect to consider is the intuitiveness of the control interface. A clear digital display and straightforward button layout can make it easier for every member of the whole family to operate the cooking functions of the air fryer confidently. Choosing an air fryer with intuitive controls will not only streamline cooking processes but also enable all members of your household to enjoy experimenting with different foods, new recipes, and culinary creations.
Top Picks for a Family of 5
Instant Vortex Plus 7-in-1 Air Fryer
- Capacity: 6 quarts
- Wattage: 500 watts
- Functions: Air fry, roast, broil, bake, reheat, dehydrate, and rotate for rotisserie cooking.
- Notable Feature: Even Crisp technology for crisper plate and golden results.
Cosori Air Fryer Max XL
- Capacity: 5.8 quarts
- Wattage: 1700 watts
- Functions: Air fry, roast, bake, broil, dehydrate, and keep warm.
- Notable Feature: Preheat function for faster cooking and an easy-to-use LED digital touchscreen.
Ninja Foodi 8-Quart 9-in-1 Deluxe XL Pressure Cooker and Air Fryer
- Capacity: 8 quarts
- Wattage: 1760 watts
- Functions: Pressure cook, air fry, steam, slow cook, yogurt, sear/sauté, bake/roast, broil, and dehydrate.
- Notable Feature: Tender Crisp technology for the perfect combination of pressure cooking and air frying.
Conclusion
Investing in the best overall Air Fryer can revolutionize your family's experience, providing healthier and delicious meals with ease and more even cooking. By considering factors such as capacity, power, multi-functionality, ease of cleaning, and control options, you can confidently choose the best-size air fryer with a larger capacity model to meet the needs of your family of five. With the right top performer appliance, you'll be well on your way to enjoying convenient and nutritious meals for years to come.
Read the full article
0 notes
Text
Mistakes to Avoid When Upgrading Your Backyard

If you want to spruce up your backyard, you must take the right steps so that you have a nice and relaxing space that you enjoy. Unfortunately, there are many common mistakes that people make when working on improving their backyard space, and it can lead to many costly and time-consuming problems. The last thing you want to do is undo all your hard work or not have your backyard ready for the spring and summer months to enjoy. So, to help you on your journey, here are some of the most common mistakes that people make so that you can avoid them and create the backyard of your dreams.
Taking on too much
Image credit
It is a nice idea to want a multitude of plants and vegetables to grow, perhaps even the installation of a pool, a seating area, and interesting features. However, it can be a huge mistake to add all of this into your backyard if you are not going to be able to keep up with it all. What many people don’t realize is that plants, vegetables, and even pools require a lot of time, maintenance, and even money. Vegetables, for example, will require the right soil, the right amount of light, the right amount of time inside and in the backyard, enough room to grow, space away from certain vegetables, fertilizers, and harvesting at the right time. If you have things like a pool in your backyard, you will also need to consider how to keep it clean, how to maintain it, how to cover it over winter, and what to do when it isn’t working. It might be something like a Pool Pump Repair, or you may need to call out a professional. You need to understand what is involved. These are all the things you need to think about with each element of your backyard that you install.
Not considering the layout
Whether you are growing vegetables or setting up a relaxing area to sunbathe, you must consider the layout of your backyard. Many people make the mistake of not considering which way the sun rises and sets and how much light comes into the backyard behind buildings and structures. This can often lead to areas being set up in the wrong places, for example, growing plants and vegetables in areas that don’t get any shade and setting up a sunbathing area that is in the shade at lunchtime. Make sure you consider the layout of your backyard and what may impact your goals, before you make any changes.
Not making a plan
To help you avoid taking on too much and the incorrect layout, you need a plan. One of the biggest mistakes people make is avoiding the planning process and just winging it. While this might end up in your favour, it is a huge risk to take. When you make a plan, you can consider what you want to achieve and reverse engineer it into the right tasks. This will help you plan better, budget the money that you need, and ensure you minimize mistakes.
Sprucing up your backyard is a great thing to do. Make sure you consider these mistakes and avoid them at all costs!
Read the full article
0 notes
Text
Is Your Home Weather-Proof?
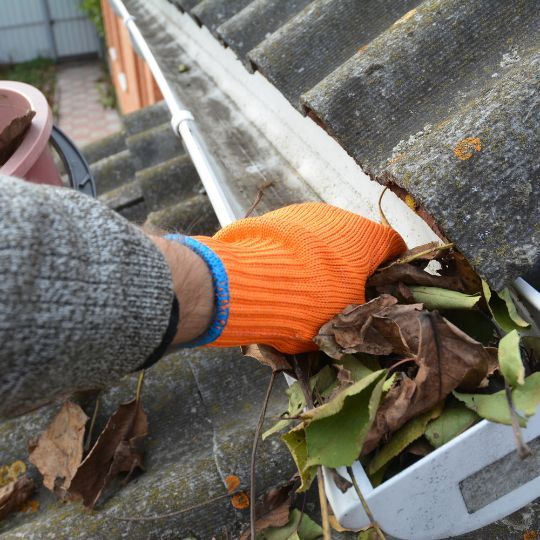
Whether you live in a hot climate or a cooler one, the weather is always going to be a factor in your life. Not only is it something you need to think about when it comes to your comfort and safety, but your home could be vulnerable as well. It’s wise to understand how to spot if your home is weather-proof or if there could be problems looming - if there are, you can do something about them sooner rather than later and ensure that your property stays protected. With that in mind, here are some things to look for to make sure your home is weather-proof.
Protect Your Roof
Photo by Alessio Cesario
If there’s one area of your home that could be most vulnerable to the weather (which includes heat, cold, rain, snow, high winds, and storms), it’s your roof. After all, that’s where the weather is going to be focused a lot of the time, and if your roof isn’t secure or in good repair, other areas of your home could suffer. Water leaking through the roof will lead to mould and dampness, for example, and any holes caused by shingles being blown off will mean it’s more expensive to heat the property.
The best thing to do is stand outside your home and look up at the roof - don’t lean out of a window to try and see better, as that’s highly dangerous. Of course, you won’t be able to see everything from the ground, which is why it’s often a good idea to get experts to look instead. They can tell you if there are problems and carry out roofing repair work to put things right much more quickly and accurately than you would be able to.
Upgrade Your Windows And Doors
Your roof is the most vulnerable area of your home, but there are other areas to check as well, and your windows and doors should be next on the list. If they’re quite old or not of great quality, it could be that there are drafts and leaks, and your home will always be difficult to keep warm or cool (depending on the time of year and the temperature outside). That’s going to end up costing you more in energy bills, not to mention the fact that it makes your home a lot easier for burglars to access.
If your windows and doors are causing problems, the best course of action is to replace them where possible - getting brand new windows and doors that are up-to-date and comply with regulations makes your home safer, more comfortable, and cheaper to run. If your budget doesn’t stretch to new windows and doors, you’ll need to seal the gaps around them as a temporary measure.
Clear Your Gutter
Your gutter is a very important part of weather-proofing your home - as long as you keep it clear. The gutter is there to capture the water that rolls off the roof and funnel it down to a safe place where it’s not going to cause any harm - a drain is the usual end point. Without your gutters, the rain or snow would fall off the roof and pool around your walls, potentially damaging the foundation, not to mention the walls themselves as the water dripped down.
You’ll need to clean out your gutters on a regular basis so they can do their job; they tend to get full of debris like leaves and twigs, and that means the water can’t go where it needs to, and it will tip over the top of the gutters instead.
Read the full article
0 notes
Text
Before You Renovate Do These 4 Crucial Things!
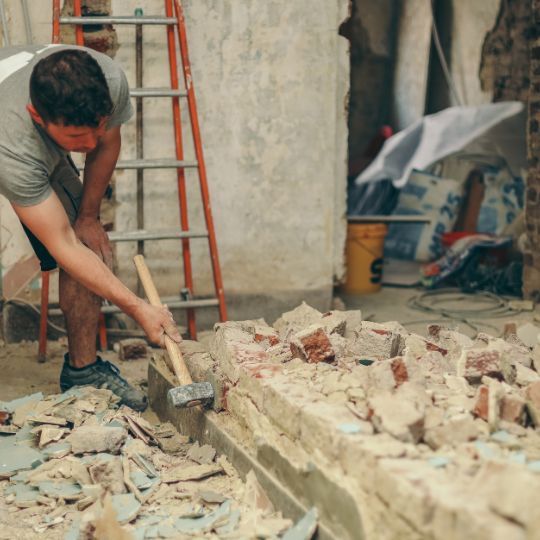
Renovating your home can be a great way of adding value to the selling price, and making it a space that you and your family enjoy. However, renovations can be big undertakings, and you must do the following things before you even begin the renovation process. Keep reading to find out more.
Set a budget and secure your finances
Renovations don’t come for free. Indeed, they can be considerably costly depending on what you are having done, with extensions usually being the most expensive. With that in mind, making sure you set a firm budget ahead of time is a very good idea, as this can stop costs running away while you are engaged in the process.
Of course, you will need to have a good idea of the approximate amount that a renovation will cost before you set such a budget. To that end, getting at least three quotes and comparing them is a good starting point.
Make sure you secure any fiance that you need to complete your project as well. After all, there is nothing worse than getting halfway through a renovation and then running out of funds. You may wish to fund the work out of your own pocket or savings, or you may wish to take out a loan to cover the costs. For example, some people choose to remortgage their home against the cost of a renovation.
Make plans
Another thing you must do before you begin a renovation is ensure it's properly planned out. This means more than just sketching your ideas on the back of a napkin and hoping for the best. Instead, you will need to work with a professional architect and/ or interior designer who can create proper blueprints for your contractors to work from. Experts in design will also be able to take you through the process and provide invaluable advice in areas where you may not have any experience.
Demolish before you begin
Many renovations require a significant amount of demolition before any new building can begin. That is why it's important to find a reliable and trustworthy home demolition specialist to work with before you begin. Indeed, a good home demolition expert will be able to ensure the process is as fast, tidy, and efficient as possible so you can move on to the construction elements of your renovation as quickly as possible.
Consider the disruption in your home
Last of all, before you begin any renovation in your home, it's crucial that you give proper thought to any disruption it may cause. In particular, bathroom and kitchen renovations can be most disruptive because they prevent your usual family routine from happening.
However, you can take steps to reduce any disruption and inconvenience, including setting up a makeshift kitsch with a portable hot plate, microwave, and air fryer in another room in your home.
You may also wish to make plans to stay with family or friends during a bathroom renovation or refresh your gym membership so you can be sure of a shower each day before work, even when the water is off.
Read the full article
0 notes