
beccameliora
healthy eating
healthy eating guideline for beginners who want a better life
9 posts
Don't wanna be here? Send us removal request.
Last Seen Blogs

drrl0
Untitled

dignitycollege1-blog
online cna course ca

pictures-of-wilbur
Archive

drew6395
My Drity Thoughts

snowfilly1
Untitled
Text
Read More My AM + PM Skincare Routines and Current Fave Products! (cruelty-free)
The following post My AM + PM Skincare Routines and Current Fave Products! (cruelty-free) is republished from Oh She Glows by Angela (Oh She Glows)
Hey everyone! I hope you’re doing well and staying safe out there. This post is a shift from my usual recipe-related content, but it’s one I’ve been asked to do for ages now and I’m happy to finally have this post put together. It’s a bit of a beast! Be sure to see the bottom of this blog post because I’m announcing a fun live event in celebration of Oh She Glows for Dinner (which launches next week!). I hope you’ll join us on Oct 14th at 7pm EST!!
Skin care is such a personal journey, and I certainly don’t expect that what I do will work for you or that you should follow my routines because we all have vastly different skin care needs. That said, I personally love seeing skin care routines that other people follow (it’s a bit of an obsession in recent years). I hope you enjoy this post too!
As a teenager, I remember using strong acne cleansers and ointments that would strip my skin. And super coarse scrubs. I suffered from tons of bad breakouts in my teen years and just felt so insecure most of the time. I wish I could give that girl a big hug. Needless to say, my skin care has evolved over the years as I’ve learned more about my changing skin and which products and ingredients are effective for me. I actually didn’t get into a formal skin care routine until the past couple of years. When Adriana and Arlo were younger, I was lucky if I washed my face and threw on moisturizer before bed because I was so tired. I was also trying to solve ongoing allergic reactions so I was super careful about introducing new products and rarely ever did. If you are in a similar phase of life, be kind to yourself and don’t worry about having the perfect routine, or heck, a routine at all. Do what makes you happy and works for you, whatever stage you are in. Now that my kids are a bit older (and I seem to have figured out, at least in part, what was causing my allergic reactions), I’ve been loving getting back into skin care again because it helps me slow down and take some time for self-care. It’s a favourite part of my day.
Without further ado, here are the cruelty-free products I’m using lately. I’ve also shared my AM and PM routines below. Keep in mind I am in no way claiming to be a skin care expert by any stretch of the imagination; I just love learning about it and consider this an evolving personal journey!
As always, this post is not sponsored. As you may know, I don’t do any sponsored content…this was a decision I made many years ago, but I like to mention it once in a while for new readers. :) I also purchased all of the products myself (nothing was gifted). There are affiliate links for some of the products below, however, so if you click an affiliate link and make a purchase I may earn a small percentage. I’m always grateful for your support!
First, a bit of info on my skin type to provide context:
Combination skin (mixture of dry areas and normal/oily areas)
Reactive (flushes easily)
Prone to hyperpigmentation
I’m still working on reducing melasma from my 2 previous pregnancies, and have made slow progress!
Thanks to Eric for taking this photo of me (this photo cracks me up…I’m looking all super creepy at myself while applying a mask).
Cleansers
In the evening, I use the double cleanse method because it’s really helpful to break down sunscreen and makeup. I start with a rich cleansing balm, then move on to the jelly cleanser as my second cleanse. In the morning, I only use the jelly cleanser since my skin doesn’t need much cleansing.
The Inkey List Oat Cleansing Balm (150 mL: $12.99 CAD/$9.76 USD; this product contains no animal derivatives, however they are not yet vegan certified)
This ultra-thick and rich cleansing balm is often sold out and for good reason. It’s so luxurious to use (I love to give myself a little facial massage when I use it). It has a fantastic price point for a cleansing balm, and I find that it calms my skin down and makes it softer! I do have one small complaint about this balm – for the first week or two of use, the balm is very hard to squeeze out of the tube..I’m talking major arm workout. But, once I’ve used it for a couple weeks, it starts coming out much easier. Thank goodness for that because I don’t have much energy at the end of the day to fight containers.
Herbivore Pink Cloud Rosewater + Tremella Creamy Jelly Cleanser (100 mL: $32 CAD/$24 USD, vegan)
I like that this cleanser doesn’t leave my skin feeling dry! It’s gentle and moisturizing, and one small pump is all you need for a full face lather!
Serums
These are my current go-to serums! You’ll see how I rotate them in my routines below.
The Ordinary Niacinimide 10% + Zinc 1% (30 mL: $5.90 CAD/USD, vegan)
Targets: balances oil production, reduces appearance of acne, brightens skin tone
The Ordinary Retinol 1% in Squalane (30 mL: $6.70 CAD/USD, vegan)
Targets: fine lines, photo damage, texture
NIOD Copper Amino Isolate Serum 2:1 (15 mL: $60 CAD/USD, vegan)
Targets: textural damage, uneven tone, enlarged pores, lack of radiance
NIOD Re:pigment (15 mL: $39 CAD/USD, vegan)
Targets: hyperpigmentation
NIOD Fractionated Eye Contour Concentrate (15 mL: $68 CAD/USD, vegan)
Targets: dynamic lines, static lines, fine superficial under-eye lines, loss of elasticity (especially upper-eyelids), dark circles, puffiness and textural unevenness.
Vitamin C Serum
Timeless Vitamin C + E Ferulic Acid Serum (not pictured as I’m currently out and waiting for it to arrive. Photo update coming soon!) (1 oz/30 mL: $34.55 CAD/$25.95 USD, vegan)
This is a lovely, L-ascorbic acid serum that helps brighten and smooth my skin! In the past, I’ve had problems with sticky or oily vitamin c serums, but this one has a watery texture. I keep it in the refrigerator when storing.
Mineral-Based SPF
Paula’s Choice Resist Skin Restoring Moisturizer with SPF 50 (2 oz/60 mL: $43.94 CAD/$33 USD)
I’ve worn this moisturizer with SPF 50 year-round for years now. There is rarely a day I don’t wear it. I also wear hats religiously when outdoors…you’ll almost never find me outside without a hat on. When I’m outside in the summer during peak UV hours, I wear a goofy-looking wide brim hat, add a fresh layer of facial SPF, and mineral-based sunscreen on my body. Even though I can’t take away all those years I used to tan when I was younger (whyyyy, Ange, whyyy?), I’ve vowed to protect my skin now and in the future!
Night Cream
A thick moisturizer is the final step in my evening skin care routine and locks in my serums. I’m actually between night creams at the moment as a cream I love (Herbivore Pink Cloud Moisture Cream, vegan and pictured in this post) may have been discontinued (although I’ve seen that you can still find it at some physical Sephora locations). I also love Drunk Elephant’s Protini Polypeptide Cream (vegan), but I’m not a fan of the packaging.
Oils
The Ordinary 100% Organic Cold-Pressed Rose Hip Seed Oil (30 mL: $9.80 CAD/USD, vegan)
I don’t use many oils, but this is a go-to of mine which I use some evenings. It gives the skin a nice glow! When my skin is looking extra thirsty, I’ll add a couple drops of this into my evening moisturizer or layer it underneath my moisturizer.
Masks
Tatcha Violet-C Radiance mask (50 mL: $117 CAD/$88 USD)
This new-to-me mask contains vitamin C as well as AHA’s from 7 different fruits (shown in mirror photo above). The biggest benefit I’ve noticed with this mask is that it makes the skin feel very smooth and is moisturizing. It’s a great one to use before makeup for a smooth application. I’ve noticed subtle brightening, but not as much brightening as I was hoping. Because of this and the high price point, I’m not sure whether I will repurchase it. I do like it overall, so I’ll have to see if something better comes along..I always like trying new things out!
Chemical & enzyme exfoliants
Since I don’t use any chemical exfoliants in my current daily AM or PM skincare routines, I like to get in one of these peels once a week. I always patch test new products, but this is especially important with peels. The Ordinary has a handy guide to patch testing here.
The Ordinary Lactic Acid 10% + HA (30 mL: $6.80 CAD/USD, vegan)
I primarily use this lactic acid for KP (Keratosis Pilaris), which I’ve struggled with on the back of my arms. Its gentle chemical exfoliation really helps smooth and soften bumpy skin with regular use and it keeps the skin hydrated at the same time. I tend to forget about applying it, but when I’ve used it regularly (every other day), it has really helped smooth my arms! Of course, you can also use this on your face, too, and it comes in an even more gentle 5% concentration, if need be.
The Ordinary AHA 30% + BHA 2% Peeling Solution (30 mL: $7.20 CAD/USD, vegan)
This is a really effective chemical exfoliation for my skin, but you have to be careful with it as it’s not for everyone. Before using, I patch tested this peel on my inner forearm for 10 minutes (the max recommended time). Then I waited 24 hours to see if a reaction formed. When my skin didn’t react, I applied it to my face for just 1 minute for the first use. For the second use, a week or two later, I left it on for 2 to 3 minutes, and I worked my way up from there, very slowly. I’ve used at home chemical exfoliants in the past without issue and my skin has no problems with this mask at the recommended ‘up to 10 minute’ time, but I wouldn’t recommend it for sensitive skin types. The Ordinary says, “It is only suitable for experienced users of acid exfoliation.” It’s also important to make sure your skin is dry before application – there should be no water on the skin. Anyway, this mask makes my skin absolutely glowing and smooth…it’s truly a ride or die for me. I find that I only need to keep it on for 5 to 8 minutes max for great results…less is more.
AlumierMD Enzymatic Peel
This lovely enzyme peel mask contains 10% lactic acid with fruit enzymes for a gentle but effective exfoliation. I purchased it from my sister Kristi who is a trained skin care specialist with AlumierMD and is so knowledgeable about skincare! I find you only need to leave this enzyme mask on for a few minutes, so it’s nice for busy mornings when your skin needs exfoliation, but you find yourself short on time. It’s a beautiful one to apply before adding your other serums so they’ll soak in nicely. If you want to find out more about this product or AlumierMD products in general, drop Kristi a line at [email protected] and say hello or follow her on Instagram :)
Moisturizing Lip Balm
Summer Fridays Vegan Lip Butter Balm, Vanilla (15g: $29 CAD, $22 USD)
Oh boy, do I love this balm! Summer Fridays says it’s a “silky vegan lip mask that hydrates and soothes parched lips while sealing in moisture.” I would have to agree. I’ve tried quite a few vegan balms and this one is my favourite so far. I use it morning and night…and before going outside in chilly weather!
Light-emitting diodes (LED) low-level light therapy
Project E Beauty Photon Face Rejuvenation Face & Neck Mask ($260 CAD/$195 USD)
It’s getting CREEPY up in here! I’ll start with what I don’t love about this LED mask and I’ll end with what I do love. Don’t love: the mask is heavy on the face (particularly on the bridge of the nose). I use the LED mask while lying down in bed and I hold the mask slightly lifted off the bridge of my nose. I’ve found that if I keep my upper arm resting on the bed (rather than suspended in the air) my arm doesn’t get that tired, but it’s still a bit of an annoyance.
Okay, now onto what I love about it and what has made me stick with it—I’ve seen results. And I mean, my expectations were low. I use this diligently for 20 minutes, 5 to 6 times a week, and I’ve noticed that it has slightly plumped and firmed my skin over the past few months. My skin also feels smoother and softer to the touch. I love that this mask comes with a neck attachment. My neck used to be quite rough in texture and now it feels softer and is visibly smoother.
At first, I thought I was imagining the results and wondered if the results were actually from my skincare products, so I decided to try a little experiment. I tried this LED light on my thigh/knee area where I don’t use any serums. Lo and behold it had the same effect – skin softening and slight plumping. So, I’m pretty sure that the red LED light is doing some good things for my skin (consistent use is key). While this LED mask has a lot of wavelength options, I only use the red light which can help boost collagen production and it’s the one I have seen the most research backing (such as here, here, and here). The added benefit of using this device is that it has forced me to relax for 20 mins at a time – something I never used to make time for. Now I look forward to relaxing on my bed, closing my peepers, and kicking back while listening to various Youtube channels (about as close to meditation as I will likely get, but I’ll take it!). Anyway, I’m not totally happy with this product since it is uncomfortable on the bridge of my nose, so my advice would be to look into various brands.
My AM + PM skin care routines
Lately, I rotate between the following morning and evening routines. In other words, from the lists below, I pick only one morning routine and only one evening routine per day. I try to rotate them fairly evenly. The products in each routine are listed in order of use/application, too. For example, if I list NIOD Re:pigment before The Ordinary’s niacinamide, it means I apply Re:pigment first, let it soak in for about 30 to 60 seconds, then apply niacinamide afterwards.
I created these routines by chatting with DECIEM consultants to determine which products can be combined (and in what order to layer them), and which ones should not be combined. I also love to refer to The Ordinary’s Regime Guide and this handy conflict chart over at DECIEM Chat Room as starting off points.
Morning routine #1:
Herbivore Pink Cloud Rosewater + Tremella Creamy Jelly Cleanser
NIOD Re:pigment
The Ordinary Niacinamide 10% + Zinc 1%
NIOD Fractionated Eye Contour Concentrate
Paula’s Choice Resist Skin Restoring Moisturizer with SPF 50
Morning routine #2:
Herbivore Pink Cloud Rosewater + Tremella Creamy Jelly Cleanser
The Ordinary Copper Amino Isolate Serum 2:1
The Ordinary Niacinamide 10% + Zinc 1%
NIOD Fractionated Eye Contour Concentrate
Paula’s Choice Resist Skin Restoring Moisturizer with SPF 50
Morning routine #3: (photo coming soon!)
Herbivore Pink Cloud Rosewater + Tremella Creamy Jelly Cleanser
Timeless Vitamin C + E Ferulic Acid Serum
NIOD Fractionated Eye Contour Concentrate
Paula’s Choice Resist Skin Restoring Moisturizer with SPF 50
Evening routine #1:
Double cleanse with The Inkey List Oat Cleansing Balm, then cleanse with Herbivore Pink Cloud Rosewater + Tremella Creamy Jelly Cleanser
NIOD Re:pigment
The Ordinary Niacinamide 10% + Zinc 1%
NIOD Fractionated Eye Contour Concentrate
Night cream
Evening routine #2:
Double cleanse with The Inkey List Oat Cleansing Balm, then cleanse with Herbivore Pink Cloud Rosewater + Tremella Creamy Jelly Cleanser
The Ordinary 1% retinol serum (2 times per week)
NIOD Fractionated Eye Contour Concentrate
Night cream
Evening routine #3:
Double cleanse with The Inkey List Oat Cleansing Balm, then Herbivore Pink Cloud Rosewater + Tremella Creamy Jelly Cleanser
NIOD Copper Amino Isolate Serum 2:1
The Ordinary Niacinamide 10% + Zinc 1%
NIOD Fractionated Eye Contour Concentrate
Night cream
Evening routine #4: (photo coming soon!)
Double cleanse with The Inkey List Oat Cleansing Balm, then Herbivore Pink Cloud Rosewater + Tremella Creamy Jelly Cleanser
Timeless Vitamin C + E Ferulic Acid Serum
NIOD Fractionated Eye Contour Concentrate
Night cream
Tips I follow:
Always patch test new skin products. If using any The Ordinary or NIOD products, see their guide on patch testing.
Follow product instructions carefully.
I like to use a slow, gradual approach when introducing new products.
Some of the products/ingredients above are not recommend for pregnancy or breastfeeding, so be sure to consult with your doctor before use.
I try to do my evening routine 30 to 60 minutes before I go to bed, so the products have plenty of time to soak in and are less likely to rub off on my pillow.
Whew, was this a beast or what? It was so much fun to put together. :) Drop me a line and let me know about your favourite skin care products…I love hearing what you guys use and love!
I’m excited to announce that Indigo and Chatelaine are hosting a free online event on October 14th at 7pm EST in celebration of Oh She Glows for Dinner! I’ll be chatting with the lovely Maureen Halushak and really hope you will join us! There will also be signed copies of my new book for sale if you’d like to treat yourself or that special someone. =) I’ll be donating 100% of my personal proceeds on the book sales for this event to Building Roots! Be sure to reserve your spot here if you’d like to join us. :)
Only a week to go until Oh She Glows for Dinner launches into the world! This week is the last week to take advantage of my OSG for Dinner Bonus Bundle, so if you preorder, please make sure you download the free bundle. I am so grateful for your support and can’t wait for you to start cooking! xo
Comments (0) | function fbs_click() {u=location.href;t=document.title;window.open('//www.facebook.com/sharer.php?u='+encodeURIComponent(u)+'&t='+encodeURIComponent(t),'sharer','toolbar=0,status=0,width=626,height=436'); return false;}Share on Facebook | Tweet | Pin It
© copyright 2020 Oh She Glows. All Rights Reserved.
0 notes
Text
Read More Perfect Little Pumpkin Cookies with Spiced Buttercream
The following post Perfect Little Pumpkin Cookies with Spiced Buttercream is republished from Oh She Glows by Angela (Oh She Glows)
Hey everyone, I hope you are doing well! I’m popping in with a fun fall-inspired cookie recipe today that’s been on repeat in this house.
First, I want to thank you all so much for your support for Oh She Glows for Dinner! I’m immensely grateful for each and every one of you who believe in me and in what I create. It’s sounding like cozy, plant-based meals to enjoy at home is a theme you’re really eager for, and hearing this makes me so happy because this book was almost the end of little ‘ol me…hah ;) jk. Well, it was my biggest challenge to date, but sooo worth it and I’m thrilled with how it all came together. Now that I get to cook from this book in my own kitchen, it’s pretty darn special. I can’t wait for you to be able to do so as well.
Your pre-orders help a lot because the more pre-orders we have, the better chance we have to get the book stocked in more numerous and varied retailers, such as independent stores, chain stores, and online retailers, allowing everyone to locate the book more easily and support their favourite stores. I appreciate your help so much!! Click here to find out where you can pre-order your copy so you can start cooking up these delicious, cozy recipes as soon as it’s hot off the press! Not much longer to go now. :) If you pre-order, don’t forget to claim your pre-order Bonus Bundle here until October 13th.
Okay, now it’s time to ring in the fall season with a brand-new, lightly spiced, and completely addictive frosted pumpkin cookie.
Sending you all my love and good vibes for the new season ahead!
Perfect Little Pumpkin Cookies with Spiced Buttercream
Vegan, soy-free
Why hello there, beautiful pumpkin season! These lovely pumpkin cookies are lightly crispy around the edges, tender and chewy in the middle, and the perfect light-tasting base for my Fluffy Pumpkin Pie Spice Buttercream. My recipe tester, Nicole, says they are like “airy, pumpkin spiced clouds with a delightful outer shell to sink your teeth into!” If you aren’t in the mood for frosting, and prefer a lightly sweet, wholesome-tasting cookie, they also taste great without the buttercream. You can use store bought pumpkin pie spice for convenience, or this recipe for Homemade Pumpkin Pie Spice Mix. In the Tips section, I’ve provided sifted whole-grain spelt and all-purpose white flour swap options for the white/light spelt flour. Be sure to check them out before you begin as the flour substitutions aren’t direct 1:1 swaps. This recipe is adapted from my Easy Vegan Sugar Cookies with Pink Frosting.
Yield
20 cookies
Prep time
25 Minutes
Cook time
13 Minutes
Total time
38 Minutes
Ingredients:
For the wet ingredients:
3 tablespoons (45 mL) grapeseed oil
3 tablespoons (45 mL) pure maple syrup
1/4 cup (60 mL) unsweetened pumpkin purée
2 tablespoons (30 mL) brown rice syrup
1 1/2 teaspoons ground flaxseed
1/2 teaspoon pure vanilla extract
For the dry ingredients:
3/4 cup plus 1 tablespoon (83 g) almond flour*
1 cup plus 1 tablespoon (127 g) white/light all-purpose spelt flour**
3 tablespoons (27 g) arrowroot starch
1/4 cup (60 g) natural cane sugar
1 teaspoon pumpkin pie spice
1/4 teaspoon fine sea salt
1/2 teaspoon baking soda
For the Fluffy Pumpkin Pie Spice Buttercream:
1/4 cup plus 2 tablespoons (75 g) soy-free vegan butter
1 1/2 cups (190 g) powdered icing sugar, sifted if necessary
1/2 teaspoon pumpkin pie spice
Pinch fine sea salt
Cinnamon or pumpkin pie spice, for garnish (optional)
Directions:
Preheat the oven to 350°F (180°C) and line one extra-large baking sheet (or two medium-sized sheets) with parchment paper.
To a small bowl, add the wet ingredients: grapeseed oil, maple syrup, pumpkin purée, brown rice syrup, ground flax, and vanilla. Whisk until combined.
To a large bowl, add the dry ingredients: almond flour, spelt flour, arrowroot starch, cane sugar, pumpkin pie spice, salt, and baking soda. Whisk until combined.
Pour the wet mixture over the dry mixture (being sure to scoop all of the wet ingredients stuck to the sides of the bowl), and stir until it comes together into a dense, very thick dough.
The dough will be very sticky, but this is normal! Scoop a slightly heaping 1 tablespoon of dough into your hand, and roll it into a ball. Continue with the remaining dough, placing each ball onto the baking sheet about 2 to 3 inches apart. If needed, you can lightly wet your fingers during this process. Do not flatten the balls before baking as they will spread out on their own.
Bake the cookies for 12 to 13 minutes until lightly golden (I like baking them until lightly golden as the edges get a bit crispy during cooling). Cool the cookies completely on the baking sheet. To speed up the cooling process, cool the cookies for 10 minutes on the pan then transfer the cookies to the fridge until completely cooled.
Meanwhile, prepare the Fluffy Pumpkin Pie Spice Frosting: To a large bowl, add the vegan butter. Using electric beaters, beat the butter until smooth (about 30 seconds). Add the powdered sugar, pumpkin pie spice, and salt. Starting on low speed, beat until smooth and fluffy, gradually increasing the speed as the ingredients combine. It will look very crumbly at first, but it will eventually come together and become fluffy. If the frosting is still too dry, you can thin it with a tiny bit of almond milk (1/2 teaspoon at a time), and continue beating until smooth. If it’s too thin, you can add a little more powdered sugar and beat again until smooth.
Spread the frosting onto the completely cooled cookies, and top with a sprinkle of cinnamon or pumpkin pie spice, if desired. Serve and enjoy! Leftover cookies can be stored in an airtight container in the fridge for 1 to 2 days. The cookies will soften when sealed in a container.
Tips:
* Be sure to use almond flour and not almond meal which is much coarser.
** I prefer the white/light spelt version. If you can find some, it’s so lovely in these! If you can’t find it in the store, though, you can sift whole-grain spelt flour before using. The flour won’t be as fine and delicate as white/light spelt flour, but it will work in a pinch. To sift: place a large bowl on top of a kitchen scale, and tare the scale to zero. Spoon flour into a fine mesh sieve, and gently shake the sieve side-to-side until you have about 127 grams of sifted flour in the bowl. Discard the coarse flakes that remain in the sieve. Using sifted whole-grain spelt flour produces a more wholesome flavour and texture. Alternatively, you can use 3/4 cup plus 2 tablespoons (127 grams) all-purpose white flour instead of white/light spelt flour. When using all-purpose white flour, the cookies will taste a bit less sweet and complex compared to spelt flour.
Flours are measured using the “scoop and shake until level” method, where you scoop the measuring cup directly into the flour and shake the cup side to side until the flour is level. I recommend weighing the flour whenever possible for the most accuracy.
For those of you who missed my earlier announcement, Indigo is hosting a wonderful contest in celebration of Oh She Glows for Dinner! Plum members who pre-order my new cookbook are automatically entered in this wonderful prize package. It is a great time to do so, because the book is on sale for 22% off right now (Please note, I don’t know when this sale ends). Click here to enter!
Comments (0) | function fbs_click() {u=location.href;t=document.title;window.open('//www.facebook.com/sharer.php?u='+encodeURIComponent(u)+'&t='+encodeURIComponent(t),'sharer','toolbar=0,status=0,width=626,height=436'); return false;}Share on Facebook | Tweet | Pin It
© copyright 2020 Oh She Glows. All Rights Reserved.
0 notes
Text
Read More Oh She Glows For Dinner + Pre-order Bonus Bundle!
The following post Oh She Glows For Dinner + Pre-order Bonus Bundle! is republished from Oh She Glows by Angela (Oh She Glows)
Hi everyone! I hope that summer is treating you well so far, and you’re staying in good health and good spirits during what has been a heartbreaking year. How are you and your families doing right now?
At long last, I have some fun news to share with you today! This cookbook reveal was supposed to go out to you in May, then in June, and then in early July, but with everything going on in the world it just didn’t feel right, so I delayed it multiple times. I’m not sure it feels right even now, but I’ve had a lot of questions about the new book’s listing on various retailers online, so I knew I couldn’t delay any longer. I’m holding onto the hope that this news will bring a smile to your face and a bit of cheer. :)
If you haven’t guessed already, my new cookbook, Oh She Glows for Dinner: Nourishing Plant-Based Meals To Keep You Glowing, is finally complete and it comes out in a couple of short months! It’s been a wild ride to cross the finish line (never in my wildest dreams did I think I’d be wrapping up a cookbook during a pandemic and lockdown), but after 3 years of working away on this project, I’m absolutely thrilled to let you know all the juicy (pun intended) deets about this new book. If you subscribe to my newsletter, you may have seen the sneak peek pop into your inbox yesterday!
Here’s a little behind-the-scenes from earlier this year when I was going over the book design!
Shifting from “behind-the-scenes” mode to “in-the-spotlight” mode doesn’t come easily for me (I’m much more of a behind-the-scenes kinda gal!), so this “launching into the world” part of the creation process is a big challenge for me on a personal level, and oh boy, the nerves I have right now are unreal. I’d be perfectly happy to work away diligently behind-the-scenes and never have to self-promote. ;) Do any of you relate? I’m always up for a good challenge, though, and getting to reconnect with you all is the icing on the vegan cake!
This book would not have been possible without your encouragement, patience, and support throughout the whole process! It also wouldn’t have been possible without my small-but-mighty team made up of Nicole and Eric. They are my rocks, my sanity savers, my reasons for inappropriate fits of laughter, my sounding boards, my reminders to drink more caffeine and breathe, and it goes on. My incredible, diligent group of recipe testers (a special shout out and thank you to Anna, Carin, Tana, Tammy, Laurie, Caroline, Danielle, Vanessa, Lynn, Audrey, Stephanie D., Anne, Kathy, Stephanie S., Andrea, Beth, Katie, Lindsay M., Bridget, Laura, Lindsay V., Erin, Heather, Suzanne, Adrienne, Stephanie M., Carolina, Kirsten, Lori, Marina, and Kristen) have tested, and tested, and tested these recipes right alongside me and shared the most helpful feedback. And last but not least, I have so much gratitude for the amazing teams at Penguin Random House Canada and Avery!
I held this book in my hands for the first time last week! I can’t even tell you how fast my heart was a-thumpin’ when I opened the box! It is always slightly terrifying and thrilling to open one of my books for the first time, and it really never gets any easier to send my heart and soul’s work off into the world. But I am so darn proud of this book. It’s my very first hardcover book, too!
About this book
Oh She Glows for Dinner is a reflection of what you, my dear readers, have asked me for the most over the years—more plant-based, crowd-pleasing dinner recipes!
Dinner is something I think most of us have struggled with (I know I sure have!), and when you throw “plant-based” into the mix it can be even trickier to figure out. If you’ve ever shrugged your shoulders over what to make for a vegan meal and resorted to toast or a bowl of cereal, you certainly aren’t alone. I knew I had to create this cookbook to help answer the ever-burning “what’s for [plant-based] dinner?” question. As an added benefit, the recipes in this book also make incredible (and often portable) lunches! You’ll also find the perfect, satisfying sides to add to your dish, meal-worthy salads for every season, hearty & healing soups and stews, and a bounty of flavour-poppin’ sauces, dressings, parmesans, and pestos that you can make to change up the flavour profile (or simply punch up your dish even more). And I threw in a delicious dessert/drink chapter, of course, because it wouldn’t be an Oh She Glows cookbook without some sweet, healthified treats! ;)
What you’ll find inside:
Dietary and Cooking Labels
Each recipe indicates whether it is nut-free, gluten-free, soy-free, grain-free and/or oil-free, raw/no bake or one pot. Out of 106 vegan recipes in this cookbook, 101 are gluten-free or have a gluten-free option, 90 are nut-free or have a nut-free option, and nearly all are soy-free. I also share whether the recipe is kid-friendly, freezer-friendly, and/or if any advance prep is needed. My “on the glow” label tells you whether the recipe is portable. My goal was to pack in as much helpful info as I could for you (dare I say this is my most informative book yet?)…you know me, go big or go home…lol.
Storage and Reheating Instructions
Almost all of the recipes in this cookbook also include specific storage and reheating instructions, customized to each recipe. My recipe testers and I spent so much time testing the recipes to take the guesswork out of them for you!
Active Time and Total Time
Each recipe tells you how much active time and total time will be required. Active time is the time you are actively preparing food in the kitchen. Total time reflects how long the recipe takes from start to finish. If applicable, we also share Soak time and/or Chill time.
Full-page colour photographs
I am so excited to share that I did the food photography and food styling for the recipes in this book – there are more than 100 of my photographs inside!
Glow Getter Meal Plans
This book includes 4 meal prep plans! Each time-saving plan provides step-by-step instructions, so you can prep or fully make 3 dinner recipes in just 60 to 90 minutes. I knew it was important to create plans that would actually work for a busy lifestyle. I’ve tried plans in the past that take 2.5 to 3 hours each week, and they just didn’t fit into my life. These plans don’t take long (60 to 90 minutes at a brisk pace) and they set you up with a few hearty meals each week!
Menus To Get Your Glow On
I also share my tried-and-true menus for special occasions or themed nights, such as Girls’ Night, Mother’s Day, Game Night, The Oh She Glows Cookbook Club Night, and more. If you have ever struggled with how to combine recipes for special meals, I really hope this will give you the inspo you need to simplify your planning. Don’t forget to check out our bonus bundle below as it includes 4 designed printable menus which correspond to menus found in the book!
Helpful Recipe Lists
My Helpful Recipe Lists index at the back of the book provides at-a-glance searching of recipes by allergy label or preference, so you can find all the gluten-free recipes grouped together in one spot, or all the kid-friendly, freezer-friendly, nut-free, one pot, and on the glow recipes.
My Pantry Staples, Kitchen Tools and Appliances
I’ve included a condensed list of the essential pantry items I keep on hand along with my favourite tools and appliances. If I have a preferred brand, I share those names with you, so you know exactly what I use in my own kitchen.
The Oh She Glows for Dinner Bonus Bundle is here!
The response to my pre-order bonus bundles for my previous two cookbooks was so enthusiastic, I knew I had to raise the bar and add in some exciting and unique new bonus features. This Oh She Glows for Dinner Bonus Bundle is definitely my favourite, most cheerful and creative pre-order bundle yet. All the *heart eye* emojis for this one. I had so much fun collaborating with local artist, Kayla Whitney, to create an adorable, custom Oh She Glows “Glow” downloadable art print for you to print and hang on your walls! This is my very first custom Oh She Glows print and it looks so bright and cheery on the wall. If you end up hanging the print in your house, we’d LOVE to see it! Simply tag it with #ohsheglowsfordinner on social media.
In addition to the “Glow” art print, you’ll receive 4 artfully designed Oh She Glows for Dinner menus to download and adorn your dinner table on special occasions. Super-handy Glow Getter Meal Plan printables from the new book will make prepping the plans even easier when your book arrives. It’s so convenient to print the meal plans and place them on your counter so you can cross things off as you work through the plan. Lastly, I couldn’t make you wait until October to get cooking, so I’ve included 4 advance recipes in this bundle—a few of my summer-friendly ones that we’ve been enjoying during this hot season!
If you pre-order Oh She Glows for Dinner, keep your receipt handy and follow this link to get your free bonus bundle PDF!
Pre-order now at the following retailers:
Amazon.ca
Amazon.com
Indigo.ca
Barnes & Noble
Barnes & Noble (signed copy)
The Book Depository
Books-A-Million
Apple Books
Amazon.co.uk
Please note: We earn a small commission if you purchase an item through our affiliate links above. Thank you so much for your support!
I can’t wait to hear what you think!!
With love and gratitude,
Angela xo
Comments (0) | function fbs_click() {u=location.href;t=document.title;window.open('//www.facebook.com/sharer.php?u='+encodeURIComponent(u)+'&t='+encodeURIComponent(t),'sharer','toolbar=0,status=0,width=626,height=436'); return false;}Share on Facebook | Tweet | Pin It | Snapchat |
© copyright 2020 Oh She Glows. All Rights Reserved.
0 notes
Text
Read More Cozy At Home Spicy Any-Veggie Soup
The following post Cozy At Home Spicy Any-Veggie Soup is republished from Oh She Glows by Angela (Oh She Glows)
Hi everyone! It has been so hard to find the right words for this post as my heart is breaking for the world right now. I hope you are all staying safe and doing well. How are you doing? I’m wishing you all love and strength to get through whatever challenges may be coming your way during this pandemic. We’re about to start our 7th week of “sheltering at home” and are all doing well & taking things one day at a time.
A gift from my heart
We’ve been trying to do our part by helping the community in various ways, but I also want to do a little something personal for some of my blog readers who are working on the frontlines and in essential services during this pandemic. This idea is a small way for me to connect with you and say thank you for all that you’re doing! So that said, I’d like to mail a signed and personalized copy of my brand new cookbook (my very first hardcover….eek!), along with an Oh She Glows Recipe App download, to 15 frontline and essential workers located in Canada or the US. These gifts will be sent out as soon as my book launches early this fall. Side note: I almost nixed this idea because I worried there would be hard feelings if I couldn’t send one to everyone who reaches out (I will likely have a lot more than 15 emails), but I hope you’ll understand that even though I can’t send you all one, I’d still like to do this to bring a smile to some of your faces during this difficult time. (And I’ll be doing more cookbook giveaways for the entire OSG community in the late summer and fall, too, so there will be other opportunities coming up.) You can nominate yourself or someone you know. Please send a brief email along with your city, and province or state (or your nominee’s story and location) to [email protected] by May 1, 2020. We’ll select 15 frontline and essential heroes and I will cover all costs of shipping, the book, etc. Due to the volume of emails we anticipate receiving, we’ll only be able to reply to those who are selected, but I want to say a huge thank you in advance for sharing your story with me and to all of you out there who are making sacrifices for your communities every day.
A little about this soup
Today, I’m sharing a versatile, nutrient-packed, and pantry-friendly soup that I’ve been making for the past several weeks. I can’t tell you how much of a go-to recipe this has been while trying to juggle work deadlines and refereeing (oops, I mean parenting) and homeschooling. You can use virtually any veggies you have on hand as long as it totals about 8 cups (be sure to see the Tips in the recipe below for ideas). I’ve created both Instant Pot and stovetop versions for you as well. I love that I can throw everything into my Instant Pot, turn it on, and walk away! And the stovetop version is almost as simple…the only difference is that you’ll need to stir it a few times during cooking. I’m whipping this up twice weekly until the warm weather sets in. I hope it brings you some comfort during these trying days. I’d love to hear which veggie combos you use…my favourite combo so far is: broccoli, carrots, butternut squash, frozen green beans, and sliced cremini mushrooms. A nutrient powerhouse! I’m not joking when I say that I’m eating this daily for lunch…it helps balance out all the baked goods that I’ve been stuffing in my face…lol.
PS – I’ll be sure to share a lot more details about the new book (as well as the big cover reveal!) soon. If you haven’t already, be sure to sign up for our newsletter, as we’ll be relaunching it this spring and revealing the cover and details there first.
Sending you all love, good health wishes, and big virtual hugs,
Angela xoxo
Cozy At Home Spicy Any-Veggie Soup
Vegan, gluten-free, grain-free, nut-free, refined sugar-free, soy-free
This spicy, bursting-with-flavour soup can be made with whatever veggies you have lurking in the crisper and pantry. My favourite combination of veggies is broccoli (rich in immune-boosting vitamin C), butternut squash, carrots, and frozen green beans, and I’ve detailed the amounts I use in my recipe below. You can use any veggies you love as long as it totals 8 cups of chopped veggies (see my Tip below for ideas!). I’ve also provided two different cooking methods: a hands-free Instant Pot method and a traditional (but still very easy) stovetop method. The beauty of this soup is that it’s so simple to make—we simply add the ingredients to the pot and let it cook away! The soup’s spicy flavour comes from using a generous amount of red pepper flakes. I like 2 teaspoons for a moderate, zippy heat level, but if you aren’t a fan of a lot of heat, start with 1 teaspoon and go from there. If you want to use my Instant Pot method, you can find the directions at the bottom of the Tips section. This recipe is adapted from my 8-Minute Pantry Dal.
Yield
8 cups (2 L)
Prep time
15 Minutes
Cook time
25 Minutes
Total time
40 Minutes
Ingredients:
1 tablespoon (15 mL) coconut oil or olive oil
2 1/2 cups (625 mL) water
1 (14-ounce/398 mL) can light coconut milk
1 (14-ounce/398 mL) can fire-roasted diced tomatoes*
3 cups (190 g) broccoli florets (1 1/2-inch florets)**
2 cups (270 g) peeled, seeded, and chopped butternut squash (1/2-inch cubes)
1 1/2 cups (195 g) chopped peeled carrots (1/2-inch thick coins)
1 1/2 cups (160 g) frozen cut green beans***
2 teaspoons red pepper flakes, or to taste****
1 teaspoon fine sea salt, or to taste
1 teaspoon garlic powder
1 cup (170 g) uncooked red lentils
2 tablespoons (30 mL) apple cider vinegar, or to taste
Herbamare, for garnish (optional)
Directions:
Stovetop method: To a large pot, add the oil, water, coconut milk, diced tomatoes (with juices), broccoli, butternut squash, carrots, frozen green beans, red pepper flakes, salt (starting with 3/4 teaspoon), garlic powder, and red lentils. Stir to combine.
Set the heat to high, cover with a tight-fitting lid, and bring the mixture to a low boil. Once it comes to a boil, remove the lid and reduce the heat to medium. Stir again, scraping off any lentils stuck to the bottom of the pot.
Simmer, covered, over medium heat for 15 to 20 minutes, stirring occasionally, until the lentils are soft and the veggies are just fork tender. The veggies should have a touch of resistance when pierced with a fork. The cook time will vary based on the type of veggies you use.
After cooking, remove the lid and stir in the apple cider vinegar, starting with one tablespoon and adding from there, to taste (we love 2 tablespoons for a lot of brightness). Sometimes, there may be a slight separation in the soup after adding the vinegar, depending on the brand of coconut milk used. This is nothing to worry about. Season with more salt, if desired (I add another 1/4 teaspoon of fine sea salt, plus a bit of Herbamare). I also enjoy adding a bit more apple cider vinegar to my individual serving because I adore its tanginess in this soup. Serve and enjoy. Refrigerate leftovers in an airtight container for up to 4 to 5 days.
Tips:
* I love fire-roasted diced canned tomatoes in this soup, but feel free to use regular canned diced tomatoes if that’s what you have.
** You can use practically any veggies you have on hand (most veggies should work, however, I probably wouldn’t try beets or eggplant, but maybe that’s just me). Veggies to try out: broccoli, cauliflower, bell peppers, carrots, sweet potatoes, yellow or red potatoes, button mushrooms, squash, sautéed onions/garlic/celery, thickly sliced zucchini (with skin), kale, frozen peas, etc. Just make sure the chopped veggies total 8 cups. If using onion, celery, or garlic, be sure to sauté them in the oil over medium heat for about 5 minutes, until softened, before adding the remaining ingredients. I have not tested any frozen veggies besides frozen green beans, so I can't vouch for other ones working.
*** If using French-cut frozen green beans (the thin variety), add them during the last 5 minutes of cooking to prevent them from softening too much.
**** 2 teaspoons of red chili flakes results in a zippy, moderate level of heat (my fave way to make this soup!). If serving to spice-shy folks, start with 1 teaspoon (for a mild soup) and add more after cooking, if desired.
INSTANT POT METHOD:
1.To a 6-Quart (or larger) Instant Pot, add all the ingredients, except the red lentils and apple cider vinegar. Stir until combined.
2. Now, pour the red lentils evenly overtop the mixture and gently press them into the liquid with your hands or a spoon (do not stir the lentils into the mixture as this can result in a burn notice in some machines).
3. Secure the lid in the lock position and check that the Steam Release Handle is pointing to the “Sealing” position.
4. Press the “Pressure Cook” button (or “Manual”, on some machines) and set the cook time to 1 minute on high pressure. After a few seconds you’ll hear a couple beeps and the screen will say “on”. The cooking process has begun! (Pro tip: it will take about 25 minutes for the machine to come to pressure before the 1 minute timer is triggered.)
5. You’ll hear a few beeps when the 1 minute timer is up. Immediately do a “Quick Pressure Release” to avoid overcooking the soup (simply shift the Steam Release Handle to the “Venting” position to release the pressure). Once all of the pressure has been released, the float valve will sink and you won’t hear steam anymore.
6. Carefully open the lid. My Instant Pot defaults to the “keep warm” setting, so I cancel it and turn the machine off to avoid over-cooking the veggies. Stir in the apple cider vinegar (starting with 1 tablespoon and adding more from there, to taste...we love 2 tablespoons for a nice zing). Sometimes, there may be a very slight coconut milk separation in the soup after adding the vinegar. This is natural and nothing to worry about. Season each bowl with a sprinkle of salt or Herbamare, if desired, and enjoy!
Comments (0) | function fbs_click() {u=location.href;t=document.title;window.open('//www.facebook.com/sharer.php?u='+encodeURIComponent(u)+'&t='+encodeURIComponent(t),'sharer','toolbar=0,status=0,width=626,height=436'); return false;}Share on Facebook | Tweet | Pin It | Snapchat |
© copyright 2020 Oh She Glows. All Rights Reserved.
0 notes
Text
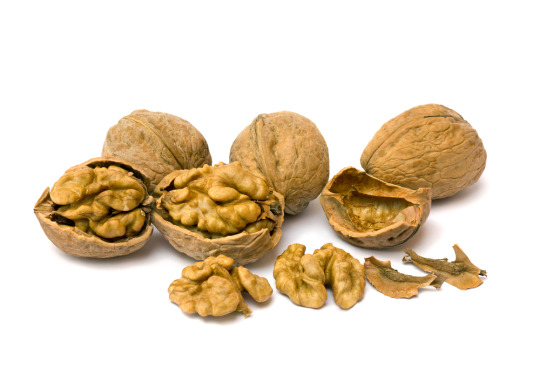
Tách màng hạt óc chó như thế nào? Có nên tách màng hạt óc chó không?
Dẫu biết rằng việc tách màng hạt óc chó là không bắt buộc (trừ trường hợp hạt óc chó bị hôi dầu hoặc ẩm mốc) nhưng nhiều người vẫn thắc mắc rằng làm thế nào để tách được màng hạt óc chó nhanh và dễ dàng nhất?
1. Cách tách màng hạt óc chó
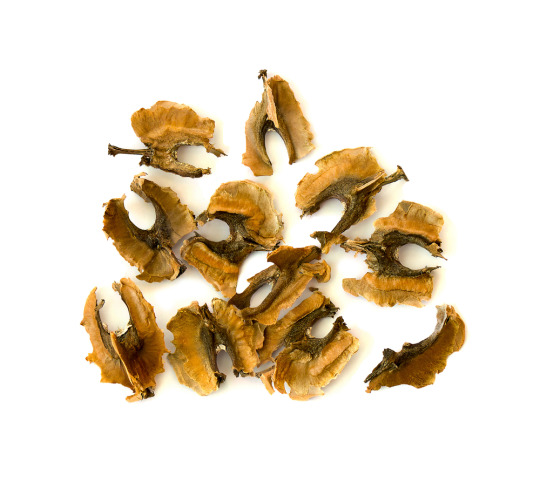
Xác định màng óc chó
- Sau khi tách phần vỏ cứng bên ngoài, bạn sẽ thấy một lớp vỏ lụa bọc quanh hạt óc chó (có hình dạng giống như một bộ óc với kích thước nhỏ). Nếu nhìn rõ hơn, bạn sẽ thấy các đường vân đan xen nhau trên lớp màng này giống như các mạch máu đang chạy xung quanh bộ não vậy. Khá thú vị đúng không?
- Lớp màng này có vị hơi đắng và hơi chát nhưng nếu loại bỏ lớp màng này đi cũng đồng nghĩa là bạn đang đánh mất hương vị đặc trưng của hạt óc chó
>>>>>> Hạt óc chó có tốt không? Đọc thêm tại đây https://tuikhoeconban.com/qua-oc-cho/
Hướng dẫn tách màng óc chó
Dưới đây chúng tôi sẽ giới thiệu cho bạn 2 cách để tách được lớp vỏ lụa (lớp màng) của hạt óc chó:
Cách 1:
- Thả hết những hạt óc chó đã được tách vỏ cứng bên ngoài vào một chậu nước lạnh. Ngâm trong nước lạnh khoảng 30-50p để giúp lớp màng dễ bong hơn.
- Sau khoảng thời gian trên, bạn vớt tất cả những hạt óc chó đã ngâm và tiến hành tách vỏ lụa. Sau khi ngâm, lớp màng sẽ rất mềm, dai và dễ bong hơn vì thế bạn sẽ không phải mất nhiều công sức để làm việc này.
- Tiến hành rang lại những hạt óc chó đã được tách màng để mang lại độ giòn và thơm cho hạt.
Kết quả: Màng sẽ tách được khỏi hạt dễ dàng và không làm mất đi chất dinh dưỡng.
Cách 2:
Đây là cách cực nhanh và siêu dễ dàng. Chi cần rang sơ hạt khoảng 2-3p sau đó đợi hạt nguội, làm ướt tay và tiến hành bóc. Với những bước này, bạn có thể tách lớp vỏ một cách dễ dàng.
>>>>>>>> Xem thêm: Sữa hạt óc chó – Đâu quá khó!!!!
2. Lý do vì sao không nên tách màng hạt óc chó
Đối với những người đã từng mua hạt óc chó bóc sẵn vỏ cứng bên ngoài được đựng trong túi hút chân không, chắc chắn họ cũng biết rằng chúng chưa từng được bóc qua lớp màng bên ngoài. Điều này chắc chắn là có lý do của nó. Một vài lý do vì sao không nên loại bỏ đi lớp màng:
- Hương vị thơm ngon, béo ngậy của hạt óc chó sẽ bị mất đi nếu như bạn bóc đi lớp màng này.
- Lớp màng có đặc tính chữa bệnh và được sử dụng trong y học dân gian với trường hợp bệnh lý về khớp hoặc điều trị các vấn đề về tuyến giáp và các bệnh của phụ nữ.
- Màng óc chó rất cần thiết cho các hoạt động bình thường của cơ thể người. Các loại thuốc sắc khác nhau được làm từ màng óc chó có th��� giúp ích trong trường hợp viêm kết mạc hoặc viêm đại tràng.
Tui Khỏe Còn Bạn đã giới thiệu cho các bạn 2 cách để tách được lớp màng bên ngoài hạt óc chó. Mọi thắc mắc về các hướng dẫn này, bạn có thể để lại bình luận ở phần bên dưới đây để được chúng tôi giải đáp nhanh nhất nhé.
0 notes
Text
Read More Obsession-Worthy Peanut Butter Cookie Ice Cream
The following post Obsession-Worthy Peanut Butter Cookie Ice Cream is republished from Oh She Glows by Angela (Oh She Glows)
Many years ago, I was reading a blog post by a blogger I’d been following for a while. She wrote about a recent struggle with depression and her honest words made such an impact on me. I remember thinking how brave it was for her to tell her story. While I hated that she was going through it, I also recall feeling comfort in her words because it was another reminder that even those we admire and put on a pedestal are human. I was just like…Wow, it must’ve taken so much for her to share that. At the time, I was early on in my blogging journey, and I told myself that I would always try to share my struggles, just like she did.
Last week, I gave a speech at the University of Guelph at their Awards of Excellence Gala (you can see some photos in my saved story on Instagram!). In my speech, I shared how I’ve struggled with my mental health, like anxiety, since I was very young and how it’s felt debilitating at certain points in my life. I spoke about how various personal challenges have coincided with a career that’s made me face them head on. The day before the event, I almost decided to scrap my speech and write something that was easier to talk about, but I said screw it and decided to share it. It was my story! Allowing myself to feel shame surrounding my story only gives it power.
After my speech, a man with a warm smile came up to me, crouched down next to my chair, and thanked me for my speech. He talked about a time in his life when he struggled with his mental health, and we both had tears in our eyes by the end of our conversation. Another man came up later to tell me about his young relative’s struggles. This night was yet another reminder of the power of vulnerability and it left such an impact on me!
It’s been a bit of a strange year for me (one that I can’t believe we’re already half-way through!). I went through an emotional time for the first few months of the year and found myself in a mild depression. I lost joy and passion for so many things. At certain points, I couldn’t even bring myself to get back to messages from friends and family. It makes me emotional just writing about it now because the difficult emotions of that time come back so easily. After suffering in silence for 2 to 3 months, I finally opened up to my friends and family about it and got help. I’ve been in a much better place since the spring. I wanted to be honest about it and to let you know what was going on at the time, but I didn’t feel strong enough to talk about it when I was in the thick of it.
There’s also been another reason for my absence and this is something that’s much easier to tell you about! I have a third cookbook in the works and I’ve been working on it for about a year and a half now! Okay, okay, I did let this news “slip” in the blog comments a couple times and also in my Instagram DM’s, too, so you may already know. ;) I’ve held off announcing it here because during certain periods, well, I wasn’t even sure if it was going to come to life. When I fell into my depression at the beginning of the year, I lost passion for almost everything. Creativity and motivation aren’t things that can be forced so I just went with the flow and tried to trust that I’d feel myself again.
After working through some things and starting to feel better, it was as if a lightbulb flicked on in my head. I came to life. I was suddenly thrilled at the prospect of creating again. I could not get to work fast enough. And since late winter, I picked up where I left off before January and dove into the work that I love so much. Shortly after, Eric, Nicole, and I started working with our recipe testing group (about 40 incredible testers strong!), and things have been going better than I could’ve imagined. The recipes are so delicious…my testers are telling me it’s my best collection of recipes to date. I’m so proud of it and I’m nearly finished, only about 1 month away from handing in my manuscript. Once my manuscript is in, I’m going to be diving into the food photography, which I’ll be shooting for this 3rd book. I’m a bit nervous at the prospect of shooting 100 photos in 2 months time, but I’ll get there, one day at a time! It will be fun to shift from recipe creation and writing to something so artistic like photography.
The cookbook is going to focus on something you all have been asking for more and more of over the years, and that’s more dinner and lunch recipes! It’s mostly going to focus on savory recipes, with a dessert chapter, of course (how could I not include a dessert chapter?). It’s going to feature food you’ll want to make for weeknight dinners, weekend meals, portable work/school lunches, and special holidays and occasions. Gah. There are so many gems. It’s slated to be out fall 2020, so not too long to wait (at least in the publishing world, this feels SO soon)!! If there’s anything you’d love to see in the book, please leave a comment below and let me know!!
Thanks for listening and for your support through the ups and downs of life. I’m so grateful you’re here as I’ve felt like a big ‘ol failure on the blogging front this year. It’s time to shake the guilt and move onward and upward. And if you’re reading this and struggling too, I’m sending you all the love in the world and hope you can find a support system!
This is my first ever vegan ice cream recipe on the blog (can you believe it?!), and oh dear me, it’s one we can’t stop eating. I’ve been in a bit of a vegan ice cream bender since I bought this Cuisinart ice cream machine in the spring. It’s so much easier to use than I thought! Almost too easy.
Happy Canada Day long weekend to my Canadian Friends! And happy 4th of July to my American friends! Have a safe, happy, and delicious weekend, everyone.
Obsession-Worthy Peanut Butter Cookie Ice Cream
Vegan, gluten-free, oil-free
This is my favourite kind of summer indulgence! My reader-favourite Flourless Peanut Butter Cookies meet my dreamy homemade peanut butter and coconut milk ice cream in this cooling summer treat. Chewy coconut, snappy chocolate chips, and tender bites of soft peanut butter cookies blend perfectly with a creamy vanilla and peanut butter vegan ice cream. If I’d known how simple it was to make my own vegan ice cream (only 5 ingredients!), I would’ve invested in an ice cream machine long ago. Well, I’m making up for lost time now! The peanut butter ice cream is inspired by Cookie + Kate.
Yield
8 (1/2-cup) servings
Prep time
10 Minutes
Cook time
12 Minutes
Chill time
overnight (ice cream bowl) + 30 minutes
Total time
22 Minutes
Ingredients:
1 batch Flourless Peanut Butter Cookies, divided
2 (14-ounce/398 mL) cans full-fat coconut milk*
1/2 cup (105 g) natural cane sugar
3 tablespoons (45 mL) smooth natural peanut butter
2 teaspoons (10 mL) pure vanilla extract
1/4 + 1/8 teaspoon fine sea salt, or to taste
Directions:
Chill the ice cream bowl in the freezer overnight, or for at least 12 hours. This step is very important to ensure the ice cream thickens properly.
Prepare the Flourless Peanut Butter Cookies. After baking, cool the cookies for 10 to 15 minutes, then transfer each one to a plate. Place in the freezer on a flat surface for a minimum of 25 minutes. As soon as you transfer the cookies to the freezer, get started on the ice cream.
Add the ice cream ingredients (entire cans of coconut milk, sugar, peanut butter, vanilla, and salt) to a blender and blend for about 8 to 10 seconds, until smooth (be sure not to blend longer than 10 seconds, as it may effect the final texture of your ice cream).
Place the frozen ice cream bowl into the ice cream maker, insert the churning arm, cover with the lid, and turn on the machine (if the instructions for your ice cream maker are different, please follow the directions that came with your machine). Slowly pour the mixture into the bowl as it churns. Churn for about 22 minutes, until the mixture has thickened into a very thin, soft-serve texture.
Once the cookies have been in the freezer for 25 minutes, chop 6 of the cookies into small, almond-sized chunks. Reserve the remaining 7 cookies, at room temperature, for later.
After 22 minutes of churning, slowly add the chopped cookies, a handful at a time, to the mixture while the machine is still churning. I like to use a fork to gently push the chopped cookies into the ice cream and help it along. Churn another 5 to 8 minutes, until the ice cream has thickened a bit more. It will have a thick, soft-serve texture when ready. There will be some hardened ice cream along the inside of the bowl...I like to think of this as the chef’s extra helping (wink, wink)! Serve immediately, or for a firmer texture, transfer the ice cream to a loaf pan or airtight container and spread out smooth. At this stage, I like to crumble an extra cookie all over the top (and gently push it into the ice cream) to make it look extra-enticing, but this is optional. Cover and freeze for 2 hours for a more traditional ice cream firmness.
To serve, scoop into bowls or ice cream cones. Or, if you're feeling wild, make ice cream sandwiches with the leftover cookies...oh yea!!
Storage tip: Leftovers can be stored in an airtight container in the freezer for 3 to 4 weeks. Be sure to cover the ice cream with a piece of wrap to prevent freezer burn. To soften, let the container rest on the counter for 20 to 30 minutes before scooping.
Tips:
* The cans of coconut milk do not need to be chilled beforehand.
Always follow the directions that come with your ice cream maker as there may be slight variations. My churning time is an estimate only; you may find you need more or less time with your machine! Watch closely during the last few minutes of churning. It it still looks too soft, feel free to let it churn a bit longer than the range I provide.
This is the ice cream maker that I use and love. Pro tip: This machine is a bit noisy once the mixture starts to thicken, so I like to keep the machine in a nearby room with the door closed while it churns (don't worry, my machine doesn't seem too offended and still makes great ice cream!).
No ice cream maker? No problem! The blended liquid can be poured into popsicle molds for creamy frozen popsicle treats. Simply add the blended liquid to each popsicle mold, leaving at least an inch of room at the top. Now, carefully add some cookie chunks to each, pushing them down slowly into the liquid. If needed, add a bit more liquid to completely fill each mold. Secure the tops and freeze until solid. Run the popsicles under hot water to loosen them from the molds.
Want to torture a person? Give them an ice cream cone on a hot day, and tell them they can’t eat it until you’ve snapped a good pic. bahaha.
Comments (0) | function fbs_click() {u=location.href;t=document.title;window.open('//www.facebook.com/sharer.php?u='+encodeURIComponent(u)+'&t='+encodeURIComponent(t),'sharer','toolbar=0,status=0,width=626,height=436'); return false;}Share on Facebook | Tweet | Pin It | Snapchat |
© copyright 2019 Oh She Glows. All Rights Reserved.
0 notes
Text
Read More Flourless Peanut Butter Cookies
The following post Flourless Peanut Butter Cookies is republished from Oh She Glows by Angela (Oh She Glows)


Flourless Peanut Butter Cookies
Vegan, gluten-free, oil-free
Peanut butter, shredded coconut, and rolled oats form the base of these soft and chewy chocolate chip cookies. Brown sugar lends a light caramel flavour which pairs so well with the peanut butter and sea salt. They're completely flourless, in addition to being vegan and gluten-free, but no one will be the wiser. You must try these in my Obsession-Worthy Peanut Butter Cookie Ice Cream for a decadent summer treat! This recipe is from Oh She Glows Every Day (page 213).
Yield
13 cookies
Prep time
10 Minutes
Cook time
13 Minutes
Total time
23 Minutes
Ingredients:
1 tablespoon (5 g) ground flax*
3 tablespoons (45 mL) water
1/2 cup (53 g) unsweetened shredded coconut
1/2 cup (52 g) gluten-free rolled oats
1/2 cup (68 g) packed brown sugar
1 teaspoon baking powder
1/2 teaspoon fine sea salt (reduce salt if using salted peanut butter)
1/4 cup (49 g) mini non-dairy chocolate chips**
1/2 cup (125 mL) natural smooth peanut butter***
1 teaspoon (5 mL) pure vanilla extract
2 tablespoons (30 mL) pure maple syrup
Directions:
Preheat the oven to 350°F (180°C), and line a large baking sheet with parchment paper.
Add the ground flax and water to a medium bowl, and whisk until combined. Set aside.
To a large bowl, add the coconut, rolled oats, brown sugar, baking powder, salt, and chocolate chips. Stir to combine.
To the same bowl as the flax mixture, add the peanut butter, vanilla, and maple syrup. Stir until smooth. The mixture will be very thick.
Using a spatula (this helps to scoop up every last bit), scoop the wet mixture on top of the dry ingredients, and stir until thoroughly combined. The batter will be very dry at first, but this is normal! You'll need to put some elbow grease into stirring. I like to knead the dough with my hands to make it all come together. (You can also use electric beaters, but I prefer to get in there with my hands and knead until no dry patches remain.) If for some reason your dough is still too dry to shape into balls, add a teaspoon of water and mix again.
Lightly wet your hands (shaking off excess water) and form about 13 balls, just smaller than golf balls. Stop and rinse off sticky hands as needed. Place each ball onto the prepared baking sheet about 2 to 3 inches apart. Gently press down on each ball to flatten into a 1-cm (just less than 1/2-inch) thick disc. If there are any leftover chocolate chips in the bottom of the bowl, scoop them up and push them into the tops of the cookies.
Bake for 12 to 14 minutes. The cookies tend to only spread out a little. They'll be delicate coming out of the oven, but they will firm up as they cool. The bottoms will be golden. Allow the cookies to cool on the baking sheet for 10 minutes before carefully transferring to a cooling rack until completely cooled. Once cooled, the cookies will remain soft and chewy. For a firmer texture, transfer the cookies to the freezer (my favourite way to enjoy them!). Store leftovers in an airtight container or freezer bag in the freezer for up to 1 month.
Tips:
* If you have a flax allergy you can swap 1 tablespoon ground flax for 1/2 tablespoon ground chia seed. The cookies will turn out a bit thicker, but it works in a pinch.
** I use Enjoy Life Mini Chocolate Chips which are vegan.
*** Be sure to use 100% natural peanut butter in this recipe (you should only see peanuts on the ingredient label), as some testers have reported that the recipe doesn't work when using peanut butter that contains added oils or sugar. Avoid using thick or dry peanut butter as the cookies won’t spread out that much. If you prefer homemade peanut butter, you can easily make your own peanut butter if you have a heavy duty food processor. Simply process two cups of roasted peanuts for 5 to 10 minutes until smooth, scraping down the bowl as necessary. This will make just under 1 cup of peanut butter.
photo credit: Ashley McLaughlin
Comments (2) | function fbs_click() {u=location.href;t=document.title;window.open('//www.facebook.com/sharer.php?u='+encodeURIComponent(u)+'&t='+encodeURIComponent(t),'sharer','toolbar=0,status=0,width=626,height=436'); return false;}Share on Facebook | Tweet | Pin It | Snapchat |
© copyright 2019 Oh She Glows. All Rights Reserved.
0 notes
Text
Giải nhiệt mùa hè bằng sinh tố đậu xanh rau má thanh mát, ngọt ngào
Sự hòa quyện giữa vị thanh mát của rau má và ngọt ngào, bùi bùi của đậu xanh tạo thành một ly sinh tố đậu xanh rau má đậm đà, bổ dưỡng cho cả nhà. Công thức dưới đây vừa đơn giản vừa dê làm không chỉ giúp giải độc, làm đẹp da mà nó còn là thức uống thơm ngon, mát lạnh cho ngày hè nóng bức nữa đó. Cùng Tui Khỏe Còn Bạn khám phá xem công thức đó là gì nhé.
Chuẩn bị nguyên liệu và vật dụng
- Rau má 100g
- Đậu xanh đã xát sạch vỏ 200g
- Dừa xiêm 1 quả, chọn quả vừa tới
- Đường, muối trắng
- Dụng cụ chế biến bao gồm: máy xay sinh tố, dụng cụ lọc
>>>>>>>>>> Xem thêm: Cách nấu chè hạt sen long nhãn mà ai ăn cũng khen
Sơ chế nguyên liệu và chế biến sinh tố đậu xanh rau má
- Chọn quả dừa ngon, chặt đầu dừa rồi đổ hết nước dừa ra một cái bát lớn, phần cùi dừa nạo để riêng ra bát khác.
- Rau má chọn phần non, loại bỏ gốc và rửa sạch. Sau đó, pha một thau nước muối loãng và ngâm rau má vừa rửa sạch vào khoảng 10 phút rồi vớt ra và để ráo nước. Để sinh tố được nhuyễn dễ dàng mà không có xơ, bạn nên băm nhỏ vừa phải. Tiếp theo là bỏ rất cả vào một chiếc máy xay sinh tố cùng với 200ml, nhấn nút và xay nhuyễn. Loại bỏ cặn bã còn lại bằng cách đổ vào dụng cụ lọc một vài lần, sau đó loại bỏ bã.
- Đậu xanh ngâm với nước ấm 70 độ khoảng 2 tiếng. Sau đó vớt ra để ráo rồi đem bỏ vào nồi luộc hoặc hấp chín. Cho đậu xanh vào máy xay sinh tố và xay cực mịn, thêm nước dừa, nước rau má đã lọc trước đó và một chút đường. Nhấn nút xay tiếp cho tới khi nó tạo thành hỗn hơp sinh tố thật mịn. Nêm thử để biết nhạt hay ngọt và để nêm nếm sao cho phù hợp với khẩu vị của bạn.
- Uống luôn hoặc đổ vào bình thủy tinh và bảo quản trong tủ lạnh trong khoảng một vài ngày.
Cách trang trí
Để tăng thẩm mỹ cho món sinh tố đậu xanh rau má này, bạn nên rót ra một chiếc cốc thủy tinh cách điệu, thêm dừa nạo ở bên trên, thêm đá hoặc sữa đặc vào để món sinh tố này thêm ngon ngọt và béo ngậy hơn. Trong diễn biến khác, thay vì thêm đá thì chúng tôi khuyên bạn nên đặt nó trong tủ lạnh khoảng 2 tiếng rồi dùng.
Chỉ với một vài bước đơn giản, bạn đã có ngay một ly sinh tố đậu xanh rau má thơm mát, bùi bùi, ngon miệng này rồi. Thêm một vài viên đá hoặc để nhiều giờ trong tủ lạnh để giúp bạn giảm nhiệt độ trong ngày hè nóng bức nhé.
>>>>>>>> Tham khảo thêm: Ăn sáng đúng chuẩn với smoothie bowl cùng hạt dinh dưỡng
0 notes
Text
Có thể bạn chưa biết 4 thực phẩm giảm mỡ bụng siêu nhanh này
Mỡ bụng có liên quan chặt chẽ đến các bệnh nguy hiểm ở người như bệnh tiểu đường, bệnh tim và kháng insulin và những căn bệnh này có thể ảnh hưởng tới tất cả mọi người, không phân biệt tuổi tác và di truyền. Vì thế, nếu bạn muốn giải quyết vấn đề này bằng cách tiêu thụ những thực phẩm giảm mỡ bụng thì trong bài viết này Tui Khỏe Còn Bạn đã tổng hợp 4 loại thực phẩm giúp đốt cháy mỡ bụng siêu nhanh. Từ đây, bạn có thể đưa vào chế độ ăn uống của mình để tạo nên một cuộc sống khỏe mạnh, hạnh phúc nhất.
1. Quả óc chó
Hạt óc chó có nhiều chất béo không bão hòa không chỉ có lợi cho tim mà còn giúp chúng ta giảm mỡ bụng tuyệt vời. Tiêu thụ một vài hạt óc chó mỗi ngày có thể giúp kích thích giảm béo và thúc đẩy trọng lượng cơ thể khỏe mạnh. Quả óc chó cũng được biết đến với sức mạnh kiểm soát sự thèm ăn tuyệt vời nhờ sự hiện diện của axit béo omega-3, sterol thực vật và vitamin giúp ức chế cơn đói, giúp giảm cân hơn nữa.
>>>>>>>>>> Xem chi tiết lợi ích của quả óc chó tuikhoeconban.com/qua-oc-cho/
2. Quả mâm xôi
Quả mâm xôi được nạp chất xơ và polyphenol như anthocyanin và ellagitannin. Chất xơ giúp bổ sung số lượng lớn vào phân, cải thiện nhu động ruột và giúp bạn no lâu trong thời gian dài. Các chất chống oxy hóa giúp làm sạch các gốc oxy tự do có hại do đó làm giảm viêm và béo phì do viêm. Hãy thêm quả mâm xôi vào bữa sáng bằng cách xay sinh tố.
3. Dầu dừa
Dầu dừa có tác động tốt đến mức lipid trong máu và thậm chí có thể giúp giảm mỡ bụng cực tốt. Được nạp chất béo lành mạnh, dầu dừa làm giảm mức cholesterol xấu trong máu, cải thiện tiêu hóa và tăng khả năng miễn dịch tổng thể đồng thời giúp bạn no lâu. Sử dụng dầu dừa để nấu ăn. Bạn cũng có thể bôi nó lên vùng mỡ bụng để tăng hiệu quả cao hơn.
4. Hạt điều
Magiê trong hạt điều rất cần thiết để điều chỉnh quá trình chuyển hóa chất béo và carbohydrate, có thể giúp bạn giảm cân hơn nữa. Hạt điều là nguồn protein tương đối tốt, là chìa khóa để giảm cân, đặc biệt là khả năng giảm mỡ bụng rất hiệu quả. Thêm hạt điều vào trong chế độ ăn uống của bạn ngay hôm nay để có được một vóc dáng hoàn hảo như bạn đã từng mong muốn nhé.
>>>>>>>>> Xem chi tiết hạt điều tại tuikhoeconban.com/hat-dieu/
Mặc dù các loại hạt dinh dưỡng này có lượng calo cao, nhưng nếu ăn đúng lượng hàng ngày thực sự có thể giúp giảm cân. Đừng quên bổ sung các loại thực phẩm này với chế độ ăn uống lành mạnh và kết hợp thêm một số hoạt động thể chất để giảm mỡ bụng hiệu quả.
Để tìm hiểu thêm về các thực phẩm giảm mỡ bụng siêu nhanh khác, hãy truy cập vào đây https://www.facebook.com/tuikhoeconban/
___________________________
Link ẢNH: https://www.shutterstock.com/image-photo/raspberry-leaves-isolated-on-white-background-615905192?src=PYJgpIrmdNL0fNAsoYfrrQ-1-6
https://www.shutterstock.com/image-photo/cashew-nut-isolated-on-white-541201657?src=lSi2rNUHI3DKM3ksHteQjA-1-0
1 note
·
View note