
Last Seen Blogs

cavaliiers
𝒋𝒖𝒔𝒕 𝓇𝑒𝓂𝑒𝓂𝒷𝑒𝓇 𝓂𝑒
ramyeonaddict
entij

wiwwola-blog
я и я

muttsmischiefacademysblog
Mutts And Mischief

scardea-x
--flight risk
Text
WEEK 10: WRAPPING UP
3D PRINTING
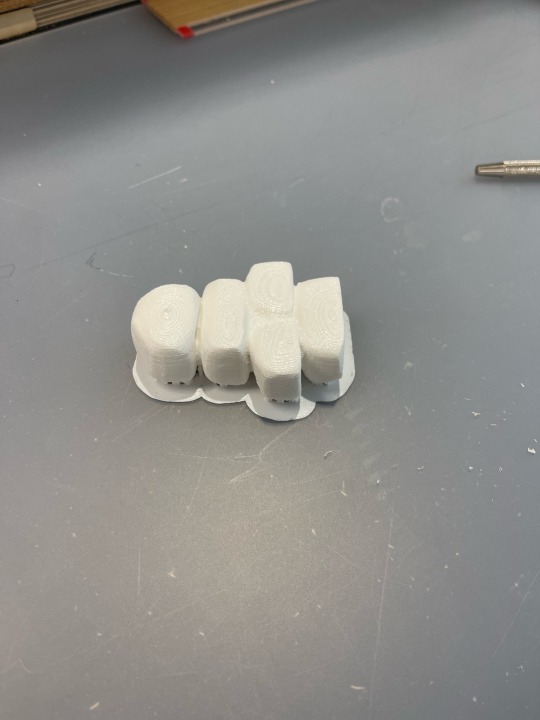
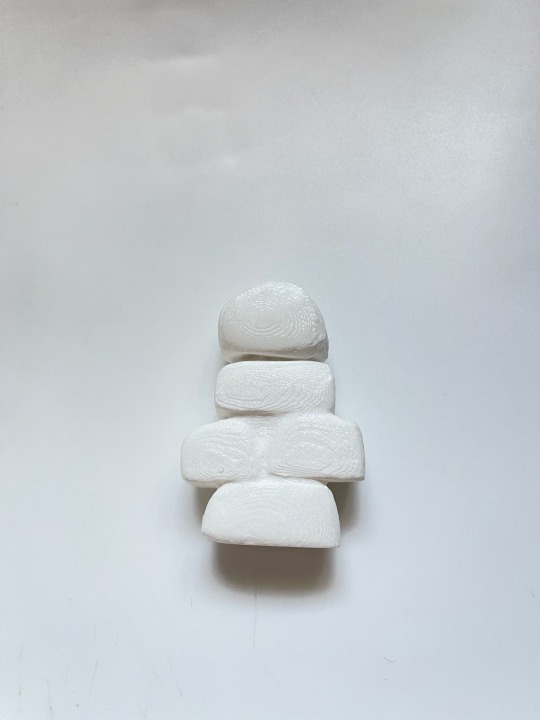
Continuing from my last post, this week after preparing the files for 3D Printing and getting it ready on cura, I decided to 3D print it. since all the difficult settings were dine with all I had to do was consult with one of the staff at the DFL to confirm that the settings were right and ready to go. some things i was nervous about was that the printing would take too long but after slicing it and making some adjustments such as sizing, infill and changing the print settings to fast which meant having 0.2mm printing instead of the 0.1mm for each layer, this will result in a rougher print but since this was only a model I concluded that this quality would suffice. Then onto the printing, it was interesting ti see the printer at work since this was my first time 3D printing it was great to see the progress at each stage and the see the interior construction was very exciting.

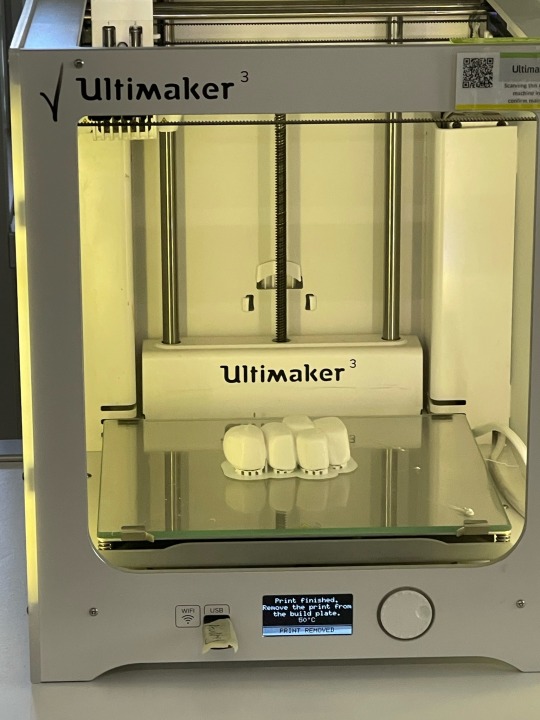
The end product was successful however since I had my bottle flat the printing filaments that touched the bed were a bit messier than the front, however after sanding the bottle it had quite an aesthetic finish and This activity has certainly sparked my interest to experiment further with 3d printing.


FINAL REFLECTIONS
This class has been one of my favourites so far, it had a great blend of theory and practical though it leaned toward the practical activities which I generally prefer that made the classes very enjoyable and the assessments felt very integrated with the things we were learning and that made it that much more immersive and it made me look forward to assessments instead of dreading it which is something fairly new to experience.
Having the class begin from teaching us basic sketching in order to built a foundation of the rest of the class really helped in understanding the importance of drawings such as engineering and orthographic drawings and made me realise how accuracy in the measurements are everything. I enjoyed the process of learning how to use the basic drawing tools before jumping into digital design.
I appreciate how this class allowed us to explore different mediums as a whole process, from taking our basic sketches to engineering drawings to 2d renders then foam models and finally be able to create 3d renders of our work and print them in 3d forms, the whole structure of this learning process made it not so overwhelming to follow along and eventually build on our skills to be well versed in designing an relaying our designs in a more professional way.
I really enjoyed how we got to learn different methods but they each complement each other as a whole process, even though at first the pen to paper orthographic drawings and perspective drawings seemed intimidating as I continue to get practice it really made me understand the components and could now easily produce drawings. along this learning curve, I appreciate the help I got from the tutors and my peers.
This class has really provided a learning environment where we can learn from each other and not be afraid to ask silly questions, the Tumblr aspect of this course was something that I was skeptical about at first when it was introduced but now have grown to love. this showed me the importance of self and peer input/ reflections to always improve on my work as it can always be better.
I believe that this course has certainly improved my skills in both analog and digital design. it made me understand that it cant just be one or the other and to be good at one we have to understand the other to fully gauge the design. Without this course I would not have been able to explore softwares such as 3Ds Max, illustrator, Rhino and others as in depth as I have as well as learning to construct physical models with the appropriate tools.
If i had to do this course all over again I would document my process much more and I would try to ask as many questions as possible.
I am honestly sad that this class is coming to an end but thankful for the experience and skills i have acquired. thank you to Gonz, Sarah and Rob for their guidance and advice along the way, they made the classes an immersive and insightful experience.
Hope to see everyone next term!!
10 notes
·
View notes
Text
WEEK 9 : PREPARING FOR 3D PRINTING
PART 1 : SCANNING THE MODEL
For this week's activity it integrates our perfume bottle foam models from studio class. we began by getting a 3d scan of the physical foam bottle. some problems that occurred at this stage were the scanner could not pick up some sections of the bottle due to lack of light thus the bottle would need to be scanned from different angles then we eventually got a 3d scan in stl file.


PART 2: IMPORTING THE FILE AND REORIENTING
I began by importing my STL file into rhino and used the Quad Remesh function to simplify the object this allows us to edit the object easier as a simpler polygon and one obstacle i faced was the laptop i was using was not strong enough to process the original STL file this step aided on that too as i was able to manipulate it easier.
I proceeded to open the file into 3DS Max to reorient the object and position it for printing since the original file put it in an awkward position and away from the planes. some difficulty i had in this area was opening the file in 3dsmax since i was not familiar with the interface.
PART 3: PREPARING IN CURA
After repositioning the model, the next step was to import it into Cura to further prepare it for 3D printing. the steps to take were to position it in such a way that it would be more stable to print to reduce risk of failure since 3D printers can be quite temperamental, i found that laying the object on the biggest side on the printing bed would be more beneficial also would also reduce the printing time since it would require less supports. i also reduced the infill of the object to 10% since that would be sufficient structure for a sample model.


This week's activity greatly sparked my interest and It was interesting to see how 3D scanning worked ad how it could eventually lead to a physical model and I hope to further explore this part of model making.
5 notes
·
View notes
Text
WEEK 8: DIGITAL MODELLING
This week's activities consisted of getting familiar with CAD, specifically 3DS Max in model making. The use of Digital model making as compared to Physical model making allows us to make adjustments and iterations of our models easier and to experiment with different textures and materials which could then be translated into physical models.
Using CAD would especially aid in observing different materials or finishes which would either wise be time consuming to make actual physical models with different materials.
Beginning this activity I was quite nervous since I had barely any prior experience in 3D modelling softwares and since I was using a Macbook this might have served as another issue in controls as the majority of tutorials used a window interface with different controls.
PART 1: BEGINNER STEPS
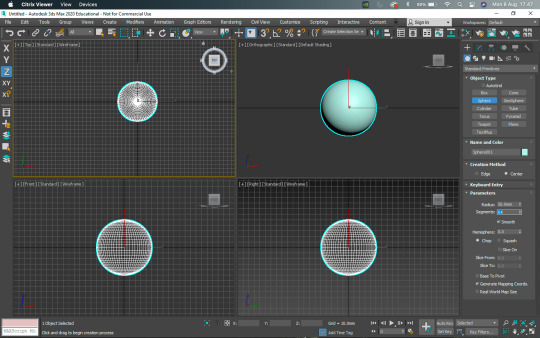
The activity began with making sure our user settings such as units and interface were as needed and to simplify it for tools we were going to be exploring. First thing we were asked to do was creating a sphere and adjusting it's dimensions to the desired size, this step was easily straight forward using the primitives tab and modifying it.
PART 2: EXPERIMENTATION
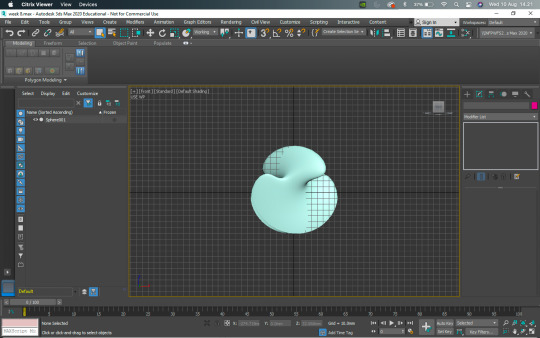
After creating the Sphere the next step was to explore the modifiers such as squeeze, stretch, bend, melt, twist, taper and skew. This portion was particularly fun as I got to discover what each modifiers did by experimenting visually and to create unique forms. i found that the option to stack and toggle the modifiers to be interesting as we can put a combination of modifier in different manners.


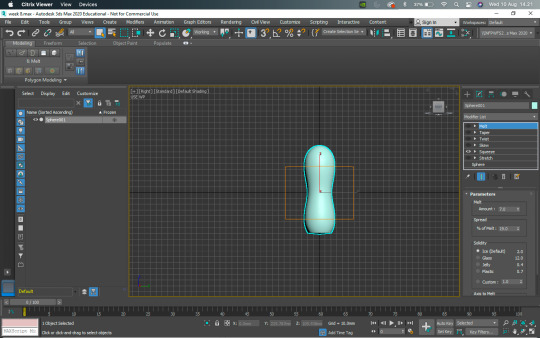
PART 3 : POLYGON MODELLING TOOLS
In this section we explored some other functions of Polygon Modelling such as Extruding, Bevelling, Chamfering, Cloning, Bridging and NURMS. These functions allowed us to create forms that can be cloned then connected via two poly surfaces then create extensions of the forms via Extruding or Bevelling then to smoothen the form via NURMS. This part of the activity was very informational on how to simplify the modelling by understanding the use of each tools, one problem I had while following the tutorial was due to the difference in some commands and interface since i was using a Macbook. Overall, enjoyed this process and found the modelling tools to open a whole new area of possibilities to attempt and explore.


PART 4: APPLICATION
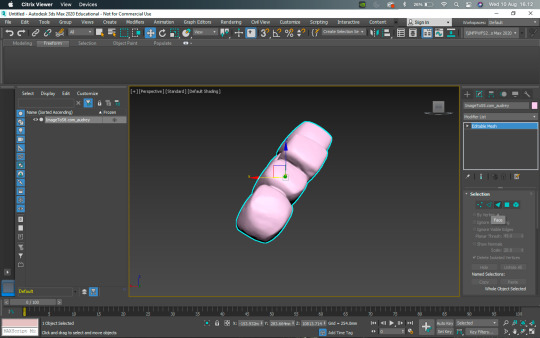
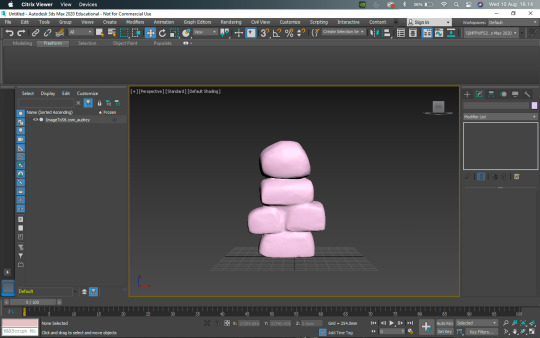
After watching the week 8 tutorial videos, I attempted to create a form which implements some of the things the tutorials showed, in on of the tutorial videos, the lathe function was also demonstrated and from this I experimented by making a mug. this function is especially helpful in creating objects that are identical all around.

Finishing these week's activities I gained more confidence in using 3DSMax and inspired me to further explore 3D modelling since this would aid in making prototypes and models for future projects.
2 notes
·
View notes
Text
WEEK 7: PHYSICAL MODEL MAKING
This week we focused on the construction of Physical Models using blue foam as a medium. this activity allowed us to understand the process of creating quick sketch model quality objects to deliver our original concepts and convey our ideas quickly, as providing a physical model aids in further understanding the form and how it would interact with the user.
PART 1: PREPARATION
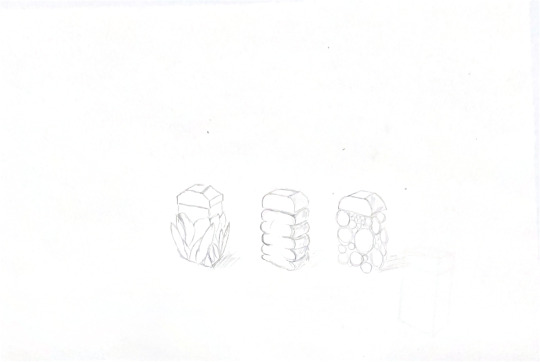
We began this activity by creating orthographic drawings of our desired bottle design with the measurements. The bottle design I decided to execute was a fairly symmetrical design with the same pattern on four sides and a smooth top and bottom. I began with creating a positive template and planned to use it for all four sides.
PART 2: EXECUTION

I began by creating 3 identical rectangular prisms with the measurements 100x60x60mm, from there I pasted the template on one face of the cuboid and began to cut out the negative shapes using a hot wire cutter this created the pattern on 2 sides and this was where the first problem occurred since the two sides of the prisms now had a textured surface, I could not paste the template on the side to create the other two faces. I Consulted rob with this issue and he suggested that I use a marking gauge to score the other faces of the shape since the design would be identical and to further carve the curves using rasps and and clean them with files. This solution made the construction of the rest of the model easier.
PART 3: FINISHING
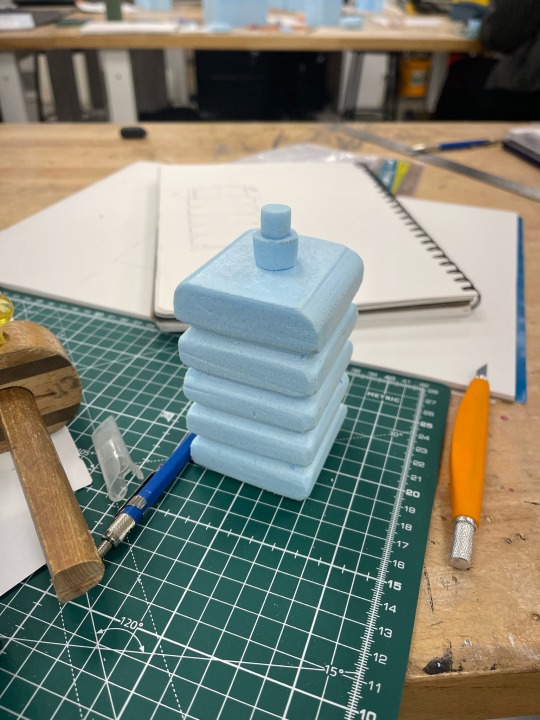
After achieving the desired grooves and textures on the sides, I began to smoothen the surfaces by sanding it down to create a cleaner look, however i did not spend too much time on this part since the concept of a sketch model was just to get an idea out then to move on to the next just to get a grasp of the physical object.
I repeated the previous steps to create another model with a different concept
The atomiser I used in this sketch model was made for the Studio 1B class and it really aided in the construction of accurate sketch modelling since we do not have to replicate each time we make a different bottle we could just move the atomiser from bottle to bottle to see what it would look like.

This week's activity helped me learn the basics of modelling using blue foam and how to use the different tools for different effects needed on the model.
6 notes
·
View notes
Text
WEEK 6: DIGITAL SKETCHES
From last week’s final three sketches it was time to refine them into digitalised versions, in contrast to last week’s activity, I really enjoyed this task.
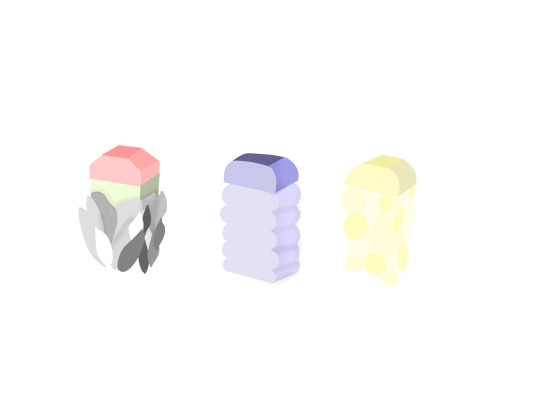
I chose to use procreate to create sketches this was a program I am familiar with and would like to say experienced in(?)
Below are the step by steps to the drawings i produced, i started by using the initial hand drawn sketches as a template then created a basic 2D version of the drawings and then proceeded to shade to create more depth. In using this application it allowed more control in the finer details and to focus on the individual elements of the object.
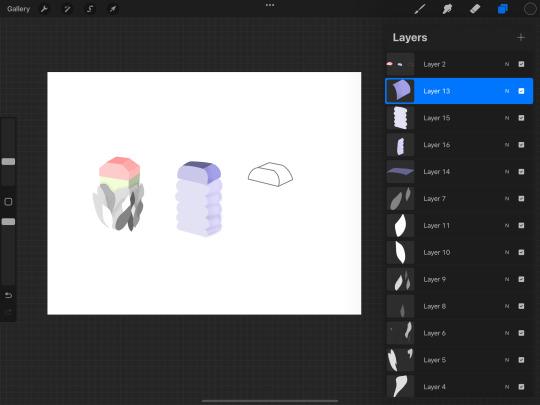

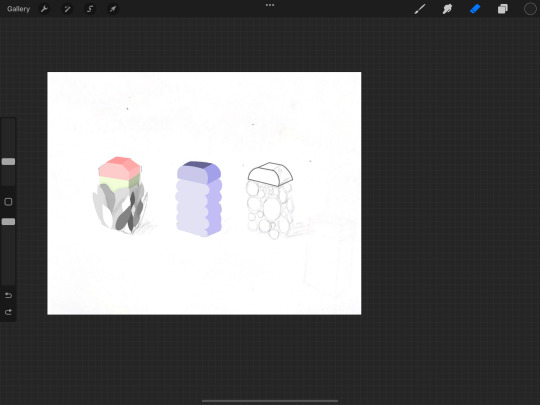
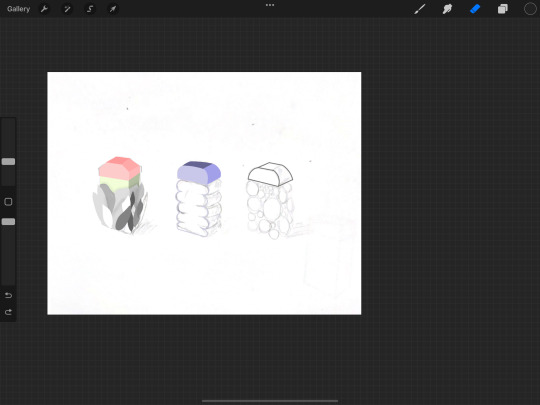
(I promise the last bottle is not SpongeBob)
The color palette i chose are those that resonates with the word joy and i chose a minimalist rendition of the object.
9 notes
·
View notes
Text
WEEK 5: Sketching- my greatest enemy
PART 1: BACK TO BASICS
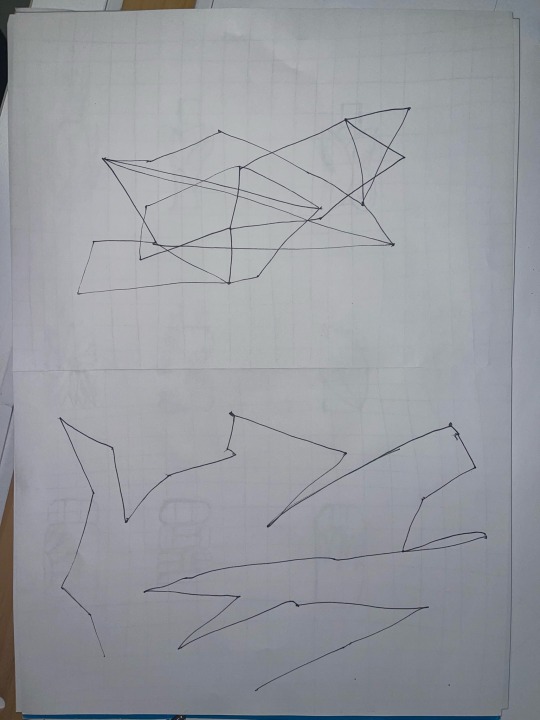
This week’s class began with a series of exercises to begin sketching. Hand drawing has always been a big struggle for me. At first these exercises seemed a little silly. Drawing lines and playing connect the dots. However after each second attempt of the activity i started to realise how this could aid in sketching. During this activity i attempted to do the first sides without looking at the suggestions such as use of shoulder or looking at points before drawing the line. Then after listening to the instructions using my full shoulder not just wrists and keeping myself relaxed. I could clearly see a difference. There were more consistencies and straighter lines. Which has always been an issue for myself.
Care to guess which was the first and second attempts?

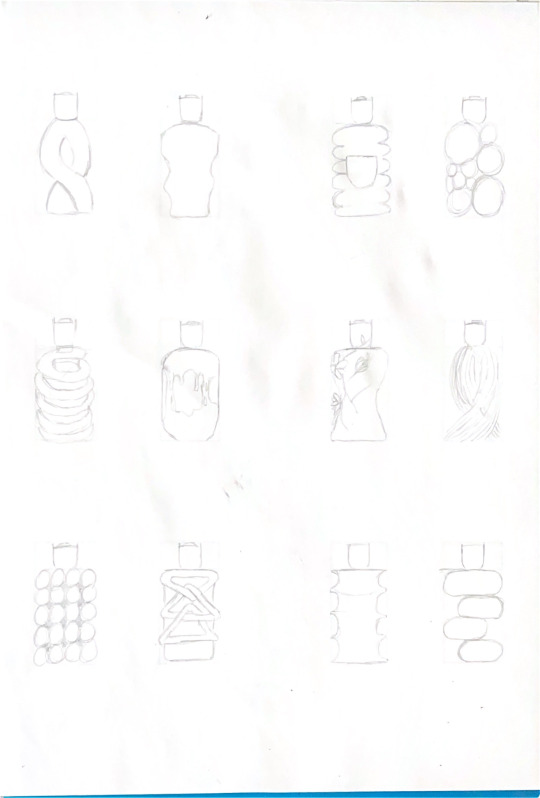
PART 2: THUMBNAILS NOT CLICKBAITS
This section was pretty straight forward. Starting with the template.
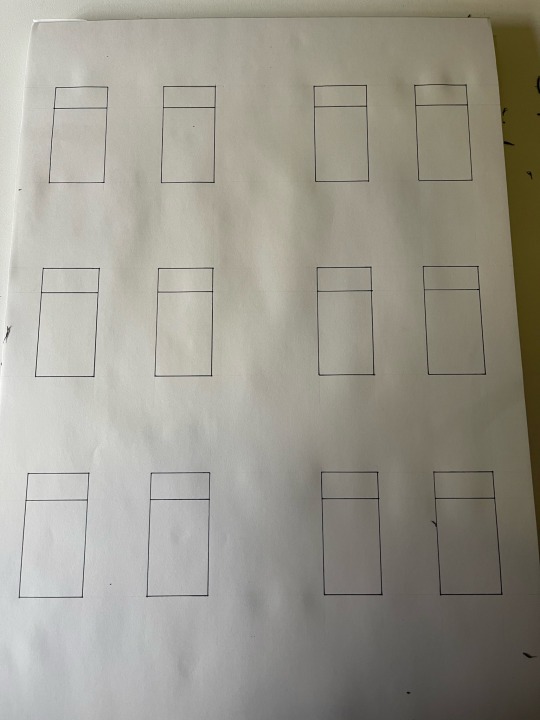
We had to draw thumbnail sketches of bottles. This was where I got a bit confused since i did not attend class this week. The activity sheet states to redesign an olay bottle however after seeing my peers work it seems some of them have done perfume bottles for Design studio 1B. I was not sure which one to do so I did a little of both since one instructed not to change the cap while others could. However for both I decided to adopt a more nature feel. The emotion i chose for the perfume bottles were joy and I associate this emotion with nature and more rounded shapes

PART 3: MORE PERSPECTIVES
This third part the one i struggled with the most, however the activities from last week and the experienced i gained from failing and succeeding in it have greatly aided in the process.
I chose designs from my thumbnail sketches and mix and matched some of the elements from each sketch and picked out my three favourite. This section was still particularly difficult due to the positioning of perspectives with oddly shaped items. Having the templates really aided in the drawings.
Things to Improve from this week: photography and odd shapes in perspective.
2 notes
·
View notes
Text
Week 4: Perspective sketches
This week’s learning topic was about perspective sketches, specifically two-point perspective. Before beginning this task I was worried about the use of a bigger paper size since this would be the first time and how the drawings look complicated.
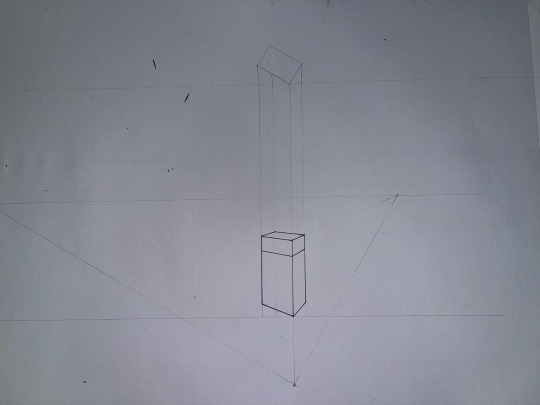
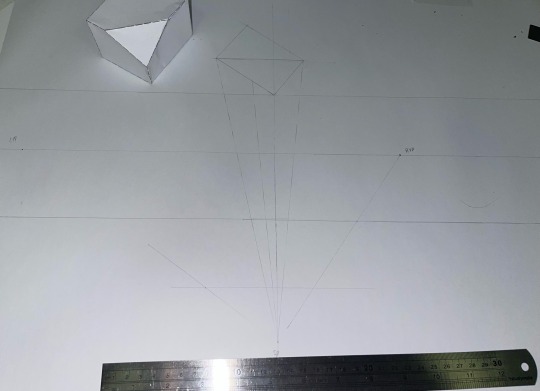
PART 1: where the mistakes happened
In the first task to draw the chamfered box model we were asked to look at the box at such an angle so it resembled the instructions. I misread the task and put in the wrong angles thus it lacked resemblance to the goal. After some dissecting of methods and instructions i came to the conclusion that the rotation of the top view was off and the distance from the PP to the SP was too long.
The following are the wrong attempts.
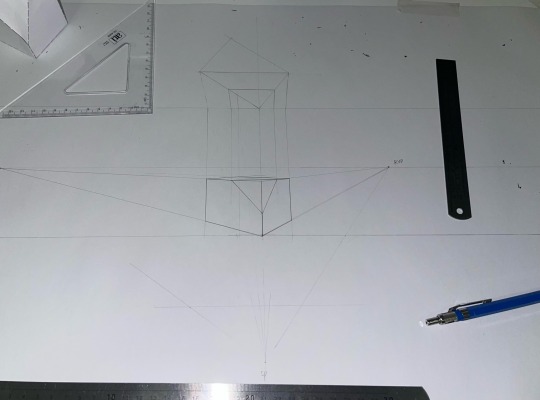
The online module in drawing in two perspective aided a lot along the way. It had clear instructions and explanations. As mentioned earlier i was wary about using a larger scale paper but then shortly realised it was so the RHV and LHV had enough distance.
From this trial and error it was realised that the slightest change in the points could alter the view of the box completely.
As the box pulls to the view points it can be seen as decreasing in size and tapering off.

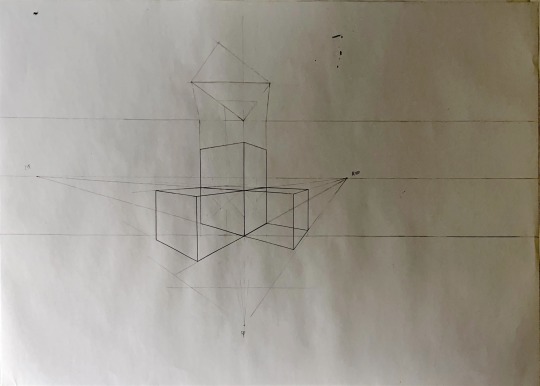
PART 2: THE EASY ONE
This section of the activity was to add boxes to three sides of an original box. After the first activity my understanding of the theory was better this constructing a simple box would be easier. This task required the extension of lines from the original box then connecting them to the viewpoints. The confusion in this task however, was how to determine the measurements. Eventually it was estimated however this could be something I missed. Advice for this section is more than welcomed and will be highly appreciated.
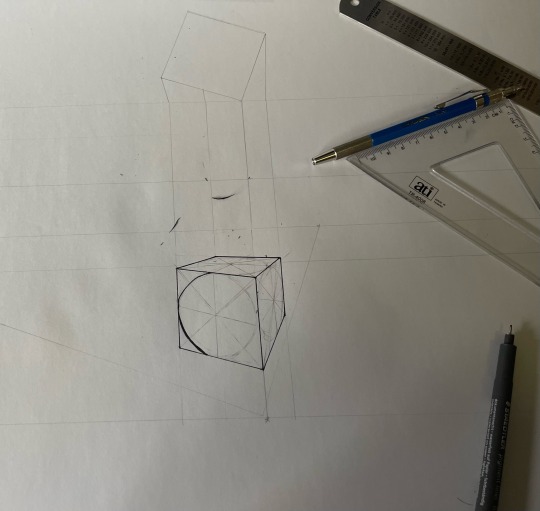
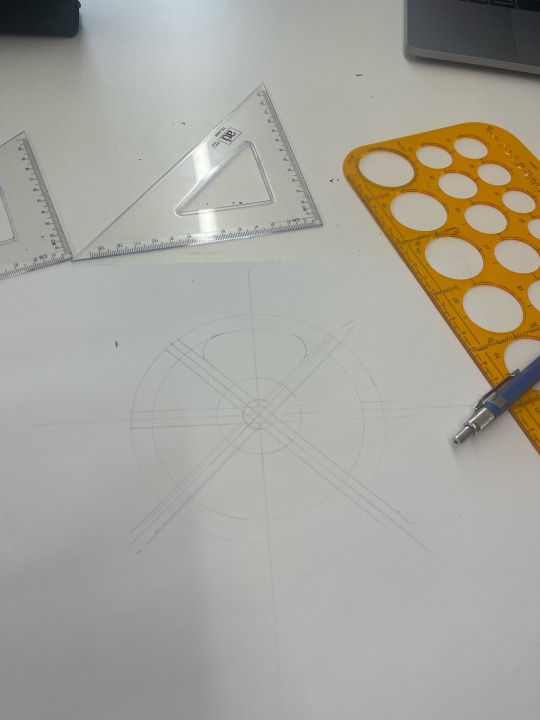
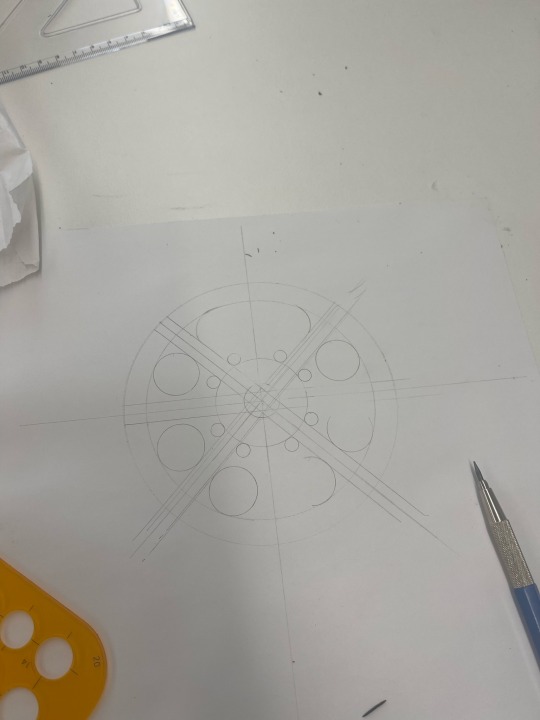
PART 3: DRAWING CIRCLES
This sections was a bit trickier however,drawing the initial box was a simple process due the practice from the previous tasks. The first steps were to determine the middle point of the faces of the cube. This can be achieved by dragging a line from corner to corner of the box then a perpendicular cross vertically and horizontally then to find the major and minor axis was a bit more difficult due to when following the instructions from the module, the axis would intersect with the initial lines drawn from corner to corner. This was a bit of a confusion thus the solution was to keep the vertical and horizontal lines as a guide to the centre but erase the rest. After the major and minor lines were established (as highlighted below) sketching the ellipses were messy and were not exact. This could be further improved in future attempts as well as outlining the ellipses with a steadier hand.


In conclusion for this week’s task the online module was a life saver and this method of perspective drawing will get easier as we understand the concepts better.
Things to improve on: photography of the work. Some pencil likes do not show up on scan. Should be thicker
4 notes
·
View notes
Text
Week 3 Exercise
This week’s tutorial activity was to construct third angle orthogonal drawings of a tapered box with disproportionate sides. This exercise was to practice the proportions and different ways to represent an object.
The page consists of a front view, top view, section and removed auxiliary view. The progress pictures of the drawing was lost thus only the final drawing is presented.
For this exercise the difficulty was in figuring out which lines to include such as for the frontal view if the slanted lines would be included.
Another difficulty would be I mispositioned the sectional view this not providing sufficient space for the auxiliary view. The solution for this was to do a removed auxiliary view of the sloped surface.
Overall this activity has provided good insight on the use of auxiliary views and the positioning of drawings.

7 notes
·
View notes
Text
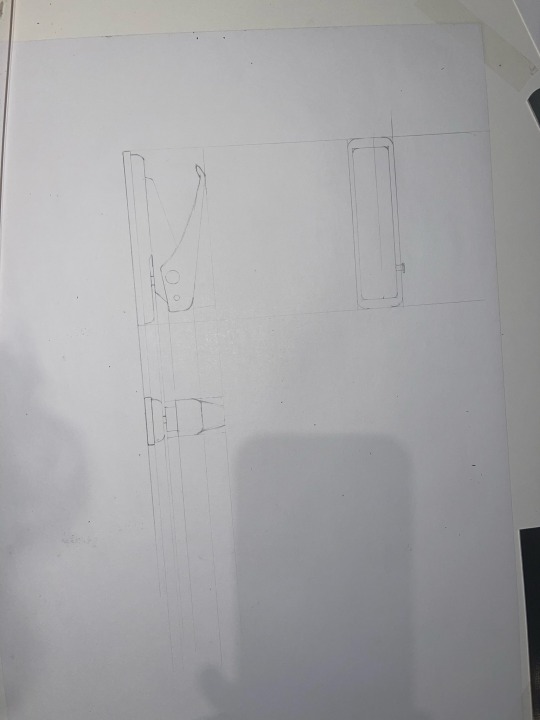
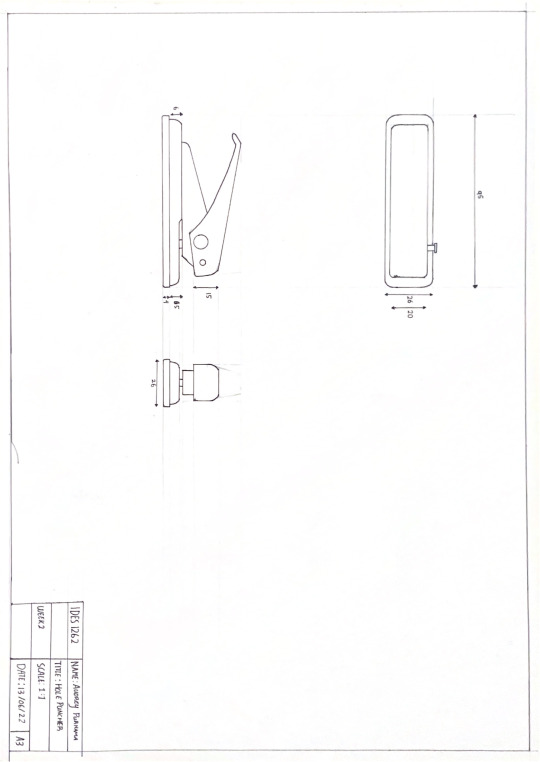
Week 2 Exercise
Part 1
The first part of week 2 exercise was to construct a box with the dimensions of a chosen object with an added 10mm on each side. The object of this exercise was a one hole puncher. Then to label the front, top, left side and right side. This part wasn’t too difficult as it was straightforward although I made a mistake where the dimensions for the front were confused with that of the top, thus providing confusion for the following steps. In order to improve I should have checked the dimensions better.
Part 2
Freehand sketch. This part of the activity was to freehand sketch the chosen object in order to get a better sense of space in the final paper and to indicate the measurements for easier drawing later on. For this section i made the mistake of putting the right hand side as the left hand side and not being aware of the use of space on the page
Part 3
Technical drawing. This part was the final drawing for this exercise. The previous steps were to make the final drawing easier and cleaner. Since the mistake was made in part 1, the sides had to be re labeled and rotated. Since in part 2 the draft was mistaken, I had to rearrange the measurements. However, i was overall pleased with the end result as the drafts aided in constructing the final orientation and layout.


0 notes
Text
Week 1 : Tutorial Activity
For this week’s activity we were instructed to replicate a series of shape using the various drawing instruments in order to get acquainted to them.
The first figure depicts two equilateral triangles formed into a star-like figure with a circle as a guide. The tools necessary to complete this task were the set squares that had 60 and 30 degree angles, compass and rulers, when starting the task I was confused as to where to begin and had trouble figuring out which set square to use as by first observation one might immediately use the 60 degree angle since it is equilateral. However after a few trial and errors and asking around, the way to go would be using the 30 degree angle along the centre of the circle and mirroring it on the other side in order to find the perfect centre and proportions of the triangles.

The second figure required us to use the circle template for figures and rounded angles and this one was more straight forward in the sense that the figures were easier to dissect and the tools were easy to use.

Final figures

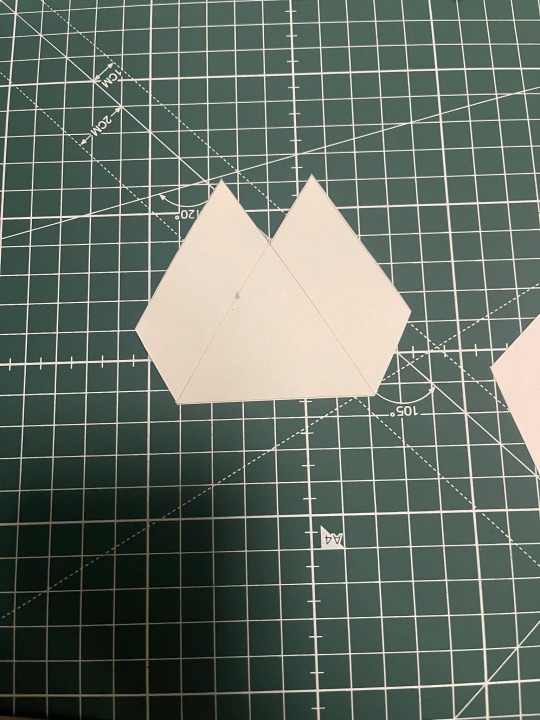
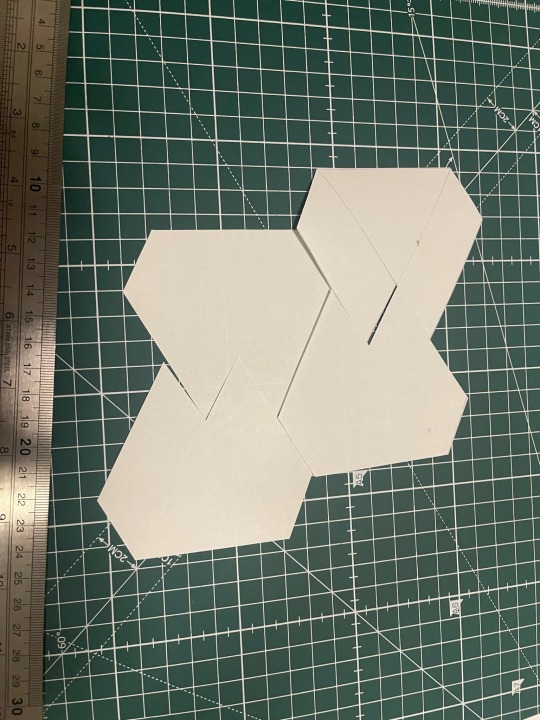
The last task for this week was to draw a figure that consisted of equilateral triangles then to cut it out and tesselate the shapes, I had trouble with cutting the sharp edges and consistency on the angles but eventually figured that extending the lines from the original shape will aid in the consistency.
5 notes
·
View notes
Text
Hello!
Hi, I’m Audrey and I am currently a first year Industrial Design student just like most of you. Some things about me I love knitting, reading and sleep
Looking forward to getting to know everyone and to learn more about design.
1 note
·
View note