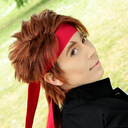
anchencosplay
Fight the time!
Welcome to my cosplay blog
My name is anchen.
I'm just a Fangirl in costumes. That's all.
81 posts
Don't wanna be here? Send us removal request.
Last Seen Blogs

maisiefeliz
patrick

itsliamgallagher
FUCK OF

ihubble
Art 'n' Salt

sheseesinthedark
Untitled

littlebusty
Little Busty
Text
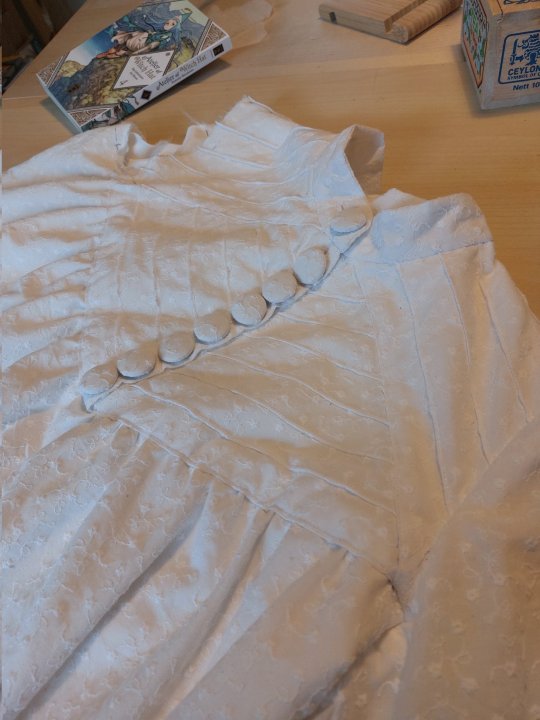
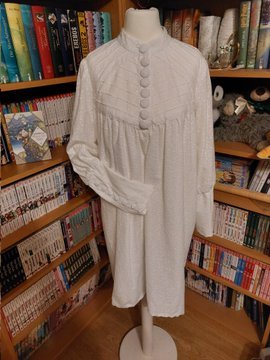
It's time for a new Project. This time i wanna be witch from Witch Hat Atelier.
I started with the white dress they wear under the iconic big cape. For that i used the pattern 120 from the 08/2011 burda style magazine as a base for the top part and the sleeves.
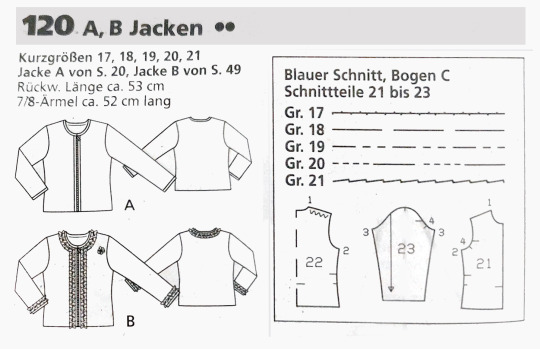
I added the button placket first to the front part and marked where the 7 buttons are gonna sit.
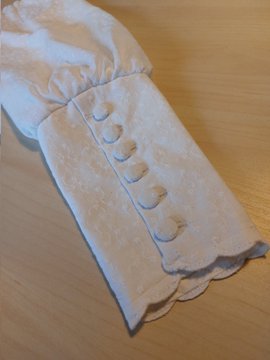
Then i decided a point at the armhole and connected that point to the top and the bottom of the button placket. After that i measured the space and divided that by 7 and marked each line with that result. To each line i added 0,7 cm for the pintucks later. For the back part i did it similar. For the sleeves i split off the bottom part and added space for another button placket. To the top sleeve part i added more space to the middle so the sleeve will be fuller and puffy.
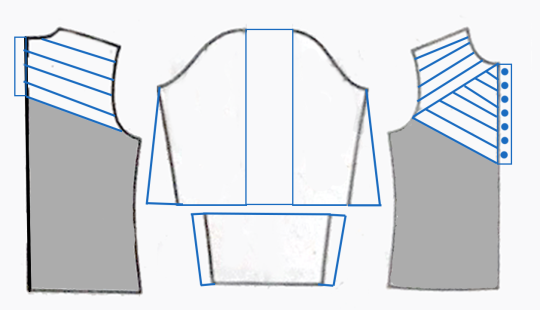
In the end my pattern looked like this: (all the dark gray parts got thrown away)
I also constructed a collar for the dress from scratch and for the bottom part of the white dress i used a simple rectangle as big as all the fabric that i had left after i cutted all the parts for the top part.
Now to the fun part: sewing!
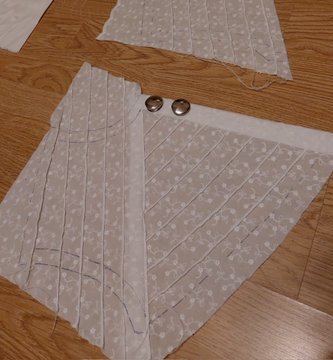
The first thing i made was all the pintucks in the front and the back. That took more time than i thought because i sewed really slow to make them as accurate and neat as possible. After that i pieced the two front parts together and added the button plackets in the front and in the back. Next was the shoulder seam - I hid that one under another pintuck so it's barely visible! Because the embroidered fabric i chose is pretty thin and see-through i sewed in a lining. After that i sewed on the collar.
Then i prepared the bottom part of the dress by sewing on the lining. I made sure the scalloped edge from the fabric is still visible. I also made this for the bottom part of the sleeves. After that i pinned the skirt part onto the dress. Thought it would be good to use my dress form for that but in the end i just measured the distance between the highest and the lowest point of the V-shaped front part and the A-shaped back part. With that i could mark these points on the side and the middle of the skirt and could connected the points. Then i could cut off the excess fabric. Next i gathered the skirt fabric at the top, sewed it on the top part. Lastly i also gathered the fabric for the top part of the sleeves into a puffy sleeve and sewed that on the dress - then the dress was done~
25 notes
·
View notes
Text

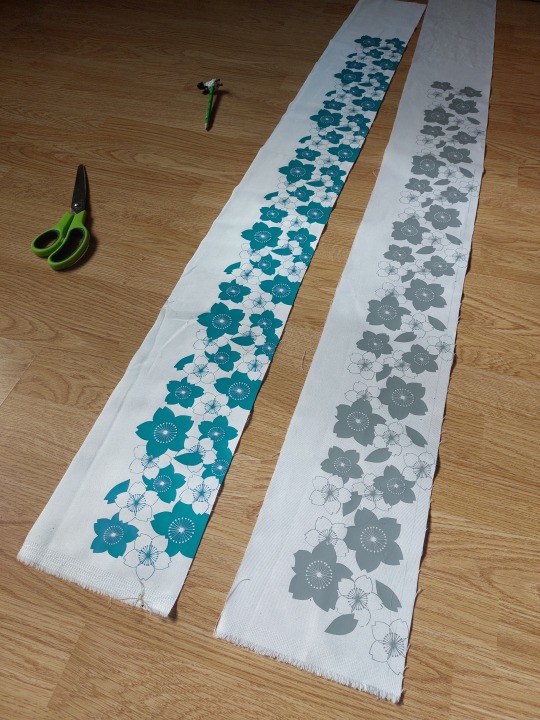
For my Horikawa Cosplay i recreated the pattern our lovely singing swordbois have on their collar. It really helped that i stared a lot at the selfies from all the actors and noticed that some have a different section of the patterned fabric. Sadly not enough was visible to made a fully repetitive file. So the file i made is only repetitive in the vertical. I also didn't cut the flowers off that no longer fit on the collar for the seam allowance.
You can download that file here. It includes a svg, dxf and png file of the pattern. The file also contains the ones i changed a little bit with a thicker rim around the flowers for the Suishinshi of my cosplay group. But its just the part that is visible on the collar.
You can use these files for free. If you do - it would make me really happy when you can show/link me a picture of your creation. ♥
Notes:
When you use this pattern make sure you change it to the right section for your sword men like in the picture above. The pattern repeats with the flower at the bottom right corner - it matches up with the cut out in the flower in the top right corner.
If you have some difficulties with the file you can ask me for help.
#touken ranbu#toumyu#srs22#shinken ranbu sai 2022#cosplay svg#project: matsuri swords#toukenranbucosplay#刀剣乱舞
11 notes
·
View notes
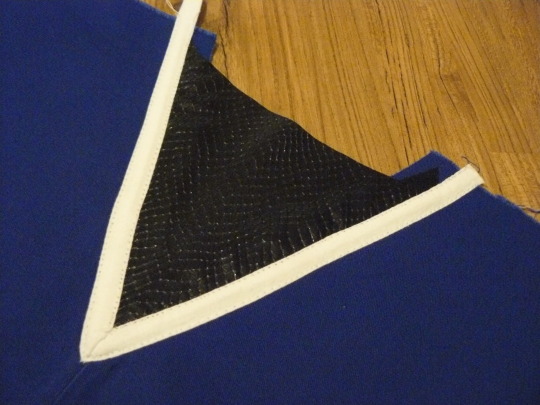
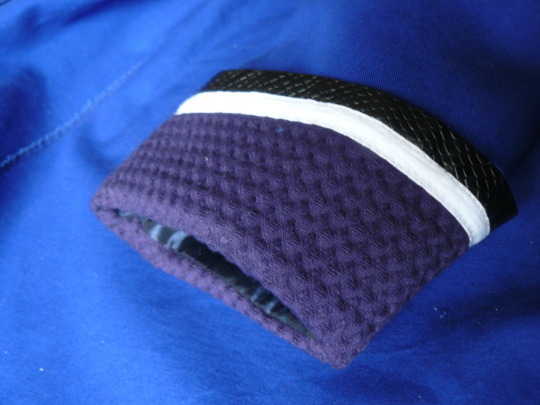
Text
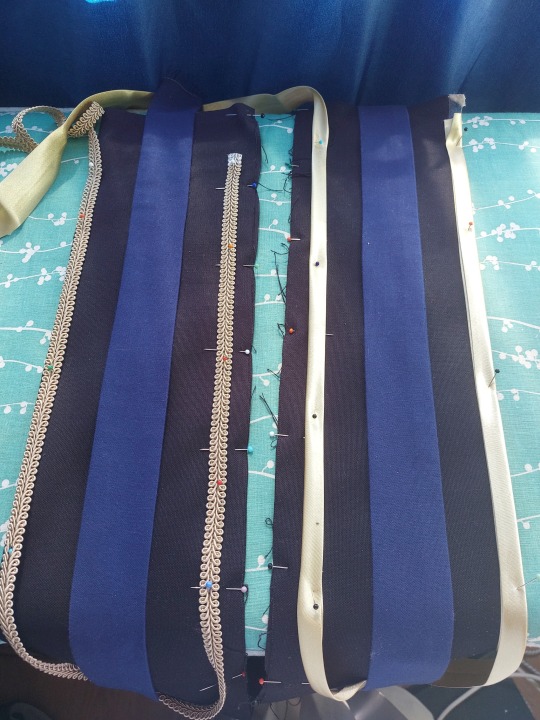

For my latest cosplay project i had to dye my first color gradient.
I kinda avoided the gardients in my over 10 years i've been making costumes but a friend asked me if i wanna join her cosplay group as Horikawa. I already cosplayed Horikawa with Amala as Izuminokami last year so i was really happy she asked.
The outfit looked simple but pretty. I could finish a white hakama, that i started around 2011/12 for a cosplay i dont wanna make anymore. Past me already cut the fabric and ironed the folds in - so i just had to do the side seams, the hems and add a waistband.
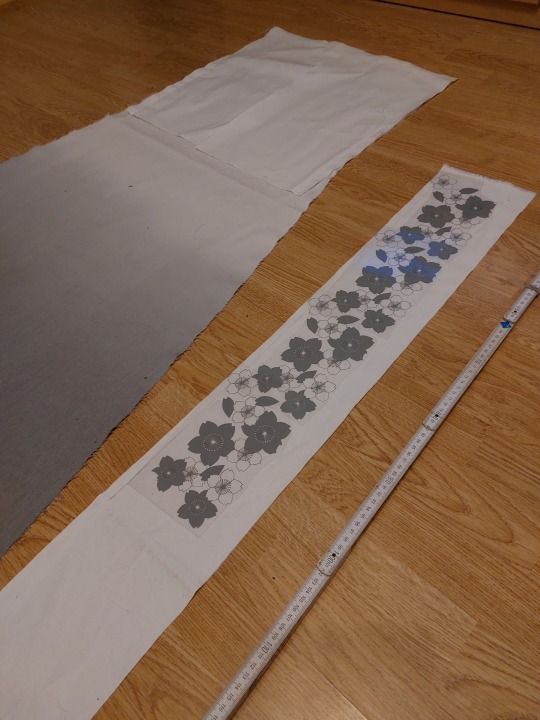
For the top i sewed together 3 rectangles. The back rectangle is much longer and it gets wider towards the bottom. Before i sewed it togehter i dyed the gradient - two times. The first one was a barely visible after it dried. So i made it much darker than that in the second run and after it was dry i liked it enough to not redo it. Then had to add the collar like the ones on yukatas.
Before i could do that i had to made the pretty flower pattern for it. Recreating it took me some time but really happy how it turned out. My loyal cutting plotter had no problems cutting such fine details out of iron-on-foil and then i just had to iron it on so the pattern repeats without a visible seam. I also made the collars for my friends who cosplayed as Izuminokami and Suishinshi in our group. Sadly the purple foil for Suishinshi was a troublemaker. My previous cutting settings didn't work, also recommended settings for that foil didn't work. So i made some adjustments in my file and used a lot of pressure while cutting it. I was really worried it would damage my cutting mat but i finally worked! After that i made some cute little petals for the back out of some shiny gold iron on foil and also ironed that on.
The last thing i sewed was the Obi. First I was unsure if i should add a trimming or a bias tape but i chose the clean look of the bias tape.
Then i bought white Jikatabi and added a white shirt from my closet.
The last photo is made by Sui at Connichi 2022
#touken ranbu#horikawa kunihiro#cosplay wip#toukenranbucosplay#toumyu#srs22#shinken ranbu sai 2022#project: matsuri swords
4 notes
·
View notes
Text
Hello everyone~
its been a while, since i wrote or post something on this blog.
In the last weeks i thought a lot about social media, posting habits, reach, monetization and of course my own cosplay & crafts.
Right now i have the feeling that everyone who has a public social media these days wants it to get fame, be a influencer and earn easy money. You have to post regulary to get the change to have a reach and some people can see your post. If you dont do it - then you are worthless. Most social media places favour this because the algorithm is wrote like this.
For a creative person this is hard and not healty for body and mind.
Creating always takes time. If you try to rush you get a low quality outcome.
As someone who just wants to post as a documentation of their hobby and wants to get to know and connect to other like-minded people. I dont feel like it's a place for me - i never cared much about all the numbers. Maybe its just my current circle or like a generation problem because i get old and a lot of new people join the cosplay community with a completly different mindset who do only care about these numbers.
It really got to my head lately because i'm often unsatisfied with my own crafts and selfmade garments in the last years. So i dont post photos of them. But to get the feedback i'm worthless because i dont post regulary really hurts. I still enjoy the sewing and (sometimes also the) crafting progress. It calms me and after my 9-5 job its really nice to get my head in a creative mindset. Even if its always hard to sit down and just do it. Didn't get easier in the times of covid and a head that also tells me stupid things.
Scrolling through this 'old' blog of mine was really nice. It reminded me of these costumes i made in the past that i'm really proud of and the good times i had with them. I also got reminded of all the things i learned in the meantime.
So i'm gonna try do focus to blog here again, i think its really healthy for me because i can do it just in my time and paste. Also its a good documentary of my journey and i can organize my post so i can find them everytime when my mind is telling me stupid things again.
1 note
·
View note
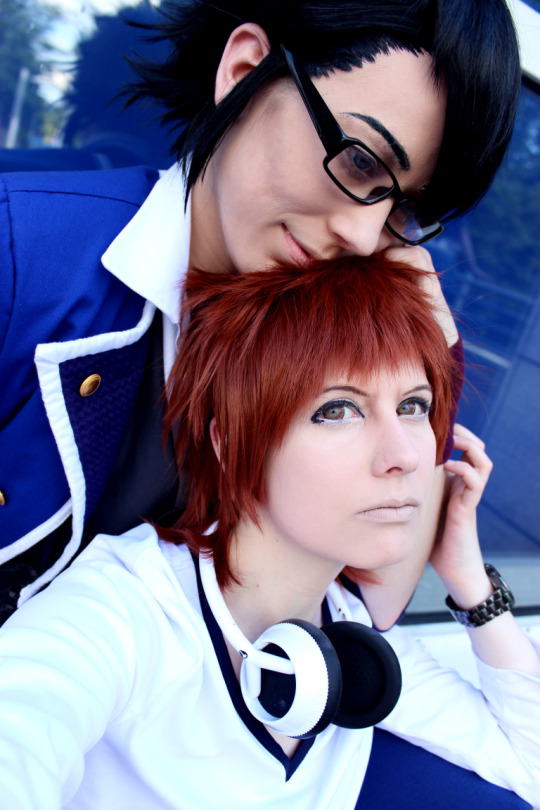
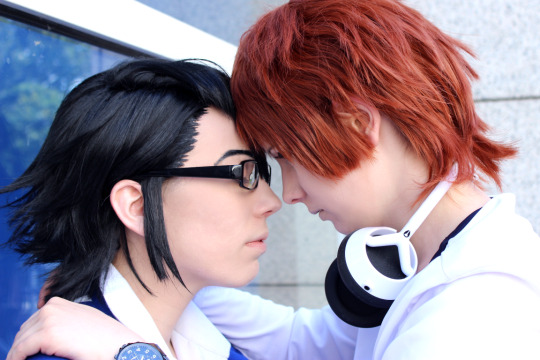
Photo
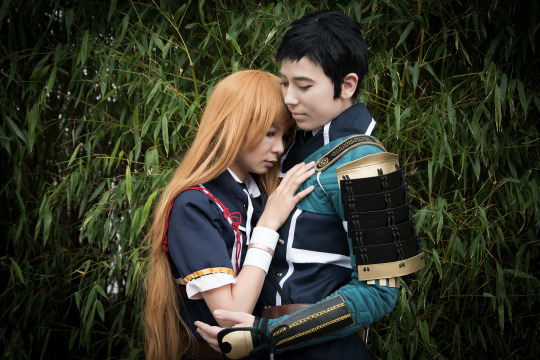
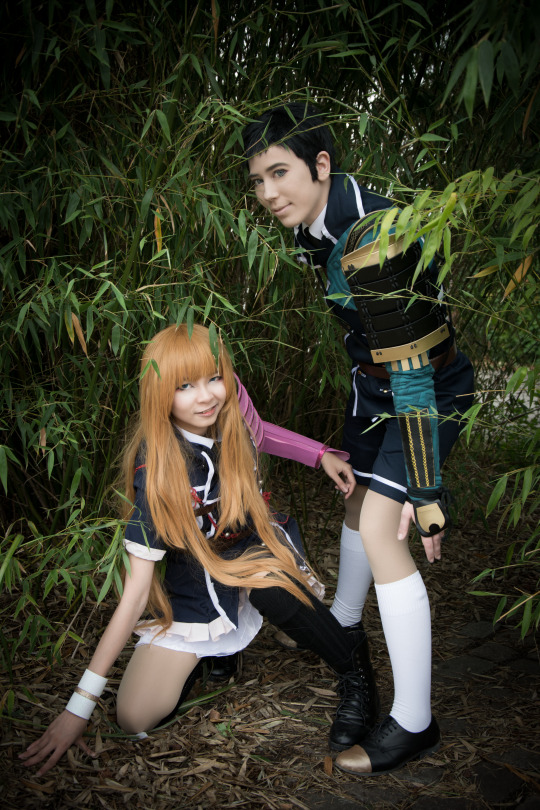
Touken Ranbu
Midare Toushirou: Rei Rabbit | Atsushi Toushirou: @anchencosplay
Photo by Sui
#touken ranbu#midare toushirou#atsushi toushirou#toukenranbucosplay#project: taishous favorite#anchencosplay
1 note
·
View note
Photo
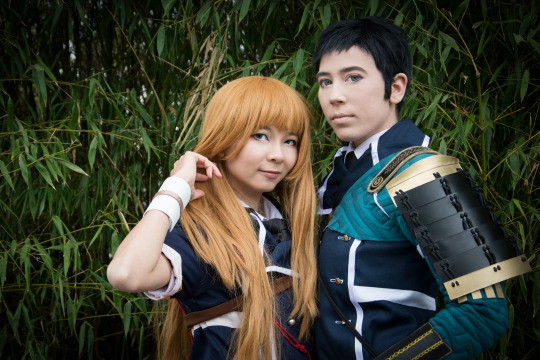
Touken Ranbu
Midare Toushirou: Rei Rabbit | Atsushi Toushirou: @anchencosplay
Photo by Sui
#touken ranbu#midare toushirou#atsushi toushirou#toukenranbucosplay#project: taishous favorite#anchencosplay
3 notes
·
View notes
Photo


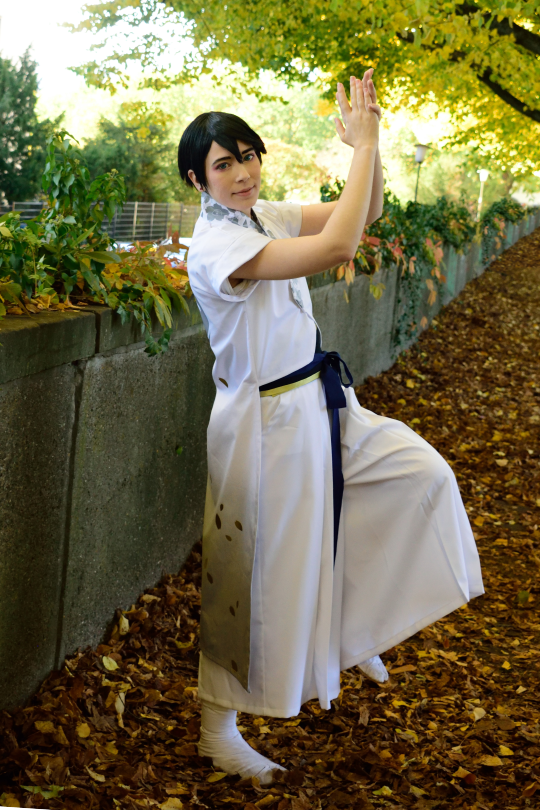
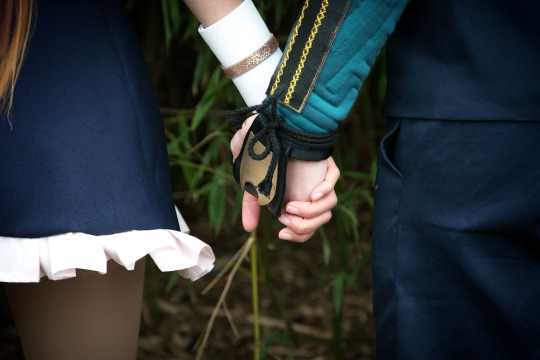
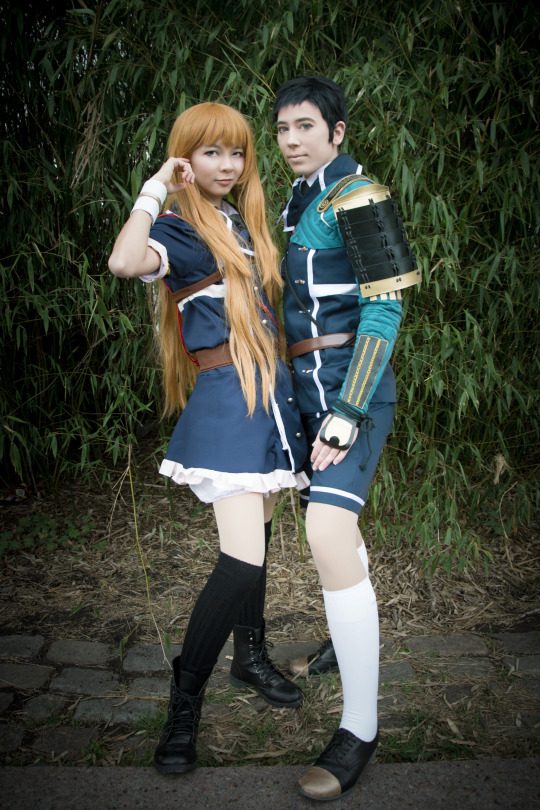
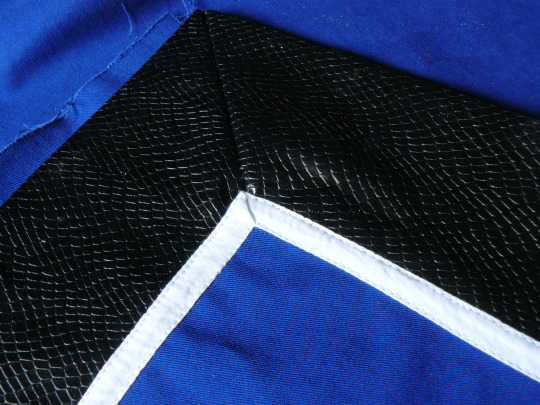
Some months ago i worked on my Atsushi Toushirou Costume.
Beforehand I did my research and read a lot about samurai armor and even found some pattern for it.
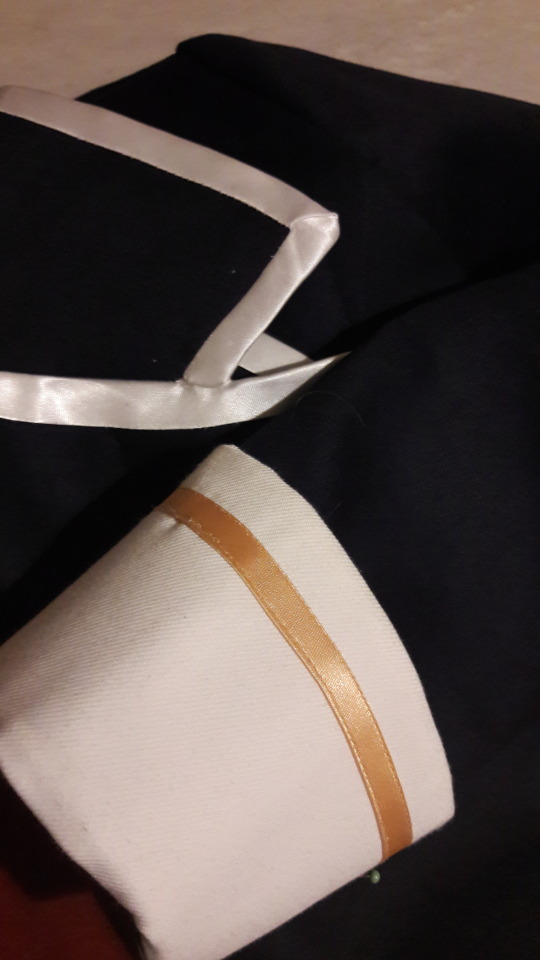
I started with the sewing parts and i used cotton twill for the uniform. The white stips made it a lil bit like a puzzle but it’s was easy to sew. Even the bias tape.
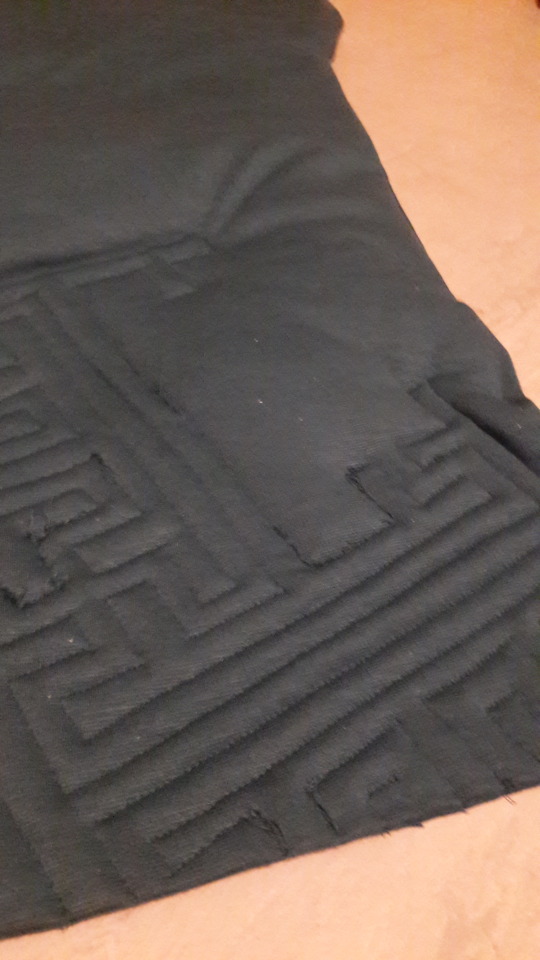
Next was his right Kote. For the sayagata pattern on it i quilted the outerlines and fill it in with some fabric dye. So it's like a lil blanket for my arm.
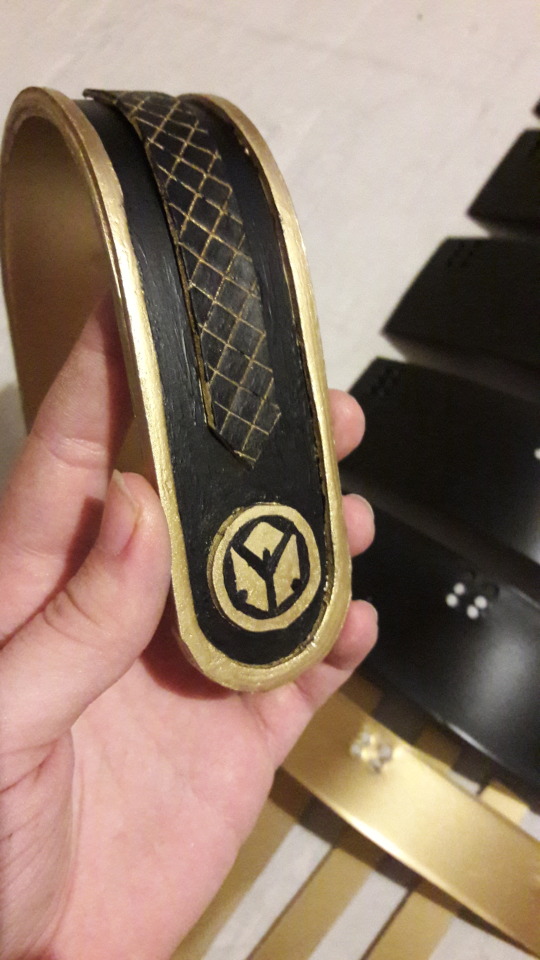
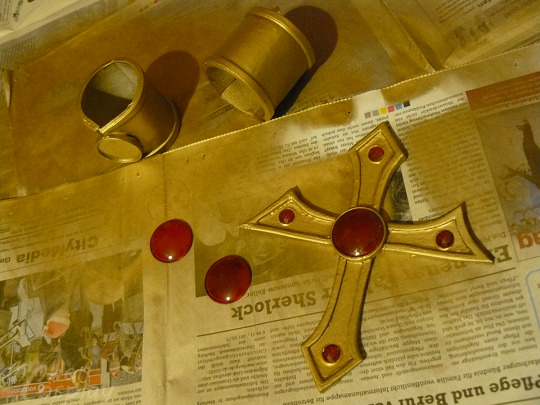
For his amor i used sintra and craft form. I cut it out and heat it up so i could bend it in this slightly rounded shape. Then i sewed the small parts directly to the Kote. Exept the Sode. I tied the seven parts together and glued on some bands for attachment.
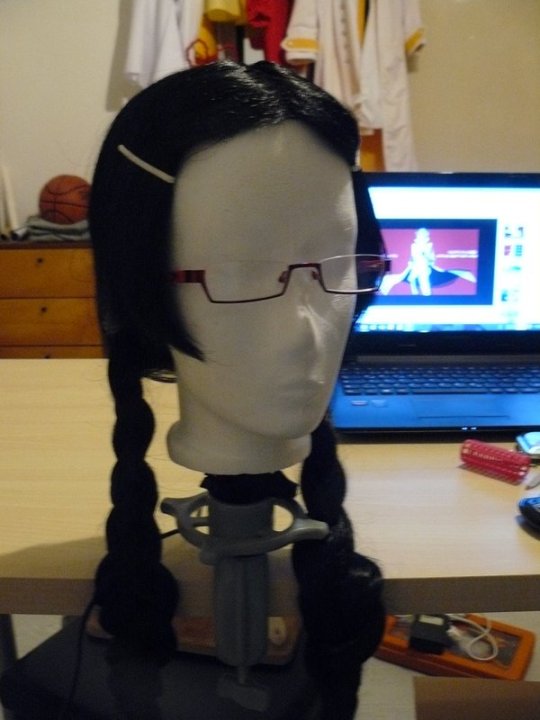
At the end i bought some belts, bands, the necktie and the Socks. Also i modify some old shoes and my Daichi Wig so it fits for Atsushi.
1 note
·
View note
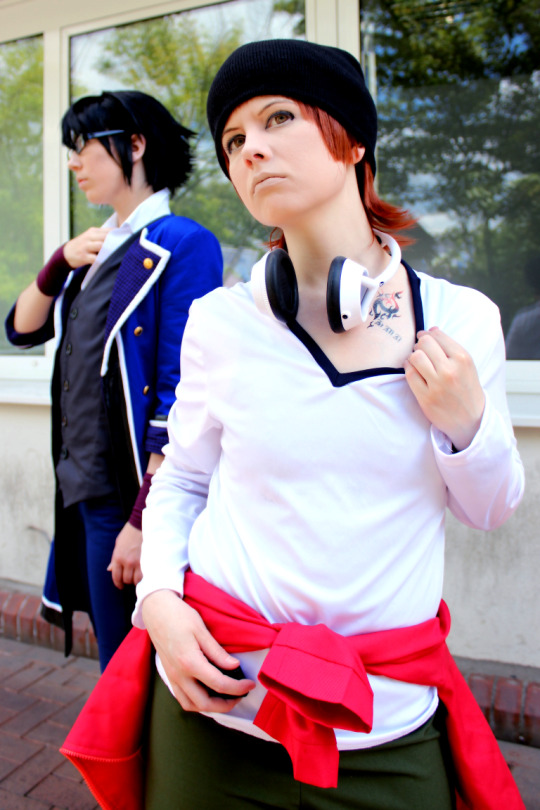
Photo
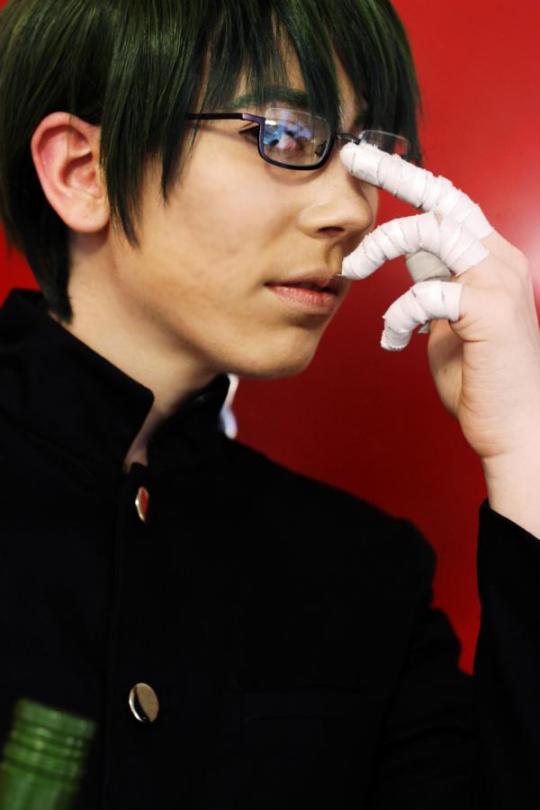
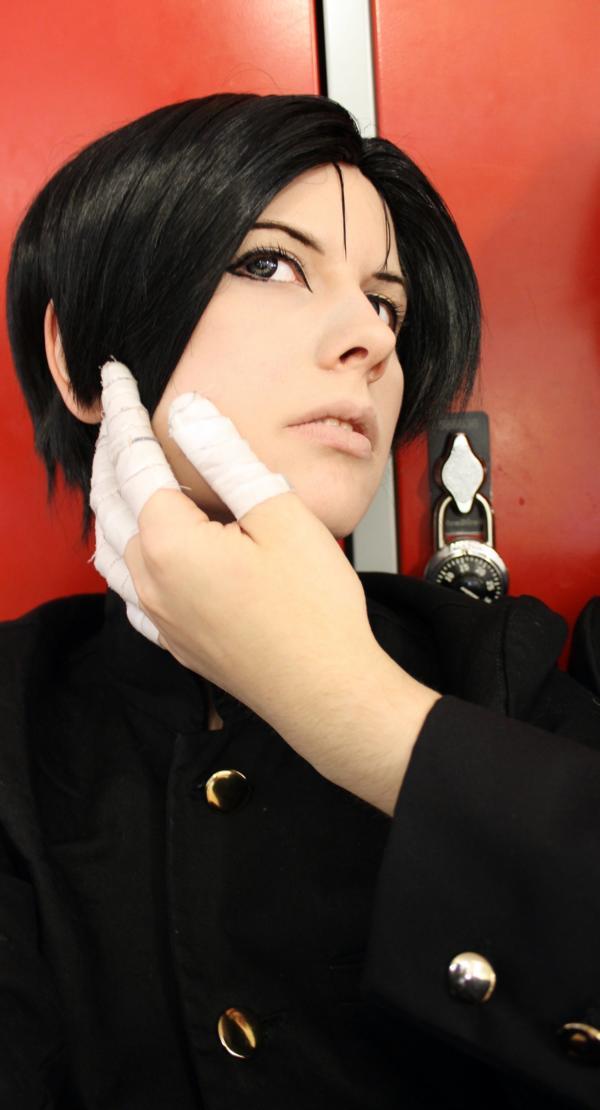
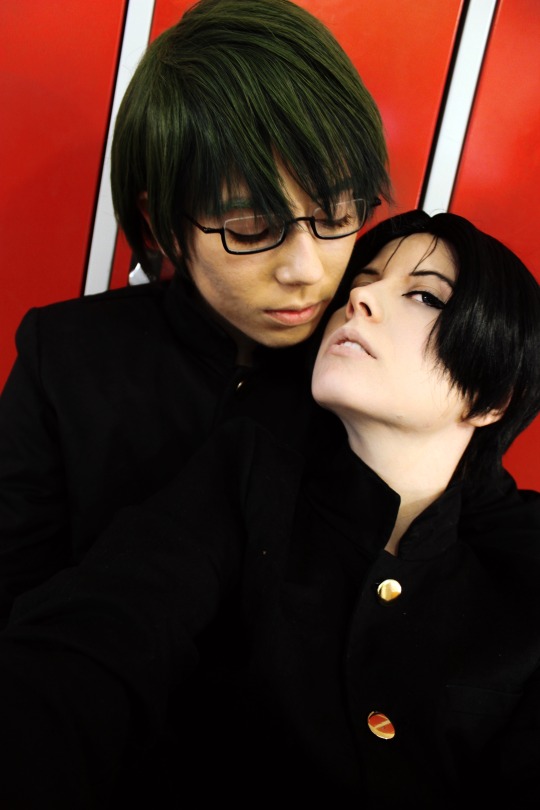
Photo: @kainecos
Midorima: @anchencosplay
Takao: Me
Takao: Shin-chan, you said you can’t cook, why do you take olive oil with you?
Midorima: Cooking is not the only use for oil, let me show you.
8 notes
·
View notes
Photo
first Photos from CosDay’16
Yata Misaki: Kaine
Fushimi Saruhiko: anchen
Photo: Kaine | Edit: anchen
#sarumi fest 2016#sarumi#k project#yata misaki#fushimi saruhiko#k cosplay#my cosplay#anchencosplay#project trash prince
19 notes
·
View notes
Video
10 notes
·
View notes
Photo

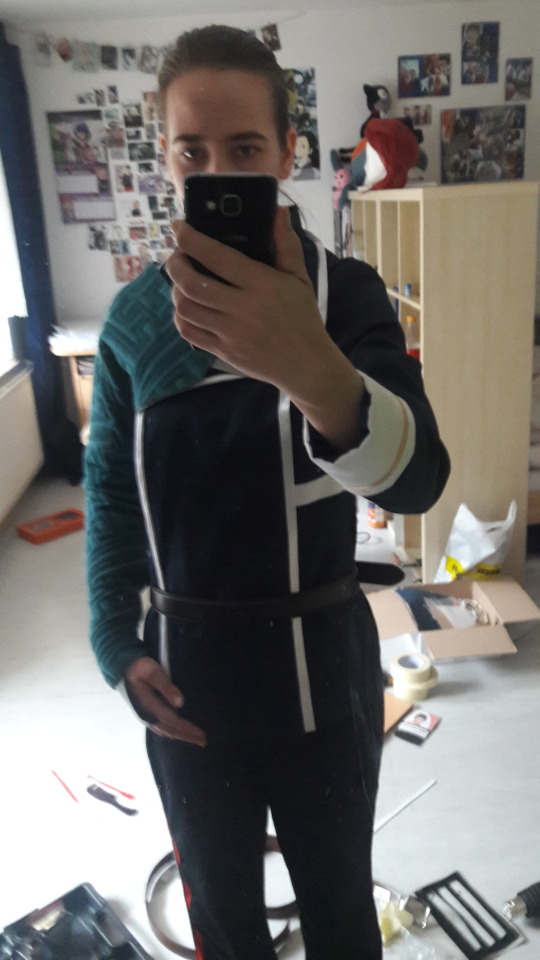
This coat - it was a journey but now its finished and i’m super pleased with the outcome.
Drafting the pattern was a little bit like a but puzzle. I combine the 3 different coat patterns i own to create this.
The sewing part was easier. Even it was nasty to find some nice purple fabric - in the end i dyed one. Which was a big mess like always. I hope one day i will get better with fabric dye~ Also i was pretty unsure if the fabric i chosed would look good together. I quite like it to combine several structured, patterned and/or glittery facbric but every time i'm curious until the end if it looks good - really happy, that it did and everything flows just right ♥
4 notes
·
View notes
Photo
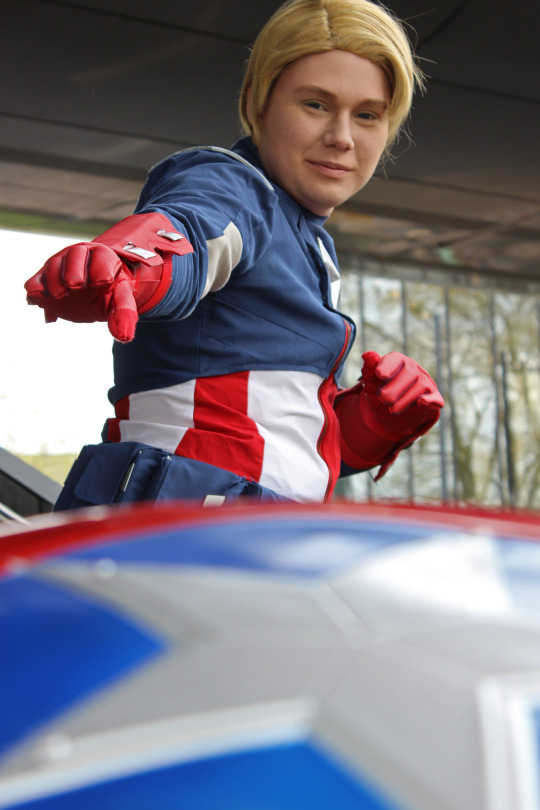

Dokomi 2016 Cosplay Photoshooting
Bucky: @barnsjames
Steve: @arcardia
Thor: @anchencosplay
(Still have to find out who the other cosplayers were. If you know anyone, please tell me!)
Full gallery: http://animexx.onlinewelten.com/fotos/mitglied/573123/343287/seite_0_0_0/
5 notes
·
View notes
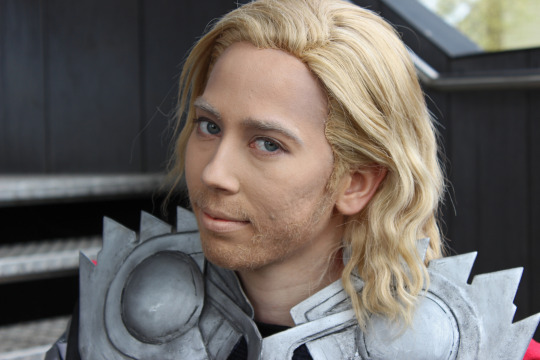
Photo
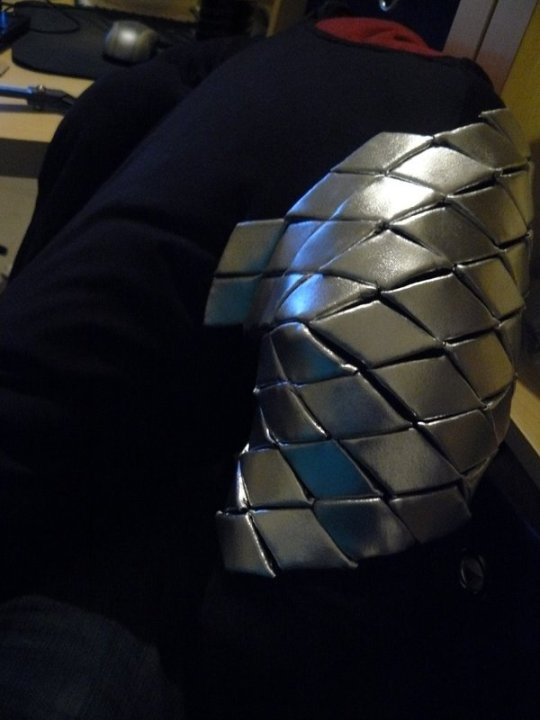
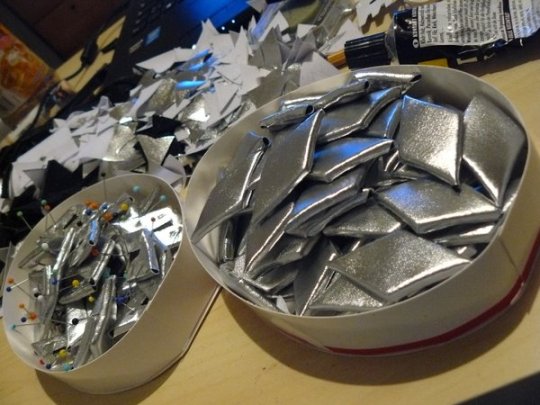
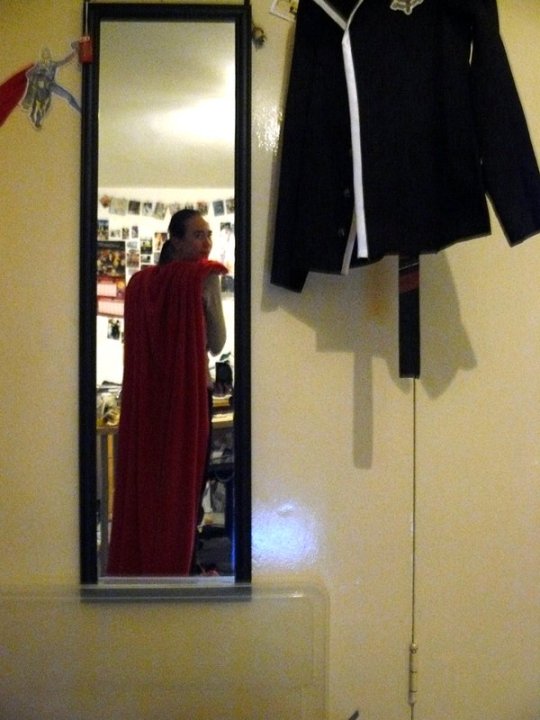
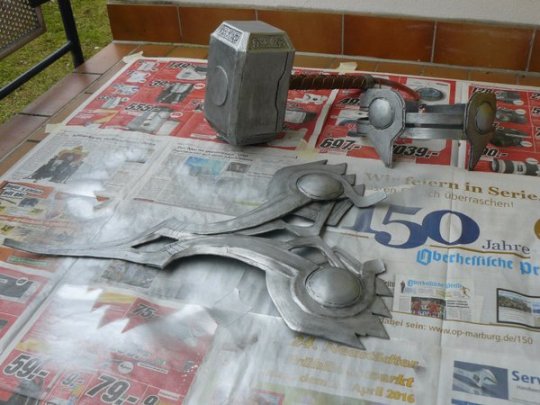
FINALLY i finished project THOR. It took me 3 years, because i only work from time to time on it.
In the last few weeks I had just to assemble the breastplate, the belt, draping the Cape and making the scales on his arms. The first three points wasn’t a problem, but making the scales took like forever x_x
I sewed the muscle suit at the beginning, also i have worn it for casual!Thor. The scales are out of felt, overdrawn with some shiny fabric. Mostly because i I was afraid that, if I do it out of form or something like this and paint it, the paint would crack. Another important point is that i could sew the fabric scales on the muscle suit, which holds excellent. Unfortunately i ran out of time, so i glued the most scales on. But i think i will change that before i wear it again.
4 notes
·
View notes
Photo
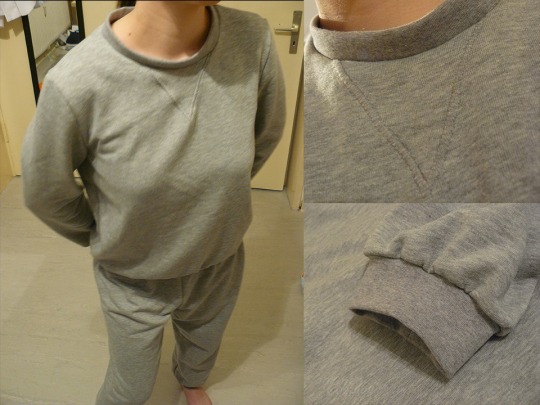
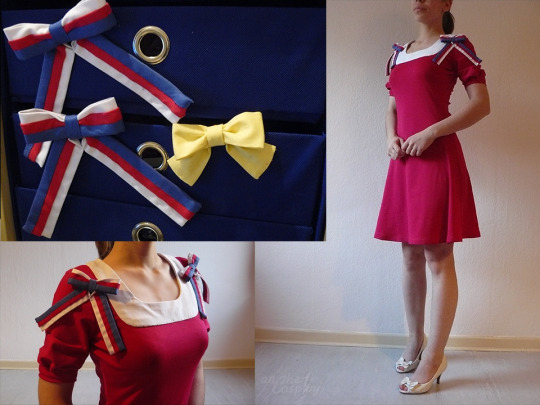
Trying to distract myself a little bit from Jeanne. So I sewed Tsukimis super comfy and super lame Pyjama. Also this cute pink dress. It was really funny to sew such easy stuff and watching the Anime at the same time. Kuragehime is such a lovely series! *w*
1 note
·
View note
Photo

This Costume is an only struggling project!
#Project: motivation thief#Cosplay WIP#anchencosplay#i'm not satisfied with this#and thats why i lost my motivation i guess#but i need it to finish this thing
3 notes
·
View notes
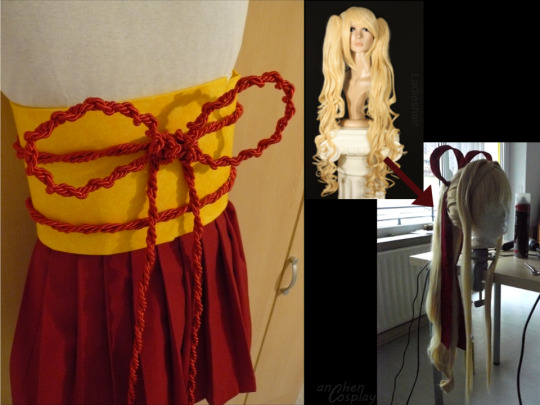
Photo
Yesterday i was in Nuremberg with my sister at the peppermint anime festival!
We watched the Love Live Movie and other really good Animes and of course we wore our Love Live Costumes!
It was really nice to watch Animes all day long in the cinema, even though that sometimes i couldn't read the subtitles when a tall someone sit in the row in front of short short me.
2 notes
·
View notes
Photo

anchen as Hongkong from Hetalia
Photo & Edit by Javis-Ean
3 notes
·
View notes