#linksys extender firmware update
Text
How to update my Linksys wifi extender Firmware?
Firmware is the program that your extender uses to function. It is still insufficient unless the extender's firmware is updated to the most recent version. Firmware is the program that runs your extender and gives users access to all of its features.
Linksys extender firmware update is given by the company from time to time to enhance the performance and speed of the extender.

Why there is a need to update Firmware?
1. Your device's features and functionality are enhanced by a firmware update.
2. It can offer solutions for any performance problems that might arise.
3Linksys firmware update can enhance a device's performance and keep it competitive with newer models, thanks to the constantly evolving technological advancements. It can also speed up the extender's operations.
5. The extender performance will be improved by a firmware update that optimizes the performance of the extender
6. The need for costly repairs or bug fixes will be decreased with regular firmware updates.
What if we don't update theLinksys wifi extender Firmware?
1. If we don't update the Linksys extender firmware of the extender, it leads to the dysfunctionality of the extender
2. The extender can’t work on its fill capacity.
3. Sometimes extender got disconnected from the router, this is due to a firmware glitch.
4. If the firmware is not updated, it affects the performance of the wifi extender.
5. if we don't update the firmware then it may lead to restricting our internet speed.
How to update linksys Extender Firmware?
Firmware updates fix bugs for better security and enable devices to operate proficiently by bringing necessary program changes.Firmware performs the essential hardware functions. We can also access the Linksys extender using the Linksys extender default IP. These instructions will assist you in upgrading the Linksys extender's firmware:
1.Log into the settings page of the online extender to start the upgrade process using extender.linksys.com
2. Login with your username and password.
3. Go to the administration section.
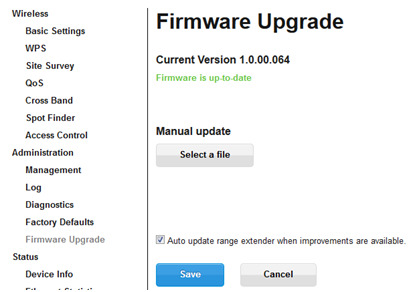
4. The firmware update option can be found in the administration.
5. The firmware update process will begin when you click "Firmware Update."
6. Wait for the firmware update.
6. By updating the extender's firmware, bugs are fixed, new features are added, and the extender performs better.
If you are having problems updating firmware, please contact our technical support staff, who will assist you in resolving your problems.
0 notes
Text
How to setup Linksys RE6300 Extender?
Linksys RE6300 is a wireless range extender that is designed to boost your Wi-Fi coverage area. The device is easy to set up and offers a hassle-free way to extend your Wi-Fi network to hard-to-reach areas in your home or office. Linksys RE6300 extender Setup is simple and quick if you are tech savvy; in this article, we will walk you through the setup process of your RE6300 wifi extender. This Linksys extender has dual band wifi range and can cover up to 7500 Sq Ft of area for good wifi signal and strength.
Linksys RE6300 extender Manual Setup
Follow these steps for Linksys RE6300 extender setup via manual method:
Plug the range extender into an electrical outlet near your router and wait for the power light to turn on.
Connect your device to the Linksys RE6300 Extender Setup network.
You can find the network name and password on the label attached to the range extender.
Open a web browser and type extender.linksys.com or 192.168.1.1 into the address bar.
Click on "Start Setup" and follow the on-screen instructions to complete the setup process.
If you want to connect the range extender to your router using an Ethernet cable, connect the cable to the Ethernet port on the range extender and the other end to an available Ethernet port on your router.
Once the setup is complete, you can connect your devices to the range extender Wi-Fi network.
How to configure Linksys RE6300 via WPS?
WPS is the simplest and quickest for Linksys RE6300 extender setup. Additionally, it supports Wi-Fi Protected Setup (WPS), allowing the extender and router to connect without requiring a password.
Follow these steps for Linksys RE6300 extender setup using WPS:
Press the WPS button on the range extender until the light flashes.
Within two minutes, press the WPS button on your router.
Wait for the range extender's light to turn solid green, indicating that it is connected to your router.
Once connected, you can move the range extender to a new location within range of your router's Wi-Fi signal.
Common Issues During Linksys Wifi Extender Installation
The extender has not enabled extender.linksys.com.
The web-based Linksys RE6300 Extender setup page is inoperable.
The default Linksys extender IP address is missing.
There are no visible flaws in the Linksys RE6300 Extender.
insufficient performance The Linksys RE6300 reset WiFi extender is connected, but there is no internet access.
Logging into Linksys RE6300 extender setup fails.
My password for my Linksys extender has been forgotten.
It is not possible to configure a Linksys RE6300 Extender.
An orange light error on a Linksys RE6300 Extender
Linksys extender firmware cannot be updated.
Troubleshooting tip for Linksys RE6300 Extender configuration issues
The troubleshooting procedures forLinksys RE6300 Extender are as follows:
Keep your Linksys RE6300 Extender away from metal objects, aluminium studs, microwaves, fish tanks, walls, room corners, cordless phones, Bluetooth devices, and other potential interference sources.
Check that the extender is receiving enough power from the wall outlet.
Examine the wiring connections to ensure their functionality. It is not advisable to use any damaged cables.
Take advantage of your smart device's fast internet connection.
Check the URL in the address bar if you're having trouble logging into your Linksys extender.
There should be no damage or short circuits in the wall outlet you're using.
start the most recent web browser version.
How to Update Firmware on Linksys RE6300 range extender?
A Linksys RE6300 extender firmware update is a piece of software that enhances the functionality of the device or fixes bugs. The web-based setup page for the Linksys RE6300 extender allows users to download and install firmware updates.
Follow these steps to update the firmware on your Linksys RE6300:
Open a web browser and type extender.linksys.com into the address bar.
Enter the range extender's login credentials. The default username and password are "admin."
Click on "Administration" and then "Firmware Upgrade."
Click on "Check for Updates" and wait for the range extender to search for new firmware.
If a new firmware version is available, click on "Update" to begin the installation process.
Wait for the installation to complete, and do not turn off or unplug the range extender during the update.
Linksys RE6300 range extender Factory Reset
A Linksys RE6300 extender reset involves returning the device to its original factory settings. The extender's reset button must be pressed and held for a short period of time until the LED light flashes in order to complete this procedure. Following the reset, all customised settings and configurations will be lost, and the device will return to its original settings.
Follow these steps to reset your range extender:
Locate the reset button on the range extender. It is usually located on the bottom or back of the device.
Press and hold the reset button for about 10 seconds or until the power light blinks.
Release the reset button and wait for the range extender to reboot.
Once the power light is solid, the reset process is complete, and you can begin the setup process again.
#Linksys RE6300 extender Manual Setup#How to configure Linksys RE6300 via WPS?#Common Issues During Linksys Wifi Extender Installation#Troubleshooting tip for Linksys RE6300 Extender configuration issues#How to Update Firmware on Linksys RE6300 range extender?#Linksys RE6300 range extender Factory Reset
0 notes
Text
do you meed a router for google pixel vpn
🔒🌍✨ Get 3 Months FREE VPN - Secure & Private Internet Access Worldwide! Click Here ✨🌍🔒
do you meed a router for google pixel vpn
Router for Google Pixel VPN setup
Setting up a VPN (Virtual Private Network) on your Google Pixel device can enhance your online security and privacy by encrypting your internet connection. However, to ensure seamless and secure connectivity, it's essential to have a reliable router that supports VPN configurations.
When selecting a router for your Google Pixel VPN setup, several factors should be considered:
VPN Compatibility: Look for routers that are compatible with the VPN protocol you intend to use. Popular VPN protocols include OpenVPN, IKEv2/IPSec, and L2TP/IPSec. Ensure that the router supports the protocol recommended by your VPN service provider.
Performance: Opt for a router that can handle the VPN encryption without significantly impacting your internet speed. Routers with powerful processors and ample RAM are better equipped to handle VPN traffic effectively.
Security Features: Choose a router with robust security features such as built-in firewalls, intrusion prevention systems, and automatic firmware updates to safeguard your network against cyber threats.
Ease of Setup: Look for routers with user-friendly interfaces and intuitive setup processes to simplify the VPN configuration on your Google Pixel device. Some routers even offer dedicated VPN setup wizards for easy installation.
Compatibility with Google Pixel: Ensure that the router is compatible with your Google Pixel device and supports the VPN protocols and encryption standards required for seamless connectivity.
Popular router brands such as Asus, Netgear, TP-Link, and Linksys offer a wide range of models that meet the criteria mentioned above. Before making a purchase, thoroughly research the specifications and user reviews to find the best router for your Google Pixel VPN setup. Additionally, consider consulting with your VPN service provider for recommendations on compatible routers to ensure optimal performance and compatibility. With the right router in place, you can enjoy secure and private internet browsing on your Google Pixel device with ease.
Google Pixel VPN compatibility
Title: Unlocking the Full Potential of Your Google Pixel with VPN Compatibility
In today's interconnected world, privacy and security are paramount concerns for smartphone users. With the rise of cyber threats and data breaches, protecting your online activities has never been more critical. Thankfully, Google Pixel smartphones offer robust features to safeguard your digital life, including compatibility with virtual private networks (VPNs).
VPN compatibility on Google Pixel devices enables users to encrypt their internet connection and route their online traffic through secure servers. This functionality adds an extra layer of security, preventing hackers, ISPs, and other third parties from monitoring your online activities. Additionally, VPNs help users bypass geo-restrictions and censorship by masking their IP addresses and providing access to content from around the globe.
Setting up a VPN on your Google Pixel is a straightforward process. Users can choose from a variety of VPN apps available on the Google Play Store, many of which offer user-friendly interfaces and intuitive setup procedures. Once installed, users can configure their VPN settings to connect automatically whenever they access the internet, ensuring continuous protection without any manual intervention.
The benefits of VPN compatibility extend beyond security and privacy. By encrypting your internet connection, VPNs can also enhance your online experience by reducing the risk of throttling from ISPs and improving connection speeds, particularly when accessing content from remote servers.
Whether you're browsing the web, streaming videos, or conducting sensitive transactions online, VPN compatibility on Google Pixel devices empowers users to take control of their digital privacy and security. By leveraging the built-in VPN functionality, users can enjoy peace of mind knowing that their online activities remain private and secure, regardless of their location or network environment.
Network requirements for Google Pixel VPN
When it comes to using a VPN on your Google Pixel device, ensuring that you meet the necessary network requirements is crucial for a seamless and secure connection.
First and foremost, having a stable internet connection is key. Whether you are using Wi-Fi or mobile data, having a strong and reliable signal will help prevent any disruptions in your VPN connection. A poor connection can lead to slow speeds, dropped connections, and potential security vulnerabilities.
Additionally, it is important to consider the type of network you are connecting to. Public Wi-Fi networks, for example, can be risky due to potential security threats. Using a VPN on these networks can help encrypt your data and protect your privacy.
Furthermore, it is recommended to use a VPN service that is compatible with your Google Pixel device. Not all VPNs are created equal, and some may not work effectively on certain devices. Ensuring compatibility will help guarantee a smooth and hassle-free VPN experience.
Lastly, staying up to date with software updates and security patches on your Google Pixel device is essential for maintaining a secure VPN connection. These updates often include important security improvements that can help keep your data safe while using a VPN.
By meeting these network requirements, you can enjoy the benefits of using a VPN on your Google Pixel device while ensuring optimal performance and security.
Wireless connectivity setup for Google Pixel VPN
Title: Simplifying Wireless Connectivity Setup for Google Pixel VPN
In today's hyper-connected world, safeguarding our online activities has become paramount. With cyber threats lurking at every digital corner, utilizing a Virtual Private Network (VPN) is no longer just an option but a necessity. For Google Pixel users, setting up a VPN can enhance privacy, security, and access to geo-restricted content. However, navigating the intricacies of wireless connectivity setup for a VPN on your Google Pixel device may seem daunting at first glance. Fear not, as we've compiled a comprehensive guide to simplify the process.
Firstly, ensure your Google Pixel device is running on the latest software version. This step is crucial as it often includes security patches and optimizations for VPN usage. Next, select a reputable VPN service provider from the plethora of options available in the Google Play Store. Look for one that offers a user-friendly interface, robust encryption protocols, and a vast server network.
Once you've chosen your preferred VPN provider, download and install the app on your Google Pixel device. Follow the prompts to create an account and customize your VPN settings according to your preferences. Now comes the crucial part – configuring wireless connectivity for seamless VPN usage.
Navigate to your device's settings and select the "Network & Internet" option. From there, choose "VPN" and tap on "Add VPN." Enter the necessary details provided by your VPN service provider, including the server address, VPN type, and authentication credentials.
After saving your VPN configuration, toggle the switch to connect to the VPN server of your choice. Voila! Your Google Pixel device is now securely connected to the VPN, encrypting your internet traffic and shielding your online activities from prying eyes.
By following these simple steps, you can effortlessly set up wireless connectivity for a VPN on your Google Pixel device, ensuring peace of mind and enhanced online privacy wherever you go.
VPN setup guide for Google Pixel without a router
Setting up a VPN on your Google Pixel without a router is a straightforward process that can help enhance your online security and privacy. By utilizing a VPN (Virtual Private Network), you can encrypt your internet connection and keep your data safe from potential cyber threats.
To begin setting up a VPN on your Google Pixel, you will first need to download a VPN app from the Google Play Store. There are various VPN providers to choose from, so be sure to select one that fits your needs in terms of security features, server locations, and speed.
Once you have downloaded and installed the VPN app on your Google Pixel, open the app and follow the on-screen instructions to create an account and log in. Next, you will need to select a server location to connect to. Choosing a server closer to your physical location can help optimize your connection speed.
After selecting a server location, you can simply toggle the VPN connection switch to connect to the VPN server. You should now see a key icon in your notification bar indicating that your Google Pixel is connected to the VPN.
It is important to note that while using a VPN on your Google Pixel without a router can enhance your security and privacy, it may also impact your internet speed to some extent. However, the added layer of protection provided by the VPN is invaluable, especially when connecting to public Wi-Fi networks or accessing sensitive information online.
By following this VPN setup guide for your Google Pixel without a router, you can enjoy a more secure online experience and browse the web with peace of mind knowing your data is protected.
0 notes
Text
How to Fix Linksys WiFi Extender Blinking Orange?
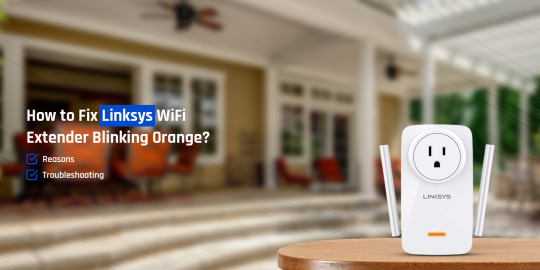
Unlike other routers, Linksys router has several LED lights. Each light indicates a specific meaning. Once you notice the status LED on your Linksys device, you can determine its performance easily. If you are experiencing a Linksys WiFi extender blinking orange light issue, you need not worry at all.
Once you delve into the information given in this blog post, you can be able to familiar with the factors responsible for these issues. Apart from this, you will also know about the most helpful troubleshooting tips to resolve the Linksys extender showing an orange light issue. So, let’s move ahead and go through the key details given.
Why is Linksys Extender Flashing Orange Light?
There are a few key factors that are accountable for the Linksys extender flashing orange error. All of them have been given below. Let’s have a glance at them.
Improper placement of your extender
Damaged Ethernet cables
Outdated firmware of your extender
Excessive distance between your router and extender
Incorrectly establish a connection between your router and modem
Defective wall socket
Incomplete hardware setup
Resolving the Flashing Orange Light on Linksys Extender
To enable you to fix the Linksys extender flashing orange light issue, we have given a few troubleshooting tips. Let’s have an overview of each tip carefully.
Check power supply
To ensure a stable internet connection, contact your internet service provider if the current connection is unstable, as it may cause an orange light issue with your extender.
Stable internet connection
For confirming a stable internet connection, contact your internet service provider if the current connection is unstable, as it may cause an orange light issue with your extender.
Install the latest version firmware
In some cases, outdated firmware on your networking device can cause the LED lights on your extender to display orange lights, indicating the need for a firmware update.
Locate the extender at a central location
For fixing an orange light issue with your Linksys extender, locate it halfway to your workplace and avoid metal appliances near it, as improper placement can cause issues.
Power cycling
To power cycle your Linksys extender, remove all cables, press the power button, remove the power plug, and plug it back into the wall socket to fix the orange light issue.
Linksys Extender reset
For resolving an orange light issue with your extender, press and hold the reset button for 15 seconds, release when LED lights flash, and wait patiently.
Wrapping-up,
Hopefully, after taking a deep dive into the information given in this blog post, you will come to know about the reasons and key fixes related to Linksys WiFi extender blinking orange light issue.
Are you experiencing an orange light issue with your Linksys extender? It will be best for you to get in touch with our expert team members, who will guide you for your every query!
#Linksys Extender Blinking Orange#Linksys WiFi Extender Flashing Orange Light#Linksys Flashing Orange#Linksys#Extender#WiFi#Internet#USA#Canada#Australia#florida
0 notes
Text
0 notes
Text
Linksys velop setup
A Linksys Velop setup can greatly enhance the coverage of your home network. To get started, make sure you have the extender, an Ethernet wire, and a computer or mobile device with a web browser. The extender should first be connected to a power source, then you should wait for the LED indicator to turn solid blue. Then, join your device to the Velop extender's Wi-Fi network or create a wired connection using the Ethernet cable. After that, launch a web browser and type "extender.linksys.com" or the standard IP address listed in the user manual. To finish the configuration procedure, choose your current Wi-Fi network and input the network password as directed on the screen.
How do I setup the Linksys Velop extender manually?
Here are simple step-by-step instructions for the Linksys Velop setup manually:
Start by placing the extender in a central location within range of your existing Wi-Fi router. Make sure the extender is powered on and the LED indicator is solid blue.
On your device (laptop, smartphone, or tablet), go to the Wi-Fi settings and connect to the "Linksys Extender Setup" network. This network should be visible in the list of available networks.
Once connected to the extender's network, open a web browser and enter "extender.linksys.com" in the address bar. If that doesn't work, you can try entering the default IP address, which is usually "192.168.1.1" or "192.168.0.1".
You will be directed to the Linksys Velop extender setup page. Click on "Start Setup" or a similar button to begin the setup process.
Select your preferred language and click "Next" to proceed.
The extender will search for available Wi-Fi networks. Select your existing Wi-Fi network from the list and click "Next".
Enter the password for your Wi-Fi network and click "Next" to continue.
You will have the option to create a new network name (SSID) and password for the extender's network. If you prefer, you can keep the same network name and password as your existing Wi-Fi network. Make your selection and click "Next".
The extender will apply the settings and connect to your existing Wi-Fi network. This process may take a few minutes.
Once the setup is complete, you will see a confirmation message. You can now disconnect from the extender's network and connect back to your regular Wi-Fi network.
Note:- If you need any help regarding your Linksys velop extender so contact our technician or visit the official website that is 192.168.1.1.
Linksys WiFi Mesh Setup via Linksys App
During the unboxing process, you receive a few products that must be purchased for the Linksys Velop setup. The Velop setup, an instruction book, some ethernet cables, and a power cable are included. As soon as you have an Ethernet cable and the Velop setup, continue with the remaining instructions below.
Place the Linksys Velop next to the main router.
Put one end of the ethernet cable into the router's port and the other end into the ethernet port on the Velop to complete the connection.
The Velop setup should then be connected to the power connector by inserting the power line.
When hooked into a power outlet, the LED indicator turns blue to show that everything is ready.
Don't create the connection until the main router has finished booting.
After a few minutes, the Velop's LED will turn solid purple, signaling that it is ready for use.
Installing and utilizing the Linksys app on your device will then allow you to launch the Linksys Velop Setup.
Make sure the app is using the most recent release. Update your device's version if it is out of date.
Enter your email address and password after marking the terms as accepted.
Then a website will appear on your computer screen asking you where the internet comes from.
After choosing your internet connection, launch the Linksys app and pick the WiFi list.
The network name for Velop Setup will appear in the list.
Firmware Upgrade Linksys Velop extender
Updates to the Linksys Velop firmware are simple to do and solve many performance problems. Therefore, always enable the auto-update firmware feature in the Linksys app. You mostly have two options if you choose to do it manually. The first one entails going to a certain URL, whereas the second one requires signing into CA. Take these two actions independently.
Before utilizing this method, ensure that your node is setup or set to its factory default settings. The node's IP address is 192.168.1.1, so note it down. Read the printed instructions for further details.
Download your product's firmware file first onto a computer or laptop.
If the node has been setup, launch any web browser and type IP addressfupdate.html into the search bar. use the IP address of the node.
If the node is still using its factory default settings, look for IPaddressfupdate.html.
The screen will then display a sign-in page. To sign in, enter your username and password and then click "Sign In."
After viewing the firmware upgrade page, choose and upload the firmware file, then click Update.
Wait till the upgrade is finished.
Following the update, the designated node will power on and show a solid blue light.
However, when the factory default settings node is ready for setup, it will show a solid purple light.
The Linksys Velop Setup process should be repeated.
0 notes
Text
Simple Steps to Set Up Your Linksys RE6500 Extender
The main fix for your wireless network's slow or nonexistent connectivity is Linksys RE6500 Setup. It offers all of your devices constant, seamless wireless connectivity throughout your premise. When compared to other wireless extenders on the market, the RE6500 offers you the highest performance thanks to its cutting-edge technological features.
Setting up Linksys RE6500 refers to the process of configuring and installing the Linksys RE6500 Wireless Range Extender.
Linksys RE6500 Wifi Range Extender Setup via Manual method
The quick methods to manually Setting up Linksys RE6500 extender are as follows:
Connect the extender to the nearby Wi-Fi router.
Join the Wi-Fi network provided by the extender with your computer or mobile device.
Start a web browser, and in the address bar type extender.linksys.com or the default IP address, which is typically 192.168.1.1
To configure the extender settings, adhere to the on-screen directions.
Choose your current Wi-Fi network from the list, then type the password.
Any optional settings should be tailored to your preferences.
Click "Finish" or "Save" to finish the setup process.
Ideally, place the extender halfway between your router and the spot with spotty Wi-Fi service.
To get better performance and coverage, connect your devices to the expanded network.
You may manually configure your Linksys RE6500 extender and increase the coverage and range of your Wi-Fi network by following these simple steps.
How to setup linksys re6500 extender using the WPS push button?
To setting up Linksys RE6500 extender utilizing the WPS (Wi-Fi Protected Setup) push button technique, follow these steps:
Connect the extender to the Wi-Fi router in the same room.
The WPS button should be located on your WiFi router.
Hold down the WPS button on the router for a few seconds.
Press the Linksys RE6500 extender's WPS button within two minutes.
The extender will begin to attempt to connect to the router when the WPS LED on it begins to blink.
The WPS LED will turn solid or cease blinking after the connection has been made, signifying a successful setup.
Make sure the extender is within your Wi-Fi network's coverage area and move it to the best possible spot.
Your devices should be connected to the extender's extended network.
You may quickly configure your Linksys RE6500 extender utilizing the WPS push button technique by following these steps. This approach makes the setup procedure simpler by doing away with the need to manually configure network settings.
Common issues during the setting up linksys re6500 extender
The following are some typical problems that you could run into while configuring the Linksys RE6500 extender:
Weak signal: If the extender is situated too distant from the primary router, it may have a weak signal or a limited range.
Incorrect login details: Inputting the wrong Wi-Fi password during the setup procedure may result in connectivity problems.
Compatibility Problems: The extension might not work properly with some router models or software updates.
Outdated Firmware: The extender's outdated firmware may cause setup problems or have limited functioning.
Network Congestion: The performance of the extender may be impacted in locations with significant Wi-Fi network congestion.
Setup Page loading error: On occasion, you could have issues with the setup page clocking out or not loading correctly.
Try the offered fixes or consult the product manual to troubleshoot and fix any of these typical problems if you run into them. Additionally, getting in touch with Linksys customer service or asking for help from technical specialists might offer additional direction in resolving particular issues you may run across during the configuration of your Linksys RE6500 extender.
Troubleshooting steps
It's possible that your extension is out of range of the router or that it is situated on the border of the signal area. Here are some troubleshooting steps you can take to address common issues with the setting up linksys re6500 :
To avoid poor connectivity, place the extension close to the router.
Keep in mind that the wifi password, also referred to as WiFi, is case-sensitive when inputting.
Additionally, make sure the SSID (network name) to which you are connecting your device is correct. Linksys Extender Setup XXX is the extender's SSID at all times.
The last three characters of the extender's mac address make up the SSIDs XXX.
According to the router's compatibility, choose the wireless security. If your router uses WPA security, your extender needs to do the same.
The extender's outdated firmware can occasionally be the problem.
Your extender's firmware needs to be up to date to the most recent version for a Linksys Extender RE6500 configuration to be effective.
From the web-based extender settings page, you can upgrade the firmware.
The light on the extender's top panel will start blinking white when the firmware is updated.
How to upgrade the Linksys Extender Firmware? is a help link you can use to receive assistance with upgrading the extender's firmware.
Prior to setting up, you must reset an extension RE6500 that has been given as a gift or that has been used previously.
The bottom panel of your extension has a reset button. For 30 seconds, press the reset button, then wait for the gadget to respond.
Rebooting could take a moment
Update Linksys RE6500 Extender Firmware
To upgrade the firmware on your Linksys RE6500 extender, follow these 7 simple steps:
Join the extender's network using your PC or mobile device.
Open a web browser and type the default IP address or extender.linksys.com into the address bar.
If prompted, log in to the extender's administrative interface.
Search the menu for the "Administration" or "Firmware Upgrade" area.
From the Linksys support page, download the newest firmware.
Find the firmware update option on the extender's administration page, and then select the downloaded file.
Start the firmware update process, then wait for it to finish.
You may quickly and securely upgrade the firmware on your Linksys RE6500 extender by adhering to these straightforward procedures. To ensure top performance, security, and compatibility with the newest features, it is advised to keep the firmware on your extender up to date.
0 notes
Text
Linksys Extender Dropping Internet Connection - Troubleshooting Guide Here!
Is your Linksys extender dropping internet connection? Maybe the extender is facing some issues. You must cross-check that your modem is properly connected to the router. After that, ensure your extender is well within your router’s network. If you still face the same issue, check for the latest updates and perform the firmware update.
0 notes
Text
A Complete Guide to Linksys RE6400 Extender Setup
The Linksys RE6400 extender is a tool created to increase the coverage and range of an existing Wi-Fi network. To reach places with spotty or no Wi-Fi service, it receives the wireless signal from the primary router and amplifies it.
In order to use Linksys RE6400 Extender Setup , you normally need to plug it in and use a web browser to reach the configuration page.
Extender RE6400 Setup requirements
Wireless connection that is active
Password and Security Key for the WiFi network
The power supply and extender must be securely connected.
Instructions for Linksys RE6400 Extender Setup
The steps you need to follow for Linksys Extender Setup RE6400 are listed below:
Open your laptop or PC and select the wifi icon.
You will now see a list of wireless networks that are accessible and within range of your device.
From this list, pick Linksys Extender Setup XXX.
Open any web browser once you are joined to the Extender's network.
Type extender.linksys.com or 192.168.1.1 in the address bar and press the enter key.
Contact our specialists if you have error pop-ups when logging into your extension.
Mark the user license agreement's acceptance box. Click on "start setup."
Click "next" after selecting "setup as a wireless extender".
Choose the name of the wireless network you want to expand.
The process of finding your wireless network could take a while.
If it is unable to detect your network, you must manually enter the SSID.
After that, enter the password in the box that appears.
Use the additional on-screen instructions to configure your range extender.
After making the necessary setting adjustments, click next.
Check the extender's location using spot-finding technology.
Click next if it indicates that the location is accurate. If not, make the necessary adjustments.To gain future access to the extender's settings portal, the last step is to generate an admin password.
When you're finished configuring the admin password, tap Save.
If you’re stuck between the Linksys RE6400 setup then contact our professional experts they will solve your problem.
Linksys RE6400 Extender Setup common issues
The following are some typical problems that consumers may run into while setting up a Linksys RE6400 extender:
Weak Signal or Range: If the extender is unable to successfully spread the Wi-Fi signal to the targeted locations, coverage may be patchy or unreliable.
Connection Drops or low Connectivity: When connected to the extender, users may encounter frequent disconnections or spotty connectivity.
Connecting to the Extender May Be Difficult: Users may run into problems when attempting to connect their devices.
Incorrect Network Configuration: When providing the correct network information, such as the Wi-Fi network name (SSID) or password, during the setup process, users may experience difficulties.
Problems with Firmware upgrade: Setup may be complicated if there are issues with attempting to upgrade the extender's firmware to the newest version.
Network interference: Disruptions to the extender's signal and setup may result from other adjacent wireless devices or sources of interference, such as cordless phones or microwaves.
Troubleshooting tips for Linksys RE6400 Setup common issues
The following are the steps for troubleshooting typical Linksys RE6400 extender setup issues:
Verify the connections and electricity.
Place the extension properly for the best signal reception.
Verify the correct SSID and password for the network connection.
If prior configuration attempts failed, perform a factory reset.
Observe the setup wizard's directions, which Linksys provides.
Install any available firmware updates after checking for them.
Consult Linksys' technical assistance or online resources if issues continue.
How to update Linksys RE6400 Extender Firmware?
The streamlined procedures for updating the firmware on your Linksys RE6400 Extender are as follows:
Join the Wi-Fi network provided by the extender with your computer or mobile device.
Open a web browser and type "192.168.1.1" or "http://extender.linksys.com" into the address bar.
Use your credentials to log in.
Then select "Administration" or "Firmware Upgrade."
Go to the Linksys support page and download the most recent firmware for your extender.
Upload the extender using the firmware file you downloaded.
Watch for the extender to restart after the upgrade is complete.
0 notes
Text
Linksys AC2200 Extender Setup
We'll go over every step of setting up the Linksys AC2200 extender on this page. Dead zones will be eliminated in your house or business thanks to Linksys AC2200. Your signal will cover an additional 2000 square feet with this Linksys AC2200 Extender Setup . You receive a strong, quick signal from your extension, enabling you to stream HD movies and play games.
There are two ways to configure your Linksys AC2200. There are two methods for doing this: manually and through WPS.
Setting up your Linksys AC2200 range extender with your hands:
Grab every tool you can.
In the same room, bring your boost.
Next, establish an Ethernet cable connection between your device and the extender.
You must now connect your Linksys AC2200.
Type extender.linksys.com into the address bar.
You'll see a page where you can log in on your device.
Enter your default username and password, click the "Login" button.
If your Linksys AC2200 range extender still won't connect, give us a call at our toll-free number or start a live chat with us. Our specialists configure your problem.
Linksys AC2200 configuration with WPS
WPS, which stands for "Wi-Fi protected setup," is a protocol for securing wireless networks. Follow these instructions to configure your Linksys AC2200 extender through WPS.
Open the Linksys AC2200 box.
Link it up to a power source.
Ensure that your extension is in the same room as your router.
The orange light will turn green after two minutes.
On both your router and the AC2200 extension, press the WPS button.
Delay until the WPS is completely green.
It indicates that the Linksys AC2200 Extender Setup is complete.
How can Linksys AC2200 firmware be updated?
If you want quicker wifi, make sure your Linksys AC2200 has the most recent firmware. Do the following to upgrade the firmware on your Linksys Extender:
An Ethernet cable can be used to link your device and AC2200 extender.
Check to see that your booster is not plugged into your router.
Start a web browser.
Type 192.168.1.1 into the address bar.
On your smartphone, you may now see the page where you can log in.
Please enter your login information.
Next, select the "Login" button.
That’s how your Linksys AC2200 Extender Setup firmware is successfully updated.
Note: You can use live chat or our toll-free number to contact our specialists if you're still having issues with the firmware.
How is the Linksys AC2200 reset?
When they can't remember their admin password and wish to recover it, the majority of users reset to factory defaults. All of your personal information, including your password, username, and SSID, is deleted when you reset a Linksys AC2200 Extender Setup so that it may be configured anew.
Reset Linksys AC2200 by performing the steps below:
Turn on your Linksys AC2200 first.
Find the button on your booster that resets it to its initial configuration.
Get a toothpick for yourself.
Using a toothpick, press and hold the factory reset button for ten seconds.
The LED will begin to blink after a short while, at which point your booster will restart on its own.
You can now configure your extender in a different method.
This is how to perform a factory reset on your Linksys AC2200. In case you need assistance with any step of the procedure, you can phone our toll-free number or chat with one of our skilled professionals. We are accessible to you 24/7, every day of the week.
Typical setup problems with Linksys AC2200 Extender
The website extender.linksys.com is broken.
extender.linksys.com was accessed using the incorrect password.
Internet access is available, however the WiFi extension is inoperable.
The WiFi extender is not able to connect to extender.linksys.com since it is not connected to the network.
Accessing the IP address 192.168.1.1 is problematic.
After the Linksys WiFi Range Extender AC2200 has been configured, the Linksys setup screen is still visible.
My Linksys extender's default password has slipped my mind.
The extender's LED lights don't function properly.
When the internet connection drops, the Linksys EX2200 won't let you log in.
Updates to the Linksys firmware are not being made.
With a WiFi extension, there are issues getting online.
Linksys range extender has no network name.
On the Linksys AC2200 Extender Setup , the internet is not working.
issues with the red light of the Linksys extension.
Internet access but no functionality.
Tips for Linksys AC2200 Extender Setup and Troubleshooting
Try these steps if you're experiencing problems configuring your Linksys range extender EX2200:
Verify that the Linksys AC2200 Extender is receiving the appropriate amount of electricity from the wall outlet.
Check to determine if the wall plug is faulty or has a short circuit before plugging in the extension.
You can immediately connect to the internet using your device.
Every electrical connection should be checked. Utilize only undamaged cables.
Avoid placing your extension near devices like microwaves, fish tanks, cordless phones, room corners, metal objects, walls, and walls, as well as aluminum studs.
Check that you have the correct URL entered in the address box if you are having issues using extender.linksys.com.
Try configuring your Linksys Linksys AC2200 Extender once more after a power cycle.
To access extender.linksys.com, only use the most recent version of a web browser.
Your extender's firmware should be updated to the most recent Linksys version.
Put your AC2200's settings back to how they were when it left the factory.
Why didn't the aforementioned troubleshooting advice solve your issues? Not to worry. Simply contact us, and we'll assist you with configuring your Linksys AC2200 Extender.
1 note
·
View note
Text
Eero vs apple airport

EERO VS APPLE AIRPORT PRO
Mesh networking has become very popular in recent years, with offerings from companies such as Google, Netgear, Linksys, and others. But, for now, mesh wireless technology is mostly available at premium prices.
EERO VS APPLE AIRPORT PRO
Wi-Fi has undergone changes, with the implementation of the new Wi-Fi 6 protocol, which offers faster and more efficient data transfer the latest iPhones and iPad pro models all support this technology, and it’s likely that the next updates to Apple computers will as well.Ī number of mesh Wi-Fi systems are available to support Wi-Fi 6, with more coming soon. Wi-Fi 6 and mesh networking are becoming the norm But they ensure excellent coverage even in large homes and on multiple floors. Today, mesh Wi-Fi systems are more expensive than a single standalone router. This bridge mode increased the range of an 802.11 network. In its heyday, AirPort wireless access points made it easy to create a Wirelessly Extended Network. But anyone who wants more control or better range eventually opts for a separate access point. Presumably, sales of these devices weren’t good enough to maintain the product line and the associated firmware and software.Ĭonsumers often don’t buy routers or Wi-Fi access points they use what their ISP gives them. When introduced, Apple’s AirPort products worked well for many consumers and small businesses as they dipped their toes into Wi-Fi. And the Time Capsule contained a hard drive, to use for Time Machine backups. (AirPlay was originally called AirTunes.) It allowed you to connect a stereo or powered speakers directly to the device. The AirPort Express was the first easy way to stream music to devices in your home using AirPlay. The AirPort Extreme, AirPort Express, and Time Capsule were easy-to-use routers and Wi-Fi access points that fit perfectly into the Apple ecosystem. In April 2018, Apple announced that it was discontinuing AirPort, its line of home Wi-Fi products. Apple Why Apple Is Missing the Boat on Home Wi-Fi
0 notes
Text
Laptop wifi antenna booster

LAPTOP WIFI ANTENNA BOOSTER INSTALL
LAPTOP WIFI ANTENNA BOOSTER DRIVER
LAPTOP WIFI ANTENNA BOOSTER PC
LAPTOP WIFI ANTENNA BOOSTER FREE
Screw, a drinking straw, and a black marker Physically extend your router's antenna with copper wire, a wood Boost Your Wi-Fi Antenna for Less than a Dollar.You could also upgrage your firmware to Tomato You're using the same basic router as the fellas in the video, you can If you don't want to attach unsightly parabolic boosters and This project should only takeĪbout three minutes and will hopefully leave you with impressive Gains from 82% to just under 100%, though I only saw boosts of aroundįive percent, so your mileage may vary. Manufacturer's website regularly for these updates to keep your routerĪs shown above, by carefully folding tinfoil into a parabola, you canīoost your wireless strength tremendously.
LAPTOP WIFI ANTENNA BOOSTER DRIVER
Perhaps the easiest way to improve your router's performance is byĮnsuring that its firmware and driver are up to date. Make sure that fewer people are using the Wi-Fi when you plan on connecting, this increases chances of Wi-Fi working better. The best coverage possible throughout your home. Lastly, make sure it's in the center of your house, so you have The router if you can (one reader found that his attic was the perfect Point the antennas vertically, and elevate
LAPTOP WIFI ANTENNA BOOSTER FREE
If you want the best signal, you'll need it out in the open, free ofĪny walls and obstructions. I usually place it on a window sill because that gets better reception. All the antennas are covered in 1-year warranty.Place it in a area that is not crowded. These antennas are also one of the best value for money buys as you can get 3 for just 15$. The most popular high gain antenna with nearly 700 positive reviews and a consumer rating of 4/5 stars on Amazon. The device is Dual-Band 802.11n/ac with Long Range Support.Īvailable Here! Super Power Supply 3 x 9dBi 2.4GHz 5GHz Dual Band WiFi RP-SMA Antenna(14.99$)
LAPTOP WIFI ANTENNA BOOSTER PC
The only high gain antenna on our list that that comes with its own easy to connect USB extension which is about 1.2m long, therefore it can be connected to a Mac or a PC as well. The antenna is approximately 15 inches in length and like most top products, it is omni directional.Īvailable Here! Edimax EW-7811UAC High Gain Antennas For WiFi Router (24.40$) The affordable antenna can fit all VOIP devices and PCI cards thanks to an RP-SMA connection. The Omni-directional antenna has a 9dB gain and is compatible with all 802.11b and 802.11g WiFi networks and devices.Īvailable Here! Alfa 9dBi WiFi Booster SMA OMNI-Directional High-Gain Screw-On Swivel Antenna (14.99$) The comparatively large antenna has the dimensions of 25.1 x 4 x 2.2 inches and weighs 13.4 ounces.Īvailable Here! WIFI 10 dBi 2.4GHz Antenna High Gain Antennas For WiFi Router (5.85$)Ī simple antenna that is quite popular on all VoIP devices. The mega antenna is going to boost your Wifi signals for sure.
LAPTOP WIFI ANTENNA BOOSTER INSTALL
The dual bands deliver four dBi (2.4GHz) & 7 dBi (5 GHz) gains where as it is easy to install and connect, thanks to RP-SMA connection ports.Īvailable Here! Bolo Brands N Wireless 18dbi 2.4GHz Wifi High Gain Antenna(22.95$) The high gain antenna set is great if you have multiple routers around the house. As per data sheet the antenna has 60 degrees vertical beam width and is rated as 8dbi Omni.Īvailable Here! Linksys High-Gain Antennas, 4-Pack (77.77$) Made by EnGenius the antenna is renowned for its range. The antenna has a 2.15dBi gain, and this device is mainly used for wireless radios.Īvailable Here! Engenius Outdoor High Gain 8dBi Omni Antenna (89.99$) This antenna has SMA- Female connector and can be extended in height up to 400mm. The product itself-weighs just 1.6 ounces.Īvailable Here! Aweek NA-773 SMA-F High Gain Antennas For WiFi Router (10.90$) The device has two frequency ranges 2.4Ghz and 5 Ghz with a respective gain of 5 and 7db. The antenna can also be used in cars apart from your wifi router.Īvailable Here! Asus WL-ANT-157 Antenna High Gain Antennas For WiFi Router (28.10$)Īsus Antenna can be an excellent accessory for your computer. The high-quality Antenna has a 5dBd gain on 440MHz – 450MHz and 2.4dBd gain on 144MHz – 148MHz. Tram 11861 Amateur Dual Band High Gain Mag Mount 37″ Antenna (42.99$) So here is our list of 10 best High Gain Antennas that you can buy right now. Are you like the many people having trouble with their WiFi at home? Are those signals too weak to reach your study room? Well, there is a solution for that, and they are called “High Gain Antennas.” These add-on devices increase the range of your WiFi router and can even penetrate thick walls ensure proper connectivity every time you want to surf the internet.
0 notes
Text
How to Fix Linksys RE6500 Blinking Orange Light?
Linksys Extender RE6500 Blinking Orange Light - Troubleshooting Steps
Linksys extender RE6500 blinking orange light? Not to worry! Most users may come across this issue if the Linksys extender encounters any technical issues. There are numerous technical glitches that your device may encounter during its lifespan. These are two of the most common reasons that make Linksys extender blinking orange light.
In this post, we will understand the reasons behind the Linksys RE6500 blinking orange. Make sure you read this post until the end in order to avoid missing any useful info. So let’s get started with the reasons first.
Linksys RE6500 Blinking Orange - possible reasons
In this section, we will discuss the main reasons why you may think why is my Linksys RE6500 extender blinking orange.
Linksys wifi extender RE6500 fails to connect to the router.
The extender is placed very far from the main router.
There are a lot of interruptions around your router. Therefore, your router may be unable to reach the extender.
The firmware of your extender is outdated.
The firmware of your Linksys wifi extender is faulty.
Now, in this section, we will discuss the troubleshooting steps to fix the Linksys orange light issue. Kindly follow the instructions carefully to avoid any hassle.
Firstly, make sure the distance between your existing wireless router and Linksys wifi extender is very less.
If the existing router is far away from the Linksys wifi extender, the Linksys extender will blink orange light.
After that, you should check if the error has gone or not. If not, you may need to reboot both the devices.
The second reason is the outdated firmware on your Linksys extender, you may need to update the firmware as well.
Now, go to the Linksys extender support website and enter the serial number of your device to check for the latest firmware updates.
After that, download the latest firmware on your computer or laptop.
Login to the Linksys admin page using extender.linksys.com and go to the Firmware Update page.
Now, click Browse and select the downloaded file on your device.
Allow your device to process the firmware update.
After a few minutes, your Linksys extender RE6500 will reboot.
In case the firmware of your Linksys extender is already updated but has somehow malfunctioned, you may need to reset the Linksys wifi extender. To reset Linksys extender, press the reset button and hold it for a few seconds. Release the button after 10 seconds and wait. Make sure you give your device a few minutes to get back to the original settings. Moreover, please ensure to not turn off your device in the middle of the reset process.
So that was all about the Linksys RE6500 blinking orange light. We hope this post resolved your issue and your device is once again doing its job. In case you encounter any problems with your extender, kindly reach out to the support team.
0 notes
Text
Steps For Linksys Extender Firmware Update
The Linksys extender firmware update process will require you to download the latest firmware file from the main website and proceed with the process online. If you are looking for help with the update process, you can always reach out to the team at our end. Or, you can always refer to the information available on our website now.
0 notes
Text
HOW USER LOGIN TO THE LINKSYS RE6500HG EXTENDER | EXTENDER.LINKSYS.COM
LINKSYS RE 6500HG EXTENDER
Linksys RE 6500HG Extender comes with many advanced features and with the most straightforward coverage area. It immediately covers the 10000 square foot, and you'll easily use your network in every corner of the house. The Linksys extender has the AC 1200 Mbps wireless speed. It comes with dual-band and cross-band technology. Linksys RE 6500HG extender has a four-gigabit ethernet port and also offers the 2 high gain antennas. The extender also has audio capacity. You'll easily attach your music system with your Linksys extender. It can efficiently work together with your router, and you'll take the experience of the most straightforward technology of the Linksys RE 6500HG extender and also has spot finder technology so that you'll place your Linksys RE6500HG range extender at the most straightforward place where you'll get the purest signals. You'll easily manage your all network with the Linksys app.
SETUP OF THE LINKSYS RE6500HG EXTENDER WITH THE WPS BUTTO
The user can simply found out with the wireless protection setup.
Now you'll unbox the Linksys RE6500HG extender.
You need to attach the antennas with the Linksys extender.
Here you'll connect your Linksys RE6500HG extender with the power outlet.
After this, you'll check the facility of the Linksys RE6500HG range extender is
Functioning
Here you'll locate the WPS button on your Linksys RE6500HG range extender and your Linksys wifi router.
Now you'll quickly press the WPS button for a couple of seconds on the Linksys RE6500HG range extender, and after this, you'll press the WPS button on your Linksys router.
Here you'll see the lights start glittering.
If you see the blinking white color light, then it means the method goes on.
After this sit comes solid white, it means the connection is about up between both devices.
If just in case there's the Yellow color light, then it means it failed. You like to try this process.
Here you'll use your Linksys RE6500HG extender.
MANUAL SETUP OF THE LINKSYS RE6500HG RANGE EXTENDER
You can quickly found out your Linksys RE6500HG range extender.
Here you'll unpack the Linksys RE6500HG range extender.
After this, you'll attach the antennas with the Linksys RE6500HG range extender.
After this, you'll place your extender near the router.
You can also get help from the spot finder technology.
Here you'll attach the Linksys RE6500HG range extender with the facility supply.
Now you'll check the facility of the Linksys extender is functioning.
After, this you'll attach your Linksys RE6500HG range extender with your computer help of the ethernet cable.
Here you'll open the web browser.
Now you'll enter the www.extender.linksys.com and here you furthermore may enter the IP address 192.168. 1.1.
The user can enter the username and the password here; the username is the admin, and the password is the password.
Here you'll see the setup page open, and now you'll enter the details.
After this, you'll easily use the Linksys extender.
LOGIN TO THE LINKSYS RE6500HG EXTENDER
The user must open the online browser.
Here you'll enter the www.extender.linksys.com or enter IP 192.168. 1.1 address and enter the username and the password here; the username is the admin, and therefore the password is the password.
Now you'll easily access the settings. You'll easily access the advanced settings.
FIRMWARE UPDATE OF THE LINKSYS RE6500HG RANGE EXTENDER
You can open the online browser.
Here you'll enter the details of login.
Here you'll click on the advanced settings.
After this, you'll click on the firmware update.
The firmware takes a couple of seconds for the update process.
Now you'll get the newest firmware with security patches.
RESET OF THE LINKSYS RE 6500HG EXTENDER
The user can reset the Linksys extender once they aren't ready to fix some problems. There's no substitute for the matter. It's straightforward to reset the Linksys RE 6500HG extender. You can locate the push button on the Linksys RE6500HG extender. Here you'll press the push button with the fastener for a couple of seconds. Now you'll release the reset button; after this, you see the lights start flashing. It comes stable for a few seconds. After this, your Linksys RE6500HG extender comes within the default stage.
0 notes
Photo
Linksys Range Extender Firmware Update
Secure your Linksys range extender by downloading the latest firmware version from our website. Updated firmware gives you smoothly working internet connection with high speed. For more details, visit our website and clear your all doubts. Visit here:- https://extenderlinksys-us.com/services/
0 notes
Last Seen Blogs

saeranz
saeranz

myundeadgayson
Jason Todd's Empty Casket

dc-builders-construction-llc
D.C Builders & Construction LLC

voliyu
Domain of Fu Hua

padawansuggest
Listen to the Padawan