#just experimenting with subtle edits that don't completely change the photos
Text
Film Adaption - workbook part 2
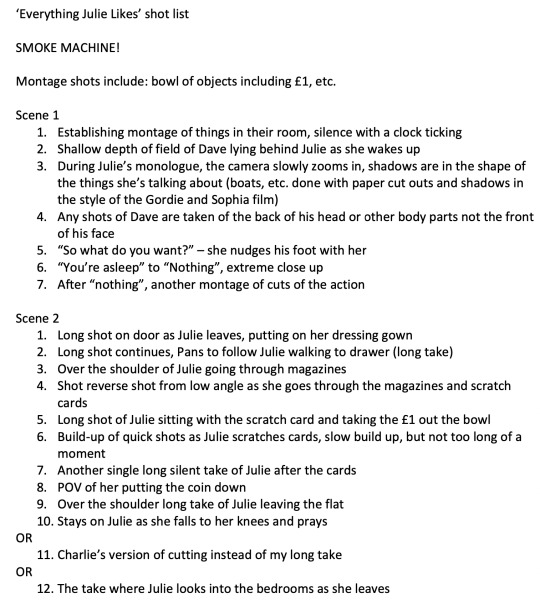
'Everything Julie Likes'
1. Finding Our Feet (meeting with Charlie/shot list/storyboard)
After getting sorted into our groups and officialising our group members' roles (Myself as director, Charlie as writer/cinematographer, Alyssa as sound recorder/sound editor, Alexander as sound editor/sound recorder, Laura as producer/production design) for Film Adaption (I chose Charlie's film, 'Everything Julie Likes'), Charlie and I had a couple of one on one meetings and chats about the direction we wanted 'Everything Julie Likes' to take. We spent time discussing Charlie's shot ideas - to which I gave my feedback - and plans of a shotlist, characters, and the general tone Charlie had in mind when first writing the script, so that I could accurately portray what she visualised her script as the film's director. One of the main things we wanted to get across in the film is the focus on Julie. Since it's made clear through the dialogue that Dave isn't overly present in her life, we wanted this to come across through the visuals of the film too. This would be done through close ups on Julie, and then whenever Dave is on screen he is only ever seen from behind, close ups on parts of him that don't show his face clearly, etc.
Here is the shot list I roughly jotted down during our first ever meeting together, and then the official shot list that was produced after these discussions:

2. finding Our Film (casting call/location scout)
Once we had a good idea of the skeleton of the film, we all got to work on finding our actors and location. Charlie and I had spoken a bit about how we pictured the characters - Julie and Dave - and so I passed that information onto Laura, who then made a casting call for our group to make public on social media and various casting groups on Facebook. This process was rather tedious as it took a while for people to get back to us, and then when they did.... very very veryyy slow replies... typical. We took to asking around the Napier acting students (including Alexander's own brother!), but that too deemed unsuccessful. in the end, we cast two of our course mates - Jagoda and Luke - as our Julie and Dave, but we had absolutely no complaints as their performances turned out really great.
Next on our list was finding a location. At this point, the top things on our checklist of what we were looking for in a location was a window with bright natural light, and a bed. Unfortunately due to COVID-19 we were unable to scout around for the perfect flat, but my bedroom in my flat luckily fit the description well enough. I sent various videos and pictures to our film's group chat so everyone could get an idea of the space. We all agreed it would work well, and so there we had it - our location was found.
3. the news of filming in uni/script changes
Unfortunately, right as we were sorting things out for our film, the class received an email bearing the news that - due to COVID-19 rules - we were no longer allowed to film in whatever location we wanted. Instead, we were now limited to one of two Merchiston campus classrooms available for filming. This meant we had to act quickly to change the script, shot list, story board, etc. to accompany these sudden changes in our plans.
Our original plan to shoot in a bedroom with both of the actors in bed was obviously no longer appropriate for the COVID-19 guidelines, and so we worked around how this could work in a classroom. We decided to have it set at a table instead, with far more focus on Julie than in the original script. Charlie got to work with editing the script, and we all got to work on planning how we could dress an Napier classroom to look like a realistic room in a family home.
We were also no faced with the task of creating natural light, as we no longer had my bedroom window to work with and this lighting was what we'd wanted from the start. We were sent some video tutorials on how to create cucoloris from our lecturers, and this (along with the use of sheers to dim harsh light) would be our best bet for mimicking the look of natural light shining through a window.
4. set dressing/Pinterest board
During the group meetings we had to prepare for this change, we had discussions of what we wanted our set to look like. This involved talk of colour palettes, who was able to provide what furniture, and thoughts of what Julie and Dave were like as people and the type of home they may live in.
We made it clear from the start that we wanted the flat to look lived in and slightly messy, as Julie is struggling quite a bit when we meet her in Charlie's script. This meant we sourced empty bottles, food containers, and various nick-nacks to complete this look, and by bringing our own stuff from home it would look as realistic as possible. To help give us ideas for making the room look realistic (and since none of us have ever built a room from the ground up before), I made a Pinterest board of various images to give us inspiration:
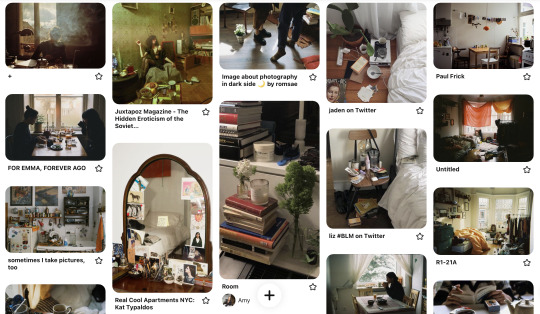
However, we decided some of the images looked too 'aesthetically pleasing' and not naturally messy enough, so we only picked up on small details i.e. the string of hanging pictures, layered books.
We also spoke about our desired colour palette for the film, and came to the conclusion that a muted tone would be best. We didn't want anything that would take too much attention away from the actors, as this film is very performance based. More so, we had to think about the characters Julie and Dave, and how they would realistically decorate their home. Since Julie's story is based around the fact there isn't much colour in her life anymore, any bright or statement decor just didn't feel right for her. Therefore, we settled on a muted coral type colour for the wallpaper, and a subtler approach to decoration.
5. shopping trip/making cookies to stand in for our new lack of window
To prepare for our shoot, Alyssa, Laura and I spent a day going to B&Q and various other shops to gather everything we needed to dress out film's set. This day turned out to be super fun!
Before heading off, Laura had made a list of everything we needed to buy ahead of time so that we wouldn't forget anything (including some items we may have already had at home):
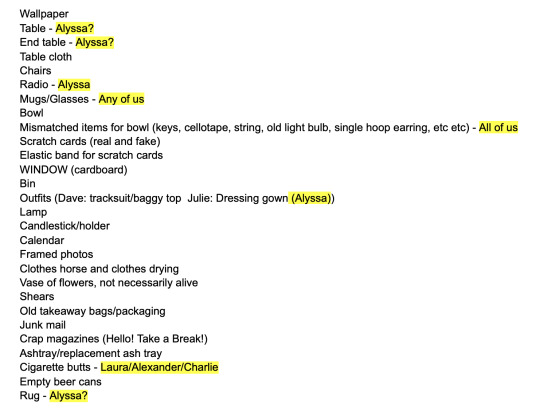
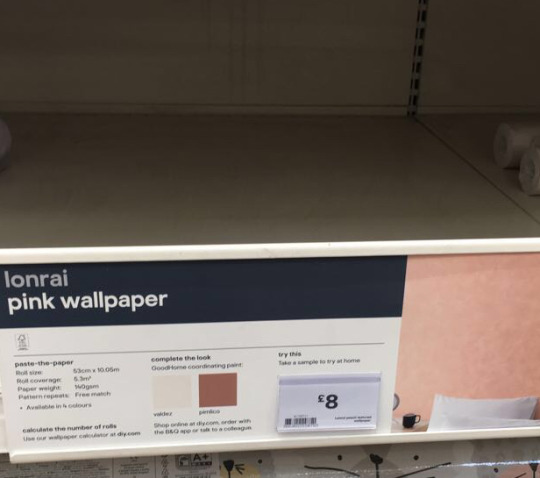
In the end, it turned out so successfully and within the day we had pretty much everything we needed. While in B&Q, I would take pictures of all the wallpapers I thought were best, and would send them back to the group chat to get a second opinion from the rest of the group before making a final decision. Of course... the one wallpaper that was completely sold out was the most perfect out of the whole batch, but luckily we found it in the B&Q on the other side of Edinburgh - there's always something...
One of the other main things on our list was cardboard to make cucoloris/'cookies' for our window lighting, which a friendly Tesco employee gave away to us for free.
That night I got to work making them. Once I got the hang of it, they were easy enough to complete, and so I made 3 different variations of a window shape for us to try out on the prep day to see which one looked most realistically like a window.
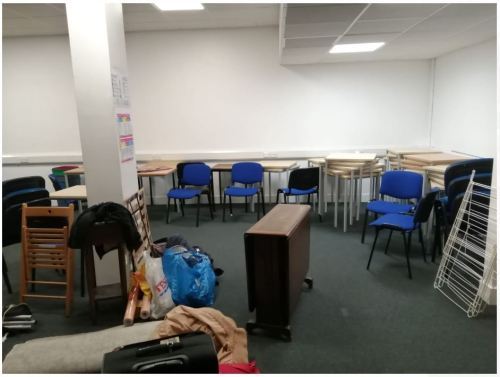
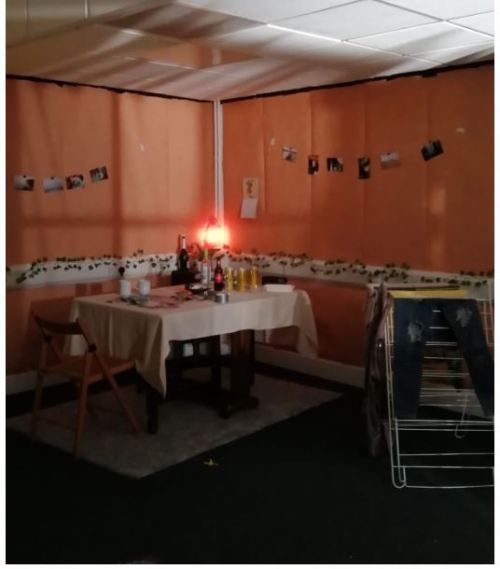
6. prep day
The majority of our prep day was spent setting up the room. This involved sticking up the many sheets of wallpaper and decorating the table. The main struggle with the wallpaper was getting it to lie flat against the wall, as there was a rim of sockets that stuck out and ran around the entire room, making the paper slightly lumpy. We tried our best to get it to stick in a way that didn't look so obviously makeshift on camera and - although it may not have looked 100% perfect - I think Laura and Alexander did a good job of sticking it to the wall despite the confinements the room gave us.
Setting up the table consisted of continually replacing and shifting various objects until we reached that perfect 'natural', 'lived in' look for Julie's home.
Here is a before and after of the room (photo credit to Charlie!):
During this set dressing, Charlie did her job as the cinematographer and set up the camera and lighting, ready for the next day of filming.
She spent some time playing around with the lighting to see what worked best, and through a mix of gels and sheers - we had our perfect morning sun glow through the cucoloris. Switch out gels, and there was our night time lighting.
7. shoot day
Throughout shoot day, we did end up running slightly behind. However I think our rigorous planning, Laura's tight schedule, and our great team meant we managed to get back on top of things. Once we got into the swing of it, we were getting through shots at a comfortable speed, and once I's gotten into the grove of directing the actors, Jagoda and Luke did an excellent job of staying consistent with their performances throughout the day.
Our most ambitious shot of the day was the dolly shot, which we had left to the very end to give us all the time we needed at the end of the day for rehearsals and multiple takes. This dolly shot was to go along with a short monologue heard on a radio we see in shot, and so in order to make the editing easier for Alexander, I would call out the lines the way I wanted them to be read in post-production, as Charlie worked the camera. This did take us a few shots as we wanted to experiment with the speed at which we pushed the camera in - along with trying out how it looked with a focus pull. Kieran recommended we do an ambitious shot like this earlier in the shoot day incase we are pushed for time at the end of the day, so I will definitely bare this in mind for future shoots incase we fail to get back on schedule like we were able to on this shoot.
Overall, the shoot went really successfully! We covered everything we needed in good time, but worked well enough that we were capable of experimenting and making subtle changes throughout the day when need be.
8. edit/sound edit/colour grade
From this point, the film was then handed over to Alexander to edit the footage. He would send each draft to our group's google drive, which we would each watch and then have a Zoom meeting to give feedback. He did a good job of taking in any notes I had and soon enough we had picture lock.
Them, it was Alyssa's turn to edit sound. Before she began, her and I had a chat about some things I wanted - for example, during the montage of Julie scratching the cards I really wanted the sound to build, layering more scratching sounds to create a truly overwhelming feeling. After her first draft of the sound edit, she showed it to me and we called to talk about any feedback I had. Much like Alexander, she was really efficient with taking on feedback and made an excellent job of the sound.
After both picture and sound were locked, Charlie took on the task of colour grading.
9. my experience
Going into this project as a first time director, I was extremely nervous. I was scared I'd let down Charlie's script or that I wouldn't communicate to the actor's well enough or just that I may not do the project justice in general. I do still have a lot to learn and while my first time won't be perfect, I am still happy with how 'Everything Julie Likes' turned out. Everyone in this group was extremely hard working, creative, and worked super well as a team - I'm proud of what we managed to achieve despite all the last minute changes we had to face :)


10. the crit
0 notes
Text
Double Exposure Outcome 3
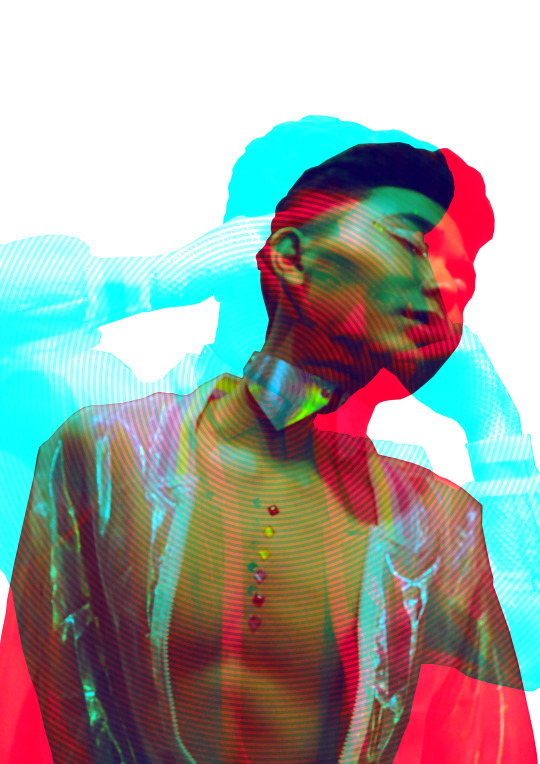
For my third piece I created something similar to the second outcome, but overall lighter and with an added new effect. What this represents is the LGBTQ+ community, and their equality struggles that need to improve completely. I chose and image by searching LGBTQ into pexels.com, where I found images of a man wearing glamorous makeup and outfit. Once again you can see confidence in his poses, which is how they should be able to feel just like any other unfairly struggling community. The man in the photos is also asian, therefore representing another group of racially discriminated people.
Although this piece is overall simple, I don't think it looks empty nor boring. If anything the simplicity allows the colours, patterns and imagery to really stand out, which is effective if it works and this outcome is a positive example. I think the repeating circular pattern really improved the piece, stopping it from looking too simple or uninteresting. Because I've used a white background the canvas doesn't look filled, and instead looks empty which is why I needed that extra detail.
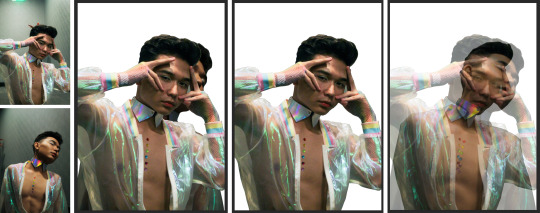
To begin with I selected two images of a man posing in similar positions, this adds movement to the piece which is a perfect example of what you can do with double exposure. With these I repeated the same steps to cut them out, merge a background layer and overlap them with a lower opacity. Although if I was to go back I would have cut the hair out more, because the shape still looks a little blocky.
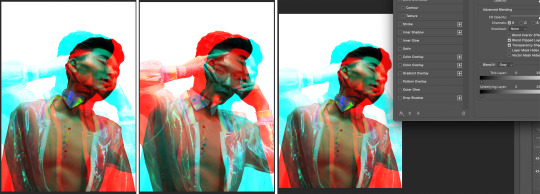
Next I played around with the blending RGB channels, to find that red and blue worked really well. However I was unsure which way round the layers would be coloured, so I asked my online friend Millie for her opinion and she preferred the first version. We discussed and thought the red stands out more, therefore this option looks more balanced and blends smoother with the other layer.
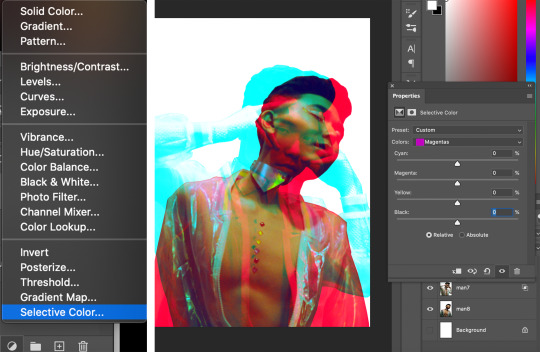
Once I saved the layer style I created a selective colour adjustment tool, here I edited every colour until I was happy with the vibrancy, hue and brightness of the art. It may not look so different but the subtle changes make all the difference, I controlled the colours by eye and looked out for what appealed me.
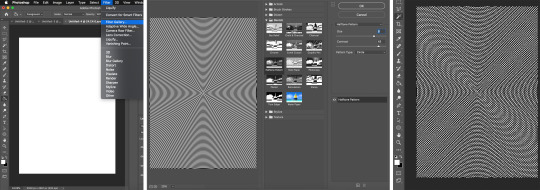
To create the circular pattern effect I first went into the 'filter gallery', here I selected 'halftone pattern' and set the pattern type to circle. I then adjusted the size and contrast of the circles, so they weren't large and thick lines but big enough to be seen. One I was happy with the pattern I selected any white using the magic wand tool, with which I deleted so it wasn't covering the image behind and broadened the blending options.
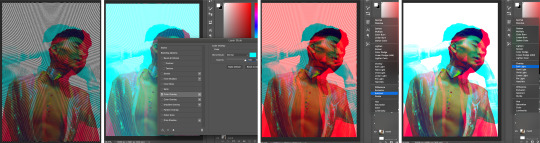
Finally I overlaid the same blue onto the pattern, rasterised the layer style and experimented with different blend modes. In the end I went for 'soft light' because it filled within most of the man, yet the light colours remained without. However the pattern was slightly too prominent, therefore I lowered the fill/opacity of the layer just to lessen the impact but not lose it.
0 notes
Last Seen Blogs

maxim88cc
MAXIM88

littlegelen
littlegelen

queenofchaosbd
𝔟𝔢𝔩𝔡𝔞𝔪

infinitelilith
InfiniteLilith

photosquareblog
Blog.Photosquare.in