#It'd be nice to use the patio as a patio and not as a DIY space lmao
Text
MCM Shelf Saga
Part 1 - Introduction, Commencing Stripping Hell
Spring has come, which can only mean one thing. It's time for another furniture refinishing project.
So you might remember this chair I've refinished before, and you might remember how I mentioned in the backstory of that post that my late mother had painted three pieces of furniture (a chair, a desk and a shelf) in matching colors, the three having been left to collect dust in one of our attic closets for the past few decades.
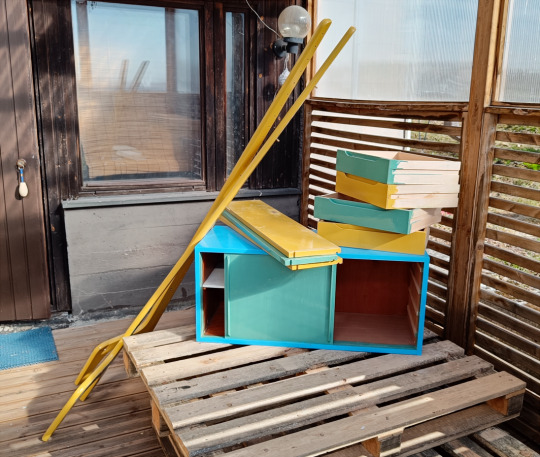
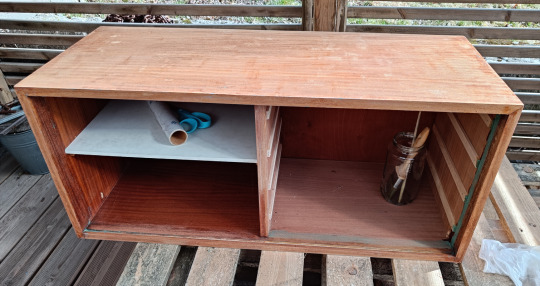
Indeed, this is one of the three furniture pieces, and just like with the chair, I ain't keeping it if it looks like that. It's either getting refinished or yeeted, and since I don't want to waste perfectly good furniture, it's the former. And since the weather now allows it, it's time for me to get started on working on this beast of a project.
Now there's actually two things I had to do before I could begin this project. Step one was disassemble the entire unit because, TL:DR; we could not move it out of the tiny ass closet without either moving a fuck ton of furniture and storaged items out of the way and maybe break something while hauling this outside, OR just disassemble it 'cause it needed to get dissambled anyways.
So, with dad's help we did just that (with relative success, we did have to break some of the original screws because they had dug into the wood and made disassembly impossible otherwise, but it's fine that hardware can be replaced) and brought it to the patio where I can work on it.
The other thing I had to do was actually quickly check if the shelf was safe for me to work on. If you want more info you can read the chair post but long story short, I was worried there could be toxic car paint under this paint layer and if there was, I was going to refuse to refinish this piece. But all I did was gently sand some paint off a shelf to see what was underneath and it was wood so! Safe it is!
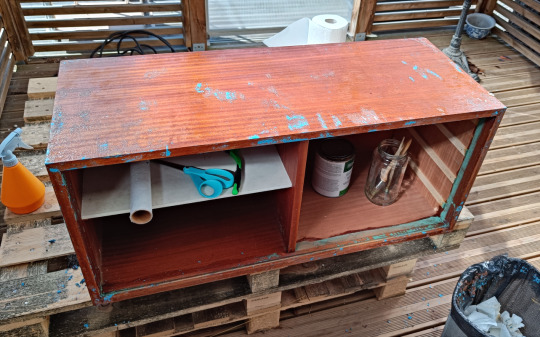
So this is probably somekinda MCM shelf, the style looks like it and the color of the wood could suggest it. The main unit of it is made of just veneered chipboard but hey, it's vintage chipboard, and there's nothing wrong with it, so it's still worth giving a second (a third?) life to
Didn't take a photo of it with the drawers and the sliding door still inside but I doubt that matters. Parts of the inside of the unit did get painted over which is. Not great for me, but it is what it is

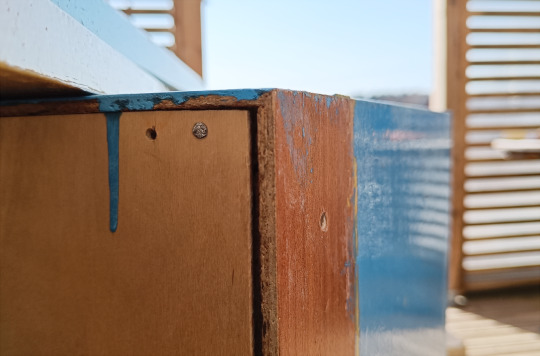
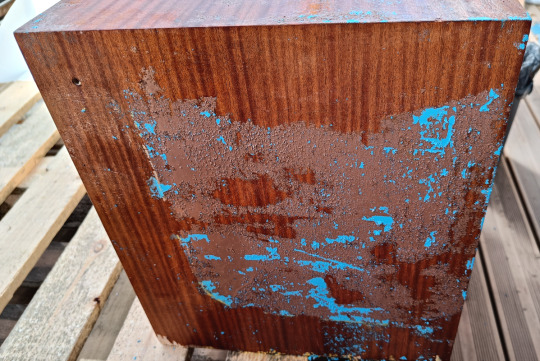
Intrestingly, the sides of the shelf (that make both the feet of the unit as well as where the shelves hook onto) seem to have been black originally, as the inside facing parts never got painted over. Meanwhile the main unit has some veneer damage right where the sides were... Like it's not great but since that part does get completely covered it's not a huge deal


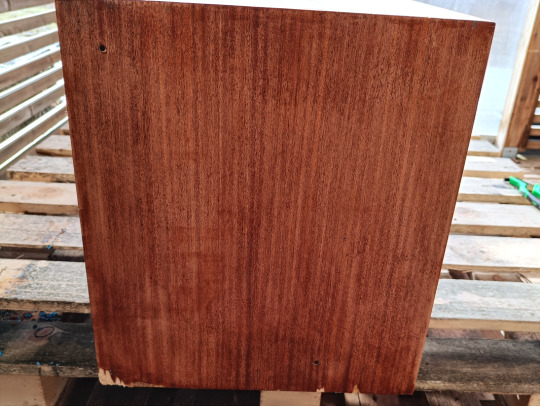
And the shelves of the shelf. As you can see, I did a quick test on them to see what was under the paint and it looked safe to work on


So I actually kinda started by testing my paint removal methods on one of the shelves. When I did the above check up, I noticed the paint was quite hard to just sand through, so just sanding it didn't seem like a great option. I did also soon discover the paint was quite hard to scrape.
Now, I did't want to use paint stripper since it causes me that severe nausea, so I decided to try out a hot air gun to remove it. And it did work! However
First off I just wasn't excited about using electricity 'cause. Energy crisis. Y'know. Shit's expensive.
While it worked it wasn't super effective? It might've been just poor technique on my part but I felt like I had to stand there blowing hot air onto the paint for a long time for it to start reacting before quickly sweeping in to scrape a tiny section clean before starting again on another tiny tiny section
And the main thing... Under the paint there seemed to be an old finish of some kind. Probably a poly coat, IDK. But I was getting worried of how it was reacting to the heat. Like. IDK I was worried it might melt and damage the wood or something

So. I had to go crawling back to the paint stripper. Because in the end, it felt like the safest option for me to use (nausea aside). From the chair project I knew it would be able to remove the paint easily and knowing this whole thing has a lot of thin veneer all over it, it'd probably be the best way for me to ensure I didn't damage the veneer too much.
Goop time it is

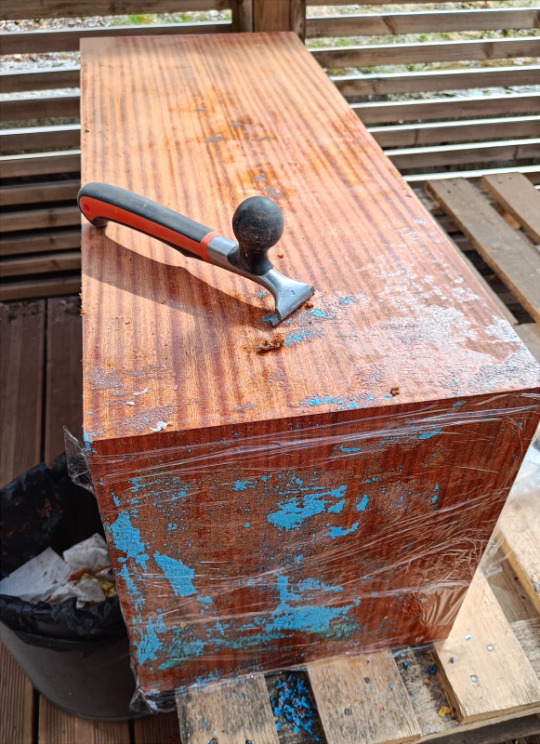
I did one coat of paint stripper and let it sit over night (plastic wrapped so it wouldn't dry out)
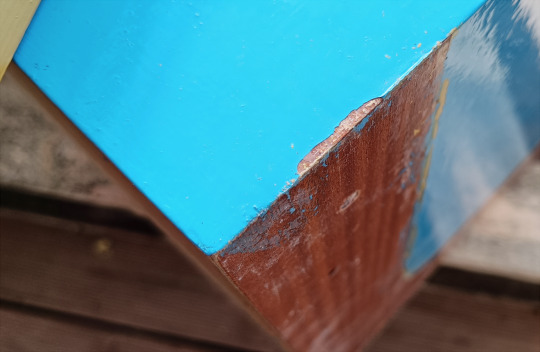
Here's what the sides were looking like after one round of paint stripper. It really wasn't going to be enough so what I ended up doing was that I applied another coat of paint to the top and let it do it's thing for like an hour (while I was walking my cat), before coming back. I then did another round of stripper on both sides while I finished removing the paint residue from the top

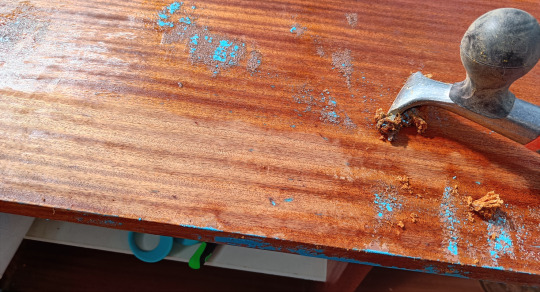
So here's what two rounds of paint stripper did to the top, as well as one round to the inside bits. It seems like the paint may have permanently strained parts of the inside where the wood was raw as it did not want to come off at all, though fortunately the worst parts are the parts that'll end up getting covered by the drawers so it could be worse

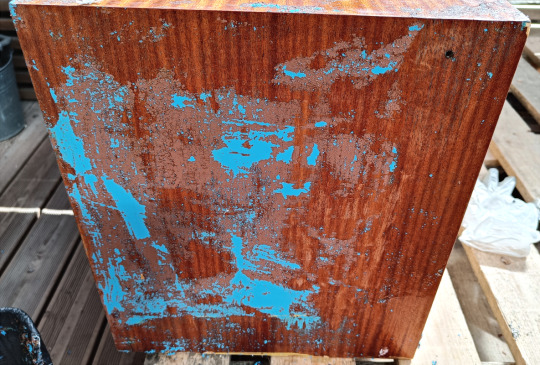
Now the paint stripper did not make the old finish come off the main unit really. It did soften it, but that didn't make it easier to remove, it made it just kinda goopy and unpleasant to remove but, since I had no other choise, I kept on going at it and scraped it away along with the remaining paint residue
After I finished working on the top I went back to remove the rest of the paint from the sides and the old finish. Eventually getting to this point

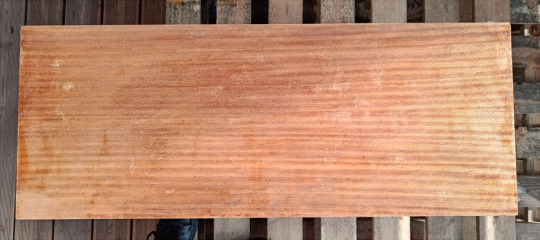
The veneer is not in great shape, there seems to be some possible water damage marks on the wood (possibly from the stripper??) OR there might be just more of the old finish there that I haven't managed to remove yet
The veneer is super thin. I could keep on scraping and sanding it, but I'm just really afraid I might go through the veneer and do some really bad damage, so... I kinda wan tto try using oxalic acid first. If there's water stains, the acid should be able to remove the stains, meaning there's less sanding for me to do in general and less of a chance of me sanding through that veneer.
But I don't have oxalic acid at the moment, and I kinda wanna finish stripping the paint off from the entire unit first, so this first part is coming to an unsatisfying end.
The main unit has been put to the side while I finish stripping the rest of the unit, starting with the drawer fronts!
((Sidenote: I am planning on staining the wood dark/black so the stains aren't super worrysome for me, the dark stain would end up hiding most of them I'm sure))
Part 2 / Part 3 / Part 4 (Finale)
#Refinish Diary#Mine#furniture refinishing#furniture restoration#mcm furniture#This was not gonna be a multiparter but I remember Tumblr has max 30 images per post#And I was already at like 20 so. Guess it's gonna be a multiparter#For the record I started working on this in mid April and haven't worked on it since#I realized I needed to get yard work done and so like. When the weather's been nice I've done yard work#So much yard work#And when it's been ass I haven't bothered to lift a finger#I'll get back to it soon I swear there's just a little more yard work for me to do!!#And I just wanna do this when the weather is nice!! Leave me alone!!#I can't have the shelf pieces blocking the patio entrance anyways so I need to finish it sooner than later#It'd be nice to use the patio as a patio and not as a DIY space lmao
5 notes
·
View notes
Last Seen Blogs


bar30application
bar30

omg32things
lıvayn

idiotstcve-blog
"You're an idiot, Steve Harrington."

dinaradwan-blog
Hi I'm Dina