#im done with psd for now phew
Photo
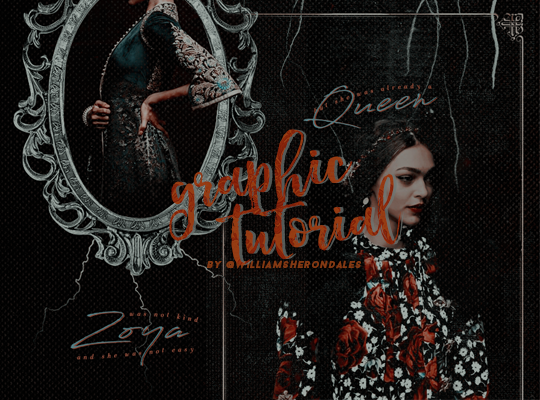
so i got an ask if i could do a tutorial on how i made this zoya edit, and this is my attempt at that. to follow the tutorial you’ll have to have photoshop installed (i use photoshop CS6) and have some basic editing knowledge.
the first thing i do when i’m editing is finding pictures and i often spend hours searching on pinterest, and more often than not i have to go back searching for different pictures after i’ve started editing bc the original pictures just didn’t work out. i usually never end up with the result i imagined when starting the edit akndkasn, but that’s how editing is i guess
first: here are the pictures i ended up using: (x) and (x). These are the textures i’ve used (x) and here are the credits for them (x) (x). Here is a lightning pic it’s not the same as i used but close enough
i’ve also used a few psds, here is one of them (x), the other i unfortunately can’t find the link to, im so sorry! these may do the trick tho or come close enough: (x) (x) (x)! but in this tutorial it isn’t really the psds that matter anyway.
now to the editing!
1. create a new file, in this one i used 540x650 px as dimensions.
2. fill in the whole layer with the color black (#000000)
3. open the first texture (the one with a crown on) and adjust the placement so that the crown isn’t in the picture. set the layer to screen

4. i used a gradient map next, but i have no idea how to share that with you so if you go to adjustments and create a “solid fill”, with the color #20284d and set the layer to “color” and the opacity to 48% it should be basically the same

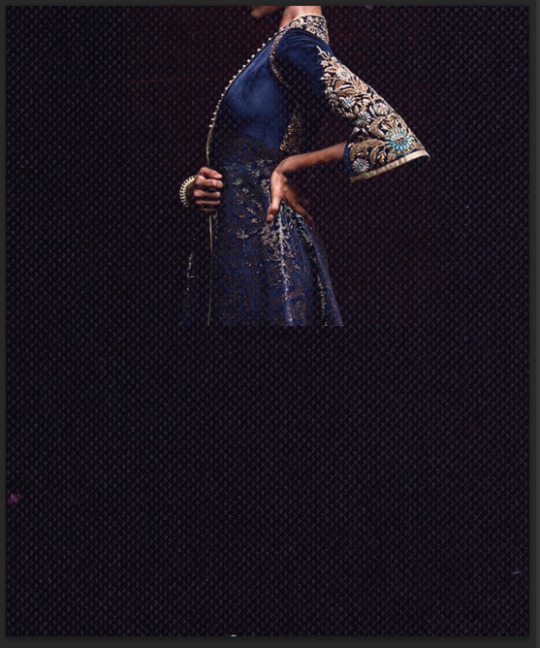
5. next i want to put in the first picture, set the layer to lighten, resize and place it like below:
6. next i take in the two psds, and i place photoshowski #2 on top of the other psd.
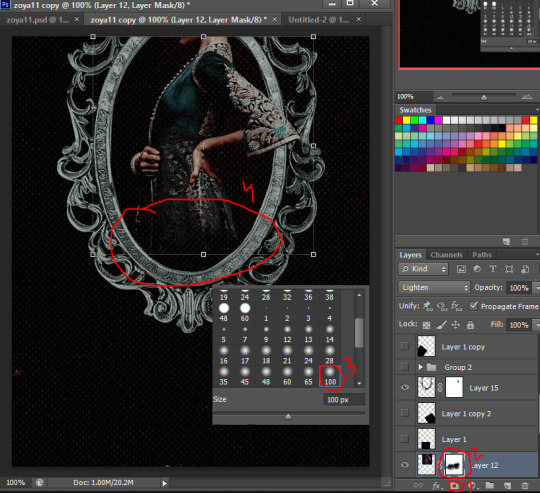
7. put in the frame texture, resize if necessary and place it like below. make sure the layer is below the psds!

i want the arm/sleeve to be in front of the frame, so i create a layer mask. if you don’t know how layer masks works read this. i use the color black and choose a small enough brush size and draw over the arm where the frame is. important: make sure the layer mask is the chosen layer!

8. i want to create i layer mask on the picture with the person in too, to make the transition of the dress and the border of the layer a little smoother. this time a choose a bigger brush
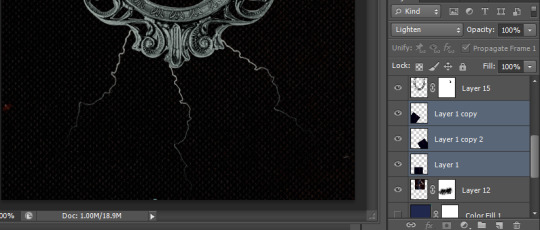
9. i wanted to add some lightning too since that is something i associate with zoya’s character. find the lightening pic and resize and put the layer to lighten. make sure the layer is below the frame layer. duplicate the lightening layer two times and rotate and place them like shown below:
10. now all that’s left is text! some think this is the fun part, others think this is the hard part adnsaddka, but usually you have an inkling on how you want the text to be. i usually find the quote even before i start the edit, since the quote is the thing that often inspire me the most!
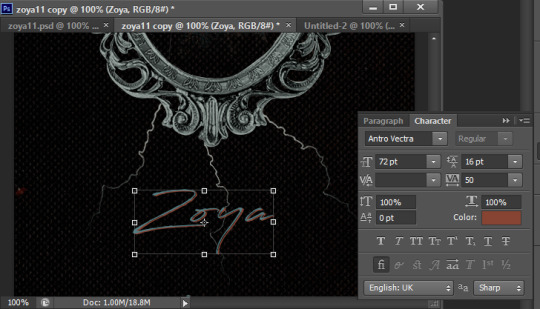
in the end i decide to place the text below the frame, with these settings and font, with the color #527c82: (i almost always have the text layers above the psds, i find that psds often make the quality of the text worse)

i duplicate the text layer and place it below the other text layer. i move it 4px to the right and 4px down. i set the color to #874432:
11. i create a new text layer and use the settings like below:

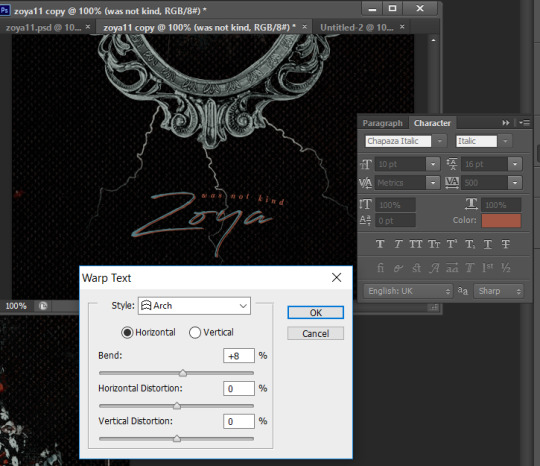
and do the same for the next text layer, with these settings:

pHEW, now the first picture is done!! feels pretty good right?? but we’re only halfway there rip, still a picture left to go:
12. repeat step 1 and 2.
13. open the second picture.
14. open the third texture, the one with the name starting with “planet-…”, and place it like shown below, and set the layer to “lighten” and the opacity to 70%.

15. take in the last texture with the “golden” border. set the layer to “lighten”. Create a layer mask and erase the middle part, so that only the border is left:

16. take in the same two psds as in the first edit
17. i personally think the psds make her a little too pale, so i put in a solid color layer with the color #754c24 and only make the layer visible where her face and skin is, using the layer mask. i set the layer to “linear burn” and the opacity to 40%:

18. i then take in the first texture we used in this tutorial and set the settings like in the first edit.
19. Only the text left now!! We’re so closeeeee
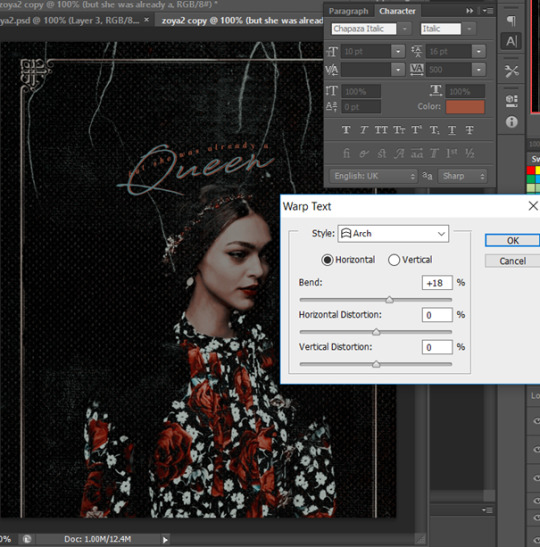
repeat step 11, but now woth the text “Queen”, and place it like below:

20. then it’s just the last text layer, i use these settings:
bim badabom we’re done!! i hope this was somewhat helpful, and that you all learned something reading all of this nadkjsdnkajs
important: i did not make this tutorial so that you would copy my edit, but rather so you could learn something from it and make your own, original edit. If you use this edit as a ‘base’ pls link either this tutorial or my original edit as ‘insp’ on your post, thank you :’)
#tutorial#editing tips#graphic tutorial#photoshop help#edit tutorial#wOw this exhausted me rip#especially since it got deleted when i was halfway through and i had to do the whole thing one more time sighhhh#anyways to the anon who requested this: i hope you see this and that you learn something from it adnjkdas#my tutorials
291 notes
·
View notes
Note
hello i know you said you wouldnt make a tutorial on the hidden figures gifset bc it was too many things but i was wondering i you could make a tutorial specifically on the 5th gifset?
heres the orginal gifset anon is talking about
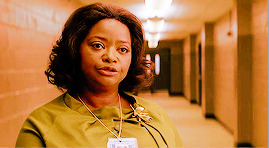
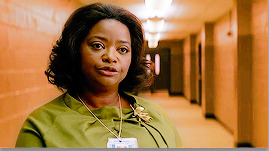
hi! yes i would love to make a tutorial for you. here’s how i go from this:
to this:
i’m just going to warn you though since i didnt save the psd i used for that gif (and its been a while since i made that gif) it may not look EXACTLY the same but this is the closest i could get to it. if you have any questions please ask
okay first things first you’re gonna want to sharpen and brighten the gif here’s this psd i used to brighten it (x)
okay now im going to focus on changing the background color
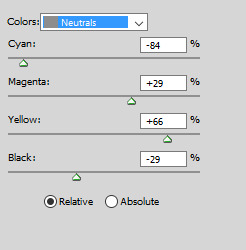
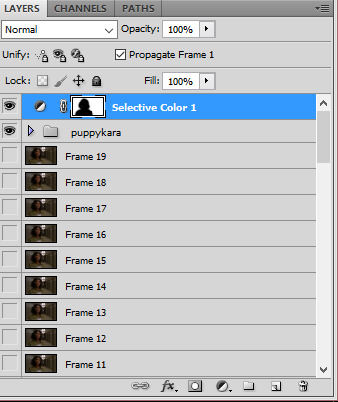
i used a selective color layer focusing in the neutrals here were my settings
okay i know this looks a little crazy now but its okay. next i used the brush tool (with the hardness at 0%) i selected the color black and clicked on the layer mask on the selective coloring layer and brushed around where i didnt want to have the effect. here’s what it looked like
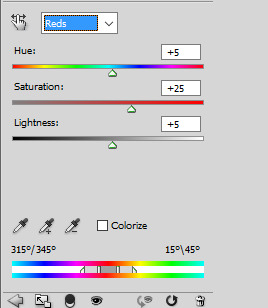
next i added a hue/saturation layer:
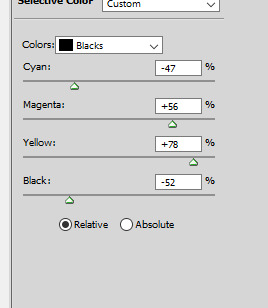
and a selective color layer to reduce the shadows in the background i also used a layer mask on this layer

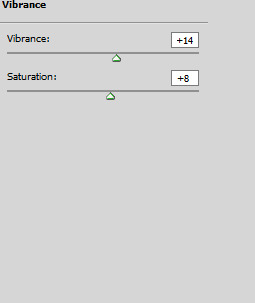
next i added a vibrance layer and a curves layer


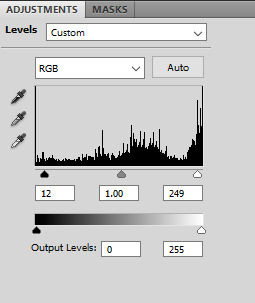
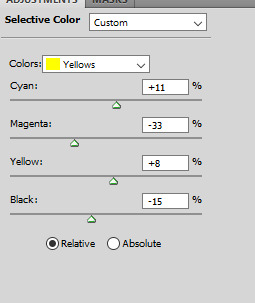
i decided to added another vibrance layer as well as some levels and selective color here were my settings:


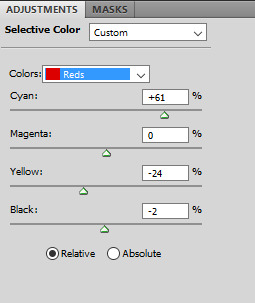
okay so now im going to bring out the color of her shirt and to do that im going to use selective color again im also going to use a layer mask and brush around anywhere that isn’t her shirt

and heres what it looked like

okay we’re almost done i promise. next im going to use selective color around her face and neck just so it doesn’t look so red/orangey here are my settings (i used a layer mask as well):

finally i added a curves layer and a vibrance layer and here is the final result (phew!)

382 notes
·
View notes
Last Seen Blogs
hilariouslife
Memes and Trash 🔥

knowanimes
Knowanimes

wasafaty
مسلسلات ماي سيما
bat-volcano
Skeleton Collector
calico-island
Calico Island 🍐