#homemade recipes
Text
Pumpkin Spice Latte Recipe🎃

I tried a homemade pumpkin spice latte. Here's the recipe I followed to make one at home:
*The changes I made: used instant coffee, used unsweetened almond milk and added more, used stevia instead of sugar (1 Tbsp), added sugar-free vanilla creamer, and used sugar-free whipped cream.
Ingredients:
1 cup of brewed strong coffee or 2 shots of espresso
1/2 cup of milk (whole milk, skim milk, almond milk, or any milk of your choice)
2 tablespoons of pure pumpkin puree (not pumpkin pie filling)
1-2 tablespoons of sugar (adjust to taste)
1/4 teaspoon of pumpkin pie spice (or a mixture of cinnamon, nutmeg, and cloves)
1/4 teaspoon of vanilla extract
Whipped cream (optional)
Cinnamon or nutmeg for garnish (optional)
Instructions:
Brew Coffee or Espresso: Start by brewing a strong cup of coffee or making two shots of espresso.
Heat Milk and Pumpkin Puree: In a small saucepan, whisk together the milk and pumpkin puree over medium heat. Stir continuously until the mixture is hot but not boiling. This should take about 2-3 minutes.
Add Sugar and Spices: Stir in the sugar, pumpkin pie spice (or your spice mixture), and vanilla extract. Continue to heat and stir until everything is well combined and the mixture is hot, but do not let it boil.
Blend or Froth: You can use an immersion blender or a frother to create a creamy texture. If you don't have either, simply whisk vigorously until the mixture is frothy.
Combine with Coffee: Pour the pumpkin spice milk mixture into your brewed coffee or espresso and stir well.
Top with Whipped Cream: If desired, add a dollop of whipped cream on top of your pumpkin spice latte.
Garnish: Sprinkle a pinch of cinnamon or nutmeg on top for extra flavor and a decorative touch.
Serve: Your homemade pumpkin spice latte is ready to enjoy! Serve it in your favorite mug and sip while it's still warm.
Feel free to adjust the sweetness and spice level to your liking. That is what I did. (See notes above) You can also experiment with different types of milk, such as almond, oat, or soy, to suit your dietary preferences. I loved using this recipe as the base for my homemade latte.
#pumpkin spice latte#homemade recipes#pumpkin spice#latte recipe#coffee recipe#coffee lover#fall moodboard#fall aesthetic#cozy fall#fall#autumn moodboard#autumn aesthetic#cozy autumn#autumn#fall drinks#halloween aesthetic#halloween moodboard#halloween#pumpkin season#pumpkin
80 notes
·
View notes
Video
Kiremitte mi tavuk... Aslında közde daha enfes olur... Pek yakında...
#food photographer#food recipes#food porn#chicken recipes#healthyfood#foodlover#foodreels#homemade recipes#homemade food#comfort food
79 notes
·
View notes
Text
dirt soup (edible)
aight beasties here's my personal homemade soup recipe. it is vegetarian because I'm not allowed around meat anymore :(
inspired by the childhood experience of collecting sticks and leaves in a bucket of rainwater & stirring it with a big ol stick, like a soup or maybe a witches brew. I call it "Dirt Soup :)"
probably about 3 pints of water
1 vegetable stock cube
1 leek (probably optional. I like leeks)
4 carrots, including the skin and leaves (skin is optional. leaves are very important)
4 small potatoes, skin included (they're small for the extra skin. you could use two medium potatoes if you want) edit: have caution with potato skin I guess, don't eat any green bits or sprouts
a lil bit of salt, a lil bit more pepper, a decent amount of cumin (& anything else you wanna add. it's a little bit bland but I like that)
fry the leek first so it doesn't go mushy & put it in a big pot. you don't have to add things in any particular order I just toss things in as I chop em. make sure wash the ingredients A LOT because skin.
I chop the carrots horizontally so they're all little circles, or maybe wheels. I chop the potatoes into very small cubes because I tried big cubes once and didn't like it.
the carrot leaves lose their flavour in the soup, which is good because I don't think they taste very nice raw.
this recipe makes about... 6 servings? I put it in a big tupperware box in the fridge & have it for lunch & dinner for like three days. it's yummy :)
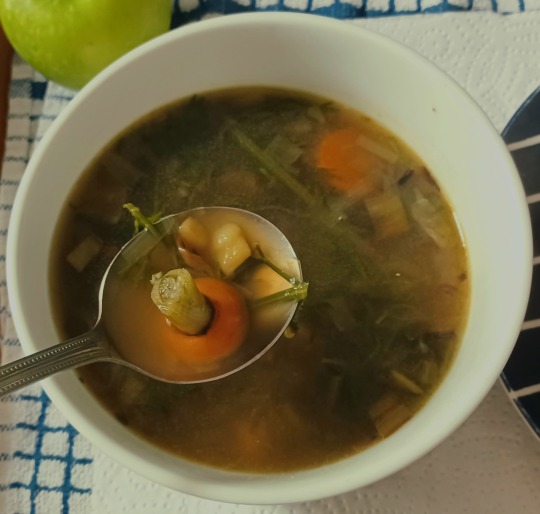
sometimes I leave a single carrot top in so I can look for it when I eat the soup. it's fun!
#soup#homemade recipes#homemade soup#gremlincore#dirtcore#goblincore#forestcore#message to all core bloggers try my soup
152 notes
·
View notes
Text

NEVER SAY NO TO PIZZA AGAIN
Growing up we had pizza at least once a week. My father was born and raised in Brooklyn and man, did he love his pizza. He would call home every Thursday and ask, “did your mother cook?” to which I would always sarcastically reply “of course not, it’s pizza night!” and then he would say “call up Dickie Dees, order a large pie with extra cheese and pepperoni, well done. Tell them ‘Jimmy’ will be there in ten minutes.” Some of my favorite memories with my dad include us either ordering pizza and watching WWE, or stopping at random hole in the wall pizza joints to see what they were about.
I’ll never forget, two weeks after getting my tonsils removed my mother got called into work for an emergency meeting and my father was responsible for feeding my siblings and I dinner that night. Guess what he ordered?
A large, extra cheese and pepperoni pie, well done from Dickie Dee’s in Newark, NJ.
The problem? I couldn’t eat solid foods yet!
Did that stop me? NOPE. My father and I sat there and cut up two slices of pizza into the tiniest, bite size pieces and I chewed them up until they were soft enough to swallow. It may have taken me thirty minutes to eat two slices of pizza, but Dad didn’t raise a quitter 💪🏽
When I decided to start losing weight as an adult, I knew I would never be successful if my meals were limited to baked chicken and broccoli or boring Cesar salads.
That’s when I learned about flexible dieting and calories in VS calories out.
For years, the media has glorified weight pills, surgeries, or overly restrictive diets for weight loss. I’m living proof that you can lose weight without giving up your favorite foods (or getting surgeries that restrict your diet for the rest of your life anyways).
I’ve been counting calories for the last two years, and I’m watching the pounds shed off week by week. I recommend everyone try this method at least once and try to do it for three months to give yourself time to see results.
The first thing you need to do is calculate how many calories you should be consuming. I recommend using this website to do that. These are going to be your maintenance calories. In order to lose weight, you need to be in a calorie deficit (meaning you need to eat less calories than you burn.) If you’re just starting out, I recommend a 3-400 deficit.
So let’s say your maintenance calories are 2400 calories per day. Subtract 400 from that, and you have the amount of calories you should be eating in a deficit, 2000 calories. I like to think about these calories as dollars (bare with me)
So let’s say you have $2000 (or 2000 calories). How you chose to spend those $2000 is completely up to you.
If you have a nice, low calorie breakfast and you want to go to McDonalds for lunch and order a Big Mac with large fries, a large coke and an apple pie go for it. Just remember that you still need to be within the 2000 calorie range in order to see results. So if you had that nice, low calorie breakfast, and then you ordered everything off the dollar menu at McDonalds for lunch, chances are you’re going to have to make some sacrifices and eat that boring old cesar salad for dinner.
It all comes down to calories in VS calories out.
With all that being said, there are plenty of ways you can make some of your favorite meals at home for half the calories without sacrificing flavors. One of the ways I’m able to eat pizza three times a week while losing weight is by making my own at home! As promised in my previous post, I’ll walk you through the recipe and leave the macros below!
Ingredients
1 Cup of self rising flour (this is super important!)
¾ Cup of Non-fat plain Greek yogurt
¼ cup of your favorite pizza sauce (homemade is best!)
56g of low fat or fat free mozzarella cheese
17g of turkey pepperoni (optional)
4g salt
4g garlic powder
Preheat your oven to 420 degrees Fahrenheit.
Start by adding ¾ cup of your yogurt to a bowl, along with the salt and garlic powder. You can feel free to add whatever seasonings you’d like here, but I feel like the salt and garlic give the dough that classic NYC pizza dough flavor. Add in ¼ cup of flour at a time and stir until combined. If you have a stand mixer, use your dough hook to make this part a little easier on yourself. If not, a wooden spoon is fine! I tend to use a little less than a full cup of flour, but I keep the remaining to the side to sprinkle on the counter while kneading/rolling out the dough.
Once your dough comes together and is still a little tacky, flour your work space and start rolling out that pizza dough to your designed shape and thickness. Place the dough on a nonstick oven safe pan (I got my 10” pizza pans at Big Lots on sale for ten cents!! Check your local discount stores’ sale sections!) and place in your preheated oven for ten to fifteen minutes. It is important to cook the dough before adding any sauce or toppings so it can cook evenly. Once the dough starts to rise a bit, remove from the oven and start adding your toppings.
I like to use homemade sauce because it just taste the best in my opinion, but you can use whatever you’d like! Keep in mind that the calories will differ depending on what brand you use.
Once you have your pizza assembled, place it back into the oven for an additional 10-12 minutes or until the crust is golden brown. I like to spray the crust with a little bit of cooking spray for that beautiful golden brown color!
Take the pizza out of the oven and allow to cool for 3-5 minutes before cutting. Slice your pizza into 6-8 slices and enjoy!
If you follow these instructions to the T, you will have an entire pizza that is only 620calories, 2.3g fat, 102g carbs and 48g protein!
Give this recipe a shot and let me know how you like it!
#fitness#low cal diet#flexible dieting#high protein#gains#fitspo#health and fitness#weight loss#calorie deficit diet#low calorie meals#pizza#homemade pizza#homemade recipes
32 notes
·
View notes
Text
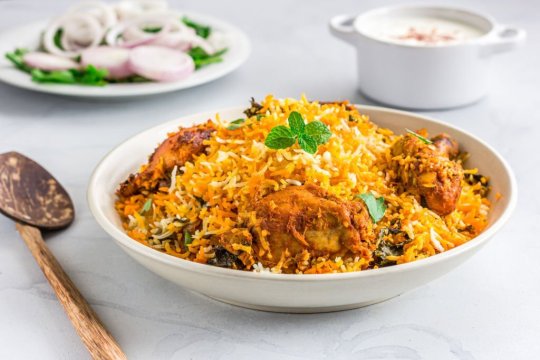


Delicious and Authentic Biryani Recipe: A Step-by-Step Guide to Making the Perfect Biryani
#biryani#biryani recipe#easy recipes#homemade#homemade recipes#chicken#chicken biryani#indian cuisine#so tasty#so yummy#dinner recipe
6 notes
·
View notes
Text

TastyFaShow's Homemade Crispy Chicken Tenders Recipe is Available Now on our website. Follow TastyFaShow to see more amazing videos. www.tastyfashow.com
#tastyfashow#homemade recipes#recipe#cooking#chicken#chicken tenders#chicken wings#chicken recipe#fried chicken#boneless wing#wings#tenders#chicken recipes
5 notes
·
View notes
Video
youtube
Best Ever Chicken Drumsticks Recipe | Juicy Chicken Drumsticks | Tasty Foods. These chicken drumsticks are crispy on the outside and tender and moist on the inside and are finger lickin’ delicious. If you need a good fried chicken recipe, then this recipe is for you!
7 notes
·
View notes
Photo

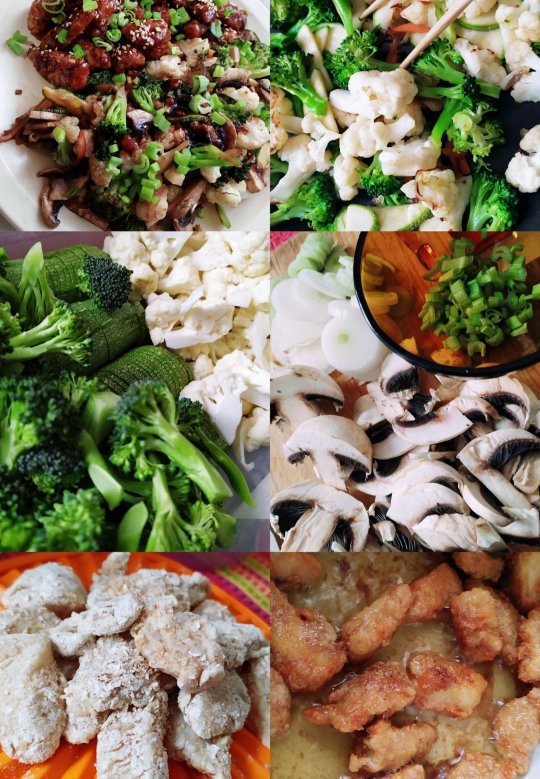
Some days my anti-stress therapy is cooking. The therapy today: teriyaki chicken and stir-fried vegetables.
#food#cooking therapy#i love cooking#asian food#asian recipes#Homemade Recipes#my recipes#personal recipe#foodgasm#Cooking Day
6 notes
·
View notes
Text
youtube
1 note
·
View note
Photo
Dive into the world of flavors with Succulent Secrets! Discover the magic of our Beef Shank recipe! Unleash your inner chef! 🍖🔥🍽️ #Foodlove #BeefShankMagic
#Succulent Secrets#Beef Shank Recipe#Unleashed Recipes#Food Blog#Food Photography#Cooking Secrets#Beef Dishes#Delicious Beef#Meat Lovers#Homemade Recipes#Comfort Food#Culinary Tips#Foodism#Epicurean Delights#Food Enthusiast#Foodie Heaven#Food Diary#Yummy#Love Cooking#Kitchen Adventures#Food and Wine#Savory Dishes#Taste Buds#Best Recipes#Dinner Ideas.
0 notes
Text
Bone Broth for Dogs: An Immune-Boosting Elixir
Boost your pup's immunity this winter with homemade bone broths! Rich in nutrients and collagen, it's a cosy treat they'll love. Dive into our guide on preparation and benefits. 🐾❄️🍲 #BoneBroth #DogNutrition #WinterCare
For many, the cooler months mean snuggling up with their furry friends, relishing warm soups, and enjoying the comfort of home. But did you know that your canine companion could also benefit from a warming bowl of nourishment? Enter bone broths: the age-old remedy that’s gaining popularity in the world of canine nutrition.
What is Bone Broth?
Bone broth is a wholesome liquid made by simmering…

View On WordPress
0 notes
Text
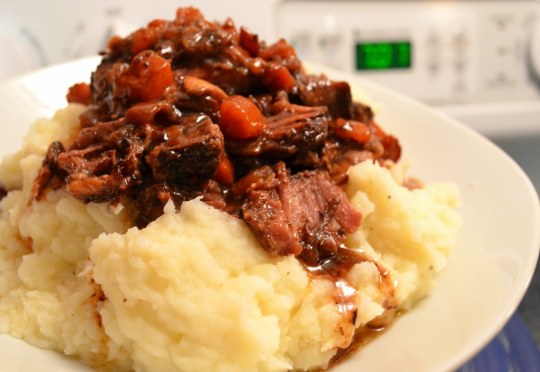
Master the Art of Mouthwatering Texas Beef Brisket: A Step-by-Step Guide
Introduction
Are you ready to embark on a flavorful journey to the heart of Texas barbecue Texas beef brisket is a true delicacy that brings the rich traditions of slow-smoked tender beef to your plate Get your apron on and fire up the smoker because we’re about to uncover the secrets to creating a mouthwatering Texas beef brisket that will have your guests begging for seconds.
Preparation…

View On WordPress
0 notes
Text
Rolled pork loin with peach and watercress salad

INGREDIENTS
📍 40g butter
📍 1 brown onion, finely chopped
📍 1/3 cup white wine
📍 2 tbsp wholegrain mustard
📍 2kg rolled pork loin (see note)
📍 1 cup fresh breadcrumbs
📍 2 tbsp finely chopped fresh flat-leaf parsley leaves
📍 2 tbsp finely chopped fresh mint leaves
📍 2 tsp rice bran oil
📍 1 tbsp sea salt
📍 1 bunch watercress, sprigs picked
📍 4 yellow peaches, stones removed and discarded, thinly sliced
📍 1/4 red onion, thinly sliced
Honey mustard dressing
📍 2 tbsp extra virgin olive oil
📍 1 tbsp white wine vinegar
📍 2 tsp wholegrain mustard
📍 2 tsp honey
>> get a FREE EBOOK WITH 500 RECIPES <<
DIRECTIONS
Step 1
Melt butter in a large frying pan over medium-high heat. Add onion. Cook, stirring, for 5 minutes or until softened. Add wine and mustard. Stir until combined. Cook for 2 minutes or until wine has evaporated. Transfer to a large bowl. Set aside to cool.
Step 2
Meanwhile, remove string from pork. Unroll. Pat rind dry with paper towel. Score at 1cm intervals. Place pork, skin-side down, on board. Slice crossways through thickest part of the meat, being careful not to cut the whole way through. Open out to form 1 large piece.
Step 3
Add breadcrumbs, parsley and mint to onion mixture. Season with salt and pepper. Stir to combine.
Step 4
Preheat oven to 250C/230C fan-forced. Press stuffing over pork. Roll up to enclose. Tie with kitchen string at 3cm intervals to secure. Place on a lightly greased wire rack in a large flameproof roasting pan. Brush with oil and rub sea salt all over pork.
Step 5
Roast pork for 20 minutes. Reduce heat to 180C/160C fan-forced. Roast pork for a further 1 hour 30 minutes or until juices run clear when a skewer is inserted into the centre. Transfer pork to a plate. Cover loosely with foil. Set aside for 10 minutes to rest.
Step 6
Meanwhile, make Honey mustard dressing: Place ingredients in a screw-top jar. Season with salt and pepper. Secure lid. Shake until honey dissolves.
Step 7
Arrange watercress, peach and onion in a serving bowl. Drizzle with dressing. Slice pork and serve with peach salad.
.................... continue reading......................
0 notes
Text
Indian traditional dish SHAHI PANEER
Ingredients for making of
SHAHI PANEER
Paneer, 200 g
3 Tomatoes, 1 Onion
1 green pepper
Ginger, 1 inch
replacing 1 moti elachi/black cardamom with 3 green
1 1/2 teaspoons of red pepper flakes
12 teaspoon of the powdered garam masala
12 tsp powdered pepper
Cream, 1/4 cup
Milk, 1/4 cup
1/9 cup tomato sauce
2 tablespoons of butter or oil, salt
2 tablespoons of leaves of coriander
2 teaspoons optional Kasuri methi
click here for further recipe:
1 note
·
View note
Text
Tired of Boring Breakfasts? Try Banitsa
Just shared a piece of my heart (and my homeland) with you all - the beloved banitsa! Head to the blog to experience the taste of Bulgaria through my eyes. 🥐
Hello Friends of Personal Growth Oasis,
Hope this finds you in high spirits! Today, let’s embark on a delicious culinary journey that takes us back to my roots – Bulgaria. And the star of this journey is none other than the delectable Banitsa.
If you’re unfamiliar with the term, Banitsa is a traditional Bulgarian dish made of rolled dough layers filled with various ingredients, usually cheese…

View On WordPress
#Banitsa Recipe#Bulgarian Cuisine#Culinary Adventures#dailyprompt#dailyprompt-1981#Food Experiences#Foodie Discoveries#Gastronomic Delights#Homemade Recipes#International Cuisine#Personal Stories#Traditional Cooking
1 note
·
View note
Text
TastyFaShow's Homemade Crispy Chicken Tenders Recipe is Available Now on our website. Follow TastyFaShow to see more amazing videos. www.tastyfashow.com
#tastyfashow#homemade recipes#chicken#recipe#chicken tenders#chicken recipe#tenders#boneless wing#fried chicken#chicken wings
2 notes
·
View notes
Last Seen Blogs

ig0ty0urbackkid
It's been emotional

mo-baobei
aleᵕ̈

awoodmeister
Unbetitelt

studiobservations
StudiObservations

cocktaildepildoras
Club de la Serpiente