#easy diy
Text
#asmr relax#asmr#oddly satisfying#diy#tutorial#do it yourself#tutorials#crafts#diy ideas#diy projects#easy diy#origami#video tutorial#craft#diy videos
106K notes
·
View notes
Text
How to make homemade pins with materials around you!!
(with step-by-step pictures)
Materials needed: Paper, cardboard, safety pins, glue gun and sticks, glue.
Step one: Draw/make/print and cut out your design.
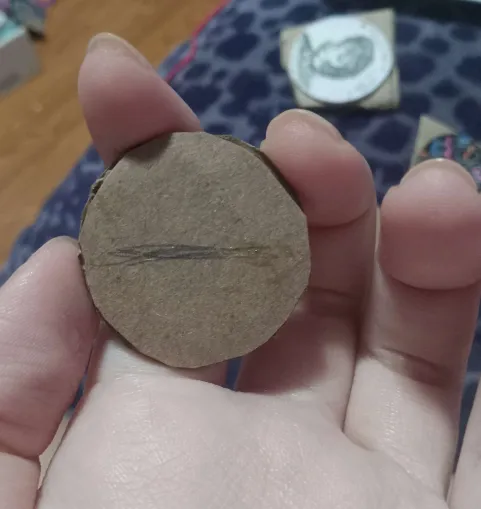
Step two: Using a non-sticky tape (like painter's tape), tape the design onto a piece of straight cardboard and cut it down to size. Bent/damaged cardboard is not the best option even if it may still work.


Step three: Once you've finished cutting appropriately, remove it from the cardboard and mark it rightside up of the design.
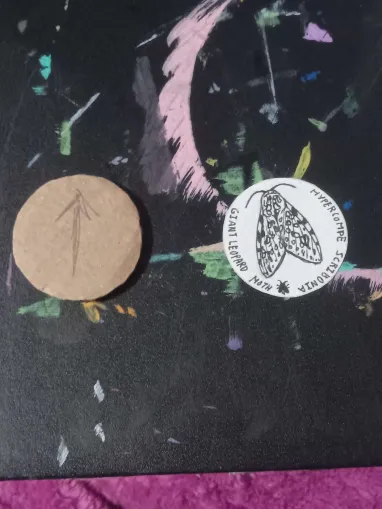
Step four: Glue the design onto the cardboard (this is what the mark is for) and make sure all sides are down. Sometimes I like to trim the edges if I'm picky about it.


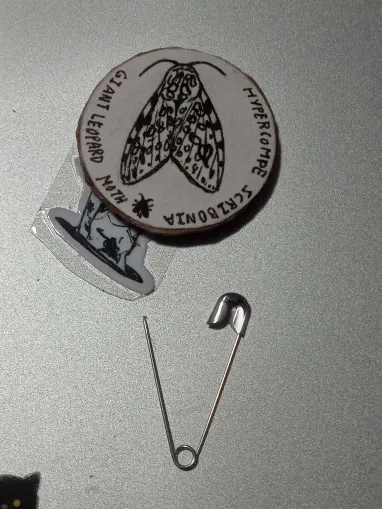
Step five: Find a pin of appropriate size and mark the line where you want the pin to lay so it doesn't get lopsided when you put it on :]

Step six: While your glue gun is heating up, open the pin up. Glue it down in whichever direction you're most comfortable with. I like to glue the ends of the pin with more glue to make it more secure.
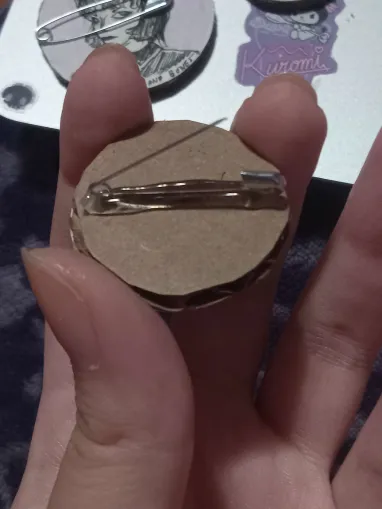
Step seven: Wait for your pin(s) to dry by leaving them flat-side down.

And you're done!!! Personally, I like to add a coat of modge-podge followed by clear nail polish to give it that glossy look, but you can also achieve the same thing by sticking a piece of clear tape over your pin and trimming it.
Thanks for reading!!
14 notes
·
View notes
Text
Back to our regularly scheduled programming
Thanks to all of you for following along on my journey this summer and to those of you who helped me raise so much money for the Ehler’s-Danlo’s Syndrome. Now that I’m back home and we’ve hurled straight into spooky season, I will bring us all back to our regularly scheduled programing: Stuff I make.
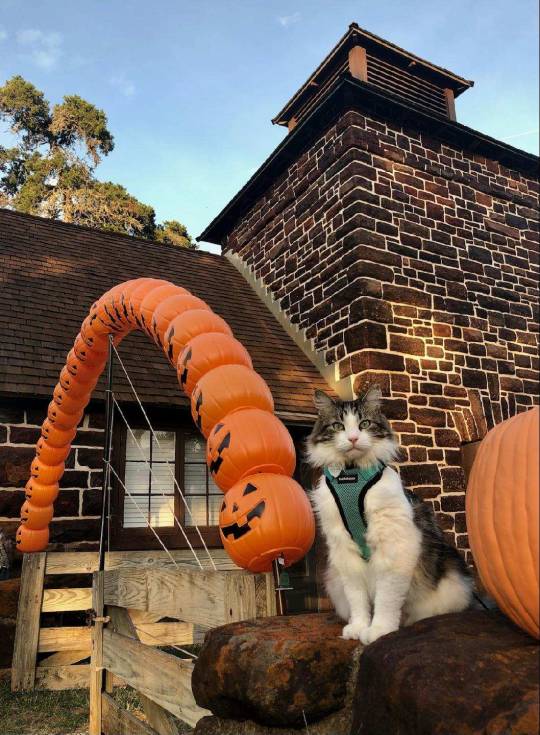
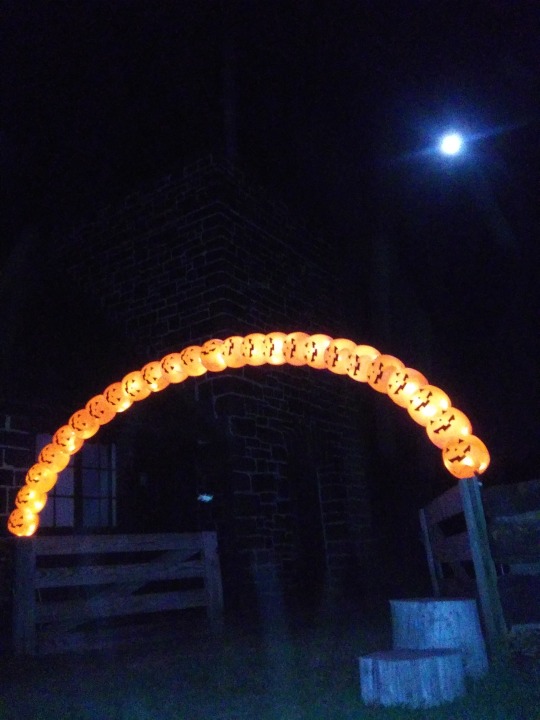
So to start off the most wonderful time of the year, I want to share with you a very affordable and easy to make pumpkin arch! Above is our sweet Ms. Nova modeling the finished product for us. Here is it all lit up at night:

First, we clearly went to the store and got the essentials:
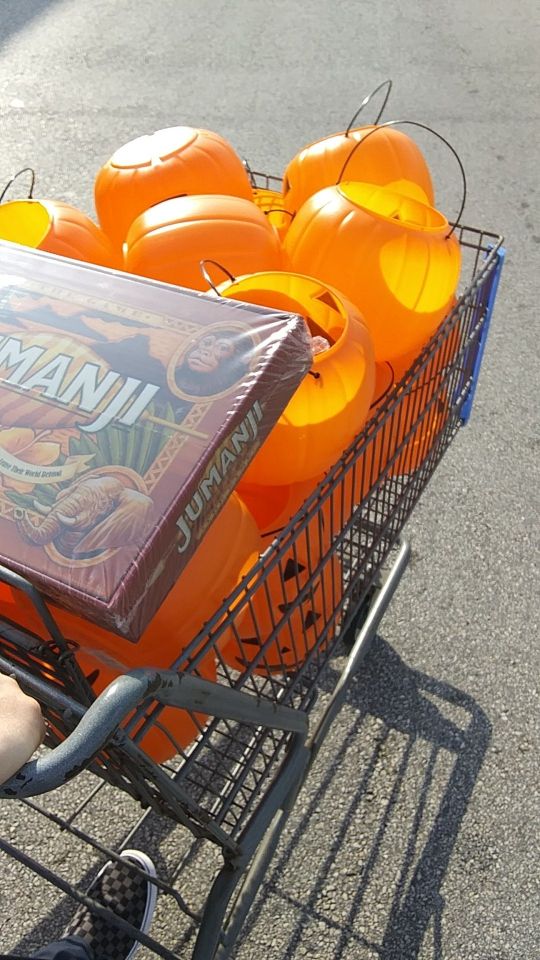
Side note: we got home and played our first round of Jumanji, and just as we rolled the dice, some raccoons or something in the attic went off very loudly. Coincidence? The game clearly works.
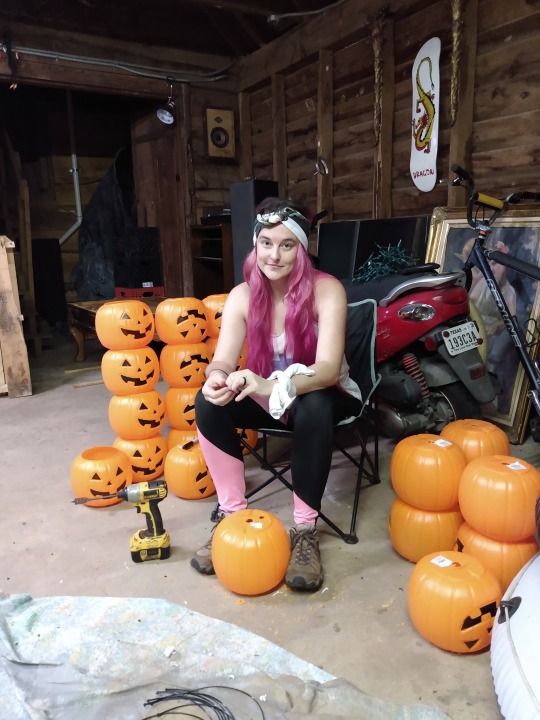
Another day, after we escaped the perils of the game successfully, I began by removing the handles and drilling a quarter sized hole in each pumpkin (for the lights and pole to go through) and a smaller .5 cm hole for each. The little hole is located in a spot so that when it rains, the pumpkin will not fill with rain.

Next, I simply strung the pumpkins and lights through a PVC pipe measured to fit the gateway where we wanted the arch -- a very strange size.

Since the gateway you see is particularly wide, we did struggle with figuring out how to attach it; we could have used weighted pots, but we chose to secure it with metal fasteners to the hinges of the gate. We also found out after a few days that the 100-degree direct sunshine was a tad too much, and it began melting during the day; not the pumpkins, but the pole was drooping. We fixed this by using a black metal bar to hold up the center. I was bummed about this at first, but I decorated it with a giant spider web and spider and it worked out ok.
As you can see, this arch was SO cheap and simple to make (99 cent buckets, $2 PVC pipe, lights we already had) and so cute! Not everything has to be grand, expensive, or hard to make. Stay tuned for more of my Spooky Season creations!
Haylan
#halloween#halloween decorations#halloween yard#pumpkin arch#jack o lantern#jack-o-lantern#trick or treat#trick-r-treat#pumpkin#pumpkin buckets#make stuff#create#cheap decorations#easy diy#diy halloween
216 notes
·
View notes
Text
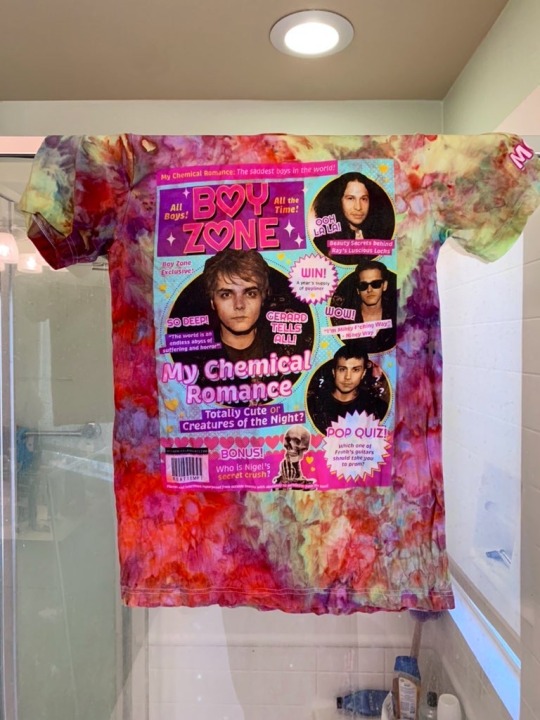
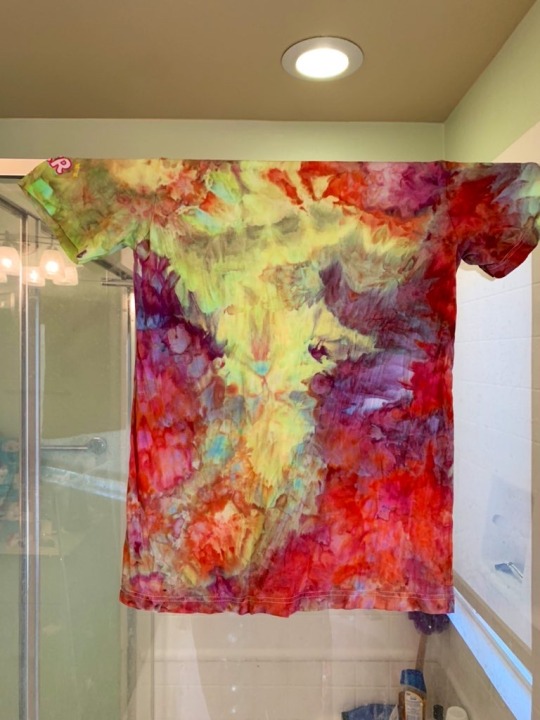
So I’ve recently gotten into ice dying my white shirts. It’s a cool technique (that look I missed out on until now) where you put the dye over ice and fuck it!! Who knows what comes out!
I did it with my Boys Zone Mcr shirt and holy fuck it turned out so rad
Before: plain white! Cool graphic but ehh white!
After: FUCK YEAH COLORS
44 notes
·
View notes
Text

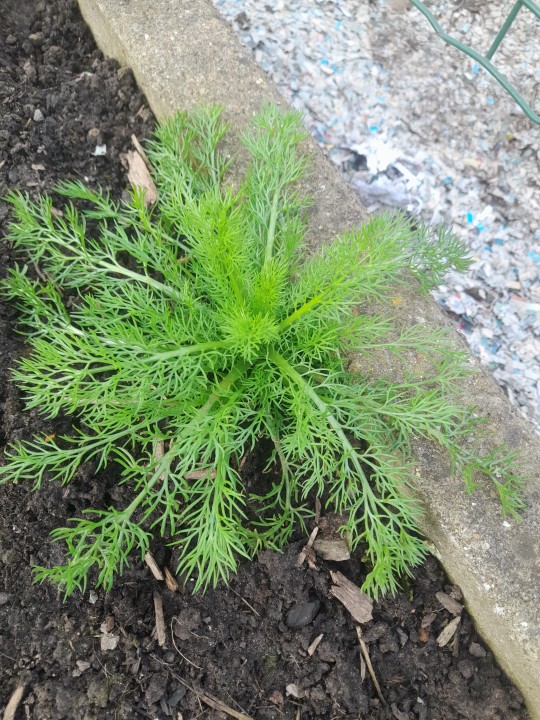

Vrijdag 5 april 2024... de Frieslanders zijn uitgeplant... en in de composthoop vond ik aardappel van 2023
#easy#diy#easy diy#enjoyingthemoment#homemade#pumpkin puree#pumpkin mash#pumpkin#orange#april 2024#2024#2023#potatoes#gardening#spring#Frieslanders#first potatoes#planting#grown#vegetable garden#fresh vegetables#camomile
4 notes
·
View notes
Text
bro. trust me. this works.
i make these all the time :)
try it lol
86 notes
·
View notes
Text
Lavender Sandalwood Sugar Scrub

View On WordPress
#are sugar scrubs good for you#benefits of using a sugar scrub on your skin#benefits of using coconut oil on your skin#Calendula#Cane Sugar#chamomile#Coconut#Coconut oil#Coconut Sugar Scrub#coconut vanilla#coconut vanilla scrub#coconut vanilla sugar scrub#diy gift#easy diy#Easy DIY Sugar Scrub#Essential Oils#Exfoliant#Facial Scrub#glass jar gift#Glass Jar Sugar Scrub#Grape Seed Oil#Grapeseed oil#Herbs#How to Make a Sugar Scrub#how to use a sugar scrub#Jojoba Oil#Lavender#Lavender essential oil#lavender sandalwood#lavender sandalwood sugar scrub
4 notes
·
View notes
Photo
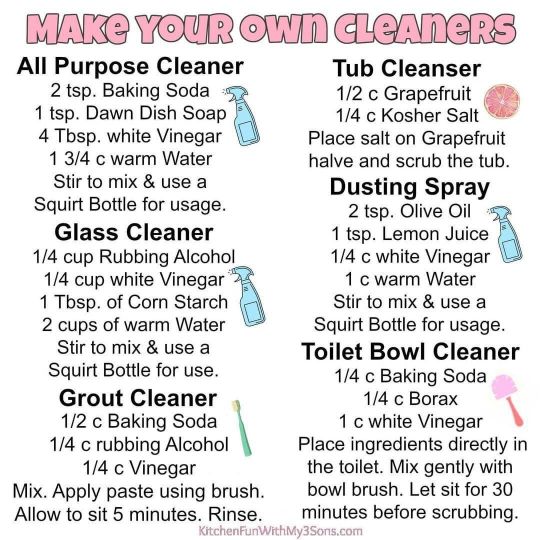
How To Make Your Own Cleaners
6 notes
·
View notes
Text
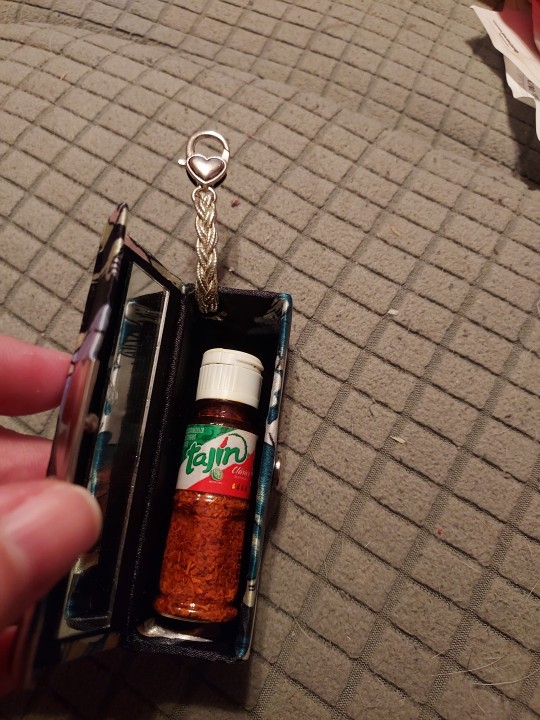
The lipstick cases from dollar tree are perfect size for mini tajin bottles. I added ribbon and a clasp and an initial from left over diamond painting gems and now the nibblings can carry a tiny tajin bottle to school for flavoring fruit and veggies and whatever they want. Or they can carry chapstick or anything else small enough to fit.


2 notes
·
View notes
Text

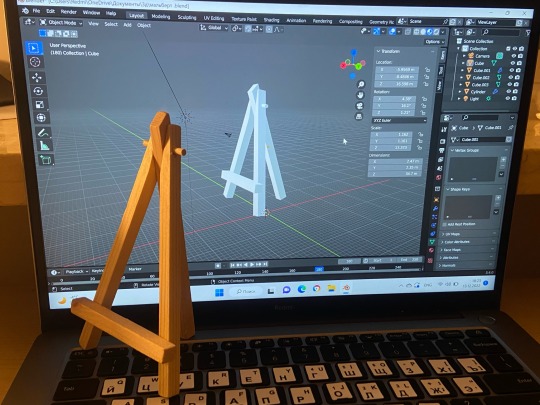
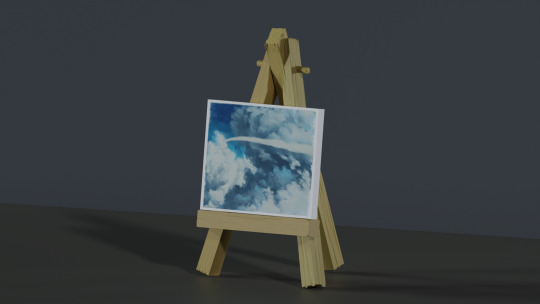
Meet his name is Boob, this is a cute little easel and his 3d version. I made it about 4 months ago, but recently I remembered about Boob and made a small canvas with my painting for him😭👍
I just recently started doing 3d modeling, so don't scold…..
#3dart#3d model#blender#digital arwork#3dtumblr#canvas#my artwrok#blender 3d#easy diy#3d#simplitools
7 notes
·
View notes
Text
God's Promises are Eternal

Grass quickly dies, and flowers fall to the ground. But God's promise will be true for ever.’
— Isaiah 40:8 | Easy English Bible (EASY)
Easy English Bible © MissionAssist 2023 (Charitable Incorporated Organisation 1162807) a member of the Wycliffe Global Alliance
Cross References: Matthew 5:18; 1 Peter 1:25; Numbers 23:19; Psalm 111:8; Psalm 119:89; Isaiah 46:10; Isaiah 55:11; Isaiah 59:21; Jeremiah 44:29
#God#Word of God#divine promises#eternal#reliable#trustworthy#true#Isaiah 40:8#Book of Isaiah#old testament#EASY#Easy English Bible#MissionAssist 2023#Wycliffe Global Alliance#easy diy
8 notes
·
View notes
Note
Ah you don't have anon on so i hope i'm not annoying you but
Would you mind explaining a bit who you managed to make Spot so well??? I've tried visualising the process in my head but the arm parts (where it goes over the page) is kinda messing me up cause i can't see any folds or tape or cuts??? Idk if it makes sense. Feel free to ignore this!!
The bookmark, right? Heh i kinda eyeballed and assumed here and there LEMME GIVE YOU SOME PISC TO HOPEFULLY HELP YOU!! (also im kinda new to tumblr ILL SET UP AN ANON ASAP!!)
use pencil for the sketch and outline in pen later once lines are crisp
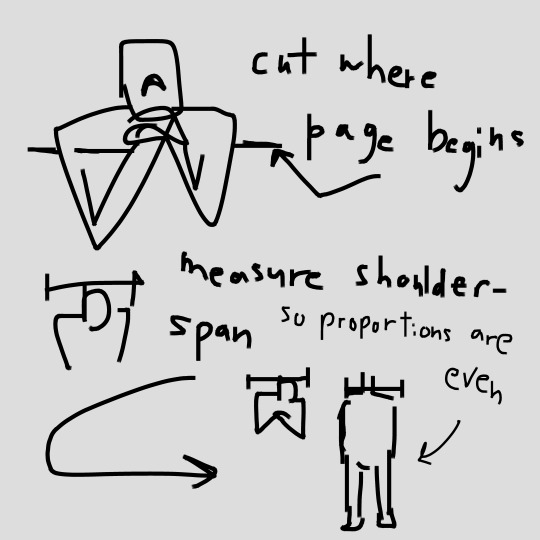
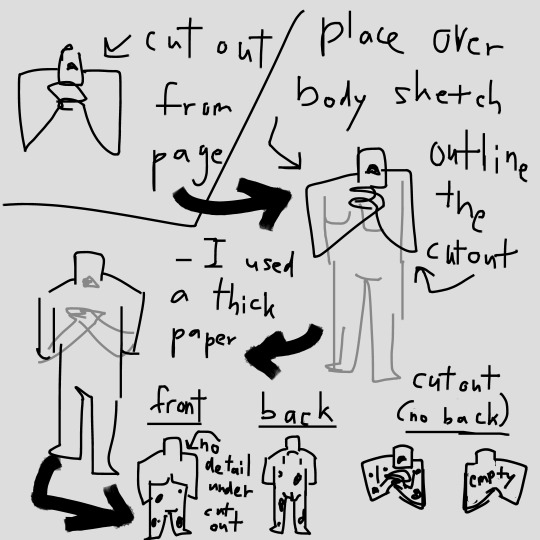
*front and back of the body are of the same paper
*part over the page sticks to the 'front' part

APOLOGIES ABOUT MY HANDWRITING I HOPE ITS STILL LEGIBLE AND I ALSO HOPE THIS HELPED
13 notes
·
View notes
Text
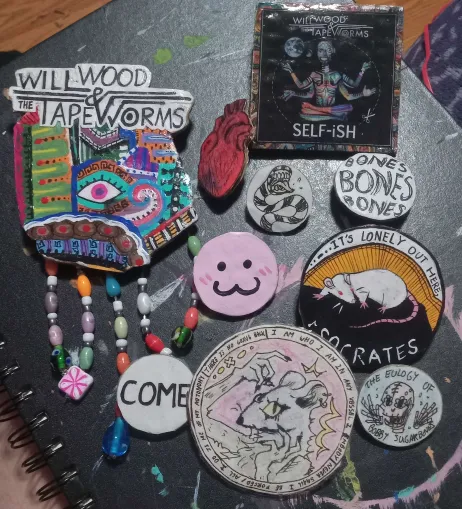
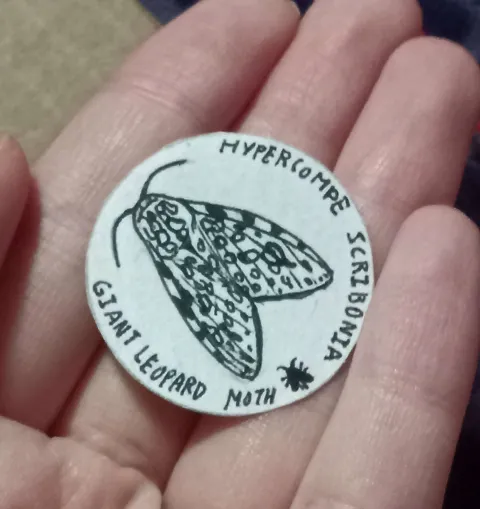
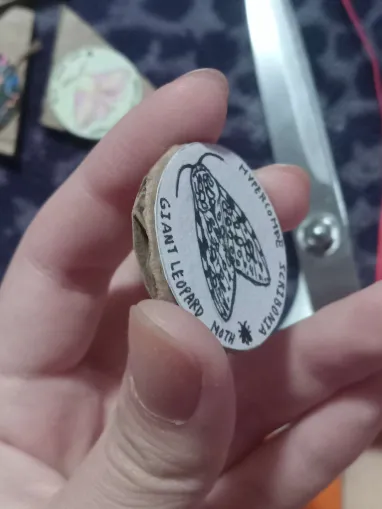
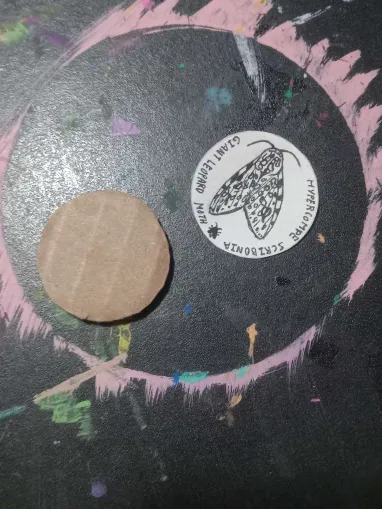
Kinda cool that I made this.
9 notes
·
View notes
Text
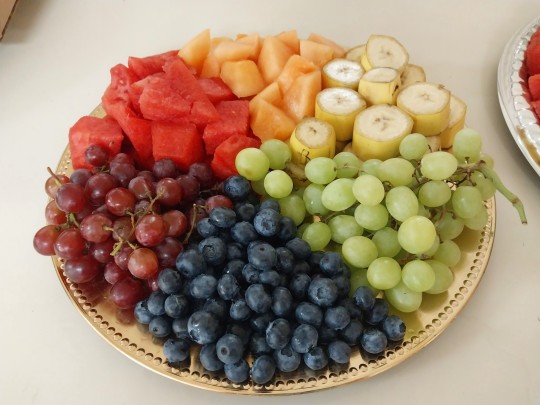


I made some color wheels for my school today!
#taste the rainbow#color wheel#colorful#colorful foods#snacktime#snacks#snackies#diy#easy diy#food diy#foodpics#foodphotography
6 notes
·
View notes
Text
Dinsdag 5 maart 2024... verspeent!
#easy#diy#easy diy#enjoyingthemoment#gardening#winter#march 2024#march#repotting#paprika#basil#aubergine#red and yellow#yellow#red#camomile#sown#grown#sowing#growing
3 notes
·
View notes
Text
https://www.tiktok.com/t/ZTRxfs6U5/
Making mini-books of all the audio and e-books I have read so far 📚📚📚
7 notes
·
View notes
Last Seen Blogs
jualraktelurjateng
Jual Rak Telurelur Jateng

lotr-described
op please add image description to og post

hsr-world
Untitled

astashetty-blog
Untitled