#3d process
Photo
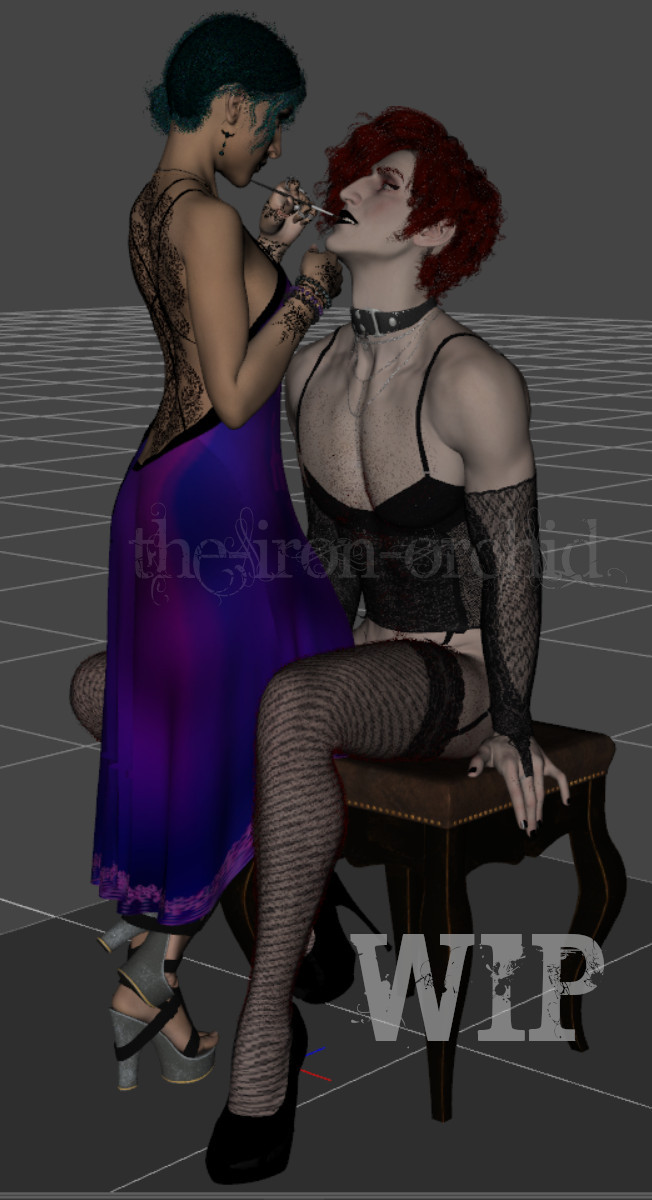
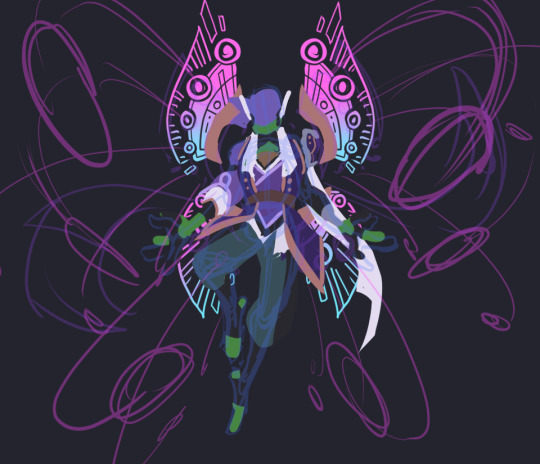
...what could I possibly be working on? >:3c
WIP: this is seriously SO FAR from done lmao. I need to free Julian’s neepnops from their confinement, add everyone’s piercings and jewelry, drape a slutty shawl on Jinana, do some shader work on the stool, and like.... actually put a SET together lmao (bedroom or bathroom?). And THEN do the lighting
I feel like Goth!Julian would have some more tattoos, what do you guys think? I am So TEMPTED to give him a Bauhaus tat lmao
#I might try another hairdo on Jinana for funsies#anyway that is a man who knows he's gonna get wrecked tonight#my art#WIP#3D process#you can see a bunch of spots where shit is clipping because I turned off smoothing to make my viewport go faster lol
63 notes
·
View notes
Text
youtube
#blender 3d#b3d#3d art#3d process#osvald v. vanstein#octopath fanart#octopath osvald#octopath traveler 2#my 3d art#youtube video#Youtube
4 notes
·
View notes
Text
There's this really dumb part with having DID, which is what do you mean I haven't processed this shit yet? Because, surprise! Maybe you did process it, but was it you-you, or was it another you that did the processing, hm? Oh, sorry, looks like this current version of you never actually did go through that, so you're gonna have to process through these thoughts and feelings and memories allllll over again.
What do you mean I haven't actually worked through my issues yet I thought I was already through with this song and dance months ago *grumbles*
#did#dissociative identity disorder#actually did#actuallydid#did osdd#osddid#cdd#system stuff#did system#by purple#in which Purple nearly makes the exact same post Green made ages ago#and then realizes she actually has nothing new to add#and is instead just. rehashing those same thoughts and feelings again#Trauma Processing 2 Electric Boogaloo Now in 3D!
786 notes
·
View notes
Text
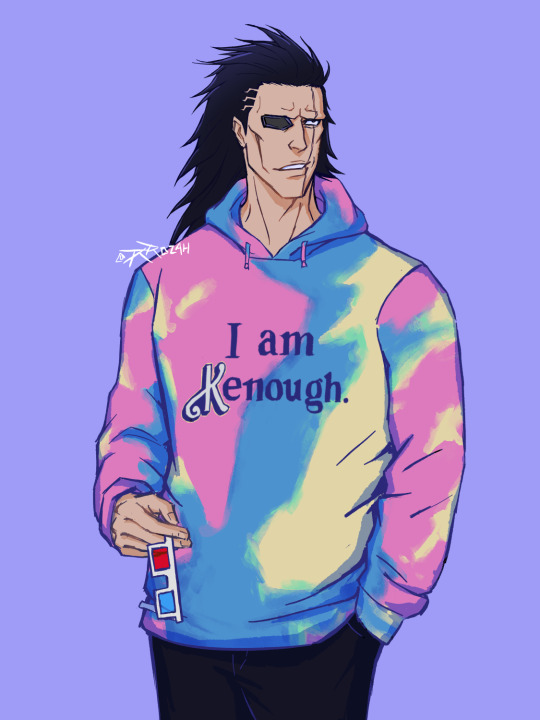
Kenpachi came back from Barbie in 3D while Yachiru is still watching Oppenheimer.
#kenpachi zaraki#bleach kenpachi#bleach#bleach fanart#barbie#bleach tybw#never knew I needed to draw him in pink#the whole process was such a delight#scribbly scribloo goofy Kenny#did the 3D glasses even work?
1K notes
·
View notes
Text
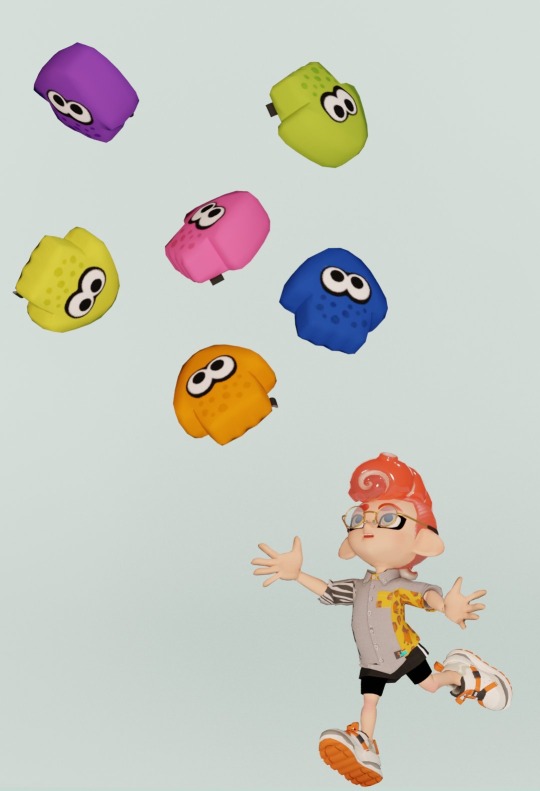
Tried Blender for the first time!
#it’s very difficult#I wanted to cry throughout the whole process#BUT I’m happy with it!!#it’s pretty good for my first thingy!!#splatoon#splatoon 3#splatoon fanart#blender 3D
2K notes
·
View notes
Text
YOU'RE KIDDING THAT I JUST MET COSTAS FUCKING MANDYLOR WHILE I WAS OUT DINING IN A RANDOM PLACE. THE GUY FUCKING TOLD ME HE HAS BEEN LIVING IN THE SAME ISLAND AS ME FOR THREE FUCKING YEARS.
THE MAN GAVE ME LIKE FOUR FUCKING HUGS AND TOLD ME WHAT WAS GONNA HAPPEN IN SAW 11 AND THAT MARK DIDN'T ACTUALLY DIE AFTER SAW 3D
THEN HE TOLD ME TO WAVE AT HIS WIFE AND KID, AND THEN HE SHOOK HANDS WITH MY DAD AND INVITED HIM FOR A DRINK AND SAID HE DID A GOOD JOB RAISING ME.
THEN HE GAVE ME ANOTHER HUG AND WENT ON HIS MERRY WAY
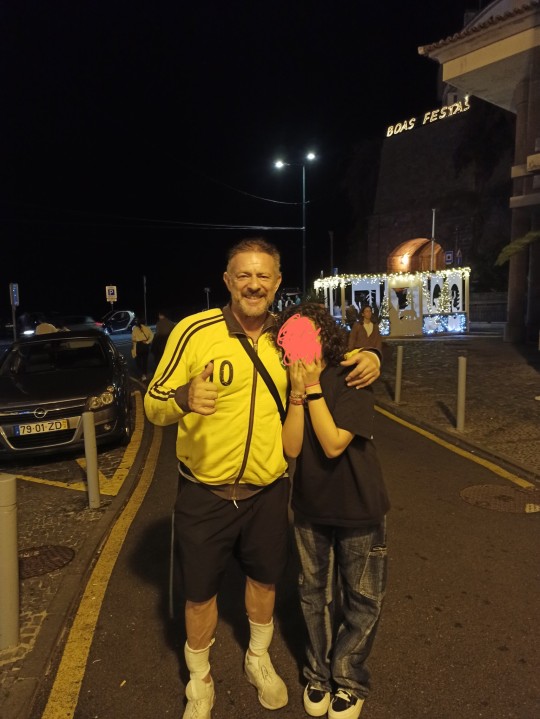
COSTAS MANDYLOR YOU FUCKING MADMAN I LOVE YOU SO MUCH
EDIT: Mark being alive has nothing to do with saw 11, he made it very clear that saw 11 will just be a prequel, also he didn't say the actual plot of the next movie, he just told me Mark would be appearing more than in X, i misspoke up there cause i was in the heat of the moment.
Don't wanna get sir Costas in any trouble cause he was the sweetest guy ever.
#saw#saw iv#saw v#saw vi#saw 3d#saw x#costas mandylor#mark hoffman#I AM NOT WELL THIS HAPPENED LIKE TWO HOURS AGO AND I STILL CAN'T PROCESS IT
425 notes
·
View notes
Text
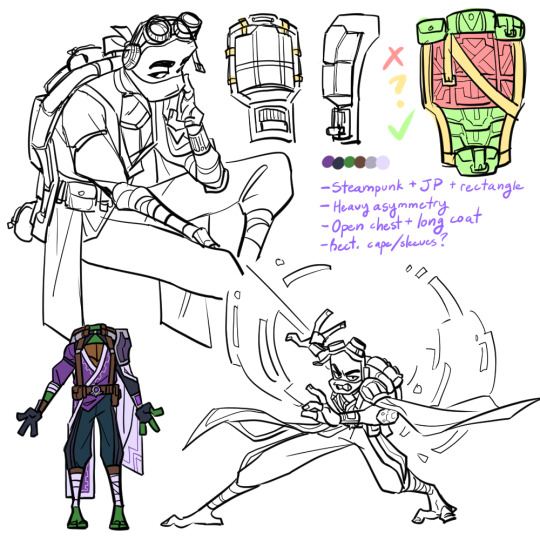

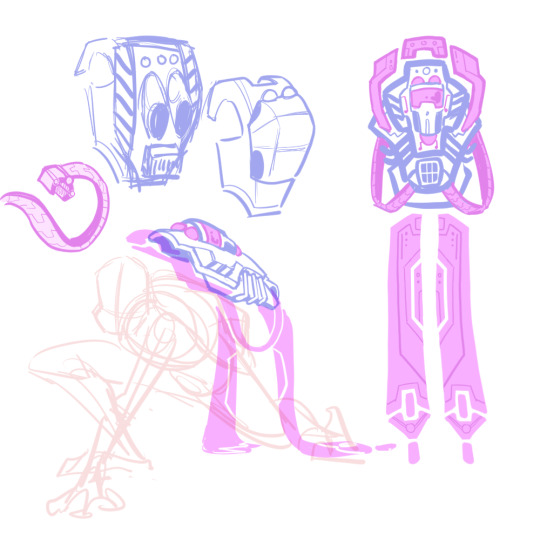


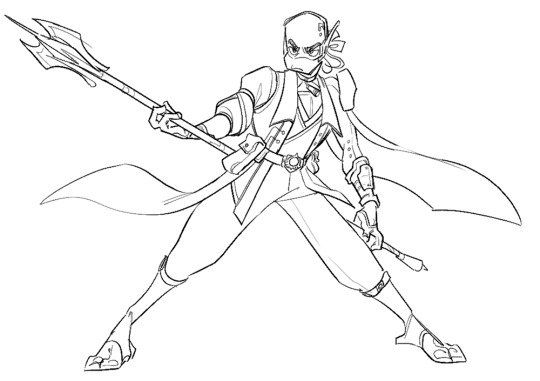


donnie had. SO. much concept art lol. i really enjoyed the whole design process though. his base design is very difficult to work with because of the battleshell, but it gave me a lot of chances to get creative and i'm happy with the results :)
(also as a disclaimer so i don't get asked about this: i don't have motivation to finish raph or the wish art for donnie, so i'm just posting what i've got)
i didn't annotate these as much since there'd be a lot to write, but i'll write out some of my thought processes and go into some detail about his final design below the cut if you're interested! (it's long. i'm talkative 😔)
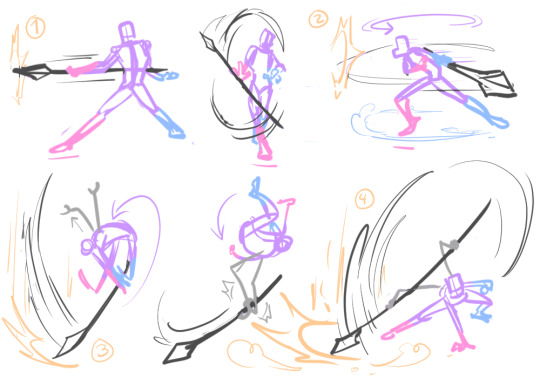
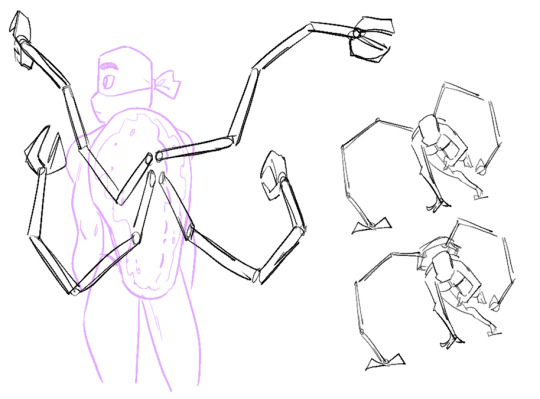
1st row - first iteration; much more literal 1:1 translation of his design into a fantasy setting. very steampunk-y. ended up completely scrapping it because, simply put, he looked more like an npc than a playable character. obviously, several features did still carry over throughout the design process :3 also wanted to imagine his attack pattern cuz i thought it'd be fun to incorporate his spider arms.
this was actually the first design of any of them i'd come up with! i've definitely learned a lot about genshin's character design style since then and i think it shows 😂
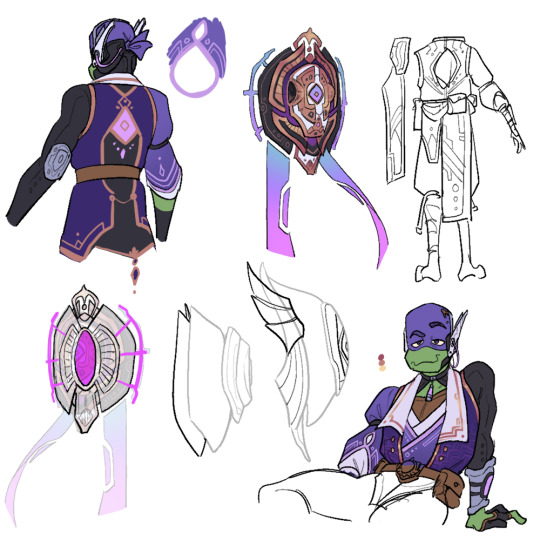
2nd row - playing around with the idea of a floating battleshell (rather than a backpack-like one in the the show & first version), inspired by nahida's cape. also hard light constructs/attachments. was leaning too into the sci-fi and rectangular motifs with the design, but i liked the idea.
3rd/4rth rows - concepts for his final outfit and shell designs (the colored/more-detailed pics are the more finalized ones). took a lot of inspiration from sumeru this time around. it's a lot sharper, shinier, and less rectangular than his og aesthetic, but i think it's more in-line with genshin's design philosophies.
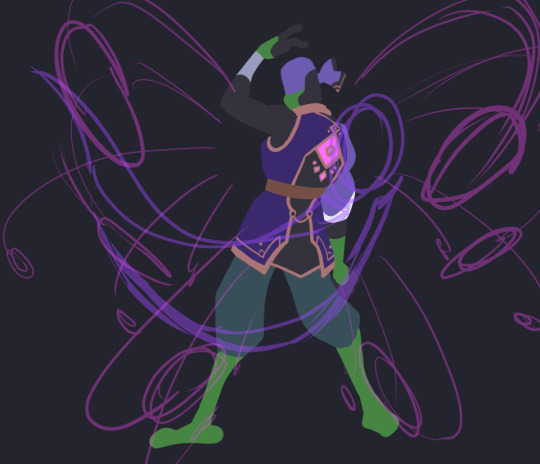
5th row - not entirely sure why i went through all the trouble of making a 3d model for this. i mostly just thought it'd be fun and good for reference. i was right, but i don't know what to do with it now lol. can't be bothered to be a perfectionist about it though, so don't look too closely at it 😭
6th row - incomplete thumbnails of his burst/wish art. not super sold on that "wing" design in particular, but i do like the idea of his shell splitting and deploying hard light weapons/rocket launchers/etc sort of like in canon.
battleshell/misc notes - i'm thinking his battleshell is controlled using the pink sensor on the back of his coat, possibly in combination with his headset. it floats behind him by default and is sturdy enough to protect his back, but he can also freely fly it around like a drone if he wants. the holes on the side are mainly for the spider arms and the banners(?) and handles(?) with the blue/pink gradient are made of hard light and only appear when the shell is in use.
i imagine like in the series, his tech here isn't necessarily very reliant on his vision/powers; much of it he likely made himself long before he received a vision and he just uses his vision to enhance it.
his burst is a barrage of missiles from his shell that lock onto an enemy and deal a large burst of electro damage in an AOE. not sure if i want his skill to be a deployable or some sort of electro-infusion/boost 🤔 maybe something that involves deploying his shell to boost his damage while leaving him vulnerable, like a glass canon? though i'm not sure he'd be that sort of risk-taker... 😅 dunno! his signature weapon would totally be his tech bo though.
that's about all i can think of. thanks for reading!
#rise of the teenage mutant ninja turtles#rottmnt donnie#rottmnt au#rise genshin au#rottmnt art#my art#mangastudio#3d#art#process
1K notes
·
View notes
Text
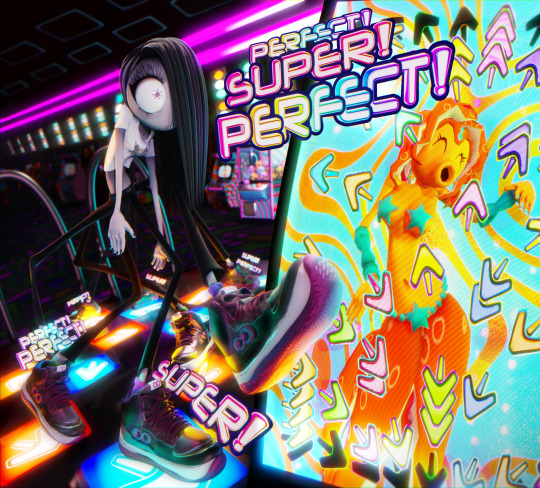
SPIDDR
#my art#3D art#blender#This took me. a few days. VERY HAPPY WITH IT THOUGH!#Basically just playing around with forced perspective and compositing. Lots of fun...#No I dont understand the logistics of eight-legged DDR. It essentially doubles as a game of twister I think.#Sometimes you get an idea for something mildly amusing and then it ends up the single most complex render you've ever made.#If I had to explain the compositing process here I think i would puke.#Please vindicate me by opening this in a new tab and zooming in. Look at the scanlines. I think they're very pretty.
1K notes
·
View notes
Text
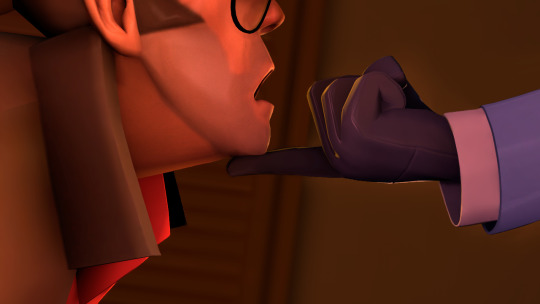
just remembered i know how to use sfm. hello lgbt community
#also completely forgot how to post-process edit i <3 you photoshop blur tool#anyway heu guys it’s been like 3 months since i last posted have men being bros#sharko’s stuff#sfm#art#sniperspy#bloody suit#what the hell else do they call it#knife party#3d#tf2#tf2 sniper#tf2 spy#suggestive
765 notes
·
View notes
Text


kilika sprites
347 notes
·
View notes
Note
Don’t be shy. Let everybody have a turn combing Julian. Hand over the brush.
~Ghoulfriendfangs
This is where the MAGIC happens, baybee!
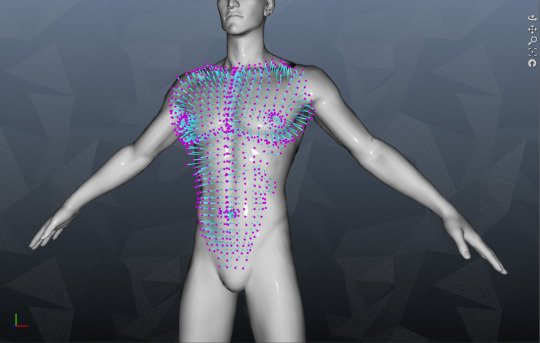
(DAZ Studio's strand-based hair creator, ft. (1) Dorito-Shaped Man with Ken-Doll Bulge, covered in strand guides)
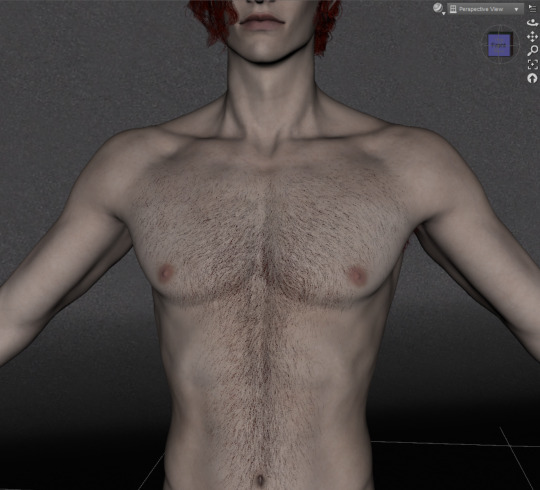
(The Viewport result after combing and applying various settings - it renders a bit thicker than that, but I think he needs some more fuzz in the upper center of his chest... back to the drawing board 😩)
You take over the combing, I'm getting myself some ice cream lmao
8 notes
·
View notes
Text
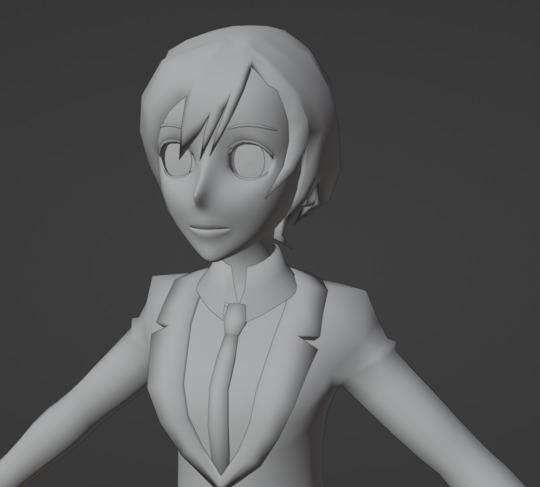
WIP
#blender 3d#b3d#3d art#3d process#OHSHC#I'm making a VRChat model of Haruhi so it's been interesting so far
2 notes
·
View notes
Text
Road to 3D- Sam Manson (Part 2):
Character Modeling


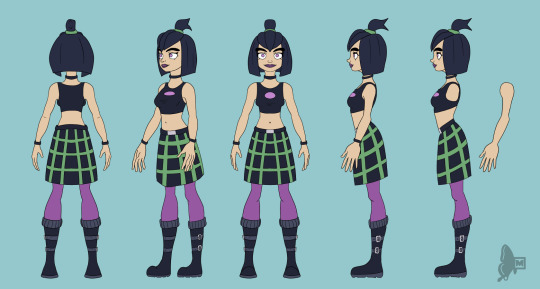
Part 1: Model Sheet
Welcome to the second and final part of this project. Since people have asked how I do my models, I decided to make a write-up on how I approach these things using the example of a model of Sam Manson. The first part focused on how I make a model sheet fo a 3d model the second part focus just on the modeling. There are many more things about how to create a fully realized 3d character that I could make whole other chapters for, like UV unwrapping, texturing, shading and rigging, but I don't have enough knowledge past the fundamentals on these topics that could warrant their own seperate posts.
Additional stuff before I continue:
I use Blender for all my model
This not a beginners guide or something similar, it would be helpful to already know the general workflow of a modeling, how to use Blender and know different terminology like edgeflow, retopology etc.
If you are a beginner and want to learn more about character modeling I recommend the videoseries "Modeling for Animation" by Dikko on Youtube
Maybe I make some reference some tricks from this videoseries
That's it, let's go!


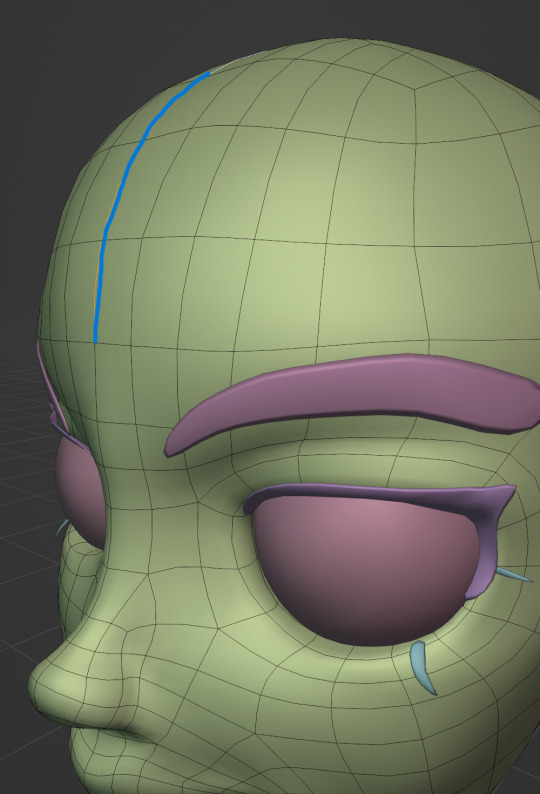
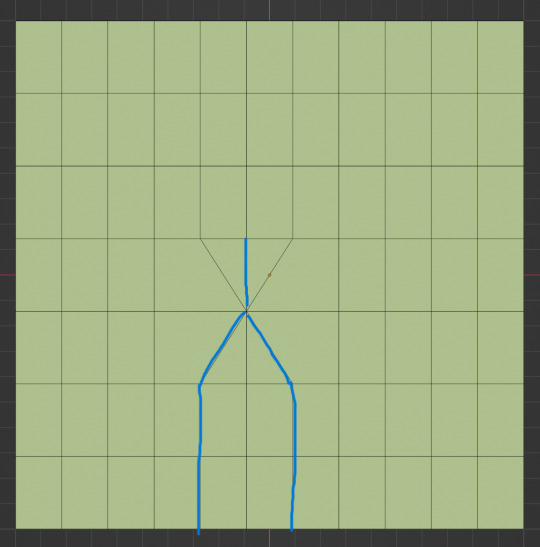
My first step is always the block-out phase. The block-out phase is what the construction lines and the first sketch in a drawing are. I align the frontview and sideview from the model sheet I made in part 1 with the z-axis (the blue line in the images above) and roughly shape out the forms with primitive forms. For this I mostly use a cube with a subdivide modifier.
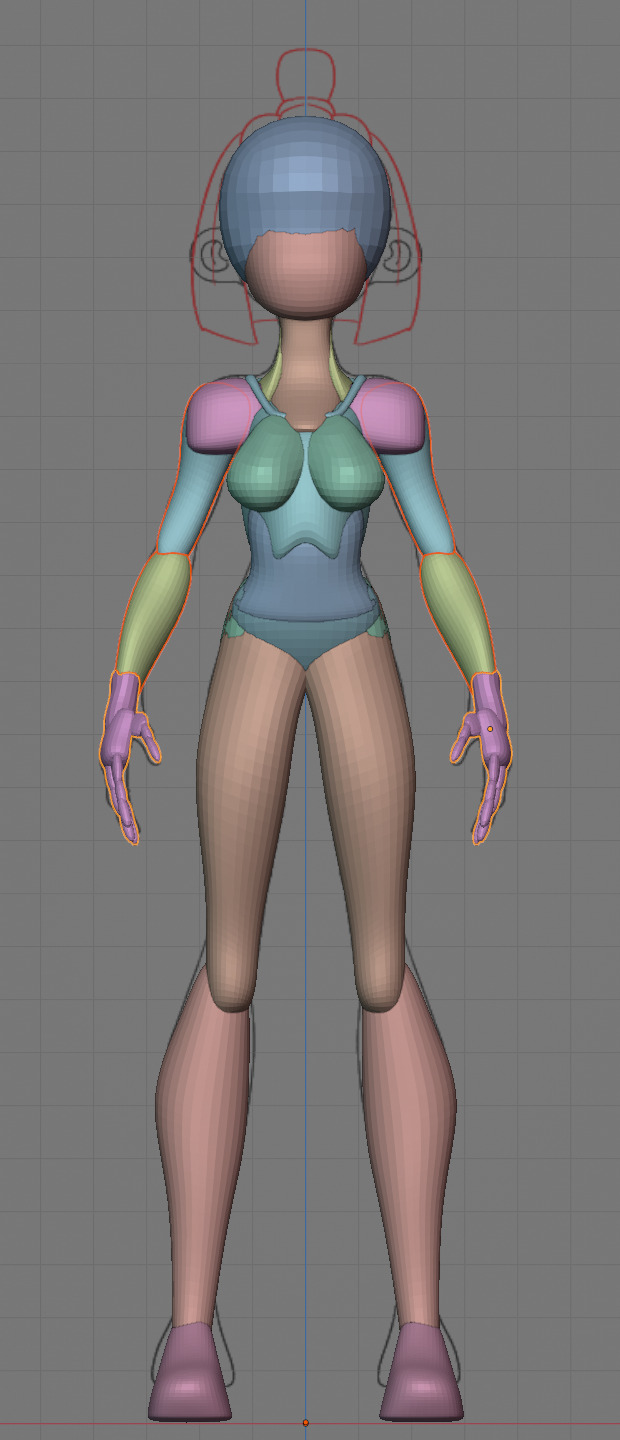


Having a modelsheet without the clothes obscuring the body makes it much easier the get the form right. The block-out phase is one of the most important steps, if it looks good than I have practically half the work done. This is also a good opportunity to practice anatomy.
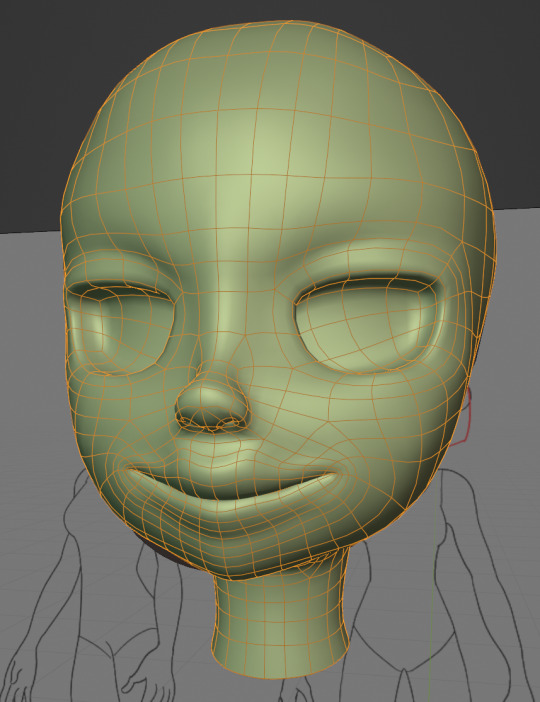

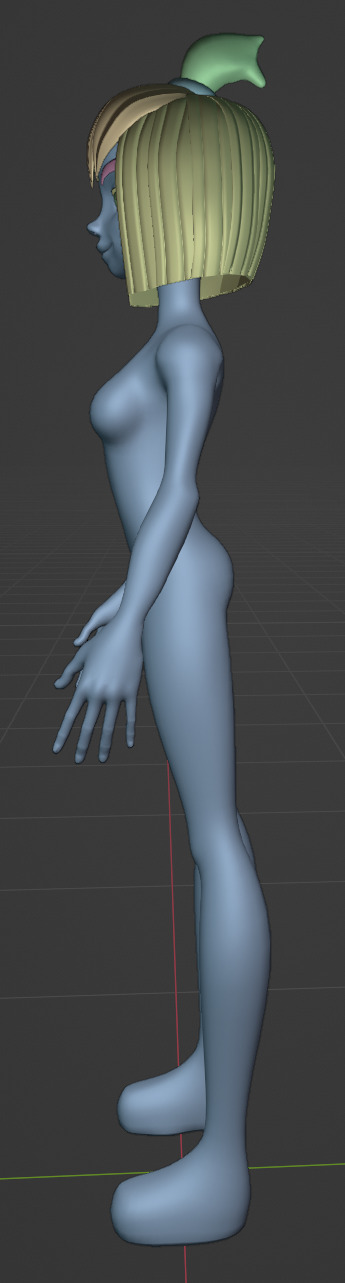
After this stage I continue with the head. First of all, don't forget to add the mirror modifier so I just need to model half of the model. There are different methods to approach modeling the head, like sculpt the head first, retopologize and than bake all the deatails onto the retopologized head. I actually prefer to polymodel the head especially when I have a good model sheet. I practially trace the lineart from the model sheet by extruding vertices, once from the frontview and once from the sideview. The most important points are the form of the eyes, the mouth, the form of the face and the jawline. The head block-out is used as an anchor point for the shrinkwrap modifier so that the traced forms actually look like they belong to a 3d form and not 2d lines floating space. From this point on it's just connecting everything, pull and push vertices so it looks like a 3d head and make sure the edgeflow is good. (It's also helpful to know how the planes of the head look like) After that I add the eyelashes, eyebrow, eyes and the ears, now it looks like something!
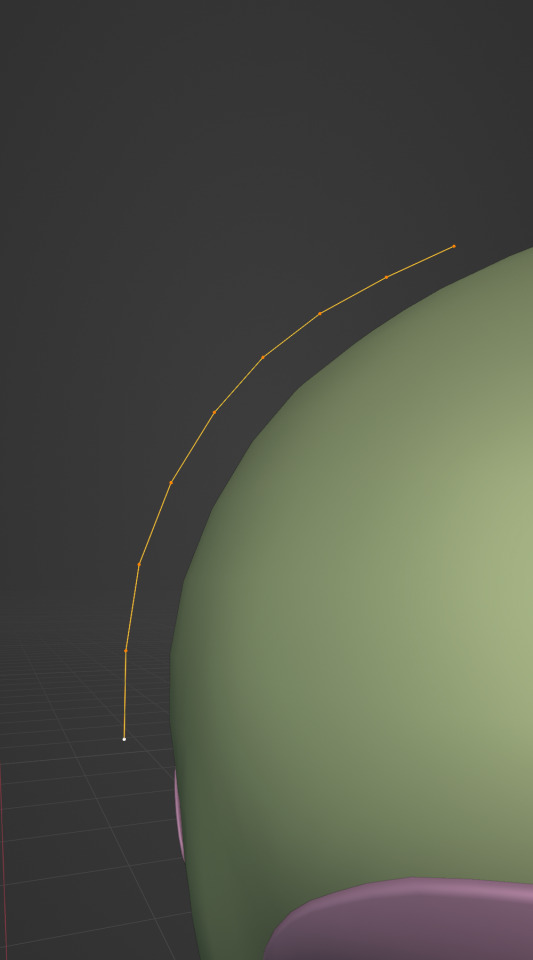
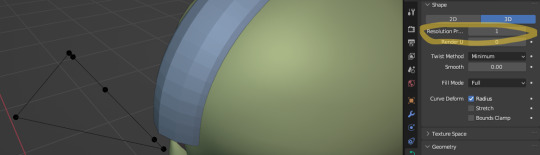
Now comes the hair. For the hair I used the "curve trick" like mentioned in the video series I recommended. Here is a tip to save time: I choose some edges from the head, duplicate and seperate it from the mesh. I convert this seperated line into a curve and choose a beziercircle as a bevel geometry. This is now the perfect foundation to model the hair further. One thing I needed a long time to notice: To get the beziercircle to a perfect square or in this case a triangle lower the Resolution U to 1 in the shape options. Now I just convert the curves into a mesh and add details and the head is done!
With the head finished I continue with the body. Remember how I wrote with a good block-out half of the work ist finished? Well, for this step I practically just use the smooth brush in sculpt mode and smooth everything out so everything looks connected. Then I retopologize the body and that's it. Well, ok there is a little bit more to it: Before smoothing things out I join the block-out part to a single mesh and remesh it with the remash modifier expept for the hands. I prefer to polymodel the hands seperatly without worrying about the rest of the body because they are difficult to model. I reattach them later. Speaking of reattaching, I make sure that the connection points have the same number of vertices while I retopologize/polymodel. To ensure that, I often use the following trick visualized with a simple example ( which is also described in the video series):
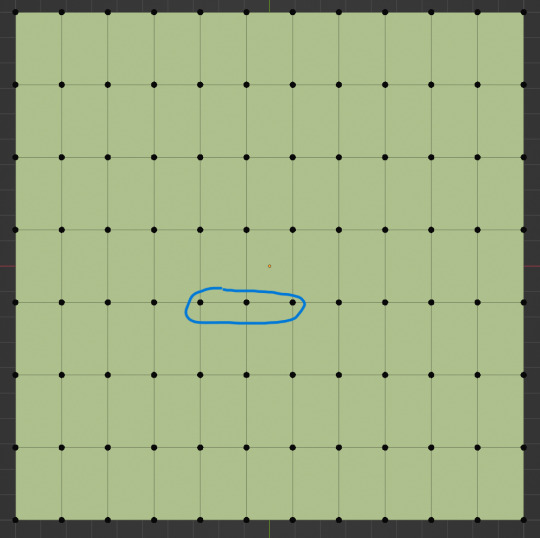

I want to reduce the amount of edges at the bottom of this plane, for this I merge 3 vertices from the middle into 1 vertice seen in the left image. After that I can select the blue marked edges from the center image and dissolve them. The result, which you can see on the right, is a nice clean edgeflow with a reduction in the number of edges.

After modeling every part I attach them together and I have a finished bodymesh the work with.

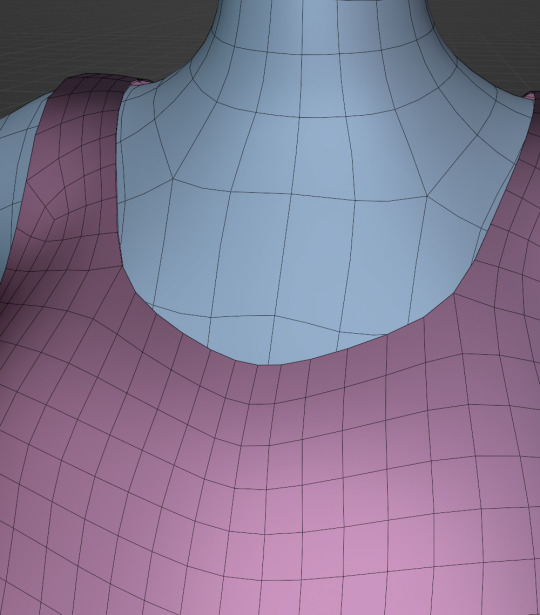
Now onto the clothes, for this I use the model sheet with clothes as reference. Having a retopologized body makes it easier to model simple stuff like e.g. Sam's shirt. On the left image the marked faces of the the bodymesh already looks like a shirt. I just need to duplicate and seperate this area, clean it up a little and the shirt is basically finished. The more complex stuff like the boots I need to polymodel around the bodymesh.
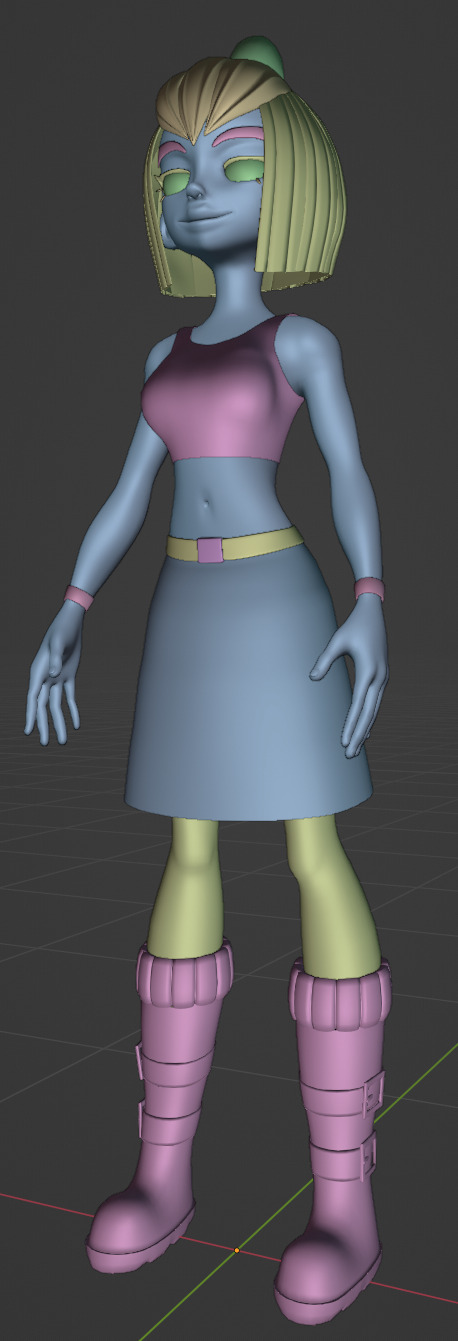

With that the modeling part is done! Now comes the things I said above: uv unwrapping, texture painting, rigging and shading. These are whole other topics I cannot go deeper because I'm still learning how to do these things but I hope my little write-up about how I appoach character modeling was enough to learn one thing or two.
Thank you for your time and thank for reading!
#3d modeling process#3d model#blender#danny phantom#sam manson#long post#my animation#my art#art resources
224 notes
·
View notes
Text
˚✧ ₊˚ʚ tcw plushies


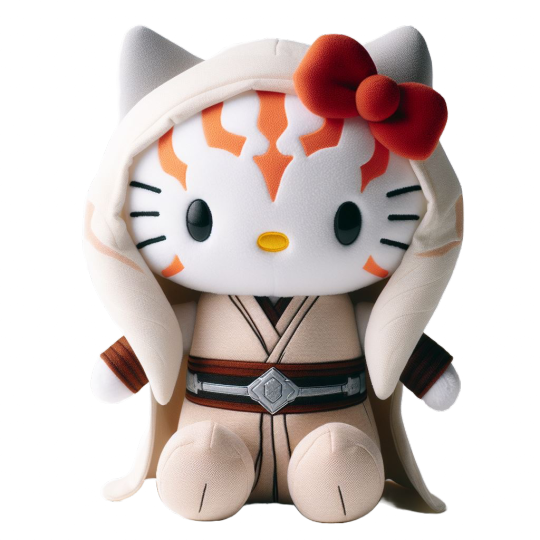

✧ ೃ༄*ੈ✩


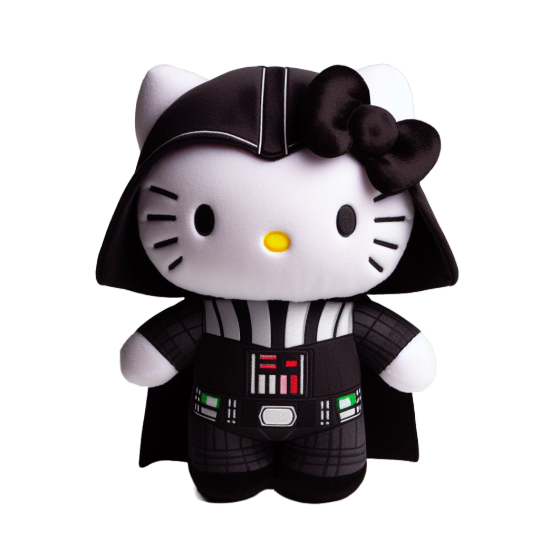
˚✧ ₊˚ʚ please reblog if you use!
˚✧ ₊˚ʚ header friends made by me, for you.
#🥛💒#milk’s love hotel#icons#star wars#the clone wars#sw tcw#hello kitty#hello kitty plush#star wars icons#hello kitty icons#clone wars icons#headers#stickers#i’ve been crying the whole process of making these#cute cute cute#ani is so precious#blender#blender art#3d artist#^ ^ <3#^o^
194 notes
·
View notes
Text
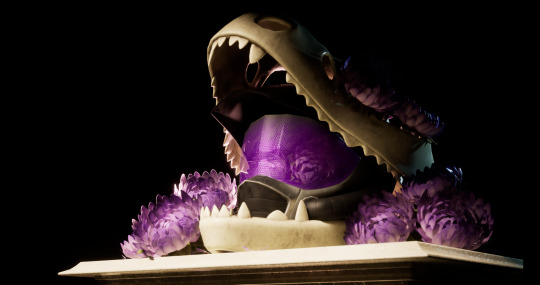
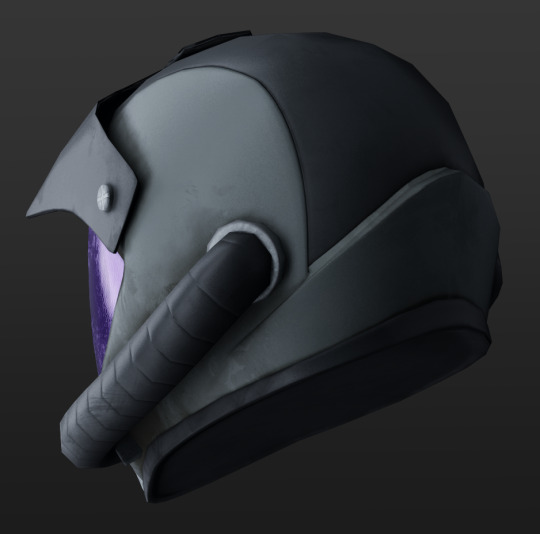
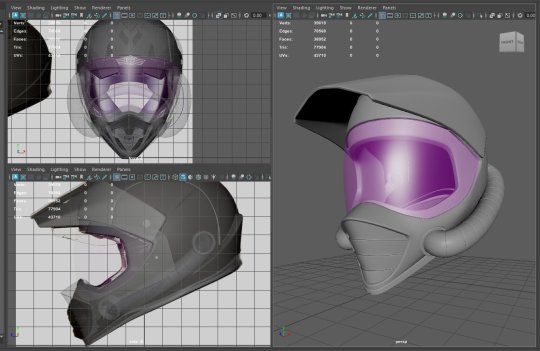
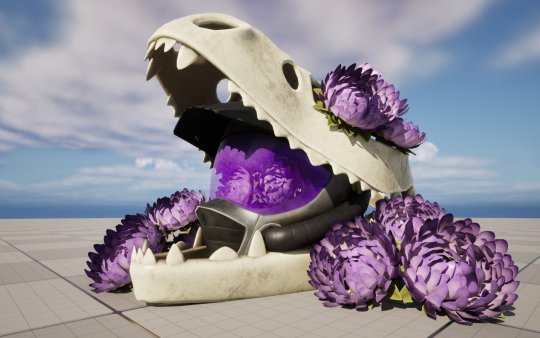
Xisuma's Helmet 💜
My 3D final for the fall quarter! 4 assets made from scratch, modeled in Maya/Zbrush, textured in Substance Painter, and rendered in Unreal Engine 5.
Detail shots and some rambling about my process below the cut! :)
The helmet! I've talked about it a lot before, but my design for X's helmet is very heavily inspired by Motocross! :) this model was done with an AHR motocross helmet as my main reference, as well as my own art of Xisuma. The tubing was the main addition!

The pedestal was the final asset I made. I designed, modeled, and textured it in one day, and I'm very proud of how it turned out! I wish I could have shown it off better in the final render, but alas, the composition didn't allow for it. I still think It's pretty neat :) The decals along the top and at the center were designed by myself as well. At the top, we have some text art. It's hard to read (deliberately) but it spells out "XISUMA," repeating four times on each side. The front decal is dragon wings, framing an end crystal.

The flowers I selected are Asters! I was under the impression when I started this project that these were Xisuma's birthflowers, but it turns out his birthday is in October, not September, LOL. I was thinking of the his Youtube anniversary... I still associate these flowers with him either way though!
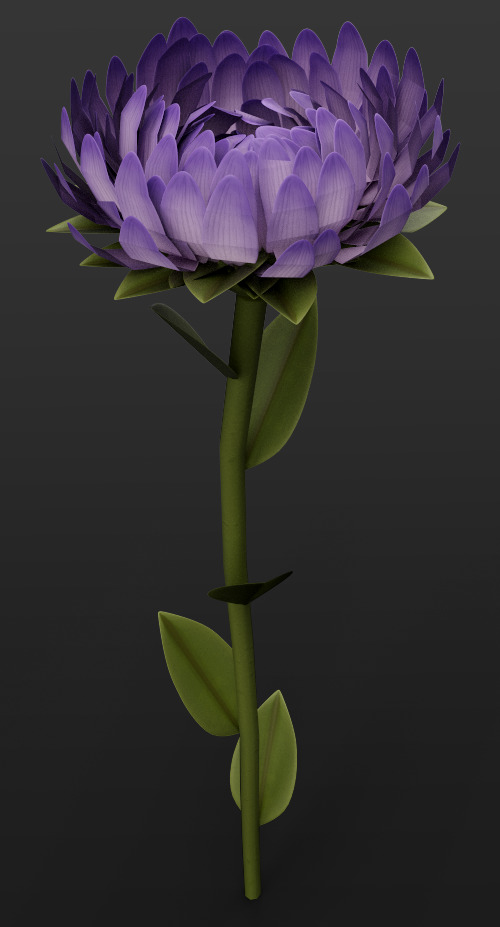
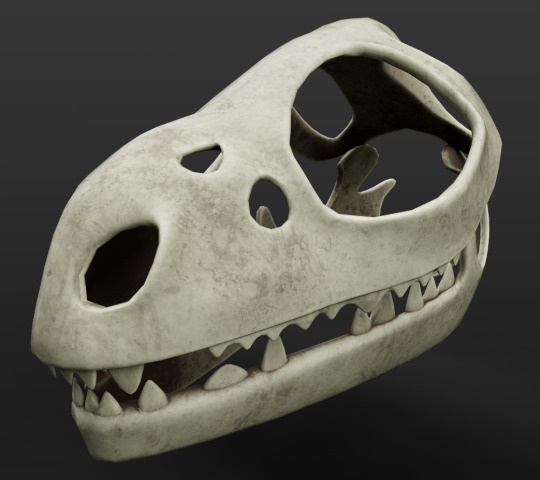
The flowers were probably the most difficult asset, but the skull might be the one I'm least satisfied with. Skulls are weird and complicated. If I were to do this over again, I'd go for a skull that I can find more precise reference for, rather than a sailfin lizard :') I picked out a lizard because I wanted to invoke dragons a lot in my imagery, but felt like choosing an extinct animal, like a dinosaur, wasn't appropriate for what I was going for? The sailfin lizard is a species which is vulnerable but not extinct, which I decided was more in line with my vision. Again though, if I were to do this over, I'd pick a skull which is more readily documented.
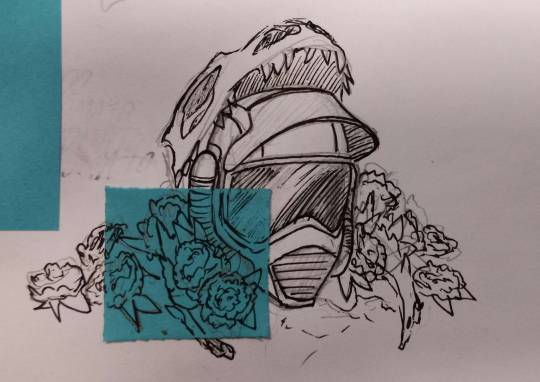
To conclude, some WIP screenshots! :] My initial sketch for the composition, two Maya screenshots, of the high poly helmet and pedestal, and an early screenshot from UE5, figuring out the composition, before I'd finished the pedestal model.

Happy to talk more about this, or answer any questions that people have! :D my ask box is open. I've been considering writing a short fic about the concept behind this piece as well... It's a little fuzzy, the details, but I do have a concept, and most of my choices for this project did have intention behind them. :)
Thanks for reading! 💜
#hermitcraft#hermitcraft fanart#mcyt#mcyt fanart#xisumavoid#xisuma#xisuma fanart#xisumavoid fanart#digital art#3d#3d art#3d render#art process#eliyipsart#eliyipswrites#this post sponsored by my particular flavor of xisumavoid autism
255 notes
·
View notes
Note
can I see your verison of, Bishop Lamb?
beloved beheaded :>
#cotl#cult of the lamb#doodles#animation#legitimately i got moho like a few weeks ago in a huge sale and never used it#thank you for the learning opportunity#my background is NOT in puppet animation lmao#thankfully a lot of the process feels the same as rigging something in 3D#but with lines and whatnot#so yeah apologies for the super simple mechanical lookin movements here i am Learning like a toddler with shape blocks
457 notes
·
View notes
Last Seen Blogs

chingachex
ChingaChex

writingforatwistedworld
Writing for a twisted world

skullgirls-imagines
Skullgirls imagines

nararion
Friolero

rapunzelita
♡ 𝓗𝓮𝓪𝓿𝓮𝓷-𝓼𝓮𝓷𝓽 ♡