paul-and-jer
PAUL-AND-JER
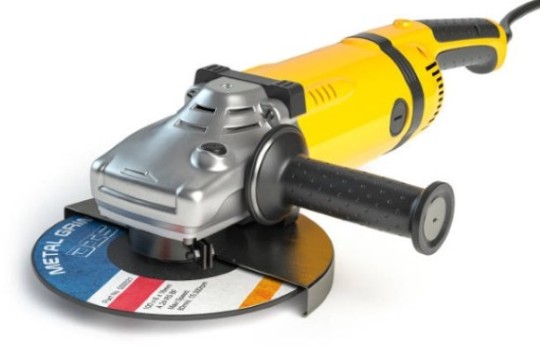
Angle grinders are powerful machines that can be used to cut and grind a variety of materials. The electric motor is the driving force behind the angle grinder, and it can be operated either manually or by a fixed handle. Angle grinders are commonly used in construction, demolition, engineering, and manufacturing industries. If you need extra information about angle grinder, you can easily check out Tools Auditor Author page.
3 posts
Don't wanna be here? Send us removal request.
Last Seen Blogs

yosukeshimizuphotography
Yosuke Shimizu

arsonistlullabyee
✧・゚A.

daprola-blog
david_

mishacoliins
I am not Misha

dragon-tamer-1
Undertale Fan
Text
How to Cut the Head off a Stainless Bolt Using Grinder?

You're trying to remove a stainless bolt, but the head is stripped. It can be frustrating when you're trying to get a job done and the hardware just isn't cooperating. All your hard work might be for naught if you can't get that pesky bolt out.
You don't have to worry, we've got you covered. With a little elbow grease and the right tools, you can remove that bolt in no time. Read on to learn how to cut the head off a stainless bolt.
What You Will Need to Cut the Head Off a Stainless Bolt?
To remove the head from a stainless steel bolt, you will need a few basic tools. Below is a list of what you'll need to get the job done:
Safety glasses
Gloves
Angle grinder
Abrasive wheel
Screwdriver
Hammer
Pry bar
Pliers
File or debarring tool
Now that you have your tools gathered, let's get started.
Instructions on How to Cut the Head Off Of a Stainless Bolt
Cutting the head off a stainless bolt is a pretty straightforward process. The easiest way we've found to remove the head of a stainless bolt is to use an angle grinder, but there are a few other methods that can be used, as well.
In order to ensure a safe and successful outcome, it is important to follow the steps below carefully.
Step 1: Put On Your Safety Gear
youtube
Before you start working, it's important to put on the proper safety gear. This includes safety glasses and gloves. The last thing you want is for a piece of metal to fly into your eye or for your hands to get cut up.
Step 2: Cut Off the Head of the Bolt
Use your angle grinder to cut through the head of the bolt. It's important to use an abrasive wheel designed for stainless steel. If you're having trouble cutting through the bolt, try using a higher speed setting on your grinder.
Step 3: Remove the Burrs
Once you've cut through the head of the bolt, there will be sharp edges left behind. These are called burrs and can be dangerous if you're not careful. Use a file or debarring tool to remove any sharp edges from the bolt.
Step 4: Use a Screwdriver to Remove the Bolt
Now that the head of the bolt is gone, you should be able to remove the bolt with a screwdriver. If the bolt is still stuck, try using a hammer to tap on the screwdriver. You can also use a pry bar to help loosen the bolt.
Step 5: Use Pliers to Remove the Bolt
If the bolt is still stuck, you can try using pliers to remove it. Make sure to grip the bolt firmly so you don't damage it.
With a little patience and the right tools, you can easily remove a stubborn stainless steel bolt.
Final Thoughts
Removing a stainless steel bolt can be a difficult and frustrating task. But with the right tools and a little know-how, you can get that bolt out without any problems. Just follow the steps outlined above and you'll have that hardware removed in no time.
If you found this article helpful, be sure to check out our other articles on home improvement and repairs. Thank you for reading.
#How to Cut the Head off a Stainless Bolt Using Grinder#Stainless Bolt Using Grinder#Grinder#Youtube
0 notes
Text
How to Sharpen a Knife with an Angle Grinder?

Anyone who has ever tried to sharpen a knife with a standard grinder knows that it can be a difficult and time-consuming task. However, by using an angle grinder, it is possible to get a sharp edge in a fraction of the time. Angle grinders are designed to quickly remove material, and this makes them ideal for sharpening knives.
This guide will show you how to sharpen a knife with an angle grinder in just a few minutes without any special skills or experience.
How to Safely Sharpen Knives with an Angle Grinder: A Step By Step Guide
It’s easy to take your knife for granted. After all, it’s just a simple tool that you use for basic tasks like cutting food or opening boxes. However, if you don’t take care of your knife, it will quickly become dull and unusable. Fortunately, sharpening a knife is a relatively simple process that anyone can do with a little practice. One popular method is to use an angle grinder. By following a few simple steps, you can have your knife razor-sharp in no time.
Step 1: Set the Grinding Wheel
Before you begin, you’ll need to set the grinding wheel at the correct angle. The ideal angle is between 30 and 45 degrees. Next, you’ll need to decide how much material you want to remove from the blade.
For a dull blade, you’ll probably want to remove more material than for a slightly dull blade. Once you’ve made your decision, simply run the blade along with the wheel until it reaches the desired level of sharpness.
Step 2: Secure the Knife
Once you’ve set the grinding wheel, it’s time to secure your knife. The best way to do this is to clamp the blade in a vise or similar device. If you don’t have a vise, you can also use a piece of wood to secure the blade. Just be sure that the wood is thick enough to prevent the blade from cutting through it.
Step 3: Hold the Knife at the Correct Angle
Step three in safely using an angle grinder to sharpen knives is to hold the knife at the correct angle. The correct angle will vary depending on the type of knife you are sharpening and the desired results. For most knives, a good starting point is to hold the blade at a 20-degree angle. To find the 20-degree mark, line up the edge of the blade with the middle of the stone. Then, tilt the blade until the end of the edge just touches the stone. Once you have found the correct angle, hold it steady while you move the blade back and forth across the stone.
Conclusion
With this knowledge of how to sharpen a knife with an angle grinder, you can keep your knives in top condition with very little effort. You can enjoy sharp, safe knives for years to come if you follow the steps outlined above and take all necessary safety precautions.
We hope you enjoyed this guide on the use of an angle grinder when sharpening knives. Just remember to be safe and have fun.
0 notes
Text
How to Sharpen a Blade with an Angle Grinder?
Whether you’re a contractor, a handyman, or a do-it-yourself, there are times when you need a sharp edge. For most people, that means pulling out the box of handheld tools and reaching for a file. If you need a faster way to do the job, use an angle grinder.
Angle grinders are electrically powered tools that spin at high speeds, making them ideal for quickly sharpening blades. The downside is that they can be dangerous to use if you’re not careful.
Here we will explain how to sharpen a blade with an angle grinder so that you will be able to do so safely and effectively. The Tools Auditor Team is constantly updating technology to ensure our customers have the most up-to-date information available.
How to Sharpen a Blade with an Angle Grinder Safely?
One of the most common power tools in any workshop is the angle grinder. These versatile tools can be used for everything from cutting rebar to grinding welds. Angle grinders are commonly used for sharpening blades. Whether you’re working with wood or metal, a sharp blade is essential for getting the best results.
Following are a few tips on how to safely sharpen a blade with an angle grinder:
1. Wear the Proper Safety Gear
Before beginning any work with an angle grinder, it is important to choose the proper safety gear. Long pants and a long-sleeved shirt will help to protect your skin from flying debris, and gloves will help to keep your hands safe. Safety glasses or goggles are also a must, as they will help to protect your eyes from sparks and dust.
In addition, it is important to choose a well-ventilated work area, as the angle grinder will create a lot of smoke and fumes. With the proper safety gear in place, you are now ready to begin sharpening your blade.
2. Select the Right Disc
Step two is sharpening a blade with an angle grinder is selecting the right disc. This is important because the wrong disc can damage the blade or cause the grinder to overheat. For most blades, a coarse-grit disc is best. These discs are made of abrasive material that will quickly remove metal and sharpen the blade. However, if the blade is very dull or damaged, a fine-grit disc may be necessary to avoid damaging the edge.
Once you have selected the right disc, make sure it is properly installed on the angle grinder. Then, hold the blade securely and begin sharpening at a low speed. Increase the speed as needed but be careful not to overheat the blade. With a little practice, you will be able to sharpen any type of blade safely and efficiently.
3. Mount the Disc
Now that you’ve selected the right disc for the job, it’s time to mount it onto the angle grinder. First, make sure that the disc is compatible with the angle grinder by checking the size and type. Next, locate the spindle nut at the end of the angle grinder. This is what you will use to tighten or loosen the disc. To mount the disc, simply align it with the spindle and thread it on until it is tight.
4. Sharpening the Blade
youtube
Now that the angle grinder is mounted and you’re wearing all the safety gear, it’s time to start sharpening the blade. First, make sure that the blade is securely clamped in the vise. Then, start the angle grinder and slowly bring the disc into contact with the blade. Apply moderate pressure and move the disc back and forth across the blade.
Remember to keep the angle of the disc consistent with the angle of the blade to ensure a uniform edge. After a few passes, you should start to see a shiny, newly sharpened edge appear on the blade. When you’re satisfied with the result, turn off the angle grinder and unclasp the blade. Now your blade is sharpened and ready for action.
Conclusion
Now that you know how to sharpen a blade with an angle grinder, you can put this handy tool to work in your workshop. Just remember to follow these tips and choose the right disc for the job, and you'll be sharpening blades like a pro in no time.
We hope you found this article helpful. Keep in mind that when working with power tools you should always take the necessary safety precautions in order to protect yourself and others.
1 note
·
View note