elliewakerellfmpyr1
Final Major Project-Year 1
153 posts
Don't wanna be here? Send us removal request.
Last Seen Blogs
shadow-icons
Shadow Icons
wolfstarluver
Stars Around My Scars
uglyduchessrantsandcomments
The rants and comments parlour
cactusspatz
a hardened and shameless tea drinker
mudsblood
cold blooded
Text
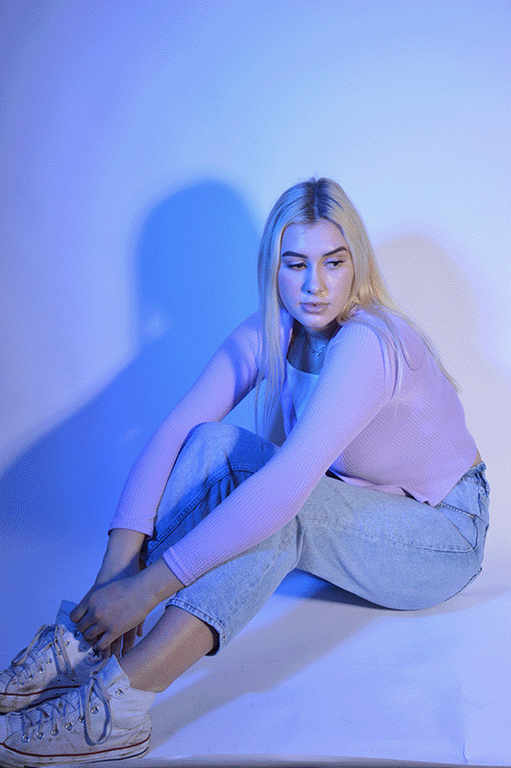
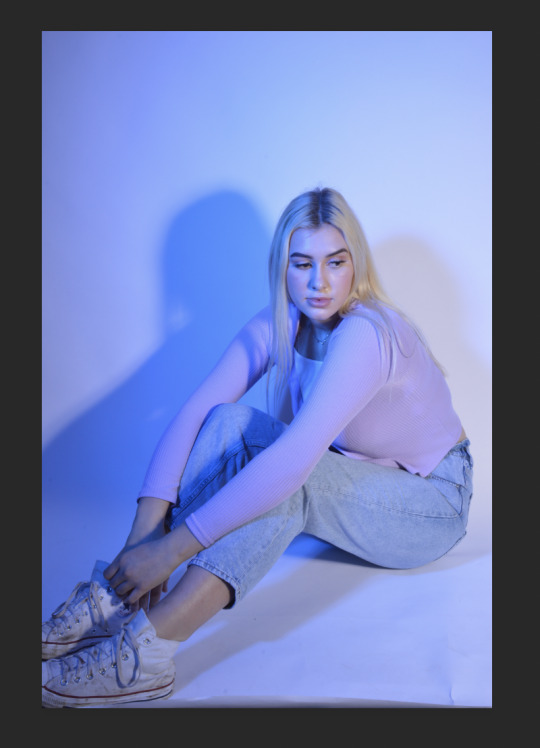
My Final Campaign Images
I have now completely finished my campaign banners...
For my 1st banner on my google sites I wanted to just have a simple opener for my campaign. I made my banner using the eye dropper tool on photoshop and getting the blue and yellow from other images so that they all link together. I then typed my slogan in the middle of the banner and distorted the text to make it all quirky. I really love the outcome of it, I think it’s simple but the perfect first banner to my campaign.

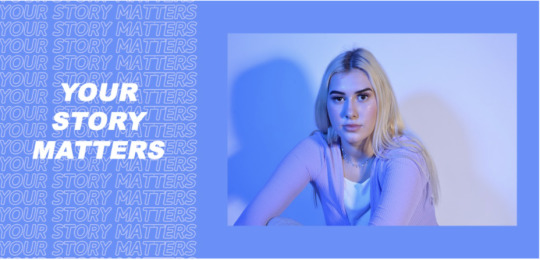
For my 2nd banner I wanted to start with one of the blue ones I made... I love the text edit on the left of the banner and then the more simple right side of just an image in the middle. I think it’s a powerful banner and I really love the colours and the outcome of it.
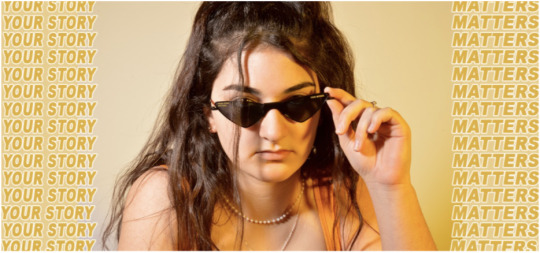
My 3rd banner I went for one of my yellow/orange ones... I wanted to put 2 of my images onto it with a put some text behind it. I added stroke to the text and then removed the fill to create that outline text. I love the colours in this image and I love the outfit which Chloe was wearing I think it’s so cool.

My 4th banner is one of my favourites it’s just 2 of my strong images. I love the ‘less is more’ vibe. I feel as though sometimes you just need to let images speak for themselves... This is definitely one of my favourite banners.

I decided to put another yellow banner as number 5... I put one of my stronger images in the middle of the banner and then edited text either side of it. I think it’s such a cool images and I really like the outcome of it.
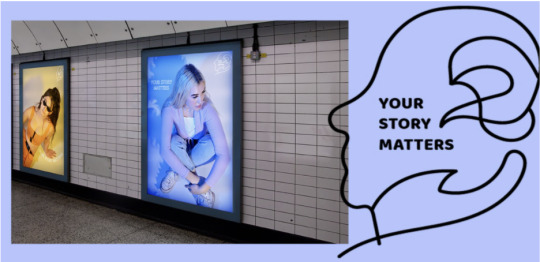
For my 6th banner image I decided to add a mockup of posters in the train station. I like the mockups as it helps to see your images in a different format. I then added my logo png to the right side of it, just the link it into the rest of my campaign images.
I really like this banner. I made a brush preset out of the image and then printed it next to image to create a sort of shadow. I then added my text to the right side of it and warped the text so that it just added a little bit extra to the image.
To finish off my google sites I added what I would say is my strongest image to the bottom as my final banner. It was an image I took in the studio and added my slogan over the top of.

I’m really proud of my final outcomes. I think they embody everything which wanted them to and I think each outcome is really strong.
0 notes
Text
Software Research- Book Research
When looking through the book 'Fashion Photography 101' written by Lara Jade i came across a section on Jade's advice on the best software to use for edits in her opinion.
On the first page she discusses the different types of software that a designer could use while on the second page she goes into more detail on a small selection of image editing softwares.
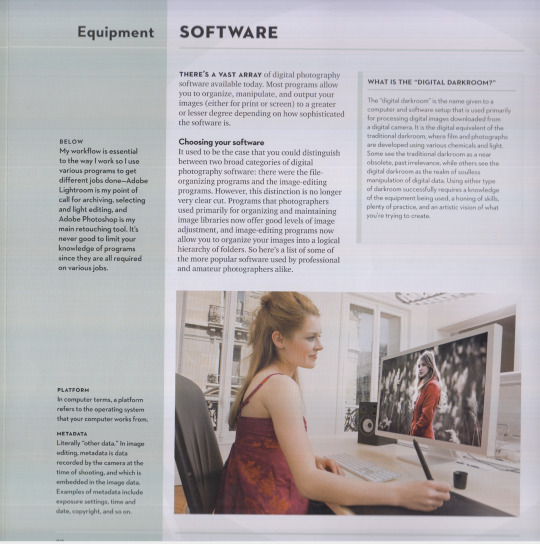

The pages talks about a "digital darkroom" which Jade later states is "the name given to a computer and software setup that is used primarily for processing digital images downloaded from a digital camera".
For my edits I used the Adobe software suit, primarily Adobe Photoshop. Jade describes Adobe Photoshop as the "ultimate playground for retouching images from start to finish".
0 notes
Text
Photography Research- Book Research
Another book which I came across and wanted to research was 'Fashion Photography 101' by 'Lara Jade'. The book talks about many things ranging from photography equipment to the best software to use...

I think that the book is perfect and it is perfect as it links my photography research back to fashion which is a big part of my course.
0 notes
Text
Photography Research- Creative Portrait- Book Research
Another section I came across in the book ‘The Studio Photographer’s Lighting Bible’ written by Calvey Taylor-Haw was a section on ‘Creative Portraits’. In this section she talks about her tips and tricks when it comes to techniques and equipment thats he uses in the studio when taking creative portraits.
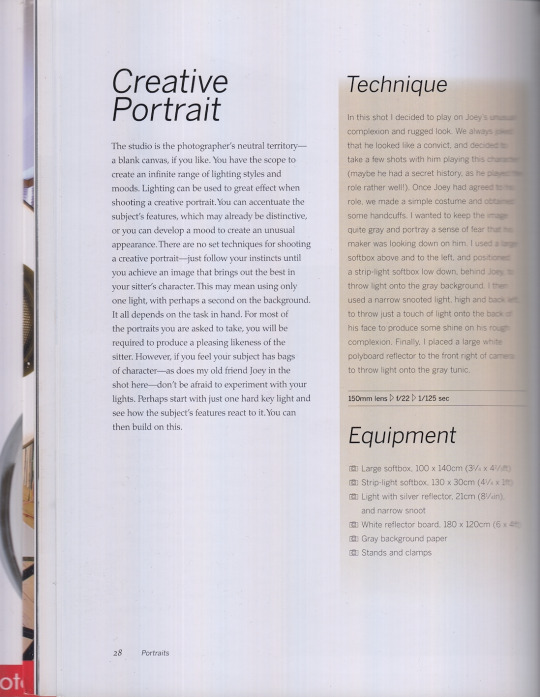

In the shoot Taylor-Haw talk about how she wanted to create a quite grey image with a sense of fear portrayed in the image. She used a soft box as one of her main lightings for a softer lighting look. Taylor- Haw then used a narrow snooted light to the top left side of the image. Once again she used a paper background to give that box background look to the image.
In my own photography I feel as though I have used a more creative portrait approach rather than a classic portrait due to the fact that my Final Major Project is based around a mental health campaign. So I have based my lighting and camera angles more similar to those that Taylor- Haw uses in her creative portraits.
1 note
·
View note
Text
Photography Research- Classic Portrait- Book Research
When looking through and researching 'The Studio Photographer's Lighting Bible' written by Calvey Taylor-Haw, I came across a section titled 'Classic Portrait'. The section is about different techniques and equipment and really helpful with useful little tips that I'll use with my own photography.

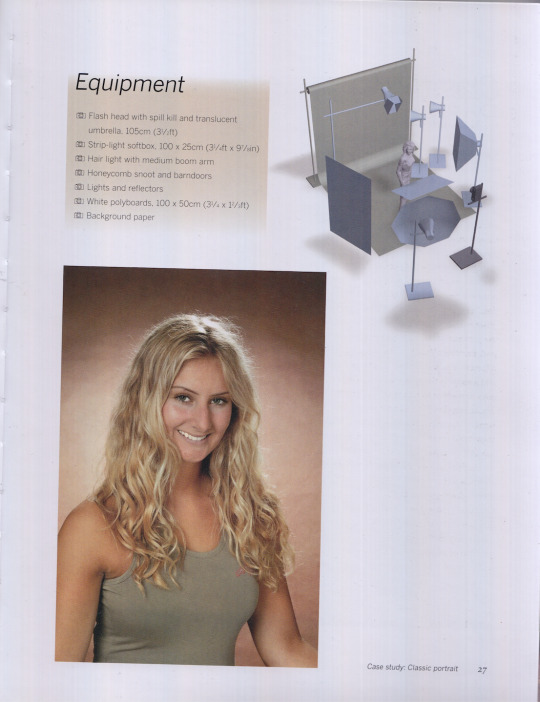
The main tips that it gives you is to use a soft box for lighting. A soft box helps to give a more a softer light and helps to defuse the lighting. Usually you place them in front of the model. It also states that background paper is a really good equipment to use. We usually use paper backdrops in any photos we use as it helps to create a good blank background for the photos.
The section warns that you that you need to be careful when positioning the lighting as you don't want to 'burn out any highlights'. Taylor-Haw says that she always tries to "achieve only one highlight in the subject's eye'.
0 notes
Text
Finalising my google sites
I then added the png of my logo onto my googles sites. I think having the png helps to break up the block imagery as well as linking it all together as it’s the logo for my campaign...

I then added a tiny bit of text underneath it, just a little bit about what my project is about...

I love the outcome of my google sites. I think it represents an uplifting campaign perfectly.
0 notes
Text
Finalising my google sites
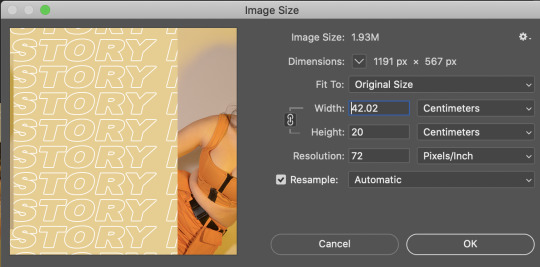
I really wanted to lay out my google sites so that my images were in a campaign format. I opened my images on photoshop with a landscape canvas which was sized 42 by 20.
I then added in my images and added text edits over the top of underneath the images...

Once I had done each of my strips I added them onto my google sites in such a way so that it was a clear campaign layout...

I love the outcome of my campaign. I love the colours and the images and I really love how it has all come together so nicley.
0 notes
Text
Week 11 Reflection
This week my main focus in finalising my final outcomes and pulling everything together.
I started off by creating a Customer Profile for my campaign. I drew over one of my images on illustrator which I had previously taken in the studio and edited it further on photoshop and then made up a personality and information for my customer. I thought it was really fun doing this. I enjoyed experimenting with drawing over an image using illustrator.
I also started to experiment with adding things onto my google sites. It was so cool to see things starting to really come together.
My evaluation for my project is also something which I started this week. I really struggled with digesting the UAL guidance which we were given if I’m honest. It took a minute to get my head around, so I broke down each section into parts and work on each part individually before bringing it all together.
Next week is the last week of our final major project. I’m excited for it all to come together but also a bit nervous as I really want my work to be the best it can be. I’m going to work really hard on finalising my work and completing everything to the best it can be.
0 notes
Text
Starting My Google Sites
I started off by adding my name onto the top of my google sites page and making sure that all the rest of the information was correct....

I then firstly, opened my banner onto the page and deleted some boxes as I felt as though they were just in the way.\
I then made sure the size of it was how I wanted it to be... I’m now going to progress on and add some of my campaign imagery and my GIF to the bottom of it to see how they work with each other.
0 notes
Text
Drawing my person for my character reference
When drawing my character for my made up character reference I started off by opening one of my images which I had previously taken in the studio... I found that it was harder to get a solid line on photoshop so I tried opening the image on Illustrator and it was so much easier...
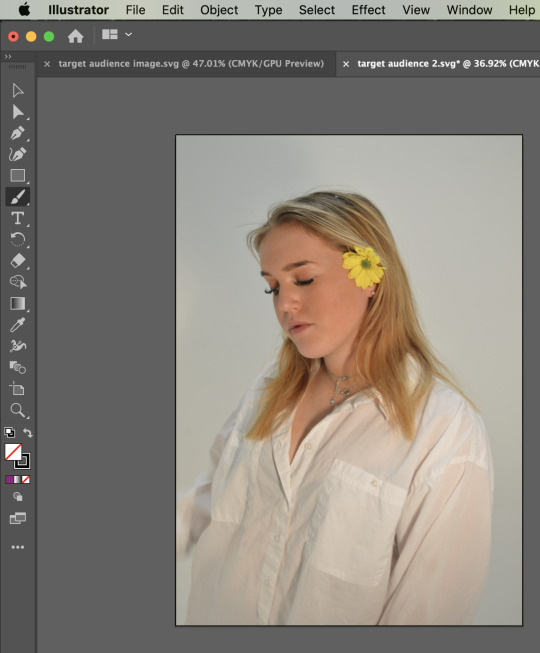
I then made a new layer on the top of this image, so that there would jut be an outline once I turned the viability of the photo off rather than drawing directly onto the image...

I then started the process of drawing over the parts of the image which I wanted as my outline...

I then turned the visibility of the underneath, original photo off and I was left with just the outline I had drawn...

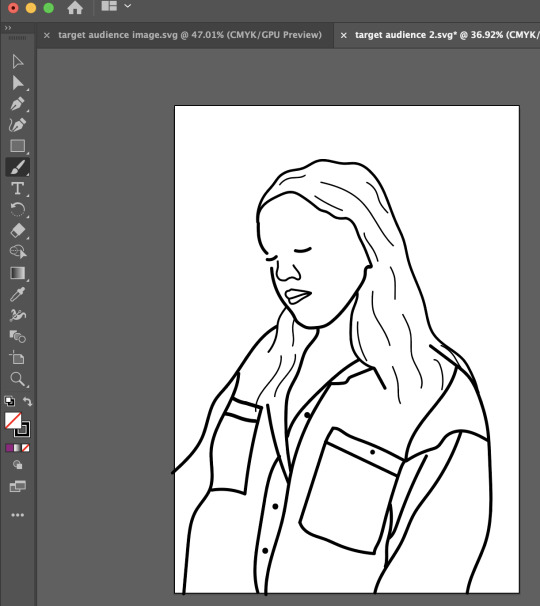
I decided to leave the flower out as I kept trying and trying to draw it but I was having a lot of difficulty.
I then saved the image and opened it on photoshop. I used the paint brush tool to then fill in the parts which I wanted filled in. I didn’t use the paint bucket tool as I originally started to do as it was filling in parts which I didn’t want filled in.
I really like the outcome of it, I think it’s really cool and simple. Next time I could try doing a more complex image but at least I now know the gist of what I’m doing...
0 notes
Text
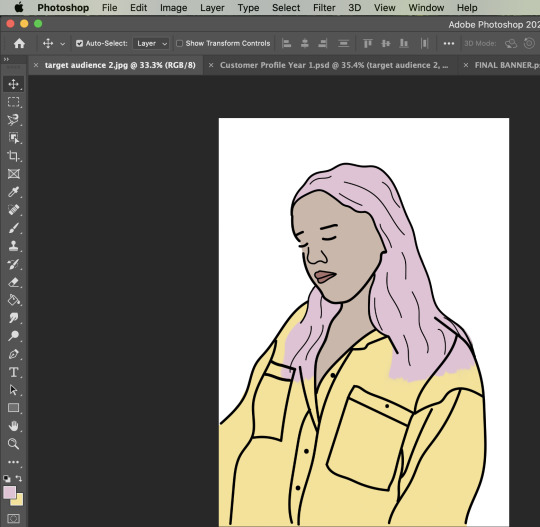
Customer Profile
I really enjoyed making a made up customer profile for my campaign. I used indesign to go over an image which I had taken in the studio and then went in with the brush tool on the outline of the image and filled in the parts with colour which I wanted to fill in...

I think it’s come out really cool. I love the yellow and pink against each other...
0 notes
Text
Target Audience
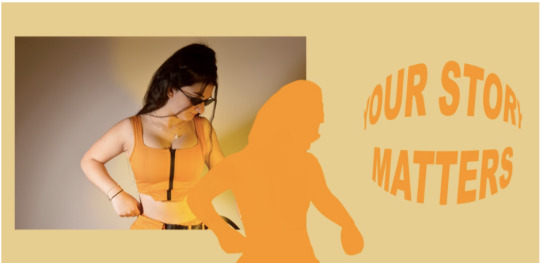
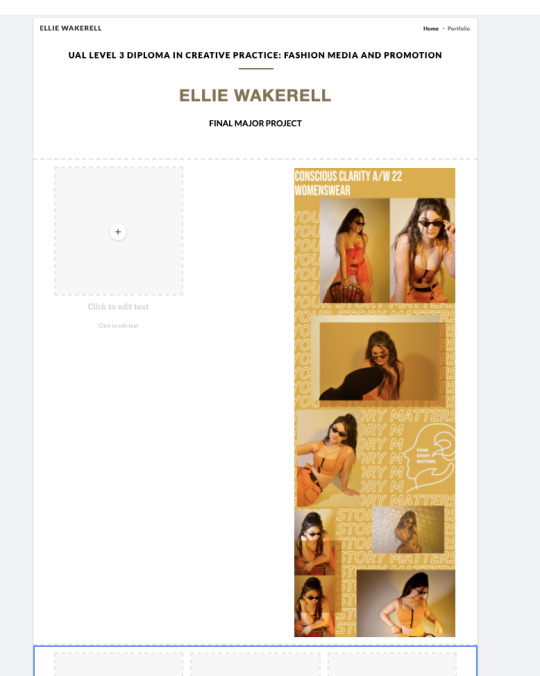
For my final major project I wanted to create a campaign which focuses on promoting positive mental health using bright colours and positive imagery. My chosen forecasted fashion trend is ‘Conscious Clarity’. I think that the colours associated with this trend scream positivity and they could be used well to uplift people who see the campaign.
My main target audience is girls/woman aged 15-115. I feel as though it’s important to promote a positive mental health to all age groups in particular teenage girls who are still in the toxic environment of secondary school.
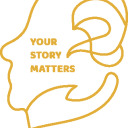
I want to use the imagery I have taken and edited to prompt a conversation using the slogan ‘Your Story Matters’.
0 notes
Text
Week 10 Reflection
This week I want to make sure that I bring all my work together and start finalising everything.
This week I primarily worked on my final banner, which showcases my photography. I loved playing around with the different image layouts and the layering on text behind the images. I really like where I’m at with my banner so far. I love the bright yellow against the clear yellow text. I feel as though I need to do the final touches to finalise my banner and to make sure it is exactly how I want it to be.
I also started my final GIF outcome.... I really enjoyed making these GIFS. It was a bit more complicated than what I thought it was going to be. Having to make sure I save each frame how I want them to be saved. But I really love the outcome of it. I’m going to try and produce a couple more to maybe add to my final google sites.
This week I feel as though it was a really important week for pulling everything together. I have finished this week with a banner and GIF which I love and which I didn’t have at the start of the week. I’m happy with the progression I have made this week.
By the end of next week I really want to have all my final pieces done and so the following week will just be a case of double, triple checking that everything is completed.
0 notes
Text
GIF 2
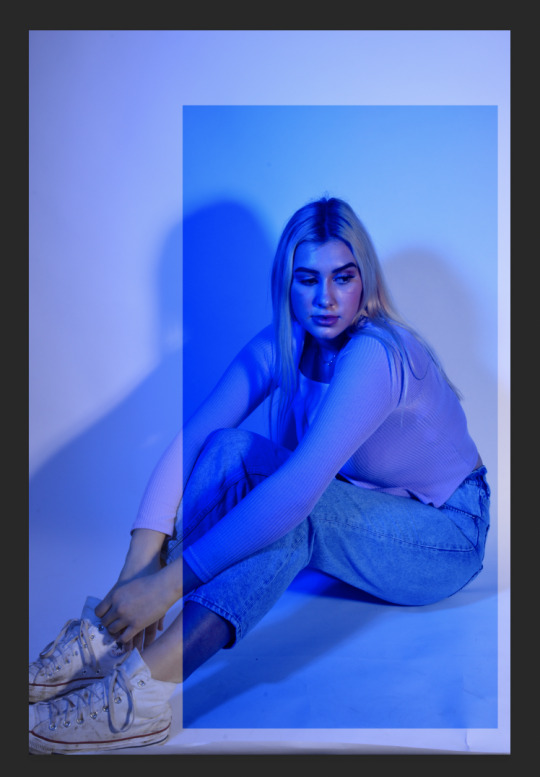
For my second GIF i wanted to make it a bit more simple with far less frames...
I really like how this GIF came out... I love the more simple effect and I think it all links together quite nicely.
0 notes
Text
Creating GIFS
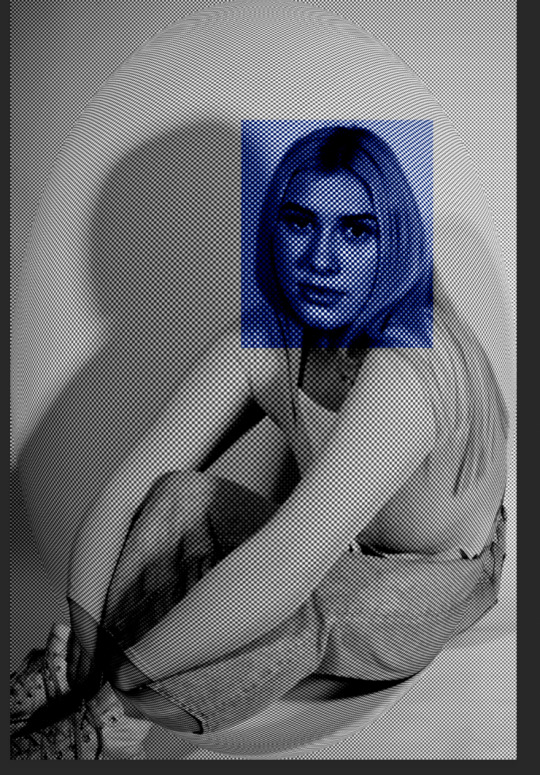
For my second GIF i used 2 images. My pattern for layers was layer one= image one layer two= image 2 layer three= image 1 layer four=image 2...
For the first image I just wanted to leave it plain...
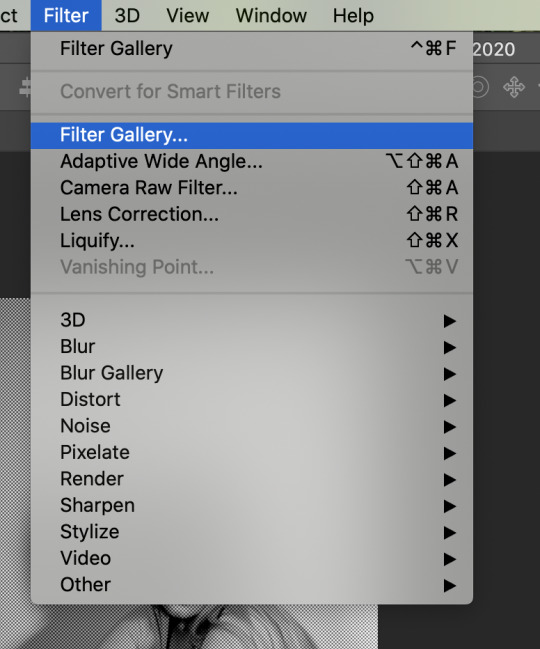
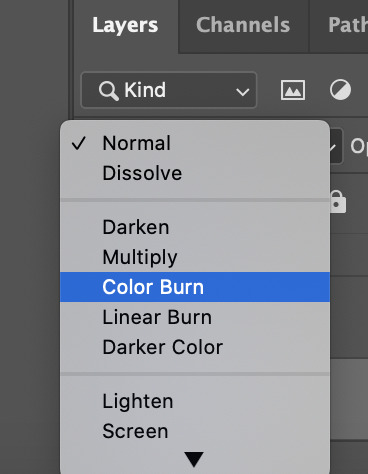
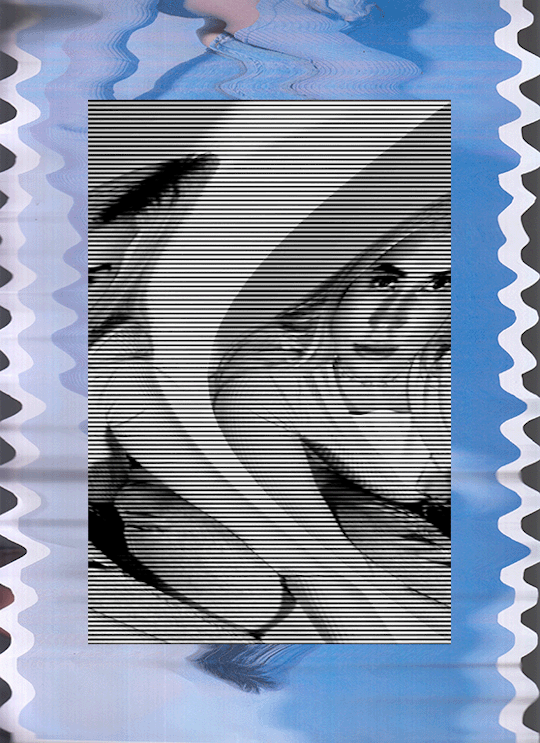
Then for layer two I went to 'Filter' and then 'Filter Gallery' and went to 'halftone gallery' and changed the pattern type to dots and changed the dot size.
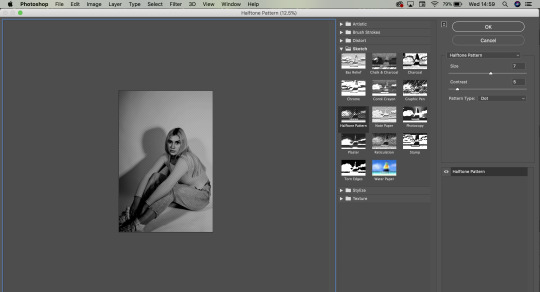
and then I added a shape over the top with the same blue as the original photo and changed the kind to 'colour burn...

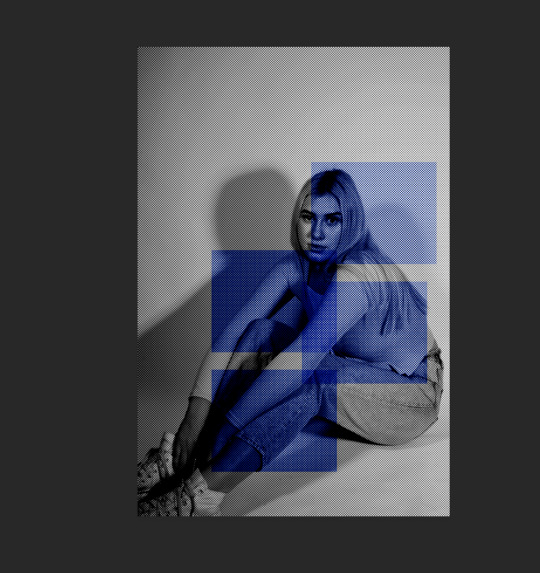
For layer 3 I just simply added a rectangle with the same blue as my original photo with the same view as the previous layer...
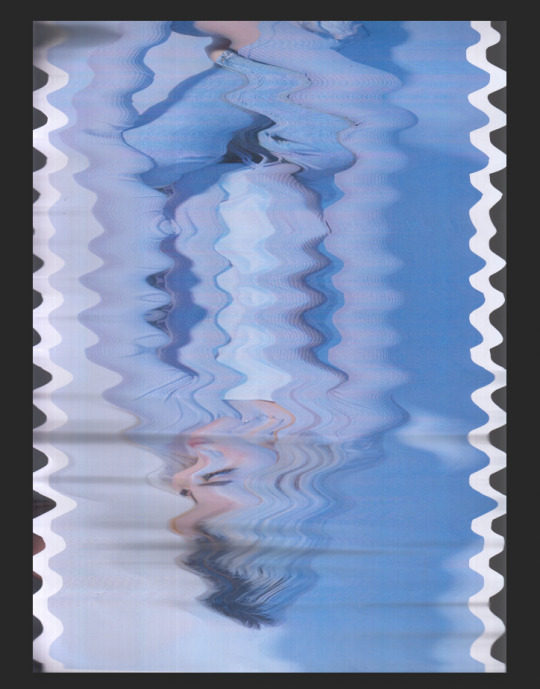
I then for the final layer, went to filter gallery again and applied a halftone effect to the image... Then I went to 'filter' distort' and 'spherize' and added a blue rectangle with the same view effect as the previous rectangles...

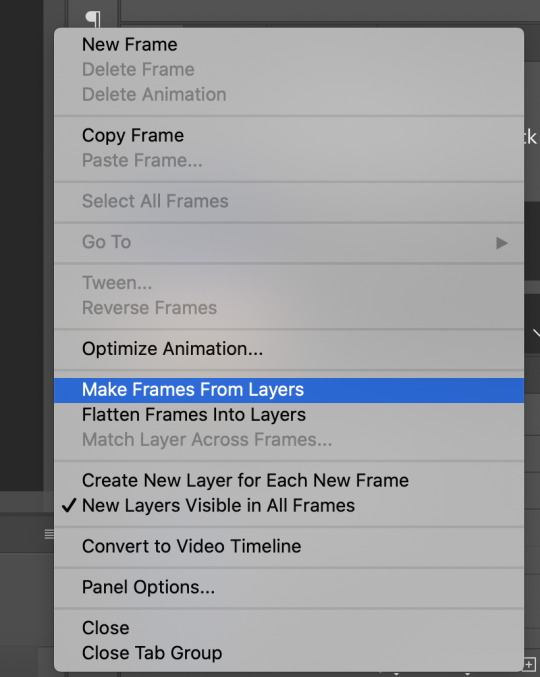
So now that I have my 4 layers. I went to window and timeline again and clicked on 'create frame animation' and 'create frames from layers' and then adjusted the frame times and made it how I wanted it.
0 notes
Text
GIF
I really like how this GIF has turned out. I love the effect of taking time to save each movement. It makes the GIF look as though it’s flowing...
I’m going to try a more choppy effect GIF and just try to experiment more and more.
0 notes
Text
Creating GIFS For Final Outcomes
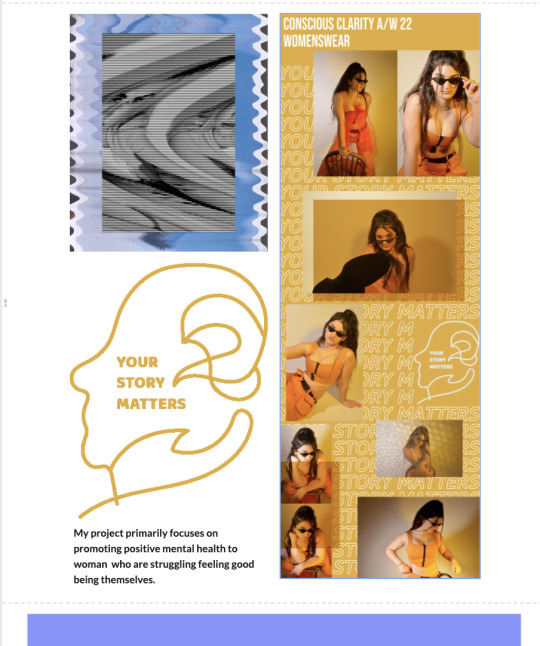
Today we were experimenting creating GIFS as one of out final outcomes.... I started off by opening up one of my scanned images and changing the image size so that the final wasn’t too big.


'Then I opened another image with photoshop, changed the image size and turned on the halftone filter so that there were lines across the page...
Then I went to 'Filter', 'Distort' and then 'shear...' and ever sop slightly moved the sheer, each time making sure to save each little change to use as my GIF frames.


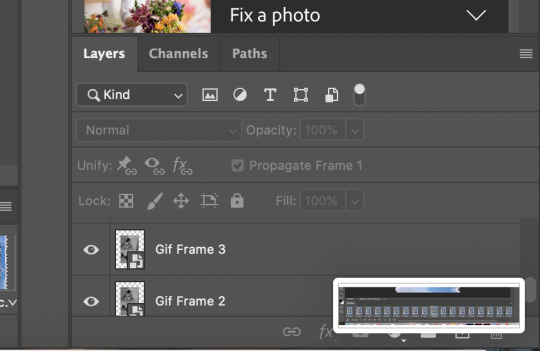
I then opened each of my frames on top of my first image and went to 'window' and 'timeline' then went to the bottom of the page and clicked 'create frame animation' and then went through each layer making a frame out of each of my layers.
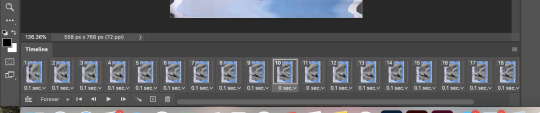
Then I changed the duration of each frame to how I wanted each one so that it was nice and flowing.
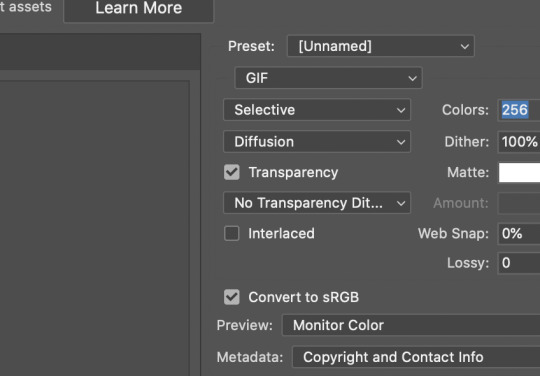
Then to save the GIF I went to "File' 'export' 'save for web' and then made sure I had GIF selected at the top of the page and then saved my Gif...

0 notes