bitopic
ᵦᵢ'ₛ ₕₒᵣᵣᵢᵦₗₑ Dᵣₐwₛ
✨I̸͎͍̓̿̀'̸̙͔͙͐̚̕m̸͉͕͓͊̒͒ T̸̢͉̝͆͛̿r̴̡̪̪͆͊͒y̵̫͇͓̾͝͝ḯ̴̢͎͎͊̽n̸͍̪̙͠͝g̵̢͕̫͛̕͝✨
700 posts
Don't wanna be here? Send us removal request.
Last Seen Blogs
221bluebelle
Why so serious?

devenir-rentier-rapidement
Comment Devenir RENTIER Rapidement ?
i-hear-a-harp
Interactive

royaldental
Untitled
kimeralas
Mi Locura No La Tiene Nadie..
Text
This isn't total drama but I'll still leave it here!
Redraw of an old fanart!
12 notes
·
View notes
Text
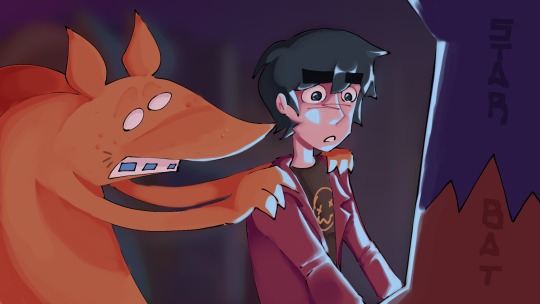
Tear Along the Dotted Line 🚹
I watched this show and I cried a lot! Watch it!
16 notes
·
View notes
Text
i started this last year and finished it today on stream :3
36 notes
·
View notes

Text

Holaa
Que onda, no está de más avisar que si quieren pueden seguir mis trabajos x Instagram @dies3l2002.
Ahí subo algunas otras pavadas que x acá capaz que no ;)
7 notes
·
View notes


Text
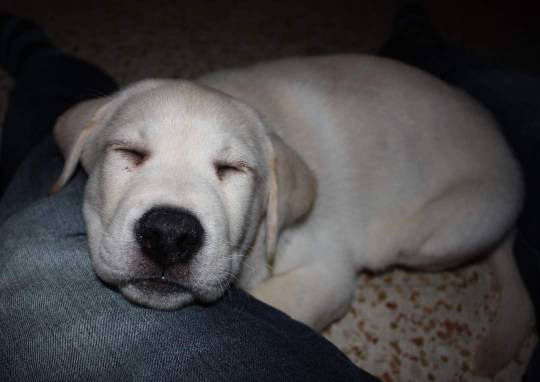
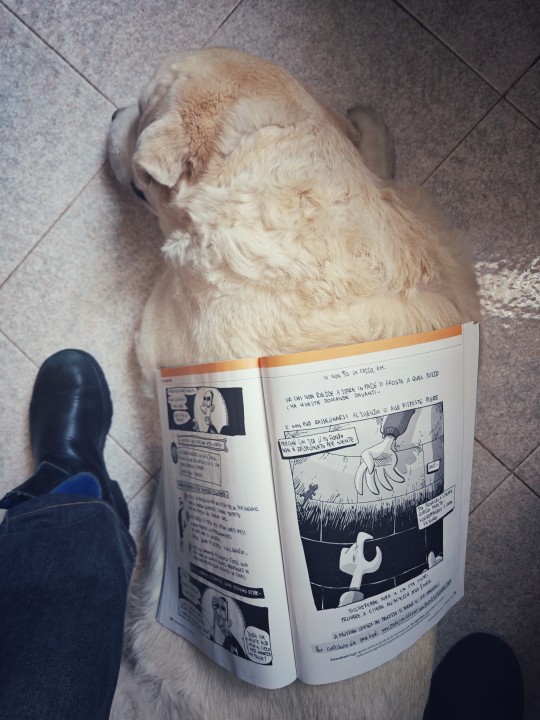
Oggi compie 14 anni il cane più buono, affettuoso e pazzo della mia vita. Caro Pablo (per le zie anziane Plabo o Palbo), ne abbiamo viste parecchie assieme. Tu continua a ripararti tra le mie gambe come se fossi un microscopico cucciolo di chihuahua e non un colosso di 37 kg. È sempre un privilegio potermi fregiare della tua amicizia e, talvolta, usarti come leggio.
P.s.: @kon-igi chiede gentilmente Pablo a quando le prossime carezzine?
99 notes
·
View notes

Text
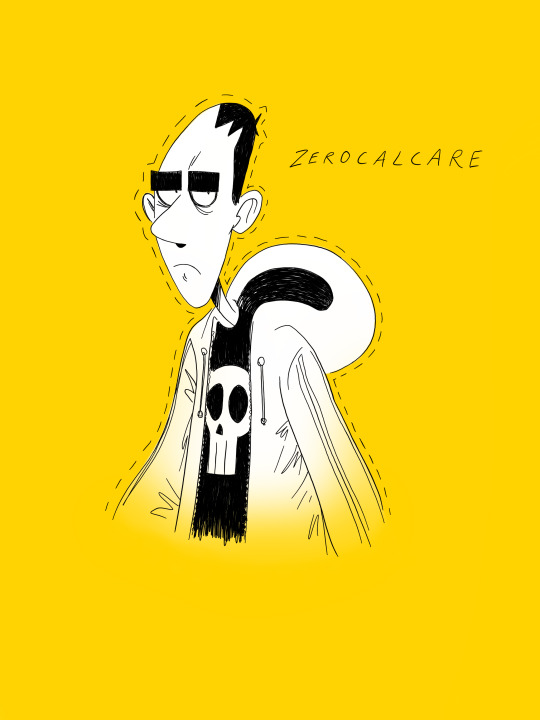
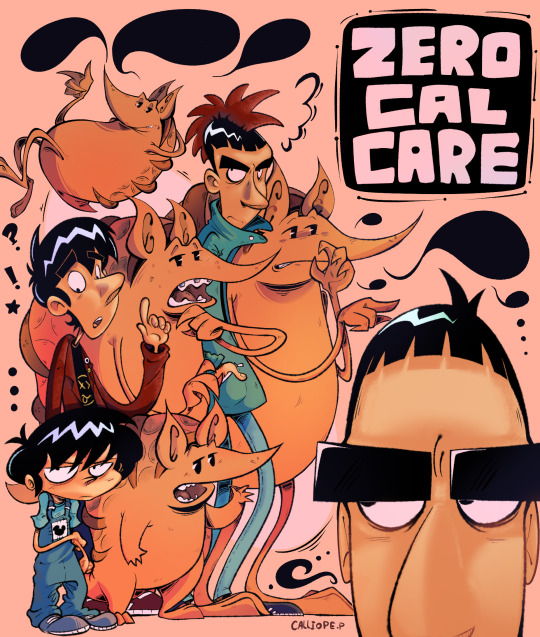
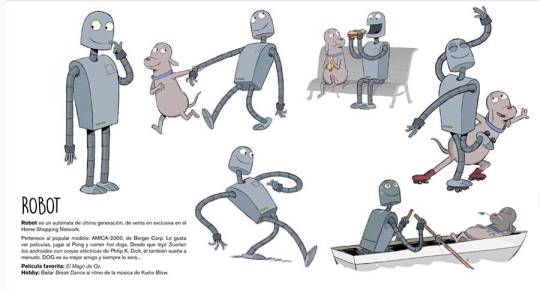
L’enciclopedia calcarea
Uno dei doni di Natale che ho accolto con maggiore gioia è stato l’ultimo lavoro di Michele Rech, in arte Zerocalcare.
Non è una nuova storia e non si tratta di un inedito. È una antologia ragionata dei personaggi presenti nei suoi fumetti. L’autore spiega come sono nati e cosa rappresentano per lui, corredando le parole con qualche tavola.
Non si tratta di materiale inedito perchélibro…
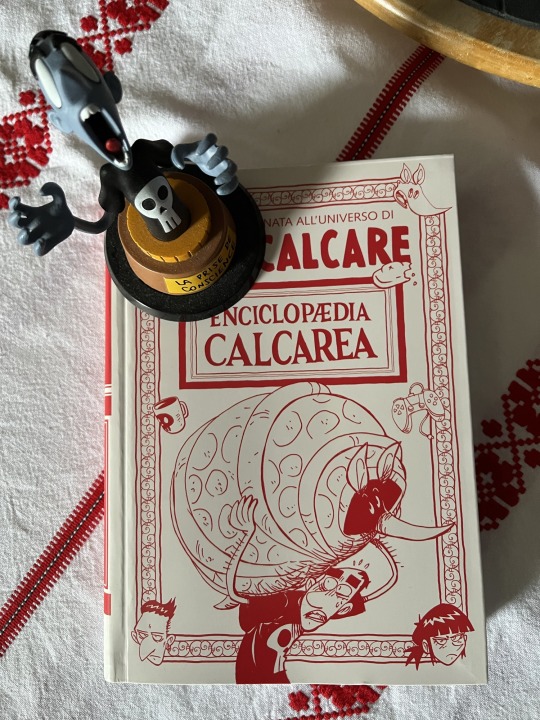
View On WordPress
2 notes
·
View notes
Text
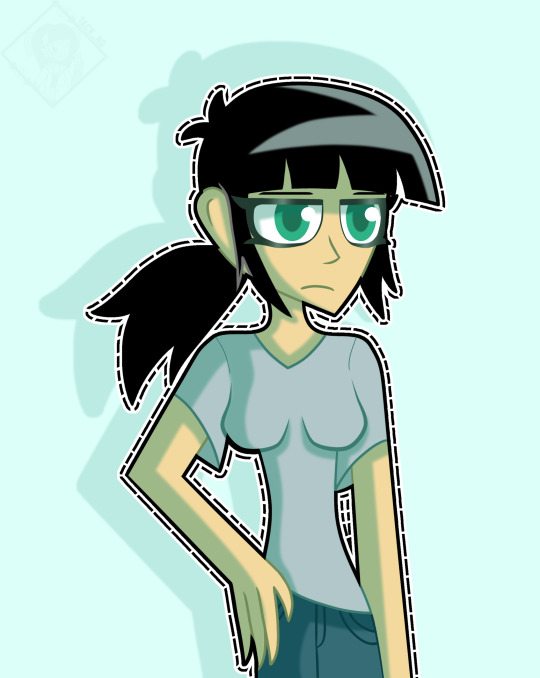
A GUIDE TO HOW I DREW THIS

This drawing was for an art trade with a friend, but as going through and drawing it I was taking screen shots and notes to make a rough make shift guide to how I draw for those who may be interested :-D
I'm not particularly an amazing artist but I sometimes get questions so I might as well make a guide. This is my first time making a guide that doesn't involve me screaming down someone's ear on a discord call so sorry if it's a little unclear or messy ;D
Something that may surprise you... Or not.
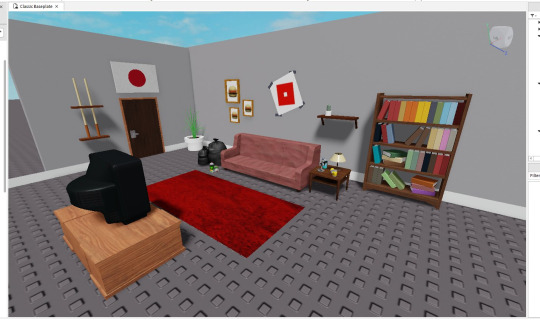
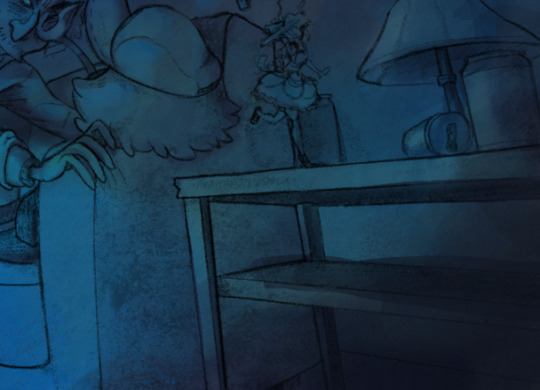
Most of my drawings that involve a background don't start with any sketch at all! For the sake of my sanity, or better yet a lack of my skill, I cannot draw backgrounds very well and often need visual guide to work. Using Roblox Studio I start my beginnings of drawings with simply just building the backgrounds part by part, with help from community made objects of course. Though I'm sure some may call this cheating I solely live by the idea of there being "no rules only tools" with art and that has been keeping me happy.
Anyways, the next step is for me to position the camera to an angle I think that might be cool for a drawing. Mind you, at this stage I've get to come up with much of any idea for the drawing I'm doing, but I only just know where I want the characters to be. In this case I want them on the couch.

Now I'm sure some people will have issue with this, but the next stage of the drawing is to simply just trace :D (I am using clip studio paint for this but im more than sure tracing is possible in any drawing program lol)

Obviously there is some limitation with this in my art since I think an overly accurate and on point drawing of a background really sucks a lot of soul out of the art so I let small things slip through. This probably defeats some point of tracing for some people but personally I don't care.
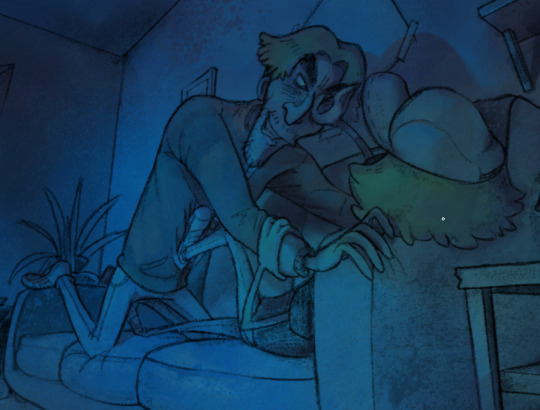
The next step of the drawing is to simple go over what I have traced from the screenshot and refine it. This means going over it all again, playing with line weight, small amounts of shading and adding detail to the objects around.


Because of how I draw, I like to frame the drawing inside of square on my canvas as a brief preview of how the drawing will look in full. I'm still doing this without even drawing the characters yet to this can obviously change later but "YOLO"
On to the next part of my drawing is to finally start drawing the characters. I still don't really have anything in mind yet for the pose so I simply go with the flow and see where it leads me as I rough out some thumbnail poses. This is on a new layer btw. I was told I should mention that...
... since a lot of...

… mistakes and changes...

... Will be made till you're happy.
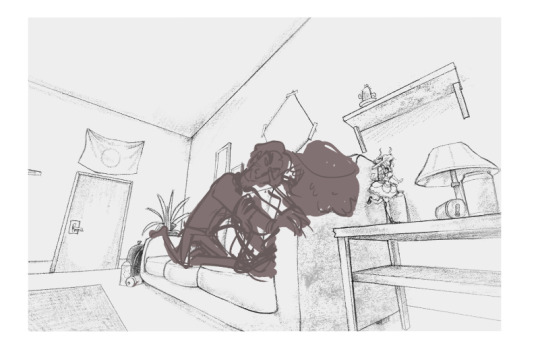
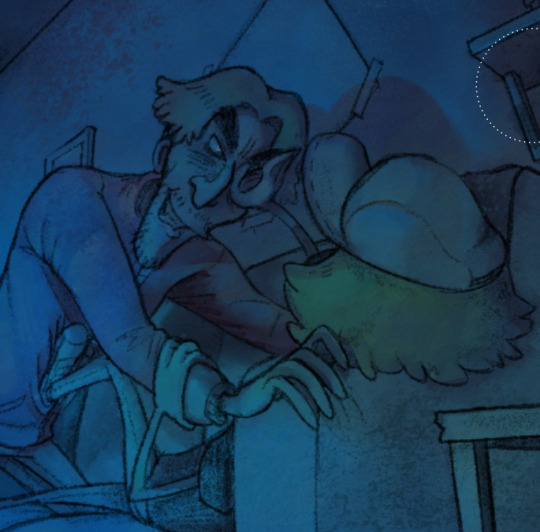
I'm not here to give you a guide on how I draw for this but really more of a process tour, so when the next step just skips to this, it must definitely feel like a leap. For this stage I simply draw out my characters on a new layer over the background, trying to make sure their line art stands out more from the background. If it looks to close, with a low opacity airbrush I will erase some of the line art on the background to make the character's line art pop out more by comparison.
Now just in case you're worried you may want to change the characters pose later and keep the background, make sure to NEVER erase the background and instead colour under the characters on a new layer with white so you will get the same appearance as erasing the background while keeping it.


That also gives some funny wiggle room to do something silly like this >;P
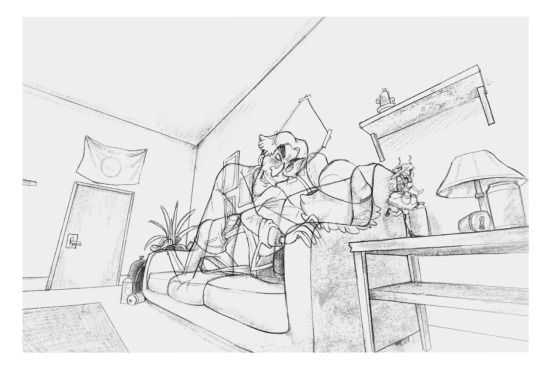
This may be hard to see, but the next step of the drawing is duplicating the characters line art, blurring it by 6% and lowering the duplicated layers opacity. When comparing it to the original, you can really see the POP

And just like that, we have the complete line art :D
Now when it comes to colouring, I don't use Clipstudio, I instead move over to a different program called Rebelle 7 for colouring. Using the 7th edition of the program is a new thing, I've been using 5 for waaay longer. I just skipped on using 6 lol.
For those unfamiliar, the appeal of the Rebelle software is simply for emulating traditional mediums digitally. I've been using them for the past year or so to make some cool drawings using what the programs offer. I mostly use the water colour stuff but there's tons of other stuff with them too. I'd love to shill it some more, but I'm not being paid, you can do some digging yourself about it >;-)
So before moving to Rebelle 7, I exsport my drawing as a png. Please make sure the background on the drawing is WHITE. This is because when we import the drawing to Rebelle 7 we will be using it on a multiply layer so the white of the background becomes transparent. If you are drawing with coloured lines you can export it transparent but I haven't messed with it enough to know much haha
A before and after of making the line art layer a multiply layer:


Now this is where the colouring fun begins >:D
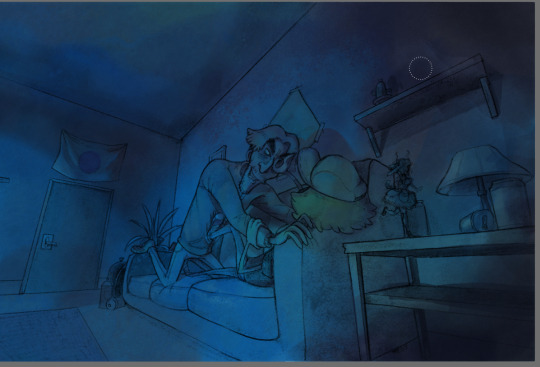
So how I started with this drawing was by splashing down a LOT of blue teal and green for the colour theme of this image. With the water colour brush the colours blended together really well from the start. Of course you can always go over it and blend them some more if you don't like the appearance. Using the textured blenders gives a cool look to the colouring :D
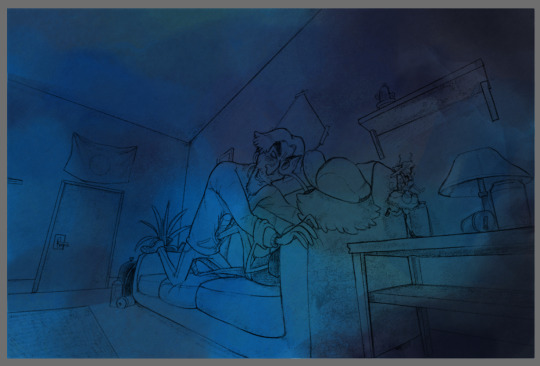
The next thing I do once I got the base colour down is that I move straight to shading. Typically on most drawings I would start with the character colours first, but in this specific drawings case the shading comes first since I want to keep hold of all these blues.

While shading I'm never too worried about keeping it messy since I thinks it gives my art a special charm to it since I adore the look of messy traditional art.

And just like that, after a LOT of trail and error my shading is done... FOR NOW
The next part of the drawing is now coming down to colouring the characters :D
With adding colours to this drawing I am only going to add them to the characters and maybe a few small parts around the background. I first start with making a new layer set to "Darken", "Soft light" or "Multiply". With each new colour I put down I make a new layer for it so I can experiment with it individually. PROBABLY not practical, however that's just how I do it. I'm sure other layer types work fine, it just really depends with your drawing and what you're trying to do.
Images below of me testing colours and layer types:


For this drawing, since the lighting is so strong (from the off camera TV) I want the character's colours to be very weak when against the light. The main colour of the drawing (our the base colours I put down earlier) the colours of the characters we are adding are only there to hint of what colours the characters really are. I want the focus to stay on the blue. This will involve a lot of testing.

I'm not really amazing at this so this will change a lot as I colour more and more. Using grey scale view helps to let you know if the colours you're adding are changing the lighting of the image. So make sure to check if you don't want to mess up your shading!

In the pictures on the wall I purposely left empty so while colouring i can give a vague illusion to a picture without really drawing it and keeping the attention to the characters and not the background. this is also a fun time to sneak in Easter eggs if I feel like it
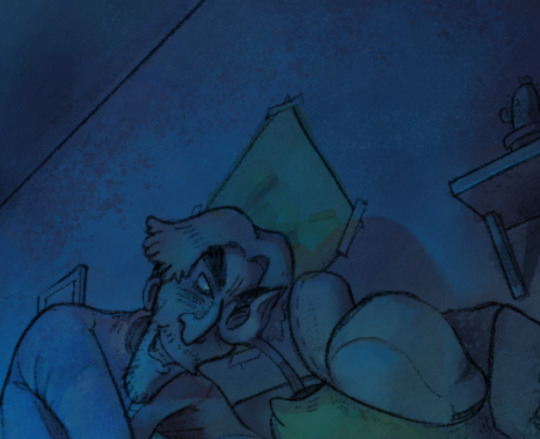
I don't bother adding much colour to the BG as mentioned before, only to the characters.
After adding your colour check the grey scale and decide if your image needs any highlights to make it pop
In my case it does this part is optional depending on your drawing.
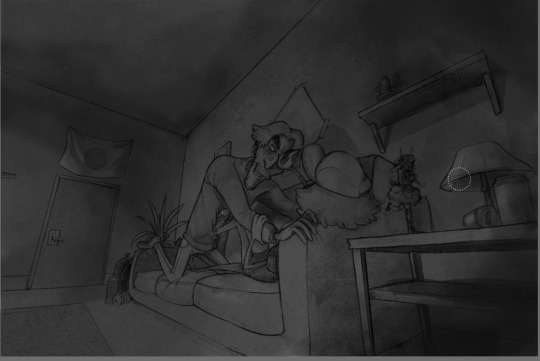
For deciding where the highlights go I pre pick a colour and go over the areas I want to make lighter in greyscale, not worrying about the colours just yet since it's on a new layer and that means I can mess with it more later :D

Turing greyscale off may not look the best NOW, but messing with the layers and blending blushes may go a long way!
Due to Tumblr's Image post limit I'll just go over with the next few parts over text, tho it can really be summarized with a few sentences.
After blending it looked fine, however the image STILL didn't pop in the way I had wanted so I changed the layer blending mode to "Linear Dodge". This worked perfectly however I had to re-do some highlights because I noticed mistakes.

But besides all that, we now have achieved the wanted look!
I don't really know how to end a guide, so I guess this is it. Thanks for reading! I hope this is a little bit helpful or at least interesting to someone. :D
1 note
·
View note